If you suddenly find the middle mouse button not working as you use it on your Windows 10 computer, then you’ve come to the right place as this post will provide some suggestions that can help you fix the issue.
This kind of problem can affect your experience in using your computer as the middle mouse button helps you in scrolling through long web pages and screens with a lot of data. So if that stops, you will end up using your keyboard instead which is kind of a hassle compared to using the middle mouse button.
It is possible that this problem could have something to do with either the hardware or software. To isolate the possibility of a hardware failure, you can try to connect the mouse to a different computer and see if it works just fine there or if it still has the same problem. If the mouse works properly on a different computer, then the issue is software-related. It is possible that a software update, especially gaming software, could have been misconfigured in a way that the middle button does not respond like it’s supposed to. To resolve the problem, you might want to try reinstalling or updating the mouse drivers or run the Hardware and Devices troubleshooter. You can also install OEM-specific mouse drivers or modify some entries in the Windows Registry.
The problem may be caused by a corrupted or an outdated mouse driver. To fix it, you have to update or reinstall the mouse driver. How? Follow these steps:
Note: You can install a dedicated driver on your computer in case you have it or you could also look for it directly from the website of the manufacturer.
The next thing you can do to fix the problem is by running the Hardware Troubleshooter. Although it won’t make much of a difference, there’s still a possibility that it could automatically fix the problem with these function keys. To use it, refer to these steps:
Aside from updating or reinstalling the mouse drivers, you might also want to try installing OEM-specific mouse drivers. When you install Windows, it will use a generic driver for all its components. The disadvantage of generic drivers for the mouse is that it limits its functionality. In fact, some also configure the middle mouse button to respond to specific action which does not work without the correct drivers. In such cases, you need to visit the website of your computer’s manufacturers to download and install the latest drivers and then open the software and configure it the way it was before. Keep in mind that some OEMs also offer gestures, so you also have to check on that.
If a Windows Update is the one that caused the problem, you could correct it by making some modifications in the Registry but before you proceed, make sure that you create a System Restore point first.

HKEY_LOCAL_MACHINESYSTEMCurrentControlSetEnumHIDStep 8: From this folder, you have to start matching the values in the first part of the value you’ve taken note of. Step 9: Open the folder which has the same value and repeat this for the second part of the value. Step 10: Afterwards, click on the Device Parameters and look for a property named “FlipFlopWheel” and invert its value from 0 to 1 or 1 to 0 to reverse the scrolling direction. And then restart your PC to apply the changes made. After you restart your PC, you should see the changes in the scrolling direction of your mouse. Note that you can change the value back to its original value or just use the registry backup to undo the changes you’ve made.
0xC1900101 – 0x20017, The installation failed in the SAFE_OS phase error during Replicate_OC operationTo fix this issue, you need to follow the given options below. But before you do, you need to create a System Restore point first so that if anything goes wrong, you can always undo the changes you’ve made.
dism /Mount-Image /ImageFile:H:sourcesboot.wim /index:1 /MountDir:C:UsersUserDesktopmount
C:UsersUserDesktopmountWindowsSystem32mcupdate_GenuineIntel.dll
dism /Unmount-Image /MountDir:C:UsersUserDesktopmount /commit
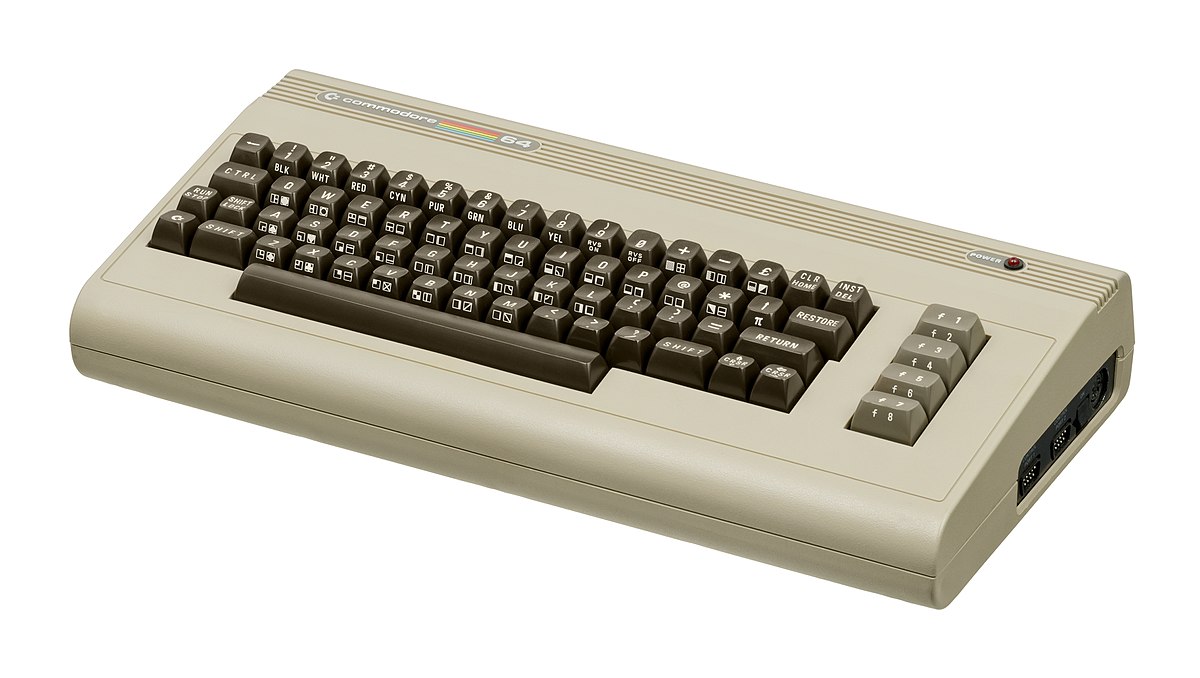 History of Commodore
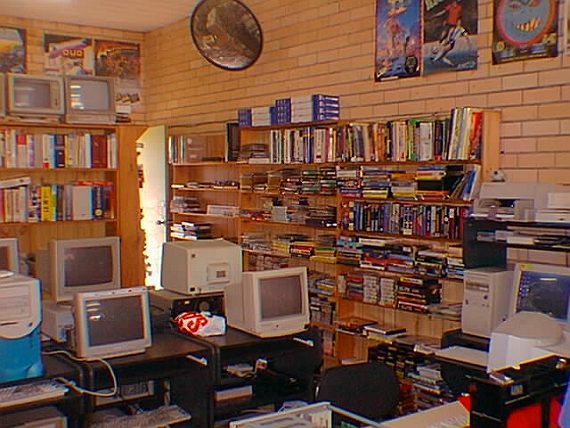 With sales booming and the early reliability issues with the hardware addressed, software for the C64 began to grow in size and ambition during 1984. This growth shifted to the primary focus of most US game developers. The two holdouts were Sierra, who largely skipped over the C64 in favor of Apple and PC compatible machines, and Broderbund, who was heavily invested in educational software and developed primarily around the Apple II. In the North American market, the disk format had become nearly universal while cassette and cartridge-based software all but disappeared. So most US-developed games by this point grew large enough to require multi-loading.
At a mid-1984 conference of game developers and experts at Origins Game Fair, Dan Bunten, Sid Meier, and a representative of Avalon Hill said that they were developing games for the C64 first as the most promising market. By 1985, games were an estimated 60 to 70% of Commodore 64 software. Over 35% of SSI's 1986 sales were for the C64, ten points higher than for the Apple II.
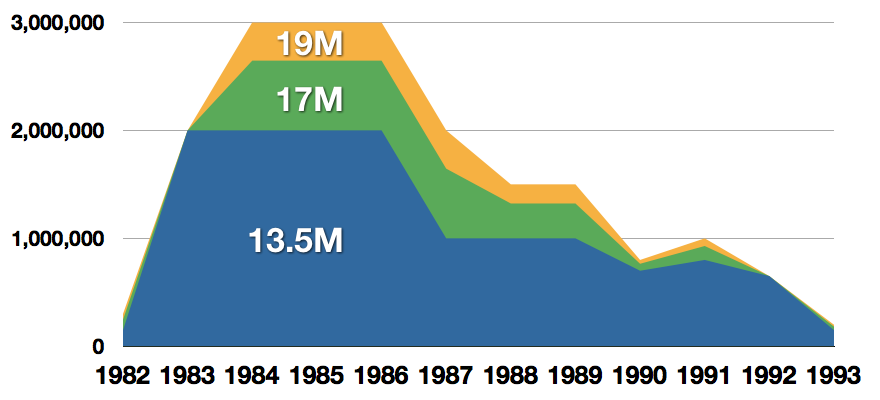
Everything was great for Commodore but the industry was moving forward and by the year 1988, PC compatible computers were stated to be the largest and fastest-growing home entertainment systems pushing C64 on to second place. Also, Nintendo’s gaming system has started to take hold in the world with amazing 7 million systems sold in 1988 only.
By the year 1991, many developers exited the gaming market for Commodore 64 home computer system and its popularity started to fall due to lack of software and not so many hardware changes.
With sales booming and the early reliability issues with the hardware addressed, software for the C64 began to grow in size and ambition during 1984. This growth shifted to the primary focus of most US game developers. The two holdouts were Sierra, who largely skipped over the C64 in favor of Apple and PC compatible machines, and Broderbund, who was heavily invested in educational software and developed primarily around the Apple II. In the North American market, the disk format had become nearly universal while cassette and cartridge-based software all but disappeared. So most US-developed games by this point grew large enough to require multi-loading.
At a mid-1984 conference of game developers and experts at Origins Game Fair, Dan Bunten, Sid Meier, and a representative of Avalon Hill said that they were developing games for the C64 first as the most promising market. By 1985, games were an estimated 60 to 70% of Commodore 64 software. Over 35% of SSI's 1986 sales were for the C64, ten points higher than for the Apple II.
Everything was great for Commodore but the industry was moving forward and by the year 1988, PC compatible computers were stated to be the largest and fastest-growing home entertainment systems pushing C64 on to second place. Also, Nintendo’s gaming system has started to take hold in the world with amazing 7 million systems sold in 1988 only.
By the year 1991, many developers exited the gaming market for Commodore 64 home computer system and its popularity started to fall due to lack of software and not so many hardware changes.
 Commodore announced that the C64 would be finally discontinued in 1995.
However, only one month later in April 1994, the company filed for bankruptcy. When Commodore went bankrupt, all production on their inventory, including the C64, was discontinued, thus ending the C64's 11 and a half year production.
Commodore announced that the C64 would be finally discontinued in 1995.
However, only one month later in April 1994, the company filed for bankruptcy. When Commodore went bankrupt, all production on their inventory, including the C64, was discontinued, thus ending the C64's 11 and a half year production.
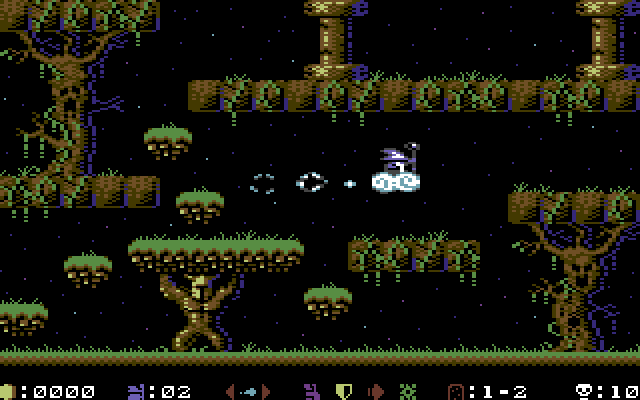 Zak McKracken and the Alien Mindbenders
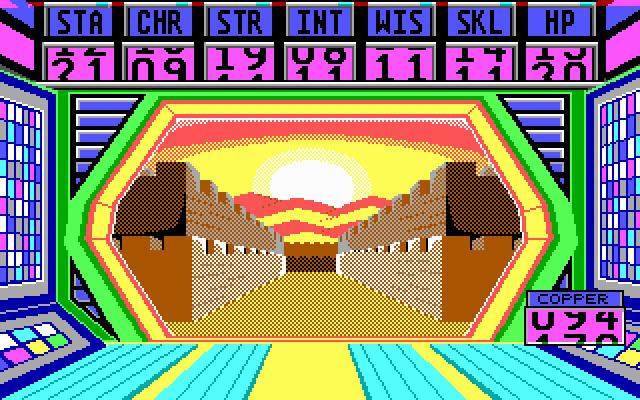
 If you are not keen on spending money for reliving and checking games or software of C64 here are some links to help you to at least experience part of it completely free.
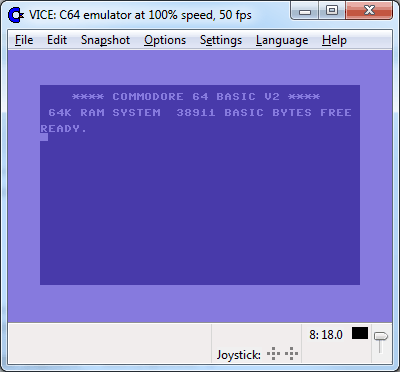
Commodore 64 Emulator
C64 Game ROMs
If you are not keen on spending money for reliving and checking games or software of C64 here are some links to help you to at least experience part of it completely free.
Commodore 64 Emulator
C64 Game ROMs
intel's first gaming card that will hit the market soon has been shown in its innovation event, the Intel Arc A770. In its core ticks ACM-G10, coming with 32 Xe-cores and all the way up to 16GB of GDDR6 memory (the basic entry-level version will have 8GB of GDDR6). The card will support ray tracing and supersampling with Intel's XeSS.

This is Intel's first gaming desktop GPU and after testing with some YouTube channels it turned out that the card itself sits somewhere between nVIDIA RTX 3060 Ti and an RTX 3070 so it will still be low in performance compared with the new RTX 4090 or AMD's new RDNA3 upcoming lineup. But as stated this is Intel's first gaming graphics card and having this kind of performance is no small feat for the first-time product.
One thing that is really great tho and that is going for Arc A770 GPU is its price! The Limited Edition card will cost $329 which is at this moment most cheapest GPU currently on the market in that performance range. nVIDIA is between $500 and $700 for comparison and if Intel can hold on to its performance with almost half the price card could be a great hit among gamers. GPU itself will launch on October 12th.
 Error Causes
 As more and more people get into insider preview of upcoming Windows 11 we will see more and more different takes and opinions on it.
Generally speaking, the first wave was quite positive when it was previewed but how time is passing more and more limitations and frustration comes to the surface.
Some of the limitation that is inside it, which have been confirmed by Microsoft itself includes features missing that we had in Windows 10 like moving the application to the taskbar in order to pin it, moving the file in the taskbar to open it in default application and some big annoyances like Windows opening widgets always in Edge no matter what is your default browser. Not being able to move the taskbar from the bottom is also one of many illogical things.
There is not really a point in these missing features since they were working fine in Windows 10 and many users liked them since they could customize Windows more to their liking, now with this new look at limitations it reminds me personally much of apple macOS and I will be honest, I am not a big fan of that kind of thinking.
If I wanted that kind of OS I would have gotten myself a MAC, not custom build PC, but hey, Linux is always a free alternative, and how Microsoft itself is pushing limitations and in my opinion bad design choices along with awful system requirements that might just be a case for a lot of users.
I am really not sure what is logic behind these moves and I am sure they have their reasons but this time it seems that their take on the new OS is not resonating well with the overall user population, well at least what I have heard so far. Things of course can still be changed and made for the better and I would rather see release postponed and issues addressed than getting more system hogging and limited new OS that at its current state looks like reskinned Windows 10 with limitations.
As more and more people get into insider preview of upcoming Windows 11 we will see more and more different takes and opinions on it.
Generally speaking, the first wave was quite positive when it was previewed but how time is passing more and more limitations and frustration comes to the surface.
Some of the limitation that is inside it, which have been confirmed by Microsoft itself includes features missing that we had in Windows 10 like moving the application to the taskbar in order to pin it, moving the file in the taskbar to open it in default application and some big annoyances like Windows opening widgets always in Edge no matter what is your default browser. Not being able to move the taskbar from the bottom is also one of many illogical things.
There is not really a point in these missing features since they were working fine in Windows 10 and many users liked them since they could customize Windows more to their liking, now with this new look at limitations it reminds me personally much of apple macOS and I will be honest, I am not a big fan of that kind of thinking.
If I wanted that kind of OS I would have gotten myself a MAC, not custom build PC, but hey, Linux is always a free alternative, and how Microsoft itself is pushing limitations and in my opinion bad design choices along with awful system requirements that might just be a case for a lot of users.
I am really not sure what is logic behind these moves and I am sure they have their reasons but this time it seems that their take on the new OS is not resonating well with the overall user population, well at least what I have heard so far. Things of course can still be changed and made for the better and I would rather see release postponed and issues addressed than getting more system hogging and limited new OS that at its current state looks like reskinned Windows 10 with limitations.  The first step is to right-click anywhere on the taskbar (in empty space) and choose Taskbar settings
Once the taskbar settings are opened, find Widgets and click on the switch on the far right to turn it off, immediately no more information will be shown on the taskbar and it will be free again. And that is all there is to it.
The first step is to right-click anywhere on the taskbar (in empty space) and choose Taskbar settings
Once the taskbar settings are opened, find Widgets and click on the switch on the far right to turn it off, immediately no more information will be shown on the taskbar and it will be free again. And that is all there is to it. Windows 10 isn’t activated error occurs when Windows users attempt to upgrade to Windows 10 for free and end up in a non-activated state. It is a Windows 10 activation error affecting PC owners who attempt to upgrade their Windows 7 or Windows 8.1 operating systems. A message box will appear with the following message: “Windows 10 isn’t activated after upgrading for free from Windows 7 SPI or Windows 8.1 update.”
Common symptoms of this error code include the following:
Error CausesTo understand the cause of this activation error, users will need to understand activation within Windows. Activation is a process that allows Windows to verify that you are upgrading your operating system based on the Microsoft Software Licensing Terms. These terms specify, for instance, the number of devices upon which you can use Windows.
Once you have a genuine copy of Windows and you are following the terms mentioned earlier, you should be able to activate and complete the upgrade to Windows 10. However, the activation fails when these conditions are not met. Note also that the error may occur if users fail to upgrade to Windows 10 before reinstalling, requiring them to repeat the installation process by first going back to the previous version of Windows present on their system. Once the upgrade process is not done as should, you might encounter other Windows 10 errors such as error code 0xc0000142
If you see this error code, “Windows 10 isn’t activated after upgrading for free” proceed to rectify it using manual repair methods below.
To fix this activation error code in Windows 10, users will need to employ at least one manual repair procedure. This process can successfully be completed by non-technical Windows users. However, you may also consider getting assistance from a Windows repair technician if you are not certain you have the requisite skills needed to complete the manual repair tasks below.
The main methods to resolve the error code “Windows 10 isn’t activated after upgrading for free from Windows 7 SPI or Windows 8.1 update” is as follows:
If you attempted upgrading for free to Windows 10 and ended up with the activation error you will need to first perform a manual activation. Follow the steps below to complete the process.
The steps above enable users to successfully activate Windows 10 if the issue involves a connection problem. However, if Windows is not activated, it may mean your copy of Windows is not genuine. This may require you purchase a copy of Windows to rectify the issue. However, if you have a genuine copy of Windows proceed by applying the steps found in method two.
A valid product key is one way you can verify your copy of Windows is genuine. This will enable you to complete activation and allow you to access the free upgrade to Windows 10. Follow the steps below.
Error codes in Windows often occur due to poor maintenance of one’s PC. To improve your system and reduce your machine’s risk of experiencing error codes, download a powerful automated tool. This tool is both powerful and user-friendly, making its benefits accessible to even the most non-technical Windows users.
Error Causes