There is a built-in tool in Windows 10 the Disk Cleanup Utility which can help you restore hard disk space by removing temporary files, Thumbnails, old Windows files, Windows Upgrade logs, Delivery optimization files, and many more. However, from time to time, this built-in tool also experiences some issues. One of these issues is when it gets stuck on Windows Update Cleanup. Read on to find out what you can do in such a case.
When the Disk Cleanup Utility is stuck on the Windows Update Cleanup, the process could be slow and take a long time to complete when purging the files. If this happens, click on Cancel to close the dialog box. After that, try running the Disk Cleanup Tool again as administrator and check if the files that you want to clean is still there or not. If it isn’t there, then this means that the cleanup has been done, otherwise, you need to refer to the options given below.
Option 1 – Try to manually delete the contents in the SoftwareDistribution folder
Open the WinX Menu.
From there, open Command Prompt as admin.
Then type in the following command – don’t forget to hit Enter right after typing each one of them.
net stop wuauserv
net start cryptSvc
net start bits
net start msiserver
After entering these commands, it will stop the Windows Update Service, Background Intelligent Transfer Service (BITS), Cryptographic, and the MSI Installer
Next, go to the C:/Windows/SoftwareDistribution folder and get rid of all the folders and files thereby tapping the Ctrl + A keys to select them all and then click on Delete. Note that if the files are in use, you won’t be able to delete them.
After resetting the SoftwareDistribution folder, you need to reset the Catroot2 folder to restart the services you just stopped. To do that, follow these steps:
Type each one of the following commands.
net start wuauserv
net start cryptSvc
net start bits
net start msiserver
After that, exit Command Prompt and restart your computer and then try to run Windows Update once more.
Option 2 – Try to manually delete the contents of the Windows.old folder
The Windows.old folder is the one that holds the older version of Windows when you upgrade. It comes really useful when you want to revert to the previous version of Windows 10. Thus, you can delete the Windows.old files in case the cleanup tool is stuck.
Option 3 – Try running Disk Cleanup in a Clean Boot State or Safe Mode
Another thing you can try is to restart your computer in a Clean Boot State or Safe Mode. Chances are, there are some programs that are preventing the Disk Cleanup Utility tool to run properly. After you restart your computer in a Clean Boot State or Safe Mode, try to run the Disk Cleanup tool again and then see if it now works or not.
Option 4 – Run the Windows Update Troubleshooter
You might also want to run the Windows Update Troubleshooter as it could also help in fixing this issue. To run it, go to Settings and then select Troubleshoot from the options. From there, click on Windows Update and then click the “Run the troubleshooter” button. After that, follow the next on-screen instructions and you should be good to go.
Option 5 – Run the DISM tool to fix the corruption in the Component Store
You can try running the Deployment Imaging and Servicing Management or DISM tool to fix the Wdf01000.sys Blue Screen error. Using this built-in tool, you have various options such as the “/ScanHealth”, “/CheckHealth”, and “/RestoreHealth”.
Open the Command Prompt with admin privileges.
Then type in the following commands and make sure to hit Enter right after you type each one of them:
Dism /Online /Cleanup-Image /CheckHealth
Dism /Online /Cleanup-Image /ScanHealth
exe /Online /Cleanup-image /Restorehealth
Do not close the window if the process takes a while as it will probably take a few minutes to finish.
Receiving a screen of death is not a pleasant experience at all and most users would agree that they would very much like not to face one during their work with the computer. Sadly PC is not a perfect machine and it is not working in a perfect environment so errors happen.
The most famous and well-known death screen is blue which is also the most common one, my bet would be that there is not a user which has not been faced with this blue error screen. There is no simple explanation why these stop errors occur as several factors can be involved. However, it is known that the malfunctioning of hardware drivers or drivers that are installed by third-party software drive this unwanted change.
But did you know that there is more colors for infamous death screens and not just blue one?
Microsoft has coded different errors to different colors in the goal for the technical team to be aware right away of what type and kind of error they are dealing with.
Color for screen errors are: Blue, Black, Pink, Brown, Yellow, Red, Orange, Green and White
If you are interested in what color represents what keep reading.
BLUE
A stop error or exception error commonly called the blue screen of death (BSoD) or blue screen, is an error screen displayed on Windows computers following a fatal system error. It indicates a system crash, in which the operating system has reached a condition where it can no longer operate safely. This is caused by many different problems, such as a general hardware failure or a crucial process terminating unexpectedly.
BLACK
On Windows 10 systems, a Black Screen of Death can be caused by an unfinished Windows Update.To resolve this problem, simply hold the power button down on your PC or laptop to switch off the computer. A cold start should result in the system booting properly.
PINK
It is a diagnostic screen with a white type on a pink background. Pink Screen is mainly seen when the VMkernel of an ESX/ESXi host experiences a critical error, becomes inoperative, and terminates any virtual machines that are running. It is not fatal and generally considered more of a developer testing issue. When encountered, it can be fixed quickly by following the simple action of pressing and holding your computer’s power button to shut down the device.
BROWN
The Microsoft Windows 10 Operating System Brown Screen of Death is an on-screen fatal error notification with bug check codes which is seen when a computer crashes due to graphics hardware or software-related problems (failing graphics drivers).
YELLOW
It affects the functioning of a browser, particularly Mozilla Firefox. The Yellow Screen of Death makes the appearance with a weird buzzing sound in the background when the XML parser refuses to process an XML document causing a parsing error and a weird buzzing sound. The issue persists unless the computer is manually rebooted.
RED
Commonly the Windows 10 red screen is caused due to the hardware error, particularly if you overclock your Windows PC/laptop. Despite this, sometimes the red screen of death is also caused by outdated or incompatible drivers or due to BIOS issues.
ORANGE
The Orange Screen of Death on Windows occurs due to fatal hardware errors. Multiple reasons have been reported for the Orange Screen of Death. Some had this issue when watching a YouTube video, some were not able to boot into Windows. It can even occur when waking up from Sleep.
GREEN
The green screen of death only appears when you're running an Insider Preview version of Windows 10. It's the same as the blue screen of death, and it will show the same error messages. ... If you see a green screen of death (GSOD) on your PC, that's a sign you're using an Insider Preview build of Windows 10.
WHITE
The White Screen on Windows is also an error where the screen of the computer just turns white and freezes. There can be several things that can cause the white screen to appear on the Windows laptop monitor. But the main issue could be because of malfunctioning of the graphics hardware.
Afraid of the growing threats online? As you should be. But we’re here to show you what kinds of malware are out there and what you can do to keep them at bay.
Malware definition
Malware comes from the term malicious software. It’s software designed to attack and exploit devices and networks to the advantage of the hacker who made it.
Malware can be transmitted in different ways. Most commonly this happens via infected USB drives, downloadable files or malicious websites. Depending on the type and ultimate goal, the consequences of a malware attack can range from negligible to catastrophic.
Credit: Ed Hardie on Unsplash
What kinds of malware are there?
1. Virus
A virus is typically spread via infected files, websites or links. It’s one of the oldest malware types and one of the most difficult to get rid of. That’s because, once activated, it replicates itself - hence the name.
It can perform different kinds of attacks, depending on what the creator wants to achieve. The main characteristic of a virus is that it really doesn’t show itself until you activate the host. So that’s a scary thought for sure.
2. Adware
Sometimes an ad blocker isn’t enough to fight off unwanted ads. And some of them can, unfortunately, be malicious. They may redirect you to infected sites or prompt downloads of risky files. Even just opening a malicious site can lead to data theft.
So, definitely be careful when clicking around. Even if an ad seems completely legitimate, you can never be too sure.
3. Ransomware
Through ransomware, cybercriminals gain access to a user’s data and use it to extort them for money. Basically, the user is threatened with data deletion or even exposure if a ransom isn’t paid by a specific deadline.
This is a particularly nerve-wracking type of malware. If it targets an individual, it preys upon their sense of anxiety, fear, guilt and even shame. If it targets a business (which is a lot more common), it preys upon not only that business’s profit but also every single one of their customers and their data.
4. Trojans
This type of malware disguises itself very well as a legitimate-looking program. Once you download it, hackers can get full access and control of your device, data and network. They can even be hidden in games, apps and attachments. They cannot self-replicate, though, so we guess that’s… good news?
5. Worms
Worms can replicate, just like viruses, but you don’t need to actually activate the infected program for them to get going. They can be used for various purposes, ranging from data deletion to file encryption to support a ransomware attack.
Credit: Growtika on Unsplash
6. Spyware
Spyware refers to malicious software that stays hidden on your computer and monitors your activity. The best-known type is keyloggers. This can be used to steal sensitive data like passwords and banking information.
7. Rootkits
Rootkits are among the most dangerous types of malware. They allow administrative access and full control of a device, which lets hackers continue hijacking all your data and monitoring your activity without your knowledge.
8. Botnets
Botnets are networks made up of bots - computers that cybercriminals have infected with malicious software. Bots and botnets give hackers remote access to users’ devices and allow them to spy on your camera, take screenshots, memorize passwords and launch Distributed Denial of Service attacks. This one truly makes your hair stand on end.
What can you do about it?
You know the old adage - better safe than sorry. And trust us, malware attacks are such a pain in the you-know-what that you really don’t want to be sorry.
Luckily, there are simple solutions that can shield you from most digital threats these days. What you want to be looking at is a solid antivirus program. Well, technically, you need an antimalware program, but since the latter evolved from the former, we still mostly refer to them as antivirus software. The majority of antimalware programs these days don’t just shield you from potential risks online, but include additional features as well. For example, some Bitdefender antivirus packages also include parental control and a VPN. And Bitdefender is not just for PCs either - it offers protection for your beloved iPhone or Android as well. You can throw in a password manager in there too, for an additional layer of security.
Credit: Dan Nelson on Unsplash
If you aren’t too concerned about all these various threats or feel like you don’t need extra security, you can at least take a step to protect your information from being exposed to lurking cybercriminals as you’re browsing. This can be done through a good VPN like Surfshark, which hides your identity in the digital space and prevents your data from being tracked.
Choosing the right protective software is especially important if you have children with access to the Internet, since they’re unfortunately even more vulnerable to malicious attacks. If you aren’t sure what the right kind of antimalware program is right for you, you can reach out to us and we’ll be happy to help keep your entire household or office digitally secure.
The bottom line
The truth is that there’s no way to be 100% protected in the online world. Hackers are constantly coming up with new ways to infiltrate our devices. But malware-battling software evolves along with them and there’s still plenty you can do to keep risks away. Stay safe!
As you know, the USB security keys are a secure medium to validate a lot of components in a computer. They can be used to log in to Windows 10. Now with the advancement of APIs, you can authenticate across the website as well using the same key. However, there are times when it may not work and it could be caused by several factors. It could be due to corrupted or incompatible drivers or it could also be due to compromised integrity of the key, and many more.
So if you happen to encounter an issue with the USB security key on your Windows 10 computer, then there are several potential fixes you can try. You can try toggling the Internet Options settings or reinstall the respective USB drivers. You could also try changing the PIN of the security key or disable the antivirus program on your computer or troubleshoot the web browser. Refer to the potential fixes provided below to fix the problem.
Option 1 – Try to toggle the settings of the Internet Options
In the Windows Search box, search for Internet Options to open it.
Next, go to the Security tab and drag the security slider to the lowest possible security for all the given zones.
After that, click on OK to save the changes made and close the Internet Options.
Note that this option is only a temporary measure as it can make your computer vulnerable. Make sure to press the Reset all zones to default level button.
Option 2 – Try to update or reinstall the respective drivers
If updating the drivers of the device did not fix the problem with the USB security key, you can try to update or reinstall the Universal Serial Bus Controller drivers instead of using the Device Manager. Refer to the following steps:
First, click the Start button and type “device manager”.
Then click on the “Device Manager” from the search results to open it.
From there, look for the “Universal Serial Bus controllers” option and then right-click on each one of the USB drivers and select the Update Driver from the menu.
Note: If it is a regular USB drive, then it will be listed as a USB Mass Storage Device but if you have a USB 3.0 device, then look for a USB 3.0 Extensible Host Controller.
Restart your PC and then click the “Search automatically for updated driver software” option.
Note: If updating the USB Controller drivers didn’t work, you can try to reinstall them instead.
Option 3 – Try to change the PIN of the security key
If the first two options didn’t work, you can try changing the PIN of the security key. There are instances when the PIN for the security key might have been corrupted. Thus, resetting it can help you resolve the problem.
Option 4 – Temporarily disable Firewall and third-party antivirus
Firewall and antivirus programs are known to block the proper functioning of the USB security key. Thus, your antivirus or firewall programs might be the reason why you can’t download anything on your Windows 10 computer. To isolate the issue, you need to temporarily disable both the Firewall and antivirus programs and then check if you can now download anything from the internet. Do not forget to enable them again as disabling them can leave your computer vulnerable to cyber threats.
Option 5 – Try to troubleshoot the web browser
Troubleshooting your web browser can also help you fix the USB security key problem. You can do that by checking if your web browser supports the security key and you can do that by checking on the official website of your browser. You can also try to update your web browser to its latest version but if it didn’t help, you can try to reinstall it or switch to another web browser.
rtf64x64.sys Blue Screen error happens in random intervals but it is a regular occurrence, it can happen when playing games, when watching movies, or even when the computer is idle. in this article we will guide you on how to resolve this error from the most simple steps you could take and do not worry, altho the error seems dreadfully and scary, it is nothing to worry about.
If you can boot Windows normally after error great, proceed with instructions, else reboot into safe mode or use installation media to boot.
Use official Microsoft online troubleshooter
Microsoft has an online blue screen troubleshooter that was made specifically for this kind of situation. Go to Troubleshoot screen error and answer questions needed. Most of the time this will be enough to solve any blue screen issue.
Update network and sound drivers
How is this error traced back to Realtek devices, go to the Realtek website and download drivers. Install them and reboot the system.
Use a dedicated software solution
DRIVERFIX is an application made for these and other kinds of driver issues and problems, it is one click automated solution for driver fixing. Visit the Driverfix site and download the application
Perform system Restore
If you have not managed to fix the issue with previous steps roll back to a previous restore point when everything was working.
Replace network or sound card
If everything failed including system restore then it is likely that it is a hardware malfunction. Replace faulty components and you should not receive errors anymore.
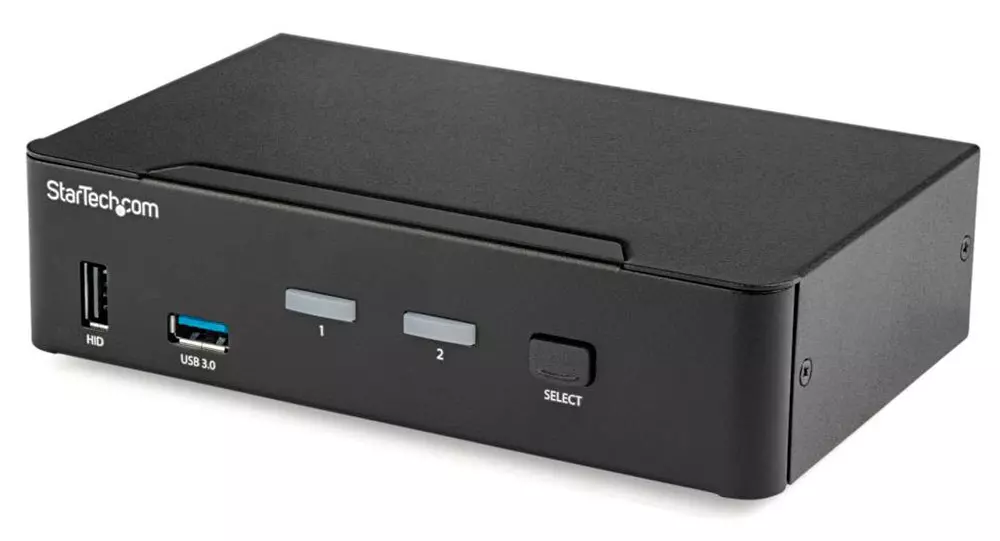
You probably heard about switches for LAN but not a lot of people heard about KVM switches. So what exactly is KVM switch?
If we look at the name, it is a shortcut for Keyboard, Video & Mouse and the original idea was to have multiple computers but one keyboard, mouse, and monitor. These peripherals would be connected to the KVM switch and other computers could all use one set of these on the fly when needed.
The technology behind the switch is a little interesting since it will actively fake signals to other computers that are not using peripherals. Once they are switched to them the transition is smooth and not noticeable. In old days these switches were more important than today since on every mouse or keyboard disconnection you had to reboot the computer, and although today that is not the case CPU will still detect disconnection and on the next connection it will run through the ID of the device and try to use the existing driver and if peripheral was connected in other USB port, it will install the same driver but connect it to the new USB port.
This type of reconnection can slow down work and place unnecessary load on the CPU so that is why KVM will fake connection in order to make switching externals on the computer smooth and in nick of a time.
Modern KVM switch
These days modern KVM switches will offer you more options than just being able to switch between keyboard, mouse, and monitor. Modern switches now offer Lan, audio, and many more various options.
There are also different kinds of switches offering you only one option, like for example just a Video switch that will let you use one monitor on three computers and many more other specialized options.
Software switches
So far we talked about Hardware switches, a real device being able to take peripherals into it and switch computers on the fly. On the other line, we have software switch solutions that will have specific software installed on all computers and have it run at all times, and switching between them will be through specific software.
There are two very good and main advantages of using software solutions instead of a hardware one. First, of course, is the price, since the most popular Synergy is an open-source solution, completely free of charge. The second big advantage is that software switch is not limited to how many computers can you use. Hardware switches tend to go to a large number like 16 but if you have a large cluster of computers over a LAN, let's say 30 then the box solution might be difficult.
On the other hand software solution will switch only keyboard and mouse since each other computer will have to have some screen on it in order to work. Both solutions have their strong advantages and disadvantages and it is up to you to choose one that best suits you.
Conclusion
If you are multitasking with a lot of computers or just need your peripherals from time to time to connect to another machine then the KVM switch is something that you might find the use of. Just be aware that if you go for some cheap switch you might experience some lag on your peripherals, but if that is not a concern you can get hardware one for as low as $50 USD.
While browsing the internet, if you suddenly encounter a warning with an error message saying, “Server certificate has been revoked ERR CERT REVOKED” then it indicates that the SSL certificate used by the website has been revoked by its issuer. This kind of problem can only be fixed by the website owner but that does not mean that you can’t do anything about it. In fact, you have the option to bypass this error as well as contact the certificate issuer – all this and more.
Just a reminder, if a website that accepts payment, its passwords don’t have SSL or has some certification issue, you should never trust it. For instance, if you are trying to purchase something online and you’re on the payment stage but you encounter the “Server certificate has been revoked ERR CERT REVOKED” error, you must not proceed.
To resolve the “Server certificate has been revoked ERR CERT REVOKED” error, here are some things you can do.
Option 1 – Try contacting the Certificate Issuer
If you are the website owner, of course, the best thing you can is to get in touch with the Certificate Issuer in order to resolve the problem.
Option 2 – Try fixing the Date and Time
You have to check your computer’s Date and Time. There are cases when this simple setting causes a connection problem. So if your computer Date and Time is set to date or time that this after the certificate expiration date, then you have to make sure that you set it to automatically configure time. To do so, just open Settings > Time and Language. From there, turn on the toggle for “Set time automatically” and “Set time zone automatically” options. After that, check if it fixes the error, if not, you need to check if the manual selection is correctly set or not.
Option 3 – Bypass the Certificate Revocation Check
As pointed out earlier, you have the option to bypass the Certificate Revocation check. All you have to do is follow the steps below.
In the search box of your browser, type “internet options” and open it once it appears.
After that, go to the Advanced tab and navigate to the Security subheading.
Next, uncheck the “Check for publisher’s certificate revocation” option as well as the “Check for server certificate revocation” option.
Now restart your computer. Upon the next startup, try opening the website again. This time, your browser will stop checking it for certificate issues. However, it’s not safe to leave those options unchecked so make sure that once the website’s SSL certificate is fixed or once you no longer have to visit that website, you recheck those options.
As you know, both the Windows Update and Windows Store are inter-dependable services in Windows 10 operating system. So when one of these services encounters an error like the “0x80070424, ERROR_SERVICE_DOES_NOT_EXIST”, the other service will most likely get this error as well. Note that this kind of error can occur to both the Windows Update Standalone Installer and to the Windows Update section in the Windows 10 Settings app. Some users also reported getting this error while trying to update Windows Defender as well.
You can see the following error message in the Windows Update Standalone Installer:
“Installer encountered an error: 0x80070424, The specified service does not exist as an installed service.”
While you’ll see the following error message in the Windows Store:
“The were some problems installing updates, but we’ll try again later. If you keep seeing this and want to search the web or contact support for information, this may help: (0x80070424).”
To fix this error, you can try to re-register the Background Intelligent Transfer Service DLL file or run the Windows Update and Store apps troubleshooters. You can also reset the Windows Update-related folders or the Microsoft Store or fix the Windows Update files by using the DISM tool. On the other hand, you can also use the Registry Editor or check Windows Services. For more details regarding these potential fixes, refer to each one of the given options below.
Option 1 – Try to re-register the Background Intelligent Transfer Service DLL file
You may have to re-register the Background Intelligent Transfer Service DLL file using the regsvr32.exe before you can successfully install the program and fix ntdll.dll file crash error. The Regsvr32 tool is a command-line utility that can be used to register and un-register OLE controls as DLL and ActiveX (OCX) controls in the Windows operating system. Follow the steps below to use it.
Open Command Prompt as admin from the WinX menu.
Next, type the following commands in the elevated Command Prompt and hit Enter to execute the command. This will re-register the affected DLL file using the Windows operating system tool, regsvr32.exe.
regsvr32 Qmgr.dll /s
regsvr32 Qmgrprxy.dll /s
Note: Replace “[DLL file]” with the name of the DLL file that was pointed out in the error.
After you execute the given commands, you should see a message saying, “DllRegisterServer in vbscript.dll succeeded” if the Regsvr32 tool was able to run successfully.
Now restart your computer and check if the error is now fixed.
Option 2 – Try to run the Windows Store or the Windows Update Troubleshooters
The Windows 10 Store Apps Troubleshooter will help you in fixing the Error code 0x80070424. This is a great built-in tool from Microsoft that helps users fix any app installation issues. So this is worth a try to solve the problem. This built-in tool also helps you fix the Windows 10 Store if it isn’t working.
To use the Windows Store Troubleshooter, follow the steps below.
Tap Win + I keys again to open the Windows Settings panel.
Go to Update & Security and then go to Troubleshoot.
On your right hand side, scroll down to find the Windows Store Apps and then click on Run the troubleshooter option and see if it fixes the problem.
Note:You can also try running the Windows Update troubleshooter to fix the error. You can run it under the Windows Update section of Update & Security.
Option 3 – Delete the files from Software Distribution Folder & Catroot2 folders
The downloaded Windows Updates are placed in a folder called “SoftwareDistribution”. The files downloaded in this folder are automatically deleted once the installation is completed. However, if the files are not clean up or if the installation is still pending, you can delete all the files in this folder after you pause the Windows Update service. For complete instructions, refer to these steps.
Open the WinX Menu.
From there, open Command Prompt as admin.
Then type in the following command – don’t forget to hit Enter right after typing each one of them.
net stop wuauservnet start cryptSvcnet start bitsnet start msiserver
After entering these commands, it will stop the Windows Update Service, Background Intelligent Transfer Service (BITS), Cryptographic and the MSI Installer
Next, got to the C:WindowsSoftwareDistribution folder and get rid of all the folders and files there by tapping the Ctrl + A keys to select them all and then click on Delete. Note that if the files are in use, you won’t be able to delete them.
After resetting the SoftwareDistribution folder, you need to reset the Catroot2 folder to restart the services you just stopped. To do that, follow these steps:
Type each one of the following commands.
net start wuauservnet start cryptSvcnet start bitsnet start msiserver
After that, exit Command Prompt and restart your computer and then try to run Windows Update once more.
Option 4 – Try to reset the Microsoft Store cache
Just like browsers, Microsoft Store also caches as you view apps and games so it is most likely that the cache is no longer valid and must be removed. To do so, follow the steps below.
Right click on the start button and click on Command Prompt (administrator).
Next, type in the command, “wsreset.exe” and tap Enter. Once you do, the command will clear the cache for the Windows Store app.
Now restart your PC and afterwards, try opening Microsoft Store again and then see if Error Code 0x80070424 is resolved or not.
Option 5 – Try to check the Windows Update or WU setting in the Registry
Tap the Win + R keys to open the Run utility and type “regedit” in the field and tap Enter to open the Registry Editor.
Next, go to this registry path: ComputerHKEY_LOCAL_MACHINESOFTWAREPoliciesMicrosoftWindowsWindowsUpdate
Here, look for the DWORD named “DisableWindowsUpdateAccess” and double click on it and then set its value data to “0”.
Exit the Registry Editor once you’re done and restart your computer.
Option 6 – Try to check the status of some Windows Update Services
Tap the Win + R keys to open the Run dialog box.
Next, type “services.msc” in the field and hit Enter or click OK to open Services.
From the list of Services, look for the following services and make sure that their Startup type is as follows:
Windows Update Service – Manual (Triggered)
Background Intelligent Transfer Service – Manual
Workstation Service – Automatic
After that, check if the Service status of the listed services above are set to Running. If they’re not, click on the Start button to start these services and then check if you can now enable the Windows Update service or not.
Option 7 – Run the DISM tool
You can also run the Deployment Imaging and Servicing Management or DISM tool to fix the error code 0x80070424. Using this built-in tool, you have various options such as the “/ScanHealth”, “/CheckHealth”, and “/RestoreHealth”.
Open the Command Prompt with admin privileges.
Then type in the following commands and make sure to hit Enter right after you type each one of them:
Dism /Online /Cleanup-Image /CheckHealth
Dism /Online /Cleanup-Image /ScanHealth
exe /Online /Cleanup-image /Restorehealth
Do not close the window if the process takes a while as it will probably take a few minutes to finish.
Once it’s done, reboot your computer and check if it has fixed the error.
Drwtsn32.exe (DrWatson Postmortem Debugger) is a process file from Microsoft Corporation that runs on Microsoft Windows Operating System. This file is digitally signed from Microsoft Windows Component Publisher- Microsoft Timestamping Service.
This file is a type of executable file. It is useful to debug and creates log files when an error occurs during running or program execution.
The information logged by DrWatson is used by technical support personnel to diagnose a program error for a computer running Windows. It creates log files in the following location C:Documents and SettingsAll UsersApplication DataMicrosoftDr Watson.
However, when using Internet Explorer, MS Outlook or any other application on Windows, you can experience drwtsn32.exe application error. This error occurs when the drwtsn32.exe file crashes. The error is displayed as:
“DrWatson Postmortem Debugger has encountered a problem and needs to close”"drwtsn32.exe - DLL Initialization Failed" when shutting down
Solution
Error Causes
The ultimate reason behind ‘drwtsn32.exe application error’ is malware and viral infection.
Malicious software can enter your PC through downloaded files , browsing on unsafe websites and phishing emails. These viruses can disguise themselves as DrWatson utility. Plus theymay have the same name as this process.
However, the best way to detect if it is a virus is to track its location. Malicious software will usually hide in some other location instead of its standard location.
However, other reasons for this error also include incompatible software and damaged system files.
Further Information and Manual Repair
a) Scan PC with an Anti-Virus
It is advisable to repair this issue right away especially if the underlying cause is a viral infection typically because viruses can expose you to privacy errors and risks such as cybercrime, identity theft, and data security issues.
To resolve it, download a powerful antivirus. Scan your PC with it and remove all the viruses immediately. However, when doing so, you may have to compromise PC performance and halt other PC activities. Anti-viruses are notorious for slowing down PC speed.
In addition to this, sometimes you may have to stop other activities on your PC for the antivirus to scan for viruses.
b) Repair Registry Errors with Restoro
Nonetheless, if the drwtsn32.exe application error is related to system file corruption, then this indicates registry issues where all the system data is stored.
Registry issues occur if you don’t maintain your PC properly and let invalid, wasted and obsolete files accumulate on your PC. This damages and corrupts the system files and generates such error messages. To repair it, download a registry cleaner.
However, the best alternative to resolve drwtsn32.exe application error in seconds whether the error is linked to registry issues or viral infection is to download Restoro.
This is a multi functional PC fixer embedded with multiple utilities including a powerful antivirus, a registry cleaner and a system optimizer.
It wipes out all the unnecessary files stored in the registry, repairs the damaged and corrupt system files and restores the registry. With the help of the antivirus, all privacy errors and viruses are scanned on your PC and removed immediately.
And to ensure your system’s speed is not compromised, it also functions as a system optimizer and increases your PC’s speed significantly.
The software is safe and efficient. It has simple navigations and a user-friendly interface which makes it very easy for all levels of users to work around. It is compatible with all Windows versions.
Click here to download Restoro and resolve drwtsn32.exe application error today!
Error Code 0xc0000005 can be a frustrating error that occurs when you attempt to use programs within Windows 10. While it is most often associated with Windows 10, this particular error has also made an appearance in previous versions of the Windows operating system. In each case, the error works in the same ways and is generally caused by the same things.
Common symptoms include:
Inability to run programs as designed
Inability to start programs
While it can be hard to have to deal with an error like Error Code 0xc0000005 on your Windows machine, there are at least three different strategies that you can use to attempt to resolve the problem at hand. If you do not feel like you have the skill or ability to complete these steps on your own, get in touch with a professional who is familiar with the Windows 10 operating system that can assist you. Please note, if this error code is not rectified, you could be exposing your computer to other error messages such as error code 0xC1900101 -0x20017.
Solution
Error Causes
The most common causes of Error Code 0xc0000005 on Windows 10 machines include interference with other programs that are running on the computer, such as antivirus programs, problems encountered within the registry entries made on the operating system, or faulty drivers that cause bad interactions between the system and the program in question.
Fortunately, there are several methods that can be used to resolve these specific issues.
Further Information and Manual Repair
There are three main ways that you can try to resolve Error Code 0xc0000005 on your Windows machine. Depending on your degree of technical ability and confidence, it may be easy to moderately difficult to follow these steps, so if you feel like you are not able to complete the methods below on your own, be sure to get in touch with a qualified computer repair technician to aid you in the process.
Here are the best ways to resolve Error Code 0xc0000005 on your Windows machine:
Method One: Disable Any Anti-Virus Processes
In some cases, an antivirus program can cause interference with your programs. If you believe that this is the primary culprit of your issue, try temporarily disabling the software that you are running to see if you are then able to use the program that experienced the error correctly.
Always be sure to keep on other security software, such as Windows Defender, while you disable your antivirus programs, ensuring that your computer is still protected from malicious software. In general, this is usually the best security tool that you can run on your computer, without interfering with other programs.
Method Two: Run a Registry Cleaner
In some cases, the error code can appear when a registry entry is either seen to be missing or faulty by the system. If you believe this is the primary cause of your problem, use a trusted registry cleaning software to scan the files and attempt to automatically fix the problem.
Always be sure to check out the provider of the registry cleaning tool that you use, as not every tool that you can download from the Internet is safe. When possible, always try to use registry tools that are directly available from the Microsoft website, rather than ones that you do a simple search for online.
Once the registry scan is complete, take the time to reboot your computer to ensure that every change that has been made can be recognized and applied by your operating system and devices.
Method Three: Check Your Drivers
If your drivers aren’t communicating properly with your hardware, it can cause the error code to appear. To fix this, open up your device manager software and choose to update your driver software. You can run an automatic search for updates to your drivers to make things easier.
When the driver updates have been downloaded and installed, make sure that you take the time to reboot your computer, which can allow your computer to apply and recognize any changes that have been made.
Method Four: Use An Automated Tool
If you wish to always have at your disposal a utility tool to fix these Windows 10 and other related issues when they do arise, download and install a powerful automated tool.
Libmysql.dll is missing or not found error appears in Windows when the user is trying to open and run the application.
In this guide, we will offer you solutions on how to fix and remove this annoying error.
Check recycle bin
Some applications or purely by accident itself libmysql.dll gets deleted. If you have not turned recycle bin off go to it and check to see if the file is by any chance there. If you find it, right-click on it, choose restore, the error will be gone.
Update drivers
Press ⊞ WINDOWS + X to open the Windows menu and click on Device manager
In device manager locate device which has alert mark next to it
Right-click on it and choose update driverReboot your computer
Run SFC scan
Press ⊞ WINDOWS + X and choose command prompt (admin)
In command prompt type in sfc /scannow and press ENTERwait for the operation to complete and Reboot your system
Reinstall application
if you are getting an error only on one application or an error has started to appear after the installation of a particular application go to Windows applications, uninstall it and then install it again. There is a chance that the file has been corrupted during the installation process.

 A stop error or exception error commonly called the blue screen of death (BSoD) or blue screen, is an error screen displayed on Windows computers following a fatal system error. It indicates a system crash, in which the operating system has reached a condition where it can no longer operate safely. This is caused by many different problems, such as a general hardware failure or a crucial process terminating unexpectedly.
 On Windows 10 systems, a Black Screen of Death can be caused by an unfinished Windows Update. To resolve this problem, simply hold the power button down on your PC or laptop to switch off the computer. A cold start should result in the system booting properly.
 It is a diagnostic screen with a white type on a pink background. Pink Screen is mainly seen when the VMkernel of an ESX/ESXi host experiences a critical error, becomes inoperative, and terminates any virtual machines that are running. It is not fatal and generally considered more of a developer testing issue. When encountered, it can be fixed quickly by following the simple action of pressing and holding your computer’s power button to shut down the device.
 The Microsoft Windows 10 Operating System Brown Screen of Death is an on-screen fatal error notification with bug check codes which is seen when a computer crashes due to graphics hardware or software-related problems (failing graphics drivers).
 It affects the functioning of a browser, particularly Mozilla Firefox. The Yellow Screen of Death makes the appearance with a weird buzzing sound in the background when the XML parser refuses to process an XML document causing a parsing error and a weird buzzing sound. The issue persists unless the computer is manually rebooted.
 Commonly the Windows 10 red screen is caused due to the hardware error, particularly if you overclock your Windows PC/laptop. Despite this, sometimes the red screen of death is also caused by outdated or incompatible drivers or due to BIOS issues.
 The Orange Screen of Death on Windows occurs due to fatal hardware errors. Multiple reasons have been reported for the Orange Screen of Death. Some had this issue when watching a YouTube video, some were not able to boot into Windows. It can even occur when waking up from Sleep.
 The green screen of death only appears when you're running an Insider Preview version of Windows 10. It's the same as the blue screen of death, and it will show the same error messages. ... If you see a green screen of death (GSOD) on your PC, that's a sign you're using an Insider Preview build of Windows 10.
 The White Screen on Windows is also an error where the screen of the computer just turns white and freezes. There can be several things that can cause the white screen to appear on the Windows laptop monitor. But the main issue could be because of malfunctioning of the graphics hardware.