
Error Code 0x80070490 - What is it?
When downloading a Windows update, it is important to remember that these updates are what keeps your computer safe. Some users have reported seeing error code 0x80070490 when allowing updates for their Windows PC. This error code may appear when the user is trying to connect to the update site for Windows and maybe a result of a corrupted CBS manifest. Having this error code will not only stop the update of the system, but it will also certainly halt any work being done with the computer. Quite a few Windows users have written in complaints about this error while updating from any prior Windows update to Windows 10.
Common symptoms include:
- While a user is performing the updates, the Windows computer will stop running the updates, and it will show the error code 0x80070490.
- Windows updates will not install any new features and will not install security patches.
- The computer will not continue with the Windows update, and it may revert back to the previous state that the computer was in, prior to attempting the updates.
Error Causes
There is not a lot known about what exactly causes the error code 0x80070490, but it is something critical that makes Windows abruptly stop its updates. It could be caused by a simple glitch in the computer system, or it could be caused by a larger problem. One thought is that the CBS (Component-Based Servicing) manifest can be corrupt. Another thought is that the computer's anti-virus software may be interfering with the computer's ability to perform the necessary updates.
Further Information and Manual Repair
There is very little information known about error code 0x80070490 and why it exists, but there are a few methods in which to correct it. Users should be careful when trying to fix this error themselves. If the user feels that the methods are too complicated or they are uncomfortable taking it on themselves, they should contact a Windows repair technician to fix the problem. Not all methods listed will suit the user's needs, but it is dependent upon the problem at hand as to which method will be the best fit to fix the error code. If these steps are taken and the error is not corrected, it is vital to contact the Windows repair technician.
Method One: Creating a new local account
Create a new local account on the computer, and allow administrator privileges on it. Next, move all of your documents and personal files to the new account. Delete the old account (you will no longer be using this) and switch over to the new one. After switching to the new local account, add the Microsoft account to it.
Method Two: Delete user ID, Store cache from the registry
- You will need to open the Registry Editor. Do this by pressing the Windows Key and R, then typing in “Regedit”. After this is typed in, press Enter or click the OK button to start the registry editor.
- When this starts, you will need to navigate all the way to the following key on the left pane:
- HKEY_LOCAL_MACHINESOFTWAREMicrosoftWindowsCurrentVersionAppxAppxAllUserStore After this, find the key that is similar to this: S-1-5-21-1505978256-3813739684-4272618129-1016
- NOTE: this is just an example. The keys will be in a similar format but will not look exactly like this.
- Select all the keys that look like this, and then delete them. After these keys are deleted, close the Registry Editor and restart the computer.
Method Three: Check to see if BITS, MSI Installer, Cryptographic, and Windows Update Services are running
Press the Windows key and R. Then, type in services.msc. After the Services window starts up, find the following services: BITS, MSI Installer, Cryptographic, and Windows Update Services. When these services are found, make sure that they are up and running. If one or more of these services is not running, make sure that they are started. To do this, select the service and then click on Start the Service.
Method Four: Windows Update Troubleshooting
Press the Windows key plus W and then type in “troubleshooting”. Select Troubleshooting. On the top left corner, select View All. Click on Windows Update troubleshooter. After this, follow the on-screen instructions in order to run the troubleshooter. After the troubleshooter has run, the issue should be fixed.
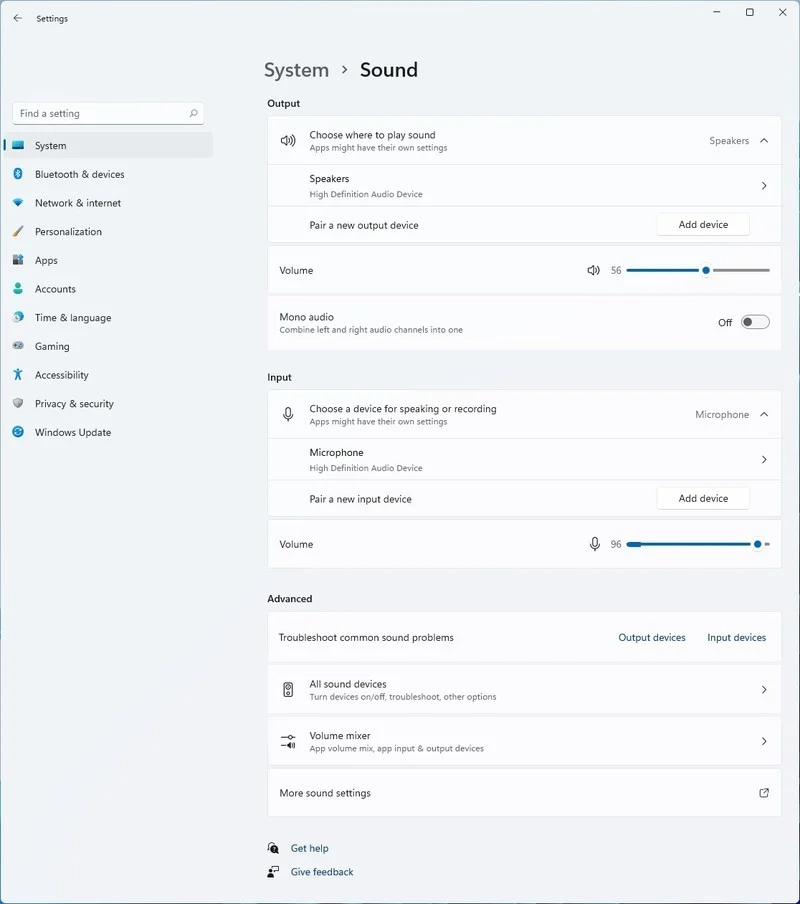 Windows 11 has brought some new features and changed some of the existing ones. One of these changes includes quick switching of audio devices which will play audio.
Audio switching can still be done under the taskbar, it is just a little different and one could say even hidden. Follow this quick guide and you will be switching from your headphones to speakers as an example in a matter of seconds.
Windows 11 has brought some new features and changed some of the existing ones. One of these changes includes quick switching of audio devices which will play audio.
Audio switching can still be done under the taskbar, it is just a little different and one could say even hidden. Follow this quick guide and you will be switching from your headphones to speakers as an example in a matter of seconds.

 Bluetooth perhaps is slowly becoming an outdated feature but sometimes you can really used it and need it.
By default, in Windows 11 Bluetooth is turned OFF so if you need it, you will need to turn it ON first. Luckily turning it ON is easy and we will guide you through the process
Bluetooth perhaps is slowly becoming an outdated feature but sometimes you can really used it and need it.
By default, in Windows 11 Bluetooth is turned OFF so if you need it, you will need to turn it ON first. Luckily turning it ON is easy and we will guide you through the process