Uninstalling the Weather App in Windows

Windows 10 has a pre-installed Weather app that offers the local weather information, forecast, temperature gradient, historical data, multiple locations, and many more. It can be handy especially if you tend to check on the weather. However, if you are one of those users who barely use this app, you have the option to uninstall it from your computer and that’s exactly what we’re going to do in this post.

There are several methods to uninstall the Weather app in Windows 10. You can uninstall it via Settings or Start Menu or even using a command in Windows PowerShell. Note that uninstalling the Weather app does not affect the functionality of your Windows 10 computer by any means so you shouldn’t worry about uninstalling it. To get started, follow the instructions provided below.

Option 1 – Uninstall the Weather app through Settings

The first option you can try to uninstall the Weather app is through Settings. It’s a very simple process so you wouldn’t have any trouble following it.

  • First, click on the Start menu and go to Settings.
  • From there, select System > Apps & Features.
  • After that, wait until the list of apps is opened, and then look for the Weather app and click on it.
  • Next, click on Uninstall in the given menu to uninstall the Weather app from your computer.

Option 2 – Uninstall the Weather app through the Start Menu

Another simple way to uninstall the Weather app is through the Start Menu. It only takes a right click and there are actually two ways to go about this – one is new with the recent feature update of Windows. How? Refer to these steps:

  • Click on the Start button and type in “weather” and right-click on the Weather app which appears in the list.
  • Next, click on the Uninstall option. This will uninstall the Weather app.
  • You can also use the other uninstall option which you can find on the right side of the list that also shows other quick action for the app.

Option 3 – Uninstall the Weather app through a command in Windows PowerShell

  • Tap the Win + X key combination and click on the “Windows PowerShell (Admin)” option to open PowerShell with admin privileges.
  • After that, execute the following Remove App package command for the Weather app to uninstall it.

Get-AppxPackage Microsoft.BingWeather | Remove-AppxPackage

  • Once done, it will remove the Weather app from your computer.

Do You Need Help with Your Device?

Our Team of Experts May Help
Troubleshoot.Tech Experts are There for You!
Replace damaged files
Restore performance
Free disk space
Remove Malware
Protects WEB browser
Remove Viruses
Stop PC freezing
GET HELP
Troubleshoot.Tech experts work with all versions of Microsoft Windows including Windows 11, with Android, Mac, and more.

Share this article:

You might also like

Fix Error Code 0xc0000225 in Windows 10
Error 0xc0000225 is the error that occurs on system startup, most times error just disappears all by itself but in some cases, it can be really persistent and can even cause you not to be able to enter the system that could be a really annoying thing, especially if there is some important task waiting to be finished. In this guide, we will present you with solutions for this error and how to solve it so you can get back to work as soon as possible.

Solution if you can not log into windows due to repeating error

If an error repeats itself constantly and you are unable to boot into Windows itself you will need to prepare Windows boot USB. You can download the Microsoft media creation tool here and then use it to create a bootable USB with Windows 10. Once the USB is done reboot your system and boot from USB. CHoose repair Windows instead of install and follow onscreen instructions.

Solution if you can log into Windows

If you can log into Windows bring up the command prompt in administrator mode and type in it SFC /SCANNOW followed by ENTER, wait for the whole operation to finish, and then reboot the system.
Read More
Sites for COVID-19 information
Living in today's world sadly is still living in the COVID-19 pandemic. It has been more than a year and sadly pandemic is still very strong and we are battling it on a daily basis. Governments all over the world are trying to battle pandemics in their own way with their own ideas and prevention measures. We as individuals can not very much influence how will the pandemic itself go but fortunately in this modern age of information we can at least follow and be in the loop at the current state of the situation regarding it. Today instead of having a troubleshooting article or tips and trick for your PC we are doing something else but in the domain of internet technology, you know, just to keep everything still IT related ???? Below you will find websites with small descriptions of what they do to keep yourself informed and hope to get over this dreadful pandemic.
  1. The WHO’s COVID-19 Dashboard

    If you are interested in real-time COVID-19 information about active cases, death tool so far, new cases and the number of vaccines administrated so far I would recommend WHO's dashboard. How WHO is a non-government institution composed of doctors from all over the world with just a single goal in mind, to help and put an end to this pandemic is a great non-biased source of information on the current state of virus spread.
  2. Vaccine Finder

    Please be aware that Vaccinefinder is working only on the territory of the United States of America. The reason why it was included in this list is that basically it is a great idea and I hope to see this site expand on other world regions or at least that inspires the emergence of another worldwide website with this type of content. If you live in the USA, this site will be a great help since you can track where and how many shots are distributed to states and even towns in America.
  3. COVID tracking project

    This site is also for U.S. residents, this time it is about tracking cases in each state with details and statistics. If you are interested in more detailed statistics of hospitalized patients per state or overall you are just interested in statistics about the pandemic in the U.S. this site might provide all the information about your needs.
  4. NPR

    On national public radio or NPR for short, there is a special section devoted to the coronavirus where new articles about pandemic are released daily with new information and new findings on how to battle it and the current state of things. A great informational site to keep up with the current state of things.
  5. Google's COVID-19 page

    Google has not been inactive during this pandemic and on its page specially dedicated to the COVID-19 virus you can find a lot of free information updated daily. From safety and prevention tips to data about pandemics there is a lot of ground covered on-page and we recommend at least going through the prevention section to inform yourself how to keep yourself and others safe.
  6. Coronavirus tracker

    This daily updated chart can show how many cases and deaths are from chosen time period all in form of a chart, you can see charts for each country in the world how COVID cases rose or dropped along with the death tool it brought.
There you go, 6 websites to track and inform yourself about this dreaded pandemic which has managed to change the world and people's lives forever, sadly on the bad side.
Read More
Removing old drivers from Windows 10
So you have just got home from that new computer store with your fancy and all-new mouse, screen, keyboard, etc. You plugged in your new component, Windows detected it, installed drivers for it and it is working like a charm. A few months later down the road and the computer starts little by little to slow down. Plug and play is a great concept, and automatic detection is even greater but how time passes old unused stuff piles in your hard drive and in Windows itself thus slowing down your computer and taxing it more and more as new components and software are added. Old drivers from old components sadly are not removed from Windows itself and over some larger period of time they can pile up and slow down your daily operations on the computer or even cause some problems in it. This guide will teach you how to manually remove old unused device drivers from your Windows so it is fresh and like new again.

Making old devices visible

In order for us to remove old drivers, the first thing we must do is make them visible in our device manager, old drivers are hidden and will not show up, we must make this happen. We do this by pressing WINDOWS + X keys on your keyboard to bring up a hidden menu in Windows. keyboard with windows and x markedOnce the menu appears, click on Command Prompt (admin) Windows menu command prompt adminOnce the command prompt with administrator privileges comes on-screen type in it following string: The device manager will open, go to view > snow hidden devices in order to show unused devices. device manager show hidden devices

Removing old device

Open any category and if there is a device that was once used and still has its drivers in the system it will be shown as faded out. device manager hidden device shownRight-click on the device and click on uninstall device to remove it completely from your system. device manager uninstall device driverPlease always be careful when removing devices so you do not remove the device which is being used by mistake and always double-check that you are removing something that you used to have on your system. This method will show all hidden devices even ones that are hidden but crucial to the system working properly.
Read More
Remove Polimva from your PC

Polimva is a Browser Extension for Google Chrome. This extension offers users the ability to search for any recipe on the web.

From the Author:

Polimva will help you discover new content! You will be exposed to cool and fun content every day! You can search and find new articles, videos, and reviews on daily basis.

-Amazing search experience. -Access to new interesting articles and videos every hour. -Polimva Changes the default search. -Updated content every day. -Follow any channel and topic that you like. -Choose the interface and the design of the results you get every time.
This extension changes your default search engine to Yahoo, and while active it changes the displayed ads on your browser, allowing it to make revenue on every ad you click. While this is not malicious, the extension redirects your search to its servers first before forwarding it to yahoo and displaying search results. The information that is sent back to the servers contains your browsing data & visited web pages. As a result, Polimva is considered a potentially unwanted browser hijacker and if flagged for optional removal.

About Browser Hijackers

Browser hijackers (also known as hijackware) are a kind of malware that modifies internet browser settings without the computer owner’s knowledge or approval. These kinds of hijacks appear to be rising at an astonishing rate worldwide, and they could be truly nefarious and often harmful too. They are designed to disrupt browser functions for many different reasons. It redirects you to the sponsored websites and injects adverts on the browser which helps its developer generate ad revenue. Even though it might seem naive, all browser hijackers are damaging and therefore always regarded as security threats. What’s more, hijackers could make the entire infected system vulnerable – other destructive malware and viruses will grab these opportunities to get into your computer system effortlessly.

Indications of browser hijack

Here are some signs that suggest you’ve been hijacked: 1. your browser’s home page is reset to some unfamiliar webpage 2. bookmark and the new tab are also modified 3. the default web browser configurations have been changed and/or your default web engine is altered 4. you see multiple toolbars on your web browser 5. your internet browser displays endless pop-up windows 6. your internet browser starts running slowly or displays frequent errors 7. you’re disallowed access to certain websites, for example, the website of an antimalware software manufacturer like SafeBytes.

Exactly how browser hijacker infects PCs

Browser hijackers can enter a PC in some way or other, including via downloads, file sharing, and email also. They can also come from any BHO, extension, add-on, toolbar, or plug-in with malicious purpose. Some internet browser hijackers spread in user’s PC by using a deceptive software distribution method called “bundling” (generally through freeware and shareware). Some of the popular hijackers are Polimva, Conduit Search, Babylon Toolbar, OneWebSearch, Sweet Page, and CoolWebSearch.

The best ways to remove a browser hijacker

Some browser hijacking could be simply corrected by finding and removing the corresponding malware software from your control panel. Unluckily, many of the software applications used to hijack an internet browser are deliberately built to be difficult to remove or detect. You should think of doing manual fixes only if you’re a tech-savvy person since there are possible risks associated with tinkering around with the computer registry and HOSTS file. You can opt for automatic browser hijacker removal methods by simply installing and running an efficient anti-malware program. If you need to get rid of persistent hijackers effectively, install the top-rated, award-winning anti-malware software Safebytes Anti-Malware.

Malware Blocking Internet And All Anti-Malware Software? Do This!

Malware could cause many different types of damage to computer systems, networks, and data. Some malware variants alter browser settings by adding a proxy server or modify the PC’s DNS settings. In such cases, you will be unable to visit certain or all of the websites, and thus unable to download or install the required security software to eliminate the malware. So what to do when malicious software prevents you from downloading or installing Safebytes Anti-Malware? There are a few steps you can take to circumvent this issue.

Use Safe Mode to fix the issue

Safe Mode is a special, simplified version of Microsoft Windows where just bare minimum services are loaded to counteract viruses and also other troublesome applications from loading. In case the malware is set to load immediately when the computer starts, shifting into this mode may well prevent it from doing so. In order to get into Safe Mode or Safe Mode with Networking, press F8 while the computer is starting up or run MSConfig and find the “Safe Boot” options in the “Boot” tab. Once you are in safe mode, you can attempt to install your anti-malware software application without the hindrance of the malicious software. Now, you could run the anti-virus scan to eliminate viruses and malware without any interference from another application.

Switch over to a different browser

Certain malware might target vulnerabilities of a specific web browser that block the downloading process. In case you suspect that your Internet Explorer has been hijacked by a trojan or otherwise compromised by cybercriminals, the ideal thing to do would be to switch to an alternate browser such as Mozilla Firefox, Google Chrome, or Apple Safari to download your chosen computer security software – Safebytes Anti-Malware.

Install security software on a thumb drive

To successfully eliminate the malware, you might want to approach the issue of running an anti-malware software program on the affected computer system from a different angle. Follow these steps to run the anti-malware on the infected computer. 1) Download the anti-malware on a virus-free PC. 2) Plug in the pen drive to a USB slot on the clean computer. 3) Run the setup program by double-clicking the executable file of the downloaded software, with a .exe file format. 4) Choose a USB flash drive as the location when the wizard asks you exactly where you want to install the program. Follow the instructions on the computer screen to finish off the installation process. 5) Now, plug the pen drive into the corrupted computer. 6) Double-click the EXE file to run the Safebytes software from the thumb drive. 7) Click on “Scan Now” to run a scan on the infected computer for viruses.

A Look at the Best Anti-Malware Program

Want to install the very best anti-malware software for your desktop? There are numerous applications on the market that comes in free and paid versions for Microsoft Windows computers. Some of them are good, some are ok types, and some will destroy your computer themselves! You must be very careful not to choose the wrong product, particularly if you purchase a paid program. On the list of recommended software by industry experts is SafeBytes Anti-Malware, well-known security software for Windows computers. SafeBytes anti-malware is really a powerful, highly effective protection application created to assist end-users of all levels of IT literacy in identifying and removing malicious threats out of their PC. With its outstanding protection system, this software will automatically detect and eliminate most of the security threats, including adware, viruses, browser hijackers, ransomware, trojans, worms, and PUPs. There are plenty of wonderful features you will get with this particular security product. Listed below are a few of the great ones: Robust, Anti-malware Protection: By using a critically acclaimed malware engine, SafeBytes gives multilayered protection that is made to catch and remove viruses and malware that are hidden deep inside your PC. Live Protection: SafeBytes gives you round-the-clock protection for your personal computer limiting malware intrusions instantly. This software will constantly monitor your computer for suspicious activity and updates itself continuously to keep current with the constantly changing threat scenarios. Safe Web Browsing: Through its unique safety rating, SafeBytes tells you whether a website is safe or not to visit it. This will assure that you’re always certain of your safety when browsing the internet. Lightweight Tool: SafeBytes is a lightweight and easy-of-use anti-virus and anti-malware solution. As it utilizes very little computer resources, this application leaves the computer power exactly where it belongs to: with you. 24/7 Support: Expert technicians are at your disposal 24/7! They will quickly fix any technical issues you may be experiencing with your security software. Put simply, SafeBytes has formulated a meaningful anti-malware solution that is aimed to protect your computer against various malware. Malware problems can become a thing of the past when you put this application to use. So if you’re searching for the very best malware removal application out there, and when you don’t mind shelling out a few bucks for it, opt for SafeBytes Anti-Malware.

Technical Details and Manual Removal (Advanced Users)

To get rid of Polimva manually, navigate to the Add or Remove programs list in the Control Panel and choose the program you want to get rid of. For browser plug-ins, go to your browser’s Addon/Extension manager and select the plug-in you intend to disable or remove. You might even want to reset your home page and search engine providers, and also delete browsing history, temporary files, and internet cookies. If you choose to manually delete the system files and Windows registry entries, use the following checklist to make sure you know exactly what files to remove before undertaking any actions. However, this can be a complicated task and only computer experts can accomplish it safely. Furthermore, certain malware keeps replicating which makes it tough to eliminate. You are advised to do this process in Windows Safe Mode.
Files: %UserProfile%\Local Settings\Application Data\Google\Chrome\User Data\Default\Extensions\epngjnkooalbmphkdlahcdhnfondeicc Registry: HKEY_CURRENT_USER\Software\Microsoft\Windows\CurrentVersion\Run HKEY_LOCAL_MACHINE\SOFTWARE\Microsoft\Windows\CurrentVersion\Run HKEY_LOCAL_MACHINE\SOFTWARE\Wow6432Node\Microsoft\Windows\CurrentVersion\Run
Read More
Removing Linkey From Windows Tutorial

Linkey is a potentially unwanted web browser search extension for the top browsers, designed to modify the user’s search and home pages in order to direct advertising. This extension changes your default search provider, redirects new tabs, and distributes information & statistics to the server. This extension will display unwanted ads, redirect you through unwanted search engines, and send your browsing information (potentially private information) back to its ad network.

From the publisher: Linkey is compatible with all the latest versions of Internet Explorer, Chrome, and Firefox. Linkey is a simple browser extension that allows you to get the best sites in one click in visualized & friendly interface.

About Browser Hijackers

Browser hijacking is actually a type of unwanted software, often a browser add-on or extension, which causes modifications in the browser’s settings. Browser hijackers could do many different things on your PC. Usually, hijackers will force hits to websites of their preference either to increase traffic producing higher advertisement revenue, or to obtain a commission for each and every user visiting there. Nonetheless, it’s not that harmless. Your online safety is compromised and it is also extremely annoying. Browser hijackers could also allow other malicious programs without your knowledge to further damage your computer.

How to know whether the web browser is hijacked?

The typical symptoms that suggest having this malicious software on your PC are: 1. your homepage has been reset to some unfamiliar site 2. your browser is constantly being redirected to adult sites 3. the essential web browser settings are modified and undesirable or insecure resources are put into the trusted sites listing 4. unsolicited new toolbars are added to your browser 5. you may notice endless pop-up ads on your screen 6. your web browser starts running sluggishly or exhibits frequent errors 7. You simply can’t access particular sites, particularly anti-malware websites.

How it infects your computer

Browser hijackers attack computers through malicious e-mail attachments, downloaded infected computer files, or by checking out infected internet sites. They could be included with toolbars, BHO, add-ons, plug-ins, or browser extensions. Also, certain freeware and shareware can put the hijacker in your PC through the “bundling” technique. Examples of well-known browser hijackers are Fireball, GoSave, Ask Toolbar, CoolWebSearch, Babylon Toolbar, and RocketTab. Browser hijackers could interrupt the user’s browsing experience severely, keep track of the websites visited by users and steal financial information, cause problems in connecting to the internet, and ultimately create stability issues, making applications and computers crash.

How you can get rid of a browser hijacker

Some hijackers can be simply removed by deleting the free software they came with or by removing any extension you have recently added to your computer. Unluckily, the majority of the software products used to hijack a browser are deliberately built to be difficult to eliminate or detect. Moreover, manual removals demand in-depth system knowledge and therefore can be an extremely difficult job for novices.

What To Do When You Cannot Download Safebytes Anti-Malware?

All malware is bad and the magnitude of the damage may vary greatly in accordance with the type of infection. Certain malware variants modify internet browser settings by including a proxy server or modify the computer’s DNS configurations. When this happens, you will be unable to visit some or all of the websites, and therefore unable to download or install the necessary security software to remove the malware. If you’re reading this, you may have infected by a virus that prevents you from downloading computer security software like Safebytes Anti-Malware. There are a few options you can attempt to get around with this obstacle.

Install in Safe Mode

The Windows-based PC has a special mode called “Safe Mode” in which just the bare minimum required programs and services are loaded. If the malware is blocking internet access and affecting your PC, running it in Safe Mode will let you download antivirus and run a diagnostic scan while limiting potential damage. In order to get into Safe Mode or Safe Mode with Networking, press F8 while the system is starting up or run MSConfig and look for the “Safe Boot” options under the “Boot” tab. After you restart into Safe Mode with Networking, you could download, install, as well as update anti-malware software from there. After installation, run the malware scanner to remove most standard infections.

Use an alternate browser to download an antivirus application

Certain viruses might target vulnerabilities of a specific web browser that obstruct the downloading process. If you appear to have a virus attached to Internet Explorer, then switch over to an alternate internet browser with built-in safety features, such as Chrome or Firefox, to download your favorite antivirus program – Safebytes.

Install security software on a thumb drive

Here’s another solution which is creating a portable USB anti-malware software that can check your system for malicious software without needing installation. Do these simple actions to clean up your affected PC using portable anti-malware. 1) Download the anti-malware program on a virus-free computer. 2) Plug the Flash drive into the clean computer. 3) Double-click on the downloaded file to open the installation wizard. 4) Choose the USB flash drive as the destination for saving the software file. Follow the on-screen instructions to finish the installation. 5) Unplug the USB drive. You may now utilize this portable anti-malware on the infected computer system. 6) Double click the Safebytes Anti-malware icon on the flash drive to run the software. 7) Click on “Scan Now” to run a complete scan on the infected computer for malware.

A Look at the Best AntiMalware Program

Want to download the very best anti-malware software for your laptop? There are several applications in the market that come in paid and free versions for Microsoft Windows systems. Some of them are excellent, some are ok types, while some will destroy your PC themselves! When searching for an anti-malware tool, choose one which provides dependable, efficient, and complete protection against all known computer viruses and malware. On the list of highly recommended software programs is SafeBytes AntiMalware. SafeBytes carries a good track record of top-quality service, and customers are very happy with it. Safebytes is one of the well-established computer solutions companies, which offer this all-inclusive anti-malware software. Using its cutting-edge technology, this application will allow you to eradicate multiples types of malware such as computer viruses, trojans, PUPs, worms, ransomware, adware, and browser hijackers. SafeBytes has got a variety of wonderful features that can help you protect your PC from malware attacks and damage. Below are some typical features present in this tool: Live Protection: SafeBytes offers a totally hands-free active protection that is set to observe, prevent and remove all threats at its very first encounter. This utility will always monitor your computer for any suspicious activity and updates itself regularly to keep current with the newest threats. Most Reliable AntiMalware Protection: This deep-cleaning anti-malware software program goes much deeper than most antivirus tools to clean your computer system. Its critically acclaimed virus engine finds and disables hard-to-remove malware that conceals deep inside your PC. Internet Security: Through its unique safety rating, SafeBytes notifies you whether a site is safe or not to access it. This will make sure that you’re always certain of your safety when browsing the net. Lightweight Utility: The program is lightweight and can run silently in the background, and that does not have an effect on your PC efficiency. 24/7 Live Professional Support: SafeBytes provides 24/7 technical support, automatic maintenance, and upgrades for the best user experience.

Technical Details and Manual Removal (Advanced Users)

If you wish to manually remove Linkey without the use of an automated tool, it may be possible to do so by removing the program from the Windows Add/Remove Programs menu, or in cases of browser extensions, going to the browsers AddOn/Extension manager and removing it. You will likely also want to reset your browser. To ensure the complete removal, manually check your hard drive and registry for all of the following and remove or reset the values accordingly. Please note that this is for advanced users only and may be difficult, with incorrect file removal causing additional PC errors. In addition, some malware is capable of replicating or preventing deletion. Doing this in Safe Mode is advised.

The following files, folders, and registry entries are created or modified by Linkey

Files: C:Users%USER%AppDataLocalTempis33084504mysearchdial.dll C:Users%USER$AppDataLocalTempis357113909833170_stpsetup.exe c:Users%USER$AppDataLocalTempMega Browsemegabrowse_setup.exe C:Program Files (x86)Linkeylog.log C:Program Files (x86)LinkeyHelper.dll C:Program Files (x86)LinkeyChromeExtensionChromeExtension.crx C:Program Files (x86)Linkey C:Program Files (x86)LinkeyChromeExtension C:Program Files (x86)LinkeyIEExtension C:Users%USER$AppDataRoamingDigitalSitesUpdateProc Registry: HKLMSOFTWARECLASSESAPPID6A7CD9EC-D8BD-4340-BCD0-77C09A282921 HKLMSOFTWAREWOW6432NODECLASSESAPPID6A7CD9EC-D8BD-4340-BCD0-77C09A282921 HKLMSOFTWARECLASSESCLSID181F2C09-56DD-4F98-86D7-59BA2BC59B5A HKLMSOFTWARECLASSESCLSID4D9101D6-5BA0-4048-BDDE-7E2DF54C8C47 HKLMSOFTWAREMICROSOFTWINDOWSCURRENTVERSIONEXPLORERBROWSER HELPER OBJECTS HKLMSOFTWARELINKEY HKLMSOFTWAREWOW6432NODELINKEY HKLMSOFTWAREWOW6432NODESYSTEMKGeneral HKUS-1-5-18-ED1FC765-E35E-4C3D-BF15-2C2B11260CE4-0SOFTWARECONDUITValueApps HKLMSOFTWAREWOW6432NODEMICROSOFTWINDOWSCURRENTVERSIONEXPLORERBROWSER HELPER OBJECTSEF5625A3-37AB-4BDB-9875-2A3D91CD0DFD HKLMSOFTWARELINKEY|ie_jsurl, http://app.linkeyproject.com/popup/IE/background.js HKLMSOFTWAREWOW6432NODELINKEY|ie_jsurl, http://app.linkeyproject.com/popup/IE/background.js
Read More
Windows 11 was released in beta for all
windows 11 betaMicrosoft has released Windows 11 as a public beta release for all the people that are not willing to be in the insider program. Beta release as of this moment is identical to Insider Preview build 22000.100. and updates will not roll so fast as in insider preview and it is marked as unstable release, same as insider build. I would not install Windows 11 beta on the main PC since some drivers still have issues and may lead to some blue screens. Be aware that the beta build will have all Windows 11 system requirements including TPM 2.0. This is a big difference from insider build which can be installed on systems lacking official requirements. So basically if you have a spare PC that could run Windows 11 install it so you can see what it brings and feel it so you can make a decision will upgrade once it is released later this year.
Read More
Fix Err Connection Timed Out issue in Chrome
If you are using Google Chrome browser in surfing the web, you might have experienced a situation where you’re trying to connect to a website but were unable to since Chrome failed to fetch the website to the browser and throws an error that says, This webpage is not available – Err Connection Timed Out. Aside from an issue with the network connection, there are also other reasons why this error suddenly shows up, read on to fix it. There are times when the Windows computer is responsible for this kind of issue. And it can happen not just to Google Chrome but to other browsers as well. To resolve this issue, here are some suggestions that might be of help.

Option 1 – Try checking the network cables and then restart your router and reconnect

The first thing you can do is to check if all the network cables are properly connected be it to your computer or to the router. And if your computer is connected via Wi-Fi, you need to restart your router once. And of course, you can always opt to forget the Wi-Fi details and then reconnect again just make sure that you know the password.

Option 2 – Check the Windows Host file

You can also try to cross-check the Windows Hosts file to find out if the website you are trying to open has been blocked because if it is, then it’s no wonder why you’re getting the ERR CONNECTION TIMED OUT error in Chrome. There are instances when some third-party application modifies the file and adds some websites to the blocklists. So if the website is indeed blocked, you need to remove it from the list.

Option 3 – Try removing Proxy

Removing the Proxy might also help you in fixing the ERR CONNECTION TIMED OUT error. Here’s how you can do it:
  • Tap the Win + R keys to open the Run dialog box.
  • Then type “inetcpl.cpl” in the field and hit Enter to pull up the Internet Properties.
  • After that, go to the Connections tab and select the LAN settings.
  • From there. Uncheck the “Use a Proxy Server” option for your LAN and then make sure that the “Automatically detect settings” option is checked.
  • Now click the OK and the Apply buttons.
  • Restart your PC.
Note: If you are using a third-party proxy service, you have to disable it.

Option 4 – Try to clear the browsing data of Google Chrome

If your browsing data in Chrome hasn’t been cleared for some time now then that might be the reason why you’re suddenly getting the ERR CONNECTION TIMED OUT error when you browse the web. To fix this error, you need to clear your web browsing data. Refer to the following steps to do so.
  • Tap the Ctrl + Shift + Delete buttons to go to the Clear browsing data section in Chrome.
  • Next, set the time range to “All time” and tick all the boxes and then click on the Clear data button.
  • After that, restart the Chrome browser and try to open the website you were trying to open earlier.

Option 5 – Flush the DNS and reset TCP/IP

You might also want to flush the DNS and reset TCP/IP as it could help in fixing the ERR CONNECTION TIMED OUT error. To do so, refer to these steps:
  • Click the Start button and type in “command prompt” in the field.
  • From the search results that appear, right-click on Command Prompt and select the “Run as administrator” option.
  • After opening Command Prompt, you have to type each one of the commands listed below. Just make sure that after you type each command, you hit Enter
    • ipconfig /release
    • ipconfig /all
    • ipconfig /flushdns
    • ipconfig /renew
    • netsh int ip set dns
    • netsh winsock reset
After you key in the commands listed above, the DNS cache will be flushed and the Winsock, as well as the TCP/IP, will reset.
  • Now restart your computer and open Google Chrome then try opening the website you were trying to open earlier.

Option 6 – Run the built-in Malware Scanner and Cleanup Tool in Chrome

In case you don’t know, there is actually a built-in malware scanner and cleanup tool in Chrome that helps you get rid of any unwanted ads, pop-ups, and even malware, as well as unusual startup pages, toolbars, and other things that could affect the performance of the browser.

Option 7 – Reset Chrome

Resetting Chrome can also help you get rid of the ERR CONNECTION TIMED OUT error. Resetting Chrome means restoring its default settings, disabling all the extensions, add-ons, and themes. Aside from that, the content settings will be reset as well and the cookies, cache, and site data will also be deleted. To reset Chrome, here’s what you have to do:
  • Open Google Chrome, then tap the Alt + F keys.
  • After that, click on Settings.
  • Next, scroll down until you see the Advanced option, once you see it, click on it.
  • After clicking the Advanced option, go to the “Restore and clean up the option and click on the “Restore settings to their original defaults” option to reset Google Chrome.
  • Now restart Google Chrome.
Read More
How to turn off check boxes in File Explorer
By default inside Windows 11 in File Explorer, once the file is selected, the small check box will appear beside it on left indicating visually that the file is selected. Older users will remember this feature from old Windows Vista and the feature itself is great if you are on some sort of touch device and need to select multiple files. windows 11 File Explorer
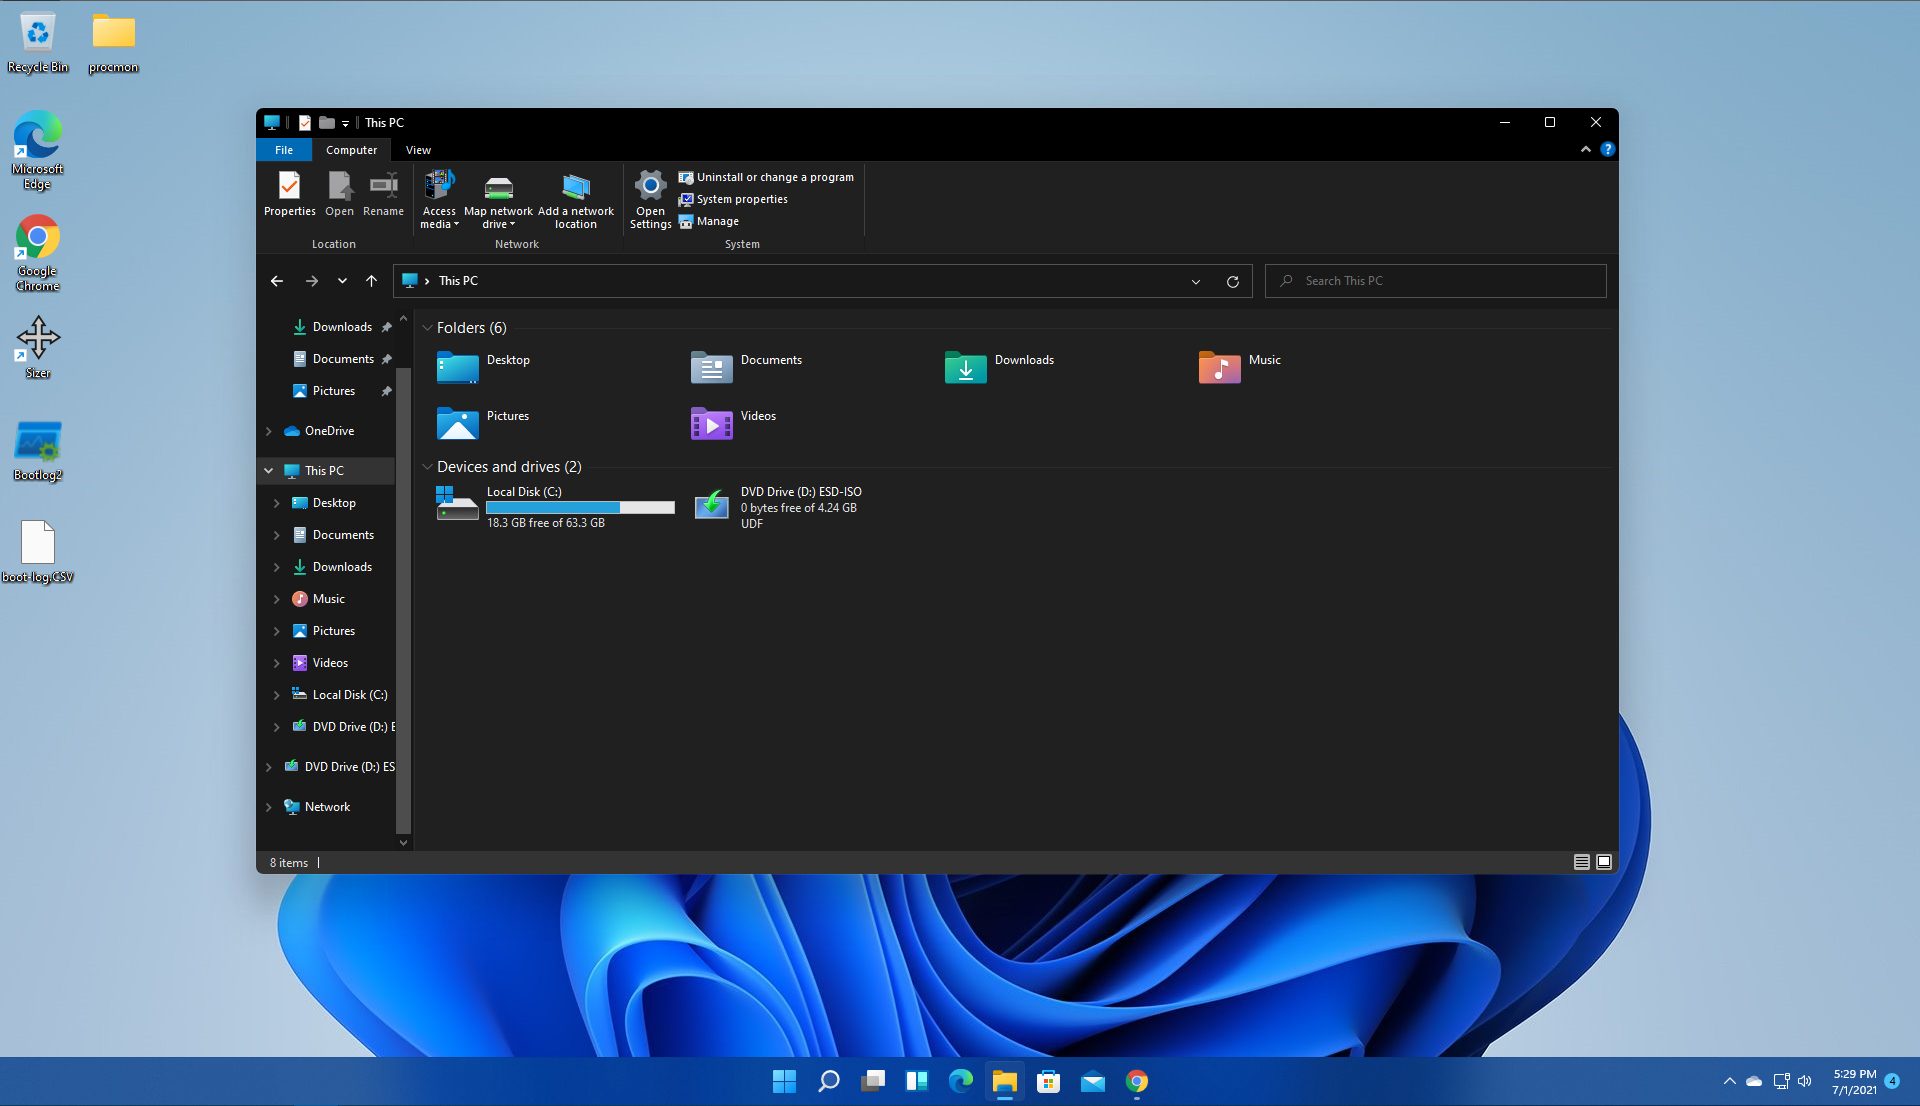
However, if you are working on a computer with a keyboard and mouse this feature might annoy you and seem like something that is not needed. Like many things inside Windows 11 this feature also can be customized and turned OFF if you do not want it. In this guide, we will see how to turn these boxes off. Microsoft has somewhat hidden this feature but luckily it is not difficult to find it if you know where to look.

Turning check boxes OFF

  1. Open File Explorer (if you do not have an icon on your Taskbar, right-click on the Start button and select File Explorer from the menu)
  2. Click on View on the top toolbar
  3. Select Show
  4. Uncheck Item Check Boxes
That is everything that needs to be done, after the checkbox is unchecked all check boxes from File Explorer will disappear. If you wish to turn boxes back ON, just follow the steps and check the box beside Item Check Boxes.
Read More
Quick Guide to Fixing 0x0000007E Error

What is 0x0000007E Error Code?

If you’ve been experiencing a 0x0000007E error code pop message on your PC frequently then you need to get it fixed before it causes serious damage to your system. 0x0000007E is a Stop error or Blue Screen of Death error code. This error message turns your computer screen blue and locks you out of the program running on your computer. It freezes your system and hampers your ability to perform any type of task on your PC.

Solution

Restoro box imageError Causes

Error 0x0000007E, a blue screen of death error triggers registry issues. It’s not easy to narrow down the cause of 0x0000007E as it results due to many reasons like memory overload, cluttered disk space, viral infection, malware attack, and if the hardware malfunctions. Ignoring 0x0000007E error pop up is not wise. It is more like a warning of the serious damage that can happen to your PC if it is not fixed timely. It also leads to slowing down the system and increases boot time. This error message exposes you to dangerous Windows PC threats like registry corruption and damage. Registry corruption can lead to system crash and failure and you may also lose all your important data saved on your PC.

Further Information and Manual Repair

Install Restoro

You don’t always have to spend hundreds of dollars to hire a technician to fix error pop-ups on your PC try using Restoro Restoro is an advanced and multi-functional PC repair tool with a comprehensive suite of powerful features designed to resolve almost all types of PC errors in seconds including 0x0000007E error code. It is a next-generation PC repair tool that serves as a system optimizer, anti-virus, and quality registry cleaner. Its built-in intuitive technology enables Restoro to scan, identify and repair the ultimate cause of the error code 0x0000007E in just a few seconds. Eventually, it spares you from the hassle of finding the root cause of the 0x0000007E error message and then selecting a tool specifically designed to resolve only that particular cause with limited features. This highly functional PC error tool is the answer for all your registry issues. By running Restoro on your PC, you can fix the 0x0000007E BSOD error code and avoid registry corruption.

Why Restoro?

The smart registry cleaner utility embedded in this tool enables it to scan for registry errors and clear up disk space accumulated by junk files, internet temporary files, invalid entries, and other types of unnecessary files taking up a good chunk of your disk space. This clutter also slows down your PC performance as it requires more power than it has to run the system because of the excess load on the RAM. However, by wiping out the clutter with this helper, you can optimize the speed of your PC and see a significant difference in its performance. Restoro backup feature enables you to create backup files for safety purposes. Furthermore, it has several other built-in value-adding features like privacy error utility and system stability utility for enhanced functionality. To resolve the error code 0x0000007E in seconds, all you need to do is download and install Restoro on your system and run it to scan for errors. In a few seconds, you will see a scanning report with comprehensive details of the types of PC damages. To fix the issue right away, create backups and click ‘fix’ to resolve. In just a few clicks you can repair your PC. Download Restoro Today!
Read More
Fix Invalid Product Key or Version mismatch
If you suddenly encounter Activation Error codes such as 0xC004E016, 0xC004F210, 0xC004F034, and 0xC004F00F on your Windows 10 computer, then they all point to the same issue – Invalid Product Key or Version mismatch. When you see any of the aforementioned error codes above, it indicates that you are either entering a wrong product key or you are using an incorrect ISO when installing it on your computer. In such cases, you may see either of the following error messages:
“You are running Windows 10 Pro, but you have a valid digital license for Windows 10 Home.” Or: “The specified product key is invalid or is unsupported by this version.”
If you got the error code 0xC004F00F then it means that you’ve entered a product key for the Enterprise edition of Windows to activate Windows 10 Pro or Windows 10 Home. It could be that you have a key from your work and you accidentally use it on your Home PC. If you got the error codes 0xC004E016, 0xC004F210, then it means that you have entered a product key that is meant for a different edition or version of Windows. On the other hand, if you got the error code 0xC004F034 instead, then it means that you have entered an invalid product key or a product key for a different Windows version. Whichever error codes you have, refer to the possible solutions given below to fix the Invalid Product Key or Version mismatch Activation Error in Windows 10.

Option 1 – Try running the Windows 10 Activation Troubleshooter

The first thing you can do to resolve this Activation error is to run the Windows 10 Activation Troubleshooter. To do so, follow these steps:
  • Go to Settings and then select Activation.
  • After that, click on the Windows Activation and then troubleshoot. This will help you address most of the commonly found activation issues in Windows devices.

Option 2 – Try purchasing a new license

There is an exception offered by Microsoft – if you are connected to a Microsoft account prior to the hardware change, then you can most certainly use the same license key to reactivate Windows 10 again. Microsoft calls this an “Exception path” which should be fixed easily by the Windows Activation Troubleshooter as pointed out earlier. However, if the Windows Activation Troubleshooter isn’t able to resolve the error you can try purchasing a new license. In such rate case, even if you do have a Microsoft account available on your Windows 10 computer, and if Windows was never activated, this solution will not work. And if you haven’t connected your Microsoft account with your Windows 10 computer prior to the major hardware change, then your only option left is to purchase a new license. For you to do that here are some steps you can follow.
  • To purchase a new Windows license, the first thing you have to do is click on the Start button > Settings > Update & Security.
  • From there, go to Activation and select the “Go to Microsoft Store” option.
  • After receiving your new license, you need to go back to Update & Security then go to Activation and select the “Change product key” option.
  • Now update your Windows 10 computer using the new key and it should automatically activate your computer.
  • Next, you have to create a Microsoft account or connect to your existing local account to your online account.
  • Once the system links the key and the account, you need not buy a new license in case something like this happens again.
Note: If you are an IT administrator, you need to keep in mind that there is a limit to the number of times you can reactivate Windows on your computer. Moreover, if you don’t see any option to reactivate the license, and it is a work computer, you need to contact your organization’s tech support.

Option 3 – Try activating Windows 10 via mobile phone

Activating Windows 10 can also be done using your phone. Just note that you have to call Microsoft to do so.
  • In the Start Search box, type in “Slui 4” and tap Enter.
  • Next, select your country and click on Next.
  • Keep the window open and call the toll-free number of the country you’re from.
  • Afterward, a confirmation ID should be given by the automated system which you must take a note of.
  • Finally, in the box on the window, type in the confirmation ID and click on the Activate button. That should do it.
Read More
1 2 3 171
Logo
Copyright © 2023, ErrorTools. All Rights Reserved
Trademark: Microsoft Windows logos are registered trademarks of Microsoft. Disclaimer: ErrorTools.com is not affiliated with Microsoft, nor claims direct affiliation.
The information on this page is provided for information purposes only.
DMCA.com Protection Status