Uninstalling the Weather App in Windows

Windows 10 has a pre-installed Weather app that offers the local weather information, forecast, temperature gradient, historical data, multiple locations, and many more. It can be handy especially if you tend to check on the weather. However, if you are one of those users who barely use this app, you have the option to uninstall it from your computer and that’s exactly what we’re going to do in this post.

There are several methods to uninstall the Weather app in Windows 10. You can uninstall it via Settings or Start Menu or even using a command in Windows PowerShell. Note that uninstalling the Weather app does not affect the functionality of your Windows 10 computer by any means so you shouldn’t worry about uninstalling it. To get started, follow the instructions provided below.

Option 1 – Uninstall the Weather app through Settings

The first option you can try to uninstall the Weather app is through Settings. It’s a very simple process so you wouldn’t have any trouble following it.

  • First, click on the Start menu and go to Settings.
  • From there, select System > Apps & Features.
  • After that, wait until the list of apps is opened, and then look for the Weather app and click on it.
  • Next, click on Uninstall in the given menu to uninstall the Weather app from your computer.

Option 2 – Uninstall the Weather app through the Start Menu

Another simple way to uninstall the Weather app is through the Start Menu. It only takes a right click and there are actually two ways to go about this – one is new with the recent feature update of Windows. How? Refer to these steps:

  • Click on the Start button and type in “weather” and right-click on the Weather app which appears in the list.
  • Next, click on the Uninstall option. This will uninstall the Weather app.
  • You can also use the other uninstall option which you can find on the right side of the list that also shows other quick action for the app.

Option 3 – Uninstall the Weather app through a command in Windows PowerShell

  • Tap the Win + X key combination and click on the “Windows PowerShell (Admin)” option to open PowerShell with admin privileges.
  • After that, execute the following Remove App package command for the Weather app to uninstall it.

Get-AppxPackage Microsoft.BingWeather | Remove-AppxPackage

  • Once done, it will remove the Weather app from your computer.

Do You Need Help with Your Device?

Our Team of Experts May Help
Troubleshoot.Tech Experts are There for You!
Replace damaged files
Restore performance
Free disk space
Remove Malware
Protects WEB browser
Remove Viruses
Stop PC freezing
GET HELP
Troubleshoot.Tech experts work with all versions of Microsoft Windows including Windows 11, with Android, Mac, and more.

Share this article:

You might also like

Disable Windows print spooler in PowerShell
The third time is charm saying goes but not when we are talking about Microsoft. Print spooler is again in focus, in a bad way. This is the third print spooler vulnerability to emerge in just five weeks. While a critical flaw was originally identified and patched in June, a similar flaw came to light shortly after and was subsequently patched (with mixed success). print spooler
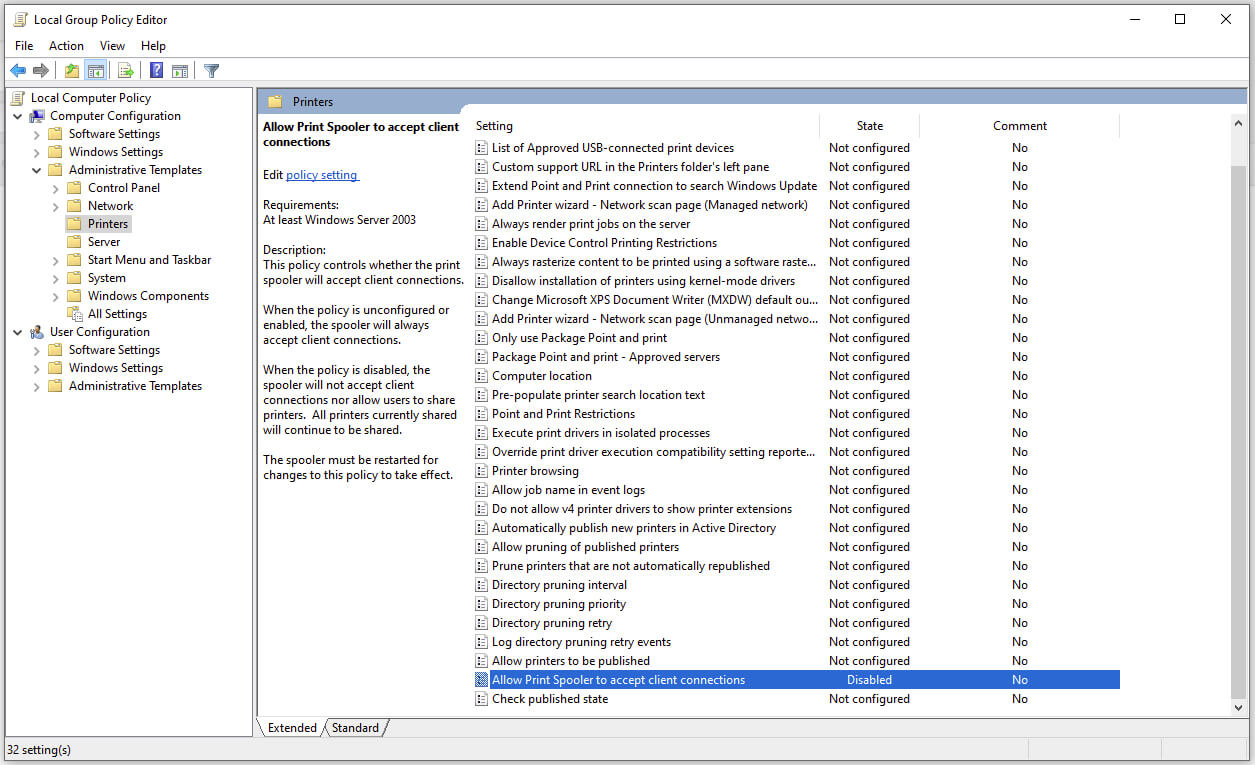
Microsoft is once again advising its customers to disable Windows print spooler after a new vulnerability that allows hackers to execute malicious code on machines has emerged. While a patch fixing the flaw will be released in due course, the most effective workaround currently on the table is to stop and disable the print spooler service entirely.
"An elevation of privilege vulnerability exists when the Windows Print Spooler service improperly performs privileged file operations. An attacker who successfully exploited this vulnerability could run arbitrary code with SYSTEM privileges. An attacker could then install programs; view, change, or delete data; or create new accounts with full user rights."

Stop this service right away or you are risking a potential attack.

  1. Press ⊞ WINDOWS + X to open the hidden menu
  2. Click on Power Shell (admin)
  3. In Power Shell type in the following command to check if spool service is running: Get-Service -Name Spooler followed by ENTER
  4. If spooler service is running type in the next command to stop it: Stop-Service -Name Spooler –Force and press ENTER
  5. Then follow with this command to disable it at startup: Set-Service -Name Spooler -StartupType Disabled followed with ENTER
That’s it, we hope a patch will come soon for all the people that are using network printing and indeed need this service running in order to do work.
Read More
Automatically Adjust Active Hours in Windows
In case you didn’t know, the new Windows 10 v1903 has brought tons of new features around Windows 10 Updates. One of these features is the ability to automatically adjust the Active Hours based on your computer activity. This feature is really useful as it tells the operating system when to install the Windows Updates. A lot of users use the Active Hours feature to ensure that the Windows Update won’t force them to restart their PCs to install the update. So if your computer is turned on, it won’t apply the update during the active hours you’ve specified. In addition, the active hours change for many users and they are not that strict. For instance, if you set the active hours between 10 am to 5 pm, Windows Update won’t be forcing you to restart your computer to install the updates at those times. Note that Windows Update allows enabling an option using where it can monitor the active hours in your computer and change it. To configure this setting, here’s what you have to do:
  • Frist, go to Settings > Update & security > Windows Update.
  • Next, take note of your current active hours and click on the “Change active hours” link.
  • Then toggle the option that says, “Automatically adjust active hours for this device based on activity”. This will change the active hours and if you match it with the previous one, it should be different.
As you can see on the image given above, the earlier active hours were between 8:00 to 17:00 and were changed to 11:00 to 19:00. If you have been using this feature for a while you’ll find how useful and handy it is especially when you’re using your computer and don’t want any notifications like the prompts for Windows Updates to bother you while working.
Read More
How to Fix Explorer.exe System call failed
One of the most critical processes in the Windows 10 operating system is the Explorer.exe. And there are times when you might encounter an error that says, “System call failed”. You can encounter this error when you try to launch File Explorer, and in such case when the File Explorer does not work, it could cause issues in accessing folders and files on your computer. This kind of error pops up when the explorer.exe system file has become corrupted or if there is some process that interferes with its smooth functioning. To fix this error, you can try to restart the explorer.exe process, run both the System File Checker scan and DISM tool. You could also put your computer in a Clean Boot State or uninstall any programs you’ve installed recently. For more details, follow each one of the given suggestions below.

Option 1 – Try to restart the Explorer.exe process

The first thing you can do is try to restart the Explorer.exe process. To do so, refer to these steps:
  • First, right-click on the Taskbar and select the Task Manager.
  • Next, expand the Task Manager window to see all the active processes.
  • From there, look for the Windows Explorer process, right-click on it and select Restart.
  • After that, check if the error is now fixed.

Option 2 – Run System File Checker scan

If restarting the explorer.exe process didn’t work, you can also try running the System File Checker or SFC scan to fix the error. System File Checker is a command utility built into your computer that helps restore corrupted files and missing files. Refer to the following steps to run it:
  • Hit the Win + R keys to launch Run.
  • Type in cmd in the field and tap Enter.
  • After opening Command Prompt, type in this command: sfc /SCANFILE=c:windowsexplorer.exe
Note: If you are using a 64-bit Windows operating system, enter the “sfc /SCANFILE=C:WindowsSysWow64explorer.exe” command instead.
  • Wait until the process is completed and then restart your computer.

Option 3 – Run the DISM tool

You might also want to run the DISM tool. This tool is known to repair potentially corrupted files in your system as having them could also system issues like the “System call failed” error. To repair these corrupted system files, you can run the DISM commands:
  • Tap the Win + X keys and click on the “Command Prompt (Admin)” option.
  • After that, input each one of the commands listed below sequentially to execute them:
    • Dism /Online /Cleanup-Image /CheckHealth
    • Dism /Online /Cleanup-Image /ScanHealth
    • Dism /Online /Cleanup-Image /RestoreHealth
  • Once you’ve executed the commands given above, restart your computer and check if the problem is now fixed.

Option 4 – Try running the Check Disk utility

  • In the Windows Search box, type “command prompt” and from the search results, right-click on Command Prompt and select “Run as administrator”.
  • After opening Command Prompt, type this command and tap Enter: chkdsk c: /f /r
  • The command you entered will start to check for errors and fix them automatically. Else, it will throw an error message saying, “Chkdsk cannot run because the volume is in use by another process. Would you like the schedule this volume to be checked the next time the system restarts? (Y/N)”.
  • Tap the Y key to schedule Disk Check the next time your computer restarts.

Option 5 – Put your computer in a Clean Boot State

As pointed out, there are some instances that some conflicting programs installed in your computer might be the one that triggers the “System call failed” error to appear when you try to open File Explorer. To identify which program is causing the problem, you need to put your computer in a Clean Boot State. To do so, follow the steps below.
  • Log onto your PC as an administrator.
  • Type in MSConfig in the Start Search to open the System Configuration utility.
  • From there, go to the General tab and click “Selective startup”.
  • Clear the “Load Startup items” check box and make sure that the “Load System Services” and “Use Original boot configuration” options are checked.
  • Next, click the Services tab and select the “Hide All Microsoft Services” check box.
  • Click Disable all.
  • Click on Apply/OK and restart your PC. (This will put your PC into a Clean Boot State. And configure Windows to use the usual startup, just simply undo the changes.)
  • Once your computer has restarted in a Clean Boot State, perform your scan again and see if it now works, and then start to isolate the problem by checking which one of the programs you installed recently is the root cause of the problem.

Option 6 – Try to uninstall the programs you’ve installed recently

In case you don’t know, freeware software packages aren’t always free as some of them could contain malicious software that can cause serious damage to your computer. Thus, if you have installed a program recently prior to getting the “System call failed” error, then you have to uninstall that program.
  • Tap the Win + R keys to open the Run dialog box.
  • Then type “appwiz.cpl” in the field and tap Enter to open the Programs and Features in Control Panel.
  • Next, arrange the list of installed programs in the order of the installation date.
  • After that, look for the problematic program and right-click on it, and then select Uninstall.
  • Once the process is done, restart your computer and see if the error is fixed.
Read More
Fix SYSTEM_PTE_MISUSE Error in Windows
If you suddenly encounter the SYSTEM_PTE_MISUSE – 0x000000DA Blue Screen error while using your Windows 10 computer, read on as this post will provide you some potential fixes to resolve this kind of Blue Screen of Death (BSOD) error. There are many potential causes for the SYSTEM_PTE_MISUSE – 0x000000DA BSOD error. However, incompatible hardware detection and hardware recognition failure are some of the topmost culprits. Another thing that could trigger this kind of BSOD error is system file corruption which means that if a system driver for particular hardware ends up getting corrupted, it won’t be able to recognize the external device and will eventually crash the system with the SYSTEM_PTE_MISUSE – 0x000000DA Blue Screen error. The SYSTEM_PTE_MISUSE bug check has a value of 0x000000DA which indicates that a page table entry or PTE routine has been improperly used. To fix this error, here are some suggestions that might help but before you get started troubleshooting the problem, make sure that you create a System Restore Point first.

Option 1 – Try to disable PIT Security in the BIOS

If you are using a Dell computer and it throws up this kind of Blue Screen error, you need to go to the BIOS and uncheck the PIT Security and see if it helps in fixing the problem.
  • Tap the F2 key during the boot phase to enter the BIOS.
  • Once you’re in the BIOS, go to the Security tab and to the PIT Security section.
  • From there, uncheck the “PIT On” box to disable PIT Security.
  • Now restart your computer and check if the Blue Screen error is fixed or not.

Option 2 – Check for any incompatible devices

The next thing you can do to troubleshoot the SYSTEM_PTE_MISUSE Stop error is to plug in and out each one of the different hardware that is connected to your computer. Doing so will help you determine which one of the hardware is the one that’s triggering the error to pop up. You will also know what hardware drivers or anything else that could be causing this error which includes external devices like mouse, keyboard, printer, as well as internally attached components like the Graphics card and so on.

Option 3 – Try to update, rollback or disable device drivers

To fix the SYSTEM_PTE_MISUSE Stop error, you can also try to roll back, or update, or disable device drivers. It is most likely that after you updated your Windows computer that your driver also needs a refresh. On the other hand, if you have just updated your device drivers then you need to roll back the drivers to their previous versions. Whichever applies to you, refer to the steps below.
  • Open the Devices Manager from the Win X Menu.
  • Then locate the device drivers and right-click on them to open the Properties.
  • After that, switch to the Driver tab and click on the Uninstall Device button.
  • Follow the screen option to completely uninstall it.
  • Finally, restart your computer. It will just reinstall the device drivers automatically.
Note: You can install a dedicated driver on your computer in case you have it or you could also look for it directly from the website of the manufacturer.

Option 4 – Run the System File Checker Scan

System File Checker or SFC is a built-in command utility that helps in restoring corrupted files as well as missing files. It replaces bad and corrupted system files to good system files. Thus, you can try running it to resolve the SYSTEM_PTE_MISUSE Blue Screen error. To do so, follow the steps given below.
  • Tap Win + R to launch Run.
  • Type in cmd in the field and tap Enter.
  • After opening Command Prompt, type in sfc /scannow
The command will start a system scan which will take a few whiles before it finishes. Once it’s done, you could get the following results:
  1. Windows Resource Protection did not find any integrity violations.
  2. Windows Resource Protection found corrupt files and successfully repaired them.
  3. Windows Resource Protection found corrupt files but was unable to fix some of them.
 Restart your computer.

Option 5 – Run the Blue Screen Troubleshooter

The Blue Screen troubleshooter is a built-in tool in Windows 10 that helps users in fixing BSOD errors like SYSTEM_PTE_MISUSE – 0x000000DA. It can be found in the Settings Troubleshooters page. To use it, refer to these steps:
  • Tap the Win + I keys to open the Settings panel.
  • Then go to Update & Security > Troubleshoot.
  • From there, look for the option called “Blue Screen” on your right-hand side and then click the “Run the troubleshooter” button to run the Blue Screen Troubleshooter and then follow the next on-screen options. Note that you might have to boot your PC into Safe Mode.
Read More
Can’t print a file, it opens Save as option
As you know, Windows 10 supports a variety of peripherals which includes a long list of printers. However, a number of users reported that they encountered a glitch on their Windows 10 computers where they receive Can’t print a file and a prompt to save the Word, PDF file, and so on each time they try to print the file. This kind of issue is not common and could be due to various reasons like the malfunctioning of device drivers, misconfiguration of the printer’s settings, and so on. There are several options you can check out to resolve the problem. You can try to run the built-in troubleshooter or check the configuration of the printer, as well as update or reinstall the driver for printers or reset the printer. For more details, refer to each one of the options provided below and make sure to follow them carefully.

Option 1 – Run the Printer Troubleshooter

One of the first basic troubleshooting you can perform to resolve the printer issue is running the Printer Troubleshooter. This built-in troubleshooter can detect and automatically fix the problem for you. To use it, follow these steps:
  • Tap the Win + R keys to open the Run dialog box.
  • Next, type “exe /id PrinterDiagnostic” in the field and click OK or hit Enter to open the Printer Troubleshooter.
  • Then click the Next button and follow the next on-screen instructions to fix the issue with the printer.

Option 2 – Try checking the printer’s configuration

The next thing you can do to fix the problem is to check the configuration of the printer since there are instances when there could be some misconfiguration with the settings of the printer that may result in several issues like this one.
  • First, you need to open Control Panel and from there, look for the option Devices and printers and open it.
  • After that, right-click on the entry of your printer that you want to use in printing documents and select the Set as a default printer option.
  • You could also try to open PDF and then go to the Print dialog box and uncheck the Print to file option.

Option 3 – Try to update or reinstall the printer driver

The problem with your printer might also be caused by corrupted or outdated drivers. Thus, you can try to either update or reinstall it. How? Follow the steps below.
  • First, click the Start button and type “device manager”.
  • Then click on the “Device Manager” from the search results to open it.
  • From there, look for the USB Composite Device option and right-click on it, and select the Update Driver from the options.
  • Restart your PC and then click the “Search automatically for updated driver software” option.
  • Now uninstall and remove the printer driver software and reinstall it then refresh.

Option 4 – Try to reset the settings of the Printer or reinstall it

If none of the three options given above worked, you can try to either reset the printer settings or reinstall the printer so that it can go back to its default state. However, if it doesn’t work, you can try to uninstall the printer as well as its related drivers. To do so, follow these steps:
  • First, go to Settings > Devices > Printer and Scanners.
  • After that, select the printer and select the Remove Device option.
  • Once done, restart your computer and check again and see if the error is now fixed.
Read More
Samsung had Data Breach

After Plex, DoorDash, and LastPass, Samsung has also confirmed that they also have experienced a data breach and that some customer data has been stolen.

samsung HQ

On Friday, September 2nd Samsung announced that an unauthorized third party gained access to some of the company's U.S. systems in late July and that Samsung learned in August that some personal information was affected. It was also stated that affected information is: names, contact information, demographics, dates of birth, and product registration information. Also so far it was said that no Social Security numbers nor credit card number information have been compromised.

For now, Samsung is sending an email directly to anyone that has been affected by this data breach, however, they did not state what service or product has experienced this breach, we just know that it has happened at Samsung Electronics America which sells everything, from smartphones to debit cards. Also keep an eye on your inbox if you are a Samsung user since it took them a whole month in order to go public with this information and there is no justification for this, if it was reported on time people could change their information and take other steps.

Read More
How to Fix Win32kbase.sys BSOD error
There is various Blue Screen of Death errors that you can encounter as you use your Windows 10 computer and some of these Stop errors have something to do with the win32kbase.sys file. This post will guide you in fixing the BSOD errors related to the win32kbase.sys file.
  • A problem has been detected and Windows has been shut down to prevent damage to your computer. The problem seems to be caused by the following file: Win32kbase.sys.
  • Your PC ran into a problem and needs to restart. If you would like to know more, you can search online later for this error: win32kbase.sys.
  • SYSTEM_SERVICE_EXCEPTION (win32kbase.sys)
  • STOP 0x0000000A: IRQL_NOT_LESS_EQUAL – win32kbase.sys
  • STOP 0x0000001E:
KMODE_EXCEPTION_NOT_HANDLED – win32kbase.sys
  • STOP 0×00000050:
PAGE_FAULT_IN_NONPAGED_AREA – win32kbase.sys
The win32kbase.sys file is a Windows operating system Base Win32 Kernel Driver file located in the System32 folder so if it ends up getting corrupted or if it went missing, your computer will throw up Blue Screen error. To fix BSOD errors that have something to do with the win32kbase.sys file, here are some possible fixes that could help. Worry not for these possible fixes are not complicated.

Option 1 – Run the Check Disk or CHDSK utility

One of the first things you can try to resolve the win32kbase.sys Blue Screen error is running the CHKDSK utility. If your hard drive has issues with integrity, the update will really fail as the system will think that it’s not healthy and that’s where the CHKDSK utility comes in. The CHKDSK utility repairs hard drive errors that might be causing the problem.
  • Open Command Prompt with admin privileges.
  • After opening Command Prompt, execute the following command and hit Enter:
chkdsk /f C:
  • Wait for the process to be completed and then restart your computer.

Option 2 – Run SFC or System File Checker scan

System File Checker or SFC is a built-in command utility that helps in restoring corrupted files as well as missing files. It replaces bad and corrupted system files to good system files. To run the SFC command, follow the steps given below.
  • Tap Win + R to launch Run.
  • Type in cmd in the field and tap Enter.
  • After opening Command Prompt, type in sfc /scannow
The command will start a system scan which will take a few whiles before it finishes. Once it’s done, you could get the following results:
  1. Windows Resource Protection did not find any integrity violations.
  2. Windows Resource Protection found corrupt files and successfully repaired them.
  3. Windows Resource Protection found corrupt files but was unable to fix some of them.
 Restart your PC.

Option 3 – Try to run the DISM commands

You might want to repair potentially corrupted files in your system as having them could also trigger the win32kbase.sys Blue Screen error. To repair these corrupted system files, you can run the DISM commands:
  • Tap the Win + X keys and click on the “Command Prompt (Admin)” option.
  • After that, input each one of the commands listed below sequentially to execute them:
    • Dism /Online /Cleanup-Image /CheckHealth
    • Dism /Online /Cleanup-Image /ScanHealth
    • Dism /Online /Cleanup-Image /RestoreHealth
  • Once you’ve executed the commands given above, restart your computer and check if the dxgkrnl.sys Blue Screen error is now fixed.

Option 4 – Try to run the Blue Screen Troubleshooter

As you know, the Blue Screen troubleshooter is a built-in tool in Windows 10 that helps users in fixing Blue Screen errors related to the win32kbase.sys file. It can be found in the Settings Troubleshooters page. To use it, refer to these steps:
  • Tap the Win + I keys to open the Settings panel.
  • Then go to Update & Security > Troubleshoot.
  • From there, look for the option called “Blue Screen” on your right-hand side and then click the “Run the troubleshooter” button to run the Blue Screen Troubleshooter and then follow the next on-screen options. Note that you might have to boot your PC into Safe Mode.
Read More
Rise of video-making AI

Recently Meta has gone viral that it is working on an AI video-making algorithm named Make a Video. AI will like in picture making AI take text input and produce a video from it.

Now, a new player enters the AI video battlefield, its name is GOOGLE!

google ai

The Google research project Imagen Video is also text to video generator similar to Meta's Make a Video with one little difference. unlike Meta's offering which includes only sign-up, Google is withholding access for now under the veil of safeguarding issues.

Google has been in the Ai space before with their Imagen, a DALL-E style generator capable of photorealistic picture generation based on text prompts. The new Google tool works in a similar way but with better functions. Ai can generate a diverse range of high-fidelity videos across different aesthetic styles and with a deep understanding of 3D models thus creating high-definition, 24-frames-per-second videos.

"With the help of progressive distillation, Imagen Video can generate high-quality videos using just eight diffusion steps per sub-model. This speeds up video generation time substantially, by a factor of ~18x,”

Jonathan Ho, author of the research paper

Despite filtering for “undesirable content”, the team admits “there is a risk that Imagen has encoded harmful stereotypes and representations”. So, until the AI - and its users - can be trusted, Google refuses to release Imagen Video without additional safeguards in place.

Read More
CD/DVD icon is not showing in File Explorer
In the past, CDs, DVDs, and floppy drivers used to be the primary sources of external storage for many users – that is until the USB storage devices took over. These days, a lot of devices no longer have a built-in CD or DVD writer or reader as it contributes to the thickness of the device. On the other hand, there are still various devices that still come with a built-in CD or DVD writer or reader. However, recently, users who still use CD or DVD on their devices reported a problem where the CD or DVD icon is not visible in the File Explorer as well as in “This PC” or the My Computer page. The cause of this issue is still unknown at the time of writing, but there are still some potential fixes you can try to fix it. You can try to update or roll back the device drivers or apply some tweaks in the Registry Editor. For more details, refer to the given options below.

Option 1 – Try to update or rollback device drivers

The first thing you can try to fix the missing CD or DVD icon is to either update or roll back the device drivers. It is most likely that after you updated your Windows computer that your driver also needs a refresh. On the other hand, if you have just updated your device drivers then you need to roll back the drivers to their previous versions. Whichever applies to you, refer to the steps below.
  • Open the Devices Manager from the Win X Menu.
  • Then locate the device drivers and right-click on them to open the Properties. Note that the concerned drivers will be listed under the DVD/CD-ROM drives section as well as the IDE/ATAPI Controllers section.
  • From there, look for the following drivers:
    • ATA Channel 0.
    • ATA Channel 1.
    • Standard Dual Channel PCI IDE Controller.
  • Now, right-click on each one of the listed drivers and update them all. You could also try to roll them back to their previous versions.
Note: You can also directly download the relevant drivers of your computer from the manufacturers’ website. So if you have an SSD, the issue might be due to an old storage driver.

Option 2 – Try to use the Registry Editor

  • Tap the Win + R keys to open the Run dialog box and type “Regedit” in the field and then tap Enter to open the Registry Editor.
  • Next, navigate to this registry key: HKEY_LOCAL_MACHINESYSTEMCurrentControlSetControlClass{4D36E965-E325-11CE-BFC1-08002BE10318}
  • After that, look for the DWORD values named “UpperFilters” and “LowerFilters”.
  • Right-click on each one of these DWORD values and select Delete.
  • Now restart your computer and see if it fixes the problem.

Option 3 – Try creating a new Registry entry

There is another option you can try in the Windows Registry to fix the missing icon of the CD/DVD. You can try adding a new entry. How? Refer to these steps:
  • Tap the Win ­+ R keys to open the Run dialog box and type “Regedit” in the field and hit Enter to open the Registry Editor.
  • After that, navigate to this registry path: HKEY_LOCAL_MACHINESYSTEMCurrentControlSetServicesatapi
  • From there, right-click on “ATAPI” and select New > Key.
  • After that, name it is “Controller0” and right-click on the sub-key and then select New > DWORD (32-bit) Value.
  • Now name it as “EnumDevice1” and double click on it and then set its value data to “1”.
  • Click OK and restart your computer to apply the changes made successfully.
Read More
Enabling the new Light Mode Theme in Windows
In case you don’t know, Windows now comes with an all-new Light Mode theme which gives a light accent color to the Taskbar, Start, and Notification Area. Aside from that, it also brings new improvements and features. This new theme is somewhere between dark and completely white and in this post, you will be guided on how you can enable this new feature in your Windows 10 computer. Although the Light Mode sure looks stunning and a lot of users love it, it actually switches all the apps plus the Taskbar and Start Menu to the light mode which was not the case before. In addition, the icons in the system tray area, as well as the notification center, are also inverted. To resolve that, there are several ways you can customize the light mode theme as well as activate it in the Windows 10 v1903. How? Refer to each one of the options given below.

Option 1 – Via Theme settings

Windows 10 brought a new theme called “Windows (Light)” which will enable the light mode automatically and will set the accent colors to automatic. This will also apply the new Windows 10 wallpaper on your desktop. To enable Windows (Light), all you have to do is right-click on the desktop and select Themes from the left menu. After that, select the Windows (Light) option under the Change Themes section. This will apply to the Windows (Light) mode.

Option 2 – Via Color settings

The second and more customizable way to activate the light mode is via Settings. Aside from the Light and Dark, Windows also introduced a Custom color option which allows you to decide the default Windows and App mode independently. To enable Light mode via Settings, refer to the steps below.
  • First, open Settings and go to Personalization.
  • After that, select “Colours” from the left menu.
  • Next, select Light under the “Choose your color” section to activate the light mode in Windows 10. This will activate light mode all over your computer.
Note: If after activating light mode, you find that you don’t like it and you want to keep things as they were before (Light App Mode and Dark Windows Mode), you can achieve that using the Custom option. All you have to do is select Custom from the drop-down menu to decide the default Windows and app mode independently. After that, select light under the default app mode and dark under the default Windows mode so that you can keep things as they were before the update. On the other hand, you can also try the opposite version of the light Windows mode and Dark app mode since Windows increased the level of customizability which allows users to use an option of a completely light mode.
Read More
1 2 3 171
Logo
Copyright © 2023, ErrorTools. All Rights Reserved
Trademark: Microsoft Windows logos are registered trademarks of Microsoft. Disclaimer: ErrorTools.com is not affiliated with Microsoft, nor claims direct affiliation.
The information on this page is provided for information purposes only.
DMCA.com Protection Status