For a while now, Microsoft has been working hard to add various built-in troubleshooters in Windows 10. In fact, there is a troubleshooter for almost every standard or common error in Windows 10. And now with the newly released Windows 10 v1903, Microsoft has added the Recommended Troubleshooting which allows Windows 10 to automatically fix a lot of critical issues on your computer, and in this post, you will be guided on how you can turn on or off the Recommended Troubleshooting in Windows 10.
The Microsoft Diagnostic & Feedback data only provides two settings – Basic and Full. So if you want to turn off the Recommended Troubleshooting for some reason, the only way to do so is to stop it from collecting complete data from your PC. And to turn it on or off, you can choose to switch between them. To do that, navigate to Settings > Privacy > Diagnostics & feedback and from there, select Basic under the Diagnostic Data section. After that, go back to Settings and go to Update & security > Troubleshoot. Once you’re there, you should see a warning message saying, “Share Full Diagnostic data to get additional troubleshooting recommendations”. Based on the message, Microsoft will only offer the recommended troubleshooting based on the Full Diagnostic data which it collects from your computer.
On the other hand, if you know how to navigate and use the Windows Registry, then you can enable or disable the Recommended Troubleshooting via Registry Editor but before you proceed, make sure that you create a System Restore point. Once that’s covered, follow these steps:
Tap the Win + R keys to open the Run dialog box and type “regedit” in the field and tap Enter to open the Registry Editor.
Next, navigate to this registry path: HKEY_LOCAL_MACHINESOFTWAREMicrosoft
From there, look for the key named “WindowsMigration”. If you can’t find it, just right-click on the left pane and create a new key and then name it “WindowsMigration”.
After that, create a DWORD “UserPreference” and double click on it to set its value to “0” if you want to turn it off or “1” if you want to turn it on.
Exit the Registry Editor and restart your computer to apply the changes made.
Note: The Recommended Troubleshooting functionality can look into the error logs sent back to the Microsoft team and use an algorithm to set up a solution for you and they’re nothing but Diagnostics and Feedback data that Windows collects and sends back to Microsoft. Moreover, the recommendations are only visible if you are connected to the internet, else it will show the same message.
As you know, Windows 10 is equipped with a Mobile Hotspot feature that allows users to share the existing internet connections to other devices over Wi-Fi. However, one of the downsides to this feature is that it does not stay on if there are no devices connected to it for over five minutes. In other words, if there are no devices connected to the mobile hotspot for five minutes, it will turn off automatically. Thus, if you want the mobile hotspot to stay turned on, then you’ve come to the right place as this post will walk you through how to stop the Mobile Hotspot from turning off in Windows 10.
There are two scenarios tackled in this post wherein the Mobile Hotspot feature turns off automatically and where the hotspot disables when there is no internet connection. To remedy these scenarios, you can try turning off the power saving feature or use a PowerShell command to change the “PeerlessTimeoutEnabled” settings or increase the Mobile Hotspot idle timeout settings. You could also increase the timeout period when a cellular connection is not available or disable the Wi-Fi and network adapter power management options. For detailed instructions, refer to each one of the given options below.
Option 1 – Try turning off the power saving feature
The first solution you can check out is to turn off the power-saving feature. To do so, follow these steps:
Open the Settings app and go to Network & Internet and from there, click on the Mobile Hotspot option.
Next, toggle the “Share my Internet connection with other devices” option.
After that, toggle the “When no devices are connected, automatically turn off mobile hotspot” option.
Option 2 – Execute a command in PowerShell
The next option you can try to keep the mobile hotspot turned on is through a command in PowerShell. To get started, follow these steps:
Tap the Win + X keys and select the “Windows PowerShell (Admin)” option.
Next, execute the following command to make sure that the Mobile Hotspot stays on even when no devices are connected to it:
After the command is executed, here is what the script is doing in the background:
It stops the Mobile Hotspot service (icssvc).
It navigates to this registry path (HKEY_LOCAL_MACHINESYSTEMCurrentControlSetServicesicssvcSettings) and creates a DWORD key named “PeerlessTimeoutEnabled” which has a value of 0.
It then restarts the Mobile Hotspot Service (icssvc).
Option 3 – Try increasing the Mobile Hotspot idle timeout settings
Another option you can try is to increase the idle timeout settings of the mobile hotspot. In case you don’t know, the default timeout when there’s no active connection is about five minutes. So if you don’t want to keep it on always but want to keep it on longer than five minutes, then this option is for you. All you have to do is change the same key (PeerlessTimeout) as mentioned above, at a different location. In fact, you can change it to a maximum of 120 minutes. To give this a try, follow these steps:
Tap the Win + R keys to open the Run dialog box and type “Regedit” in the field and then tap Enter to open the Registry Editor.
Next, navigate to this registry path: HKLMSystemControlSet001ServicesICSSVCSettingsPeerlessTimeout
From there, change its value to anywhere between 1 up to 120.
Once done, exit the Registry Editor and restart your computer.
Option 4 – Try increasing the timeout period when a cellular connection is not available
There are many times when you want to connect devices so it becomes part of the network. And as pointed out, the Mobile Hotspot turns off automatically when there is no internet or mobile data but when you use a registry setting, you can change any value between 1 and 60 inclusive.
Tap the Win + R keys to open the Run dialog box and type “Regedit” in the field and then tap Enter to open the Registry Editor.
Next, navigate to this registry path: HKLMSystemControlSet001ServicesICSSVCSettingsPublicConnectionTimeout
From there, set the value of the “Timeout” key between 1 and 60.
After that, close the Registry Editor and restart your PC.
Option 5 – Try to disable the Wi-Fi and Network adapter in Power Management options
As you know, the Wi-Fi adapter and the network devices have properties that will turn off when on battery and when it’s not used for a long time so you can try to disable these options.
Tap the Win + X + M keys to open the Device Manager.
Next, expand the list of Network devices and select the Wi-Fi adapter.
After that, go to the Power Management tab and make sure that anything related to power saving should be turned off. This will ensure that none of the network devices will turn off the Mobile Hotspot or trigger anything that will do that.
TPM or Trusted Platform Module version 2.0 is a must-have if you plan on upgrading your system to Windows 11. So what exactly is TPM and do you have it?
What exactly is TPM?
TPM is a tamper-resistant hardware technology tasked with generating and storing encryption keys inside it for better PC security.
It can be remotely used to authenticate hardware and software by utilizing a unique endorsement key placed into the hardware itself.
This technology can be used for example in BitLocker inside Windows in order to have data on a hard drive encrypted so if the mentioned drive is connected to another computer it would not be able to be accessed since the encryption key is stored in the TPM module.
Microsoft is pushing its agenda that Windows 11 must be and must feel like safety first OS which will protect user data and user information and requiring TPM means that each Windows 11 will be secure so no additional software patches will be required for an extra layer of security.
Windows 11 will assume that each user has TPM encryption enabled and will be built upon that.
Do you have TPM on your computer?
If your computer or hardware has been purchased in 2016 or later there are very high chances that you already have the required technology to run Windows 11.
Unfortunately, many gaming motherboards have not been placing TPM in their boards and you might not have it.
Also, there is the option of you having it but it is turned off in motherboard settings making Windows unable to detect it.
As you can clearly see there are a lot of scenarios around required tech and honestly it is a complete mess.
But lucky for you there are ways to find out do you possess the needed module in order to make an upgrade.
On your current computer on which you would like to make an upgrade in your current Windows OS press ⊞ WINDOWS + R to open the run dialog.
Inside run dialog type in TPM.msc and press ENTER to open Trusted Platform Module Management on Local Computer.
You will immediately receive information do you have the required module.
If everything is fine, you are good to go, however, if it says that compatible TPM cannot be found there is a chance that either you do not have needed hardware or it might be turned off inside motherboard settings.
Check motherboard UEFI
If you have a newer motherboard but Windows utility cannot detect TPM there is a chance that it might be turned off directly on your board.
In order to check this, you will have to boot up your PC into UEFI either by pressing the corresponding key when it is turned ON or from Windows reboot options.
Once you are inside UEFI you need to find security options and see if there is an option to turn ON or enable TPM.
Since every motherboard is different and has different UEFI software we cannot cover all of the permutations and the best we can do is hope that provided information is enough.
You can also visit your motherboard manufacturer to see instructions for your specific case.
Conclusion
TPM itself is generally an OK idea and I can surely see good sides of it but there is this lurking feeling that generally, Microsoft is not really concerned about the security of our data and that the real requirement for this is trying to battle software piracy.
I simply cannot trust company which introduced tons of telemetry tracking through ages and which has done everything in their power to battle non-legal use of their software.
I do not promote piracy but I support free choice and besides, who can tell me what will happen if TPM malfunctions, will I lose all of my data forever?
It is not so uncommon that TPM has malfunctioned in the past and it is only logical to presume it can do it again in the future but this time we will not have the choice not to use it, we will be forced into it.
In today's world any professional, whatever be design, print, web design or similar is using one or more Adobe programs. Adobe has cemented itself as a must-have software for any kind of serious and even amateur work. Sadly in the latest Windows 11 adobe software in some instances can slow down your computer and put some hard load on the CPU. If you are one of these unfortunate users, keep reading because we have a few things you can do to solve this.
1. Run SFC scan
SFC scan is a built-in Windows tool aimed at diagnosing and repairing system files inside Windows itself. Running an SFC scan usually solves most issues of these kinds so we will try that one first.
Press ⊞ WINDOWS + S to open the Search bar and type in cmd
Select command prompt and on the right side click on Run as administrator
Inside command prompt type in: sfc /scannow and press ENTER
Wait for the whole process to finish and reboot your system
2. Update Windows
Windows updates are designed to fix issues and solve problems, check to see if a new update is available to install.
Press ⊞ WINDOWS + I to open the Settings app
Click on Windows Update in the bottom left pane
On the right check visually if there is an update pending and if there is, install it
3. Temporary turn off antivirus and firewall
Antivirus and firewall can interfere with adobe applications and background services, try turning your preferred protection software temporarily off and check if your CPU is still under high load.
4. Reinstall Adobe suite
Uninstall and install a clean version of the adobe creative suite or individual applications that you are using. Check your CPU load after reinstallation.
5. Uninstall Adobe CEF Helper
This is not a really advisable course of action but if non of the previous solutions have produced results then this might be the only option if you would like to keep using the software. Open File Explorer and paste the following line in the path box on top: C\:Program Files>Adobe Systems>Adobe CEF Helper or Adobe Creative Cloud >Adobe CEF Helper_uninstall.exe. Double click on the file and uninstall the CFT helper.
System Interrupts are operating system processes that function as an alert system for the CPU. So whenever a scenario needs the attention of the CPU, it alerts the CPU about it. In turn, the CPU suspends what it is doing, saves it, and then takes care of that important job and once that job is completed, it resumes back to what it was doing. This indicates that although System Interrupts appears as a process, it’s actually not. As a matter of fact, it is like a manager that reports to the CPU about all interrupts that happen on a hardware level, e.g. hardware interrupts. And if there are lots of interrupts, this means that there might be various errors occurring on a hardware level. As a result, it may take a lot of system resources. And if you consider disabling System Interrupts, stop right there as your computer will almost become useless without it.
So if you see System Interrupts consuming high CPU usage in your Windows 10 computer, you can fix it without having to disable it and cause more problems. If System Interrupts takes up more than 5 to 10% of CPU, then you definitely have a problem. This could be happening due to some hardware or driver issue. The first thing you can do is to try rebooting your computer once and see if the issue comes back or not.
High CPU usage of System Interrupts is a huge backlog for the CPU and it stays in the loop. If a simple system restart didn’t fix this issue, here are some suggestions you can try.
Option 1 – Try to update the hardware drivers
As stated, the problem might have something to do with hardware drivers so you can try to update these drivers and see if it works.
Reboot your computer into Safe Mode with networking support.
Tap the Win + R keys on your keyboard to open the Run dialog box.
After that, type “devmgmt.msc” in the field and hit Enter or click OK to open the Device Manager.
After opening the Device Manager, update all the outdated Hardware drivers on your computer.
Next, right-click on all the driver entries that are appropriately labeled, and then click the Update driver option.
Now restart your PC and check if the BSOD error is fixed or not.
Note: On the other hand, if a recent update has caused the System Interrupts high CPU usage, then you might want to roll back your hardware drivers to their previous versions.
You can check with the Windows Update History to check out any recent updates as well as the previous ones.
Option 2 – Try to disconnect and reconnect all hardware and cables
A lot of users reported that they were able to fix the problem by disconnecting and reconnecting cables and hardware like scanners, printers, cameras can help in fixing the problem. In addition, you can also boot your computer in a Clean Boot State so that you can find the problematic hardware by hit and trial method. Refer to the steps below to do so:
Log onto your PC as an administrator.
Type in MSConfig in the Start Search to open the System Configuration utility.
From there, go to the General tab and click “Selective startup”.
Clear the “Load Startup items” check box and make sure that the “Load System Services” and “Use Original boot configuration” options are checked.
Next, click the Services tab and select the “Hide All Microsoft Services” check box.
Click Disable all.
Click on Apply/OK and restart your PC. (This will put your PC into a Clean Boot State. And configure Windows to use the usual startup, just simply undo the changes.)
Option 3 – Try to enable or disable Hardware
If you do not want to remove hardware, you can just disable them using the Device Manager. Note that this can also be applied to the internal hardware.
Tap the Win + X + M keys to open the Device Manager.
Next, navigate to the device you want to disable.
Then right-click on it and choose to disable the device.
Note: Make sure that you disable one device at a time and then give it a couple of minutes and check if there are any changes in the CPU usage to pinpoint the hardware. And if there is no change, you need to enable the device you’ve just disabled and then proceed to disable the next hardware device. If there are changes, then it’s probably the culprit. Just keep in mind that you must no disable any device that is needed to keep your system up and running.
Option 4 – Try to update the BIOS/UEFI
Updating the BIOS/UEFI can help you fix the high CPU usage of System Interrupts but as you know, BIOS is a sensitive part of a computer. Even though it is a software component, the functioning of the hardware depends on it largely. Thus, you must be careful when modifying something in the BIOS. So if you don’t know much about it, it’s best if you skip on this option and try the other ones instead. However, if you are well-versed in navigating the BIOS, then follow the steps below.
Tap the Win + R keys to open the Run dialog box.
Next, type “msinfo32” in the field and press Enter to open System Information.
From there, you should find a search field on the bottom where you have to search for the BIOS version and then press Enter.
After that, you should see the developer and version of the BIOS installed on your PC.
Go to your manufacturer’s website and then download the latest version of BIOS on your computer.
If you are using a laptop, make sure that you keep it plugged in until you have updated the BIOS.
Now double click on the downloaded file and install the new BIOS version on your computer.
Restart your computer to apply the changes made.
Option 5 – Run the Hardware and Devices Troubleshooter or the Performance Troubleshooter
Hardware and Devices Troubleshooter:
The first thing you need to do is click on Start and then on the gear-like icon to pull up the window for Settings.
After opening Settings, look for the Update and Security option and select it.
From there, go to the Troubleshoot option located on the left-hand side of the list.
Next, select Hardware and Devices from the list and open the Troubleshooter and run it. Once it is doing its job, wait for it to complete the process and then restart the system.
After the system restarts, check if the problem’s now fixed. If not, refer to the next option given below.
Performance Troubleshooter:
Tap the Win + R keys to open the Run dialog box.
Type “exe /id PerformanceDiagnostic” in the field and hit Enter to open the Performance troubleshooter.
Then click on Next to get started. Wait until the process is completed.
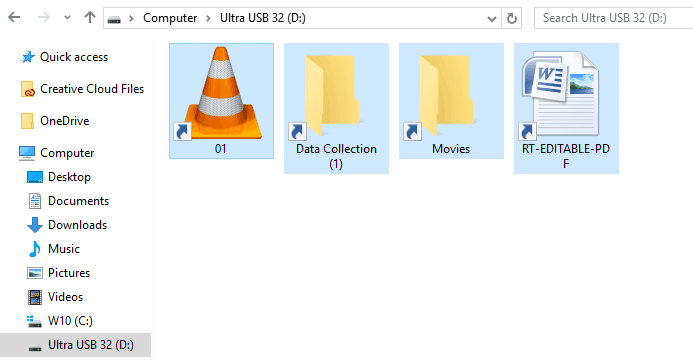
Shortcut virus is an easily spreadable and annoying combination of Worm and Trojan that hides all of your files and folders and then replaces them with shortcuts that look identical to replaced files and folders.
Once disguised it will wait patiently for a user's click and once that happens it will replicate itself and further infect the system. This rapid spread can lead to stolen personal data, some system hick-ups, and other system-related issues.
This malware mainly affects physical file transfer devices like for example and most USB drives, hard drives, and SD memory cards and it can easily transfer itself to the computer.
The advantage of this shortcut virus comparing it to others is that it is mostly undetected by a vast variety of antivirus software. So running just anti-virus software maybe not be enough to remove it from your system. Luckily for all unfortunate users that have caught this annoyance, it can be easily removed fully manually in a short time.
How to Remove Virus from USB and other removable media
Firstly plugin USB, SD, or removable drive. The infection will transfer to your computer when the infected drive is plugged in so before we go to clean the computer itself, clean each removable drive that you have. Also know that infection will spread from computers into removable devices as well if it is not cleaned.
Open the File Explorer and remember under which letter is removable drive registered. Open Command prompt but with administrator privileges and go to infected rive by typing its letter followed with “:” (for example D:) and press ENTER
Once you have successfully gone to infected drive type in command prompt:
Attrib -s -r -h /s /d *.*
This will unlock all original files back into removable storage, next copy all files to your computer, and format the removable drive. Once the format is complete, unplug the removable device. Continue to clean all devices with the same method.
How to Permanently Remove a Shortcut Virus from Your PC
Now once we have cleaned all removable devices it is time to fully clean the PC
Firstly open the task manager ( CTRL + SHIFT + ESC ), in the process tab find wscript.exe or wscript.vbs, right-click on it (or both if present), and select End Task. Now close the task manager and press Start. Inside start typing in registry editor to search for it and once found open it.
Find the following key inside the registry editor:
HKEY_CURRENT_USER/Software/Microsoft/Windows/CurrentVersion/Run
In the right panel, look for any strange-looking key names, such as odwcamszas, WXCKYz, OUzzckky, etc. For each one, run a Google search to see if it's related to shortcut viruses.
If any returns a positive match, right-click on them and select Delete. !!! Accidentally deleting an important key can cause Windows to become unstable, so double-check everything !!!.
Close the Registry Editor
Now press ⊞ WINDOWS + R to open the run dialog and type in it Msconfig followed by ENTER. Once the System Configuration window opens go to the Startup tab. In the Startup tab, look for any strange-looking .EXE or .VBS programs, select each one and click Disable. Close the Window.
Once again open the run dialog and type inside %TEMP% and press ENTER in order to open the Windows temp folder. Inside this folder delete everything.
Next in the File explorer go to
C:\Users\[username]\AppData\Roaming\Microsoft\Windows\Start Menu\Programs\Startup
Look for any strange-looking .EXE or .VBS files and delete them.
Scammers have decided to target Windows’s 10 App installer process in order to infect your computer and steal your data.
As in most usual online scams, everything starts with a strange email containing threats and other poorly written and composed speech. At the end of the given email, there would be a link claiming that you, of course, need to read it and follow instructions about the threat, if you click the link it will open a web page where you will have an innocent-looking PDF file with more information about the threat itself.
If you click on a seemingly innocent PDF file it will summon Windows 10's AppInstaller.exe tool, kickstarting a download-and-run process that'll put you in a bad place very quickly. From there, you'll have to deal with the dangers of malware BazarBackdoor, including data and credential theft.
This kind of scam is nothing new but the interesting thing here is that it uses App installer and by clicking on a link you are opening and giving permission for a malicious crook to use it. So, stay safe and do not click on any links from unknown emails no matter what.
If you see the following error message in the File History tab of the File Recovery utility of the Windows Backup module in your Windows 10 computer, read on as this post will guide you in fixing it with the help of two potential fixes.
“An internal error has occurred: The specified resource name cannot be found in the image file. (0x90070716).”
You can also encounter this error when you run the System Image Backup function. As mentioned, you can resolve this error using two potential fixes namely checking the status of the Windows Backup Service and checking the settings in the Windows Registry. For more details, refer to the instructions provided below but before you proceed, it would be better if you create a System Restore point first.
Option 1 – Try checking the status of the Windows Backup Service
First, you need to tap the Win + R keys on your keyboard to open the Run dialog box.
Next, type “services.msc” in the field and click OK or tap Enter to open the Windows Services Manager.
After that, you will see a list of services and from there, look for the Windows Backup Service and double click on it to open its Properties.
Then check if its Startup type is set to Disabled. If it is, then change it to “Manual”. Note that this service is essential as it provides backup and restores capabilities.
Now click on the Apply and OK buttons to save the changes made and then restart your computer. Check if the error is now gone.
Option 2 – Try checking the Registry setting of Windows Backup
Tap the Win + R keys to open the Run dialog box.
Then type “Regedit” in the field and tap Enter to open the Registry Editor.
After opening the Registry Editor, navigate to this registry key: HKEY_LOCAL_MACHINESOFTWAREMicrosoftWindowsCurrentVersionWindowsBackup
From there, look for DWORDs named “ValidConfig” and “ValidSystemImageBackup” located in the right-side panel.
Once you found them, delete them or set both of their values to “0” and make sure that the base is Hexadecimal and click OK.
Now exit the Registry Editor and restart your computer to apply the changes made.
The docking station was promised upon release of the Deck but it was pushed back and now the official statement is that it is delayed again.
Valve said in an announcement on June 1:
“Due to parts shortages and COVID closures at our manufacturing facilities, the official Steam Deck Docking Station is delayed. We’re working on improving the situation and will share more info when we have it.”
Valve
The docking station was presented at the same time as Deck itself and the whole idea was to make Steam Deck work like a laptop docking station. It has ports for USB devices, displays, and network connections that became functional the moment Deck is placed on it. Docking supports a mouse, keyboard, and external display making it an almost full PC station if needed.
Valve confirmed that its official dock station will not improve performance so while you wait for its release you can use another docking station with a USB Type-C connector.
Uncdms.dll is a Dynamic Link Library file and a crucial part of the Windows Desktop Search Software. It is used to search emails, documents, photos, videos, and folders instantly.
However, the Uncdms.dll error pops on the screen, when the Windows Desktop Search Software fails to start.
The error message is displayed in one of the following formats:
“Uncdms.dll cannot be found.”
“Windowssearch.exe – cannot find the component. This application has failed to start because uncdms.dll was not found. Reinstalling the application may fix the problem.”
“The file uncdms.dll is missing.”
Solution
Error Causes
Uncdms.dll error code may pop on your screen due to multiple reasons. These usually include but are not limited to:
Viral infection
Issues with Windows Desktop Search
Registry corruption
Uncdms.dll accidentally deleted during program un-installation
Further Information and Manual Repair
If you experience an Uncdms.dll error code on your system, fix it right away. This error is easy to resolve. You don’t have to be technically sound to resolve the uncdms.dll error code. Try the methods listed below to resolve without any hassle:
Method 1 - Check Your Recycle Bin and Restore the Deleted Uncdms.dll File
Since DLL files are shared files, there is a possibility that you accidentally deleted them while uninstalling some other program. To fix the issue, simply go to the recycle bin and look for the file. If you locate it, reinstall it. If you can’t, then it is advisable to download the Uncdms.dll file from a trusted DLL file website.
Method 2 - Uninstall and Then Re-install Windows Desktop Search
If the error code is related to issues with the Window Desktop Search application, then simply uninstall this software and re-install to resolve. To do this, click the start button, go to the control panel and then add/ remove programs.
Now choose Windows Desktop Search from the list of programs and click Remove. After that, reboot your PC to activate changes. Now download the software and follow the same process and reinstall the Windows Desktop Search program on your PC.
To activate changes, reboot. This will hopefully resolve the issue.
Method 3 - Update Windows
As this file is included in the service pack, try updating the Windows Utility to resolve the Uncdms.dll error code. To get started, click start and then go to the control panel, now choose Windows update. Follow the instructions to install Active X and then click install to update Windows Utility. Restart your system to bring the changes into effect.
Method 4 - Scan for Viruses and Repair the Registry
Whether the underlying cause of the Uncdms.dll error code is viral infection or registry corruption, it is advisable to download Restoro. It is an advanced and multi-functional PC Repair Tool integrated with 6 powerful utilities including antivirus and a registry cleaner.
It scans and removes all types of viruses. The registry cleaning utility works simultaneously and removes all the unnecessary files corrupting the registry including cookies, temporary files, internet history, and junk files, and repairs it in seconds, thereby resolving the Uncdms.dll error immediately.
Click here to download Restoro - PC Fixer
Finally upgraded to Microsoft’s newest OS, but the performance is a bit sluggish? Here are a few useful tips you may not have thought about that could significantly transform your experience!
How to speed up Windows 11?
1. Disable startup programs
There are many programs that launch right on startup that really aren’t essential. This, in turn, causes your PC to launch and run more slowly.
To check which programs are enabled on startup, go into the Task Manager and select the Startup tab. Find every program that doesn’t need to launch immediately, right-click on it and press ‘Disable’.
This will not shut down the program in that instant. It’ll just prevent it from running automatically as you turn on your PC. You can always launch it manually when you need it.
2. Expand your memory and storage
If you want your PC to run super smoothly, you need to have enough memory to support that. This is especially significant for those of you who love to multitask. Upgrading your RAM gives your PC more space to store the temporary data it needs to complete processing tasks. In other words, processing takes a lot less time.
Your long-term storage is equally important. Hopefully at this point you’re already using SSD over HDD, since this type of storage offers a faster boot time.
Credit: Marc Pezin on Unsplash
In any case, we recommend expanding your storage capacity. The more files and data you store, the more there is to load, significantly influencing your PC’s speed. Larger storage capacity means new data and essential updates can be stored comfortably, preventing any strain on your PC’s performance.
3. Clean up disk space
If you aren’t willing to upgrade your storage just yet, the least you can do is clean up your storage right now.
Aside from manually deleting stuff you no longer need, you can also get rid of temporary files that clutter up your storage and eat up performance for no reason. To get to them, click Windows + X and select ‘Run’ (or just type it in the search bar).
A small window will pop up, where you need to type %temp%. This will take you to a whole folder full of all the temporary files you can remove without thinking twice.
For those who upgraded from Windows 10, there’s a neat trick to get rid of potential leftover files you don’t need on your brand new iteration. Only do this if you’re 100% sticking with Windows 11, though. Go to System > Storage > Temporary files. Make sure to only leave ‘Previous Windows Installation’ and ‘Windows Update Clean-up’ checked and click on ‘Remove files’.
Lastly, make use of Windows 11’s fantastic Storage Sense feature. Turning it on will enable your PC to constantly watch out for junk or unused files to optimize your PC’s performance to the maximum.
4. Install pending updates
This one should go without saying, but pending updates can be detrimental to your Windows 11 performance. The longer you leave them untouched, the more bugs the outdated programs and patches can cause. So, make sure to regularly check for updates and install them as soon as they’re available.
5. Disable visual effects
As cool as visual effects, animations, shadows and transparency are, they can also put quite a toll on your computer’s speed. On a newer setup this generally shouldn’t be a problem, but if you do notice a drop in performance, definitely consider turning off some of these settings.
To do this you can go to the Control Panel, System Properties and click the ‘Advanced’ tab. In the Performance section, choose Settings. If you’d like a quicker way to get to the dialog (Performance Options) with Visual Effects, you can also type sysdm.cpl in the search bar.
Once there, you can either have your PC choose what’s best, choose the best appearance or the best performance. The other option is to manually toggle the effects off and on. The biggest obstacles to speed are taskbar animations, window shadows, control/element animations and animations upon minimizing/maximizing.
Credit: Windows on Unsplash
In the same vein, you should go to Settings > Personalization > Colors and disable Transparency, to prevent your computer from doing overtime just to hit the aesthetic appeal.
6. Get rid of bloatware
Bloatware is one of the biggest culprits of slow computer speed.
Pre-installed software that’s pretty much useless but takes up valuable system resources has been around since day one. No matter which device or platform you’re talking about. Luckily, a lot of it is removable, making it easy to lighten the load on your device.
To boost your Windows 11 computer, go to Settings > Apps > Installed apps.You’ll probably see a bunch of apps you don’t want or need. Click on the three dots next to each one you want to remove and press ‘Uninstall’.
Aside from helping optimize performance, removing bloatware has another great benefit. Unfortunately, often this pre-installed software is quite vulnerable, exposing you to great risk of cyberattacks. So, removing it definitely improves your device’s security and gives you at least some peace of mind.
Summary
These are a few of our fastest tips for boosting performance. There are other, more complex and time-consuming ways, of course. If you’ve tried these quick ones and still need advice on how to improve your PC’s speed, feel free to reach out!

 What exactly is TPM?
 In today's world any professional, whatever be design, print, web design or similar is using one or more Adobe programs. Adobe has cemented itself as a must-have software for any kind of serious and even amateur work. Sadly in the latest Windows 11 adobe software in some instances can slow down your computer and put some hard load on the CPU. If you are one of these unfortunate users, keep reading because we have a few things you can do to solve this.
 Once disguised it will wait patiently for a user's click and once that happens it will replicate itself and further infect the system. This rapid spread can lead to stolen personal data, some system hick-ups, and other system-related issues.
This malware mainly affects physical file transfer devices like for example and most USB drives, hard drives, and SD memory cards and it can easily transfer itself to the computer.
The advantage of this shortcut virus comparing it to others is that it is mostly undetected by a vast variety of antivirus software. So running just anti-virus software maybe not be enough to remove it from your system. Luckily for all unfortunate users that have caught this annoyance, it can be easily removed fully manually in a short time.
Once disguised it will wait patiently for a user's click and once that happens it will replicate itself and further infect the system. This rapid spread can lead to stolen personal data, some system hick-ups, and other system-related issues.
This malware mainly affects physical file transfer devices like for example and most USB drives, hard drives, and SD memory cards and it can easily transfer itself to the computer.
The advantage of this shortcut virus comparing it to others is that it is mostly undetected by a vast variety of antivirus software. So running just anti-virus software maybe not be enough to remove it from your system. Luckily for all unfortunate users that have caught this annoyance, it can be easily removed fully manually in a short time.
 As in most usual online scams, everything starts with a strange email containing threats and other poorly written and composed speech. At the end of the given email, there would be a link claiming that you, of course, need to read it and follow instructions about the threat, if you click the link it will open a web page where you will have an innocent-looking PDF file with more information about the threat itself.
If you click on a seemingly innocent PDF file it will summon Windows 10's AppInstaller.exe tool, kickstarting a download-and-run process that'll put you in a bad place very quickly. From there, you'll have to deal with the dangers of malware BazarBackdoor, including data and credential theft.
This kind of scam is nothing new but the interesting thing here is that it uses App installer and by clicking on a link you are opening and giving permission for a malicious crook to use it. So, stay safe and do not click on any links from unknown emails no matter what.
As in most usual online scams, everything starts with a strange email containing threats and other poorly written and composed speech. At the end of the given email, there would be a link claiming that you, of course, need to read it and follow instructions about the threat, if you click the link it will open a web page where you will have an innocent-looking PDF file with more information about the threat itself.
If you click on a seemingly innocent PDF file it will summon Windows 10's AppInstaller.exe tool, kickstarting a download-and-run process that'll put you in a bad place very quickly. From there, you'll have to deal with the dangers of malware BazarBackdoor, including data and credential theft.
This kind of scam is nothing new but the interesting thing here is that it uses App installer and by clicking on a link you are opening and giving permission for a malicious crook to use it. So, stay safe and do not click on any links from unknown emails no matter what. 


