 So let's dive into this cool handheld in more detail and find out why we like it so much.
Stop 0x00000000 error code is a type of a Stop error popularly known as a blue screen of death error code. This is a critical error.
It can pop up while loading or using the Windows program on your PC. When this error occurs, the computer screen turns blue and you, the user, get locked out of the program. Furthermore, it can also result in sudden system shut down or system freeze.
If not fixed timely, the error may start to pop up more and more frequently which then may lead to complete system corruption and system crash.
 Error Causes
The two most common causes for the STOP 0x00000000 error code are:
This is a fatal system error and must be resolved immediately. Delay may lead to system crashes and data loss. And recovering lost data is not easy.
Though this is a fatal error the good news is that it is easy to resolve. To repair the STOP 0x00000000 error on your system, here are some methods that you can try:
To resolve this error on your system, try using the System Restore tool. Use this tool to bring your computer back to its previous state. The Windows System Restore utility is one of the most valuable recovery tools.
To use it, simply type System Restore in the search box. Once you find it, click on it and select a restore point to bring your PC back to its normal state. To activate changes, reboot the PC.
If the underlying cause of the Stop 0x00000000 error code is related to malware infection, then you must download a powerful antivirus to resolve it. Run it to scan your entire PC.
Make sure you remove all types of malware including adware, spyware, viruses, and Trojan. Once your PC is malware-free, the error will be fixed in no time.
The registry is an important part of the PC. It stores practically all the activities you perform on your system.
It saves all the files including both important and unnecessary files such as junk files, cookies, internet history, bad and invalid entries. If these obsolete and unnecessary files are not deleted frequently and keep on accumulating it takes up all the registry space and corrupts it.
This results in registry errors like runtime and BSoD errors and sometimes may also lead to disk fragmentation.
To resolve it is advisable to repair the registry. This can be done manually but that will take too much time and also require technical expertise. However, another way to resolve it is to download Restoro.
This is a user-friendly PC Fixer with a powerful registry cleaner. It removes all obsolete and unnecessary files, cleans the registry and repairs the damaged files, thereby removing the error right away.
Click here to download Restoro and resolve Stop 0x00000000 today!
 So let's dive into this cool handheld in more detail and find out why we like it so much.
 This is a very interesting decision by Microsoft and I fully support it, this time users will be able to pay less and to choose only applications that they need instead of paying for the whole package and not using it.
 Building your own custom PC system can be one of the greatest things you can do to your budget. Instead of going for a rebuild, we will go into detail about why building your own PC is a much better option. Also, note that if you do not possess enough technical knowledge about a topic there are plenty of stores that will offer you advice on components and after all, you can always get help from a friend.
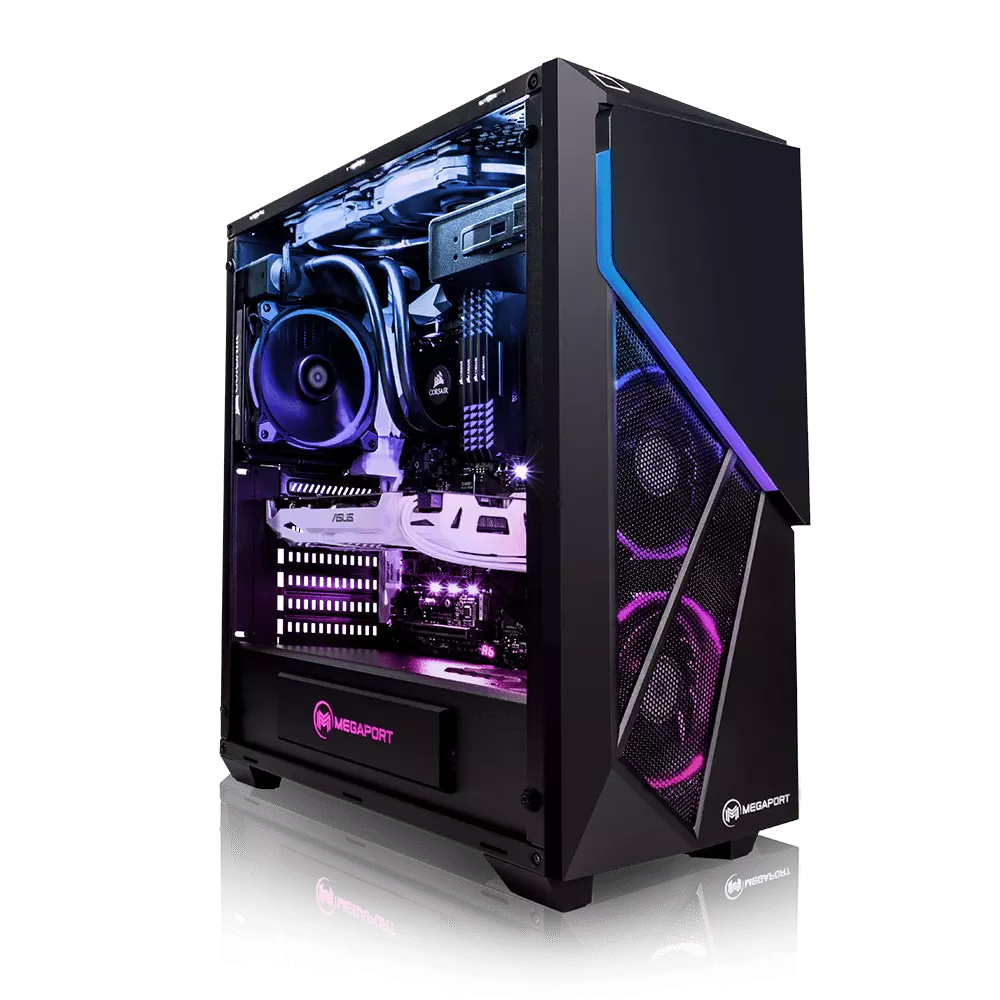
So without further diversion from the topic, let us explore all the benefits of building a custom computer.
At the first look, this statement does not feel right since when you look at the prebuilt systems you get a feeling that it is much cheaper than do it yourself variant and although CPU and GPU seem like a great deal I beg you to look under the hood on other components. Usually to lower price compromise would be made on other crucial components like SD or power supply, a PC case, or motherboard so even if you have a good CPU and GPU that will not matter much since other components would not be able to catch up with them. After all, prebuild computers will need to pay people who are building them and there is no way that will be cheaper if you just plain went and bought the same components yourself and install them.
When you are in control in choosing each component there is not only being cheaper online, it is flexibility with building itself. You choose which components you want to be stronger and which to be normal. Also, you can choose the exact model of the given component leaving you more in control and open to future upgrades.
Also, it may sound irrelevant but when building your own custom PC you can also choose which company you would like to purchase for each model, yes considering the CPU it is AMD or Intel but when you are buying a case, SSD, GPU, and other components choosing the right company for your needs is also the thing that should not be overlooked.
Not really a quality argument but with a custom PC build, you can choose would you like that RGB component or not, you choose do you like white or black fans, and many more things. You really can place a personal stamp on the computer making it indeed a personal computer.
When you buy an already prebuilt PC, usually it comes with some sort of OS on it, sometimes it is freedos, Linux and sometimes it is Windows Home. When you get your hands dirty you can place whichever system you want on it and install applications that you use and know and some preinstalled typical apps.
Error CausesSometimes we need and want some apps that are not part of the official Amazon Appstore but having their Fire TV stick prevents us from installing anything that's not in their store, or does it?

You can quickly "jailbreak" given stick and unlock additional installations via different providers. Although the term jailbreaking is associated with illegal and hacker activities rest assured that in this case there is nothing illegal about this procedure and that you are entirely safe.
In order to do this procedure firstly you will have to allow the installation of apps obtained from outside the Amazon Appstore. To do this open the settings menu on your Fire TV Stick and inside settings choose My Fire TV. On the My Fire TV page select Developer Options and inside select Apps From Unknown Sources. The prompt screen will open, choose Turn On to activate the option.
APK installation is enabled now and the next step is to download an app like Downloader that will allow you to get your favorite apps. Downloader is free to download manager fully available on the Amazon Appstore and with it, you can download any kind of file to your device including APKs.
Once installed open the Downloader app and type in the URL or search term in order to find your application of choice but please do get all of your APK from trusted sources in order to avoid exploits and getting malware.
Error Causes Razer had some strange dives into stuff not really aimed at gamers and the gaming community overall like its Zephir smart mask and now it is venturing into the area of smartwatches teaming up with Fossil. I am not clear if this initiative was set in motion by Razer or Fossil and I really do not know why limited production numbers. Officially named RAZER X FOSSIL GEN 6 SMARTWATCH, this watch comes with the official following text on Razer's page:
Way more. Way faster. Way ahead of the game. Get time on your side with the limited-edition Razer X Fossil Gen 6 Smartwatch—only 1,337 pieces worldwide. Designed for the next generation of gamers, supercharge your style with customizable straps, dials, Razer Chroma™ RGB effects, and more.Now, I am a fan of Razer and I like their products, mostly keyboards and mouse altho chair is also very good and in top of the product line in that field but I can not really stand behind this product and decision, and the only reason why I can not stand behind it is this 1337 (leet, or elite) a limited number of available pieces that is nothing more than a gimmick to sell watches at a higher price. Watch itself is not really bad, as a matter of fact, it has some solid hardware statistics.
 Windows and Devices chief Panos Panay has revealed new focus sessions feature that will be in Windows 11 on his Twitter account today. He himself is referring to it as a game-changer especially with Spotify integration.