How to Resolve Error Code 0xc00007b in Windows 8, 8.1
Error Code 0xc00007b – What is it?
When error code 0xc00007b occurs in Windows 8, users are unable to run gaming or multimedia programs on their devices. The message box will occur stating that error code 0xc00007b is present. This issue is usually related to software conflict associated with the use of a gaming program that has errors. It may also result when users use applications that are not compatible with the version of Windows they have installed on their machine.
Solution
Error Causes
Error codes on Windows devices can result from many reasons, including lack of proper PC maintenance, the presence of malware, and issues related to servers. In the case of error code 0xc00007b, it manifests itself on various versions of the Windows operating system when users attempting to run applications incompatible with their system or use the incorrect bit location. To correct these issues that may be causing error code 0xc00007b, users will need to use manual repair methods listed in this article. Failure to rectify this error code could result in others such as error code 0xc0000142.
Further Information and Manual Repair
The manual repair procedures listed in this article do not require extensive technical knowledge. Thus, even average Windows users will be able to apply these solutions in order to fix error code 0xc00007b in Windows 8. However, in case of difficulty applying the solutions listed below, contact a Windows repair technician.
Method One: Install Windows Updates
One of the first manual repair methods you can attempt is to use Windows Update. This will enable users to access the latest updates for the version of Windows they have on their system. To update your system, follow the instructions below.
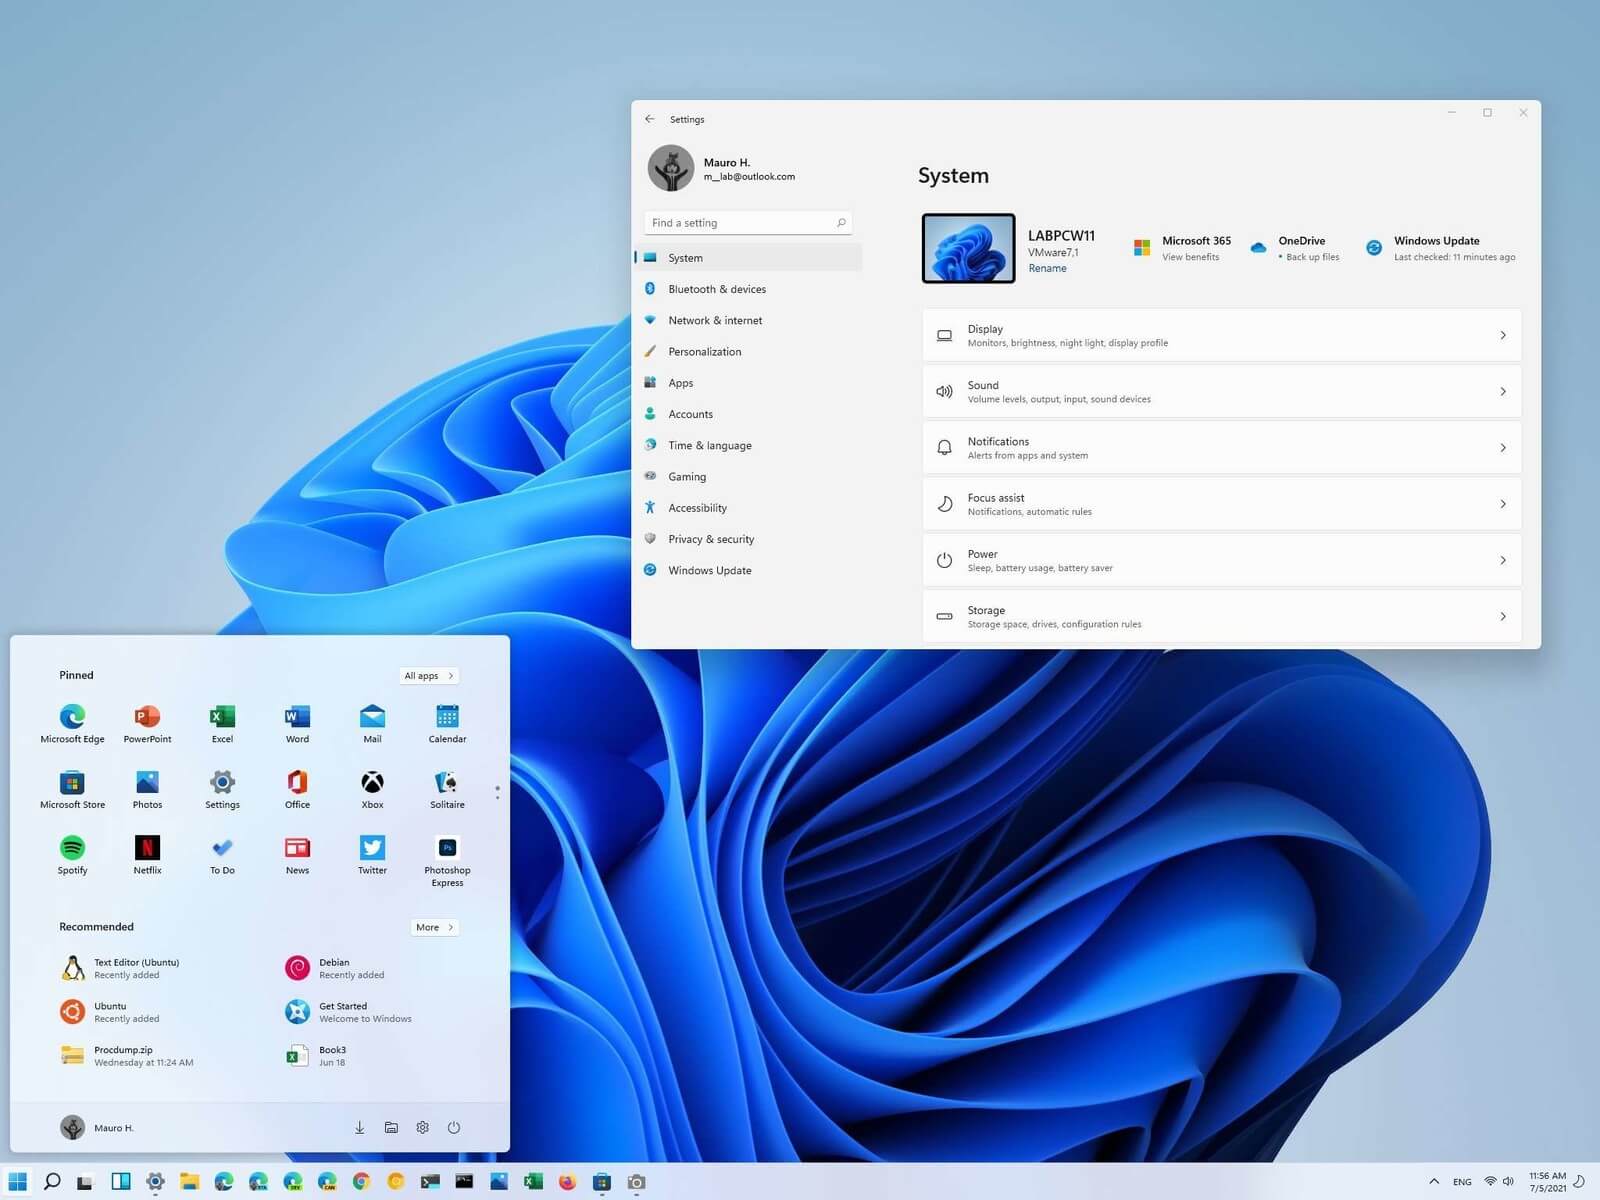
Step one: Open Start Menu, then select Settings
Step two: Select Update & security
Step three: Select Windows Update
Step four: Install updates if any are available
After you’ve completed the installation of the latest updates, reboot your machine then attempt to run the gaming application you were unable to open due to error code 0xc00007b. You should be able to run the application if Windows Update fixed the issue. However, if the error code reoccurs, proceed to the next manual repair method by installing Microsoft DirectX.
Method Two: Install Microsoft DirectX
Another important manual repair method relates to the use of DirectX, a free tool available to Windows users regardless of the version of the Windows operating system present on their PC. Visit Microsoft’s official website and search for DirectX End-User Runtime Web Installer. Ensure you access the latest version of the program, then click download.
The app enables Windows users to access high-speed gaming by providing a powerful platform for games and multimedia applications. Access to the latest version of DirectX can help users fix the issues causing error code 0xc00007b in Windows 8.
When the installation process is complete, reboot your PC, then proceed by checking if you are able to run your gaming applications. If you are still unable to run the applications the issue will need to be resolved via another manual repair method.
Method Three: Install Latest Version of .NET Framework
Access the latest version of Microsoft’s .NET Framework to complete the final manual repair method. Be sure to follow the steps listed below to download the latest version of the .NET framework. This is crucial as only the latest version of the framework is equipped with the necessary capabilities required to successfully address the issues causing error code 0xc00007b on your device.
Step one: Open your favorite web browser
Step two: Enter www.microsoft.com/net
Step three: Click Downloads
Step four: Select the latest version of the .NET Framework by clicking the framework at the top of the list. (Currently, the latest version is .NET Framework 4.6.2.)
Step five: Select preferred language, then download
Step six: Run software.
Restart your computer after you’ve downloaded the latest version of the .NET framework. Open the gaming application you were previously unable to run due to error code 0xc00007b.
You’ll be able to access all your gaming or multimedia programs if the issue was resolved via this manual repair method. Otherwise, you may need to reinstall the programs you are unable to run as there may be an issue with the program itself resulting in software conflict or the inability to run other gaming programs.
Method Four: Download an Automated Tool
If you wish to always have at your disposal a utility tool to fix these Windows 8 and other related issues when they do arise, download and install a powerful automated tool.
If you aren’t able to pull up any website and instead got the ERR QUIC PROTOCOL ERROR error message in Google Chrome then read on as this post will help you resolve the problem. When you encounter such an error in Chrome, you will see the following error message:
“This site can’t be reached, The webpage at [website URL] might be temporarily down or it may have moved permanently to a new web address, ERR_QUIC_PROTOCOL_ERROR”
This kind of error message pops up when the URL is down. However, if you are certain that the site is not down and you’re still seeing this error message, then troubleshoot further using the suggestions given below.
Option 1 – Try to disable the QUIC Protocol
QUIC is an experimental transport layer network protocol that is present in Google Chrome in order to establish a connection between two endpoints over UDP. So if there is any problem on the development side, you will most likely encounter ERR_QUIC_PROTOCOL_ERROR on your Google Chrome browser when you try to open any website. Thus, you have to disable the QUIC protocol in order to resolve the error. How? Simply follow the steps below.
Open your Google Chrome browser.
Now type in “chrome://flags/” in the address bar and hit Enter.
After that, look for the Experimental QUIC protocol which should be set by default.
Then expand the drop-down menu and select Disable.
Restart Google Chrome and see if the error is fixed or not.
Option 2 – Disable VPN
As mentioned, if you are using VPN, this could be the reason why you’re getting the Windows Update error 0x800F0922 so the most obvious thing to do is for you to turn off the VPN and try to run the Windows Update once more. And if you use a VPN software that works using their software, you can just completely exit or log-off from its account. On the other hand, if you are using a built-in Windows 10 VPN, you can simply turn it off or delete all the settings you have created there. Although it’s understandable that you might have to use a VPN connection to connect to the work network, you really have to disable it at least until the Windows Update is no longer stuck in the error 0x800F0922. It would be best if you do this when you are not working.
Option 3 – Disable the Proxy server
You can also try to disable the Proxy server to fix the ERR_QUIC_PROTOCOL_ERROR in Chrome. Refer to these steps to do so:
Tap the Win + R keys to open the Run dialog box.
Then type “inetcpl.cpl” in the field and hit Enter to pull up the Internet Properties.
After that, go to the Connections tab and select the LAN settings.
From there. Uncheck the “Use a Proxy Server” option for your LAN and then make sure that the “Automatically detect settings” option is checked.
Now click the OK and the Apply buttons.
Restart your PC.
Note: If you are using a third-party proxy service, you have to disable it.
As you know, Windows has a built-in Automatic Maintenance feature that takes care of important tasks such as security scanning and updating, Windows software updates, Disk Defragmentation, System Diagnostics, Disk Volume Errors, and many more. So if you receive an error message saying, “Windows is unable to run automatic maintenance, The maintenance schedule is unavailable”, then this post will guide you in what you can do to resolve this issue.
Here are some suggestions you can try if the Automatic Maintenance in your Windows 10 PC is not able to run.
Option 1 – Enable Automatic Maintenance
It is possible that Automatic Maintenance has been disabled so you can try enabling Automatic Maintenance on your Windows 10 PC. To do so, follow these steps:
Go to Control Panel.
From there, select System and Security > Security and Maintenance > Automatic Maintenance.
After that, set the time you want to run the Automatic Maintenance and then check the checkbox saying, “Allow scheduled maintenance to wake up my computer at the scheduled time”.
Click OK to save the changes.
On the other hand, you can also enable Automatic Maintenance via the Registry Editor. But before you proceed, you need to create a System Restore Point first.
Tap the Win + R keys to open the Run dialog box.
After that, type “Regedit” in the field and hit Enter to open the Registry Editor.
Next, look for the “MaintenanceDisabled” key and then double click on it to open it and then set its value to “0”.
Click OK and exit the Registry Editor.
Restart your computer.
Option 2 – Check the Task Scheduler Services status
Majority of the tasks in Windows 10 run via services. So it is most likely that either the Service has been stopped or is set to the manual which is why Windows is unable to run Automatic Maintenance. Thus, you need to change it to automatic mode.
Tap the Win + R keys to open Run.
Type “services.msc” in the field and hit Enter to open Services.
Next, look for the Task Scheduler service and tap the T key on your keyboard which should take you to the services that start with T.
Double click on the Task Scheduler service and select the Automatic option under the Startup Type.
If it is not started yet, click on the Start button.
Then click Apply and OK to save the changes.
Option 3 – Check the Status in Task Scheduler
You can also try checking the status in the Task Scheduler. Just open the Task Scheduler > Task Scheduler Library > Microsoft > Windows > TaskScheduler. From there, make sure that Idle Maintenance, Maintenance Configurator, and Regular Maintenance are enabled.
Option 4 – Run the System File Checker
The SFC or System File Checker scan could detect and automatically repair damaged system files that could be causing the Automatic Maintenance issue. SFC is a built-in command utility that helps in restoring corrupted files as well as missing files. It replaces bad and corrupted system files with good system files. To run the SFC command, follow the steps given below.
Tap Win + R to launch Run.
Type in cmd in the field and tap Enter.
After opening Command Prompt, type in sfc /scannow and hit Enter.
The command will start a system scan which will take a few whiles before it finishes. Once it’s done, you could get the following results:
Windows Resource Protection did not find any integrity violations.
Windows Resource Protection found corrupt files and successfully repaired them.
Windows Resource Protection found corrupt files but was unable to fix some of them.
Option 5 – Run the DISM tool
The DISM tool is another command-line tool in the Windows operating system that could help users fix various corrupted system files. To use it, follow these steps:
Open the Command Prompt as admin.
Then type in this command: DISM /Online /Cleanup-Image /RestoreHealth
The DISM command you entered will repair the corrupted system image. Do not close the window if the process takes a while as it will probably take a few minutes to finish.
A runtime error is commonly an error that's created after the PC is operating software and encounters a problem of some form. For instance, a runtime error like run-time error code 7 reveals an "out of memory" dilemma.
Solution
Error Cause
Run-time errors are normally brought on by clashes with TSR (Terminate and Stay Resident) applications or additional operating applications, software problems, storage problems, or pc viruses.
Troubleshooting a Run-time Error
First, enter the run-time error signal into a search engine to see what info you will get about the precise runtime issue you are receiving. Next, end - job all running applications and TSRs to make sure these aren't the origin of the issue. You can certainly do so by obtaining the job manager by striking Control Alt Delete.
In case your issue is regularly occurring with a unique program, go to that system programmer's site and obtain any upgrades and patches. If unavailable, try uninstalling the application involved and reinstalling it.
In the event the issue is occurring with the os, you may consider reinstalling it although it is a huge commitment. A much better idea would be to try a fix for both Windows XP or Windows 2,000. It is possible to fix and scan files by typing : sfc / scannow, heading to the Begin switch, Run, and then pushing enter. Make certain to put an area between sfc and the reduce.
You might have an equipment or storage dilemma if these measures have not resolved your run-time errors. If that is the situation, contact the support of the application under consideration for potential support accompanied by the pc or motherboard manufacturer.
Many run-time problems can be solved by upgrading the application that's creating the problem. This is only because the programmer's frequently releasing patches and improvements for their applications as insects are found and repaired.
Storage problems may frequently be fixed by rebooting the pc. Consider a reboot a short-term repair. Rebooting clears the memory but in case your COMPUTER does not have adequate memory for your applications you're operating, or sufficient hard-drive space you'll immediately run out of memory again. Something less than this sum may cause memory issues since the computer's swap file isn't in a position to expand in dimension as required.
To assess the quantity of free area, available My Computer and right-click on the HDD, generally the D: drive. Select Attributes in the menu and see the disc's ability. Perform the disk clean-up function by following prompts and pressing the Disk Clean-up button, if the room is reduced.
You may be getting run-time errors, in case your storage chip is really failing. Eliminating and changing the awful memory chip will solve the difficulty. If you're encountering other runtime-related errors, like an install runtime issue, try cleaning away the portions of the registry with some software solution.
Error Code 0xC1900101, 0x4000D is not very common among the many error codes emerging when updating to Windows 10. It is specific to Windows 7 users who try to upgrade to Windows 10 system.
This error hinders Windows 7 users to install the Windows 10 update. Once the update is launched, the process will go smoothly until a certain percentage (normally upon hitting 70% or more) and then it gets stuck. The user will then see a notification stating: “The installation failed in the SECOND_BOOT phase with an error during MIGRATE_DATA operation.”
You’ll be able to get past the error after a while. The error message will disappear and continue with the configuration process. But, not for long as it will reoccur at around 90% of installation with another error message saying: “The installation failed in the SECOND_BOOT phase with an error during PRE_OOBE operation.”
Solution
Error Causes
You’re most likely to encounter Error Code 0xC1900101 – 0x4000D when youupgrade to Windows 10 using a USB drive. There are several reasons why this update-related error happens such as wrong update, incompatibility with an antivirus program, or incompatibilities with some software.
Further Information and Manual Repair
In attempting to fix error code-related problems, it is best to do manual repair methods. Employing repair methods manually can help users pinpoint the root causes of the issues they are encountering and apply permanent solutions to fix the problem.
While every Windows user can do most manual repair methods, there are certain cases where help from a Windows expert is needed. If you’re not confident in employing the manual repair methods yourself, you can always consider seeking help from a professional Windows technician who is equipped with enough knowledge to address any issues you are facing or you can just simply use a powerful automated tool.
In fixing Error Code 0xC1900101 – 0x4000D, you can try doing any of the following manual repair methods:
Method One: Disable Background Applications
Error Code 0xC1900101-0x4000D probably occurs when there are programs running in the background of the system as you are in the process of updating. On that note, you must ensure that any programs running in the background must be disabled through Task Manager.
Press Ctrl+Alt+Del then choose Task Manager.
Right-click on all background applications then chooses End Task to close the apps.
NOTE: If there are any processes you are unfamiliar with, you can always right-click that process then “search online.” Be careful not to end “Windows process” tasks under the “Type” column as it might cause further problems.
Restart your device then proceed to Windows 10 system upgrading.
Method Two: Uninstall Anti-Malware Tools
Anti-malware tools normally trigger problems since they consist of files that are possibly incompatible with some software. If Error Code 0xc1900101-0x4000d is caused by incompatibility with an antivirus program, follow the following steps:
Open the Control Panel then choose System and Security.
Select Windows Solution Center.
Click Security to locate your antivirus.
Once you’ve located your antivirus, click on it then choose
Restart your device then check if it eliminates the problem.
Method Three: Install System Updates
Click on the Start menu then select System and Security – Windows Updates.
Choose Check for updates.
If there are any required updates detected by the system, select them all then choose Install Updates.
Restart your device.
Method Four: Check System For Any Incompatibilities
In doing this method, you need to use the System Readiness tool.
Download System Update Readiness Tool for Windows 7 for x64-based Systems (KB947821).
Once the download is finished, open Windows 6.1-KB947821-v34-x64.msu
Run the program to check for any incompatibilities in your system.
NOTE: The process might take a while depending on the speed of your device.
If there are no results found, you can now try updating again to Windows 10. However, if there are any issues found, you need to have them fixed first.
Method Five: Download A Powerful Automated Tool
Can’t seem to put up with the long and technical manual repair process? You can still fix this error by downloading and installing a powerful automated toolthat will surely get the job done in a jiffy!
Hello and welcome to errortools another tutorial which aims to make your computer life easier and more relaxed. This time we will be talking about how to switch sound output devices in Windows 10 in a matter of seconds between Headphones and external speakers, Between 2 different speakers, or any other audio output device in general.
Windows 10 with its updates has really gone from OK to one of the greats, little hacks and shortcuts which every update has introduced have really made life easier.
Now, your typical switching from one audio output device to another can be accomplished with your standard go to settings, go to devices, choose audio, pick one which you prefer and click on OK. This way altho nothing wrong with it is a little slow and if you need to switch your output devices several times in a single day often it can be time-consuming as well. Lucky for you we have a quick solution for you.
Switching guide
All right, now in order to be able to actually switch between your audio output devices make sure that all of them are working and that they are plugged in. For example, make sure that both of your headphones and speakers are turned ON and plugged in. Once you have confirmed that everything is in working order:
Click with a left mouse button on a speaker icon located on the right part of your taskbar next to the clock
Click on the small up arrow on the right next to your current audio output device.
The list will open, choose, and left click with the mouse button on your choice.
And that's it, you have changed your default audio output device in a matter of seconds.
The good thing about this method is that Windows will remember output audio levels for each device.
Potential issue
If by any chance when switching your audio devices this way freezes volume control just go to the task manager and restart Windows Explorer.
To restart Windows explorer:
PrintNightmare vulnerability has been a struggling issue for Microsoft in the past weeks, each time it seems to be addressed and fixed something new popped up and it still had issues.
Microsoft finally addressed the issue but with a price. The default behavior of Point and Print is changed. From this fix onward, the Point and Print driver installation and update behavior will require administrator privileges, which should prevent the exploit to the Windows Print Spooler that could be used by malicious individuals to gain administrative privileges in Windows.
The drawback of this fix from Microsoft is that non-elevated users may have difficulty adding or updating printers. Microsoft feels that the security risks caused by PrintNightmare are worth the tradeoff, though.
If you really want to let non-elevated users add printers, you can follow the instructions in this Microsoft Support article to disable this mitigation with a registry key. However, doing so will expose you to this known vulnerability and isn’t recommend.
As you know, networks that are domain-based are common in organizations and companies. These domain-based networks require multiple computers to be controlled through a single node known as a server. And the one that sets certain policies and restrictions on every system that is joined to the domain is the server administrator.
So if you want to add your computer to a domain, you need to have the following information available:
The domain name
A user account name that’s registered in the active directory associated with the server
Windows Enterprise, Pro, or education version
In this post, you will be guided on how you can join or remove a domain. To get started, follow the given instructions below.
Option 1 – Joining a domain
First, you need to connect your computer to the network associated with the server since your computer and the server have to be on the same network.
Next, click the Start button and then click on the gear-like icon for Settings to open it.
After that, navigate to this path: Accounts > Access work or school.
Then click on Connect. This will open a new dialog box and from there, select the “Join this device to a local Active Directory domain” option.
Afterward, you will be asked to enter the username and password of your domain account.
Now select your Account type and when you proceed, you have to restart your computer. Your domain account should now be created.
Option 2 – Removing a domain
You need to open the Windows 10 Settings app.
And from there, go to this path: Accounts > Access work and school.
Next, select the account you want to remove from the domain and then click on Disconnect.
A prompt will then appear that says, “Are you sure you want to remove this account? This will remove your access to resources like email, apps, network, and all content associated with it. Your organization might also remove some data stored on this device”. Just click on Yes.
This will give you a Disconnect from the organization prompt.
Now click on Disconnect and select Restart now to restart your computer. This will complete the removal process of the domain.
Most scrollbars are hidden by default if they are not used in Windows 11. If you are not ok with this feature and want scrollbars to be always visible and available do not worry, turning them ON is very easy.
Press ⊞ WINDOWS + I to open Windows settings
Click on Accessibility in the sidebar
Select Visual Effects
Inside visual effects settings find Always show scrollbars and switch it ON
Windows 11 will save settings automatically and apply setting right away. Close settings and continue with work.
Roblox is a very popular online game with millions of gamers playing it each day and as such it will naturally bring a lot of malware and attack on players trying to steal and exploit them for monetary gains. The latest attack and high-profile stealing of currency and assets happened exactly in Roblox.
Malicious activities have been reported to come from chrome extensions. So far 2 extensions have been identified that have hidden malware inside them but there could be more of them currently undetected. Extensions work as a front while in the back they mine user logins and other data in order to steal stuff from the Roblox platform.
To make things worse some of the malware is within long extensions like SearchBlox. The SearchBlox extension allows you to search quickly for other users if it was legitimate but has been compromised within the last month. There is evidence that people are stealing Roblox currency with the data gathered by the hidden backdoor in it.
SearchBlox extension is still Active in Chrome Web Store, with the primary listing still with the "Featured " badge. Google is actively removing malicious software from its storefront on a regular basis but this one still lingers in it.
If you or your kid have this Chrome extension installed, uninstall it right away and always be careful about which extension you install and give access to your system, keep them updated and check various blogs and article sites to inform yourself when a bad one is found.
Spying via some malicious app on the target phone is not a new thing but it can be very uncomfortable and even against the law in some countries.
Infecting the target phone can be done in various ways, another person can intentionally download and install applications on it, and you can install them via some phishing attacks or by an online scam. Once installed this piece of software presents a very serious invasion of privacy since it can track text messages, track phone location in real-time, record calls in real-time, eavesdrop on calls, take control of the camera and microphone, and many other applications.
Here are some common symptoms of mobile phones infected with spyware.
Symptoms of spyware
Random reboots Slow performance Strange text messages Overheating Unusual high data usage Non-familiar apps in the app list The fast drain of the battery Long shutdown time Strange interference and sounds during calls Signs of activity during standby mode
If your phone exhibits any of these symptoms you might have a spyware app installed and running on it.
Common spy apps
There are many apps that have been designed to spy on people that can be downloaded in the app store or on Google Play today. Most of these spyware apps are aimed at parents wanting to keep an eye on and protect their children. However, these can be used by anyone in order to spy on a target person via their phone.
Below is a list of common apps that can be used to spy on you. Many spyware apps require a phone to be ‘jailbroken’ or ‘rooted’ before being installed, this is when the phone’s operating system is changed to allow the phone to become unlocked and customizable.
mSpy : An undetectable spying app for iOS devices. It can be used to read your chats, see your location, view your email, check your call history, record your keystrokes, and more.
Spyera : This app requires rooted and jail-broken iPhones to work. It can go undetected and monitors phone calls and your call history. It even allows call recording and eavesdropping on live calls.
Flexispy : Flexispy prides itself as the #1 phone monitor for parents and can monitor everything from calls to social texts.
Umobix : This powerful spyware app has a dashboard that allows users to easily monitor someone’s location, calls, texts, keystrokes, all major social media, and more. You can detect Umobix because it heats up the infected phone and greatly affects the battery life of the infected device.
Ikey Monitor : Although it requires the device to be rooted for Android or jailbroken for iPhones, this spy app captures keystrokes, passwords, and screenshots, allows for call recording and supports multiple languages.
Clevguard : Available for both iOS and Android, Clevguard allows users to track GPS and Wi-Fi locations, capture screenshots remotely, and more. Due to a recent update, the spy app drains the target phone’s battery significantly.
Remove spyware from your phone
If any of the beforementioned apps are present on your phone you need to remove them right away.
Go to your phone settings and remove the malicious applications, then download some protection suite and scan the whole phone for any other trace of software remains or other malware apps.


 Most scrollbars are hidden by default if they are not used in Windows 11. If you are not ok with this feature and want scrollbars to be always visible and available do not worry, turning them ON is very easy.