Resize icons on desktop in Windows 10 in a matter of seconds!
Hello everyone and welcome to today's quick tip. If you have ever been dissatisfied with icon size on your desktop and any of the default sizes like small, medium large, etc have not been appropriate know that there is a quick way to resize icons on your desktop in between sizes.
All that you have to do in order to use this built-in feature is:
Press and hold CTRL and scroll with the mouse. That's it! Find your appropriate size for icons and enjoy.
![]()

HomeworkSimplified is a Browser Hijacking extension for Google Chrome developed by Mindspark. This extension will set your home page and new tab to MyWay.com.
From the Terms of Use: As part of the download process for the Toolbar, you may be given the option to reset your Internet browser’s homepage to an Ask homepage product and/or reset your new tab page to an Ask new tab product. If you do not wish to reset your homepage and/or new tab page to the Ask homepage and/or Ask new tab product(s), you can decline/opt-out of these features by checking or unchecking the appropriate box(es) during the download process for the Toolbar. While installing this extension monitors user browsing activity and sends it back to Mindspark servers, where they are later used/sold to better target and inject unwanted ads and sponsored content into your browsing sessions.Code 32, a Device Manager error, pops up when a device driver and other required services related to the driver are disabled.
The error code 32 is usually displayed in the following format:
“A driver (service) for this device has been disabled. An alternate driver may be providing this functionality. Code 32”
When a driver experiences a problem, it is reported to the Device Manager. Though error Code 32 does not cause detrimental damage to your system, it can cause the loss of functionality of the hardware device whose driver is disabled.
 Error Causes
If you come across error code 32 on your PC, then repair it immediately to ensure optimum PC performance. To resolve this error code, try the methods listed below. If you are not a computer programmer, don’t worry!
The listed solutions are easy to perform, require no technical background or expertise and more importantly, these solutions are very effective.
Simply follow the instructions to repair error code 32 on your system in just a few minutes.
Sometimes Device Manager error codes may appear due to temporary issues, which may be resolved simply by rebooting your system. If you are lucky, this might actually work.
By restarting your PC, you might be able to get rid of error code 32. However, if the error still persists, then try other methods given below.
To resolve error code 32, uninstall and then reinstall the driver. To uninstall the driver, simply follow these steps:
As discussed above, sometimes error code 32 may be triggered due to corruption of registry values.
If this is the underlying cause, then delete both the upper filters and lower filters registry values from the registry. This will take about 5 to 7 minutes. Here’s what you have to do:
This will hopefully resolve error code 32 on your system if the error was generated due to registry value corruption. However, if the error continues to appear, then resort to method 4.
Locate the problematic drivers and update them with the latest versions. This procedure is effective but time-consuming if performed manually.
It takes several minutes to identify problematic drivers and find the latest and compatible versions for each driver on the manufacturers’ website. And besides, you will have to perform updates continuously to ensure the error doesn’t occur again.
Method 5 - Download DriverFIX to Update Drivers Automatically
To avoid the hassle, download DriverFIX.
This is a cutting-edge and user-friendly software program embedded with intelligent system programming and intuitive technology that identifies problematic drivers and updates them with the latest and compatible driver versions in seconds, automatically and on a regular basis.
By installing it on your PC, you can update all the drivers and repair code 32 in no time.
Click here to download DriverFIX to resolve Device Manager error code 32 today!
Error code 0x80070005 is also known as the “Access Denied” error code because it prevents Windows users from accessing updates on their machines. This error code exists due to a lack of permissions on one’s system files or registry, permissions which are necessary for the updates via Windows Update to complete successfully. Error code 0x80070005 affects multiple versions of the Windows operating system including Windows 8, 8.1, and Windows 10.
 Error Causes
The lack of files or registry permissions which result in the presence of error code 0x80070005 on your device may occur based on several reasons. The most common of these relates to the existence of malware programs on your machine. Malware can disrupt and change system files which are required for the update process to occur. Thus, this error code requires a systematic approach to first find missing or corrupt files, as well as cleaning up malware programs that could be preventing your machine from accessing updates.
Windows 10 users can repair error code 0x80070005 by implementing manual repair procedures. These procedures include the installation of tools like SubInACL.exe which enable users to access information about registry keys and files, thus detecting issues that may be preventing them from completing the update process in Windows Update.
These manual repair methods are listed below with clear instructions that even average Windows users can understand and follow. However, if you attempt the procedures and experience any issues that prevent you from successfully fixing error code 0x80070005, contact a Windows repair technician. Also, consider downloading an automated tool since these tools often help users fix PC performance issues that cause error codes to occur within various versions of the Windows operating system.
By logging on as an administrator, Windows users may be able to access updates via Windows Update and thereby fix error code 0x80070005 in Windows 10. Follow the steps below to complete this manual repair method.
Once you are logged on as an administrator, go to Settings to access Windows Update. You will be given the option to install the latest updates. Select this option and wait for the process to be completed. If error code 0x80070005 reoccurs, however, you will need to proceed to manual repair method two which requires that you scan for malware.
This method is very simple. As you scan for malware on your machine, you will be able to detect any malicious programs that may be preventing you from installing updates on your device. This will in turn enable Windows users to clean up their system, fix the error code, and prevent others from occurring.
First, be sure you have a viable antimalware program on your machine. Scan for viruses and other harmful programs using this third-party software. Another option is to run Windows Defender on your machine.
Once you’ve completed the scan and error Code 0x80070005 moved any malware that may be present, attempt to install updates via Windows Update. If the problem causing error code 0x80070005 in Windows 10 is resolved, you will be able to install the updates. However, proceed to the next manual repair method if the error code remains on your device after you have scanned and removed malware programs.
The SubInACL tool enables Windows users to access security details and other information regarding files and registry permissions. Use this tool to fix files and registry permissions by following the instructions below.
Once you’ve been able to run the SubInACL tool and fix files or registry permissions, your machine should be able to access updates. If error code 0x80070005 reoccurs, however, you may need to contact a Windows repair technician to verify if issues unrelated to permissions are causing the error code to occur.
Stop: 0x0000000A (parameter1, parameter2, parameter3, parameter4) IRQL_NOT_LESS_OR_EQUAL *** Address x has base at x - filename
Error Causes
 Once you are in the control panel, switch your view to large icons and locate Indexing options.
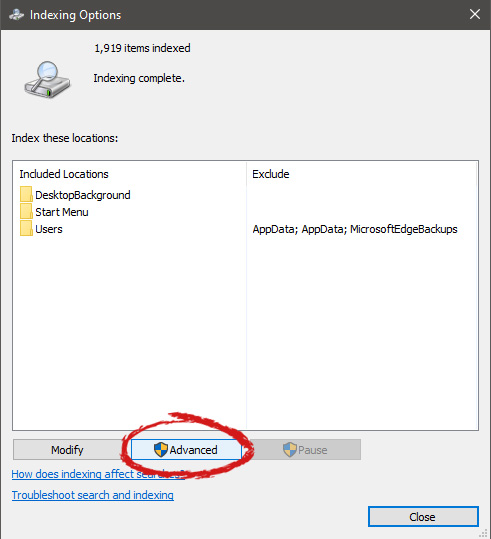
 Inside indexing options, click on advanced.
 In advanced options click on the rebuild and confirm.
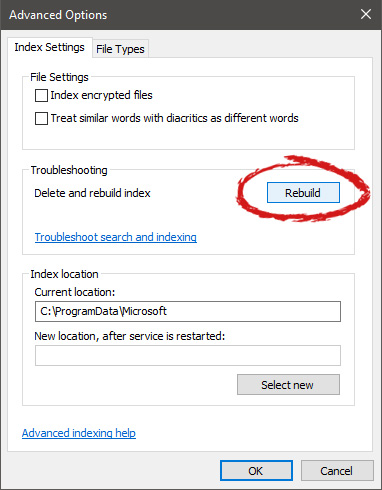 Leave your computer to finish and your searches should be working fine now.
 Computer voice control has moved a long way from its beginning routes and in today's age controlling your PC with voice is truly a reality and fully possible. Voice control is taking up the steam in everyday life, from simple commands in cars, Alexa, smartphones, TVs, etc. to modern computers.

Windows 10 has introduced voice control into PC with Cortana even during the installation process but a lot has changed from having a virtual assistant in begging days and in today's modern Windows 11 OS. You can now freely open apps, move, copy delete files, and even dictate in order to create a word document.
However, in order to take this advantage, you will need to turn it off first since it is disabled by default. Of course, you will need a microphone and some spare time to train Windows in understanding you properly.
Just like in Windows 10, in Windows 11 voice control is also in accessibility options and the first step is to turn ON Windows Speech Recognition.
Click on the Start button and type Settings into the search bar, click on Open, or press ENTER. On the left side of the settings, window locate and click on Accessibility. On the right part once Accessibility is selected scroll down and find a section titled Interaction and click on Speech. Turn on the switch next to Windows Speech Recognition.
A pop-up will appear that will lead you through the rest of the setup and that's it.
In order to make your voice control better, if you are not satisfied with the results, you can sample more of your voice into the algorithm to tune it more to your liking. Sadly this option is still deep in Control Panel.
Click the Start button and type in Speech recognition into the search bar, look for the search result with Control Panel displayed under it, and click on Open. Click on Train Your Computer to Better Understand You and follow the instructions.
The process will probably take a few minutes. The more data you provide to the speech recognition model, the more accurate it will be when interpreting your instructions. You can train the model multiple times, and each time you do, it should improve the accuracy.
PowerShell -ExecutionPolicy Unrestricted -Command "& {$manifest = (Get-AppxPackage Microsoft.<YOUR APP ID HERE>).InstallLocation + 'AppxManifest.xml' ; Add-AppxPackage -DisableDevelopmentMode -Register $manifest}"