If by any chance your search result in Windows is misleading, missing, or incorrect then it is a high probability that your search index is out of date. To repair this issue follow this guide step by step.
Please take note that rebuilding the whole search index can take a long time on some systems depending on the size of the index itself, CPU speed, HD speed, etc. Sometimes it can take even hours on large drives.
First, press ⊞ WINDOWS + R to open the run dialog and type in it Control panel to open the control panel.


Once you are in the control panel, switch your view to large icons and locate Indexing options.
 Inside indexing options, click on advanced.
 In advanced options click on the rebuild and confirm.
 Leave your computer to finish and your searches should be working fine now.

The docking station was promised upon release of the Deck but it was pushed back and now the official statement is that it is delayed again.

Valve said in an announcement on June 1:
“Due to parts shortages and COVID closures at our manufacturing facilities, the official Steam Deck Docking Station is delayed. We’re working on improving the situation and will share more info when we have it.”
Valve
The docking station was presented at the same time as Deck itself and the whole idea was to make Steam Deck work like a laptop docking station. It has ports for USB devices, displays, and network connections that became functional the moment Deck is placed on it. Docking supports a mouse, keyboard, and external display making it an almost full PC station if needed.
Valve confirmed that its official dock station will not improve performance so while you wait for its release you can use another docking station with a USB Type-C connector.
“Try that again, Something happened at our end, Waiting a bit might help, The error code is 0x80131500 in case you need it.”To fix this error, you can try changing your internet connection, toggle the date & time settings, change DNS, create a new user account, run the Microsoft Store Apps troubleshooter or reset the Microsoft Store as well re-register it using Windows PowerShell.
powershell -ExecutionPolicy Unrestricted Add-AppxPackage -DisableDevelopmentMode -Register $Env:SystemRootWinStoreAppxManifest.xml
 When you are in settings, on the left side move toward the bottom until you run into a tab that says On Startup and click on it. On right, a new section will open, click on Open a specific page or set of pages.
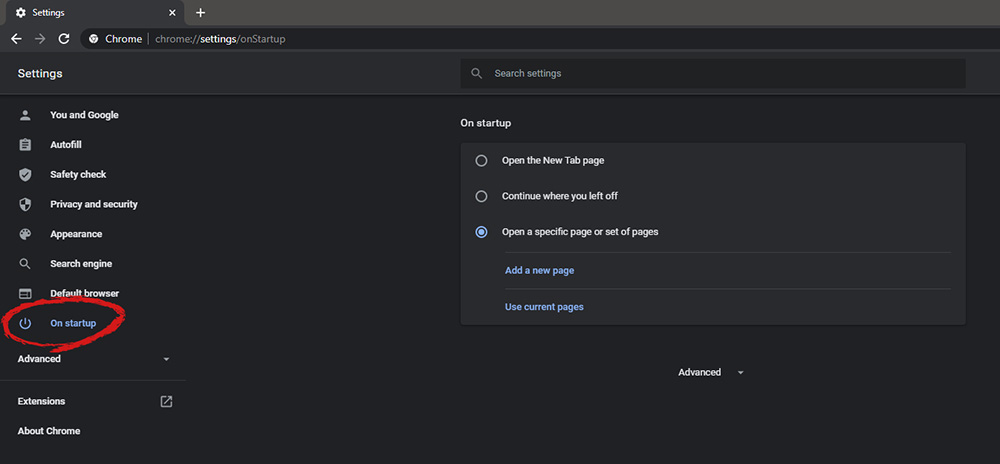 You will be presented with the option to add a new page by typing its URL or getting it from bookmarks or using a specific opened one. You can repeat this process until you have added all pages that you wish to be automatically opened once Chrome is opened for the first time.
 Error Causes
DISM.exe /Online /Cleanup-image /Scanhealth DISM.exe /Online /Cleanup-image /Restorehealth