Ieframe.dll is a Dynamic Link Library, a collection of small programs. It is stored in C:\WINDOWS\SYSTEM32. The function of this dll file is to convert Html code into web pages on IE (Internet Explorer). When this file gets corrupt, you start experiencing ieframe.dll errors on your system.
Ieframe.dll error is displayed in either of the following formats:
"Res://ieframe.dll/dnserror.htm#"
"Cannot find the file ieframe.dll"
"File Not Found C:WINDOWSSYSTEM32IEFRAME.DLL"
Solution
Error Causes
The Ieframe dll error code may occur due to multiple reasons. These include:
Incorrect Firewall settings
Ieframe.dll corruption and damage
Missing Ieframe.dll file
Internet Explorer issues
Viruses and malware attack
Outdated security software applications
If you wish to continue browsing on Internet Explorer, then it is important for you to resolve this error right away.
Further Information and Manual Repair
Here are some of the best solutions to resolve the Ieframe dll error on your PC:
Cause: Missing Ieframe.dll file
Solution: If Ieframe dll error file is missing, this means you have either accidentally deleted it while uninstalling a certain program that also shared this file.
Therefore the best way to resolve the issue is to restore the missing Ieframe.dll file. To do this check the recycle bin. If you find the file, simply restore it in the following path C:\Windows\System32.
However, if you are unable to find it, then download it from a reliable website.
Cause: Incorrect Firewall Settings
Solution: In case the error is generated due to incorrect Firewall settings, then try disabling this software. See if this works and resolves the error.
Cause: Internet Explorer Issues
Solution: Sometimes the Ieframe dll error can occur due to Internet Explorer issues. Here it is recommended to reinstall and update the latest version of IE on your system. This can be done by removing the program from the system.
Go to the Control Panel, click Add/remove programs, and uninstall the program. After uninstalling the old version, install a new and updated version of IE on your system and try running it again.
If it works, great the error is resolved. However, if it persists, then this means the problem is deeper and bigger than you think. The reason can be severe viral infection and malware attack not just damaging Ieframe.dll file but also exposing your system to privacy errors and threats.
Cause: Damaged and Corrupt Ieframe.dll files
Solution: The files can get corrupt when the registry overloads with data. It stores important and unnecessary files like junk files, cookies, internet history, temporary files, and invalid registry entries.
Such files take up a lot of disk space and damages dll files. To resolve this issue it is advisable to download Restoro. This is a powerful registry cleaner, that detects and resolves all registry issues in seconds. It wipes out unnecessary and obsolete files cluttering the registry and restores the damaged Ieframe.dll files.
It is efficient, safe, and compatible with all Windows versions. It has an intuitive interface and easy navigation which makes it simple and easy to use.
Cause: Viral Infection
Solution: If the underlying cause is a viral infection, Restoro takes care of that too. It is more than a registry cleaner.
It is embedded with a powerful antivirus that removes all malicious software from your PC including viruses, Trojans, spyware, malware, and adware. And unlike a typical antivirus, it does not reduce the speed of your system. Its system optimizer utility boosts your PC speed dramatically.
Click here to download Restoro on your PC today and resolve Ieframe dll error today!
If you have suddenly run into a problem when trying to connect or pair your Bluetooth keyboard with your Windows 10 computer, read on as this post will guide you on how exactly you can resolve the problem.
This kind of problem typically occurs when you’ve disabled the Bluetooth option. However, this option is already enabled and you still encountered the same error message saying, “Check the PIN and try connecting again”, then you need to troubleshoot the problem further.
In most cases, this kind of issue can be fixed when you restart your computer and go to the Windows Settings and select the “Add Bluetooth or other devices” option and then put the keyboard into pairing mode. And when the keyboard appears in the “Add a device” dialog box, just select it. On the other hand, if your Bluetooth keyboard won’t get connected to your Windows 10 computer and you encounter an error that says, “Can’t pair Bluetooth keyboard, Check the PIN and try connecting again”, then you need to check out the options provided below but before you do so, make sure that you create a System Restore point first as some of the troubleshooting options provided involves the Windows Registry.
Option 1 – Try to use the Device Pairing Wizard
The Device Pairing Wizard is the one that allows your computer to look for any new devices and display them underneath it. All you have to do to use this wizard is to follow its instructions to connect your Bluetooth device to Windows 10. To get started, follow these steps:
First, tap the Win + R keys to launch the Run utility and type “devicepairingwizard” in the field, and then hit Enter to run the Device Pairing Wizard.
After that, wait for a couple of seconds until the devices appear. Once they do, select the Bluetooth device you wish to add.
A new screen with a passcode should appear instantly. You need to take note of the given passcode and type them on your Bluetooth keyboard.
Once done, tap Enter. This should help in pairing your computer to your Bluetooth keyboard.
Option 2 – Try to use the Registry Editor
The next thing you can do to resolve the pairing issue with your Bluetooth keyboard is to use the Registry Editor by following these steps:
Tap the Win + R keys to open the Run utility and type “Regedit” in the field and then hit Enter to open the Registry Editor.
Next, navigate to this registry path: HKEY_USERS/.DEFAULT/Software/Microsoft/Windows/CurrentVersion/Bluetooth/ExceptionDB
From there, look for the folder named “Addrs” and expand it. If you see any folders or keys under it, select them and delete them. These keys represent the MAC address of your Bluetooth devices.
Once you’re done, restart your computer and try to pair your Bluetooth keyboard once more.
Option 3 – Try running the Bluetooth Troubleshooter
As you know, Windows 10 has various troubleshooters with user-friendly interfaces where you can utilize them to fix issues in your PC. And since you’re dealing with some Bluetooth problem, you have to run the Bluetooth Troubleshooter.
Open the Windows 10 Settings.
Then go to Update & Security > Troubleshoot.
You should find the option for Bluetooth on your right-hand side – click on it then click on the “Run the troubleshooter” option.
Now follow the next screen options.
Option 4 – Try to reinstall or update the Bluetooth driver
The issue might have something to do with the Bluetooth drivers. It could be that it is outdated and needs to be updated or that you recently updated it and since you have trouble pairing your Bluetooth keyboard, you can update, rollback, or uninstall the Bluetooth drivers. How? Follow the steps below.
Tap the Win + X keys to open the Device Manager.
Next, look for the Bluetooth device and right-click on it.
Select the option “Update driver”.
After that, a new popup window will appear. In there, select the option, “Search automatically for updated driver software”.
Note: Checking the update may take a few minutes so you’ll have to wait until it finishes. If it is able to find an update, you must install it.
Stable Diffusion is a machine learning model developed by Stability AI to generate digital images from natural language descriptions. The model can be used for different tasks like generating image-to-image translations guided by text prompts and upscaling images.
Unlike competing models like DALL-E, Stable Diffusion is open source and does not artificially limit the images it produces. Stable diffusion was trained on a subset of the LAION-Aesthetics V2 data set. It can run on most consumer hardware equipped with a modest GPU and was hailed by PC World as "the next killer app for your PC".
Since Stable Diffusion is run locally and not in the cloud, as mentioned there is no limit to the number of images that you can produce but in order to use it you will have to get down a little dirty with setting your PC environment for it since it is not really an application, it is a command line text based descriptor that will use python to generate your images, so there is no install nor GUI.
In this guide, we will show you how to both install and run Stable Diffusion on your local PC so you can start producing some cool images all by yourself.
Hardware and software requirements
Make no mistake, Stable Diffusion will not run on a potato PC, in order to harvest the power of AI-generated imagery this is what you will need:
A GPU with at least 4GB of VRAM
10GB of hard disk space
Python and libraries (Miniconda3 installer will install everything you need)
The Stable Diffusion files
Git
Any OS (Windows, Linux, macOS)
Installing components
For this tutorial, we are covering the installation and running of Stable Diffusion on Windows PC. The steps presented here are presented in a way that installation can be performed on any operating system but precise instructions will be for Windows OS.
GIT
The first thing to do is to install GIT. It is a tool that will let you easily maintain and install repos from the internet. to install it go to: https://git-scm.com/ and click on download. Follow the instructions for your version of the operating system. If you are a developer you are familiar with GIT and if you already have it installed you can skip this step.
One thing that is important when installing GIT locally is to select to use it via the command line (the second option that says "Git from the command line and also from 3rd-party software").
Miniconda3
Now when we have GIT installed, next thing is to use Miniconda3 to install python and all required libraries that are needed. Get the installer at: https://docs.conda.io/en/latest/miniconda.html
Miniconda3 is basically an easy installer so you do not have to install tons of stuff manually from different websites and sources, it is nicely packaged in the installer that will take care of everything.
Stable Diffusion
After the previous two steps, we are ready now to actually install Stable Diffusion. Go to https://huggingface.co/CompVis/stable-diffusion#model-access and install the latest library (as of the writing of this article currently it is stable-diffusion-v1-4-original, the last one on the right), the library is almost 5GB in size so be prepared for big download.
Once downloaded click on the Windows start button and type in Miniconda3 and click on open. Create a folder and name it how you want on a drive of your choice. For this example, we will install it all in disk C under folder AI_art, follow the instructions below but use your own names and destination instead. Do not close Minicoda3 after typing commands!!!
cd c:/
mkdir AI_art
cd AI_art
Extract GitHub files that you have downloaded into your new folder and get back to Minicoda3 and type the next commands:
Let the whole process finish, some files are large and it might take a while. After the whole process is finished and completed, copy the checkpoint file that you have downloaded into: C:\AI_art\stable-diffusion-main\models\ldm\stable-diffusion-v1
After the file is copied rename it to model.ckpt and you are finished.
Running Stable Diffusion
The created environment is needed in order to actually use Stable Diffusion to create images. Each time you want to use it you will have to run it, so go into Miniconda3, and inside it type:
conda activate ldm
cd C:\AI_art\stable-diffusion-main
after we are inside the folder call the script with the parameters:
python scripts/txt2img.py --prompt "TXT DESCRIPTION OF IMAGE THAT YOU WANT TO CREATE" --plms --n_iter 5 --n_samples 1
and that's it, your image is created and it is located in C:\AI_art\stable-diffusion-main\outputs\txt2img-samples\samples
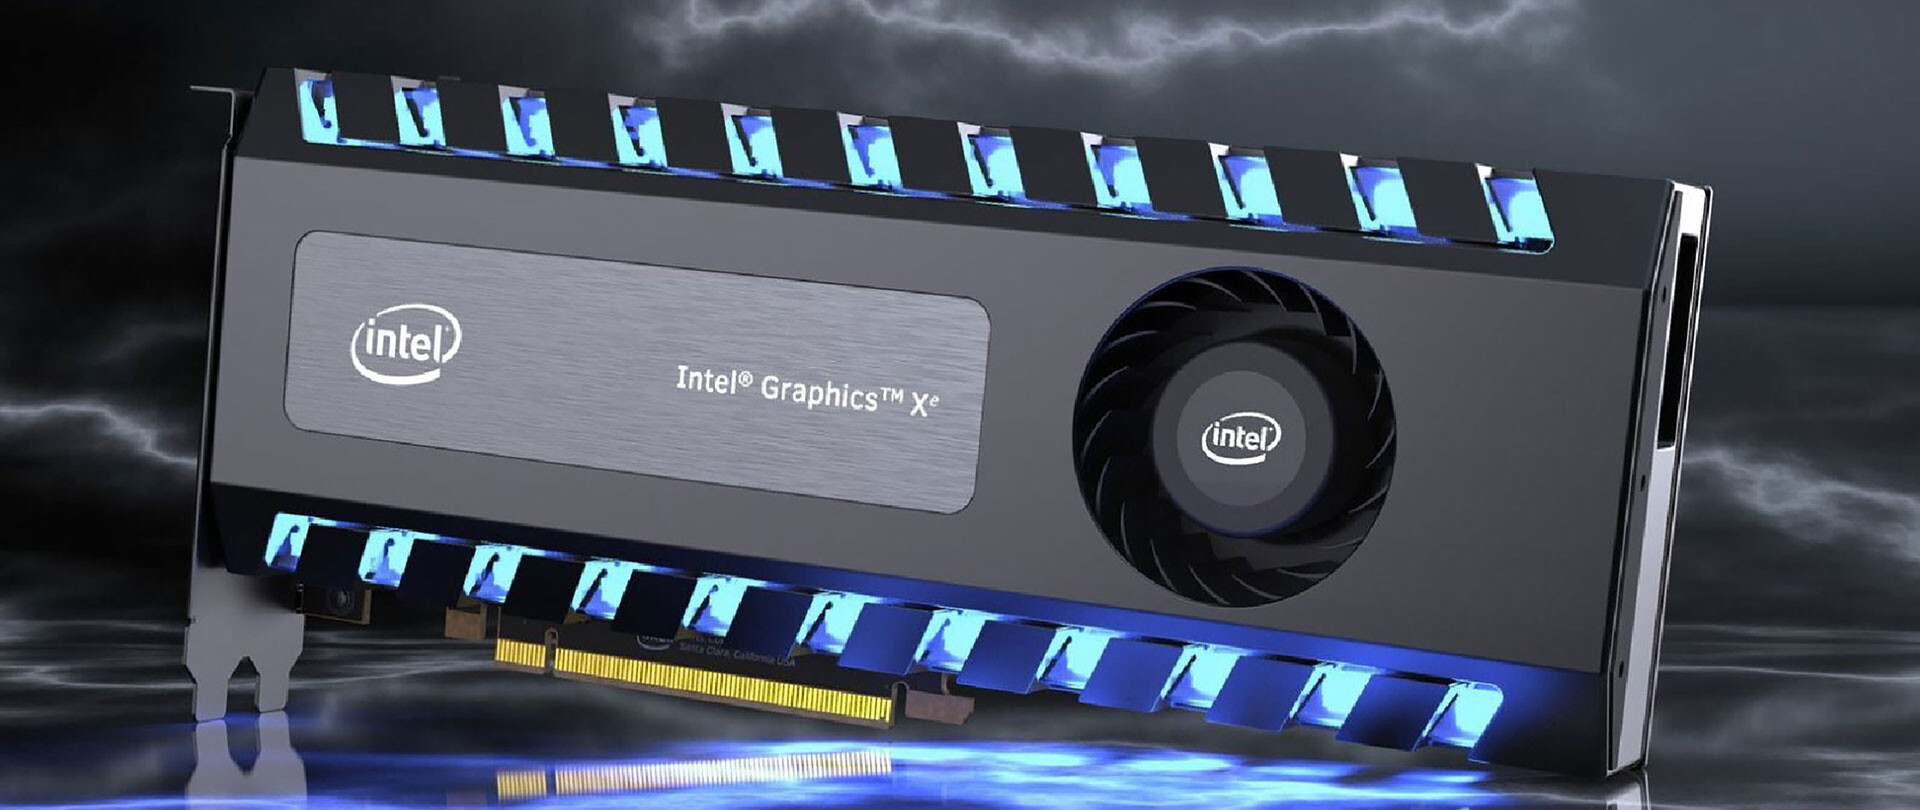
This is not the first time that Intel is trying to enter the GPU field but its adventures so far were, well let us agree not so good. All of that is hoping to be changed with the upcoming ARC GPU. The first generation of Arc graphics, code-named Alchemist and previously known as DG2, will support desktop PCs and laptops and is set to arrive in the first quarter of 2022.
Alchemist will have hardware-based Ray tracing and AI-driven supersampling. This indicates that GPU is aimed to compete in the Hi-end spectrum and battle side by side with Nvidia and AMD on the market. Alchemist will also pack full DirectX 12 Ultimate support.
Intel also released names for the next upcoming future generations of ARC GPUs: Battlemage, Celestial & Druid. More information about ARC products will be released later this year.
“Today marks a key moment in the graphics journey we started just a few years ago. The launch of the Intel Arc brand and the reveal of future hardware generations signifies Intel’s deep and continued commitment to gamers and creators everywhere,” Roger Chandler, Intel vice president, and general manager of client graphics products and solutions.
Error code 0xd0000272 is an activation error code that occurs when Windows users are unable to activate their Windows operating system. This error code features common symptoms which include the following:
Inability to activate Windows 10 operating system
Message box with error code 0xd0000272
Solution
Error Causes
When error code 0xd0000272 occurs in Windows 10, it is usually due to issues related to the Windows activation servers. In such a case where the error code occurs due to an activation server that is temporarily unavailable, users may need to wait for a few hours until the activation server is available. Their copy of Windows will then be automatically activated. Once the activation process is not done accordingly, you might encounter other Windows 10 errors such as error code 0xc004f034.
Further Information and Manual Repair
As is the case with many activation error codes, Windows 10 users can perform several manual repair methods to determine the cause as well as fix the error code affecting their device. Instead of passively waiting to see if your activation error code will be fixed on its own, resolve error code 0xd0000272 through the manual repair methods available. Below are simple instructions that when followed can lead to your success.
Method One: Verify Internet Connection
Check Settings to verify if your machine is connected to the Internet. This is one of the causes of various error codes which affect Windows 10. Also, this manual method is a simple process that can help Windows users recognize or eliminate factors that may or may not be affecting their system. To check your Internet connection, follow the simple instructions below.
Step one: Click the Start button and select Settings
Step two: Select Network & Internet
Step three: Click the Status section of the Network & Internet tab
Once you’ve been able to verify an Internet connection or troubleshoot any issues related to your network, go to Update & security. Make an attempt to activate your system. If you are successful, you will be able to access all the features and benefits offered via your copy of Windows. However, move to the next manual method below if error code 0xd0000272 reoccurs.
Method Two: Run Windows Update Troubleshooter
Your inability to activate Windows 10 may be related to an issue with Windows Update. To verify whether or not Windows Update is functioning properly, run Windows Update Troubleshooter.
You’ll need to visit the Microsoft website to access their Windows Update Troubleshoot tool. Once you’ve downloaded the troubleshooter, run the tool. After running the tool, check if you are able to access Windows Update services as well as activate Windows 10. If the problem with error code 0xd0000272 persists, however, follow the instructions provided for manual repair method three detailed below.
Method Three: Disable Proxy Settings
Another option available to individuals experiencing error code 0xd0000272 in Windows 10 is to manually disable their machine’s proxy settings. After disabling the proxy settings, remember to open the Windows Update tab to complete the activation process. See the instructions provided below to disable proxy settings.
Step one: Press Windows key + R
Step two: Type control then click OK
Step three: Select Settings then go to Network & Internet
Step four: View connection settings
Step five: Click on the Network tab
Step six: Click Proxy -- turn off proxy
Once you have successfully disabled your proxy settings, open Windows Update. Select the activation option to access your copy of Windows 10. If you are unable to complete the activation process, however, contact a Windows repair technician.
Method Four: Use an Automated Tool
Error codes in Windows often occur due to poor maintenance of one’s PC. To improve your system and reduce your machine’s risk of experiencing error codes, download a powerful automated tool. This tool is both powerful and user-friendly, making its benefits accessible to even the most non-technical Windows users.
The Photos app in Windows 10 is the default photo viewer. However, there are times when it might encounter some problems while you use it. One of these problems in the Photos app reported recently is where users try to export or share the images and videos from the app but weren’t successful in doing so. This can be really quite a hassle in opening images on your computer, especially since the Photos app is the default photo viewer in Windows 10 and if you don’t have any other photo viewer app installed.
This kind of problem in the Photos app can be noticed when you try to use the “Remix” function for both photos and videos. In other words, this problem can occur with just pictures, videos, as well as a combination of both. So if you are trying to watch a video using this app, then you wouldn’t be able to play it. In such a case, the only thing you can hear is the audio but you wouldn’t see anything except for a hazy purple screen that has not export or share option.
There are several possible causes for this problem and it could be fixed by updating the display driver/graphics driver or disabling the hardware-accelerated video encoding. You could also try updating or resetting or reinstalling the Photos app. For more details, follow each one of the suggestions provided below.
Option 1 – Try to update the Graphics driver
You can try to update your Graphics card driver using the Device Manager in your computer to resolve the blank dialog boxes problem or you can also go directly to the website of your graphics card manufacturers like NVIDIA, Intel, or AMD and go to the section called Drivers then check if there’s a new available update – if there is, download and install it.
To update your Graphics driver via Device Manager, refer to these steps:
First, boot your computer into Safe Mode.
After that, tap the Win + R keys to launch Run.
Type in msc into the box and tap Enter or click OK to open the Device Manager.
After that, a list of device drivers will be displayed. From there, look for the Display Adapters and click on them.
After that, right-click on each entry under the Display Adapters and select the “Uninstall Device” option from the menu.
Now restart your computer.
After restarting your computer, go to the Settings app and Check for Updates in the Windows Update section.
Option 2 – Try disabling the hardware-accelerated video encoding
The next thing you can do to fix the problem is to disable the hardware-accelerated video encoding in your computer. To do that, follow these steps:
Open the Photos app and click on the visible three dots located in the upper right corner of the app and then select Settings.
From there, you should see the version number of the app in the “About this app” section. So if your app is version 2018.18071.****0.0 or greater, you should see the Video section which has a toggle button.
Turn that toggle button off to disable hardware-accelerated video encoding in the Photos app. This should fix the problem, if not, simply follow the next given options below.
Option 3 – Try to update the Microsoft Photos app
Open the Microsoft Store and click on the three horizontal dots for the menu located on the top right portion of the window to see the options.
Next, select Downloads and updates and then click the Get updates button in the top right. This will install any pending updates for all the apps including the Microsoft Photos app using the Microsoft Store.
Option 4 – Try resetting the Photos app
To get started in resetting the Photos app, open the Windows 10 Settings.
Then go to Apps > Apps & features.
After that, scroll down until you see the Photos app option – click on it and open its Advanced options.
From there, you will see the Reset button, click on it and click and then click on it once more to confirm.
Note: The process may take a couple of minutes to complete. Once it’s done, open the pictures again using the Photos app.
Option 5 – Try reinstalling the Photos app
If none of the options given above worked, then you might want to consider reinstalling the Photos app. Unlike what most users think, it isn’t really that hard reinstalling preinstalled apps as you have the Windows PowerShell for that. To use this program in reinstalling the Photos app, follow these steps:
Open the Windows PowerShell program with admin privileges and key in the following command:
Set-ExecutionPolicy Unrestricted
After that, execute this second command to re-register and reinstall the Microsoft Photos app.
Note: In the command given, do not forget to replace the “PackageFullName” with the actual package name for the Photos app. After executing the command, it will uninstall the Photos app from your computer so you need to install it again from the Windows Store by simply looking for it. Once you found it, just click on install to start the installation process.
As you know, one of the most popular browsers these days is the Google Chrome browser. Browsing the web every day using your Chrome browser, leaves a trail of browsing history. Google uses the browser history to streamline and make the browsing experience a lot better. But there are times when Chrome users experience trouble in deleting their web browsing history, data, cookies, and cache. In this post, you will be guided through specific settings that will help you in getting rid of the browsing history in Chrome.
There are several options you can take in clearing the browsing history in Chrome. But before you try them, you can try the basic one first using the following steps:
First, click on the three-dotted icon and click on History from the menu.
Next, click on the Clear browsing data option and select “All time”.
Then select the type of history you want to delete.
After that, click on the Clear Data button.
If clearing the browsing history in Chrome the old way didn’t work, then you can try to check out the options provided below.
Option 1 – Clear the cache using the File Explorer
The first thing you can do is to clear the cache by using File Explorer. To get started, refer to these steps:
From the given locations above, replace “YOUR USERNAME” with the user profile name you use and then search for a file named “Cookies”.
Now delete its contents.
Option 2 – Reset Chrome
Resetting Chrome can also help you fix the error. This means that you will be restoring its default settings, disabling all the extensions, add-ons, and themes. Aside from that, the content settings will be reset as well and the cookies, cache, and site data will also be deleted. To reset Chrome, here’s what you have to do:
Open Google Chrome, then tap the Alt + F keys.
After that, click on Settings.
Next, scroll down until you see the Advanced option, once you see it, click on it.
After clicking the Advanced option, go to the “Restore and clean up option and click on the “Restore settings to their original defaults” option to reset Google Chrome.
Now restart Google Chrome.
Option 3 – Try to clean reinstall Chrome
There are instances when programs leave files behind after you’ve uninstalled them and the same thing can happen to Chrome so before you reinstall Chrome, you have to make sure that you have deleted the User Data folder. To do so, refer to the following steps:
Hit the Win + R keys to open the Run dialog box.
Next, type “%LOCALAPPDATA%GoogleChromeUser Data” in the field and hit Enter to open the User Data folder.
From there, rename the default folder and name it something else, e.g. “Default.old”.
After that, install Google Chrome again and check if the issue is now fixed.
Libcurl.dll is a Dynamic Link Library file; a component of Google Earth. Google Earth is a 3D software tool.
Libcurl.dll file is visible within a 3D application with the help of which software users can see satellite images, maps, and other geography-related information from their computers.
The Libcurl.dll file enables users to map the earth using superimposing images received via satellite imagery and also aerial photography. However, Libcurl.dll error messages may occur while using or installing this program.
The libcurl.dll error message is displayed in either of the following formats:
"Cannot find [PATH]libcurl.dll"
"The file libcurl.dll is missing."
"Libcurl.dll Not Found"
"This application failed to start because libcurl.dll was not found. Re-installing the application may fix this problem."
Solution
Error Causes
Libcurl.dll may occur due to several reasons. These include:
Bugged program
Viral infection may add malicious codes to Libcurl.dll file and generate error messages
Registry issues
Missing libcurl.dll file
Hard disk failure
Misconfigured system files
If you experience difficulty in using Google Earth and come across libcurl.dll error message, it is advisable to resolve the error immediately typically because this error has severe consequences.
If not fixed timely, it can lead to the blue screen of death errors, system hang-ups and freezes, sluggish PC performance, PC crashes and browser crashes, slow internet speed, and other system errors.
Further Information and Manual Repair
This error is crucial but the good news is that it is easy to fix. To resolve it, you don’t have to hire a technical expert and pay hundreds of dollars.
You can repair the issue with ease by yourself regardless of whether or not you are technically sound. Continue reading to find out the best solutions to fix libcurl.dll error code on your system without any hassle.
Here are some of the easiest and the best methods to resolve libcurl.dll error:
1. Check your recycle bin
Since .dll files are shared by multiple programs, there is a possibility that you might have accidentally deleted libcurl.dll file when uninstalling a certain program on your system which was also sharing this file.
And because of this, you may experience the missing libcurl.dll error message. To resolve it, all you have to do is to check your recycle bin. If you find the file here, restore it. Once restored, try running the program again! If the error code does not appear, then this means it is resolved.
However, if it continues to persist, then try other solutions given below.
2. Scan for Malicious Software on your System
While downloading files and checking unknown emails malicious software like viruses, malware and spyware can also enter your PC.
Such software can damage and corrupt dll files. This could be the underlying cause of libcurl.dll error on your PC too. So, to resolve the issue, scan and remove malicious viruses and spyware from your system by using a powerful anti-virus.
However, please note, anti-viruses are notorious for slowing PC performance and also sometimes you may also have to stop all other activities on your PC.
3. Clean the Cluttered Disk, Repair dll files and Restore the Registry
Libcurl.dll file error may also occur due to hard disk failure. This triggers registry issues. If you don’t clean the registry every now and then, it overloads the hard disk with files.
These include both important and unnecessary files like internet history, temporary files, cookies, junk files, invalid registry entries, and bad keys. These clutter the disk, damaged dll files, and the registry.
Therefore first you need to clean the cluttered disk, repair libcurl.dll files and restore the registry. Executing it manually can take a lot of time as you may find it complex if you are not a computer programmer. However, the best, easiest, and quickest way to clean, repair, and restore the registry is to download Restoro
Why Restoro?
Restoro is an innovative, advanced, and multi-functional PC repair tool loaded with powerful and PC performance boosting utilities including an intuitive registry cleaner, an antivirus, Active X controls, and class module, and a system optimizer.
So, whether the libcurl.dll error message is triggered by a viral infection, hard disk failure, or registry issues, this tool takes care of all!
The registry cleaning feature scans all registry issues, cleans the hard disk by removing unnecessary and obsolete files, repairs damaged and corrupt dll files, and restores the registry thereby resolving libcurl.dll error in seconds.
Simultaneously, the antivirus utility removes viruses and malware if found. And the system optimizer feature ensures optimum PC performance.
Restoro is easy to navigate and operate. It is user-friendly, safe, bug-free, and efficient. Furthermore, it is compatible with all Windows versions.
Click here to download Restoro and repair your PC and resolve libcurl.dll error today!
If you find that the scroll bar in your Google Chrome browser is missing all of a sudden, and it becomes difficult for you to scroll down the web page and see its content, worry not for this post will guide you on what you can do to resolve this problem.
Usually, when the mouse cursor stays hidden in the corner and only appears when you point it to the edge of the screen. However, there are instances when it won’t appear which makes navigating the web page you are visiting quite impossible. So if you encounter this kind of strange behavior on your Google Chrome browser, there are several suggestions you can check out to resolve it. In most cases, updating the browser resolves the problem, but if it does not, you can try restoring the browser’s settings to their default state by resetting Chrome or you could also disable hardware acceleration or disable the overlay scrollbars flag. For more information, follow each one of the options provided below.
Option 1 – Reset Google Chrome
Before you proceed, make sure that the Chrome browser is not running anywhere in the background via Task Manager. Once you’ve made sure that it’s no longer running, refer to these steps:
Tap the Win + R keys to open the Run dialog box.
Then type “%USERPROFILE%AppDataLocalGoogleChromeUser Data” in the field and tap Enter to open this location.
From there, look for the Default folder and then tap the Shift + Delete button and if a confirmation prompt appears, click on Yes.
After deleting the Default folder, open Google Chrome and click on the three vertical dots icon located in the top-right corner to open the menu.
Next, click on Settings and scroll down and then click on Advanced to open the Advanced Settings.
Then scroll down until you see the “Reset and clean up” section and click the “Restore Settings to their original defaults” option.
After that, you will see a confirmation box and from there, click on the Reset settings button to reset your Google Chrome browser.
Option 2 – Try to disable the Hardware Acceleration
For better performance, Google Chrome uses the Hardware Acceleration by default. Unfortunately, there are just some cases when your hardware, GPU to be specific, might not be able to cope with the requirements, resulting in the black screen issue. And if this is your case, you should try to disable the hardware acceleration from your Google Chrome browser settings panel. To do so, follow the steps below.
Open the Google Chrome settings page.
Click on the Advanced button to get more options.
Look for the option called “Use hardware acceleration when available” and then disable it by toggling the button to the left.
After that, check if the screen flickering issue in Chrome is fixed.
Option 3 – Try to disable “Smooth Scrolling” in Chrome
Disabling “Smooth Scrolling” in Chrome might also help you fix the issue. To do so, follow these steps:
Open Chrome and type “chrome://flags” and hit Enter.
Next, look for a flag named “Smooth Scrolling”. You can scroll down until you find it or search it in the Search Flag bar. Note that Smooth Scrolling is enabled by default in the newer versions of Chrome.
After that, select the drop-down menu and select Disabled.
Recently, some users reported not being able to boot up their Windows 10 computers. And during the startup phase, at some time, the bootup sequence is halted with a Recovery error along with an error message saying, “Your PC/Device needs to be repaired” with an error code of 0x0000605.
This kind of error message indicates that Windows was not able to verify the digital signature for the file as the signing certificate or it could be that it has expired. To resolve this error, you can follow the potential fixes given below and see if you stumble upon a fix that might work out for you.
Option 1 – Change the Date & Time settings in the BIOS
Some users reported that they were able to fix the error by changing the Date & Time settings in the BIOS. Upon checking, they saw that in their BIOS settings, the date was off several years. As a result, the incorrect date and time settings end up ticking the system into believing that the Windows build has expired long before the actual expiration date.
You can check if the error pops up due to the same reasons by accessing the BIOS settings. To do so, you have to tap the Boot key that’s associated with your motherboard manufacturer during the initial startup phase. After that, you can search for a particular boot key online or you can also tap keys like F2, F4, F8, F10, F12, and the Delete key.
Once you’re able to access the BIOS settings, locate the Date & time or anything similar, and then check if the date is correct or not. If not, you need to change the date to the actual date and then save the changes made and restart your computer and then check if the issue is now fixed or not.
Just remember that if the actual date is past the expiration date of the build you have, you need to change it to an older date. If your Windows 10 PC is able to boot back up, you have to update it to a stable Windows build and then go back to the BIOS settings and change the date to the current one else you will definitely encounter Windows update errors in the future as well as security alerts.
Option 2 – Perform a clean install of a stable Windows 10 build
If every system boot fails accompanied by a BSOD error with error code 0x0000605 “A component of the operating system has expired” and you’ve already followed every instruction on option 1, then it’s most likely that your current Windows build has already expired. Remember that almost all the Windows 10 Insider Preview builds (98xx) are created along with an expiration date and when your computer reaches the expiration date, you won’t be able to boot your computer up.
Note that the exact expiration date varies based on the build number. And prior to the expiration date, the operating system will start to display some error warnings telling you that the build will expire and urge you to update the most recent build available. And so once the computer reaches its expiration date, it will begin to reboot every three hours until it no longer boots up which is about 2 weeks approximately after the license has expired.
Once the expiration date is up and your computer no longer boots up, you need to perform a clean install and then install the latest Windows 10 build to resolve the issue once and for all.
As of the time of writing this article you no longer need or are required to have a password if you plan to log in to your Microsoft account. Microsoft explored various options for account security and came to the conclusion that passwords are obsolete.
Microsoft is letting you access your account through the Microsoft Authenticator app, Windows Hello, a security key, SMS verification, or email verification code. All of these methods are way better in terms of security than passwords.
How to turn these features on?
To get rid of your Microsoft password, the process is simple. You simply need to go to your Microsoft account, click “advanced security options,” then “enable passwordless accounts” under the Additional security section.


 This is not the first time that Intel is trying to enter the GPU field but its adventures so far were, well let us agree not so good. All of that is hoping to be changed with the upcoming ARC GPU. The first generation of Arc graphics, code-named Alchemist and previously known as DG2, will support desktop PCs and laptops and is set to arrive in the first quarter of 2022.
Alchemist will have hardware-based Ray tracing and AI-driven supersampling. This indicates that GPU is aimed to compete in the Hi-end spectrum and battle side by side with Nvidia and AMD on the market. Alchemist will also pack full DirectX 12 Ultimate support.
Intel also released names for the next upcoming future generations of ARC GPUs: Battlemage, Celestial & Druid. More information about ARC products will be released later this year.
“Today marks a key moment in the graphics journey we started just a few years ago. The launch of the Intel Arc brand and the reveal of future hardware generations signifies Intel’s deep and continued commitment to gamers and creators everywhere,” Roger Chandler, Intel vice president, and general manager of client graphics products and solutions.
This is not the first time that Intel is trying to enter the GPU field but its adventures so far were, well let us agree not so good. All of that is hoping to be changed with the upcoming ARC GPU. The first generation of Arc graphics, code-named Alchemist and previously known as DG2, will support desktop PCs and laptops and is set to arrive in the first quarter of 2022.
Alchemist will have hardware-based Ray tracing and AI-driven supersampling. This indicates that GPU is aimed to compete in the Hi-end spectrum and battle side by side with Nvidia and AMD on the market. Alchemist will also pack full DirectX 12 Ultimate support.
Intel also released names for the next upcoming future generations of ARC GPUs: Battlemage, Celestial & Druid. More information about ARC products will be released later this year.
“Today marks a key moment in the graphics journey we started just a few years ago. The launch of the Intel Arc brand and the reveal of future hardware generations signifies Intel’s deep and continued commitment to gamers and creators everywhere,” Roger Chandler, Intel vice president, and general manager of client graphics products and solutions.  As of the time of writing this article you no longer need or are required to have a password if you plan to log in to your Microsoft account. Microsoft explored various options for account security and came to the conclusion that passwords are obsolete.
Microsoft is letting you access your account through the Microsoft Authenticator app, Windows Hello, a security key, SMS verification, or email verification code. All of these methods are way better in terms of security than passwords.
As of the time of writing this article you no longer need or are required to have a password if you plan to log in to your Microsoft account. Microsoft explored various options for account security and came to the conclusion that passwords are obsolete.
Microsoft is letting you access your account through the Microsoft Authenticator app, Windows Hello, a security key, SMS verification, or email verification code. All of these methods are way better in terms of security than passwords.