Logo

Open specific pages each time Chrome starts

When we are working on our computer, we have tendencies to make it look and behave to our best needs and however, best suits us. The Internet has crawled into our lives and made itself a must-have in modern society, internet browsers as a crucial piece of software for viewing the web have also grown and made themselves to be more open for user settings and personalization, Chrome, one of the most popular browser has the option to open a specific set of pages one it is opened and that is what we will cover today in this tutorial.

No matter would you like to by default open some online store, maybe an email or news website, you can open each of them or all of them once Chrome is run, making your daily routine more enjoyable and stress-free.

The first thing, of course, is to start Chrome itself, once Chrome is up, click on three dots in the upper right corner of the Chrome window and select settings.

Google chrome settingsWhen you are in settings, on the left side move toward the bottom until you run into a tab that says On Startup and click on it. On right, a new section will open, click on Open a specific page or set of pages.

Chrome startup pagesYou will be presented with the option to add a new page by typing its URL or getting it from bookmarks or using a specific opened one. You can repeat this process until you have added all pages that you wish to be automatically opened once Chrome is opened for the first time.

BONUS:

If you have noticed right above the setting that we have used for opening a specific set of pages there is the option Continue where you left off, this option will open each page exactly where it was when Chrome was shut down letting you keep viewing where you have left off. This is useful if by any chance your battery ran out or you had to quickly turn the computer off for whatever reason.

Do You Need Help with Your Device?

Our Team of Experts May Help
Troubleshoot.Tech Experts are There for You!
Replace damaged files
Restore performance
Free disk space
Remove Malware
Protects WEB browser
Remove Viruses
Stop PC freezing
GET HELP
Troubleshoot.Tech experts work with all versions of Microsoft Windows including Windows 11, with Android, Mac, and more.

Share this article:

You might also like

Fix Windows 11 Black Screen Error
A black screen error inside Windows 11 is a typical screen turning to solid black without any error message. This can be very annoying since it can randomly appear out of nowhere and it will appear while you are using the computer. Worry not, this is not a serious error and we have several solutions for it, so please keep reading and try them as presented in order.

Black screenRestart graphic driver

This is the first thing to check if the issue is due to software or driver malfunctioning, there is a shortcut for rebooting graphic driver inside Windows 11. Press WINDOWS + CTRL + SHIFT + B to reboot the graphic driver and see if this fixes the issue. A beep sound should be heard during this process and the screen should turn back to normal.

Check connections

Sometimes the screen can go black due to a faulty connection or cable. If you have it at your hand try a different cable or slightly and gently nudge the existing one to see will screen flicker. If you are on a laptop try gently moving the lid from back to front and pay attention to the screen. If screen flickers or picture returns with this method, cable or connector needs to be replaced.

Clean your computer

The black screen can be because the computer is overheating. If this is the case either fan inside is not working properly or there is a lot of dirt and dust that needs to be removed so airflow can be established again for proper cooling. We have an article on errortools.com on how to properly clean your PC but if you are not technical enough maybe the best solution would be to call someone who is or to take the PC to service for cleaning.

Change The Projection Settings

Press WINDOWS + P to open projection settings, check to see if PC is set to PC screen only. If any other option is selected change it to PC screen only since this can cause random black screen issues.

Uninstall latest updates

If this problem has started to manifest itself during the latest update, go to setting and roll back from the latest update to fix this issue.

Scan system for malware

The black screen can also be caused by various viruses and malware. IF you have anti-virus software, run a full system scan to check it for malware. If you do not have one, download a free one and run a system scan, we recommend Bitdefender.
Read More
The device is not ready trying to connect USB
External hard drives have become essentials as they store data. However, they are also prone to issues and one of them is the “The device is not ready”. You could encounter this error when you try to access your connected hard drive. This error won’t allow you to access the contents of your hard drive so unless you fix it, you won’t be able to access any of the files on your hard drive. One of the most likely causes of this error is a hardware defect. Aside from that, it could also be due to loose connections, obsolete device drivers, as well as compatibility issues between the operating system and the hard drive. Before you start troubleshooting the problem, you need to determine if you were able to access your hard drive before you encountered the error or not. If not, you need to check the compatibility of the device with your operating system as it could be the reason why you’re getting the error. There are several potential fixes you can check out to fix this error. You can try to check the hardware connections, run the built-in Hardware and Devices troubleshooter, as well as the USB troubleshooter. You could also run the CHKDSK utility or update the drivers of the device or the USB drivers.

Option 1 – Try checking the hardware connections

The first thing you have to do before you further troubleshoot the problem is to check the hardware connections of your computer and see if there are damaged ones, just like with USB ports, it would also affect the overall connectivity of the device with the computer. So if you notice some irregularities in the connecting cable physically, you might have to buy another one and replace it and then see if it fixes the problem or not.

Option 2 – Run the Hardware and Devices Troubleshooters

  • The first thing you need to do is click on Start and then on the gear-like icon to pull up the window for Settings.
  • After opening Settings, look for the Update and Security option and select it.
  • From there, go to the Troubleshoot option located on the left-hand side of the list.
  • Next, select Hardware and Devices from the list and open the Troubleshooter and run it. Once it is doing its job, wait for it to complete the process and then restart the system.
  • After the system restarts, check if the problem’s now fixed. If not, refer to the next option given below.
Note: You could also try to run the USB troubleshooter as it could also resolve the problem.

Option 3 – Run the CHKDSK utility

As you know, the CHKDSK utility can help you in identifying the bad sectors in a drive and fix them automatically. Thus, you can run it to fix the “The device is not ready” error when you connect your USB drive to your computer.
  • Open Command Prompt with admin privileges.
  • Next, type and enter this command to execute it: chkdsk /f <drive>
  • Now, wait until the process is completed and exit Command Prompt.
  • Restart your computer and try connecting the USB drive again and see if the error is fixed.

Option 4 – Try to update the drivers of the device

Although you can always update the device drivers using the Device Manager, you might want to try downloading the latest set of drivers directly from the manufacturer’s website. Once you’ve downloaded them, install them right away and then correct the external hard drive.

Option 5 – Update or reinstall the Universal Serial Bus Controller driver

If updating the drivers of the device did not fix the “The device is not ready” error, you can try to update or reinstall the Universal Serial Bus Controller drivers instead of using the Device Manager. Refer to the following steps:
  • First, click the Start button and type “device manager”.
  • Then click on the “Device Manager” from the search results to open it.
  • From there, look for the “Universal Serial Bus controllers” option and then right-click on each one of the USB drivers and select the Update Driver from the menu.
Note: If it is a regular USB drive, then it will be listed as a USB Mass Storage Device but if you have a USB 3.0 device, then look for a USB 3.0 Extensible Host Controller.
  • Restart your PC and then click the “Search automatically for updated driver software” option.
Note: If updating the USB Controller drivers didn’t work, you can try to reinstall them instead.

Option 6 – Restart your computer in a Clean Boot State

If the first three given options didn’t work and you still see the error when you connect external devices, you can try putting your computer in a Clean Boot State and then try connecting them again.
  • Log onto your PC as an administrator.
  • Type in MSConfig in the Start Search to open the System Configuration utility.
  • From there, go to the General tab and click “Selective startup”.
  • Clear the “Load Startup items” check box and make sure that the “Load System Services” and “Use Original boot configuration” options are checked.
  • Next, click the Services tab and select the “Hide All Microsoft Services” check box.
  • Click Disable all.
  • Click on Apply/OK and restart your PC. (This will put your PC into a Clean Boot State. And configure Windows to use the usual startup, just simply undo the changes.)
  • Now try to connect the external devices and check if the error is now gone.
Read More
Problem running preinstall.cmd scripts
Setting up the Windows operating system in a computer can be quite a complicated task since there are a couple of things that take place in the background to ensure a full and protected setup of the operating system which includes a number of programs, scripts, and so on. They work together in the background to guarantee the integrity of the Windows operating system. However, there are times when this piece of code could also go wrong. As a result, you might encounter errors like the “There was a problem running preinstall.cmd scripts” error. “Preinstall.cmd” is a type of CMD file associated with Applications & Drivers developed by Gateway for the Windows OS. To fix the “There was a problem running preinstall.cmd scripts” error, there are several things you can try. You can try to download a new Windows installation image or create a new bootable drive as well as uninstall conflicting or incompatible programs. In addition, you can also run the Windows Update troubleshooter or reset Windows 10.

Option 1 – Try to download a new Windows installation image

Your first option to fix the “There was a problem running preinstall.cmd scripts” error is to download a new Windows installation image. You can get the official ISO files for the latest release of Windows 10. After you’ve downloaded the ISO files, you can use them to upgrade to the latest Windows 10 version.

Option 2 – Try creating a new bootable drive

  • Insert your USB drive into your PC.
  • Tap the Win + R keys to open the Run dialog box and type in “cmd” and tap Enter to open the Command Prompt. Alternatively, you can also search for “cmd” in the Cortana search box to open Command Prompt.
  • Once you’ve opened CMD, type in this command to open the DISPART utility – diskpart
  • After that, you should see a new black and white window that would say, “DISKPART>”.
  • Next, type in “list disk” in the command line and tap Enter to see the list of all the Storage devices as well as your hard disk connected to your PC. Here, you have to identify your disk’s number.
  • Type in this command where “X” is the disk number you have identified and then tap Enter – disk X
  • Type in this command and hit Enter to clear the table records and all the visible data on the drive – clean
  • Now you have to recreate a new primary partition of the drive so you’ll have to type in this command and tap Enter right after – create part pri
  • A new primary partition has been created so you have to select it by typing this command and tapping Enter – select part 1
  • Now you have to format it to make it visible to normal users by typing – format fs=ntfs quick
Note: If your platform supports the Unified Extensible Firmware Interface or UEFI, replace the “NTFS” with “FAT32” in the command on Step 10.
  • After that, type in this command and tap Enter after – active
  • Finally, type this command and hit Enter to exit the utility – exit
  • After you prepare the image for the operating system, save it to the root of your USB Storage device.

Option 3 – Try to uninstall conflicting programs

If you are using a computer made by Dell and got Windows 10 preinstalled in it, then you can try to uninstall the programs listed below and see if it fixes the problem.
  • Dell Encryption Management service
  • Dell Digital Library service

Option 4 – Run the Windows Update Troubleshooter

You might also want to run the built-in Windows Update Troubleshooter in Windows that could help you in resolving the “There was a problem running preinstall.cmd scripts” error. All you have to do is go to Settings > Update& security > Troubleshoot > Windows Update. From there, click on the Run the troubleshooter button and follow the next one-screen instructions that appear. After that, restart your computer and check if the error is now fixed or not by trying to install the update once again.

Option 5 – Run Microsoft’s online troubleshooter

Running Microsoft’s online troubleshooter might also help you fix the error. This online troubleshooter is known to help in fixing Windows Update errors, it scans your computer for issues that might be causing the problem and then fixes them automatically.

Option 6 – Try to reset Windows 10

  • Tap the Win key or click on the Start button located in the Taskbar.
  • Then click on the Power button at the bottom right portion of the screen.
  • Next, press and hold the Shift key on your keyboard and then click on Restart. This will restart your Pc into the Advanced Startup options.
Note: Once you have access to the Advanced Startup options, you have to go to the setting which allows you to Reset your Windows 10 PC. All you have to do is select Troubleshoot > Reset this PC to reach the following screen Afterward, select either the “Keep my files” option and then proceed to the next on-screen instructions that follow to reset your Windows 10 computer without losing your files.
Read More
Get public IP address inside Windows 10
There are a lot of online services and a lot of ways to get your public IP address. One of them being typing whats my IP in Google search and you will get immediate results. But there is a way to get the same information inside Windows 10 which could be very useful if for any reason you can not connect to mentioned services. By checking public IP directly inside your windows you can make sure that the issue for not being able to open some websites is not due to your public IP. In order to use this Windows feature, we will be checking our public IP using Windows PowerShell. To open Power Shell in Windows first press ⊞ WINDOWS + R to open the run dialog keyboard with windows and r markedInside run dialog type Powershell and press ENTER In the Powershell type in the following command and press ENTER
(Invoke-WebRequest -uri "http://ifconfig.me/ip").Content
When the command finishes you will see what is your public IP address, if you wish to know more about your connection type in and press ENTER:
Invoke-RestMethod -Uri ('https://ipinfo.io/')
This command will provide you with further information like city, region, country, and others.
Read More
How to Fix Error Code 0xc1900106 on Windows 10

Error Code 0xc1900106  – What is it?

One of the most common errors encountered by Microsoft users upgrading from Windows 7 or Windows 8/8.1 to Windows 10 is the Error Code 0xc1900106. Microsoft users experience a failure in the installation process. Either they will be notified that the installation process was ended but failed or that Windows is not able to install the update.

Solution

Restoro box imageError Causes

More and more Windows users are having trouble upgrading their operating system to Windows 10. There are a lot of errors being encountered by users and one of them is the Error Code 0xc1900106. This error is normally due to the misconfigured system files. If a Windows user encounters this error, most likely their device has some registry problems.

Further Information and Manual Repair

Fixing error code-related issues could be best resolved to do manual repair methods. Applying repair methods manually can help Windows users address the root causes of the errors they encounter, as well as apply definite solutions to rectify the issue.

Most Windows users can be able to implement manual repair methods themselves but there are some cases where help from a Windows professional is needed. If you’re not a very tech-savvy person and not confident performing the manual repair methods yourself, it would be advisable to seek help from a professional Windows technician who is knowledgeable enough to address the errors or problems you are encountering. However, if you don’t want to resort to seeking help from a professional, you can also consider using a powerful automated tool.

In trying to fix Error Code 0xc1900106, here are the following manual repair methods you can take:

Method One: Custom Installation

  1. Make a backup of your personal files
  2. Users of Windows 8/8.1 should Refresh first then proceed to upgrade.
  3. If the Refresh process does not work, reset your device then try again.
  4. If resetting your device still does not work, you can proceed with a custom installation.
  5. When your Windows installation media is ready, you need to choose to boot from CD, DVD, or USB drive to begin setup. (For example purposes, this article will discuss booting from DVD).
  6. When your device is all set to boot from DVD, you will be prompted to Press any key to boot from CD or DVD…
  7. Once you’ve pressed any key, the screen will show the Windows logo which might take a while. No need to worry though, as long as you can see the indicator, you’re good.
  8. Choose your Language, Time, and Keyboard method from the drop-down menu then hit Next.
  9. Click on the Install Now button then wait until Setup begins.
  10. Tick on the I accept the license terms check box then select Next.
  11. Choose Custom: Install Windows only (advanced)
  12. Choose the Primary partition then select Next. You will be prompted by the following warning: The partition you selected might contain files from a previous Windows Installation. If it does, these files and folders will be moved to a folder named Windows.old. You will be able to access the information in Windows.old, but you will be able to use your previous version of Windows. Just click the OK button then wait as the Windows continue to install. Windows will restart once this phase of the setup completes and will reboot into setup once again.
  13. At this point, Windows will detect and install your hardware. Once this finishes, Windows will restart again.

Method Two: Reset Windows Update Components

  1. From your device’s desktop, hit Windows key + X to open the command prompt as admin.
  2. Once the command prompt window appears, you can type or copy and paste the following commands (all at once):

net stop wuauserv net stop cryptSvc net stop bits net stop msiserver ren C:WindowsSoftwareDistribution SoftwareDistribution.old ren C:WindowsSystem32catroot2 catroot2.old net start wuauserv net start cryptSvc net start bits net start msiserver pause

  1. Exit the command prompt.
  2. After you reset the Windows Update components, see if you receive Windows Updates which includes the firmware updates for your computer.

Method Three: Ensure Windows is Updated

  1. If you have an antivirus, make sure to disable it during the upgrade process.
  2. Run Windows Update to check if the system is updated.
  3. Ensure that the latest firmware and drivers are installed. To be able to do this, go to the computer manufacturer’s website or you can also try contacting company support.
Read More
Chrome won’t open or launch on Windows
If you’re suddenly unable to launch or open Google Chrome or unable to load web pages, then it’s most likely that the files in Chrome have been corrupted or some plugin is taking up a lot of resources which is why you encounter an error message saying, “Google Chrome has stopped working”. And when you try to check the Task Manager, you’ll see that Chrome is really taking up lots of resources, however, when you check the Taskbar, strangely, you will see nothing. If you are currently facing this issue in Chrome on your Windows 10 PC, follow the given options below.

Option 1 – Kill Google Chrome’s process in the Task Manager

If you aren’t able to open Chrome, then maybe its process is running in the background and you don’t see the browser windows. If that’s the case, you may have to force quit the browser and then try to open it again.
  • First, right-click on the Taskbar then select the Task Manager. And if the Task Manager is not responding, you can just use the Alt + Ctrl + Del keys and then select the Task Manager.
  • After opening the Task Manager, under Processes, look for Google Chrome’s process which would most likely be named “chrome.exe”.
  • Right-click on Google Chrome’s process and then select the End task option.
  • Now try to open Google Chrome again.

Option 2 – Try checking if your antivirus program is blocking Google Chrome

There are instances when due to false-positive, a security or antivirus program might block Chrome which is why it failed to open properly. Thus, you can just disable the security program temporarily and then check if you can now open Chrome or not.

Option 3 – Delete the User Profile in Chrome

You can also try deleting the User Profile folder in Chrome. To do so, follow these steps:
  • Tap the Win + R keys to open the Run dialog box.
  • Then copy and paste “%USERPROFILE%AppDataLocalGoogleChromeUser Data” and hit Enter.
  • From there, look for a folder named “Default folder” and then copy the folder to another drive as a backup.
  • After creating a copy of the folder, delete the Default folder.
  • Next, open Google Chrome again and go to Settings > Advanced > Reset.

Option 4 – Disable the Extensions in Chrome

There are instances when issues on a browser are triggered or caused by some problematic extension. To find out which one of your extensions is causing the problem, disable them all first and then enable them back one by one.
  • Click on the three-dotted icon for the menu located at the top-right corner of your screen.
  • Then click on the More tools option and go to Extensions.
  • From there, you will see a list of all the installed extensions in Chrome.
  • Disable all these extensions and restart the browser.
  • Now enable them back one by one to figure out which one of them is the culprit. You could also remove extensions that you no longer use.

Option 5 – Run the Chrome Cleanup tool

You might also want to try running the Malware Scanner & Cleanup tool in Chrome. This is a built-in tool that can help you get rid of any unwanted pop-ups, banners, ads, unusual startup pages, toolbars, and malware. Thus, it can help you to resolve the issue in Chrome.

Option 6 – Try to reinstall Chrome

If running the Malware Scanner & Cleanup tool in Chrome didn’t work out for you, you can try reinstalling it. To do so, follow these steps:
  • Open the Settings app and go to System > Apps & features.
  • From there, look for Chrome and uninstall it from your PC.
  • Then go to the official website of Google Chrome and download its latest version and install it.
Read More
Android apps inside Windows 11
Android apps inside Windows 11
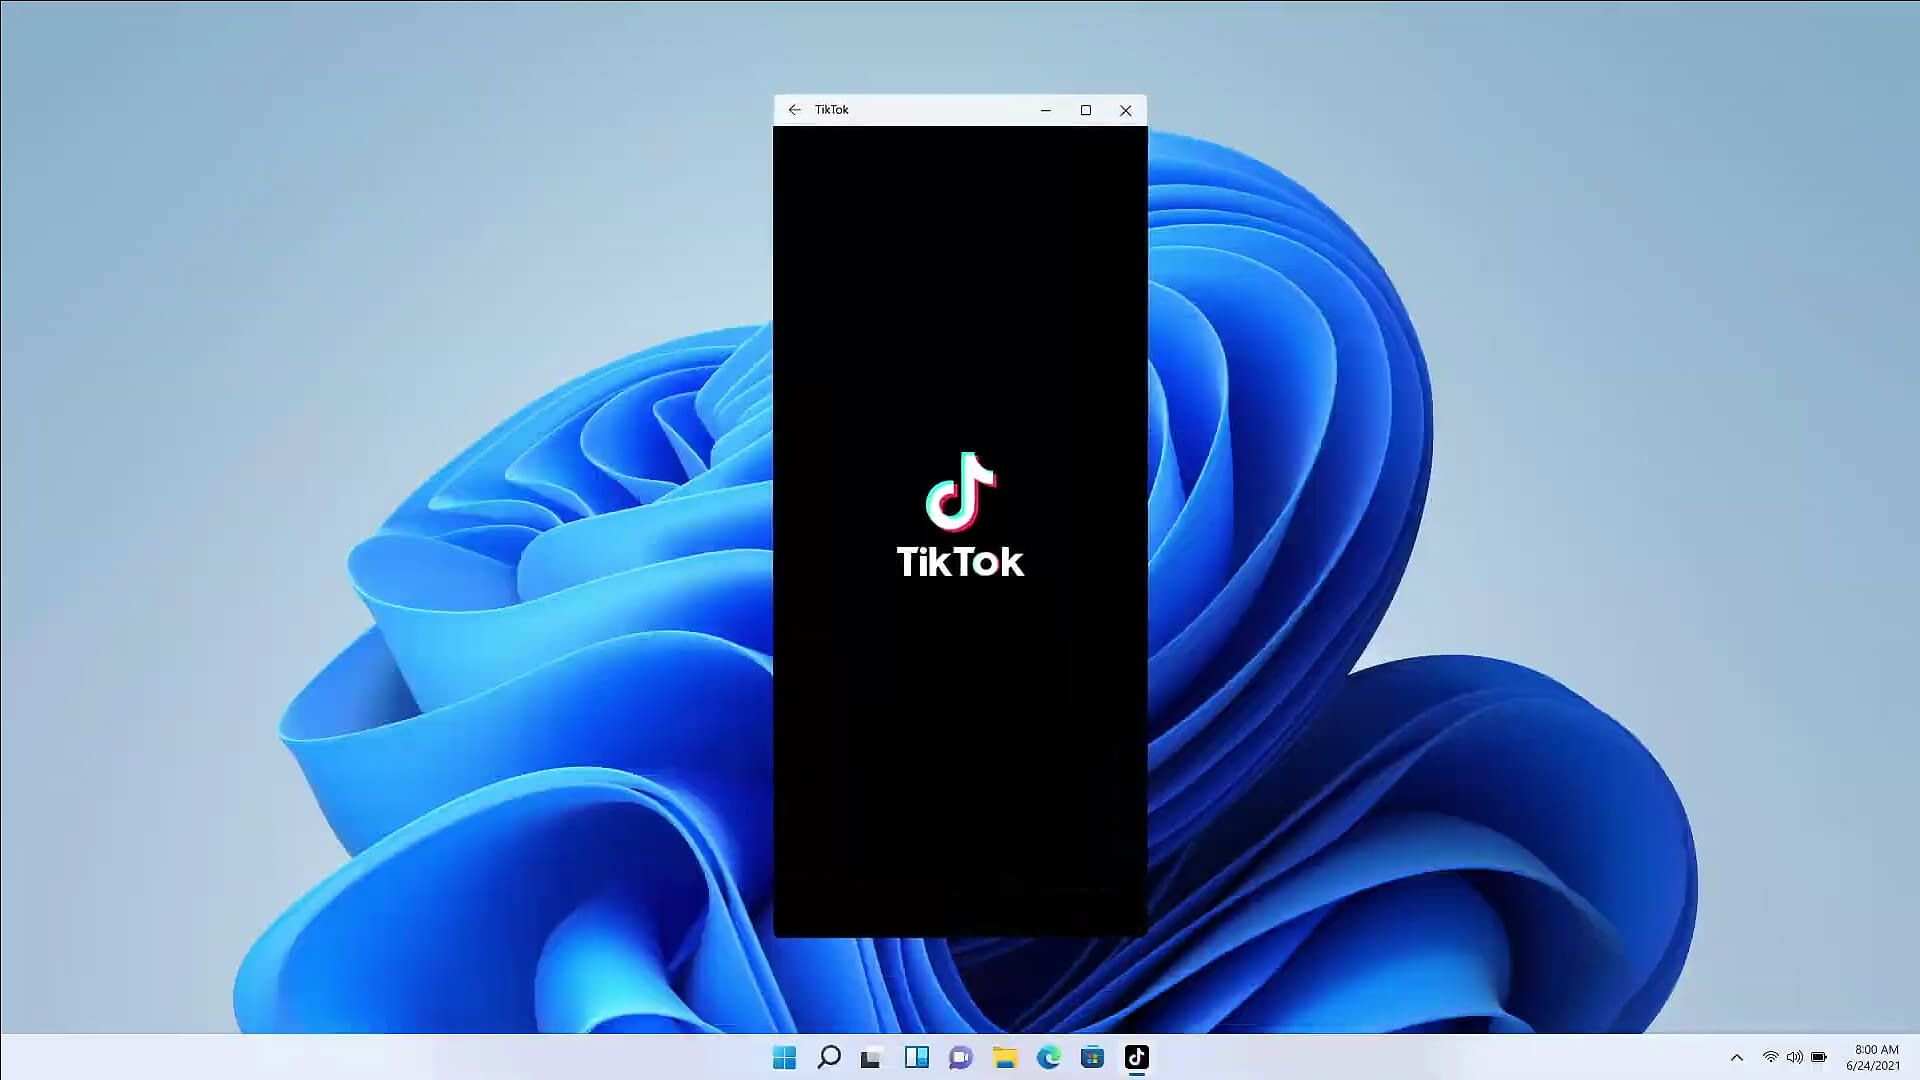
The euphoria around Windows 11 is not dying and reveal that Android apps will work natively inside Windows 11 has raised many emotions and questions. So, Microsoft has announced that Android apps will run natively inside Windows 11 OS and that they will reside alongside your other installed ones as icons, etc. It is no secret that many users have been using emulation software to run Android apps inside Windows so far, so what is the difference?

It is still emulation

Whatever you would like to believe it is still emulation and Android apps are at the end of the day still Android apps running inside emulated environment. This time we will not need third-party emulation software running inside Windows, we will have third-party emulation services running inside Windows. Intel has teamed up with Microsoft in order to integrate Intel bridge algorithms in order to run Android apps, meaning that yea, pretty much we have emulation services running in order to run the application. The problem with this kind of approach is that well emulation software is running and consuming system resources only when we start it, this kind of service is always running and always consuming resources and for someone who really does not care about Android apps at all, this is just a waste of resources.

Android store

The store is another issue here, instead of the Google play store we will have the Amazon app store integrated inside the new Microsoft store. This means that any kind of for example game progress or login information from Google store cannot be transferred into Windows 11, add to that information that in the Amazon app store there are tons of missing applications like SLACK, TRELLO, BitWarden, etc and we might have a serious question here about the use of this feature.

Android apps that do not use Android services

If you even look past that it is still emulation and that it is available on the Amazon app store there is still concern about applications not using Google services for their running. Many Android apps are relying on Google services like location or optimize their use of on-device resources, handle in-app purchases, etc. that cannot be found on this system. Uber is a prime example that uses Google location service to determine your location and for its mapping data, with that application, is useless. Other like Guardian will even pop up message that says Google play service is required in order to even work.

Android apps without Eero system

Amazon Eero system for enhanced internet access is not even yet available in its own app store which brings us to missing some key players like Bank of America, Chase mobile, Bueller, etc. And across the board, the apps that are present in the Amazon Appstore are often as good as abandoned. Lots of titles are numerous versions behind their up-to-date Play Store counterparts, and plenty of programs you encounter in the Amazon environment clearly haven't been touched in years.

Conclusion

Many new Windows 11 features are quality features that I personally consider good but although this one seems innovative and good I simply cannot stand back it up. Android apps were already inside Windows with emulation software which used google services and was working just fine, this was not needed in my opinion.
Read More
System Restore gets stuck or hangs up
As you know, System Restore is a useful tool in Windows operating system that helps users in fixing system issues by undoing any recent changes to the computer that may have caused the problem. However, there are times when you might encounter some issues when running this tool and one of these issues is when System Restore suddenly gets stuck or hangs up on initializing the restoration of the Registry in Windows 10. If you encounter a similar problem, read on as this post will guide you on what you can do in such cases. There are several things you can do when you face this kind of problem in System Restore. First, you can try to wait it out, give it more time to load, which should not take longer than 5 minutes. And if it’s still stuck after that time, give it another hour. However, if nothing changed after an hour, then you need to troubleshoot the problem further. Keep in mind that you must not interrupt System Restore by shutting it down abruptly, it could result in an unbootable system. To get started in troubleshooting the problem, you need to follow each one of the suggestions offered below.

Option 1 – Try to use the Windows Recovery Environment

The first troubleshooting option you need to try is to simply tap the power button for about 10 seconds. This is what you have to do when you have to interrupt System Restore or reset your Windows 10 computer. Tapping the power button for 10 seconds will perform a hard shutdown and once your computer shuts down, restart your computer again and follow the steps below but before you do that, make sure that you have a Windows bootable USB or DVD.
  • First, insert the bootable USB or DVD and boot into it, and select the “Repair your computer” option.
  • Next, once you see the manufacturer logo on your computer, tap the key to enter into Windows Recovery Environment.
  • After that, change the Boot sequence to DVD drive under the UEFI Firmware settings and restart your computer.
  • Once your computer has restarted, select the boot order and make changes accordingly as displayed in the BIOS.

Option 2 – Try to run the Automatic Repair Utility

You might also want to use Automatic Repair in fixing the error. To do so, follow the steps below.
  • You can start by creating and booting from a bootable Windows 10 USB Stick.
  • After that, click on Repair your computer located on the bottom left corner when you are on the initial Windows Startup screen.
  • Next, click on Troubleshoot, and then on the other screen, click the Startup Repair option.
  • Now select the operating system you want to repair. Once you do that, it will start to repair your operating system. Wait until the process is completed and then check if the problem’s now fixed.

Option 3 – Try to run System Restore in Safe Mode

If you can’t boot into your Windows 10 computer, you can try to run System Restore again in the Advanced Startup Options.
  • Boot your computer into Safe Mode.
  • After that, select an option > Troubleshoot > Advanced Options > Startup Settings > Restart.
  • Once your computer has restarted, tap the F6 key to enable Safe Mode with Command Prompt and to run System Restore from there.
  • Now in Command Prompt, type the “rstrui.exe” command to run System Restore in Safe Mode. This will help in fixing the problem since it would be safer to perform System Restore of the computer.
Read More
How to Fix Application Load Error 5:0000065434
When it comes to downloading and installing games in the Windows operating system, Steam is one of the well-known sources. You can find many big titles in Streams such as PUBG, Heaven Vaults, and a whole lot more. It is undeniably a great source of getting games in the Windows operating systems. However, just like other software, Steam is not immune to errors as you could encounter errors while using it. This isn’t caused by a bad code but also due to reliance on various factors in both respects to the software and hardware. One of these errors is the Application Load Error 5:0000065434. This kind of error can appear when you launch numerous game titles on your Windows 10 computer like Skyrim, Oblivion, Bully, Morrowind, Vortex, and many more. To fix this application error in Steam, you can try to copy the Steam executable file or use the Command Prompt. You could also try to verify the integrity of the game files feature or delete any conflicting files on your computer.

Option 1 – Try copying the Steam executable file

The first thing you can do to fix the error is to copy the executable file of Steam.
  • First, right-click on the desktop shortcut of steam located on your Desktop and click on the “Open file location” option.
  • After that, copy the executable file for Steam and navigate to the folder of the library of the games which is usually located in SteamSteamAppsCommon
  • Now paste the Steam executable file you just copied inside the folder of the game and see if it fixes the error or not.

Option 2 – Try to use the Command Prompt

  • In the Start Search, type “command prompt” and right-click on Command Prompt from the search results and then select the “Run as administrator” option.
  • After opening Command Prompt as administrator, execute the following command:
cd "C:Program Files (x86)Steamsteamappscommon" mklink "steam.exe" "C:Program Files (x86)Steamsteam.exe"
  • The command you entered will create a link between the executable file of Steam to the operating system. Once you see a message that states, “Operation completed successfully”, restart your computer.

Option 3 – Try to use the “Verify integrity of the game files” feature

The next thing you can do to get rid of the error is to use the “Verify integrity of the game files” feature. How? Refer to these steps:
  • Open Steam and right-click on the entry of the game where you encountered the error in the Library and then select Properties.
  • After that, navigate to the LOCAL FILES tab and click the “VERIFY INTEGRITY OF GAME FILES” button.
  • Wait for the process to be completed and see if the feature has helped in fixing the error or not.

Option 4 – Try to delete any conflicting files

The error might be caused by some conflicting files on your computer which is why you have to delete them. To do that, follow these steps:
  • Open the Documents folder and look for the folder created by the game that’s throwing the error. For instance, it could be stored in the “My Games” folder.
  • Next, delete the folder and then try to launch the game again and see if the error is now fixed.
Read More
Guide to Fixing PFN_LIST_CORRUPT Blue Screen

PFN_LIST_CORRUPT Blue Screen - What is it?

PFN_LIST_CORRUPT is a blue screen of death error code. It occurs when the PFN (Page Frame Number) list becomes corrupt. The Page Frame Number is basically used by your hard drive to determine your location of each one of your files on the disk. This error may occur when starting up the program or while using it. Blue screen of death errors occurs without any warnings. The program disrupts all of a sudden and the computer screen turns blue.

Solution

Restoro box imageError Causes

PFN_LIST_CORRUPT Blue Screen error may occur due to multiple reasons. Some of the common reasons include:
  • Hardware problems
  • Device driver issues
  • Registry problems
  • Viral Infection
It is recommended to resolve the PFN_LIST_CORRUPT Blue Screen of Death error immediately without any delay virtually because this error can be quite fatal to your PC. It can pose serious threats to your system like system freeze, crash, failure, and valuable data loss. Furthermore, if the error is related to viral infection, it can expose you to privacy issues, data breaches, and cybercrime too.

Further Information and Manual Repair

This is a critical PC error but easy to resolve. You don’t need any technical expertise to fix this error on your PC. Here are some quick and easy methods to resolve PFN_LIST_CORRUPT Blue Screen error:

Method 1: Install Compatible Device Drivers

Sometimes when new hardware is added to the PC, you need to install updated versions of the device drivers to ensure there are no incompatibility issues. Incompatibility between the hardware and device drivers may generate PFN_LIST_CORRUPT Blue Screen of death error on your screen. To resolve, it is advisable to download and install the latest updated versions of the device drivers from the manufacturer’s website.

Method 2: Scan for Viruses

PFN_LIST_CORRUPT Blue Screen of Death error may occur due to viral infection too. Viruses and spyware enter your PC when you log on to unreliable websites and download programs from there or open phishing emails on your PC. These viruses corrupt and damage programs and files resulting in such errors. To fix the issue, you need to install a powerful antivirus and ensure all kinds of viruses and spyware are detected and removed from your system.

Method 3: Clean and Restore the Registry

PFN_LIST_CORRUPT Blue Screen error indicates poor PC maintenance. When you don’t clean and remove unnecessary and obsolete files like junk files, bad registry keys, cookies, internet history, temporary files, and invalid entries from the registry, the registry overloads and gets damaged. These files accumulate taking up a lot of disk space and also corrupt system files. If these files are not removed timely, it results in registry issues like a blue screen of death errors and run-time errors. To remove these files and clean the registry, you need to install a powerful registry cleaner. Whether the underlying cause for PFN_LIST_CORRUPT Blue Screen of Death error on your PC is viral infection or registry issues, to resolve the BSOD error code in seconds download Restoro. This is a cutting-edge and multi-functional PC fixer deployed with both an antivirus and a registry cleaner. Additional features include a system optimizer too. It is user-friendly and easy to operate. You can download it on all Windows versions without any hassle. It is safe and bug-free. The registry cleaner feature scans and removes all unnecessary files, cleans and repairs the registry while the antivirus utility simultaneously removes all kinds of malicious software including spyware, viruses, Trojans, and malware. Click here to download Restoro now and resolve the PFN_LIST_CORRUPT Blue Screen of Death error immediately!
Read More
1 2 3 171
Logo
Copyright © 2023, ErrorTools. All Rights Reserved
Trademark: Microsoft Windows logos are registered trademarks of Microsoft. Disclaimer: ErrorTools.com is not affiliated with Microsoft, nor claims direct affiliation.
The information on this page is provided for information purposes only.
DMCA.com Protection Status