In case you don’t know, Windows 10 comes with a native ability to project to another screen, be it wireless or wired. All it takes to do that is by tapping the Win + P key combination to display options to manage the extended display. However, there are times when you might encounter errors when you do that like the “Your PC can’t project to another screen” error. This kind of error stops you from projecting your computer to the other screen. Here’s the full content of the error message:
“Your PC can’t project to another screen, Try reinstalling the driver or using a different video card.”
This error could be due to loosely connected hardware or the display adapter. It is also possible that a recent Windows Update has messed up its settings. To resolve this issue, you can try several suggestions that will be given in this post. You can try to check the hardware cable connections or run the Hardware and Devices troubleshooter. You could also update or reinstall the display adapters or replace the graphics card.
Option 1 – Try checking the hardware connections
The first thing you have to do before you further troubleshoot the problem is to check the hardware connections of your computer and see if there are damaged ones, just like with the ports as it would also affect the overall connectivity of the device with the computer. You also have to make sure that no pin is missing from the ports. So if you notice some irregularities in the connecting cable physically, you might have to buy another one and replace it and then see if it fixes the problem or not.
Option 2 – Run the Hardware and Devices Troubleshooters
The first thing you need to do is click on Start and then on the gear-like icon to pull up the window for Settings.
After opening Settings, look for the Update and Security option and select it.
From there, go to the Troubleshoot option located on the left-hand side of the list.
Next, select Hardware and Devices from the list and open the Troubleshooter and run it. Once it is doing its job, wait for it to complete the process and then restart the system.
After the system restarts, check if the problem’s now fixed. If not, refer to the next option given below.
Option 3 – Try to update or reinstall the display adapters
You might also want to update the drivers for Display adapters and Monitors or you might also have to update or reinstall your NVIDIA driver if you’re using one. To update or reinstall the display adapters, follow these steps:
Tap the Win + R keys to open the Run dialog box and then type in MSC and tap Enter or click OK to open the Device Manager.
Expand the section for Display Adapters.
And then select the Display Driver and right-click on it.
From the drop-down menu, select the Update Driver option and follow the on-screen instructions to install the latest version of the Display Driver.
Restart your PC after the installation.
If you find that updating the drivers does not help, you can try to reinstall them. How? Simply follow the steps below.
Tap the Win + X keys and select the Device Manager.
After that, look for the affected driver in the Device Manager window. And if you see a yellow exclamation mark beside it, right-click on it and select the option “Rollback” to roll back the driver.
And if the Rollback option is not available, just select Uninstall and then restart your PC.
Finally, open the Devices Manager once again and select the option “Scan for hardware changes” to install the driver.
Option 4 – Consider replacing the graphics card
You might also want to consider replacing the graphics card of your computer to resolve the problem if the options provided above didn’t work.
Lately, some users reported getting an error that says, “System doesn’t have any USB boot option, Please select other boot option in Boot Manager Menu” when they tried to reinstall the Windows 10 operating system on their PCs or boot from an installation media. If you have the same problem, then this post should help.
This kind of error is applicable to multiple devices by various OEMs and is mostly due to the Secure boot being enabled, or the Legacy or CSM support being disabled. It could also be that the bootable USB device was not correctly made and so on. Whatever the cause may be, here are some suggestions you need to check out to resolve the “System doesn’t have any USB boot option, Please select other boot option in Boot Manager Menu” error and reinstall Windows 10 successfully.
Option 1 – Disable the Secure Boot in the BIOS
Disabling the Secure Boot in the BIOS settings is definitely recommended to resolve the error. To disable Secure Boot, here’s what you have to do:
First, boot your computer into Windows 10.
Next, go to Settings > Windows Update. From there, check if there is anything that you have to download and install if you see any available updates. Usually, OEMs send and update the list of trusted hardware, drivers, and operating systems for your computer.
After that, go to the BIOS of your computer.
Then go to Settings > Update & Security > Advanced Startup options. If you click on Restart Now, it will restart your computer and give you all the advanced options.
Next, select Troubleshoot > Advanced Options. As you can see, this screen offers you further options including System restore, Startup repair, Go back to the previous version, Command Prompt, System Image Recovery, and UEFI Firmware Settings.
Select the UEFI Firmware Settings which will take you to the BIOS.
From there, go to the Security > Boot > Authentication tab where you should see Secure Boot. Note that every OEM has its own way of implementing the options so it varies.
Next, set Secure Boot to Disabled and set Legacy Support to On or Enabled.
Save the changes made and exit. Afterward, your computer will reboot.
Option 2 – Try to reset the BIOS or the UEFI Settings
If updating the BIOS didn’t help in fixing Error 0199, you can try to reset the BIOS instead.
Start your computer and tap the F10 key during the booting process to enter the BIOS. If it does not work, you can try tapping the F1 or F2 key as well as the Del key.
Once you’re already in the BIOS, tap the F9 key to get the prompt to RestoreLoad default configuration now for the BIOS.
Next, click on Yes and then follow the next on-screen instructions that appear to set the BIOS back to its default settings.
Once you’re done restoring the default settings of the BIOS, restart your computer and then check if it now boots properly.
Option 3 – Make a proper bootable USB Drive/Stick
To make a proper bootable USB drive, you need to use the Windows Media Creation tool. The Media Creation tool in Windows allows you to use the ISO installation file to make a bootable device that you can use to install Windows on your PC. Note that this is kind of different from the usual installation process as it could erase your computer’s current settings and data on the primary drive. Thus, before you proceed, you need to backup all your data into some removable drive and then use the Media Creation Tool to make a bootable drive.
After making the bootable drive, you need to plug it into your computer and then reboot.
Next, tap the F10 or Esc key to open the boot options.
Now set the boot priority of the removable drive the highest. Once the setup comes forth, follow the next onscreen instructions and install Windows without any problems.
Option 4 – Try enabling Legacy or CSM boot support
If the Legacy or CSM boot support is disabled, then it’s no wonder why you’re getting an error. Thus, you need to enable it by following these steps:
Open Settings and go to Update & Security > Advanced Startup options.
Next, click on Restart Now to reboot your computer.
After that, select Troubleshoot > Advanced Options where, you will see more options such as System Restore, Startup Repair, Go back to the previous version, Command Prompt, System Image Recovery, and UEFI Firmware Settings.
From there, enable Legacy Support and then save the changes and exit. This will restart the computer.
Once your computer has restarted, check if the error is now fixed.
We have talked about gaming on old computers and have covered new and upcoming Steam deck handheld console. Today we are combining old gaming with a handheld console and our target of talk is Retroid pocket 2. This product is packed with really high-quality plastic and with some great features in it.
So let's dive into this cool handheld in more detail and find out why we like it so much.
Good manufacturing quality
Plastic and overall manufacturing quality are really, really good. The battery is great, packing 4000mAh that can hold over 3 hours of nonstop gaming, and all buttons and joysticks are great. The screen is a 640 x 480 60Hz 3.5″ IPS screen (4:3 aspect ratio) that performs really great for its purpose, retro gaming. There is a Digital D-Pad and dual analog joysticks. The right joystick is the lower profile to avoid being accidentally moved when pressing the four gaming buttons. There are three buttons at the bottom which are Home, Start, and Select. On either side are good-quality stereo speakers. On the bottom of the device are a Micro SD Card slot and a 3.5mm headphone port. On the top of the device are Left and Right shoulder and trigger buttons. There are the power button and volume adjustments. There are a USB Type-C OTG port and a Micro HDMI output for connection to a TV.
Good technical statistics
Good, not great but then again since this is retro handheld you cannot really expect some crazy stuff like alder lake inside. So the console is punching ARM Cortex A7 CPU with 2 cores and a clock of 1.5GHz paired with ARM Mali 400-MP2 500MHz GPU. The console has 1GB LPDDR3 RAM memory and 8GB eMMC Storage where 5GB is freely available, the rest is taken for OS. As mentioned before the display is 640x480 resolution with a size of 3.5″. The battery is Lithium-Ion with a power of 4000mAh and on the handheld, there is a USB Type-C connector, 3.5mm headphone jack, and Micro-HDMI. It also has Wifi/Bluetooth 4.0
Retroid Pocket 2 OS and support
Pocket 2 comes with Android 6 but you can update its firmware to the 8.1 version on the official site that I would highly recommend. New versions of the handheld will come with 8.1 on it from the box. Having Android as OS opens many possibilities like you can download Android apps such as Steam Link, allowing you to play actual PC games on your Retroid Pocket 2. Not just that, if it does get a newer version of Android it could even have the ability to use xCloud, Xbox’s cloud gaming service. Of course, hardware will not be able to handle modern games but the option is still there and for some old PC titles available on steam like Commander Keen, for example, this is a great option.
The console can emulate basically everything up to Dreamcast, including N64, PSP, and Playstation 1. It can emulate Nintendo DS also, but it can only do so with one screen. The only problem with this console is you will need to install and update Apps. You’ll need to learn about RetroArch, an app that lets you download emulators or cores to play games.
Retroid price
The last thing on the list is the price of the console itself. Going just under the 100$ mark this really makes it an affordable option for plenty of people that would like to experience retro handheld gaming or for ones like me, nostalgic gamers wanting to relive some era of playing games on the road.
Conclusion
Among Chinese handheld devices for retro gaming, Retroid Pocket 2 is really on top of what the market can offer. If you are looking for a great handheld retro console and are not afraid of little dive-ins into the OS and various configurations, Pocket 2 will reward you with plenty and wide emulation support.
Have you been feeling anxious in the digital space? Feeling like you have a million eyes on you each time you visit a website? It can definitely make you uneasy. Luckily there’s an easy fix, and it’s called a VPN.
In this article we’ll take you through the basics of what a VPN does and some of the biggest benefits you can reap from buying one.
VPN: definition and how it works
VPN stands for Virtual Private Network, so its name already says a lot about what it does.
A VPN is specialized software that keeps your browsing private and secure. Essentially it hides your identity, preventing possible cyberattacks and data theft. This is especially important in cases of public network use, where you’re highly exposed to potential threats.
To be more specific, this software encrypts your Internet Protocol (IP) address by filtering it through a server hosted by the VPN provider first. That way, it prevents your Internet service provider, third parties and lurking online thieves from tracking the actual you.
Credit: FLY:D on Unsplash
Some providers, such as Surfshark VPN with its IP Rotator feature, even make it a habit to frequently change your IP address to further protect your identity. With most VPN providers, you can also appear to be in a completely different country, adding to your disguise.
There are tons of advantages you can look forward to if you decide to use a VPN. Take a look at some of the crucial ones.
Benefits of using a VPN
When choosing a VPN, you can find both free and paid options. We recommend you go with the paid ones, since they have stronger security, encryption and data protection, as well as more advanced features. Free VPNs come with limitations and risk of malicious attacks on the software itself.
You can choose to buy a singular VPN service or opt for antivirus software that has a VPN built in, for example Bitdefender’s Ultimate Security plan. That depends on what you use your computer for and how much.
When you pick one, here’s what it can do for you.
1. Access region-specific content
When we said you could change your location, we meant it. Say you’re using a streaming service and a show you desperately want to watch isn’t available in your country. You can use your VPN to make it look like you’re browsing from a country where it’s unlocked.
This option is also convenient for gamers who want to access maps, skins and other in-game items unavailable in their location.
In addition, you can use this powerful feature when you’re traveling to a region where some of your favorite content may not be accessible.
Do keep in mind that you need to read the Terms and Conditions (yeah, we know - who does that?) of your games and services before doing this, since you could end up getting a penalty. It’s also important to remember that there are entire countries that have strict regulations or even bans on VPNs, for example Belarus, Russia and China. So make sure to be very cautious with your VPN use, friends.
2. Browse like no one’s watching
VPNs shield your browsing habits from prying eyes on the web. Those can be malicious hackers or just third-party cookies tracking your every move to later bombard you with targeted ads. For example, Surfshark VPN features a Cookie blocker that blocks all cookie-related pop-ups and lets you browse in peace (and secret). It works even when the VPN is turned off, which is also pretty neat.
In addition, their CleanWeb 2.0 technology makes sure ads and especially malware don’t stand a chance at all, since they’re blocked before they can even load.
The inability of sites to track your browsing means they can’t collect and analyze any of your data. So, your personal information - or your company’s information in case that’s what you’re using your computer for - is entirely hidden and secure.
3. Save money
It’s well-known that the prices of certain items and services vary based on your location, browsing time, age and many other factors. This most commonly goes for airline tickets and hotel stays.
You can use your VPN to avoid high prices and surcharges. Clear all cookies, turn on your VPN and visit an online shopping site to check out their prices. Then compare your findings with the offers you see when your VPN is off, when you spend a long time on the site or have an active account with the company.
Sometimes this can really help you find the best deals and avoid breaking the bank. But again, check the Terms and Conditions before you purchase something using a VPN.
4. Secure your smart home
The more smart devices you have connected to your network, the more exposed you are to potential cyberattacks. Phones and computers are generally designed to be decently secure even without a VPN or antivirus, but smart home devices leave a lot to be desired in that regard.
Protecting your home network with a VPN software means all devices connected to it are secure, be it an air purifier or Alexa.
Credit: Bence Boros on Unsplash
5. Prevent connection slowdown
Your ISP can intentionally slow down your internet speed based on how much data you’ve consumed (data throttling) or your activities online (bandwidth throttling).
But with a VPN, what kind of data you send and receive and how much is entirely hidden. Therefore, if your ISP can’t see you, they can’t control you and they can’t throttle down your speed.
The bottom line
You can never be too safe online. So definitely think about getting yourself a solid VPN to pump up your privacy and security as much as you can. And if you have any questions or need help choosing the perfect software for you, feel free to reach out to us.
The CoreFoundation dll error is a common error associated with Apple Software products. Most of the Apple Software products rely on this dll file to load and run. This dll file is Apple’s proprietary.
The error message is prompted in the following format:
“CoreFoundation.dll was not found”
or
“Apple Application Support is missing’.
Solution
Error Causes
The CoreFoundation.dll error message is triggered because of several reasons. These include:
Deleted CoreFoundation dll file
The CoreFoundation dll file has been overwritten
Poor installation of the Apple software
Corrupt software due to viral infection
Registry problems
Further Information and Manual Repair
It is advisable to fix CoreFoundation dll error code right away to avoid inconvenience. This error may stop you from accessing and running your desired Apple application.
Here are some of the best ways to resolve this error on your system:
1. Restore the Deleted CoreFoundation dll File
Since Dynamic Link Library is a shared program, if you happen to delete an Apple program on your PC, chances are you might have deleted that file too in the process.
Therefore, the easiest way to recover and restore the CoreFoundation dll file and resolve the error is to look for the file in the recycle bin. If you can’t locate it, then another way to restore the missing CoreFoundation dll file is to download the files from the internet.
2. Reinstall Apple Software
If the error still persists then it is advisable to re-install Apple software via iTunes or any other Apple Software that you have on your PC.
For example, if you have iTunes, then to reinstall it first go to the start menu and then the control panel. Now click on Add/Remove programs and locate iTunes software. Click the Uninstall button next to iTunes. Wait for a while until the program is completely uninstalled.
After the installation is complete, restart your PC and then download the latest version on iTunes and install it. Now try running the software again. Hopefully, this will resolve the issue.
3. Scan for Viruses
Another way to resolve CoreFoundation dll error on your system is to scan for viruses. Run an antivirus to detect viruses and remove them from your PC.
4. Clean Your Registry
Remember DLL file errors also indicate a corrupt registry. When you don’t clean the registry it overloads with unnecessary and obsolete files like junk files, cookies, temporary internet history, and bad /invalid registry entries.
When these files accumulate, they damage the registry, dll, and system files too. It also causes disk fragmentation. To repair the registry and fix dll files again, download a registry cleaner.
Whether you want to scan for viruses or clean the registry, it is advisable to download Restoro.
This is a multi-functional and advanced PC Fixer deployed with an intuitive algorithm and multiple powerful utilities. These include an antivirus, a registry cleaner, Active X controls, and class scanner, and a system optimizer.
The registry cleaner detects all registry issues and resolves them instantly. It wipes out the unnecessary files cluttering and damaging the registry. It fixes and restores the damaged dll files including CoreFoundation dll file thereby resolving the error. It takes a few clicks to resolve this error.
The antivirus feature scans your entire PC and removes all kinds of malicious software including spyware, malware, viruses, and Trojans.
To ensure the antivirus does not slow down the speed of your PC, Restoro also features a system optimizer that boosts the performance of your computer significantly.
It is powerful and bug-free software with a user-friendly interface that makes it quite easy to operate. You can download it on any Windows version as it is compatible with all.
Click here to download Restoro and resolve CoreFoundation dll error now!
Code 17 is a typical Spotify error code. Spotify is a music streaming service. Through this software, PC users can browse songs and search by artist, album, and playlist.
Simply put, it is an audio player available for BlackBerry, iOS, and Microsoft Windows desktop.
You may experience error code 17 if the process fails when downloading Spotify from the internet. The error message is displayed in any one of the following formats:
Error 17: Spotify has encountered a problem and needs to close. We are sorry for the inconvenience. Spotify could not be started (Error code 17)
Some of the symptoms of this error code are program crash, slow Windows performance, and periodic system freeze.
Solution
Error Causes
Error 17 may be triggered by several reasons such as:
Viral infection
Incomplete installation of Spotify software
Corrupt download
Registry corruption
Windows Installer service terminated
To use the audio player Spotify successfully on your PC, it is advisable to fix error 17 right away on your system. Delay may cause inconvenience and limit your access to your desired program.
Further Information and Manual Repair
To repair this error code on your PC, you don’t have to hire a professional or be a technical whiz yourself. The good news is that this error is quite easy to fix.
You don’t need to be technically sound to resolve it. Here are some proven methods for you to fix error code 17 on your system.
So let’s get started:
Method 1 - Make sure that the Windows Installer is running
Sometimes Spotify error 17 may occur if the Windows Installer service is terminated. Therefore before you download, make sure the Windows Installer is running. This is a good way to ensure the error code 17 messages don’t pop up on your PC again.
For this here’s what you need to do, first quit all programs. Now go to the start menu and in the search box type RUN, and press enter. In the Open Box, type msiexec /unregister and then press OK to confirm.
After that, perform the same steps again, and now in the Open Box type msiexec /regserver and press OK to save.
Reboot your PC and try downloading Spotify again. If the program successfully downloads on your system, then this means error 17 is resolved. However, if the error code still persists, then try other methods given below.
Method 2 - Use System Restore to Undo Recent Changes
Another reason for the cause of error 17 is the improper or incomplete installation of Spotify. Improper installations can configure settings and also leave bad entries in the registries.
To resolve, use System Restore utility built-in Windows. By using this system tool, you can undo recent changes and resume your computer to its previous condition as it was before the proper installation was attempted.
To do this, go to the start menu, then in the search box type System Restore and press enter. Go to System Restore and choose a restore point. Once you’ve selected the point, reboot your PC to activate changes.
Method 3 - Remove Viruses
Viruses can enter and damage your PC if you download software programs from unknown websites. These not only damage your PC but also hinder your ability to install desired programs successfully in this case audio player Spotify.
In such an event, simply use an antivirus to remove all viruses infecting your system. After they are removed, make sure you download and install Spotify software from a trusted website.
Method 4 - Repair the Registry
Another cause of error 17 is registry corruption. This occurs due to bad entries, invalid and junk files saved in the registry. To fix the corrupt registry simply download Restoro.
This is a user-friendly PC Fixer embedded with a powerful registry cleaner. This software is compatible with all Windows versions. The registry cleaner detects all registry issues, removes all file corrupting the registry, and cleans it immediately in just a few clicks.
Click here to download Restoro on your PC and resolve Error 17.
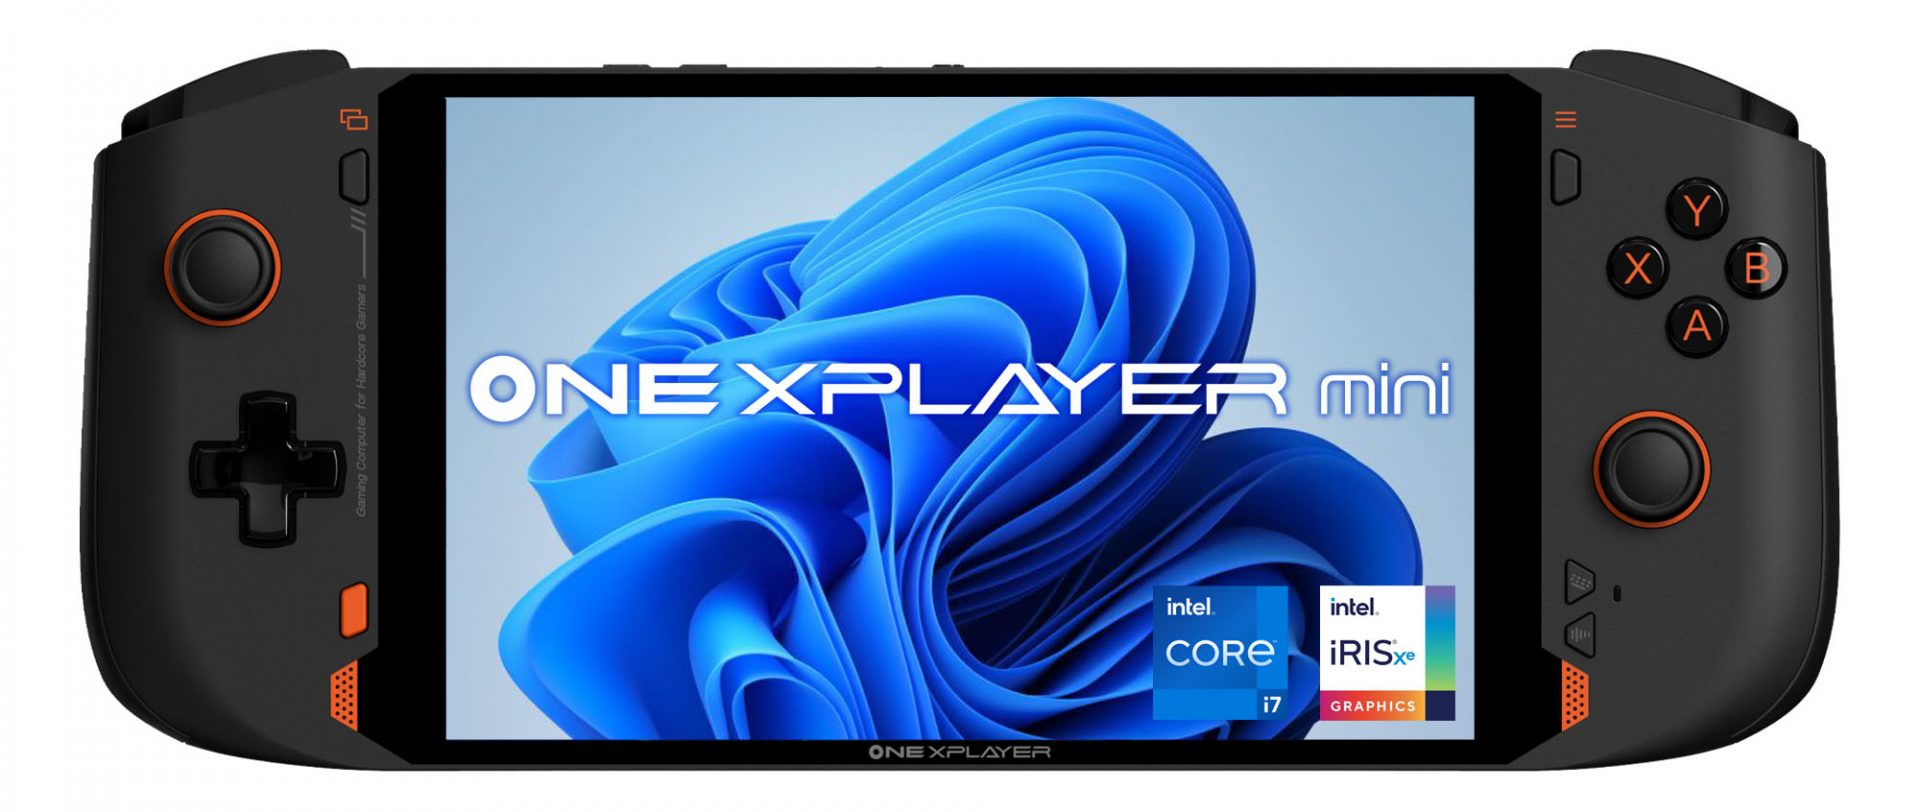
OneXPlayer is a direct competitor to Valve’s upcoming steam deck. This device is clearly inspired by Valve’s offering and it shows all over the place, from its looks to its purpose and aims to PC gamers as a handheld device.
Hardware under the hood
This device is packing a 7-inch 1080p display, 11th generation Intel Core i7-1195G7 CPU, stunning 16GB of RAM, 512GB SSD drive with the option to purchase 1TB or 2TB model. GPU of choice is Intel iris Xe Graphics that is in our opinion a bottleneck in the whole system and for more demanding games, we believe switching them to 720p would be a better option. Everything here is powered with a 10455 mAh lithium-ion battery.
OneXPlayer inputs and other stuff
Handheld is equipped with dual bumpers and dual linear triggers. The console comes with dual speakers on both sides of it. Inside the console, there is an aluminum heat sink with copper heat pipes and a fan in order to cool internal hardware. On the outside, we have two USB-C ports and one USB-A port for connections, and of course, a headphone jack for headphones. The console comes with Wi-Fi 6 and Bluetooth 5.0 for wireless connectivity.
Price
The base entry model will cost you a whopping $1.259, 1TB model $1.399 and 2TB one will go as far as $1,599. With this kind of price, I am not sure it can come up as a winner against Valve. Sure it is packing fully licensed Windows 11 that will for sure offer more options than Stem’s OS based on Linux but even with that advantage I do not think it justifies such a big price difference.
Conclusion
Of course, this kind of console or handheld PC will still find its customer base, many users will probably like it since it comes Windows ready out of the box. Sure, you can place Windows on Steam deck as well but you will need to know how, where everything is ready and you can run beside steam other launchers without issues like origin, uplay, gog, etc.
How this will be accepted by community time will tell but it is good to see that there is variety and competition in handheld PC space.
The previous Windows versions all came with Microsoft's browser Internet Explorer. A lot of users love it because not only that it is easy to use. It is also very fast. Users didn’t have to worry about compatibility because it is almost always compatible with its Windows Version.
When they introduced Windows 10, they changed the name of the browser from Internet Explorer to Microsoft Edge. It is faster and more user-friendly compared to its predecessors. But after the Creator Update, some experienced receiving the inet_e_resource_not_found error code.
In contrary to what everyone expects, you actually don’t have to uninstall and reinstall the Microsoft Edge App. What you can do is reset the browser in your Apps & Features Settings in your Microsoft Settings.
To reset the browser you can follow the steps below:
Click on the Windows icon and go to settings.
Click on Apps and this will bring you to the Apps & Features page. Look for Microsoft Edge from the list of Apps and click on it.
Choose Advance Option
Scroll down then Under Reset, click on repair or reset. When you repair it will fix the existing problem but the data that caused the problem may still be present and can still cause problems. If you click on reset, it will delete all the cache and cookies that are installed in your browser but it will save your Favorites as well as your bookmarks.
Another way to resolve this is by disabling the feature TCP Fast Open on Microsoft Edge. To disable this, go ahead and follow the steps below:
Open the Microsoft Edge browser.
Type in about: flags on the Address (URL) bar.
Under Networking, uncheck the Enable TCP Fast Open.
Close your Microsoft Edge browser and open a new one.
Flushing the DNS also worked for other Users. Sometimes, the error code the inet_e_resource_not_found is caused by a corrupted DNS cache. There are 2 ways to flush your DNS. The first option is to use the command prompt to run the command.
To access the Command prompt or CMD, you can search for it on Cortana or you can click on the Windows icon to access the Programs, scroll down to the Windows System folder and click on it.
A dropdown menu will show up, click on Command Prompt which is the first on the list.
Type in the code ipconfig /flushdns and press enter.
There will be a message that will show that says Windows IP configuration successfully flushed the DNS Resolver Cache
Exit the CMD by typing exit and press enter.
The easiest way to do this is to Press the keys Window + R on your keyboard. Type in ipconfig /flushdns in the search box and hit enter or click on OK.
These are only some of the ways to resolve the inet_e_resource_not_found. There are other ways to further troubleshoot this issue such as reinstalling your Wifi Adapter Driver or adjusting the DNS Server Address. But most of the time, users are able to resolve the issue with the steps provided above.
Each time you connect to a Wi-Fi network your PC saves that network password. If for any reason you need to see this password or passwords there are ways you can do it and we are here to show you how.
Hello and welcome to error tools where we aim to help you with all of your Windows problems and issues, where we offer our insight on various topics and sometimes go offroad and write something crazy. This time we will offer you a way on how to easily and quickly see how can you find out your memorized Wi-Fi password.
Find your W-Fi password
Make sure that you are connected to the Wi-Fi network you wish to find out the password of
Open Windows Settings app by pressing ⊞ WINDOWS + I
On the left side choose Network & Internet and click on it
Click on Advanced Network Settings
Inside Advanced Network Settings go to Related Settings
Select More Network Adapted Options
Right-click on your adapter and select Status
Click on Wireless Properties
Click on the Security tab
Click on enable on Show Character box beneath Network Security key to reveal Wi-Fi password
Bad_Pool_Header is one of the types of BSOD (Blue Screen of Death) error codes. This error triggers a problem with Windows memory allocation.
When this error message occurs, the screen turns blue and locks the user out of the application running on the system. The computer shuts down or restarts.
Solution
Error Causes
There is no one particular cause for the occurrence of the Bad_Pool_Header error code. It may appear on your system due to multiple reasons such as:
Device driver issues
Cluttered disk
Disk writing issues
Faulty memory hardware
Driver issues and disk writing issues occur when your try to update new driver versions.
During this process, users often forget to remove the files of the uninstalled version from the registry. And due to the presence of the uninstalled driver files in the registry updating and disk writing becomes an uphill task which leads to the Bad_Pool_Header display on the computer screen.
The main database of your system is the registry so you need to keep it clean to avoid disk cluttering. The hard disk clutters because the registry saves all the activities that you perform in your system. It saves junk files, internet history, invalid entries, and other unnecessary files.
This occupies a lot of your disk space thus resulting in disk cluttering and faulty memory hardware issues triggering the Bad_Pool_Header.
Ignoring the Bad_Pool_Header error is not wise. It is advisable to repair the Bad_Pool_Header right away as it can lead to serious threats like system failure and data loss.
Further Information and Manual Repair
The easiest, time and money-saving way to resolve the Bad_Pool_Header error on your system is to install Restoro.
This is a high and multi-functional repair tool that features a powerful inbuilt registry cleaner, anti-virus, and a system optimizer. This tool is the one-stop solution for all your PC-related errors including the Bad_Pool_Header blue screen of death error.
Whether it’s a driver issue, faulty memory, or cluttered disk, all the causes triggering the Bad_Pool_Header error code fall under the registry which is why it is recommended to install Restoro.
Its innovative and powerful registry cleaner scans detect and repair all the errors related to the registry in one go including the Bad_Pool_Header errors.
With this helper, you can easily remove all the unnecessary files cluttering your hard disk and damaging your registry. It wipes out the clutter in seconds and frees up disk space.
Why Should You Clean The Registry?
Sometimes the registry also gets cluttered by malicious software like viruses, spyware, and malware. These may also take up your disk space and prevent you to perform disk writing successfully and also corrupt the registry.
The privacy error finding utility embedded in Restoro helps you scan for such malicious software on your system and removes them immediately. It lends the software anti-virus properties.
When it comes to using repair tools, many users who are not technically sound often worried.
They think it may be difficult to operate. If you think the same way, let us tell you that Restoro is very easy to use. It is integrated with a high-functional yet user-friendly interface complemented by simple navigation.
Restoro Special Features
This makes it simple for all levels of users to operate it regardless of whether they are technically adept or not.
Restoro is compatible with all Windows versions. You can download it with ease and run it for scans on any Windows version you have installed on your system.
To get started, all you have to do is:
If you encounter an error saying, “Invalid file handle” when you try to rename, copy, delete a file or other operations in your Windows 10 computer, then read on as this post will guide you in what you can do to fix it. This kind of error pops up when the operating system tries to carry out an operation on a folder or file using the following words:
When you rename or create a folder or file using the reserved words given above, you could encounter an error that says, “The specified device name is invalid”. This occurs since these words are Windows system reserved words that you can’t use, unlike any other words. Thus, if you have a folder or file which contains any of the reserved words on another computer that runs a non-Windows operating system and you try to copy or rename it Windows, then it’s no wonder why you’re getting this error message.
In such cases, you can always click on the Skip button to stop the operation. However, if there are various folders or files, you can just use the Command Prompt to carry out the task. All it takes is a simple command that will get rid of the folder as well as the files in it. How? Refer to the instructions given below.
Step 1: Tap the Win + R keys to open the Run utility.
Step 2: Next, type “cmd” in the field and then tap Enter to open Command Prompt.
Step 3: After opening Command Prompt, execute the following command:
rd \.file-folder-path /S /Q
Note: The “rd” command will remove the directory or the folder while the “\.” command will select the current computer. The “/S” command, on the other hand, helps you in removing all the sub-directories and the files that are in the CON folder. The “/Q” command is not really mandatory since it helps you remove everything silently without any confirmation message. For example, if you have a folder named “CON” located on your Desktop, the path will be like this “C:/Users/<username>/Desktop/CON”. In this case, the command should be like this:
rd \.C:Users<username>DesktopCON /S /Q
However, if the error pops up for a whole different reason, you could use the following command instead to remove the reparse point extended functionality. Once you’ve entered the given command below, you should now be able to delete the file.

 So let's dive into this cool handheld in more detail and find out why we like it so much.


 Hardware under the hood
 Hello and welcome to error tools where we aim to help you with all of your Windows problems and issues, where we offer our insight on various topics and sometimes go offroad and write something crazy. This time we will offer you a way on how to easily and quickly see how can you find out your memorized Wi-Fi password.