In case you don’t know, Windows 10 comes with a native ability to project to another screen, be it wireless or wired. All it takes to do that is by tapping the Win + P key combination to display options to manage the extended display. However, there are times when you might encounter errors when you do that like the “Your PC can’t project to another screen” error. This kind of error stops you from projecting your computer to the other screen. Here’s the full content of the error message:
“Your PC can’t project to another screen, Try reinstalling the driver or using a different video card.”
This error could be due to loosely connected hardware or the display adapter. It is also possible that a recent Windows Update has messed up its settings. To resolve this issue, you can try several suggestions that will be given in this post. You can try to check the hardware cable connections or run the Hardware and Devices troubleshooter. You could also update or reinstall the display adapters or replace the graphics card.
Option 1 – Try checking the hardware connections
The first thing you have to do before you further troubleshoot the problem is to check the hardware connections of your computer and see if there are damaged ones, just like with the ports as it would also affect the overall connectivity of the device with the computer. You also have to make sure that no pin is missing from the ports. So if you notice some irregularities in the connecting cable physically, you might have to buy another one and replace it and then see if it fixes the problem or not.
Option 2 – Run the Hardware and Devices Troubleshooters
The first thing you need to do is click on Start and then on the gear-like icon to pull up the window for Settings.
After opening Settings, look for the Update and Security option and select it.
From there, go to the Troubleshoot option located on the left-hand side of the list.
Next, select Hardware and Devices from the list and open the Troubleshooter and run it. Once it is doing its job, wait for it to complete the process and then restart the system.
After the system restarts, check if the problem’s now fixed. If not, refer to the next option given below.
Option 3 – Try to update or reinstall the display adapters
You might also want to update the drivers for Display adapters and Monitors or you might also have to update or reinstall your NVIDIA driver if you’re using one. To update or reinstall the display adapters, follow these steps:
Tap the Win + R keys to open the Run dialog box and then type in MSC and tap Enter or click OK to open the Device Manager.
Expand the section for Display Adapters.
And then select the Display Driver and right-click on it.
From the drop-down menu, select the Update Driver option and follow the on-screen instructions to install the latest version of the Display Driver.
Restart your PC after the installation.
If you find that updating the drivers does not help, you can try to reinstall them. How? Simply follow the steps below.
Tap the Win + X keys and select the Device Manager.
After that, look for the affected driver in the Device Manager window. And if you see a yellow exclamation mark beside it, right-click on it and select the option “Rollback” to roll back the driver.
And if the Rollback option is not available, just select Uninstall and then restart your PC.
Finally, open the Devices Manager once again and select the option “Scan for hardware changes” to install the driver.
Option 4 – Consider replacing the graphics card
You might also want to consider replacing the graphics card of your computer to resolve the problem if the options provided above didn’t work.
PrivacyAssistant is a browser extension developed by SearchAssistant.net. These extensions allegedly offer users a safer way to browse the internet and some other tools to customize the home page with background wallpapers and one-click links that can be added. While all this may sound appealing, PrivacyAssistant also monitors your browser activity, search quarries, clicks, visits, and possibly personal information.
This extension changes your default home page to SearchAssistant.com and rerouting all searches through its search portal, displaying sponsored links instead of your typical search results. While active you may see unwanted ads and even pop-up ads appearing while browsing the internet.
Several anti-virus programs have classified this extension as a Browser Hijacker, and are, therefore, for security reasons, not recommended to keep on your computer.
About Browser Hijackers
Browser hijacking is amongst the web’s constant risks that target internet browsers. It’s a kind of malicious software that alters your internet browser’s configuration settings and redirects you to websites or pages that you had no intention of checking out. They are created to disrupt browser functions for many different reasons. Usually, hijackers will force hits to internet sites of their choice either to increase traffic producing higher advertisement earnings, or to gain a commission for each and every user visiting there. Most people believe that these kinds of websites are legitimate and harmless but that is not the case. Almost every browser hijacker poses an existent threat to your online safety and it’s important to categorize them under privacy dangers. When the program attacks your PC, it starts to mess things up a whole that slows your computer down to a crawl. In the worst-case scenario, you might be forced to deal with serious malware threats as well.
How one can recognize a browser hijack
There are numerous symptoms that point to a browser hijacking: your browser’s home page is suddenly different; you get re-directed to sites you never meant to visit; the default web engine has been changed and your web browser security settings have been lowered without your knowledge; find new toolbars that you simply did not add; you might find many pop-up ads on your computer screen; your web browser starts running slowly or displays frequent errors; you have prohibited entry to certain web pages, for example, the website of an antivirus software developer like SafeBytes.
So how exactly does a browser hijacker infect a PC
Browser hijackers may use drive-by downloads or file-sharing websites or perhaps an email attachment in order to reach a targeted computer system. They can also originate from any BHO, extension, toolbar, add-on, or plug-in with malicious intent. Other times you might have unintentionally accepted a browser hijacker as part of a software program bundle (generally freeware or shareware). A good example of some popular browser hijackers includes Conduit, Anyprotect, Babylon, DefaultTab, SweetPage, Delta Search, and RocketTab, however, the names are constantly changing.
Browser hijacking can lead to serious privacy problems and even identity theft, disrupt your browsing experience by taking control over outgoing traffic, considerably slows down your personal computer by consuming lots of system resources, and result in system instability at the same time.
How to repair a browser hijack
Some hijackers can be removed by uninstalling the free software they were included with or by deleting any extension you’ve recently added to your browser. But, the majority of hijackers are extremely tenacious and require specialized applications to eradicate them. Furthermore, manual removal requires you to execute many time-consuming and tricky procedures which are hard to carry out for inexperienced computer users.
How To Get Rid Of Virus That Is Preventing Antivirus Installation?
Viruses can cause a great deal of damage to your computer system. Some malware sits in between the computer and your net connection and blocks some or all sites that you really want to visit. It will also prevent you from installing anything on your computer, especially anti-malware software. So what to do if malicious software keeps you from downloading or installing Safebytes Anti-Malware? Although this sort of problem can be difficult to circumvent, there are some actions you can take.
Make use of Safe Mode to resolve the problem
In Safe Mode, you can actually change Windows settings, un-install or install some software, and eliminate hard-to-delete malware. In case the malware is set to load immediately when PC boots, switching into this mode may well prevent it from doing so. To enter into Safe Mode or Safe Mode with Networking, press F8 while the system is starting up or run MSCONFIG and look for the “Safe Boot” options in the “Boot” tab. Once you’re in safe mode, you can try to install your anti-malware program without the hindrance of the malicious software. Following installation, run the malware scanner to remove most standard infections.
Switch over to some other web browser
Some malware mainly targets specific browsers. If this is your situation, use another internet browser as it can circumvent the malware. In the event you suspect that your Internet Explorer has been hijacked by a computer virus or otherwise compromised by cybercriminals, the best approach is to switch over to a different internet browser like Mozilla Firefox, Google Chrome, or Apple Safari to download your favorite computer security program – Safebytes Anti-Malware.
Run anti-virus from a USB drive
Another solution is to create a portable anti-malware program on your USB thumb drive. Try these simple actions to clean up your affected PC using a portable antivirus.
1) Download Safebytes Anti-Malware or Microsoft Windows Defender Offline onto a clean computer system.2) Plug the pen drive into the uninfected PC.3) Run the setup program by double-clicking the executable file of the downloaded application, which has a .exe file format.4) Choose the flash drive as the location for saving the file. Follow the on-screen instructions to complete the installation process.5) Transfer the pen drive from the uninfected computer to the infected computer.6) Double-click the EXE file to open the Safebytes tool from the pen drive.7) Click “Scan Now” to run a scan on the infected computer for viruses.
A Look at the Best AntiMalware Program
If you are looking to download an anti-malware application for your computer, there are several tools out there to consider nonetheless, you cannot trust blindly anyone, no matter whether it is paid or free software. Some are really worth your money, but many aren’t. While looking for an anti-malware program, choose one that offers solid, efficient, and complete protection against all known computer viruses and malware. One of the highly recommended software is SafeBytes AntiMalware. SafeBytes carries a very good track record of quality service, and customers appear to be happy with it.
SafeBytes anti-malware is really a powerful, very effective protection tool created to assist users of all levels of IT literacy in finding and eliminating malicious threats out of their PC. Once you’ve got installed this software, SafeByte's state-of-the-art protection system will make sure that no viruses or malicious software can seep through your PC.
SafeBytes anti-malware comes with a plethora of enhanced features which sets it aside from all others. Listed below are some of the highlighted features included in the tool.
Robust Anti-malware Protection: This deep-cleaning anti-malware software goes much deeper than most anti-virus tools to clean your computer. Its critically acclaimed virus engine finds and disables hard to remove malware that conceals deep inside your personal computer.
Active Protection: SafeBytes gives round-the-clock protection for your PC limiting malware attacks in real-time. They’re extremely effective in screening and removing various threats since they’re constantly improved with the latest updates and alerts.
Web protection: SafeBytes checks the links present on a web page for possible threats and alerts you whether the website is safe to explore or not, through its unique safety ranking system.
Light-weight: The program is lightweight and will work quietly in the background, and that does not impact your computer efficiency.
24/7 Premium Support: Support service is readily available for 24 x 7 x 365 days through email and chats to answer your queries.
Technical Details and Manual Removal (Advanced Users)
If you wish to manually remove PrivacyAssistant without the use of an automated tool, it may be possible to do so by removing the program from the Windows Add/Remove Programs menu, or in cases of browser extensions, going to the browsers AddOn/Extension manager and removing it. You will likely also want to reset your browser.
To ensure the complete removal, manually check your hard drive and registry for all of the following and remove or reset the values accordingly. Please note that this is for advanced users only and may be difficult, with incorrect file removal causing additional PC errors. In addition, some malware is capable of replicating or preventing deletion. Doing this in Safe Mode is advised.
The following files, folders, and registry entries are created or modified by PrivacyAssistant
Having an eMail in today's modern world is no longer a privilege or being geeky, it has surely become a necessity. From Facebook to LinkedIn or Steam many services today require you to have an account in order to use them, and in order to create an account, you need working eMail.
That being said many people today have several eMail accounts, one for social media, one for work, maybe even one for very close friends and family. How creating eMail today is completely free we might end up with several eMail accounts.
eMail clients have also evolved much since their first days and became more than just applications for receiving eMails, today they can take various different tasks having additional features built into them like calendar, batch eMail processing, etc.
Taking all of said into account I am presenting to you within my personal opinion some of the best eMail clients starting with free ones.
Best free eMail clients
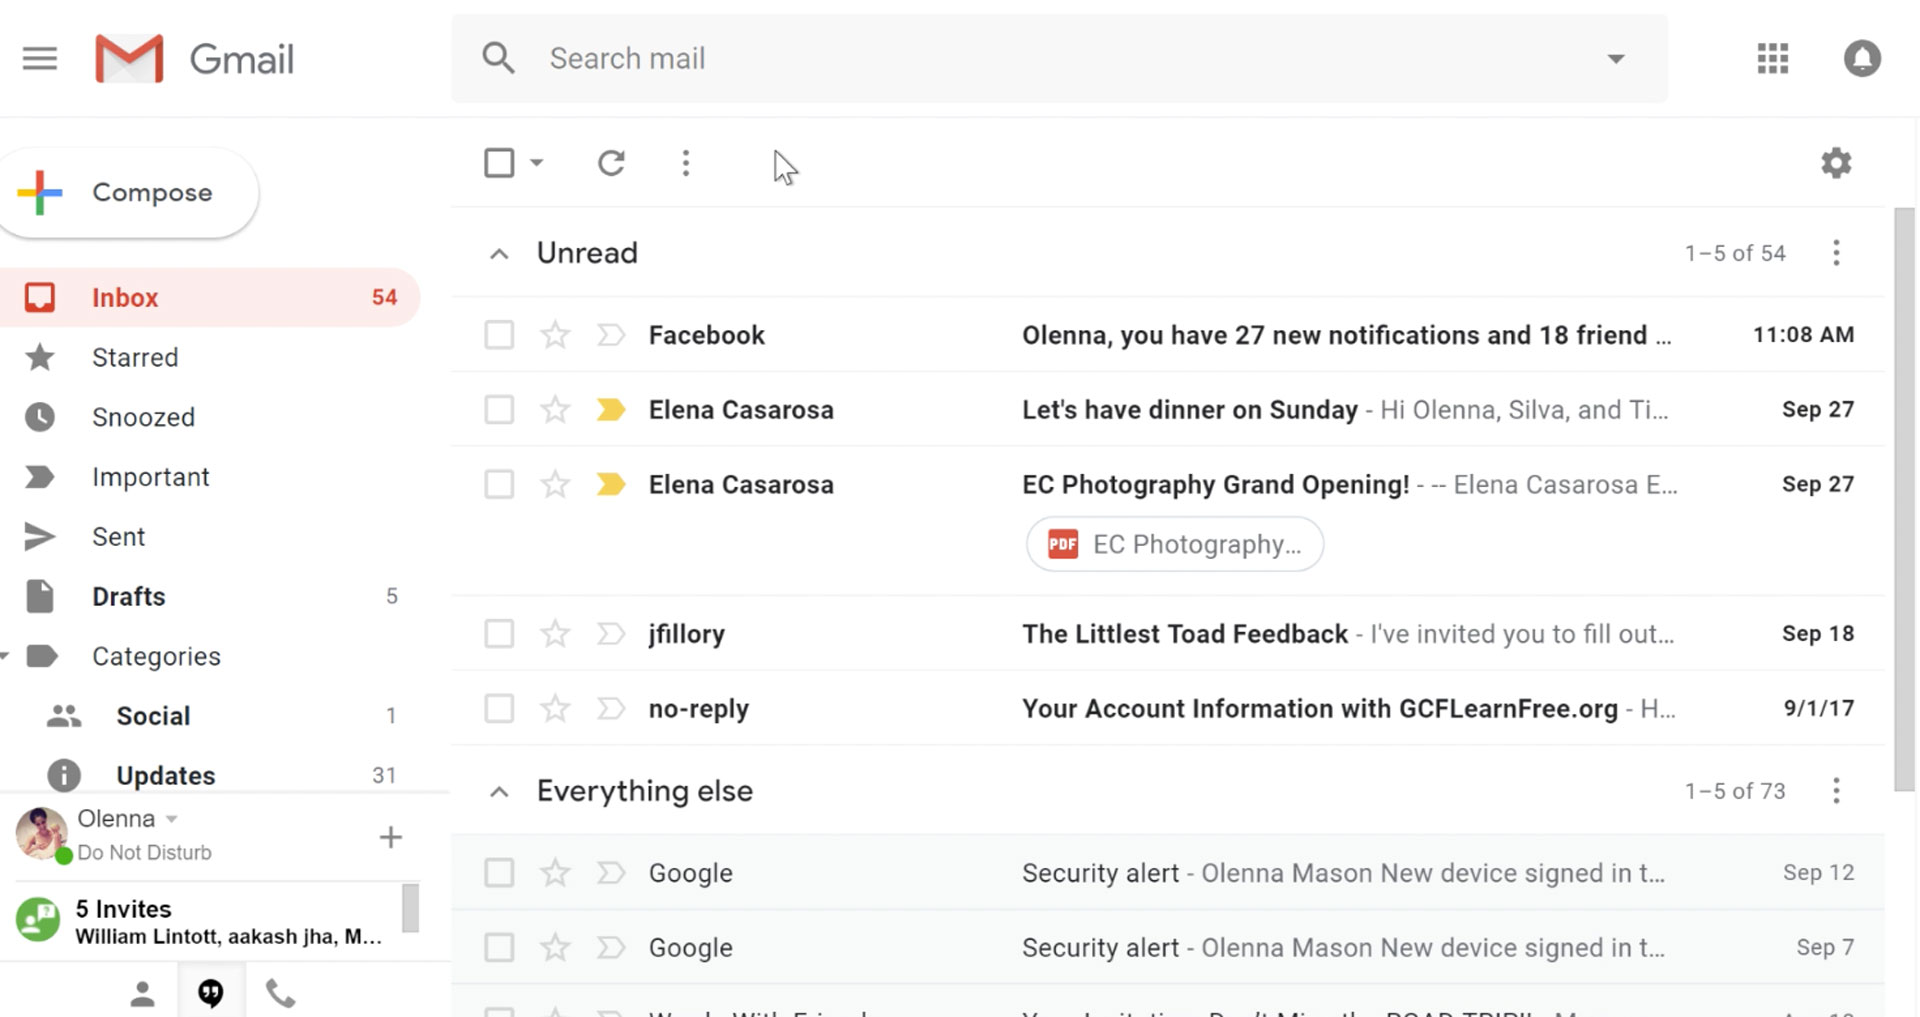
Google Gmail
https://gmail.comIt would be very difficult to even start a free eMail list without mentioning Google's Gmail. Introduced all the way back in 2004 as an invite-only service it became over time the most popular email platform largely due to the fact Google is offering free eMail accounts.
There are a lot of good things to be said about Gmail itself, most of the area is clutter-free and the largest space is reserved for eMail itself letting users focus on what is important. WEB client itself means that you do not need to have any application installed on your device, altho via Google chrome, you can use Gmail offline offering you flexibility if needed.
The ability to connect and manage other accounts like Outlook, Yahoo, etc is just making Gmail even more attractive, and the snooze feature is a really neat little detail that will pause eMail notifications if you need to focus on other things.
Lack of organizing messages into folders is a little confusing since Gmail offers its own unique label system but sometimes I need to have old reliable save eMail to folder.
All in all, Gmail is a great service and it offers a great eMail on the go experience.
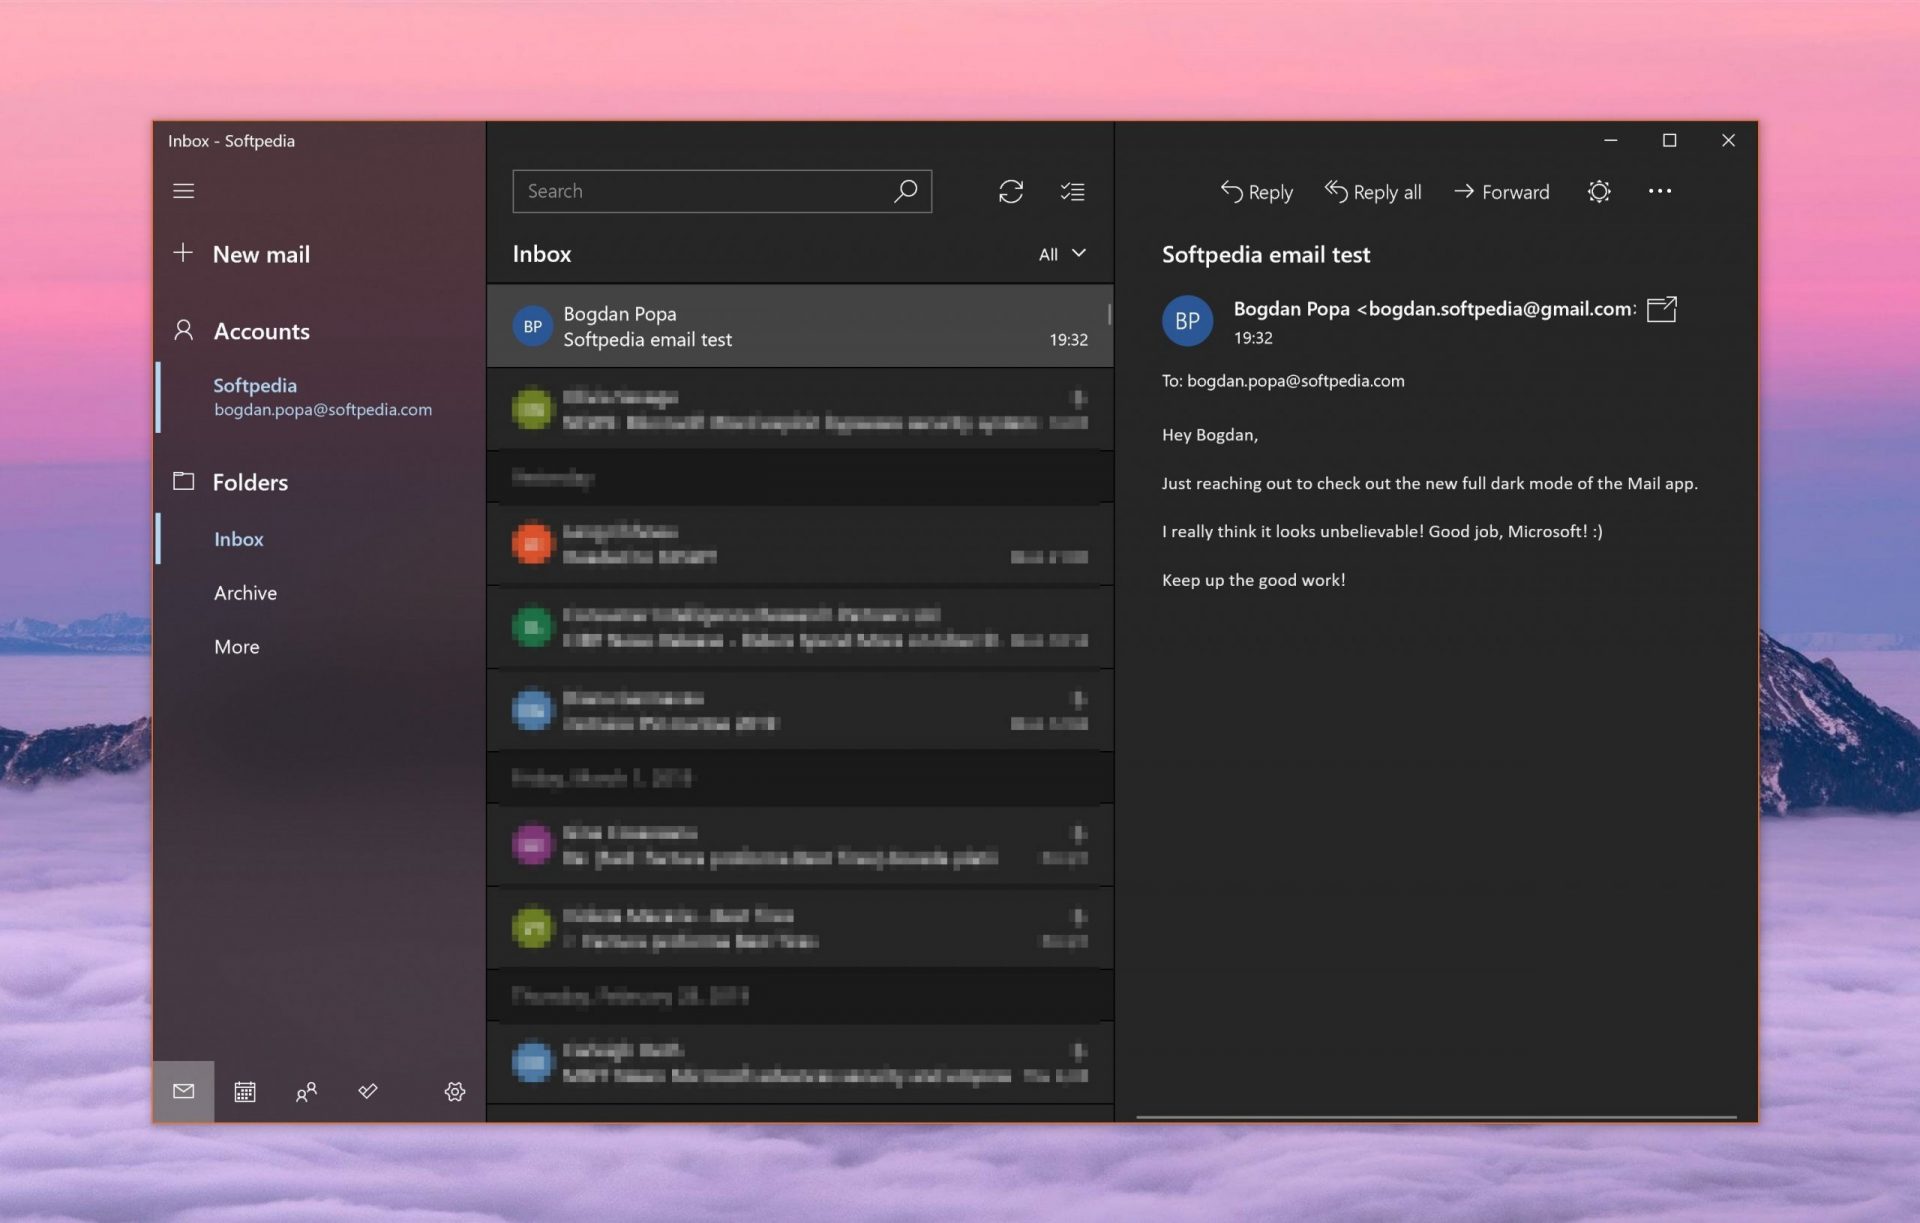
Mail eMail client
https://www.microsoft.com/en-us/p/mail-and-calendar/Free Windows eMail client simply called Mail is what was once outlook express. Mail itself has the ability to work with other popular accounts like Google Gmail account, Yahoo, iCloud etc. How it comes with Windows OS and it integrates very well with Microsoft Calendar, this eMail client is for many the first choice.
On the negative side, I might say this is a strip-down version of Outlook which is paid solution so some features are missing if we would compare the two.
Overall, a simple and nice eMail client worth your time, especially if you are on the Windows platform.
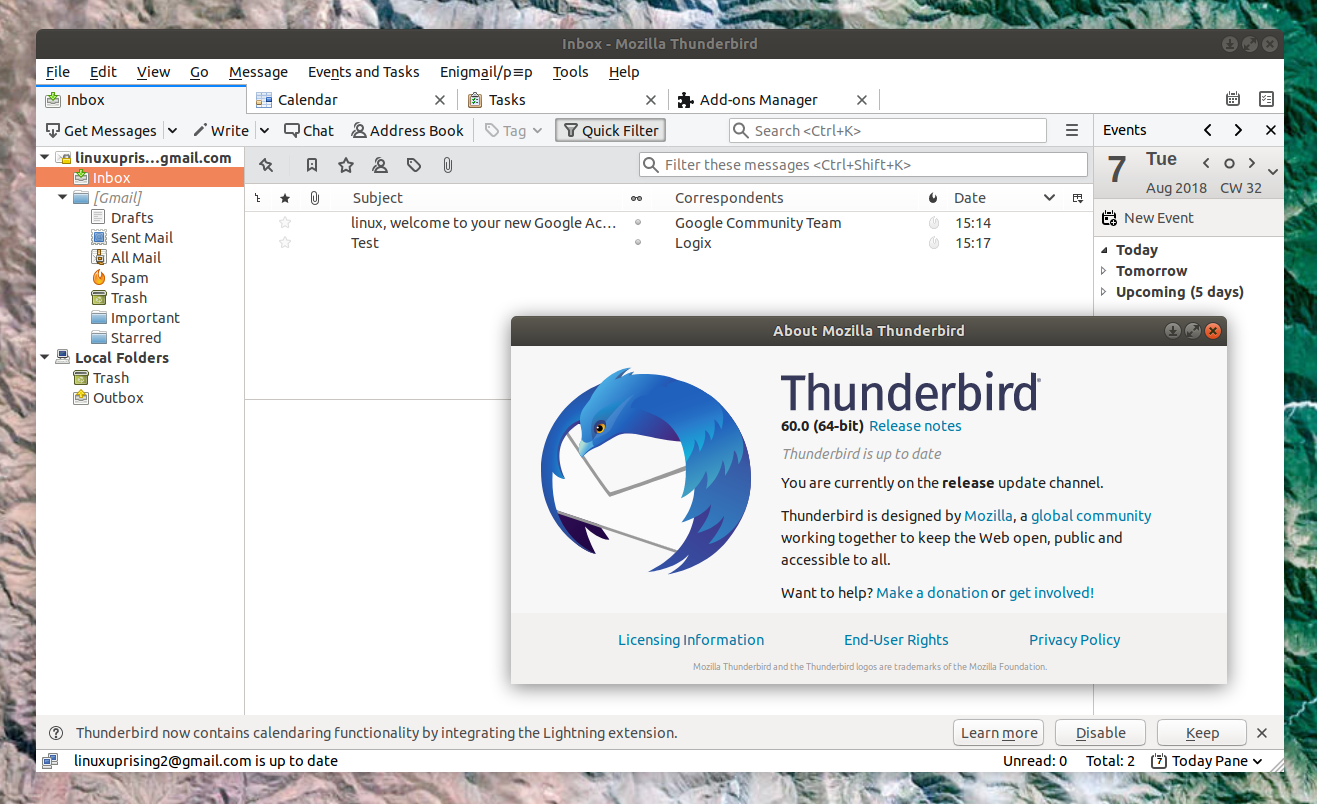
Mozilla Thunderbird
https://www.thunderbird.netGreat eMail client matching in functions against paid and premium solutions of big tech companies. Fueled with plenty of customization options and reskinning ones this eMail client offers a lot for its free price tag.
It is also fueled by Mozilla community focusing on privacy and security. It can work with any mail service and it is lightweight with a clean look, altho the look itself can be heavily customized.
The bad side is that client itself relies on email services to provide cloud-based emails, so if you are receiving your email via a service that does not have a cloud-based service in itself all of your received emails will be locked to the computer where you have received them. Also customizing it can be sometimes a little too technical for the average computer user.
All in all, Thunderbird is one great eMail client and it would be a shame not to use it because of its technical side, if you need a reliable and secure eMail client on a single machine, look no further than Thunderbird.
Paid eMail clients
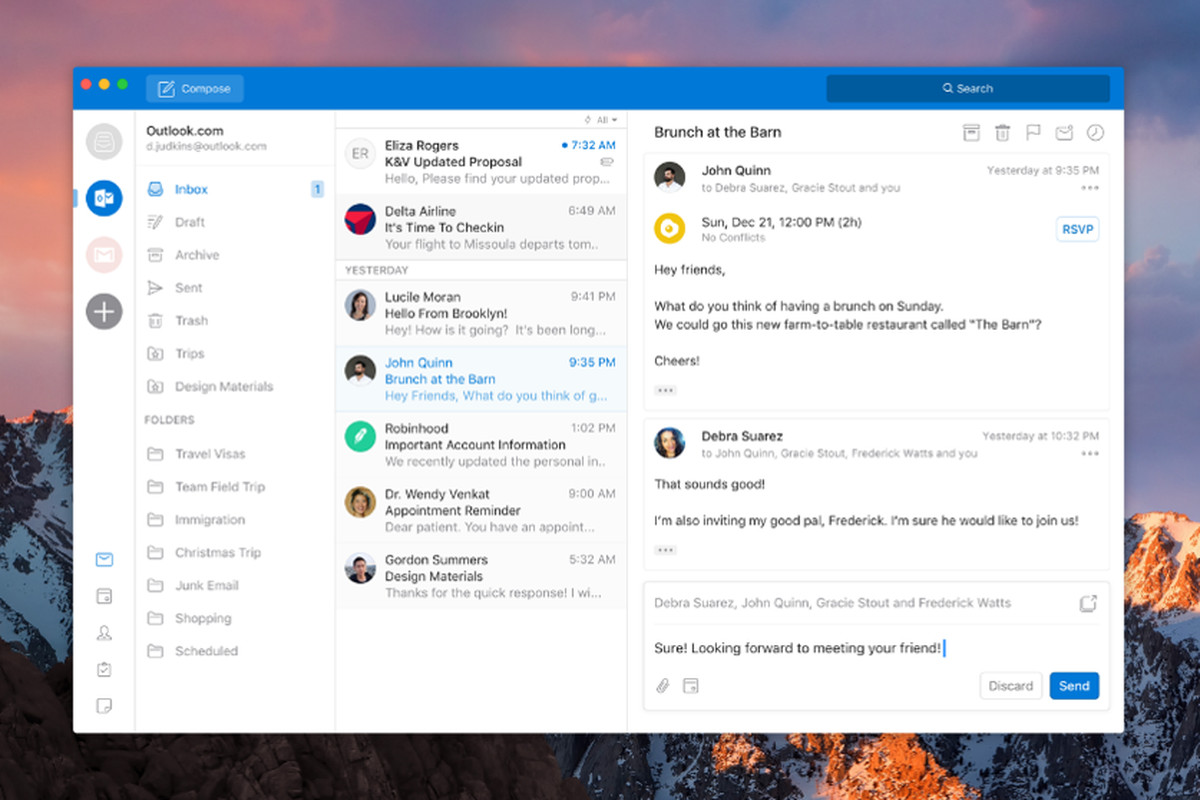
Microsoft Outlook
https://www.microsoft.com/en-us/microsoft-365/Outlook comes as a part of the Microsoft Office suite and as one of the oldest eMail clients, it is still widely popular and adopted through many users and businesses. It has tight integration with all Microsoft services and full integration with Calendar making it one of the if not the best eMail client out there.
Outlook also has a free online service completely free for personal use as well.
The downside is that you can not get it as a separate product if you want a business version other than as a part of the Office suite.
The final verdict would be that this is perhaps the best eMail client out but the big downside is that there is no desktop version outside the Office suite.
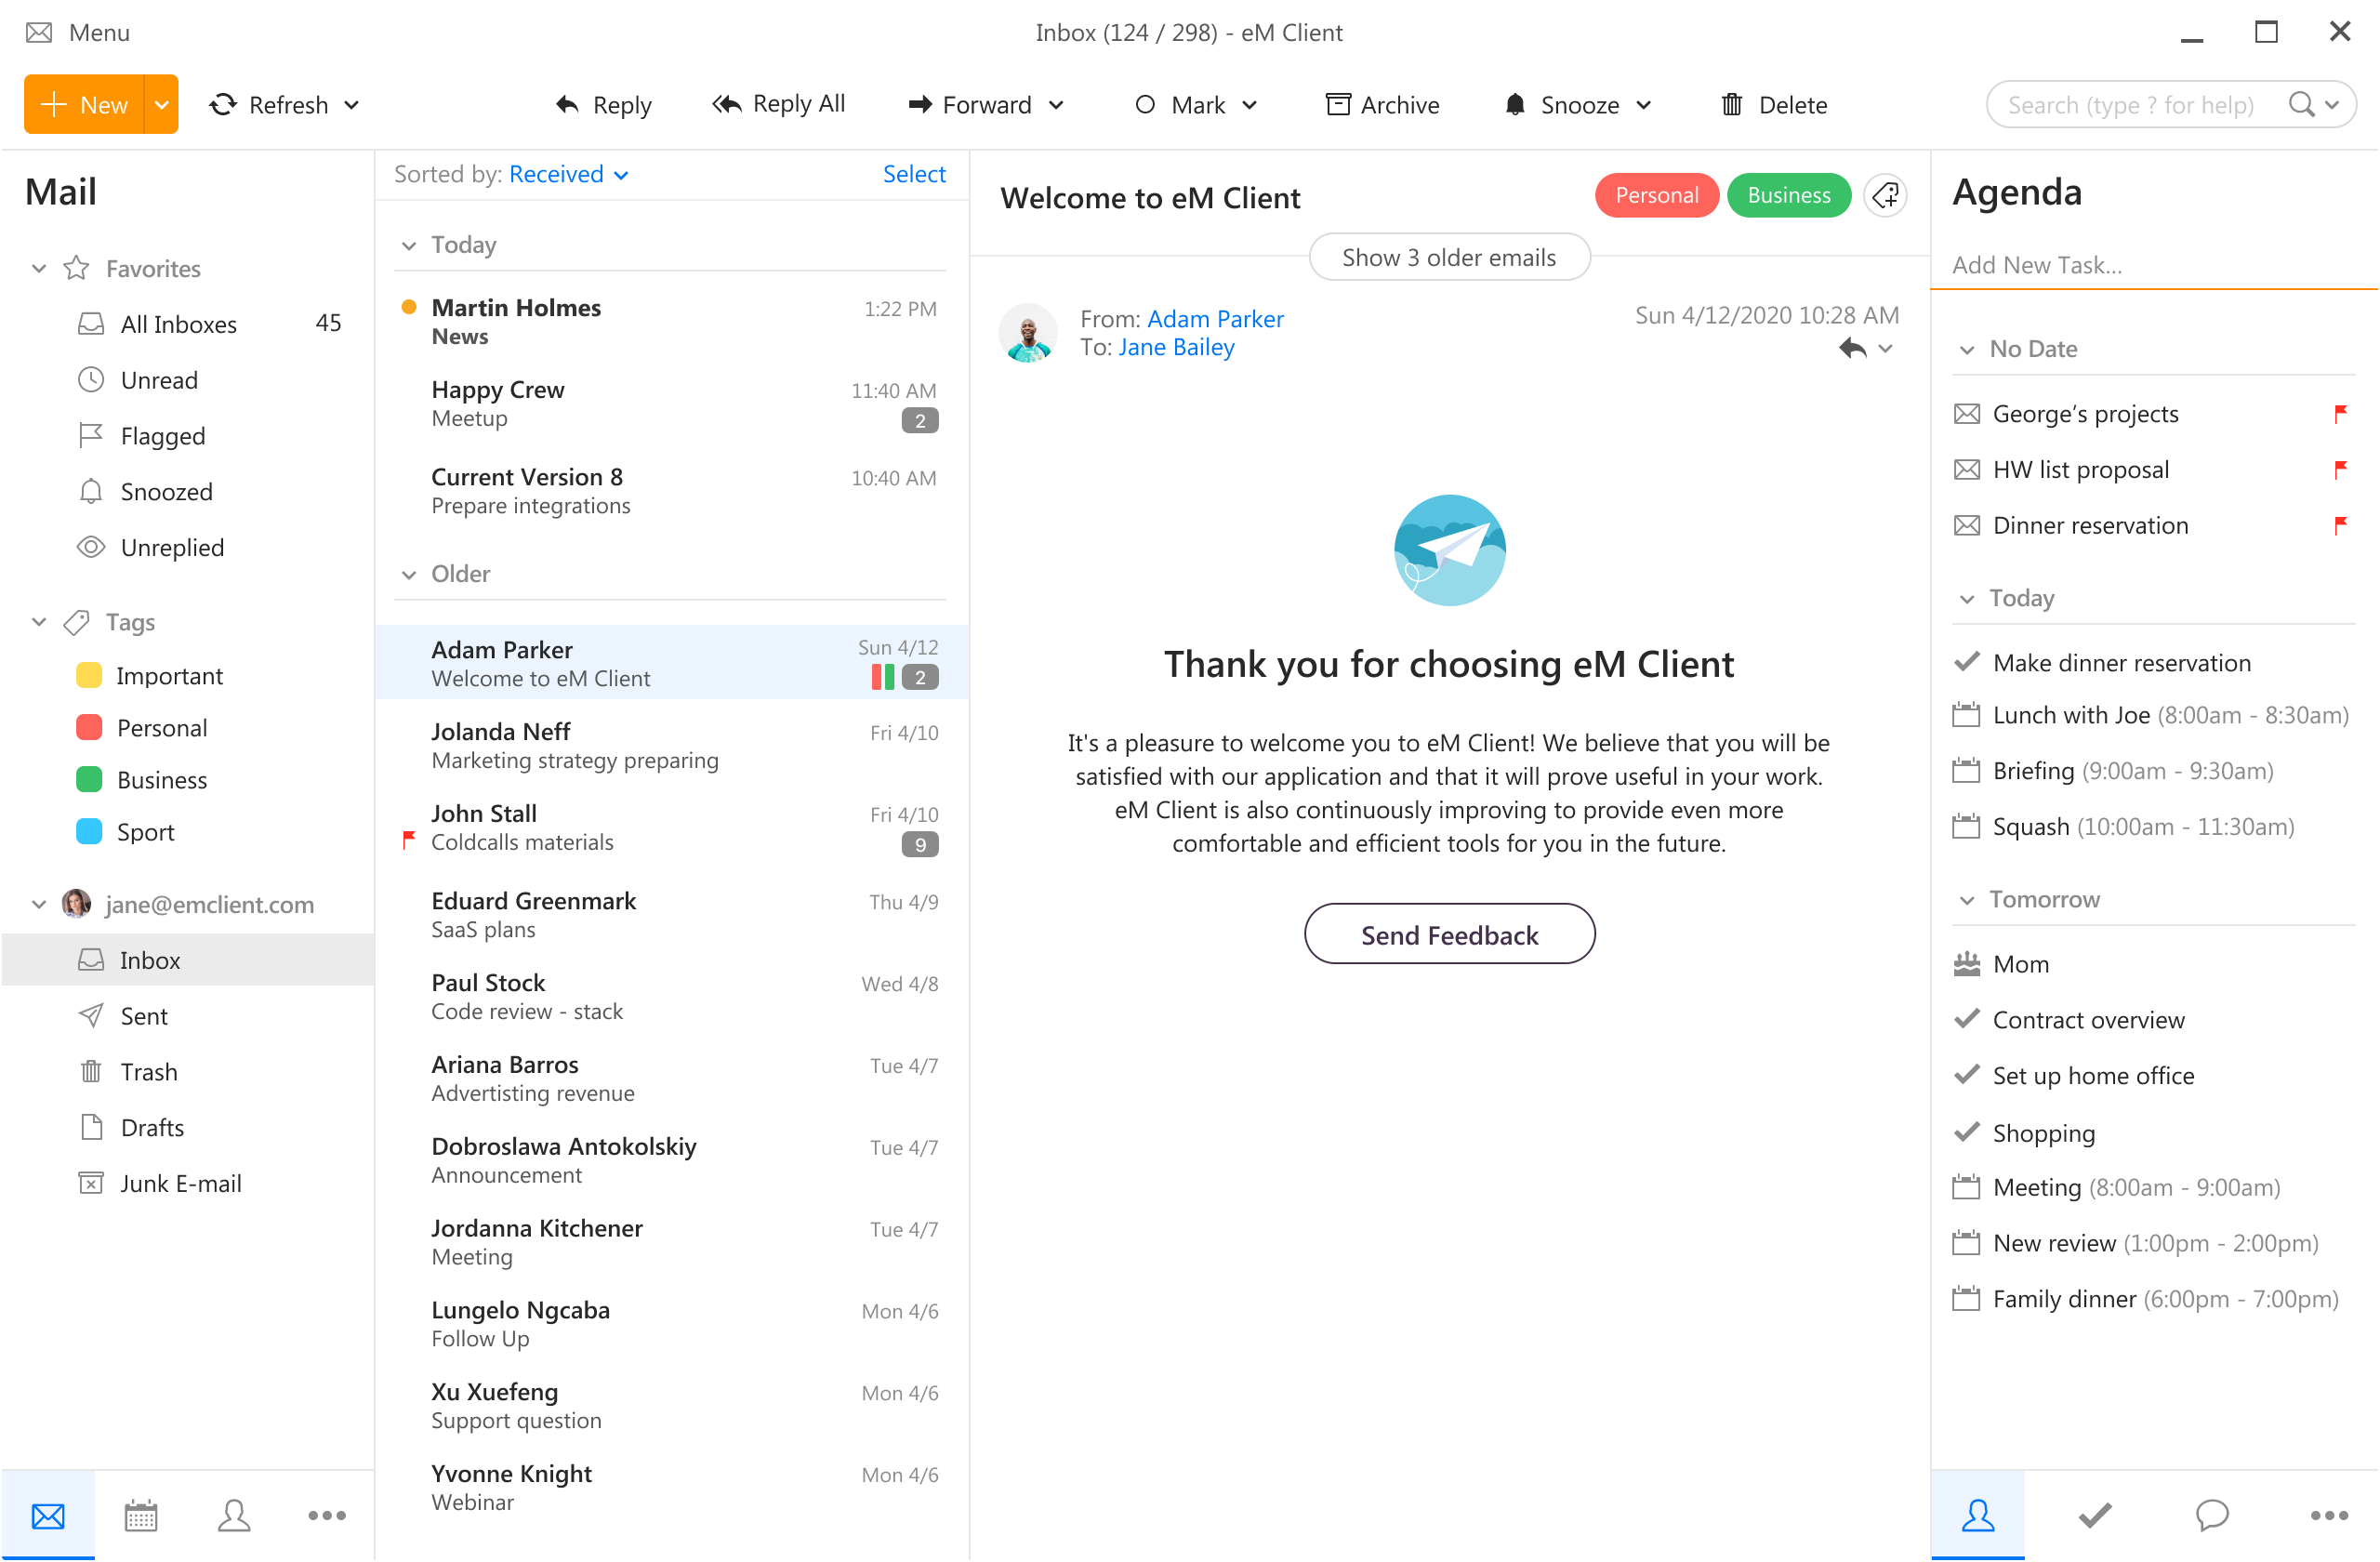
eM Client
https://www.emclient.com/eM Client offers a wide array of features, including a calendar, contacts, and chat. Support is provided for all the major email services including Gmail, Yahoo, iCloud, and Outlook.com. The latest version also offers PGP encryption, live backup, basic image editing capabilities, and auto-replies for Gmail.
Its automatic system makes it very easy to get emails from other services since there is no manual setting, all that is needed is to type in your email and eM Client will do everything else automatically.
A one-time purchase is not pricy and it could offer some features that some free clients are missing. Go check it out with a free trial and see if it is for you.
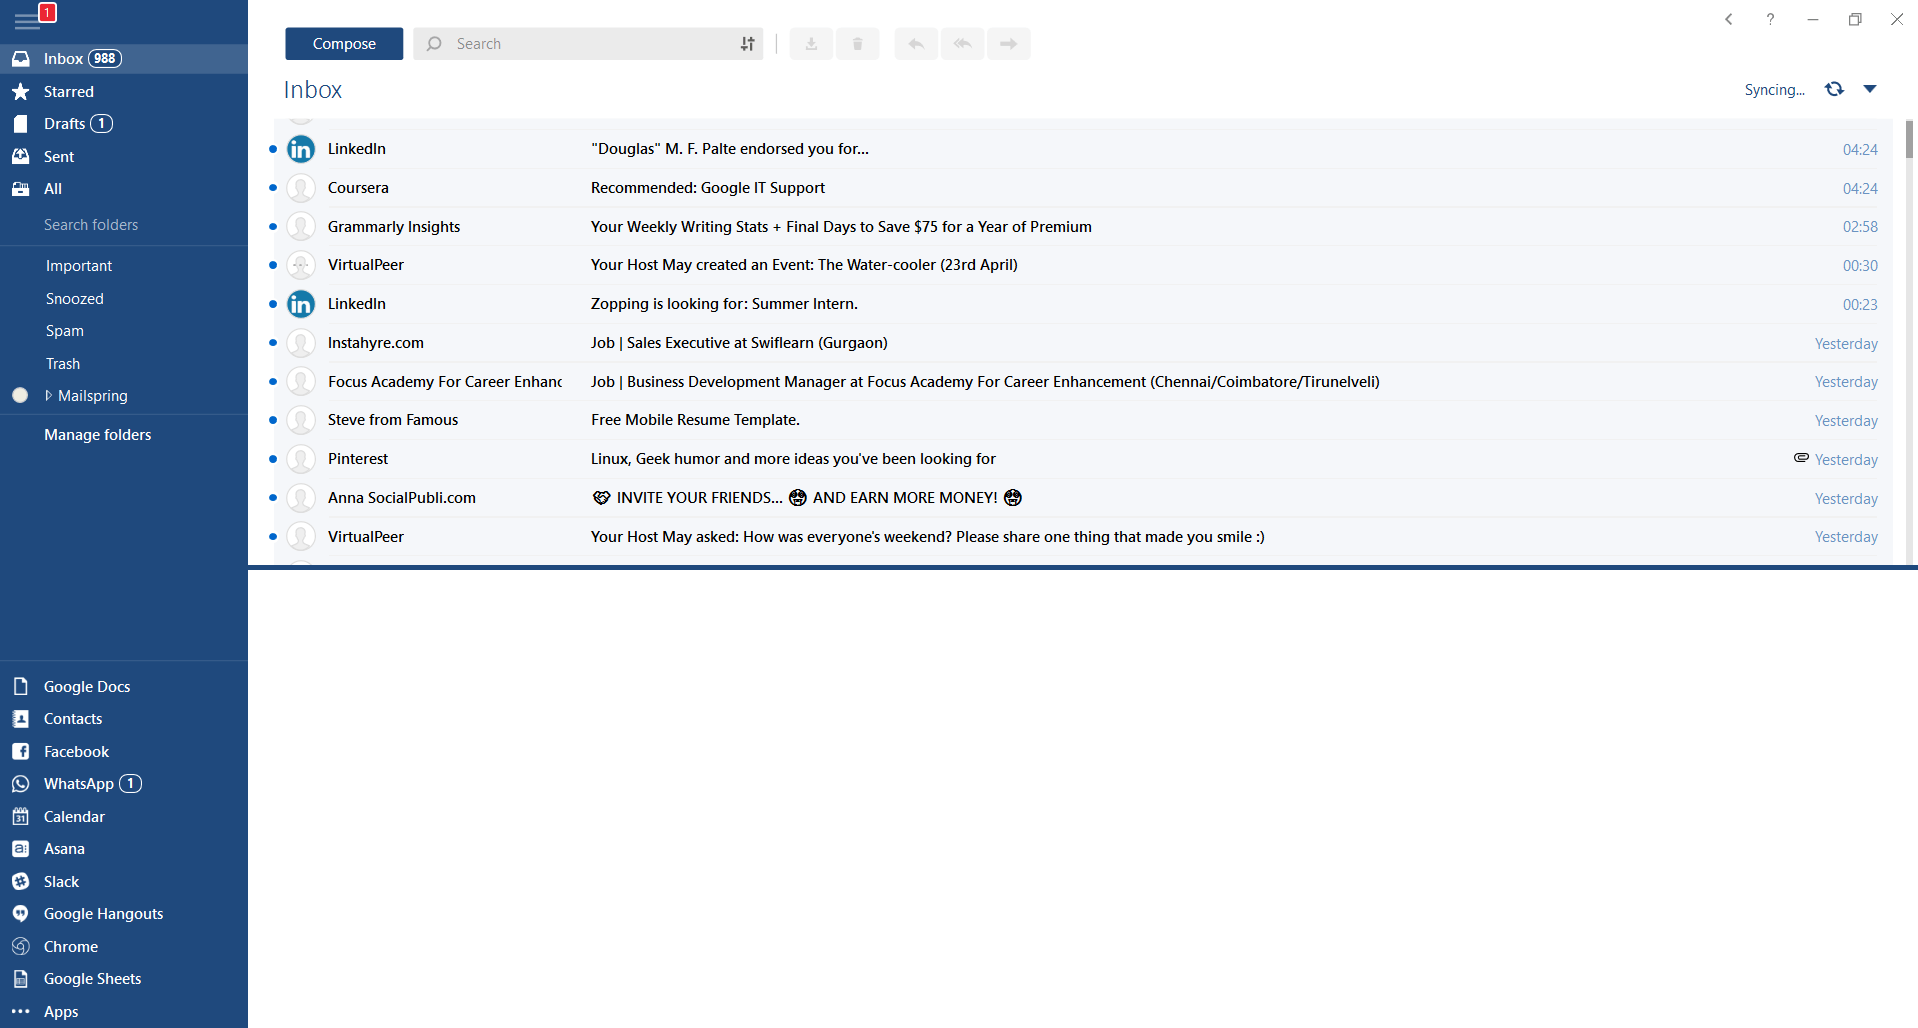
Mailbird
https://www.getmailbird.comThis eMail client's main focus is the simplicity of use with visual appeal while tackling multiple eMail accounts. It has many built-in apps along with a customizable interface. Unlike some more Microsoft-centric email clients, Mailbird Business supports a diverse range of integrated apps, including WhatsApp, Google Docs, Google Calendar, Facebook, Twitter, Dropbox, and Slack, all making for a better-streamlined workflow.
The downside of this client is the yearly subscription plan. I think people, in general, want to get away from software subscription plans so I will include this as a downside but bear in mind it is downside just in terms of a business plan not in the client itself.
Inky
https://www.inky.com/Inky is eMail client if you are looking for security. It uses AI along with machine learning in order to block all types of phishing attacks that can get through to other clients. The proprietary machine learning technology can literally read an email to determine if it has phishing content, and then is able to quarantine the email or deliver it with the malicious links disabled. It also takes things a step further and offers an analytics dashboard, which allows an administrator to see patterns of attacks based on dates, or targeted users.
The downside is that client itself is so much focused on security that sometimes some nonsecurity features get overlooked and provide a poor experience but if you need a good and greatly secured eMail client Inky is one to check out.
The error code 2738 typically occurs either when you attempt to install a program or uninstall it on Windows Vista and 7. The error message is displayed in the following format:
“Error 2738. Could not access VBScript run time for custom action.”
It is a type of runtime error associated with VB (Visual Basic) Script. It indicates that the VB script engine is not correctly registered on your computer.
Solution
Error Causes
The error 2738 may occur due to multiple reasons. These include:
Windows VB Script engine is not properly installed or is disabled on your PC
Registry keys are incorrect
Corrupt registry entries
Poor PC maintenance
As this error code may be generated due to registry issues, it is advisable to fix it immediately as it may pose serious threats to your system like system failure, crash and valuable data loss. And complete data retrieval is often the hardest task.
Further Information and Manual Repair
To avoid such threats and to resolve the error 2738 on your PC immediately, here are some solutions that you can try:
Register the VB Script Engine Correctly on Your PC
This can be done by running the command prompt as administrator:-
Simply go to the start menu, click all programs, and select accessories.
Right-click on Command Prompt and select ‘run as Administrator’.
Navigate to the folder that contains the DLL. If you are using Windows 32 bit version, then type cd %windir%system32 into the Command Prompt and then press enter.
Nonetheless, if you are using 64-bit version Windows then type the following command: regsvr32 vbscript.dll and then press enter. This will help you register the VB script engine correctly and resolve the issue.
Download and Run Restoro
If the error still persists, then this means the underlying cause of the error 2738 could be invalid and corrupt registry keys. To resolve either of the causes in seconds, it is advisable to install and run Restoro.
Restoro is an advanced, innovative, and multi-functional PC Fixer. This tool is embedded with multiple utilities including a powerful registry cleaner, an antivirus and a system optimizer. The registry cleaner is a powerful utility that instantly detects all registry issues and resolves them right away.
The registry saves all activities performed on the PC. It stores all types of files including invalid registry keys, cookies, internet history, junk files and temporary files.
If these unnecessary files are not removed and cleared from the PC, it not only takes a lot of disk space but also damages the registry and dll files.
The registry cleaning utility detects all such files and removes them. It wipes out all invalid registry entries and bad keys clean the registry and restores it.
In addition to this, this tool can also be used to remove viruses and optimize the system speed. It is a user-friendly and highly functional PC repair tool. It is compatible with all Windows versions
Click here to download Restoro on your PC and resolve error 2738 right away!
It really sucks when you can’t fully enjoy the newest version of your favorite OS.
Windows 11 is still relatively fresh and consequently has some annoying little bugs that really ruin our experience. The good news is that you’re not alone and most of them are easy to fix.
Here are 5 commonly reported Windows 11 issues and what you can do to get rid of them.
1. Windows 11 audio problems
One of the absolute most irritating things in the world is struggling with the sound on your computer. Windows 11 users have reported facing the issue of low or no sound. If you’re currently experiencing the same frustration, you can be relieved. Chances are fixing it will only take a few minutes.
The first thing to check would be whether you accidentally muted your device by pressing the mute button on your keyboard. Yes, we know it sounds a lot like the old “have you tried turning it off and on again?” But it’s important to leave no stone unturned, and the most obvious things are usually the ones we easily overlook.
Moreover, if you have several audio output sources, check whether the right one is selected. You can do this via the Action Center or through Settings. If you want to use the same source every time, we also recommend you set it as the default one.
It’s also important to have a good, up-to-date audio driver. More often than not, this will be the true cause of your audio struggles. Make sure to update your driver, and if that doesn’t work out, you can always un- and reinstall it or install a different one.
Lastly, if all attempts remain unsuccessful, run the audio troubleshooter to figure out what’s actually going wrong.
2. Unable to find files
Such a powerful new operating system, yet it can’t seem to do the simplest thing imaginable? The File Explorer not responding on Windows 11 is one of the most frustrating and most common problems with Microsoft’s newest iteration of its awesome OS.
However, 9/10 times it can be fixed by simply restarting your PC. You could also try killing the Windows Explorer process in the Task Manager and then rerunning it.
If these don’t help, check whether there are any pending Windows 11 updates. A single missing update can compromise your PC’s functionality, so always make sure to install them all on time.
Should none of that work, then there are other ways to solve the File Explorer problem. However, then the issue is probably a bit deeper and it’s no longer in the ‘easy fix’ territory.
3. Start menu not working
Just like the File Explorer, the Start menu is a fundamental element of your OS. So, it’s only natural that its malfunction grinds your gears. It may be more customizable than on previous Windows versions, but it doesn’t always work smoothly.
If you’re facing the so-called Start menu critical error, there are a few things this could be caused by. Usually it means you turned off your system while an important update was still being installed, there is a corrupt file on your PC, or Windows forcefully stopped a program.
Whatever the reason, the solution should be pretty simple. Try the basic steps: restarting your File Explorer (like we explained above) and signing out and back into your account. If that doesn’t do anything, you may want to try uninstalling third-party start menu apps (if you have any), since they can interfere with your default programs’ functionality.
Now, those are the easy fixes. If you get nowhere with them, you might need to identify the root cause and search for more complex solutions than that.
4. Snipping tool not working
Our beloved screenshot tool was introduced with Windows 10 and Microsoft decided to keep it. However, you were probably just as disappointed as us when you tried to run it and failed.
Normally, this can be fixed by installing the latest Out-of-band (OOB) update, or even pending updates in general. Even if your system appears to be up-to-date, run the checker just in case.
Another cool thing Windows 11 lets you do is ‘Repair’ and ‘Reset’, which is the easiest way to troubleshoot your Snipping tool. If this fails, you can also try the good old un- and reinstall method. Simply uninstall the tool through the Control Panel and reinstall it from the Microsoft Store.
Furthermore, in the case of an upgrade from Windows 10 to 11, it may be that the old Snipping tool version is interfering with the launch of the new one. If you don’t care that much about the additional options available with the enhanced screenshot tool, you can use the old version instead.
Simply go to your C Drive, find the Windows.old folder, search for the tool and open it from there. Make sure to pin it to your taskbar as well, if you know you’re going to use it often.
5. Can’t install the latest update
The latest Windows 11 version, 22H2, has brought tons of enhancements to our dearest operating system. Unfortunately, a lot of users still haven’t had the opportunity to experience it. A mere update of your OS version should be the one thing that goes smoothly, but sometimes that’s not the case.
Failure to install 22H2 can be caused by a few things. Most commonly, the issue is caused by lack of storage space or corrupted files, but there could be other culprits.
There are a couple of things you could try. For example, it’s crucial that your drivers be up-to-date and some important services be enabled. These are: Windows Modules Installer, Background Intelligent Transfer Service, Cryptographic Service, Windows Update services.
To enable them, search ‘Services’, find the service you need and right-click on it. Open ‘Properties’ and select the startup type ‘Automatic’.
It may also be necessary to unplug all peripherals that aren’t crucial and disable third-party antivirus tools until after the update is finished.
Ultimately, you can run the Windows Update troubleshooter to detect and fix other possible issues.
Summary
Tiny bugs like these are nothing out of the ordinary. That said, we still all hate when they happen.
Hopefully some of our solutions have helped you to a smoother Windows 11 experience. But if you’re still struggling, feel free to reach out to us. We’d be happy to help!
Many Windows 10 users often change the IP addresses of their computers’ network adapter in order to connect to the internet or network they belong to in times when there is no automatic connection for their computers. In most cases, access to modifying this setting is restricted for some odd reason even if you are an administrator. So if you are one of the users whose Windows 10 VPN IPv4 Properties are not working, this post can help you remedy that so that you can open and edit the IPv4 Properties on your Windows 10 PC.
The common way to change IP settings is by going to Settings > Network and then to Internet > Change adapter options > Select Network adapter > right click and open Properties. From there, you can select TCP/IP 4 and modify it. If you aren’t able to do this, refer to the instructions laid out below to troubleshoot the problem in accessing the IPv4 Properties.
Option 1 – Try using PowerShell to manually set the IPv4 properties
As you are not able to set it using the interface, you can do so using PowerShell instead. Note that this option will only work for you if you run PowerShell with administrator privileges.
After opening PowerShell, according to many users, you have to run the this command – set-DnsClientServerAddress -InterfaceAlias “Ethernet” -ServerAddresses xxx.xx.xxx.xxx,x.x.x.x,xxx.xx.xxx.xxx,x.x.x.x
Usually, Ethernet is the name of your network adapter which is set by default. If you want to see the actual name of your network adapter, you can just type this command and tap Enter after doing so – Get-NetAdapter -physical | where status -eq 'up'
After entering the given command, you will see a list of active Ethernet adapter in your computer as you can see on the image above. Note that the 4 sets of X like the one on the image below should match with the sequence:
Option 2 – Try editing the rasphone.pbk files
The rasphone.pbk files stores property for the connections and since you are not able to access the IPv4 properties, it is most likely that it has been disabled here. The good thing is that you can open these files and edit them using Notepad. Refer to the steps below to do so.
Open the Windows Explorer and then enable the show hidden files option.
After that, look for the files at this location – C:Users <username>AppDataRoamingMicrosoftNetworkConnectionsPbk_hiddenPbkrasphone.pbk
Then right-click on it and select the “Open with” option and choose the Notepad app.
After opening the file, look for “IpPrioritizeRemote” from the long list.
Once you found it, set its value from “1” to “0”.
After that, look for “IPInterfaceMetric” and set its value to “1” and tap Ctrl + S to save the changes you’ve made, and then exit and try accessing the IPv4 properties again. It should work, but if you’re still unable to access it, try the next option below.
Option 3 – Enable the Split Tunneling if you use VPN
All data goes back and forth when you are using a VPN service on your computer. And since you are using VPN, it could be that it disables the IPv4 interface. If that’s the case, you need to stay connected with both the local network and VPN and to do so, you have to enable Split Tunneling. How? Follow these steps:
Open PowerShell with administrator privileges.
Next, type in “Get-VpnConnection” and tap Enter. After doing so, it will give you the exact name of your VPN.
After that, type in “Set-VpnConnection -Name “yourVPNName” -SplitTunneling $True” and tap Enter. Once you enter the command, it will free your IPv5 settings so that you can change it to connect with your local network if you prefer it to.
DigiSmirkz is a Browser Extension by Mindspark Inc. This extension offers users the ability to enrich their emails or chats with tons of new emojis. When installed it will replace your default new tab page with a variety of search.myway.com, hosted at hp.myway.com. This search engine uses information about you, collected by the extension to display unwanted targeted ads by Mindspark Partners and Ad Networks.
While surfing the internet with this extension installed and enabled, you will see additional pop-up ads, inserted ads into search results and sponsored content on web pages.
Several anti-virus applications have marked this extension as a Browser Hijacker and is therefore recommended to be removed from the Computer.
About Browser Hijackers
Browser hijackers (sometimes referred to as hijackware) are a kind of malicious software that modifies web browser settings without the computer owner’s knowledge or consent. These hijacks appear to be rising at an alarming rate worldwide, and it could be really nefarious and often harmful too. Browser hijacker malware is created for a variety of reasons. Typically, hijackers will force hits to sites of their choice either to get more traffic generating higher ad earnings or to obtain a commission for every user visiting there. Although it may seem harmless, these tools were created by vicious people who always look to take advantage of you, so that they can easily make money from your naive and distraction. They not only ruin your internet browsers, but browser hijackers can even modify the computer registry, making your PC vulnerable to other types of attacks.
Major signs that an internet browser has been hijacked
There are many symptoms that indicate your browser is highjacked:
1. your homepage is reset to some unfamiliar webpage2. your internet browser is constantly being redirected to porn websites3. the default web engine and/or the default browser settings are modified4. unsolicited new toolbars are added to your web browser5. your internet browser will display constant pop-up windows6. your web browser starts running slowly or presents frequent errors7. you can’t navigate to particular webpages, like security software-related websites.
How they get into your PC
Browser hijackers can enter a PC by some means or other, for example via file sharing, downloads, and e-mail too. They may also come from any BHO, extension, add-on, toolbar or plug-in with malicious purpose. A browser hijacker could also be installed as a part of freeware, shareware, demoware and fake programs. Some of the most popular hijackers are DigiSmirkz, Conduit Search, Babylon Toolbar, Sweet Page, OneWebSearch, and CoolWebSearch.
Browser hijackers can interrupt the user’s web surfing experience severely, track the websites frequented by users and steal private information, cause difficulty in connecting to the web, and eventually create stability issues, causing applications and system to crash.
How you can fix a browser hijack
Certain hijackers could be removed simply by uninstalling the related freeware or add-ons through the Add or Remove Programs in the Windows control panel. But, many browser hijackers are hard to get rid of manually. Irrespective of how much you attempt to get rid of it, it may keep returning over and over again. You should think of undertaking manual repairs only if you are a tech-savvy person, as there are possible risks associated with tinkering around with the computer registry and HOSTS file.
Industry experts always suggest users remove any malicious software including browser hijacker by using an automatic malware removal tool, which is better, safer, and faster than the manual removal method. To remove any type of browser hijacker from your system, you can download this particular top-notch malware removal software – SafeBytes Anti-Malware.
Virus Blocking Internet And All Antivirus Software? Do This!
Practically all malware is bad and the degree of the damage will vary greatly with regards to the type of infection. Certain malware types alter internet browser settings by adding a proxy server or change the PC’s DNS configurations. When this happens, you will be unable to visit some or all sites, and thus not able to download or install the necessary security software to clear out the computer virus. If you are reading this article, chances are you’re stuck with a malware infection which is preventing you to download and/or install Safebytes Anti-Malware program on your system. Follow the instructions below to get rid of malware by alternate ways.
Make use of Safe Mode to resolve the issue
If any malware is set to load immediately when Windows starts, stepping into safe mode may block this attempt. Since only the bare minimum programs and services start-up in Safe Mode, there are rarely any reasons for issues to happen. Below are the steps you should follow to take out viruses in Safemode.
1) Tap the F8 key repeatedly as soon as your system boots, however, before the big Windows logo or black screen with white texts appears. This should bring up the Advanced Boot Options menu.2) Use the arrow keys to choose Safe Mode with Networking and press ENTER.3) When you are into this mode, you will have an internet connection once again. Now, get the malware removal software you want by utilizing the browser. To install the software, follow the guidelines in the installation wizard.4) Once the software is installed, let the scan run to eliminate viruses and other malware automatically.
Switch to an alternative browser
Malicious program code might exploit vulnerabilities in a specific internet browser and block access to all anti-virus software sites. The most effective solution to avoid this problem is to choose a web browser that is renowned for their security measures. Firefox has built-in Malware and Phishing Protection to keep you safe online.
Run anti-virus from a pen drive
Another solution is to create a portable anti-malware program on your USB stick. Adopt these measures to run the anti-malware on the affected computer.
1) Use another virus-free PC to download Safebytes Anti-Malware.2) Mount the USB drive on the same system.3) Run the setup program by double-clicking the executable file of the downloaded software, which has an .exe file format.4) Select USB flash drive as the location when the wizard asks you where you want to install the application. Follow the on-screen instructions to complete the installation process.5) Transfer the USB drive from the clean PC to the infected computer.6) Run the Safebytes Anti-malware directly from the USB drive by double-clicking the icon.7) Click the “Scan” button to run a full system scan and remove viruses automatically.
Protect Your Computer Against Malware and Viruses With SafeBytes Anti-Malware
If you are looking to purchase anti-malware for your computer system, there are lots of brands and packages for you to consider. Some of them are great while some are scamware applications that pretend as legitimate anti-malware software waiting around to wreak havoc on the computer. You need to select a company that creates industry-best anti-malware and it has got a reputation as reliable. On the list of highly recommended software programs is SafeBytes Anti-Malware. SafeBytes has a good track record of excellent service, and clients are very happy with it.
SafeBytes anti-malware is a trustworthy software that not only secures your computer system completely but is also very user-friendly for people of all ability levels. Through its cutting-edge technology, this software protects your PC against infections brought on by various kinds of malware and similar internet threats, including spyware, adware, trojans, worms, computer viruses, keyloggers, potentially unwanted program (PUPs), and ransomware.
There are many wonderful features you will get with this particular security product. These are some of the highlighted features included in the product.
World-class AntiMalware Protection: This deep-cleaning antimalware application goes much deeper than most antivirus tools to clean out your personal computer. Its critically acclaimed virus engine detects and disables hard to remove malware that conceals deep inside your personal computer.
Live Protection: SafeBytes provides real-time active checking and protection against all of known viruses and malware. This utility will always monitor your PC for any suspicious activity and updates itself regularly to keep current with the latest threats.
Web Protection: Safebytes allots all sites a unique safety rating that helps you to have an idea of whether the webpage you are going to visit is safe to view or known to be a phishing site.
Faster Scanning: SafeBytes’s very fast malware scanning engine reduces scan times and extends battery life. Simultaneously, it will effectively detect and remove infected files or any online threat.
Low CPU and RAM Usage: SafeBytes gives you total protection from internet threats at a fraction of the CPU load because of its advanced detection engine and algorithms.
Fantastic Tech Support Team: You can obtain absolutely free 24/7 technical assistance from their computer experts on any product queries or PC security issues.
SafeBytes will keep your computer safe from latest malware threats automatically with hardly any input needed from you again. You now may realize that this particular tool does more than just scan and eliminate threats from your PC. You will get the very best all-around protection for the money you spend on SafeBytes Anti-Malware subscription, there is no doubt about it.
Technical Details and Manual Removal (Advanced Users)
If you want to do the removal of DigiSmirkz manually rather than employing an automated software tool, you can follow these simple steps: Go to the Windows Control Panel, click on the “Add or Remove Programs” and there, select the offending program to remove. In case of suspicious versions of web browser extensions, you can actually remove it through your browser’s extension manager. You may also want to reset your home page and search engine providers, and also clear your web browser cache and cookies.
In order to ensure complete removal, manually examine your hard drive and registry for all of the following and remove or reset the values accordingly. Please note that only advanced computer users should try to manually edit the registry because removing any single critical system file leads to a serious problem or perhaps a computer crash. Moreover, certain malware keeps replicating which makes it tough to remove. Doing this malware-removal process in Safe Mode is suggested.
Files:
%UserProfile%\Local Settings\Application Data\Google\Chrome\User Data\Default\Extensions\fhibenoomgnppdhbjaephephkddnokof
%LOCALAPPDATA%\DigiSmirkzTooltab
Registry:
HKEY_CURRENT_USER\SOFTWARE\DigiSmirkz
HKEY_CURRENT_USER\SOFTWARE\Wow6432Node\DigiSmirkz
HKEY_CURRENT_USER\SOFTWARE\Microsoft\Internet Explorer\LowRegistry\DOMStorage\digismirkz.dl.myway.com
HKEY_LOCAL_MACHINE\Software\Microsoft\Internet Explorer\DOMStorage\digismirkz.dl.myway.com
HKEY_LOCAL_MACHINE\Software\[APPLICATION]\Microsoft\Windows\CurrentVersion\Uninstall..Uninstaller
DigiSmirkzTooltab Uninstall Internet Explorer
There is a lot of high resource utilization by any process that slows down a Windows operating system and one of the services that could cause such a thing is the utcsvc.exe process. This particular process at times can cause high CPU and disk usage. So if you are currently facing this problem, read on as this post will guide you on how you can resolve the problem.
UTC which stands for Universal Telemetry Client is a software that runs a service named Diagnostic Tracking Service or DiagTrak. This service is used by Microsoft to collect customer feedback, analyze customer’s problems, and push resolution via updates in order to make the Windows 10 operating system better. This service is an executable file that could be translated to Service Host and even though the process does not usually cause problems, there are actually times when it does especially if it results in high resource utilization. In such cases, you might want to consider disabling it to fix its high CPU and disk usage.
According to Microsoft:
“We collect information about you, your devices, applications and networks, and your use of those devices, applications, and networks. Examples of data we collect include your name, email address, preferences, and interests; browsing, search and file history; phone call and SMS data; device configuration and sensor data; and application usage.”
There are several ways you can disable the utcsvc.exe process. You can disable it using the Service Manager, Registry Editor, and Group Policy Editor. For more details, refer to the instructions laid out below.
Option 1 – Disable the Connected User Experience & Telemetry Service via Service Manager
Note that this option is for standalone systems, so if you’re not using one, refer to the next given options below.
Tap the Win + R keys to open the Run dialog box.
Then type “services.msc” in the field and tap Enter or click OK to open the Services Manager.
From the given list of services, look for the Connected User Experience service. Once you found it, click on it and you’ll see its description which states:
“The Connected User Experiences and Telemetry service enables features that support in-application and connected user experiences. Additionally, this service manages the event-driven collection and transmission of diagnostic and usage information (used to improve the experience and quality of the Windows Platform) when the diagnostics and usage privacy option settings are enabled under Feedback and Diagnostics.”
Next, right-click on it and select Properties.
Now, change its Startup Type to Disabled and click on the Apply and OK buttons to save the changes made.
Option 2 – Disable the Connected User Experience & Telemetry Service via Registry Editor
Tap the Win + R keys to launch the Run utility and type “Regedit” in the field and click OK to open the Registry Editor.
Next, navigate to this registry path: HKEY_LOCAL_MACHINESOFTWAREPoliciesMicrosoftWindowsDataCollection
After that, right-click on the folder named “DataCollection” and select New > DWORD (32-bit) Value.
Now name the new value “AllowTelemetry” and make sure that its Value data is “0” and then click on OK to save the changes made.
Restart your computer.
Option 3 – Disable the Connected User Experience & Telemetry Service via Group Policy Editor
If you have to disable the service related to the Universal Telemetry Client for company-managed systems, then you can do that using the Group Policy Editor.
Tap the Win + R keys to open the Run utility and type “gpedit.msc” in the field and hit Enter to open the Group Policy Editor.
Next, navigate to this path: Computer Configuration > Administrative Templates > Windows Components> Data Collection and Preview Build
After that, double-click on Data Collection and Preview Build to open its settings.
From there, look for the “Allow Telemetry” item and double click on it to open its Properties.
Next, set the radio button to Disabled and then click on the Apply button to save the changes made.
Restart your computer.
Option 4 – Run the Hardware and Devices Troubleshooter or the Performance Troubleshooter
Hardware and Devices Troubleshooter:
The first thing you need to do is click on Start and then on the gear-like icon to pull up the window for Settings.
After opening Settings, look for the Update and Security option and select it.
From there, go to the Troubleshoot option located on the left-hand side of the list.
Next, select Hardware and Devices from the list and open the Troubleshooter and run it. Once it is doing its job, wait for it to complete the process and then restart the system.
After the system restarts, check if the problem’s now fixed. If not, refer to the next option given below.
Performance Troubleshooter:
Tap the Win + R keys to open the Run dialog box.
Type “exe /id PerformanceDiagnostic” in the field and hit Enter to open the Performance troubleshooter.
Then click on Next to get started. Wait until the process is completed.
If the Task Manager is either blank or is not showing processes on your Windows 10 computer, then here are a few things you can do to resolve this issue. This kind of problem can occur due to some system file corruption or some malware infection in the system.
Here are some suggestions you can try to resolve the problem with the Task Manager on your Windows 10 PC.
Option 1 – Try restarting your computer
The most common and most of the time effective way to resolve this kind of issue is to simply restart your computer. Thus, you have to restart your computer and see if it helps in fixing the Task Manager issue or not. If not, you can try the next given options below.
Option 2 – Run the DISM tool
If the first option didn’t work, then running the Deployment Imaging and Servicing Management tool can help you resolve the issue with the Task Manager as it will repair the Windows System Image as well as the Windows Component Store in Windows 10.
After you access the Advanced Startup options, select Command Prompt by using the arrow keys on your keyboard.
Next, type in this command: DISM /Online /Cleanup-Image /RestoreHealth
Do not close the window if the process takes a while as it will probably take a few minutes to finish.
Option 3 – Make sure that the display columns are selected in the Task Manager
You have to make sure that you have checked or selected the display columns you want to be displayed. So if none of them are selected, you might not see any details at all. Thus, you need to right-click on the space near Name and select the columns.
Option 4 – Run the System File Checker Scan
System File Checker or SFC is a built-in command utility that helps in restoring corrupted files as well as missing files. It replaces bad and corrupted system files with good system files that might be the reason why the Task Manager is blank or is not showing processes. To run the SFC command, follow the steps given below.
Tap Win + R to launch Run.
Type in cmd in the field and tap Enter.
After opening Command Prompt, type in sfc /scannow
The command will start a system scan which will take a few whiles before it finishes. Once it’s done, you could get the following results:
Windows Resource Protection did not find any integrity violations.
Windows Resource Protection found corrupt files and successfully repaired them.
Windows Resource Protection found corrupt files but was unable to fix some of them.
Restart your computer.
Option 5 – Troubleshot the problem in a Clean Boot State
There are some instances that some conflicting programs installed in your computer might be the one that’s causing the Task Manager issue. To identify which program is causing the problem, you need to put your computer in a Clean Boot State. To do so, follow the steps below.
Log onto your PC as an administrator.
Type in MSConfig in the Start Search to open the System Configuration utility.
From there, go to the General tab and click “Selective startup”.
Clear the “Load Startup items” check box and make sure that the “Load System Services” and “Use Original boot configuration” options are checked.
Next, click the Services tab and select the “Hide All Microsoft Services” check box.
Click Disable all.
Click on Apply/OK and restart your PC. (This will put your PC into a Clean Boot State. And configure Windows to use the usual startup, just simply undo the changes.)
From there, start to isolate the problem by checking which one of the programs you installed recently is the root cause of the problem.
Option 6 – Try scanning your computer using Windows Defender
As mentioned, the Task Manager issue might be caused by some malware in the system and so to eliminate the malware, you have to scan your computer using security programs like Windows Defender.
Tap the Win + I keys to open Update & Security.
Then click on the Windows Security option and open Windows Defender Security Center.
Next, click on Virus & threat protection > Run a new advanced scan.
Now make sure that Full Scan is selected from the menu and then click the Scan Now button to get started.
The win32kfull.sys file is one of the kernel-mode device drivers in your Windows 10 operating system. In case you don’t know, there are two kinds of device drivers – the first ones are the normal drivers that communicate between your hardware and the operating system while the second ones are the kernel-mode drivers. The latter is necessary for booting your OS. And there are times when you encounter the win32kfull.sys error while booting your PC. Here’s the full context of the win32kfull.sys error:
This error could be caused by corrupted or outdated drivers with incomplete files or it could be caused by some driver or software installed on your computer. To fix this error, here are some troubleshooting options you need to check out.
Option 1 – Try updating all the Drivers
As pointed out, the win32kfull.sys error can be due to outdated or corrupted drivers that are not compatible with your hardware. These drivers include but are not limited to display, network, sound, hard drive, and more. If you are not able to access the internet, you can just manually download the update using another PC.
To update your drivers, here’s what you need to do:
Tap the Win + R keys to launch Run.
Type in devmgmt.msc into the box and tap Enter or click OK to open the Device Manager.
After that, a list of device drivers will be displayed. If you see a red or yellow sign that shows up against the driver, right-click on the driver’s name and select “Update Driver Software” or “Uninstall”. And if you find any “Unknown device”, you need to update it as well.
Select the “Search automatically for updated driver software” option and then follow the instructions to complete the process.
Restart your PC.
Note: You also have the option to go directly to the website of your graphics card manufacturer and check if there’s a new update – if there is, download it. After that, you could also check if there’s a new update of the game you’re getting the issue of the black bar.
Option 2 – Identify and uninstall problematic programs by putting your PC in a Clean Boot State
One of the main causes of BSOD errors like win32kfull.sys is a problematic program that could clash with your existing operating system as well as computer architecture. There are tons of programs that are either incompatible or conflict with the existing drivers or software in your system. To identify such programs, you need to put your PC in a Clean Boot state. How? Follow these steps:
Log onto your PC as an administrator.
Type in MSConfig in the Start Search to open the System Configuration utility.
From there, go to the General tab and click “Selective startup”.
Clear the “Load Startup items” checkbox and make sure that the “Load System Services” and “Use Original boot configuration” options are checked.
Next, click the Services tab and select the “Hide All Microsoft Services” checkbox.
Click Disable all.
Click on Apply/OK and restart your PC. (This will put your PC into a Clean Boot State. And configure Windows to use the usual startup, just simply undo the changes.)
After putting your PC in a Clean Boot State, try creating a system restore point and see if the problem still occurs. Clean Boot troubleshooting is designed to help you isolate the problem. For you to execute a clean boot troubleshooting, you must do a couple of actions (the steps are given above) and then restart your PC after every action. You might have to disable one third-party app after the other to really isolate the issue. And once you’ve narrowed down the problem, you can either disable the third-party app that’s causing the problem or remove it. Note that you must switch your PC back into the Normal Startup mode after you’re done troubleshooting the problem. Here’s how you can do it:
From the “Start” menu, go to System Configuration.
After that, switch to the General tab and click the option for “Normal Startup”.
Next, go to the Services tab and clear the checkbox for “Hide all Microsoft services”.
Then find and click “Enable all” and if prompted, you have to confirm.
Afterward, go to the Task Manager and enable all the Startup programs and confirm the action.
Restart your PC when prompted.
Once you have identified the program causing the problem, uninstall it right away from your Control Panel.
Option 3 – Perform an SFC scan
The SFC or System File Checker scan could detect and automatically repair damaged system files that could be causing the win32kfull.sys error. SFC is a built-in command utility that helps in restoring corrupted files as well as missing files. It replaces bad and corrupted system files to good system files. To run the SFC command, follow the steps given below.
Tap Win + R to launch Run.
Type in cmd in the field and tap Enter.
After opening Command Prompt, type in sfc /scannow
The command will start a system scan which will take a few whiles before it finishes. Once it’s done, you could get the following results:
Windows Resource Protection did not find any integrity violations.
Windows Resource Protection found corrupt files and successfully repaired them.
Windows Resource Protection found corrupt files but was unable to fix some of them.
Microsoft Designer, a new application developed by Microsoft will bring design backed with DALL-E 2, an AI image creation open-source software. The new app is shown as a dedicated graphic design tool that will help you in the creation of stunning social media posts, invitations, digital postcards, graphics, and more, all in a flash.
Use of the application will be by typing headings and then typing text into the prompt to generate a background image. Since Microsoft uses DALL-E 2 for image creation output should be fairly good but if you wish you will be able to use your own images instead of using AI to generate one.
The designer will be a free application once it is ready and it already has a web preview version, also free but with a waitlist. There will be premium features inside the app once it is released that will be available to Microsoft 365 Personal and Family subscribers. Microsoft also wants to add a version of a designer directly to the Edge browser as well.

 It would be very difficult to even start a free eMail list without mentioning Google's Gmail. Introduced all the way back in 2004 as an invite-only service it became over time the most popular email platform largely due to the fact Google is offering free eMail accounts.
There are a lot of good things to be said about Gmail itself, most of the area is clutter-free and the largest space is reserved for eMail itself letting users focus on what is important. WEB client itself means that you do not need to have any application installed on your device, altho via Google chrome, you can use Gmail offline offering you flexibility if needed.
The ability to connect and manage other accounts like Outlook, Yahoo, etc is just making Gmail even more attractive, and the snooze feature is a really neat little detail that will pause eMail notifications if you need to focus on other things.
Lack of organizing messages into folders is a little confusing since Gmail offers its own unique label system but sometimes I need to have old reliable save eMail to folder.
All in all, Gmail is a great service and it offers a great eMail on the go experience.
It would be very difficult to even start a free eMail list without mentioning Google's Gmail. Introduced all the way back in 2004 as an invite-only service it became over time the most popular email platform largely due to the fact Google is offering free eMail accounts.
There are a lot of good things to be said about Gmail itself, most of the area is clutter-free and the largest space is reserved for eMail itself letting users focus on what is important. WEB client itself means that you do not need to have any application installed on your device, altho via Google chrome, you can use Gmail offline offering you flexibility if needed.
The ability to connect and manage other accounts like Outlook, Yahoo, etc is just making Gmail even more attractive, and the snooze feature is a really neat little detail that will pause eMail notifications if you need to focus on other things.
Lack of organizing messages into folders is a little confusing since Gmail offers its own unique label system but sometimes I need to have old reliable save eMail to folder.
All in all, Gmail is a great service and it offers a great eMail on the go experience.
 Free Windows eMail client simply called Mail is what was once outlook express. Mail itself has the ability to work with other popular accounts like Google Gmail account, Yahoo, iCloud etc. How it comes with Windows OS and it integrates very well with Microsoft Calendar, this eMail client is for many the first choice.
On the negative side, I might say this is a strip-down version of Outlook which is paid solution so some features are missing if we would compare the two.
Overall, a simple and nice eMail client worth your time, especially if you are on the Windows platform.
Free Windows eMail client simply called Mail is what was once outlook express. Mail itself has the ability to work with other popular accounts like Google Gmail account, Yahoo, iCloud etc. How it comes with Windows OS and it integrates very well with Microsoft Calendar, this eMail client is for many the first choice.
On the negative side, I might say this is a strip-down version of Outlook which is paid solution so some features are missing if we would compare the two.
Overall, a simple and nice eMail client worth your time, especially if you are on the Windows platform.
 Great eMail client matching in functions against paid and premium solutions of big tech companies. Fueled with plenty of customization options and reskinning ones this eMail client offers a lot for its free price tag.
It is also fueled by Mozilla community focusing on privacy and security. It can work with any mail service and it is lightweight with a clean look, altho the look itself can be heavily customized.
The bad side is that client itself relies on email services to provide cloud-based emails, so if you are receiving your email via a service that does not have a cloud-based service in itself all of your received emails will be locked to the computer where you have received them. Also customizing it can be sometimes a little too technical for the average computer user.
All in all, Thunderbird is one great eMail client and it would be a shame not to use it because of its technical side, if you need a reliable and secure eMail client on a single machine, look no further than Thunderbird.
Great eMail client matching in functions against paid and premium solutions of big tech companies. Fueled with plenty of customization options and reskinning ones this eMail client offers a lot for its free price tag.
It is also fueled by Mozilla community focusing on privacy and security. It can work with any mail service and it is lightweight with a clean look, altho the look itself can be heavily customized.
The bad side is that client itself relies on email services to provide cloud-based emails, so if you are receiving your email via a service that does not have a cloud-based service in itself all of your received emails will be locked to the computer where you have received them. Also customizing it can be sometimes a little too technical for the average computer user.
All in all, Thunderbird is one great eMail client and it would be a shame not to use it because of its technical side, if you need a reliable and secure eMail client on a single machine, look no further than Thunderbird.
 Outlook comes as a part of the Microsoft Office suite and as one of the oldest eMail clients, it is still widely popular and adopted through many users and businesses. It has tight integration with all Microsoft services and full integration with Calendar making it one of the if not the best eMail client out there.
Outlook also has a free online service completely free for personal use as well.
The downside is that you can not get it as a separate product if you want a business version other than as a part of the Office suite.
The final verdict would be that this is perhaps the best eMail client out but the big downside is that there is no desktop version outside the Office suite.
Outlook comes as a part of the Microsoft Office suite and as one of the oldest eMail clients, it is still widely popular and adopted through many users and businesses. It has tight integration with all Microsoft services and full integration with Calendar making it one of the if not the best eMail client out there.
Outlook also has a free online service completely free for personal use as well.
The downside is that you can not get it as a separate product if you want a business version other than as a part of the Office suite.
The final verdict would be that this is perhaps the best eMail client out but the big downside is that there is no desktop version outside the Office suite.
 eM Client offers a wide array of features, including a calendar, contacts, and chat. Support is provided for all the major email services including Gmail, Yahoo, iCloud, and Outlook.com. The latest version also offers PGP encryption, live backup, basic image editing capabilities, and auto-replies for Gmail.
Its automatic system makes it very easy to get emails from other services since there is no manual setting, all that is needed is to type in your email and eM Client will do everything else automatically.
A one-time purchase is not pricy and it could offer some features that some free clients are missing. Go check it out with a free trial and see if it is for you.
eM Client offers a wide array of features, including a calendar, contacts, and chat. Support is provided for all the major email services including Gmail, Yahoo, iCloud, and Outlook.com. The latest version also offers PGP encryption, live backup, basic image editing capabilities, and auto-replies for Gmail.
Its automatic system makes it very easy to get emails from other services since there is no manual setting, all that is needed is to type in your email and eM Client will do everything else automatically.
A one-time purchase is not pricy and it could offer some features that some free clients are missing. Go check it out with a free trial and see if it is for you.
 This eMail client's main focus is the simplicity of use with visual appeal while tackling multiple eMail accounts. It has many built-in apps along with a customizable interface. Unlike some more Microsoft-centric email clients, Mailbird Business supports a diverse range of integrated apps, including WhatsApp, Google Docs, Google Calendar, Facebook, Twitter, Dropbox, and Slack, all making for a better-streamlined workflow.
The downside of this client is the yearly subscription plan. I think people, in general, want to get away from software subscription plans so I will include this as a downside but bear in mind it is downside just in terms of a business plan not in the client itself.
This eMail client's main focus is the simplicity of use with visual appeal while tackling multiple eMail accounts. It has many built-in apps along with a customizable interface. Unlike some more Microsoft-centric email clients, Mailbird Business supports a diverse range of integrated apps, including WhatsApp, Google Docs, Google Calendar, Facebook, Twitter, Dropbox, and Slack, all making for a better-streamlined workflow.
The downside of this client is the yearly subscription plan. I think people, in general, want to get away from software subscription plans so I will include this as a downside but bear in mind it is downside just in terms of a business plan not in the client itself.
 Inky is eMail client if you are looking for security. It uses AI along with machine learning in order to block all types of phishing attacks that can get through to other clients. The proprietary machine learning technology can literally read an email to determine if it has phishing content, and then is able to quarantine the email or deliver it with the malicious links disabled. It also takes things a step further and offers an analytics dashboard, which allows an administrator to see patterns of attacks based on dates, or targeted users.
The downside is that client itself is so much focused on security that sometimes some nonsecurity features get overlooked and provide a poor experience but if you need a good and greatly secured eMail client Inky is one to check out.
Inky is eMail client if you are looking for security. It uses AI along with machine learning in order to block all types of phishing attacks that can get through to other clients. The proprietary machine learning technology can literally read an email to determine if it has phishing content, and then is able to quarantine the email or deliver it with the malicious links disabled. It also takes things a step further and offers an analytics dashboard, which allows an administrator to see patterns of attacks based on dates, or targeted users.
The downside is that client itself is so much focused on security that sometimes some nonsecurity features get overlooked and provide a poor experience but if you need a good and greatly secured eMail client Inky is one to check out. 


