Error code 0x80240017 is associated with installing or updating a Windows Store app. This error is more common in Windows 8 and Windows 8.1. It appears due to missing certain system files and also corrupt registry.
Common symptoms
When you try to install a Windows Store app on a PC running Windows RT 8.1, Windows 8.1, or Windows Server 2012 R2, the installation fails and you receive an error message: 0x80240017
Certain apps may become unresponsive.
You may not be able to download apps or Windows update
You may have difficulty updating or installing and uninstalling other built-in programs inside Windows 8 and Windows 8.1.
When you have multiple applications running, you may experience crashes and freezes.
Solution
Error Causes
The error code 0x80240017 in Windows 8.1 or Windows 8 usually appears due to the fact that your system has changed after you installed a third-party application. It might also appear if registry entry has changed after a reboot of the operating system and you do not have the required permissions. Other causes may be due to:
Corrupted, broken, or missing system files.
Malware/spyware infection or virus attack
Hardware/RAM decline
Fragmented file
Unnecessary or redundant program installations
Further Information and Manual Repair
Repairing Error Code 0x80240017 in Windows 8/Windows 8.1
Method 1:
Resetting Windows Store app:
Press and hold the Windows key and press R. This will open up the Run command
Now, type exe and hit Enter
Just wait for it to finish and it will re-launch Windows Store. Now, try and install the app you were trying to install which was previously showing an error.
This basic solution will delete the cache and reset Windows Store.
Method 2:
Using Windows troubleshooter:
Click on Search on the Charm bar and type Troubleshooting. Click on the very first option.
A new window will open. Click View all from the left pane.
Scroll down to the bottom and click on Windows update.
Troubleshooter window for Windows update will pop up. Click on NEXT. It may ask you for administrative permission.
The troubleshooter will automatically detect problems and fix them.
Now, close this window and try download/install the app which was previously showing an error.
Method 3:
Disable Proxy Settings:
Disable proxy server on Internet Explorer
Press the Windows + R Run window will appear.
Type cpl and hit Enter
Click the Connections tab and click LAN settings
Under proxy server uncheck “Use a proxy server for your LAN”
Click OK
Now try to install apps from Windows Store.
Method 4:
Boot in Safe Mode:
Open Run command as previously described
Type MSConfig
Click on the Boot tab
Tick Safe boot in Boot option
Select Network
Click Apply and OK
Reboot your system
Your system will boot in Safe mode with Networking. You may now try and open Windows Store and should not see any errors.
Method 5:
Note: It is recommended that you back up your files and folders before attempting this step:
Move the mouse cursor over to the upper right side of the screen.
A menu will pop up on the left. Click on the “Settings” feature on the menu.
On the Settings window, click on the “Change PC settings.”
Now, left-click on the “Update and recovery” feature.
For the next step, left-click on the “Recovery” feature.
There is an option here saying “Refresh your PC without affecting your files.” There, left-click on the “Get started” button.
Now, follow the instructions on the screen to finish the Refresh process.
After the Refresh process has finished restart your Windows 8.1 or Windows 8 device.
Check again to see if the error 0x80240017 has been fixed.
If you do not possess the technical expertise required to accomplish this yourself or do not feel comfortable doing so, download and install a powerful automated tool to get the job done.
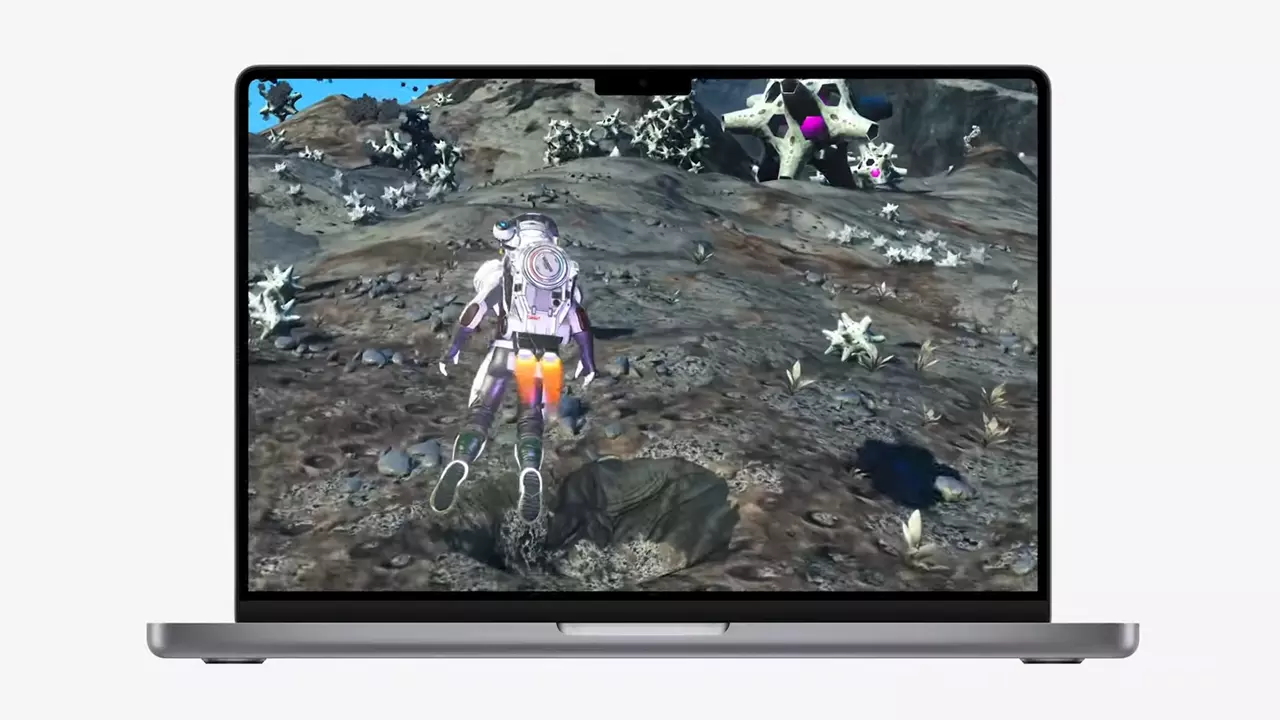
New Apple's upscaling technology called MetalFX will place iOS and macOS devices back into the gaming world. Apple had great games back in the old days and some all-time hits like the prince of Persia have been made first for apple but along the way, it just lost it.
Same as NVIDIA's DLSS and Intel's XeSS systems, Apple MetalFX also uses AI algorithms to upscale the resolution of output game frames. So, for example, the GPU inside your MAC might render the game at 1080p, but through MetalFX and AI upscaling it will look like a 4K image but have a good frame rate since it is rendered in base resolution.
The ability to make AI strike a good balance between performance and image quality is a key to technology in today's modern gaming and having this technology will help developers a ton to be able to achieve great results on Apple hardware.
The First MetalFX Games
So far three official games that will use this technology and be released natively for Appl hardware are Resident Evil 8 Village, GRID legends, and No Man's Sky. All three games have been confirmed and Resident Evil 8 Village is already sent for review people are impressed since the game can run smoothly on all Apple devices, even ones with an M1 CPU.
Apple is back into gaming
When you say Apple gaming is probably the last thing that comes to your mind but truth be told Apple makes more money from games than Microsoft, Nintendo and Sony combined. Also, Apple itself was a big player once regarding computer games as well, Myst and Prince of Persia are games that were made and have been released for Apple first. Bungie was also founded by Apple developers and Halo was originally announced as a Mac game.
Apple has been trying and pushing gaming on its platform since it kind of died down. Today all Sony, Nintendo, and Microsoft controllers work without any issues with all Apple products. Apple also has its own gaming subscription service, Apple Arcade, and its Apple TV is packed with GPU that can rival Xbox ones.
MetalFX API ties and brings it all together, it is designed to get the most performance from the hardware by minimizing overhead.
Now, computers and laptops do not hold any large numbers if we look at the user base, and that could deter developers but if we look at iPad and iPhone things are different there, much different. How same CPU power these devices and how MetalFX is available across all products it is clear that there is a market for games there. No Man's Sky is coming to iPad using these technologies and bringing full computer experience to tablets.
The “Unknown Hard” error that keeps on appearing in Windows 10 can put users in an unpleasant situation. This kind of error leads to the freezing of the taskbar, blackening of the screen, and sudden disappearance of the icons on the Desktop. And each time you try to open Windows, the system will only give you an error message saying that it’s a critical error and some applications like Start and Cortana won’t work.
Upon analysis, it seems that the “sihost.exe” is not responding and that it is the one that’s causing the c000021a Unknown Hard error to pop up. Sihost.exe files represent the Shell Infrastructure Host which is an essential component in the Windows operating system. The Windows Shell Infrastructure Host is primarily responsible for handling some graphical elements of the operating system interface such as the Start menu and the taskbar transparency. And so if the Shell Infrastructure or Sihost.exe has stopped, has been removed, or corrupted, you will most likely have issues with the overall functionality of the Windows operating system and you’ll get the Unknown Hard error
In addition, the ctfmom.exe Unknown Hard error may also occur due to incompatible drivers installed on your PC. Ctfmom is a process that identifies inputs such as handwriting, languages, and many more. It’s the one that controls the functions of background behavior. To resolve this issue, you need to first try to identify which application is the one that’s running the sihost.exe file. And if needed, you need to either update or reinstall or completely uninstall the problematic application.
Option 1 – Try to run the System File Checker
The SFC Scan or System File Checker, us a built-in utility in Microsoft Windows that can be found in the C:\Windows\System32 folder. This tool allows users to scan and restore any corrupted system files in Windows that might be causing the Unknown Hard error to appear. Before you use this tool, make sure to find out whether the sihost.exe on your computer is a Trojan that you have to remove or if it’s a file that belongs to a trusted Windows application. Once you have that sorted out, follow the steps below.
Tap Win + R to launch Run.
Type in cmd in the field and tap Enter.
After opening Command Prompt, type in sfc /scannow
The command will start a system scan which will take a few whiles before it finishes. Once it’s done, you could get the following results:
Windows Resource Protection did not find any integrity violations.
Windows Resource Protection found corrupt files and successfully repaired them.
Windows Resource Protection found corrupt files but was unable to fix some of them.
Option 2 – Try to use System Restore
You can also try using System Restore. This is one of the ways you can use it to back up your PC. Since restore points are created automatically each week by System Restore, you can use System Restore to restore your computer back to an earlier good point in time.
Option 3 – Try to troubleshoot the error in a Clean Boot State
Putting your PC in a Clean Boot state can help you diagnose and troubleshoot the issues in your system. During this state, you can start the system with a minimum number of drivers and startup programs that will surely help you in isolating the root cause of the Unknown Hard Error.
Log onto your PC as an administrator.
Type in MSConfig in the Start Search to open the System Configuration utility.
From there, go to the General tab and click “Selective startup”.
Clear the “Load Startup items” checkbox and make sure that the “Load System Services” and “Use Original boot configuration” options are checked.
Next, click the Services tab and select the “Hide All Microsoft Services” checkbox.
Click Disable all.
Click on Apply/OK and restart your PC. (This will put your PC into a Clean Boot State. And configure Windows to use the usual startup, just simply undo the changes.)
After putting your PC in a Clean Boot State, try creating a system restore point and see if the problem still occurs. Clean Boot troubleshooting is designed to help you isolate the problem. For you to execute a clean boot troubleshooting, you must do a couple of actions (the steps are given above) and then restart your PC after every action. You might have to disable one third-party app after the other to really isolate the issue. And once you’ve narrowed down the problem, you can either disable the third-party app that’s causing the problem or remove it. Note that you must switch your PC back into the Normal Startup mode after you’re done troubleshooting the problem. Here’s how you can do it:
From the “Start” menu, go to System Configuration.
After that, switch to the General tab and click the option for “Normal Startup”.
Next, go to the Services tab and clear the checkbox for “Hide all Microsoft services”.
Then find and click “Enable all” and if prompted, you have to confirm.
Afterward, go to the Task Manager and enable all the Startup programs and confirm the action.
When you try to open your Google Chrome browser and it starts to connect to the internet but suddenly, your Windows 10 computer crashes along with a Blue Screen error that says, “MEMORY_MANAGEMENT”, then read on as this post will guide you in fixing the problem.
This kind of BSOD error occurs when Google Chrome requests more memory or when it tries to access the network and demand is raised for more memory, the memory management program fails. To fix the problem, here are some possible solutions you might want to try. Follow them thoroughly.
Option 1 – Use the Driver Verifier Manager
The Driver Verifier Manager is another tool in Windows that could help you fix driver-related issues. And since the MEMORY_MANAGEMENT Blue Screen error concerns Google Chrome and an internet connection, the root cause of the problem might have something to do with the Network driver and to verify that, you can use the Driver Verifier Manager:
Type in the keyword “Verifier” in the Cortana search box to search for Verifier in Windows 10.
After that, select the option “Create custom settings”.
Make sure that you have checked everything except the options “DDI compliance checking” and “Randomized low resources simulation”.
Next, select the option “Select driver names from a list” option.
Afterward, you have to select all the drivers from any unofficial or third-party provider. To simply put it, you have to select all the drivers that are not supplied by Microsoft.
Then click on the Finish button.
Open Command Prompt as administrator and execute this command – verifier /querysettings
The command you just executed will display the Driver Verifier settings so if you see any of the flags enabled boot your Windows 10 PC into Safe Mode.
Open the Command Prompt as admin again and run this command – verifier /reset
The command will reset the Driver Verifier. Once the process is done, restart your PC and check.
Option 2 – Try updating the Network drivers
Tap the Win + R keys to launch the Run window and then type in the “devmgmt.msc” command and hit Enter to open the Device Manager window.
Under the Device Manager, you will see a list of drivers. From there, look for the Network Adapters and expand it.
Then right-click on each one of the Network drivers and update them all.
Restart your PC and see if it helped in fixing the MEMORY_MANAGEMENT BSOD error.
Option 3 – Try disabling Hardware Acceleration
You might want to disable Hardware Acceleration system-wide or for a particular program like Google Chrome and see if it resolves the MEMORY_MANAGEMENT error
Option 4 – Run the Memory Diagnostic Tool to check for Memory leaks
Tap the Win + R keys to open Run and type exe and hit Enter to open the Windows Memory Diagnostic Tool.
After that, it will give two options such as:
Restart now and check for problems (Recommended)
Check for problems the next time I start my computer
Once your computer has restarted, perform a basic scan or you could also go for the “Advanced” options such as “Test mix” or “Pass count”. Simply tap the F10 key to start the test.
Note: After you select the option, your PC will restart and check for memory-based issues. If it finds any issues, it will automatically fix them and if there’s no issue found, then it’s most likely not a memory-based issue so you should try the other options given below.
Option 5 – Perform a System Restore
Performing System Restore might help you in fixing the SYNTP.SYS Blue Screen error. You can do this option either by booting into Safe Mode or in System Restore. If you are already in the Advanced Startup Options, just directly select System Restore and proceed with the next steps. And if you have just booted your PC into Safe Mode, refer to the steps below.
Tap the Win + R keys to open the Run dialog box.
After that, type in “sysdm.cpl” in the field and tap Enter.
Next, go to the System Protection tab then click the System Restore button. This will open a new window where you have to select your preferred System Restore point.
After that, follow the on-screen instructions to finish the process and then restart your computer and check if the problem is fixed or not.
Option 6 – Run the Blue Screen Troubleshooter
The Blue Screen troubleshooter is a built-in tool in Windows 10 that helps users in fixing BSOD errors like MEMORY_MANAGEMENT. It can be found in the Settings Troubleshooters page. To use it, refer to these steps:
Tap the Win + I keys to open the Settings panel.
Then go to Update & Security > Troubleshoot.
From there, look for the option called “Blue Screen” on your right-hand side and then click the “Run the troubleshooter” button to run the Blue Screen Troubleshooter and then follow the next on-screen options. Note that you might have to boot your PC into Safe Mode.
So you just have turned your computer ON only to find out that your device which was working perfectly yesterday is not working anymore. This situation can be very stressful and disappointing but do not despair, before you toss your device through the window know that this kind of behavior can be traced back to a software issue.
In this article, we will give you hints on what to do and where to pay attention when something like this happens so you get the device back in working order.
Check if it not a hardware malfunction
To save yourself time and unnecessary frustration with juggling through Windows first inspect the device to be sure that indeed it is working properly, check all led lamps which could indicate that the device is working and receiving power, and if it is an internal device try opening the case and visually check if there are signs of working like rotating fans or led lamps on it.
Check Cables
If it is an external device that has stopped working try checking power cables and cables which go to your computer, see if they are tightly connected. If it is an internal device also check cables, nudge them and if possible disconnect and clean them.
Disconnect and reconnect the device
Try this solution to see will Windows register the device again and start it.
Update Windows
If there is a Windows update not installed, install it and see if the device will start working.
Update device drivers
Go to device manager and update the device driver to its latest version or go to the manufacturer's site and download the latest driver version.
Reinstall the device
In the device manager, uninstall the device driver and reboot Windows. When Windows boots it will recognize the device and install the necessary drivers for it.
Disable antivirus and firewall
Sometimes antivirus can prevent certain devices from working properly, especially if they rely on some system files to which antivirus or firewall has cut access. Try disabling your PC protection to see if this will resolve the issue.
Use dedicated error software
Use DRIVERFIX to automatically search and fix driver issues.
Code 39 is a device driver error code that pops up when the Windows operating system cannot load the driver for the hardware you want to use.
This hampers your ability to use the hardware properly. The error code is almost always presented in the following format:
“Windows cannot load the device driver for this hardware. The driver may be corrupted or missing.”Code 39
Error Causes
A device driver is a software program that tells the operating system how to control a particular hardware device. Each hardware device has a different driver.
There are separate device drivers for printers, CD-ROM readers, and keyboards, to name a few.
Many device drivers are already built into the operating system. But sometimes you will need to install a new device driver when you want to use a new piece of hardware device that the operating system is not familiar with, or does not anticipate.
Regardless of whether or not the drivers are already integrated into the operating system, you may still experience code 39, typically because of the corrupted or outdated drivers.
Outdated and corrupted drivers cause hardware malfunction and failure, which trigger device driver error codes like code 39. Other causes include incorrect registry values.
Further Information and Manual Repair
Below are some of the easiest and most effective methods to resolve Device Manager error code 39 on your PC.
To follow and implement these methods, you don’t require any technical knowledge or expertise. Simply follow these instructions to fix the error right away.
Method 1 - Fix with a Simple Reboot
There is a possibility that the error code 39 is caused by some fluke within the Device Manager or your BIOS.
If that’s the reason, then a simple PC reboot can resolve the issue immediately. Therefore, before you try anything, it is advisable to restart your system.
If it works, then that is great, but if it doesn’t, then don’t worry, try other methods given below to fix this problem successfully.
Method 2 - Uninstall and Reinstall Drivers
If the error code 39 is generated due to faulty or outdated drivers, then simply uninstall and remove them and then reinstall new driver versions. There are two ways to remove faulty drivers.
Method One
One is, to go to the start menu, click on Control Panel, and then Add/Remove Programs.
Remove the program and the driver you think is causing problems. This will thoroughly remove all traces of the faulty driver.
To reinstall, follow the same steps but this time install the new device driver version.
Method Two
The other way is to go to the start menu, type Device Manager in the search bar, and then press enter to continue.
In the Device Manager, find and locate the problematic device.
After that, double-click the category of device that you wish to uninstall. Let’s say, Windows is unable to load the graphics card driver.
This means you will have to click on the Display Adapter category in the Device Manager to uninstall the graphics card.
After you have successfully uninstalled, Windows will prompt you to confirm device removal.
Simply click OK to confirm and proceed. To activate the changes, restart your PC.
To reinstall, go to the Device Manager, click on the Action tab and then select the option ‘Scan for Hardware Changes.’
This method, although effective in resolving error code 39, can be time-consuming. To avoid the hassle and save time, try method 3.
Method 3 - Update Drivers Automatically with DRIVERFIX
If you would like to read more helpful articles and tips about various software and hardware visit errortools.com daily.
Windows is one of the most popular operating systems in today's world. Plenty of software and plenty of hardware is working on it without any issues. In order for Windows to deal with this ever-growing hardware and in order for hardware manufacturer's to have stable products in the Windows environment is accomplished via Drivers.
A driver is a small piece of software whose sole purpose is to control and communicate with specific hardware and create a bridge between it and Windows itself. it is made in such a way that even if it brakes the rest of the operating system will continue working uninterrupted.
Having updated drivers means better performance and better stability for device performance so it is crucial to have the latest drivers installed. Outdated drivers can also lead to some security issues which could be exploited by malicious applications.
Here, in today's article, we are presenting you with 4 ways on how to keep your drivers updated and tidy for best performance and stability. The list goes from the most simple way to the most complex and time-consuming one.
Use one-click solution, DRIVEFIX
The most simple and most straightforward solution, install DRIVEFIX, and with only one click on a mouse button, you can have all drivers fixed and updated. This application is made for this purpose and it is doing its job pretty well.
Update Windows
Windows updates come with new drivers for new hardware and with newer versions of existing ones, do update on regular basis and you should have all of your drivers up to date.
Download drivers from the manufacturer's website
Go to the manufacturer's website for your device and download and install the latest driver package.
Use device manager to update drivers
Go to the device manager and right-click on the device which you would like to update the driver. Choose update device driver.
Error code 0xC004E003 almost always appears when there are damaged files in the Windows operating system. These files could be corrupt for a number of reasons and are usually a serious danger to the life of the computer system. These file errors may be caused by a number of things. Incomplete installation setup, incorrect deletion of hardware or utilities, or an unfinished file erasure. The trigger might also be in the event that the computer system is contaminated with a virus or adware or spyware, or even by the improper shut down of the computer. Any of these scenarios have the possibility to result in the removal or corruption of data of the Windows system data files.
The data system files that are damaged will give linked data and archives that are missing or wrongly linked. These are needed for the proper functioning of the software. This can also happen when or after installing third-party software that might have changed the system files. If it is suspected that a program installation will need to be stopped, it is best to let it run through the setup and then delete it later. While it installs, it is altering program files, and likely rearranging them. Stopping this in the middle can scramble files associated with the program and files vital to the usage of the computer.
Solution
Error Causes
This error will pop up after installing third-party software that has changed the system files. These system files are necessary to finish the activation process. A restore point will be necessary if it is ultimately determined that a system restore is necessary, to bring the computer back to the state it was in previous to the failed installation.
Error code “0xC004E003” appears and does not allow the system to continue the install.
The computer will not allow any further access or installation of the program.
The computer may crash.
The third-party program will not have installed completely or successfully.
The system will not start up correctly.
Personal files are corrupt or missing.
Further Information and Manual Repair
There are several steps that can be taken when the error code 0xC004E003 appears. It is helpful to know that this can occur from trying to install third party software. Going forward, do not attempt to install third-party software that is not trusted, and does not attempt to abruptly stop the third-party software from installing. This may cause the program to corrupt the files or delete important files. Recovering from this error can be easy if there is a recent restore point already backed up in the recovery portion of the system's files.
Method One
Run an error scan. The problem should be resolved after rebooting the computer once these steps have been completed.
Download and save an error code fix utility.
Setup the program and then click the Scan button.
Click the Repair Errors button when the diagnostic has been completed successfully.
Reboot the computer.
Method Two
Best when utilized by an expert.
Start the system up and sign in as the admin.
Click on Get Started, then select Programs, Accessories, Tools, and then System Restore.
On the next screen, click on Restore my PC to an Earlier Period, and then click Next.
Select the most recent system restore date within the drop-down menu of “select restore point”.
Click Next.
Click Next on the confirmation window.
Reboot the system after the system has finished restoring.
Method Three
Another option for restoring. This method can be used by a novice.
Right-click on the Start button, then select Control Panel.
Look for the Control Panel for Recovery.
Select Recovery, then Open System Restore, then Next.
Choose the restore point right before the problematic installation.
Click Next, click Finish.
NOTE: If there are no restore points available, the system recovery may not be turned on. To check this, go to Control Panel, and select Recovery. Configure System Restore, Configure. Then, select Turn on system protection. Having a current restore point for a computer ensures the ease of recovery if any problems with the computer arise.
If you wish to always have at your disposal a utility tool to fix these Windows 10 and other related issues when they do arise, download and install a powerful automated tool.
Runtime Error 217 can be a big problem if you use your computer for business purposes and you have confidential data/documents stored on your system.
This runtime error is quite dangerous. It can slow down your PC performance, lead to system failure and crash, make your system vulnerable to hacker’s attack, and also corrupt important files on your system.
Solution
Error Causes
There is no one particular cause behind the Runtime Error 217. This error can be attributed to several factors such as:
Corrupt, missing, or faulty register DLLs of programs. This is usually the cause for Runtime Error 217 when installation is unsuccessful and the crucial system files fail to be registered within the registry.
Exposure to Viruses like malware, adware, and spyware. Once a virus (es) gain access to your PC, you may experience Runtime Error 217. These malicious programs can damage your hard drive, boot sectors, memory banks, and registries.
Outdated Msvcrt.dll (a Microsoft Visual C++ file) file called.
Incorrect Regional settings
Further Information and Manual Repair
If you see Runtime Error 217 message pop up on your computer screen, you must fix and repair it right away before it becomes a big threat to you and your PC.
Though Runtime Error 217 is alarming this does not mean that you need to panic. Keep calm and follow the recommended solutions to fix Runtime Error 217 given below.
If the error occurs because you called the outdated Msvcrt.dll file, then you must update the file. This can be easily done by clicking the start menu, accessing the control panel, and then hitting the Windows update tab.
When you experience Runtime Error 217 due to incorrect regional settings on your PC, then to resolve this issue simply go to the start menu and select Control Panel. Now in the control panel, you’ll find the option clock, click on it and go to the language and region settings. Choose your specific regional settings and save.
If the cause of the Runtime Error 217 is incorrect registry entries and DLL files corruption, then to fix the error, you need to download a Runtime Error 217 fixer. After you download this repair tool, run it on your PC. It scans and detects corrupted files and repairs the error swiftly.
Nonetheless, if the cause of this problem is a virus, then you need to install a powerful antivirus program. When you run it, the antivirus scans your PC for viruses. Once the scanning is complete the results are displayed on the screen. The results show exactly how many viruses you have on your PC. Once the scan is complete, delete all the files and click repair.
Regardless of whether you have experienced the Runtime Error 217 on your PC or not, it is advisable to install a powerful antivirus and run it every time you use your PC.
By running it regularly, you can make sure that you are not exposed to viruses, malware, and spyware programs.
Even if your PC gets infected by them, you can delete and remove them timely before the damage is done.
There are times when after you upgrade your Windows operating system, the System Logs under the Event Viewer will display an error message saying, “Event ID 10010 error – The server did not register with DCOM within the required timeout”.
What is DCOM? DCOM stands for “Distributed Component Object Model”. It is a proprietary Microsoft technology that allows the Component Object Model or COM software to communicate across a network. You can consider it as an extension of COM which is equipped with the capability of solving a couple of inherent problems related to the COM model to the better use over a network. COM is a tool that’s used for advanced configuration and troubleshooting in Windows 10. Developers usually use it to configure routine components and application behavior like participation in transactions and object pooling and so on.
The Component Services needs the DCOM wire protocol in order to communicate with the Component Object Model components on other computers. By default, in a Windows-based system, the network computers are configured initially to enable DCOM.
There are also some components in Windows that might require registering themselves with DCOM. However, if they fail to do so, you will encounter the “The server did not register with DCOM within the required timeout” error. To fix this, here are some suggestions you can check out.
Option 1 – Try to use the Component Services
Tap the Win + R keys to open the Run dialog box.
Then type “dcomcnfg” in the field and tap Enter to pull up Component Services.
Next, double click on the Computers folder located in the right pane and right-click on My Computer, and select the Properties option.
After that, switch to the COM Security tab under My Computer Properties and then go to the Access Permissions section.
From there, click the Edit Default button and in the new window that appears, apply the correct permission to objects under the Group or user names section.
Once you’re done, click OK and exit. This should fix the error.
Option 2 – Make sure that Function Discovery Resource Publication Properties Services is running
In the Cortana search box, type “services” and click on the Services icon to open the Services Manager. Alternatively, you can also tap the Win + R keys to launch the Run prompt and then type “services.msc” in the field and hit Enter to open the Services Manager.
Next, scroll down and look for the “Function Discovery Resource Publication” entry and double click on it.
Then switch to the General tab and from there, make sure that the Startup Type is set to “Manual (Triggered).
You also have to make sure that the service is running so if it’s not, just click on the Start button to start the service.
Now click on Apply to save the changes made.
Option 3 – Try resetting the default DCOM permissions
Tap the Win + R keys to open the Run dialog box.
Then type “dcomcnfg” in the field and tap Enter to pull up Component Services.
After that, expand Component Services > Computers and right-click on My Computer, and then select Properties.
Next, go to the Default Properties tab, and in the Default Distributed COM Communication Properties section, make sure that:
Disk partitioning is a concept that’s been around for so long, but is still only familiar to few. If done right, it can help get your computer in perfect order.
Today we bring you a simple definition of disk partitioning, its pros and cons, and a quick tip on how to do it properly to reap its full benefit!
Definition and purpose
The simplest way to define disk partitioning would be: it’s exactly what it sounds like. It means taking a hard disk drive and separating it into different segments. These segments are called partitions. You can visualize it as cutting a cake into smaller pieces - not necessarily of the same size, though.
So what is the purpose of these pieces?
Well, when you first get a hard drive, it’s basically just a bunch of unallocated storage space. Until there’s at least one partition, this space is unusable to your operating system. Once you create a partition, your OS will recognize it as usable storage space.
You can choose to create a single partition and use it for all your files, from program files to personal data. A lot of off-the-shelf computers come with one primary partition like this and a small secondary one reserved for recovery purposes.
Whether or not you want to split your disk into more than one segment is up to you. We would generally recommend it, though. The whole point of partitioning is for each segment to have its own purpose.
So treating all your storage space as a single unit containing different file types would be like constructing an office building with only one massive room for everything - day-to-day work, conferences, interviews, etc. And all of this for different departments of the company. You can see how this might get a little messy.
Creating multiple partitions eliminates the task of running several different types of files from the same place. This takes a heavy load off the entire process of accessing data.
Disk partitioning also brings a ton of other benefits to the table. An important disclaimer, though: there are disadvantages too. We will walk you through both sides to help you get an objective idea and make an informed decision.
Source: Kina on Unsplash
What are the benefits of disk partitioning?
1. Better file organization
This is the most obvious and perhaps the biggest advantage of partitioning your hard drive.
As we already mentioned, partitioning allows you to create separate segments for different file and data types. You wouldn’t want to use the same partition for your system files and for games, would you?
If organization and time management are important to you, then multiple partitions are the right solution. Searching for specific files will be much easier overall. Say you have one hard drive, but three partitions: C for the system files alone, D for multimedia files and documents, and E for games and apps. Your computer loads the system from C without interference from the other two, and you know exactly where to look when searching for a file.
2. Easy reinstallation
File management isn’t the only thing made faster and simpler thanks to partitioning. If you opt for creating multiple segments on your drive, reinstalling Windows will be easy peasy.
That’s because all you need to do is format the partition your system is on. Then you reinstall the OS on it, and there you go. Now you have a clean installation, with all your files saved on other partitions intact. You can even make a copy of your system partition, so you can revisit the exact same installation in the future if you want. And the whole time your pictures, music, documents stay exactly where you left them.
Source: Andrew M on Unsplash
3. Possibility of using multiple file systems
By now you’ve understood that partitions function completely separately. This means that, if for some reason you need multiple file system capabilities, partitioning will allow that.
One segment could be used for, say, an NTFS file system, while another could run ext or APFS.
4. Running different OSes
You’re an avid Windows user but need to use Linux on the side? No problem. You don’t need to buy a separate computer or anything. The possibility of running different file systems also means you can use partitioning to run multiple operating systems.
Doesn’t that sound enticing? One machine for multiple totally different uses!
5. Backup and recovery made simple
Data loss can happen on any disk, partitioned or not. However, it’s much easier to get it back on a partitioned one. You know where you stored what, and each partition can be backed up exactly as it is. It’s also a lot faster to back up single partitions than entire hard drives.
Ultimately this also means a faster path to recovery. If you lose or accidentally delete important files and data, you might want to use a recovery tool like Recuva to scan for them and get them back. Recuva is even powerful enough to recover data from damaged hard drives. But no matter how powerful, scanning a whole drive is strenuous for any recovery tool. Scanning independent partitions is a lot more convenient than that, and will get you to your goal more efficiently.
6. Optimized performance
Now, let’s keep in mind that computer performance is influenced by a number of factors. Partitioning alone isn’t what makes it better or worse. However, it can contribute to optimization. It’s easier for your computer to scan, say, a 40 GB partition to fetch the system file it needs than scanning the entire capacity of your drive.
7. Improved security (possibly*)
Separate partitions can help make your system more secure. Firstly, they minimize file corruption. If one partition gets corrupted, the others should remain unaffected. And keeping in mind the previous point about backup and recovery, ‘fixing’ the damaged partition would be much easier than fixing the entire hard drive.
Partitioning also improves security in terms of malware protection. A malicious attack on one partition is easier to deal with than malware on the whole drive. If your system partition gets infected, you can simply reinstall your OS and that should do the trick.
*Do keep in mind that partitioning can’t defend you against more advanced attacks. So make sure not to give in to a false sense of security.
What are the disadvantages of partitioning?
1. Data is still vulnerable
Yes, it’s easier to back up and recover data from independent partitions. And yes, partitioning may help protect separated files and data to a higher degree. But remember: everything is still on a single physical drive. So while digital errors and issues may be easier to deal with on partitioned drives, physical damage obviously won’t be.
If your hard drive is destroyed in some way, all data on it will be gone. That’s why, if you have crucial files on your PC, it’s important to give them the proper backup treatment before it’s too late.
2. Disbalance of space
Allocating storage space on separate partitions may be a little more tricky than you think. You may fill up one partition a lot faster than another. So on one side you’re struggling with space, and on another you have too much of it to spare. Imagine nearly filling up your system partition and then it turns out you need a lot more space for its updates than you thought.
That’s why you really have to be sure you actually have enough files of different types that you need help managing efficiently. Otherwise you’ll just create a struggle and disbalance in terms of storage.
3. Increased risk of error
If done incorrectly, partitioning can lead to more harm than good. Aside from space disbalance, there is an increased risk of incorrect partition sizes and formatting. Plus, human error is also a factor: in a moment of distraction, you may erase one partition when you meant another. Undoing such mistakes will definitely be tedious and time-consuming.
4. SSDs eliminate the need of partitioning
SSDs (solid-state drives) don’t function in the same way that HDDs do. They have faster read times and can organize files on their own. This quite literally eliminates the need for organization on your part.
Partitioning: yes or no?
The bottom line is that multiple partitions might not be necessary for the average user. But if you’re planning on storing many file types or different file and operating systems on the same PC, then you should give it a shot. It’s also an excellent solution for businesses, of course.
And if our pros and cons list isn’t enough to help you decide, you can always send us a message and we’ll help you make the right choice.
Decided to partition your hard drive?
If you’ve decided to give it a go, you definitely should make sure to do it right.
The two most effective and reliable ways to partition are using the built-in options on Windows or investing in a dedicated partitioning tool, like the EaseUS Partition Master. Which one you'll opt for depends on your specific needs.
Option 1 may be more suitable for users with at least some level of experience. In this case, you’d have to know exactly which steps to take without making errors. This is done in Disk Management on Windows 10/11. From there, you can select the partitions you’d like to split into different volumes of selected sizes.
If this is your first time partitioning, we highly suggest you either consult professionals for this or move on to option 2. The EaseUS partitioning software is specifically designed for beginners, with an intuitive interface helping you succeed in the process. All you need to do is pick the Partition Master package tailored to your needs and follow their guide.
Each package offers technical support as well, and even free upgrades (to varying degrees based on your subscription). Plus, all of this is valid for not one, but two PCs.
It’s the perfect solution for a smooth and error-free partitioning process. If you want to organize your hard drives efficiently and make the most of all your space without doing irreparable damage, it’s definitely worth the investment.