Logo

Fix Windows errors 80240020, 8007002C, 80246007, 80070004

Upgrading your Windows 10 computer does not always go smoothly and you often encounter not just one but various errors so, in this post, we are going to cover several Windows 10 upgrade errors such as 80240020, 8007002C, 80246007, 80070004. All these upgrade errors are related to the Windows Update folder. Thus, you need to clear the Software Distribution folder, repair the System Image and fix System Health in order to resolve all these Windows 10 Upgrade errors.

Before you get started on the steps to resolve these tons of errors, you have to disable your security program for the meantime, disconnect your peripherals, remove USBs connected to your PC and then make sure that your PC is connected to the main power supply. Once you have everything covered, carefully follow the options given below.

Option 1 – Delete Windows 10 Update Files in the SoftwareDistribution folder

The Software Distribution folder in the Windows operating system is a folder that can be found in the Windows directory and is used to store files temporarily which might be required to install the Windows Update on your PC. Thus, it is required by the Windows Update and maintained by WUAgent. A lot of users tried deleting the files in this folder to fix the problem and so far it has worked. Like them, you can try clearing the Windows Update cache by simply deleting the contents of the folder named “SoftwareDistribution” since Windows apparently can’t clear and re-download the update contents once they are corrupted. Thus, deleting the contents of this folder will make Windows download the contents again which will fix the problem. To do that, follow the steps below.

  • Open the WinX Menu.
  • From there, open Command Prompt as admin.
  • Then type in the following command – don’t forget to hit Enter right after typing each one of them.

net stop wuauserv

net stop bits

  • After entering these commands, it will stop the Windows Update Service and the Background Intelligent Transfer Service.
  • Next, go to the C:\Windows\SoftwareDistribution folder and get rid of all the folders and files thereby tapping the Ctrl + A keys to select them all and then click on Delete. Note that if the files are in use, you won’t be able to delete them.
  • Once all the contents in the Software Distribution folder are deleted, restart your PC and then go back to Command Prompt and input the following commands again.

net start wuauserv

net start bits

Since the folder has already been flushed, it will be populated afresh the instant your restart your computer and open Windows Update.

  • Now Open Settings and check for Windows Updates. Windows 10 should begin the download right away.

Option 2 – Try using the DISM tool

Running the DISM Tool helps in repairing the Windows System Image as well as the Windows Component Store in Windows 10. Using this built-in tool, you have various options such as the “/ScanHealth”, “/CheckHealth”, and “/RestoreHealth”.

  • Open the Command Prompt with admin privileges.
  • Then type in the following commands and make sure to hit Enter right after you type each one of them:
    • Dism /Online /Cleanup-Image /CheckHealth
    • Dism /Online /Cleanup-Image /ScanHealth
    • exe /Online /Cleanup-image /Restorehealth
  • Do not close the window if the process takes a while as it will probably take a few minutes to finish.

Note: If it happens that the Windows Update client is broken, you need to run the following command to repair it then restart your PC and click on Update once again.

DISM.exe /Online /Cleanup-Image /RestoreHealth /Source:C:RepairSourceWindows /LimitAccess

Note: The Windows Upgrade error, with error code 80240020 is an expected error message that happens when the upgrade requires customer user action. Thus, you need to do the following steps to resolve this particular Windows Upgrade error.

  • Tap the Win + R keys to open the Run dialog box.
  • Then type “regedit” in the field and hit Enter to open the Registry Editor.
  • After that, navigate to this registry key: HKEY_LOCAL_MACHINESOFTWAREMicrosoftWindowsCurrentVersionWindowsUpdate
  • Now right click on WindowsUpdate located in the left pane and then create a new key and name it as “OSUpgrade
  • Next, right-click in an empty space in the left pane and create a new DWORD and name it “AllowOSUpgrade” and enter “1” as its value.

Option 3 – Try running the Windows Update in a Clean Boot State.

Putting your PC in a Clean Boot state can also help you install Windows Updates or Upgrades without any trouble because, during this state, you can start the system with a minimum number of drivers and startup programs that will surely help you in isolating the root cause of the issue.

  • Log onto your PC as an administrator.
  • Type in MSConfig in the Start Search to open the System Configuration utility.
  • From there, go to the General tab and click “Selective startup”.
  • Clear the “Load Startup items” checkbox and make sure that the “Load System Services” and “Use Original boot configuration” options are checked.
  • Next, click the Services tab and select the “Hide All Microsoft Services” checkbox.
  • Click Disable all.
  • Click on Apply/OK and restart your PC. (This will put your PC into a Clean Boot State. And configure Windows to use the usual startup, just simply undo the changes.)
  • After that, try to install the Windows Updates or upgrade again.
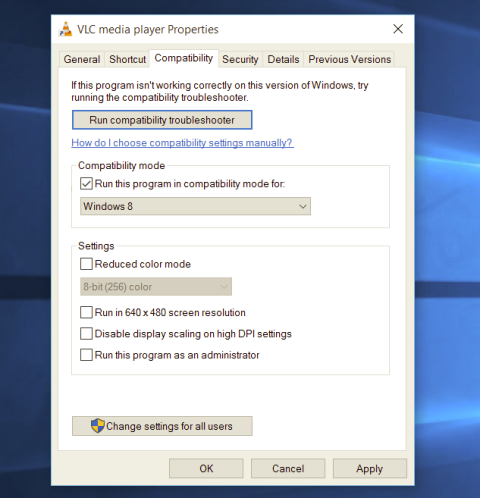
Do You Need Help with Your Device?

Our Team of Experts May Help
Troubleshoot.Tech Experts are There for You!
Replace damaged files
Restore performance
Free disk space
Remove Malware
Protects WEB browser
Remove Viruses
Stop PC freezing
GET HELP
Troubleshoot.Tech experts work with all versions of Microsoft Windows including Windows 11, with Android, Mac, and more.

Share this article:

You might also like

A Quick Fix Guide to Error 0x8004060c

What's Error 0x8004060c?

If you use Ms-Outlook. You may experience the malfunction 0x8004060c sooner or later. This malfunction was proven to arise in nearly every MS Outlook variation be it 2010 or 2,000, 2007. The malfunction 0x8004060c hinders your capacity to deliver and get e-mails from and your MS-Outlook account and happens without any forewarning. The error happens when the PST file grows too big and there's almost no memory to handle the increase (Which is rather rare nowadays). Generally, the PST file has about 2 gigabytes upper limit and when you reach that, this error is unavoidable. This error happens when you attempt incorporating data that is fresh into your MS-OUTLOOK Account.

Solution

Restoro box imageError Causes

This malfunction might generate difficulties for you personally as your e-mails vanish and can happen suddenly. The system could also crash at times unpredictably. You may not be able to see fresh notifications and attachments in your e-mail. Also, it's also possible to drop significant contact details. What's more, this malfunction could stop e-mails that are fresh to arrive in your inbox. Therefore, it is undoubtedly a significant issue that has to be repaired immediately. The following may be some of the causes for error 0x8004060c:-
  • This error might occur when OST/PST file got corrupt.
  • OST file becomes inaccessible due to Exchange connectivity or synchronization issue.
  • OST/PST file exceeded its default maximum file size.

Further Information and Manual Repair

In the event that you find the malfunction 0x8004060c at any stage, you should do the repair instead of risking dropping connections and all the significant data in your account. The easiest way to repair this malfunction and to handle this issue would be to download the Restoro. Click here to obtain this fix tool on your computer. After installing, click your mouse's left button after which can use the application. It repairs the error code 0x8004060c in the least period and walks you through the entire repair procedure quickly.
Read More
How to Fix 0x80040154 Error Code

What is 0x80040154 Error Code?

0x80040154 is a typical ‘class not registered’ error message. It occurs when PC users try to register and Run a 32-bit DLL (dynamic link library) Windows programs on a 64-bit version of Windows.

Solution

Restoro box imageError Causes

  • The 0x80040154 error causes include:
  • Incompatible software
  • Invalid entry command path
  • Damaged and corrupt DLL files
  • COM components not properly registered
  • Active X control and class issues
To avoid the inconvenience of running programs on your Windows PC, it is advisable to resolve the 0x80040154 error.

Further Information and Manual Repair

Here are some of the best methods that you can try to resolve the 0x80040154 error code on your PC:

# 1. Use Regsvr32.exe to Re-register the Failing COM Component

This is one way to resolve the 0x80040154 error code. Regsvr32.exe is a program that you can use to register DLLs (Dynamic Link Libraries) and ActiveX controls in the registry. To use this file to re-register the failing COM components, simply open an elevated command prompt. If the 32-bit DLL is in the %systemroot%System32 folder, then move it to the %systemroot%SysWoW64 folder. After that run the following command: %systemroot%SysWoW64regsvr32 <full path of the DLL>. This will help resolve the issue.

# 2. Install and Run Restoro PC Fixer.

Another alternative is to download Restoro. This is a new, advanced, and innovative PC repair tool deployed with multiple utilities like Active X control and class fixer, system optimizer, an antivirus, and a registry cleaner. It has a user-friendly interface with simple navigation. This makes it quite easy to use for all levels of users. It is safe, fast, and compatible on all Windows versions. The Active X control and class utility scans your entire PC, detects and resolves all errors like 0x80040154 triggering ActiveX and class ID issues in seconds. Besides this, Restoro also offers other benefits. By running this software on your system you can also ensure good PC health and performance as it also removes anti-viruses, repairs registry issues, fixes damaged DLL files, and also boosts the speed of your PC. DLL files often can get damaged and corrupt due to data overload. This is associated with the registry. If you don’t clean the registry frequently, it overloads with data and damages the DLL files. However, with the help of the registry cleaner utility embedded inside this software, you can repair these files easily. The registry cleaner wipes out all the unnecessary files from your system occupying your disk space and simultaneously fixes the damaged DLL files and restores the registry. However, if the DLL files are damaged due to a malware attack, the antivirus module takes care of them. It removes all the malicious software like adware, spyware, viruses, and Trojans and restores your files. Click here to download Restoro on your PC and resolve the error 0x80040154 on your PC now!
Read More
An Easy Guide to Fixing Error Code 14

Error Code 14 - What is it?

Generated due to temporary device and Window system conflicts, Error code 14 is a typical Device Manager error.  This error code can pop up anytime and usually displayed in the following format:

“This device cannot work properly until you restart your computer. (Code 14)”

Though it is not a fatal error code like the infamous Blue Screen of Death and runtime error codes, nonetheless it is still advisable to repair it immediately before any delay to avoid inconvenience.

It can lower your PC’s performance and hamper you from using certain hardware devices as a result of driver problems.

Solution

driverfix boxError Causes

Error 14 is triggered when your system is unable to correctly read the files and settings which is important for running a certain piece of your PC hardware. Now this conflict may occur due to reasons like outdated, corrupted, or poorly installed drivers. Other causes may include corrupted registry entries.

Simply put, Error code 14 is a good reminder that PC users should pay attention to updating device drivers to ensure healthy systems and optimum PC performance.

Further Information and Manual Repair

The good news is that error code 14 is quite easy to resolve. You don’t have to spend hundreds of dollars to hire a professional programmer to get it fixed. To repair, simply follow the DIY methods listed below.

We have compiled some of the best, proven, and easy to perform solutions for PC users to resolve Device Manager error codes like error code 14. Follow the instructions here to resume the functionality of your PC.

Let’s get started:

Method 1 - Reboot Your System

Sometimes, an action as simple as rebooting your PC can also resolve technical problems like error code 14. So, before you try any other method, try giving this a shot.

The moment the error code pops on your screen, simply close all the programs running on your system and restart your PC. This refreshes your system settings, processes and services allowing it to run smoothly.

However, if the error still persists, then try other methods given below.

Method 2 - Delete the Corrupted Registry Entries

Corrupted registry entry can also trigger error code 14. To resolve delete the corrupted registry entries. For this, go to the start menu and type Regedit. A dialog box will open. Now navigate through the HKEY_LOCAL_MACHINE key. Expand further to locate HKEY_LOCAL_MACHINESYSTEMCurrentControlSetControlClass. Once located, now in the right pane click upper filters and then click delete on the edit menu. Click yes when prompted to confirm the deletion.

Now in the right pane, click lower filters. Repeat the same steps as performed to delete upper filters. Confirm deletion and then exit the registry editor. To activate changes, restart your PC. This will hopefully resolve the issue. If the error code pops up on your computer screen, then try method 3.

Method 3 - Update Corrupted/Outdated Drivers

Drivers are basically software applications that communicate and provide instructions to your system to operate hardware devices.

When these become corrupt or outdated, you start experiencing problems like error code 14. To resolve, locate corrupted drivers and update them. You can do it both manually and automatically. We’ll discuss both ways.

For a manual driver update, go to the start menu, control panel, and then Device Manager. Now go through all devices listed to locate problematic drivers. To identify problematic drivers, look for yellow exclamation marks next to each device. Devices with yellow exclamation marks indicate that driver issues. To repair, right-click on each hardware device and select update driver.

Method 4 - Install DriverFIX - Alternative to Manual Driver Update

Updating each driver separately and manually is a stressful and frustrating task. This can take a lot of your time. Sometimes, you may also have to download new driver versions from the internet to install perform updates. To avoid the hassle and save time, it is advisable to install a program like DriverFIX.

This user-friendly and intuitive software is based on sophisticated technology featuring an intelligent programming system that automatically detects all your PC drivers in seconds.

Once you install this software on your system, it instantly identifies problematic drivers and matches them to the latest versions. It updates PC drivers immediately thereby resolving the error code 14 problem in a few seconds. It enables accurate installations and ensures that your PC runs at its optimum level.

More importantly, with this software installed on your PC, you don’t have to worry about keeping track of your driver updates anymore. The software updates drivers on a regular basis with new and compatible versions ensuring that your PC functions properly and you don’t experience any type of Device Manager error code. It is easy to use and install. It is compatible with all Windows versions.

Click here to download DriverFIX to resolve error code 14 on your system right away.

Read More
Middle mouse button is not working
If you suddenly find the middle mouse button not working as you use it on your Windows 10 computer, then you’ve come to the right place as this post will provide some suggestions that can help you fix the issue. This kind of problem can affect your experience in using your computer as the middle mouse button helps you in scrolling through long web pages and screens with a lot of data. So if that stops, you will end up using your keyboard instead which is kind of a hassle compared to using the middle mouse button. It is possible that this problem could have something to do with either the hardware or software. To isolate the possibility of a hardware failure, you can try to connect the mouse to a different computer and see if it works just fine there or if it still has the same problem. If the mouse works properly on a different computer, then the issue is software-related. It is possible that a software update, especially gaming software, could have been misconfigured in a way that the middle button does not respond like it’s supposed to. To resolve the problem, you might want to try reinstalling or updating the mouse drivers or run the Hardware and Devices troubleshooter. You can also install OEM-specific mouse drivers or modify some entries in the Windows Registry.

Option 1 – Reinstall or update the Mouse driver

The problem may be caused by a corrupted or an outdated mouse driver. To fix it, you have to update or reinstall the mouse driver. How? Follow these steps:
  • Open the Devices Manager from the Win X Menu.
  • Then locate the Mouse and other pointing devices and right-click on the mouse driver to open the Properties.
  • After that, switch to the Driver tab and click on the Uninstall Device button.
  • Follow the screen option to completely uninstall it.
  • Finally, disconnect the mouse and plug it back in to reinstall the mouse driver.
Note: You can install a dedicated driver on your computer in case you have it or you could also look for it directly from the website of the manufacturer.

Option 2 – Try running the Hardware Troubleshooter

The next thing you can do to fix the problem is by running the Hardware Troubleshooter. Although it won’t make much of a difference, there’s still a possibility that it could automatically fix the problem with these function keys. To use it, refer to these steps:
  • The first thing you need to do is click on Start and then on the gear-like icon to pull up the window for Settings.
  • After opening Settings, look for the Update and Security option and select it.
  • From there, go to the Troubleshoot option located on the left-hand side of the list.
  • Next, select Hardware and Devices from the list and open the Troubleshooter and run it. Once it is doing its job, wait for it to complete the process and then restart the system.
  • After the system restarts, check if the problem’s now fixed. If not, refer to the next option given below.

Option 3 – Try to install OEM specific mouse drivers

Aside from updating or reinstalling the mouse drivers, you might also want to try installing OEM-specific mouse drivers. When you install Windows, it will use a generic driver for all its components. The disadvantage of generic drivers for the mouse is that it limits its functionality. In fact, some also configure the middle mouse button to respond to specific action which does not work without the correct drivers. In such cases, you need to visit the website of your computer’s manufacturers to download and install the latest drivers and then open the software and configure it the way it was before. Keep in mind that some OEMs also offer gestures, so you also have to check on that.

Option 4 – Try to modify some entries in the Registry

If a Windows Update is the one that caused the problem, you could correct it by making some modifications in the Registry but before you proceed, make sure that you create a System Restore point first.
  • Tap the Win + R keys to open the Run utility.
  • Then type “Regedit” in the field and hit Enter to open the Registry Editor.
  • Next, navigate to this registry path: HKEY_CURRENT_USERControl PanelDesktop
  • After that, double click on the “WheelScrollLines” entry on the right pane to open its Properties.
  • Now change its value data to “3” and exit the Registry Editor and then see if the issue with the middle mouse button is fixed or not.
Read More
Windows can’t find one of the files in theme
Recently, a number of Windows 10 users getting an error on their computers that state, “Windows can’t find one of the files in this theme”. According to the affected users, this error occurs at random times even when they didn’t make any changes to their computer’s theme prior to getting the error. If you are one of these users, read on as this post will help you resolve this problem. If you click on the Yes button of the dialog box where the error is displayed, it won’t fix the problem as you will still get the same error from time to time. This kind of error could be caused by the executable file named “SettingSyncHost.exe”. It is possible that this executable file is unable to sync your theme all over your computer. On the other hand, it could also be due to some problems with the active theme. To resolve this issue, you can try to change the active theme, or disable the custom screensaver or disable theme syncing on your computer, as well as run a System File Checker or run the DISM tool. For more instructions, follow the options given below.

Option 1 – Try to change the active theme

The first thing you can do to fix the error is to change the active theme of your computer since the SettingSyncHost.exe file might not be able to properly sync the theme on the computer.
  • Go to Settings and click on Personalization.
  • Next, click on Themes and scroll down to apply a theme, and change the theme of the operating system.
  • After that, tap the Win + R keys to open the Run dialog box and type “%windir%ResourcesThemes” in the field, and then tap Enter to open the folder where the theme files are located.
  • Once you’re done, right-click and select delete for the active theme to remove the theme and its resources. This should fix the root cause of the problem. If not you can try to create a new Windows 10 theme and save it.

Option 2 – Try to disable the custom screensaver

The custom screensaver is a part of the mechanism of the lock screen. Although they were needed in the earlier Windows versions to prevent the discoloration of CRT monitor screens, they are no longer needed in the current version of Windows. Thus, you can try to disable it as it could be the one that’s causing the problem.
  • Click on the Start button and go to Settings > Personalization > Lock screen.
  • Here, scroll down and click on the Screen Saver settings.
  • After that, select the “Screen saver to (None)” option from the drop-down menu. This will disable the custom screensaver.

Option 3 – Try to disable theme syncing on your computer

You could also try to disable the theme sync feature to fix the problem. This has worked out for some users. To do so, follow these steps:
  • Click on the Start button and go to Settings > Account > Sync your settings.
  • From there, toggle off Themes in the individual sync settings column. This will disable the Theme syncing.
  • Restart your computer and see if the problem is now fixed.

Option 4 – Run the DISM tool

The next thing you can do is run the DISM tool. This tool is known to repair potentially corrupted files in your system as having them could also system issues like the “Windows can’t find one of the files in this theme” error. To repair these corrupted system files, you can run the DISM commands:
  • Tap the Win + X keys and click on the “Command Prompt (Admin)” option.
  • After that, input each one of the commands listed below sequentially to execute them:
    • Dism /Online /Cleanup-Image /CheckHealth
    • Dism /Online /Cleanup-Image /ScanHealth
    • Dism /Online /Cleanup-Image /RestoreHealth
  • Once you’ve executed the commands given above, restart your computer and check if the problem is now fixed.

Option 5 – Run the System File Checker

System File Checker or SFC is a built-in command utility that helps in restoring corrupted files as well as missing files. It replaces bad and corrupted system files to good system files that might be the cause why you’re getting the “Windows can’t find one of the files in this theme” error. To run the SFC command, follow the steps given below.
  • Type “cmd” in the Start search and then right-click on the appropriate search result.
  • Next, select “Run as administrator” to open Command Prompt with admin privileges.
  • After opening Command Prompt, type in sfc /scannow
The command will start a system scan which will take a few whiles before it finishes. Once it’s done, you could get the following results:
  1. Windows Resource Protection did not find any integrity violations.
  2. Windows Resource Protection found corrupt files and successfully repaired them.
  3. Windows Resource Protection found corrupt files but was unable to fix some of them.
  • Now restart your computer and see if the problem is fixed or not.
Read More
Fix 0xd00000e5, 0x8007139f, 0x80090030 PIN
The quickest and easiest way to log into your computer is when you use the PIN feature in Windows 10. Even though it is a bit slower compared to biometric logins such as Fingerprint and Iris scanning that comes under Windows Hello, the PIN feature is definitely less complicated. However, just like any other module of the software, it is also prone to some errors. In this post, you will be guided in fixing several PIN errors such as 0xd00000e5, 0x8007139f, and 0x8009003. These errors could be caused at different points in time like when you change or create a PIN or when you log into your computer. To fix the 0xd00000e5, 0x8007139f and 0x8009003 PIN errors, there are various solutions you can try. You may empty the contents of the NGC folder or remove and change the PIN or the password. You could also use the Group Policy Editor or reset the ACLs in the NGC folder as well as run built-in tools like System File Checker and the DISM tool.

Option 1 – Take ownership of the NGC folder and delete its contents

  • Boot your computer first into Safe Mode.
  • Next, you need to take ownership of the Ngc folder first and you can do that using Command Prompt.
  • Type “command prompt” in the Windows Search bar and then right-click on the relevant search result and select “Run as administrator”.
  • After that, if a User Account Control or UAC prompt appears, just click on Yes to proceed.
  • Next, type and enter this command: TAKEOWN /F C:WindowsServiceProfilesLocalServiceAppDataLocalMicrosoftNgc
  • Note that the <path> is the location of the folder or file in File Explorer.
  • Now type and enter this second command: ICACLS C:WindowsServiceProfilesLocalServiceAppDataLocalMicrosoftNgc /grant administrators:F
  • Finally, once the command has been executed, restart your computer.
  • Once your computer has restarted, delete all the contents in the Ngc folder and check if the error is now fixed.

Option 2 – Try to remove and change the PIN or password

The 0xd00000e5, 0x8007139f, and 0x8009003 PIN errors could be caused by some conflicting issues with the PIN or password you have set for the User Account of your computer. Thus, you have to remove or change the PIN or password to fix these PIN errors.
  • Remove the PIN by going to Settings > Accounts > Sign-in options.
  • From there, go to the PIN section and click on the Remove button.
  • You will be asked to verify your account to proceed in removing the PIN, enter your credentials.
  • Restart your computer and then set up a new PIN.
  • Once you’re done, restart your computer and check if the error is gone now.

Option 3 – Try to use the Group Policy Editor

  • Tap the Win + R keys to open the Run utility and type “gpedit.msc” in the field and tap Enter to open the Group Policy Editor.
  • Next, navigate to this policy setting: Computer Configuration > Administrative Templates > System > Logon
  • After that, double click on the “Turn on convenience PIN Sign-in” option located on the right-side panel.
  • Then set its radio button to Enabled. You will see the following description when you do so:
“This policy setting allows you to control whether a domain user can sign in using a convenience PIN. If you enable this policy setting, a domain user can set up and sign in with a convenience PIN. If you disable or don’t configure this policy setting, a domain user can’t set up and use a convenience PIN. Note: The user’s domain password will be cached in the system vault when using this feature. To configure Windows Hello for Business, use the Administrative Template policies under Windows Hello for Business.”
  • After setting the radio button to Enabled, it will turn on the Logins in your computer using the PIN.
  • Close the Group Policy Editor and restart your computer for the changes to take effect.

Option 4 – Try to reset the ACLs in the Ngc folder

  • Type “command prompt” in the Windows Search bar and then right-click on the relevant search result and select “Run as administrator”.
  • After opening Command Prompt with admin privileges, execute this command: C:/Windows/Service/Profiles/Local/Service/AppData/Local/MicrosoftNgc /T /Q /C /RESET
  • The command you entered will start checking for errors and fix them automatically.

Option 5 – Run the System File Checker scan and the DISM tool

System File Checker:

  • Tap Win + R to launch Run.
  • Type in cmd in the field and tap Enter.
  • After opening Command Prompt, type in sfc /scannow
The command will start a system scan which will take a few whiles before it finishes. Once it’s done, you could get the following results:
  1. Windows Resource Protection did not find any integrity violations.
  2. Windows Resource Protection found corrupt files and successfully repaired them.
  3. Windows Resource Protection found corrupt files but was unable to fix some of them.
  • Now restart your computer.

DISM tool:

  • Open Command Prompt.
  • Then type in the following commands and make sure to hit Enter right after you type each one of them:
    • Dism /Online /Cleanup-Image /CheckHealth
    • Dism /Online /Cleanup-Image /ScanHealth
    • Dism /Online /Cleanup-image /Restorehealth
  • After that, wait until the process is finished and do not close the window as the process will probably take a couple of minutes.
  • Once it’s done, restart your computer.
Read More
How to Repair Windows 10 Upgrade Error Code 0x80200056

Code 0x80200056 – What is it?

The Error Code 0x80200056 will appear in a few different instances, though always applies to an interrupted download.   Windows 10 will quickly discover that their upgrade and/or download did not work correctly. Not every user who upgrades to Microsoft Windows 10 will face this issue, only a select few random instances will occur. Common symptoms include:
  • A dialog box appears with the Error Code 0x80200056
  • Microsoft Windows 10 upgrade is unsuccessful
  • Users are unable to open any applications after completing the Microsoft Windows 10 install

Solution

Restoro box imageError Causes

This error can be caused by a number of common problems, the first of which is the easiest to diagnose.
  • If during the upgrade process, you accidentally restarted your PC, or inadvertently signed out of your PC, the error will occur.
  • Third-party software conflicts can cause this error message during the Microsoft Windows 10 upgrade.
  • Error Code 0x80200056 may also appear if you have corrupted system files on your PC.
  • A change in date and time during the Microsoft Windows 10 upgrade could potentially cause this error.
None of these causes should overtly affect the operation of your PC, but merely prevent the upgrade and/or download from functioning correctly. If your PC is exhibiting other operating system errors in addition to Error Code 0x80200056, it would be wise to contact Microsoft Support before the issues lead to a possible catastrophic failure.

Further Information and Manual Repair

With the very recent release of Microsoft Windows 10, we are seeing a number of users discuss Error Code 0x80200056. Luckily, there are three different methods that any home user can perform to alleviate the error and complete the Microsoft Windows 10 download successfully.

Method 1

Use if your PC restarted accidentally during the upgrade, or if you accidentally signed out of Windows during the upgrade.
  1. Make sure that your PC or Laptop is plugged in, to avoid another accidental restart.
  2. Turn your PC on, or make sure that it is running. (Close any and all unnecessary programs)
  3. Attempt the upgrade again, you should be able to run the upgrade successfully without further issue.
The following solution methods will apply if corrupted files, date/time changes, or third-party software interference is the issue causing Error Code 0x80200056.

Method 2

The following solution methods will apply if corrupted files, date/time changes, or third-party software interference is the issue causing Error Code 0x80200056.
  1. Click on your “start” icon and choose the CMD (command prompt) option.
  2. Right-click on “command prompt” and choose “run as administrator”.
  3. Paste the command “bitsadmin.exe /reset /allusers” into the command prompt and press ENTER.
  4. Restart your PC and attempt the Microsoft Windows 10 upgrade again.

Method 3

  1. Click on your “start” icon and choose the CMD (command prompt) option.
  2. Select “run as administrator” (enter a password if asked to do so).
  3. Enter the following command into the command prompt- “sfc/scannow”, press ENTER.
  4. Do not close the command prompt window until the entire process is complete.
  5. The scan will determine if you have any missing or corrupted files. You will receive a message that says either: “Windows Resource Protection did not find any integrity violations”.Or “Windows Resource Protection could not perform the requested operation”.
  6. If you received the first message, then your files are fine. The second message indicates that there are file corruption issues.
  7. To repair the disjointed files, restart your PC in SAFE MODE, and reopen the command prompt window.
  8. Enter the following command into the command prompt- “sfc/scannow”, press ENTER.
  9. After the scan is run again, you will receive a message stating that the files have been successfully repaired.
  10. Restart your PC in normal mode and start the Microsoft Windows 10 upgrade again.
To use a powerful tool to resolve Windows 10 upgrade Error Code 0x80200056 issue, download a powerful tool. Click here to download Restoro. If any of these methods do not allow for the successful upgrading of your Windows system, contact the Microsoft Support team. Make sure to include in your message to support what fixes you have attempted, and what the outcomes were. As Microsoft Windows 10 is so incredibly new, there are bound to be issued while the program is in its infancy. Fortunately, a majority of these issues should be worked out by Microsoft relatively quickly.
Read More
How to Repair Error Code 31

What is Error Code 31?

Device Manager Error Code 31 pops up when Windows prevents the driver for a particular hardware device from loading. The error code 31 is almost always presented in the following format:

“This device is not working properly because Windows cannot load the drivers required for this device.” Code 31

This error can occur with any hardware device; however, in most cases, it occurs with Ethernet cards. The good news is that it belongs in the easy-to-resolve category. So repairing it should not be difficult.

Solution

driverfix boxError Causes

Error code 31 is related to driver problems, and the most common causes include:
  • Outdated drivers
  • Missing drivers
  • Mis-configured drivers
  • Corrupt drivers

Further Information and Manual Repair

To resolve error code 31 on your system, try the methods given below. We have listed down some of the most effective and easy-to-perform DIY methods for fixing Device Manager code 31 on your PC.

Method 1 - Rollback the Driver to its Previous State

This simply means to return the driver back to its previous state - to the version last installed. Try this method to resolve error code 31. This is probably the easiest way to return your PC to its previous working state.

However, by doing so, you will not be able to update your drivers and run new driver versions on your system. In other words, this is a temporary method to fix this issue.

You may still want to try other methods given below to ensure you have the latest drivers installed on your system.

You can roll back the driver to its previous version by accessing the Driver Rollback feature located in the driver settings within the Device Manager. Or another way to perform a rollback is to use the Windows System Restore Utility.

It is a recovery tool built-in the new Windows versions. To access it, simply go to the start menu and type System Restore Utility in the search menu.

Access it and pick a point in the past, also referred to as the restore point, to return your PC to its previous state before the error code 31 occurred.

However, to resolve the problem permanently, try method 2.

Method 2 - Update the Driver

Error code 31, as discussed above, may occur due to outdated, misconfigured, or corrupted drivers. Whatever the reason may be, to ensure the proper functioning of your hardware device, it is important to update the drivers on your system frequently.

To start driver updates, first, it is important to find out and identify problematic drivers. You need to identify the drivers that are corrupt, misconfigured, and outdated. For this, go to the Device Manager and then look for devices with yellow exclamation marks.

The yellow exclamation marks next to the devices show that these device drivers are problematic. Once you’ve identified the problematic drivers, simply update them by finding the latest and compatible versions on the manufacturer’s website.

This process is time-consuming and can be frustrating at times, especially when doing it for the first time.

Also, once you’ve updated the drivers, you need to update them from time to time to ensure they don’t get outdated, or else you will have to encounter Device Manager error codes again.

Method 3 - Download DriverFIX to Update Drivers Automatically

To avoid the hassle and stress involved in updating drivers manually, it is advisable to download and install DriverFIX.

DriverFIX is a smart, innovative, and feature-filled software embedded with an intelligent algorithm that quickly detects problematic drivers, matches them with the latest and compatible versions, and updates them immediately and automatically in just a few seconds and a couple of clicks.

It’s as simple as it can be. Furthermore, with this software installed on your PC, you don’t have to stress and worry about when your drivers need to be updated again.

DriverFIX ensures all drivers are continuously and regularly updated before they become outdated.

Click here to download DriverFIX to repair Device Manager error code 31 and update drivers automatically and regularly.

Read More
What to do if Windows 10 Taskbar Volume Control is not working
The quickest way to control and manage the volume of your Windows 10 PC is using the Volume control icon in the system tray. However, you might encounter issues in using it especially if you recently updated your PC. After the update, if it no longer responds to mouse clicks, be it a right-click or left-click, read on as this post will show you what you can do to remedy that issue. If you think that you’re the only one who has experienced this problem, you are mistaken as several users also reported that the volume icon does highlight and shows the volume level if you hover the cursor over it but it does not really do anything at all. This is definitely the quickest way to change the audio output in Windows 10 especially when you have to change from speakers to your earphone and whatnot. If you are one of the users whose Windows 10 Taskbar Volume Control icon has stopped working and every time you click on the icon and nothing happens and you’re still not able to adjust the volume of your Windows 10 computer, read on as this post will show you what you can do to fix that problem. Although the audio is working just fine, you will still not be able to adjust the volume from its control icon. The problem is most likely related to the UI interaction. There are times when icons in the taskbar also experience the same issue where you can hover your mouse over them but nothing happens when you click on them. As mentioned, the issue with the volume icon does not seem to affect the actual audio of the computer. Double-check to confirm and if it turns out that the audio is indeed working fine, you can use the hardware of your keyboard to manage and control the volume, however, the software just won’t work. This issue is really inconvenient especially for users who connect their laptops to a bigger display. To fix this issue, here are some suggestions you need to check out.

Option 1 – Try to restart the Windows Explorer

This option may sound silly but it has actually worked in fixing the issue for some users. So if anything gets stuck on the taskbar or system tray, the best way to revive them is by restarting Windows Explorer.
  • Right-click on the taskbar and then select the Task Manager.
  • Next, look for Windows Explorer under the Processes tab.
  • Then right-click and select restart.
  • After that, wait for the restart process to be completed and for the user interface to refresh. Note that you will notice the Taskbar disappearing and reappearing again. It will reload the entire user interface and allows you to access the volume icon. It should work this time.

Option 2 – Restart the Audio services

Restarting the audio services in your computer can also help you fix the volume control issue and to do that, refer to these steps:
  • Tap the Win + R keys to open the Run dialog box.
  • Type in “services.msc” in the field and hit Enter to open Services.
  • From there, look for Windows Audio and then right-click on it and go to Properties.
  • After that, you have to make sure that the Startup Type is set to Automatic.
  • Then click on the Stop button. Once it has stopped, start it again.
  • Now restart your computer and see if you can now access the volume icon on the taskbar.

Option 3 – Try to update or roll back the Audio driver

If the glitch in your audio has something to do with software, chances are it might be related to the audio driver – it could be that the newest version of your Windows 10 does not work well with the old version of the driver. This is why you have to update your audio driver to the newest available version.
  • Tap the Win + R keys to open the Run dialog box and then type in devmgmt.msc and tap Enter or click OK to open the Device Manager.
  • Expand the section for the outdated device drivers.
  • And then select the outdated driver(s) and right-click on it/them.
  • From the drop-down menu, select the Update Driver option and follow the on-screen instructions to install the latest version of the driver.
  • Then also click on the option, “Search automatically for updated driver software.
  • Restart your PC after the installation.
Note: If updating the Audio driver didn’t work, you can go to the website of your PC manufacturer and look for the support section where you can download the drivers for your computer. You just need to take note of your PC’s correct model and model number so you can find the appropriate driver.

Option 4 – Try running the Playing Audio Troubleshooter

Since the Windows 10 operating system has the Playing Audio Troubleshooter, you can use this troubleshooter to try and fix the volume control issue on your PC. You can access this tool in the Control Panel or in the Taskbar Search and even on the Troubleshooters page of Windows 10. Run this troubleshooter and see if it can fix the issue or not.
Read More
Error: 0x80070035. Network path was not found
As you know, Windows allows you to share files between systems that are on the same network even though they are not connected physically. All you have to do is to make sure that the folder administrator allows access to the intended use and that your computer should be connected to the internet. Once you meet these conditions, you can share files between systems. However, recently a number of users reported that despite fulfilling these conditions, they end up getting errors instead when they try to access the shared drive. The error states:
“Error code: 0x80070035. The network path was not found.”
One of the common causes of this error is the antivirus program or the Firewall installed on your computer. It could also be that the drive is not shared in the first place or there are some issues with your network drivers. Whichever the case is, here are some potential fixes you need to check out to fix the Error code: 0x80070035.

Option 1 – Try to temporarily disable anti-virus and Windows Defender Firewall

As mentioned, the error could be due to the antivirus program or the Windows Defender Firewall installed on your computer. Thus, disabling them or any security software installed in your computer is always a good idea you can try when you’re not able to access the shared drive on your computer. There are times when you encounter problems like Error code: 0x80070035 due to interference of antivirus or security programs. Thus, you have to disable both your antivirus program and Windows Defender Firewall for the meantime and check if it fixes the error or not.

Option 2 – Check if the drive is shared

Before you further troubleshoot the problem, make sure that the drive you are trying to access is shared first. To do so, follow these steps:
  • Right-click on the folder and select Properties.
  • Go to the Sharing tab and check the status of the Network File and Folder Sharing.
  • And if the status is “Not Shared”, you need to select Share.
  • Next, select the intended Network User for sharing the file and choose the permission level for the user.
  • After that, click on the Apply and OK buttons to save the changes made. You or the intended user should now be able to access the shared folder or file.

Option 3 – Try to ping the IP address of the targeted computer

Even though the shared folder or file is shared correctly, it is possible that the network channel is not connected properly which is why you have to test it by pinging the IP address of the targeted computer from the primary computer.
  • Tap the Win + R keys to launch the Run dialog box.
  • Type “cmd” in the field and tap Enter to open Command Prompt.
  • Next, type the “ipconfig/all” command and tap Enter to execute it. This will populate various details.
  • From the given details, take note of the IPv4 address.
  • Afterward, open Command Prompt on the primary computer and then type the “ping <IPv4 address of the target computer>” command and hit Enter.
  • Now check if you get 4 confirmation replies or not. If not, you can try to access the Network Adapter Troubleshooter.
To run the Network Troubleshooter, refer to these steps:
  • Open the Search bar on your computer and type in “troubleshoot” to open the Troubleshoot settings.
  • Next, scroll down and select the “Network Adapter” option from the right pane.
  • Then click on the Run Troubleshooter” button.
  • After that, your computer will check for any possible errors and will pinpoint the root cause of the problem if possible.
  • Restart your computer.

Option 4 – Verify if Network Discovery is enabled

All you have to do is go to Start > Settings > Network & Internet and from there, click on the “Change connection properties” option and shift the radio button for Network profile to Private. After that, check if folder sharing is now working.

Option 5 – Try to modify the Network Security settings

There are times when the Network Security settings interfere with the folder or file sharing process. And if that’s the case, you can modify it to resolve the problem. How? Refer to these steps:
  • Tap the Win + R keys to open the Run dialog box.
  • Then type “secpol.msc” in the field and tap Enter to open the Local Security Policy manager window.
  • After that, go to Local Policies > Security Options located on the left pane.
  • Next, double click on Network security: LAN Manager authentication level in the right pane to open its Properties.
  • And then select the “Send LM & NTLM-use NTLMv2 session security if negotiated” option from the drop-down menu.
  • Now click on Apply and OK buttons to save the changes made.
  • Reboot your computer.

Option 6 – Try to enable NetBIOS over TCP/IP

  • Tap the Win + R keys to open the Run dialog box.
  • Then type “ncpa.cpl” in the field and tap Enter to open the Network Connections window.
  • After that, right-click on your network and select Properties.
  • Next, double click on Internet Protocol Version 4 and click on the Advanced button.
  • From there, go to the WINS tab and shift the radio button to Enable NetBIOS over TCP/IP.
  • Now click OK to save the changes made and then restart your computer.

Option 7 – Update the Network Adapter drivers

You might also want to update the Network Adapter drivers by following these steps:
  • Tap the Win + R keys to launch the Run window and then type in the “MSC” command and hit Enter to open the Device Manager window.
  • Under the Device Manager, you will see a list of drivers. From there, look for the Network Adapters and expand it.
  • Then right-click on each one of the Network drivers and update them all.
  • Restart your PC and see if it helped in fixing the BSOD error.
Note: If updating the network drivers didn’t help in fixing Error code: 0x80070035, you can also try to uninstall the very same drivers and restart your Windows 10 PC. After that, the system itself will reinstall the drivers you just uninstalled. Alternatively, you can also download and install the drivers from the manufacturer’s website directly. To reinstall the network adapter driver, refer to these steps:
  • Open the Devices Manager from the Win X Menu.
  • Then locate the device drivers and right-click on them to open the Properties.
  • After that, switch to the Driver tab and click on the Uninstall Device button.
  • Follow the screen option to completely uninstall it.
  • Finally, restart your computer. It will just reinstall the device drivers automatically.
Read More
1 2 3 171
Logo
Copyright © 2023, ErrorTools. All Rights Reserved
Trademark: Microsoft Windows logos are registered trademarks of Microsoft. Disclaimer: ErrorTools.com is not affiliated with Microsoft, nor claims direct affiliation.
The information on this page is provided for information purposes only.
DMCA.com Protection Status