This post will show you how to fix the Windows update error 0xca00a000 which you can encounter during the installation of Windows updates. Here’s the full error message of this Windows Update error:
“Updates failed
There were problems installing some updates, but we’ll try again later. If you keep seeing this and want to search the web or contact support for information, this may help:
2018-07 Cumulative Update for Windows 10 Version 1803 for x64-based Systems (KB4345421) – Error 0xca00a000”
This kind of Windows Update error pops up when Windows has missed installing one of the cumulative updates needed or when there is some problem with the driver that won’t let the installation of the updates push through. There are also instances when the system files are modified with incorrect permission that may result in the Windows update error 0xca00a000. Thus, you need to fix the trusted installer permission as well as resolve the issue with the driver. To do these things, you need to follow the options laid out below.
Option 1 – Run the Windows Module Installer
The Windows Module Installer is a built-in service in the Windows operating system that could help you resolve the Windows update error 0xca00a000. You need to make sure that this service is Started and that its Startup type is set to Automatic – you can do this via Services Manager or by executing the command given below in an elevated Command Prompt.
Tap the Win + R keys to open the Run dialog box.
Then type “command prompt” in the field and hit Enter to open Command Prompt.
And in the elevated Command Prompt type in the following command and hit Enter:
SC config trustedinstaller start=auto
After executing the command successfully, you should see the “[SC] ChangeServiceConfig SUCCESS” message on the Command Prompt window.
Option 2 – Try manually installing the updates
As mentioned, the error might be because Windows missed installing a particular update which is why you are not able to proceed with the current update. So to resolve the issue, you need to install the update that wasn’t installed by downloading it from the Microsoft Update Catalog website. You also have to make sure that you didn’t turn off the Windows update or have it delayed.
Option 3 – Delete the files from the Software Distribution folder
The Software Distribution folder in the Windows operating system is a folder that can be found in the Windows directory and is used to store files temporarily which might be required to install the Windows Update on your PC. Thus, it is required by the Windows Update and maintained by WUAgent. A lot of users tried deleting the files in this folder to fix the problem and so far it has worked. Like them, you can try clearing the Windows Update cache by simply deleting the contents of the folder named “SoftwareDistribution” since Windows apparently can’t clear and re-download the update contents once they are corrupted. Thus, deleting the contents of this folder will make Windows download the contents again which will fix the problem. To do that, follow the steps below.
Open the WinX Menu.
From there, open Command Prompt as admin.
Then type in the following command – don’t forget to hit Enter right after typing each one of them.
net stop wuauserv
net stop bits
After entering these commands, it will stop the Windows Update Service and the Background Intelligent Transfer Service.
Next, go to the C:/Windows/SoftwareDistribution folder and get rid of all the folders and files thereby tapping the Ctrl + A keys to select them all and then click on Delete. Note that if the files are in use, you won’t be able to delete them.
Once all the contents in the Software Distribution folder are deleted, restart your PC and then go back to Command Prompt and input the following commands again.
net start wuauserv
net start bits
Since the folder has already been flushed, it will be populated afresh the instant your restart your computer and open Windows Update.
Now Open Settings and check for Windows Updates. Windows 10 should begin the download right away.
Option 4 – Install the updates in a Clean Boot State
You might want to try putting your computer in a Clean Boot state and then install Windows Updates again without any trouble. During this state, you can start the system with a minimum number of drivers and startup programs that will surely help you in isolating the root cause of the issue.
Log onto your PC as an administrator.
Type in MSConfig in the Start Search to open the System Configuration utility.
From there, go to the General tab and click “Selective startup”.
Clear the “Load Startup items” checkbox and make sure that the “Load System Services” and “Use Original boot configuration” options are checked.
Next, click the Services tab and select the “Hide All Microsoft Services” checkbox.
Click Disable all.
Click on Apply/OK and restart your PC. (This will put your PC into a Clean Boot State. And configure Windows to use the usual startup, just simply undo the changes.)
After that, try to install the Windows Updates or upgrade again.
Option 5 – Run the Windows Update Troubleshooter
Running the built-in Windows Update troubleshooter could also help you resolve the Windows update error 0xca00a000. To run it, go to Settings and then select Troubleshoot from the options. From there, click on Windows Update and then click the “Run the troubleshooter” button. After that, follow the next on-screen instructions and you should be good to go.
Option 6 – Run Microsoft’s online troubleshooter
Running Microsoft’s online troubleshooter might also help you fix the Windows update error 0xca00a000. This online troubleshooter is known to help in fixing Windows Update errors, it scans your computer for issues that might be causing the problem and then fixes them automatically.
Error code 0xd0000272 occurs when Windows users are unable to activate their operating system. This usually occurs due to activation servers being busy or unavailable and affects Windows 8, Windows 8.1, and Windows 10 users.
Common symptoms of the error code include the following:
Inability to activate Windows operating system
Message box with error code 0xd0000272
Solution
Error Causes
Windows users affected by error code 0xd0000272 usually receive a message stating that the “activation server is busy or unavailable”. Some users report the error is resolved on its own after a few hours, while others experience activation issues that resolve only after manual repair methods are implemented.
Further Information and Manual Repair
To improve your chances of resolving issues related to Windows activation error codes, use manual repair methods and procedures. These are often successful as they address the issues causing the error codes to occur, whether there be missing or corrupted system files, network connectivity issues, or invalid product keys.
Error code 0xd0000272 may be resolved by simply waiting until later – a few hours at most – to reattempt activation. If, however, the activation process fails, proceed with the methods suggested below or contact a Windows repair technician.
Method One: Verify Internet Connection to Activate Windows
Are network connectivity issues preventing your machine from activating Windows? Check for this issue by verifying whether or not you are connected. Once you’ve been able to check your connection via your Internet settings and troubleshoot your network where necessary, proceed to the Product Activation Wizard.
The Product Activation Wizard will check if you have permission or authorized access to the version of Windows you are attempting to activate. This process usually involves the use of a product key. Once you enter the 25-character code – in the correct order, of course – proceed by selecting the activation option.
If the process is successful, you will be able to complete the activation and access all the features of the Windows edition you have activated. You will also notice the absence of the error code 0xd0000272 message. In cases where this manual repair method is unable to successfully resolve the issue, however, move to the next manual repair procedure on this list.
Method Two: Run Windows Update Troubleshooter
Another tool available to Windows users is the Windows Update Troubleshooter. You may access the Windows Update Troubleshooter offered on Windows 8 since it does not require an internet connection and runs most of the functions required. To do so, follow the steps below.
Step one: Swipe to the right of the screen and click Search
Step two: Type Troubleshooting
Step three: Click Settings then select Troubleshooting
Step four: Under System & Security, click Fix Problems with Windows Update
Step five: Select Next
You can also visit Microsoft’s website to access a more comprehensive Windows Update Troubleshoot tool. Download the troubleshooter and run it to fix problems related to Windows Update. Afterward, restart your computer then check the Product Activation Wizard to verify whether or not you can activate Windows 8 or 8.1. If the problem persists, however, and error code 0xd0000272 reoccurs, proceed to the third manual repair method.
Method Three: Disable Proxy Settings
Your computer’s proxy settings may in some cases interfere with the activation process, resulting in issues like error code 0xd0000272. To fix this problem, first, disable your proxy setting then reattempt the activation process using the Product Activation Wizard.
Step one: Press Win + C keyboard combination
Step two: Select Settings
Step three: Click Change PC Settings
Step four: Select Network, then Proxy
Step six: Switch proxy server settings to Off
Open the Product Activation Wizard once you’ve disabled the proxy settings. Complete the activation process based on the instructions provided. If you are successful, you will no longer be bothered by error code 0xd0000272 as the symptoms of the error code will not occur.
If, however, this manual repair method fails to resolve the error code, you may need to consider other alternatives. These may include the use of a powerful automated tool. You can also consider getting help from a Windows repair technician as such professionals are able to assess your computer and provide solutions as needed.
What software are you using to keep your information and all your files and memories safe?
None? Yikes. Let’s hope no damage has been done to your data yet then. Because with how the digital world has evolved, your data might be getting leaked and you have no idea.
Why do you need to invest in security software?
There’s really no good excuse not to purchase a quality platform for PC protection. Especially since top security solutions are available at such affordable prices nowadays, your wallet would barely even notice it.
At this point, only people who barely use their PCs and have zero sensitive information on them can get away with simply using the built-in Windows 10/11 security software. But we guarantee that those people are extremely hard to find and that you’re not one of them, and here’s why.
Even if you don’t use your computer for things that are very obviously sensitive, such as internet banking, you still have some personal data at risk of being stolen. How so? Well, think about the data you enter into your social media profiles, for example. How devastating would it be if somebody got a hold of any of it? Yep, that’s what we thought.
Credit: FLY:D on Unsplash
In the hands of a skilled cybercriminal, your phone number alone could put you at risk of scams, ransomware, identity theft and more. Also think about the stuff you share in texts and social media chats. Think about the websites you visit and how many times you may have accidentally clicked on an ad, which could very well contain malicious software. Those all seem harmless until someone’s actually used them against you.
Now imagine the dangers involved when you actually store truly confidential data on your PC and browsers. Sends shivers down your spine, doesn’t it?
In the case of a successful cyberattack of whatever type (virus, phishing, worms, etc.), there’s so much that is at stake. Businesses/legal persons will suffer from financial loss and damaged reputation, at the very least. Natural persons may be threatened or exploited, get their banking or medical information and even their identity stolen, etc. And that’s just the tip of the iceberg.
These are our biggest reasons for investing in Windows PC protection software:
Cyberthreats are constantly evolving to the point where built-in or free software won’t cut it anymore.
Those working remotely can have peace of mind knowing both personal and business data is completely secure.
Businesses using top security solutions ensure their customers trust them.
Data breaches are a pain in the you-know-what to handle. Fighting a cyberattack and going back to normal is a demanding process, and not to mention the stress it’ll cause. We’d rather prevent all that by using trustworthy security products!
It helps parents worry a little less about their children’s safety in the online world.
Added bonus: with most products, you get an ad-free browsing experience!
Obviously, there are a lot more reasons to get your PC secured. But we think you get it. So let’s cut to the chase and take a look at our 6 favorite protection solutions and the wonders they can do for you.
*Note that in this article we’re looking at products primarily suited for households and home offices, some for small businesses. No enterprise solutions will make the list today, but stay tuned for a future article on those.
Top 6 best PC protection solutions
1. Bitdefender Total & Internet Security\
One of the biggest security product vendors out there, Bitdefender offers several awesome solutions. We want to introduce two of our favorites, Bitdefender Total Security and Bitdefender Internet Security.
Bitdefender Total Security is great for both households and smaller offices. You can choose to protect 5 or 10 devices, and not necessarily just Windows devices. It also works for macOS, Android and iOS. It offers a range of powerful features, such as:
Real-time data protection
Webcam and microphone protection
Device optimization options
Anti-phishing/-fraud/-spam technology
Ransomware protection
Anti-loss and anti-theft tools
VPN and privacy firewall
Anti-tracking technology
Parental controls
24/7 support
Bitdefender Internet Security shares almost all of these features, but there are a few important differences to note. Unlike Total Security, Internet Security has more options in terms of the number of protected devices: 1, 3, 5 or 10. However it’s only compatible with the Windows platform and it doesn’t offer device optimization tools or anti-theft options. Whether or not this is a deal-breaker depends on your needs alone - we still find it a great security tool.
Credit: Firmbee.com on Unsplash
2. ESET Internet Security
An award-winning Windows security product, ESET Internet Security is essential on this list. It has an outstanding protection rate of 99.9% and a range of amazing options you’ll definitely want to make use of. It can be installed on up to 10 devices, making it an awesome tool for your household, home office or a small business. It’s also compatible with macOS and Android.
These are ESET Internet Security’s best features:
Protection against ransomware and spyware
Protection against malware specifically designed to avoid detection
In-depth scans when the computer is not in use
Firewall to prevent unauthorized access to your PC
Anti-spam tool
Anti-phishing and botnet protection technologies
Tool to scan your router and smart devices for vulnerabilities
Special browser for secure internet banking
Parental controls
Prevention of unauthorized webcam access
If you ask us, ESET has it all!
Credit: rupixen.com on Unsplash
3. Kaspersky Total & Internet Security
Having a deja vu? Didn’t you just read Total Security and Internet Security somewhere? Oh, that’s right - the first entry on our list! But here we’re talking about Kaspersky, a vendor you’ve also definitely heard about before.
Just like Bitdefender, Kaspersky is another one of those renowned names in the cybersecurity world that always make it to every ‘best of’ list. And for good reason - its products really fulfill their purpose. So let’s take a closer look at the two we chose.
These are the features both Kaspersky Total Security and Kaspersky Internet Security have in common:
Real-time virus and spyware blocking
Webcam protection
Wi-Fi security notifications
Advanced identity theft protection
Free technical support on several channels
Remote security management
Multiple devices (up to 10)
The main difference between Kaspersky Total Security and Internet Security is that the former offers more capabilities. These are the features KTS offers that KIS does not:
System cleanup
File shredding
Password management
Data backup and encryption
Both are excellent security tools, though we do prefer KTS a little more because of these additional options.
4. Norton 360 Deluxe
Of course one of the industry-leading solutions makes the list. Norton 360 Deluxe can protect up to 5 devices, be it Windows, iOS, macOS or Android. It’s worth noting that its features are best developed for Windows. Here’s what you get with Norton 360 Deluxe:
Protection against viruses, hackers, malware
100% virus protection promise
VPN included for all devices
Unlimited VPN on Windows
Password manager
Parental controls
So is there anything aside from these standard protection features that makes it such a favorite among us techies? Let us tell you! Norton added a little bit of spice here with two really powerful capabilities. The Deluxe product offers 50GB of cloud backup and dark web monitoring. The latter means the software notifies you if any of your personal information is found on the dark web, which helps protect you against identity theft.
Credit: Luke Peters on Unsplash
5. McAfee Antivirus
Don’t be misled by the name of this product. Antivirus software may have started as protection against viruses only, but it’s developed quite a lot. The name simply stuck. All that to say that McAfee Antivirus - another award-winning security solution - protects you against several different threats.
The basic and essential plan allow 1 and 5 devices respectively, while McAfee+ Premium and Advanced work on an unlimited number of devices. The latter two also offer more capabilities, as you can imagine. Here’s what you can expect from all of them:
Secure unlimited VPN
File shredder to delete sensitive files completely
Ultimate safety while browsing
Protection against hackers
100% virus protection promise
Advanced firewall to block dangerous traffic
Online support from specialists
Protection score (shows how safe you are and detects vulnerabilities)
Identity monitoring (notifies you if any of your information is on the dark web)
Password management
Unlike the previous products, McAfee Antivirus does not offer parental controls. Otherwise it’s a pretty strong and comprehensive protection tool and might just be the right choice for you!
6. Trend Micro Maximum Security
Last but definitely not least, we’ve got Maximum Security by Trend Micro. And yes, you guessed it, Trend Micro is also an award winner in terms of cybersecurity. Its products have been recognized as industry-leading security solutions by AV-Test since 2003. Among all its fantastic solutions, our favorite for households or small offices is Maximum Security.
You can use Trend Micro Maximum Security to protect 3-5 devices for a year or two years before needing to renew your license. Aside from Windows, it’s compatible with iOS, Android, Mac and Chromebook devices. Here’s what you can expect from this protection software:
Powerful malware protection
Phishing detection and prevention (email)
Password management and protection
Maximum security for online banking and shopping
System optimization
Social media privacy protection
Parental controls
24/7 technical support
No notifications during gaming
It’s truly one of the most effective platforms out there dedicated to protecting your digital life. Using this product, ransomware, identity thieves and malicious websites don’t stand a chance.
The bottom line
If you’ve made it all the way here, congratulations, you’ve made the right choice: to invest in securing your valuable data! Now the question is: which one of these 6 awesome antivirus/antimalware products to select?
The paradox of choice is a very real thing - we feel you. As mentioned, it comes down to what your specific needs are. So before you go ahead and purchase your security software, make sure to explore all options.
And if you really can’t handle the decision-making anxiety, feel free to reach out. We’ll happily assist you in finding the right product to keep your digital life secure!
The 0x00000bcb is a PC Windows error code that occurs when Windows cannot connect to the printer successfully thus hampering the installation of your system.
Solution
Error Causes
Like any other computer hardware device, printers also need additional software to function called the driver. Unsuccessful installation of driver software leaves behind locked files in the registry information that causes the next installation to fail as well.
And so eventually, when you try to connect the printer with your system, you see a 0x00000bcb error message pop up on your screen.
To ensure you fix this error code for good you need to make sure the printer software installation is carried successfully the next time you do it. And for that, you need to get rid of the locked files and bad registry keys that are preventing successful printer software installation.
Further Information and Manual Repair
The inability to install the printer support software countless times can be frustrating and cause inconvenience as it can prevent you from getting printouts. To resolve this error code, many people pay hundreds of dollars to technicians.
Nonetheless, there is a way to resolve this issue on your PC without hiring a professional or having technical expertise. Wondering how? Restoro is your answer.
This is a two in one highly functional system optimizer and registry cleaner PC repair tool. It includes multiple utilities allowing PC users to fix practically all types of PC errors in seconds. To use Restoro, you don’t need to be technically sound. It is simple and very easy to operate.
The powerful registry cleaning utility integrated into Restoro enables PC users facing error code 0x00000bcb messages to clean up the registry in no time and ensure quick and successful printer software install.
With this helper, you can swiftly clean up unnecessary and locked files and bad registry keys. The advanced registry cleaner scans for all junk files, invalid entries, bad keys, and corrupt files accumulated in your system. Once the files causing the 0x00000bcb error are scanned all you have to do is click on the fix button to repair. It’s that easy!
It cleans up the registry, wipes out the clutter, and clears up the disk space in seconds. Once the registry is cleaned, you can then try installing the printer software again.
And once the printer software is installed successfully, your system will be able to connect to your printer without displaying 0x00000bcb error messages.
In addition to this, you will also experience a great difference in the speed and performance of your PC. Here's how to Install and use Restoro to Fix PC Errors
Restoro also includes other utilities like privacy error fixer, Active X and Class detector, and system stability repair. So along with registry issues, you can also scan your system for privacy errors like viruses and malware, thus keeping your PC secure from data breaches and system security issues.
This multi-functional tool is worth downloading. It is safe, efficient, useful, and utility load. With this helper, Windows compatibility is not an issue. Restoro is compatible with all PC Windows versions. So, no matter what Windows version you are using, you can run this repair tool with ease.
So, what are you waiting for? Download it now to resolve the 0x00000bcb error code and ensure a successful printer connected to your computer.
Click here to install Restoro on your system.
Windows Vista had in it animated wallpapers on desktop but sadly how they were heavy on system resources Microsoft abandoned the idea. Moving forward a couple of years later we have Windows 10 but still, we do not have live animated wallpapers. Since I am the kind of person who does not want to wait on Microsoft and now it is time to bring animated wallpapers back I am going to make one all by myself and you are welcome to join the ride and do the same for you as well.
Enough talk, let's dive into how we can make animated wallpaper for our Windows 10.
Choosing the application
First, we will need some form of application which can we look at our animated wallpapers and since they are animations it means video, so we will need a video player and what better choice than a VLC player, an open-source light weighs all-format player.
Get a VLC player from here and install it.
Finding video source
The next thing is to of course have some looping video that we will use as background. There are many sites and ways to get seamless loop videos, I use this youtube channel for my backgrounds. Altho you can use any video footage you want it is recommended that it is not too long, that it is hi-resolution so we do not have pixels on-screen, and if you can, get it as seamless since we do not want to see stutter when the video is lopped from the beginning.
So hopefully you have desired video and VLC player installed.
Putting it all together
Copy the following code and paste it into your search bar in Windows to open the Startup folder, or navigate to the Startup folder yourself via file explorer if you know where it is.
%appdata%\Microsoft\Windows\Start Menu\Programs\Startup
Now, next thing is to copy and past the VLC shortcut into this folder so it is started when Windows is first time booted.
Right-click on the shortcut and in the edit field paste this:
"C:\Program Files\VideoLAN\VLC\vlc.exe" --video-wallpaper --qt-start-minimized --no-qt-fs-controller --repeat --no-video-title-show --qt-notification=0 "C:\videopath\filename.mp4"
where "C:\Program Files\VideoLAN\VLC\vlc.exe" is the path where VLC is installed, point this to where you have installed it
"C:\videopath\filename.mp4" is the path where you have your video that you wish to use as animated wallpaper. Please note also that in my case there is mp4 as an extension but it does not need to be mp4, just use any extension VLC can open and play.
Conclusion
And that's it, you have successfully made an animated background or live wallpaper on your Windows 10 computer. You can change your wallpaper anytime by editing shortcut and giving it a new path to a new video or simply overwrite the existing one with a new baring same name.
To begin with, Cyclic Redundancy Check is basically an error checking technique. This technique is used for data verification. It detects accidental changes in the data. It is used by computers to specifically check the data stored in the hard drive or optical disks (DVD’s and CD’s).
The Cyclic Redundancy Check error occurs when the data being verified on the hard drive or optical disks is corrupt.
Symptoms for this error code include program lock-ups, slow PC performance, inability to run and execute the desired program, system freeze and shutdown and startup issues.
Error Causes
The Cyclic Redundancy Check error code occurs due to the following reasons:
Cluttered hard disk
Registry corruption
Misconfigured files
Unsuccessful program installation
All these causes points towards registry issues and poor PC maintenance. The registry is the main database of the computer. This part of the PC saves practically every activity you perform on it including activities like application installation and deletion and web browsing to name a few.
With time and frequent PC usage, the files generated from every activity you execute on your system begin to load the registry. These include even the unnecessary files like junk files, internet files and files of applications that you’ve uninstalled.
All these files overload the registry and acquire a lot of hard disk space. And when you don’t remove these files on your system, eventually it leads to file misconfiguration, cluttered disk, and registry corruption.
New program versions that you want to install and run on your system also don’t function because the files of the old program version still saved in the registry.
Further Information and Manual Repair
As the Cyclic Redundancy Check Error causes data corruption on the hard disk, it is advisable to fix this error right away. The reason is that it can have serious consequences. It can lead to data loss, fatal crashes, and system failures.
When it comes to resolving Cyclic Redundancy Check Error, there are two ways to fix it:
Run the CHKDSK application.
This is a built-in feature in your Windows system. It checks for hard disk damage and attempts to resolve it.
If you are not able to access the Windows 10 Advanced troubleshooting options within Windows then you’ve come to the right place as this post will guide you on how you can repair or boot the Windows 10 installation without losing data using the bootable installation USB or DVD media. To repair or boot Windows 10 using the installation media, you have to download the Windows ISO, create a bootable USB or DVD drive, boot from the media and select “Repair your computer” and then select Startup Repair under Advanced troubleshooting. To get started, follow the given steps below carefully.
Step 1: Frist, download the Windows ISO.
Although this is not necessarily needed, it’s still better if you download the Windows ISO first so make sure that you download the same ISO version as installed on your computer.
Step 2: Next, create a bootable USB or DVD drive.
Insert your USB drive into your PC.
Tap the Win + R keys to open the Run dialog box and type in “cmd” and tap Enter to open the Command Prompt. Alternatively, you can also search for “cmd” in the Cortana search box to open Command Prompt.
Once you’ve opened CMD, type in this command to open the DISPART utility – diskpart
After that, you should see a new black and white window that would say, “DISKPART>”.
Next, type in “list disk” in the command line and tap Enter to see the list of all the Storage devices as well as your hard disk connected to your PC. Here, you have to identify your disk’s number.
Type in this command where “X” is the disk number you have identified and then tap Enter – disk X
Type in this command and hit Enter to clear the table records and all the visible data on the drive – clean
Now you have to recreate a new primary partition of the drive so you’ll have to type in this command and tap Enter right after – create part pri
A new primary partition has been created so you have to select it by typing this command and tapping Enter – select part 1
Now you have to format it to make it visible to normal users by typing – format fs=ntfs quick
Note: If your platform supports the Unified Extensible Firmware Interface or UEFI, replace the “NTFS” with “FAT32” in the command on Step 10.
After that, type in this command and tap Enter after – active
Finally, type this command and hit Enter to exit the utility – exit
After you prepare the image for the operating system, save it to the root of your USB Storage device.
Step 3: After creating a bootable drive, boot from the media and select the “Repair your computer” option.
Once you boot from the USB drive, it will start the Windows 10 installation right away. So you must not keep on clicking Next as you will end up installing Windows. You need to look for the “Repair your computer” link on the first installation screen and click on it and then boot your computer into Advanced Recovery.
Step 4: Select Startup Repair under the Advanced options screen
Once you’re at the Advanced Recovery screen, select Advanced Options and select Troubleshoot.
After that, look for the Startup Repair and click on it and then follow the next on-screen instructions. This solution will help you fix issues that do not allow you to boot into your computer.
On the next screen, you will see the admin account with its name. Click on it and verify using the account password associated with the email.
After verification, it will start to diagnose your computer and automatically resolve any detected issues related to boot.
After the issue is fixed, your computer should reboot normally and you should now be able to use it. Note that your personal files are still intact since the process didn’t delete or wipe them out.
Babylon is a self-published computer dictionary and translation program. Babylon is a tool used for translation and conversion of currencies, measurements, and time, and for obtaining other contextual information. The program also uses a text-to-speech agent so users hear the proper pronunciation of words and text.
Babylon’s translation software adds the Babylon toolbar identified as a browser hijacker. This toolbar may modify the homepage of the browser. It adds a Scheduled Task, Startup file, and Registry Keys that allow it to run at any time. A Windows Firewall exception is also added for the software, allowing it to connect to the internet without content.
About Browser Hijackers
Browser hijacking is actually a type of unwanted software program, commonly a browser add-on or extension, which causes modifications in browser settings. Browser hijackers will do a number of things on your computer. Often, hijackers will force hits to internet sites of their choice either to increase targeted traffic generating higher ad revenue, or to obtain a commission for each and every user visiting there. It could seem harmless, but the majority of these websites aren’t legitimate and can present a significant risk to your online safety. Additionally, hijackers can make the entire infected system fragile – other harmful malware and viruses will take hold of these opportunities to get into your PC effortlessly.
Signs of browser hijacker malware
There are several symptoms of browser hijacking. Here are a few of them: the home page of your browser is changed all of a sudden; new bookmarks pointing to porn websites are added to your favorite pages; the default browser settings have been modified and/or your default search engine is altered; unsolicited new toolbars are added to your internet browser; you notice a lot of pop-ups on your computer screen; your web browser gets sluggish, buggy, crashes frequently; you cannot go to certain sites such as homepages of anti-malware software.
How it infects your computer
Browser hijackers may use drive-by downloads or file-sharing networks or perhaps an email attachment in order to reach a targeted computer system. They may also originate from any BHO, browser extension, toolbar, add-on, or plug-in with malicious intent. Sometimes you might have accidentally accepted a browser hijacker as part of a software bundle (usually freeware or shareware). Examples of well-known browser hijackers include Fireball, GoSave, Ask Toolbar, CoolWebSearch, Babylon Toolbar, and RocketTab.
The existence of any browser hijacker on your system will considerably diminish the browsing experience, monitor your online activities that lead to troublesome privacy issues, produce system stability issues and finally cause your PC to slow down or to a nearly unusable state.
Browser hijacker removal tips
Some hijackers can be easily removed by deleting the free software they were included with or by eliminating any add-ons you’ve recently added to your computer system. Sadly, most of the software packages used to hijack a web browser are intentionally designed to be hard to eliminate or detect. And there’s no denying the fact that manual fixes and removal can be quite a difficult task for an inexperienced PC user. Besides, there are numerous risks associated with fiddling around with the pc registry files.
Anti-malware application is extremely efficient when it comes to picking up and eliminating browser hijackers that regular anti-virus program has overlooked. To get rid of any kind of browser hijacker from your PC, you could download this top-notch malware removal tool – Safebytes Anti-Malware.
What To Do If You Cannot Install Safebytes Anti-Malware?
Practically all malware is inherently unsafe, but certain types of malicious software do much more damage to your computer than others. Certain malware types alter browser settings by adding a proxy server or modify the PC’s DNS configurations. In such cases, you will be unable to visit some or all websites, and thus unable to download or install the required security software to clear out the infection. So what you should do if malware prevents you from downloading or installing Anti-Malware? Even though this sort of problem can be tougher to get around, there are some actions you can take.
Boot Windows in Safe Mode
If the malware is set to run at Windows start-up, then booting in Safe Mode should prevent it. Just the minimum required applications and services are loaded when you start your laptop or computer into Safe Mode. To launch your Windows XP, Vista, or 7 computers in Safe Mode with Networking, follow the instructions below.
1) After switching on the computer, hit the F8 key before the Windows splash screen begins to load. This should bring up the Advanced Boot Options menu.2) Use the arrow keys to select Safe Mode with Networking and press ENTER.3) Once this mode loads, you should have the internet. Now, make use of your internet browser normally and navigate to https://safebytes.com/products/anti-malware/ to download Safebytes Anti-Malware.4) Immediately after installation, do a full scan and allow the software to delete the threats it detects.
Obtain the antivirus software using a different browser
Certain malware may target vulnerabilities of a particular browser that obstruct the downloading process. The best way to overcome this problem is to opt for a web browser that is well known for its security measures. Firefox comprises built-in Phishing and Malware Protection to help keep you secure online.
Install security software on a flash drive
Another option is to store and run an antivirus program completely from a Thumb drive. Try these simple actions to clear up your affected computer using a portable antivirus.
1) Use another virus-free computer to download Safebytes Anti-Malware.2) Mount the USB drive onto the same PC.3) Double-click the exe file to run the installation wizard.4) When asked, choose the location of the pen drive as the place in which you would like to store the software files. Do as instructed on the screen to finish up the installation process.5) Remove the flash drive. You may now utilize this portable anti-malware on the infected computer.6) Double-click the antivirus software EXE file on the pen drive.7) Press the “Scan Now” button to start the virus scan.
If all the previously mentioned methods are not able to help you in downloading and installing the anti-malware, then you have no option but to reinstall the computer’s operating system to wipe out all of the data, including the harmful programs which are obstructing the anti-malware installation. If you are unclear regarding which method works best for you, simply call 1-844-377-4107 to speak to our computer professionals who can walk you through the process to fix your infected computer system.
SafeBytes AntiMalware Overview
Today an anti-malware program can protect your PC from different kinds of internet threats. But how to decide on the best one among countless malware protection application that is available in the market? You may be aware, there are several anti-malware companies and products for you to consider. A few of them do a good job in eradicating malware threats while many will harm your computer themselves. While looking for an anti-malware program, pick one which provides dependable, efficient, and total protection against all known computer viruses and malware. With regards to commercial application options, many people select popular brands, like SafeBytes, and they are quite happy with it.
Safebytes is among the well-established computer solutions firms, which offer this all-inclusive anti-malware program. When you have installed this software, SafeBytes' sophisticated protection system will make sure that no viruses or malware can seep through your PC.
SafeBytes anti-malware provides a myriad of enhanced features which set it apart from all others. The following are some of the great features included in the tool.
Optimum AntiMalware Protection: With its enhanced and sophisticated algorithm, this malware removal tool can detect and remove the malware threats hiding within your computer system effectively.
Real-time Active Protection: SafeBytes offers entirely hands-free real-time protection and is set to monitor, block, and destroy all computer threats at its very first encounter. They’re highly efficient in screening and getting rid of numerous threats because they’re regularly revised with new updates and safety measures.
Web Filtering: Through its unique safety score, SafeBytes notifies you whether a site is safe or not to visit it. This will ensure that you’re always certain of your online safety when browsing the world wide web.
Light-weight: This program is not “heavy” on the computer’s resources, so you’ll not notice any performance difficulties when SafeBytes is operating in the background.
24/7 Guidance: You can obtain totally free 24/7 technical assistance from their IT experts on any product queries or PC security concerns.
SafeBytes has put together an excellent anti-malware solution to help you conquer the latest computer threats and virus attacks. There is no doubt that your computer system will be protected in real-time as soon as you put this software to use. So if you’re trying to find a comprehensive antivirus program that’s still easy to use, SafeBytes Anti-Malware is exactly what you need!
Technical Details and Manual Removal (Advanced Users)
If you wish to manually remove Babylon without the use of an automated tool, it may be possible to do so by removing the program from the Windows Add/Remove Programs menu, or in cases of browser extensions, going to the browsers AddOn/Extension manager and removing it. You will likely also want to reset your browser.
To ensure the complete removal, manually check your hard drive and registry for all of the following and remove or reset the values accordingly. Please note that this is for advanced users only and may be difficult, with incorrect file removal causing additional PC errors. In addition, some malware is capable of replicating or preventing deletion. Doing this in Safe Mode is advised.
The following files, folders, and registry entries are created or modified by Babylon
Files:
$APPDATABabylonToolbarBabylonToolbar
$APPDATABabylonToolbar
$PROGRAMFILESBabylonToolbarBabylonToolbar
$PROGRAMFILESBabylonToolbar
Registry:
key HKEY_CLASSES_ROOT named Babylon.dskBnd.
key HKEY_CLASSES_ROOT named Babylon.dskBnd
key HKEY_CLASSES_ROOT named bbylnApp.appCore.
key HKEY_CLASSES_ROOT named bbylnApp.appCore
key HKEY_CLASSES_ROOT named bbylntlbr.bbylntlbrHlpr.
key HKEY_CLASSES_ROOT named bbylntlbr.bbylntlbrHlpr
key HKEY_CLASSES_ROOT named bbylntlbr.xtrnl”
key HKEY_CLASSES_ROOT named bbylntlbr.xtrnl
key HKEY_CLASSES_ROOT named escort.escortIEPane.
key HKEY_CLASSES_ROOT named escort.escortIEPane
key HKEY_CLASSES_ROOT named escort.escrtBtn.
key HKEY_CLASSES_ROOT named esrv.BabylonESrvc.
key HKEY_CLASSES_ROOT named esrv.BabylonESrvc
key 09C554C3-109B-483C-A06B-F14172F1A947 at HKEY_CLASSES_ROOTTypeLib.
key 2EECD738-5844-4a99-B4B6-146BF802613B at HKEY_CLASSES_ROOTCLSID.
key 2EECD738-5844-4a99-B4B6-146BF802613B at HKEY_LOCAL_MACHINESOFTWAREMicrosoftWindowsCurrentVersionExplorerBrowser Helper Objects.
key 3718D0AF-A3B8-4F5E-86F3-FAD8D02043BE at HKEY_CLASSES_ROOTInterface.
key 4E1E9D45-8BF9-4139-915C-9F83CC3D5921 at HKEY_CLASSES_ROOTTypeLib.
key 6E8BF012-2C85-4834-B10A-1B31AF173D70 at HKEY_CLASSES_ROOTTypeLib.
key 706D4A4B-184A-4434-B331-296B07493D2D at HKEY_CLASSES_ROOTInterface.
key 78868069-5D96-4B47-BE52-3D625EE3D7CB at HKEY_CLASSES_ROOTInterface.
key 78888F8B-D5E4-43CE-89F5-C8C18223AF64 at HKEY_CLASSES_ROOTInterface.
key 8B8558F6-DC26-4F39-8417-34B8934AA459 at HKEY_CLASSES_ROOTInterface.
key 94C0B25D-3359-4B10-B227-F96A77DB773F at HKEY_CLASSES_ROOTInterface.
key 98889811-442D-49dd-99D7-DC866BE87DBC at HKEY_CLASSES_ROOTCLSID.
key 9E393F82-2644-4AB6-B994-1AD39D6C59EE at HKEY_CLASSES_ROOTInterface.
key A3A2A5C0-1306-4D1A-A093-9CECA4230002 at HKEY_CLASSES_ROOTInterface.
key AD25754E-D76C-42B3-A335-2F81478B722F at HKEY_CLASSES_ROOTAppID.
key AD25754E-D76C-42B3-A335-2F81478B722F at HKEY_CLASSES_ROOTTypeLib.
key B0B75FBA-7288-4FD3-A9EB-7EE27FA65599 at HKEY_CLASSES_ROOTInterface.
key B12E99ED-69BD-437C-86BE-C862B9E5444D at HKEY_CLASSES_ROOTTypeLib.
key B173667F-8395-4317-8DD6-45AD1FE00047 at HKEY_CLASSES_ROOTInterface.
key B8276A94-891D-453C-9FF3-715C042A2575 at HKEY_CLASSES_ROOTCLSID.
key BDB69379-802F-4eaf-B541-F8DE92DD98DB at HKEY_CLASSES_ROOTAppID.
key BFE569F7-646C-4512-969B-9BE3E580D393 at HKEY_CLASSES_ROOTInterface.
key C2434722-5C85-4CA0-BA69-1B67E7AB3D68 at HKEY_CLASSES_ROOTInterface.
key C2996524-2187-441F-A398-CD6CB6B3D020 at HKEY_CLASSES_ROOTInterface.
key C8D424EF-CB21-49A0-8659-476FBAB0F8E8 at HKEY_CLASSES_ROOTInterface.
key D7EE8177-D51E-4F89-92B6-83EA2EC40800 at HKEY_CLASSES_ROOTTypeLib.
key E047E227-5342-4D94-80F7-CFB154BF55BD at HKEY_CLASSES_ROOTInterface.
key E3F79BE9-24D4-4F4D-8C13-DF2C9899F82E at HKEY_CLASSES_ROOTInterface.
key E46C8196-B634-44a1-AF6E-957C64278AB1 at HKEY_CLASSES_ROOTCLSID.
key E77EEF95-3E83-4BB8-9C0D-4A5163774997 at HKEY_CLASSES_ROOTInterface.
key FFB9ADCB-8C79-4C29-81D3-74D46A93D370 at HKEY_CLASSES_ROOTCLSID.
key BabylonToolbar at HKEY_CURRENT_USERSoftware.
key BabylonToolbar at HKEY_LOCAL_MACHINESOFTWARE.
key dhkplhfnhceodhffomolpfigojocbpcb at HKEY_LOCAL_MACHINESOFTWAREGooglechromeExtensions.
key escort.DLL at HKEY_CLASSES_ROOTAppID.
key esrv.EXE at HKEY_CLASSES_ROOTAppID.
value 98889811-442D-49dd-99D7-DC866BE87DBC at HKEY_LOCAL_MACHINESOFTWAREMicrosoftInternet ExplorerToolbar.
When you try to open your Google Chrome browser and it starts to connect to the internet but suddenly, your Windows 10 computer crashes along with a Blue Screen error that says, “MEMORY_MANAGEMENT”, then read on as this post will guide you in fixing the problem.
This kind of BSOD error occurs when Google Chrome requests more memory or when it tries to access the network and demand is raised for more memory, the memory management program fails. To fix the problem, here are some possible solutions you might want to try. Follow them thoroughly.
Option 1 – Use the Driver Verifier Manager
The Driver Verifier Manager is another tool in Windows that could help you fix driver-related issues. And since the MEMORY_MANAGEMENT Blue Screen error concerns Google Chrome and an internet connection, the root cause of the problem might have something to do with the Network driver and to verify that, you can use the Driver Verifier Manager:
Type in the keyword “Verifier” in the Cortana search box to search for Verifier in Windows 10.
After that, select the option “Create custom settings”.
Make sure that you have checked everything except the options “DDI compliance checking” and “Randomized low resources simulation”.
Next, select the option “Select driver names from a list” option.
Afterward, you have to select all the drivers from any unofficial or third-party provider. To simply put it, you have to select all the drivers that are not supplied by Microsoft.
Then click on the Finish button.
Open Command Prompt as administrator and execute this command – verifier /querysettings
The command you just executed will display the Driver Verifier settings so if you see any of the flags enabled boot your Windows 10 PC into Safe Mode.
Open the Command Prompt as admin again and run this command – verifier /reset
The command will reset the Driver Verifier. Once the process is done, restart your PC and check.
Option 2 – Try updating the Network drivers
Tap the Win + R keys to launch the Run window and then type in the “devmgmt.msc” command and hit Enter to open the Device Manager window.
Under the Device Manager, you will see a list of drivers. From there, look for the Network Adapters and expand it.
Then right-click on each one of the Network drivers and update them all.
Restart your PC and see if it helped in fixing the MEMORY_MANAGEMENT BSOD error.
Option 3 – Try disabling Hardware Acceleration
You might want to disable Hardware Acceleration system-wide or for a particular program like Google Chrome and see if it resolves the MEMORY_MANAGEMENT error
Option 4 – Run the Memory Diagnostic Tool to check for Memory leaks
Tap the Win + R keys to open Run and type exe and hit Enter to open the Windows Memory Diagnostic Tool.
After that, it will give two options such as:
Restart now and check for problems (Recommended)
Check for problems the next time I start my computer
Once your computer has restarted, perform a basic scan or you could also go for the “Advanced” options such as “Test mix” or “Pass count”. Simply tap the F10 key to start the test.
Note: After you select the option, your PC will restart and check for memory-based issues. If it finds any issues, it will automatically fix them and if there’s no issue found, then it’s most likely not a memory-based issue so you should try the other options given below.
Option 5 – Perform a System Restore
Performing System Restore might help you in fixing the SYNTP.SYS Blue Screen error. You can do this option either by booting into Safe Mode or in System Restore. If you are already in the Advanced Startup Options, just directly select System Restore and proceed with the next steps. And if you have just booted your PC into Safe Mode, refer to the steps below.
Tap the Win + R keys to open the Run dialog box.
After that, type in “sysdm.cpl” in the field and tap Enter.
Next, go to the System Protection tab then click the System Restore button. This will open a new window where you have to select your preferred System Restore point.
After that, follow the on-screen instructions to finish the process and then restart your computer and check if the problem is fixed or not.
Option 6 – Run the Blue Screen Troubleshooter
The Blue Screen troubleshooter is a built-in tool in Windows 10 that helps users in fixing BSOD errors like MEMORY_MANAGEMENT. It can be found in the Settings Troubleshooters page. To use it, refer to these steps:
Tap the Win + I keys to open the Settings panel.
Then go to Update & Security > Troubleshoot.
From there, look for the option called “Blue Screen” on your right-hand side and then click the “Run the troubleshooter” button to run the Blue Screen Troubleshooter and then follow the next on-screen options. Note that you might have to boot your PC into Safe Mode.
FlightSearchApp is a browser extension for Google Chrome. This extension claims to be a simple tool to provide updates regarding flight arrivals, flight departures, flight tracking, and access to time zone converters. However, it is a potentially unwanted program which is also known as a browser hijacker.
This extension hijacks your browser home page and search engine changing it to MyWay. While this extension is active you will see additional ads, sponsored links, and sometimes even pop-up ads appearing through your browsing sessions. It also keeps track of your browsing data, recording your browsing activity, website visits, clicks, and potentially personal information. It also adds a toolbar to the browser header which can lag the browser while also reducing usable screen size.
Several anti-virus scanners have marked this extension as a Browser Hijacker, and is therefore not recommended to keep on your computer.
About Browser Hijackers
Browser hijacking is regarded as the internet’s constant risk that targets web browsers. It is a kind of malicious software that alters your web browser’s configuration settings so that you are redirected to websites or webpages that you had no intention of visiting. Basically, nearly all browser hijackers are made for marketing or advertising purposes. The idea would be to force users to visit particular websites which are looking to improve their visitor traffic and produce higher ad earnings. It might appear naive, but the majority of such sites are not legitimate and will pose a serious threat to your on-line safety. Some browser hijackers are designed to make certain modifications beyond the web browsers, like changing entries in the computer registry and allowing other malware to further damage your PC.
How one can know whether the browser is hijacked?
Symptoms that your browser is hi-jacked include:
1. the browser’s homepage is changed2. you see new unwanted favorites or bookmarks added, typically directed to ad-filled or pornography websites3. The default search page of your web browser is altered4. unsolicited new toolbars are added to your web browser5. many pop-up ads show up and/or your browser pop-up blocker is disabled6. your web browser has become unstable or starts running slowly7. You can’t access particular websites, in particular anti-virus sites.
How it infects your PC
Browser hijackers can get into a computer by some means or other, for instance via file sharing, downloads, and email too. They are generally included with toolbars, add-ons, BHO, plugins or browser extensions. Some browser hijackers spread in user’s computer systems using a deceptive software distribution technique known as “bundling” (usually through freeware and shareware).
Browser hijackers may record user keystrokes to collect potentially valuable information that leads to privacy issues, cause instability on computers, significantly disrupt user’s browsing experience, and finally slow down the computer to a point where it will become unusable.
Browser hijacker removal tips
Some types of browser hijackers can be quickly removed from your PC by uninstalling malicious programs or any other recently installed freeware. At times, it can be a challenging task to identify and eliminate the malicious component since the associated file could be running as part of the operating system process. On top of that, manual removal expects you to execute many time-consuming and intricate procedures that are very hard to carry out for new computer users.
You might opt for automatic browser hijacker removal methods by just installing and running an efficient anti-malware program. One of the recommended tools for fixing browser hijacker infections is SafeBytes Anti-Malware. It assists you eliminate any pre-existing malicious software on your system and provides you real-time monitoring and protection against new threats. Utilize a system optimizer along with your anti-malware to fix various registry issues, remove computer vulnerabilities, and enhance your computer's overall performance.
Virus Blocking Internet And All Anti-Malware Software? Do This!
Every malware is bad and the degree of the damage will differ greatly with regards to the type of infection. Some malware is meant to interfere with or prevent things that you wish to do on your personal computer. It may not allow you to download anything from the net or prevent you from accessing a few or all of the websites, particularly the anti-malware websites. If you’re reading this now, you have perhaps realized that a malware infection is the real cause of your blocked internet traffic. So how to proceed if you want to download and install an anti-malware program like Safebytes? There are some solutions you could try to get around with this issue.
Download the application in Safe Mode with Networking
Safe Mode is a unique, simplified version of Windows in which just bare minimum services are loaded to prevent malware and other troublesome applications from loading. If the malware is set to load immediately when PC starts, switching into this mode can prevent it from doing so. To start the computer into Safe Mode, hit the “F8” key on your keyboard just before the Windows boot screen shows up; Or after normal Windows boot up, run MSConfig, check “Safe Boot” under Boot tab, and click Apply. Once you are in Safe Mode, you can attempt to download and install your antivirus program without the hindrance of the virus. After installation, run the malware scanner to remove standard infections.
Utilize an alternate web browser to download an anti-malware program
Some malware mainly targets specific browsers. If this is your situation, use another internet browser as it could circumvent the malware. The ideal solution to overcome this issue is to opt for a browser that is well known for its security measures. Firefox contains built-in Phishing and Malware Protection to help keep you secure online.
Run anti-virus from your pen drive
Another solution is to save and run an antivirus software program completely from a USB drive. Follow these steps to run the antivirus on the affected computer system.
1) Download the anti-malware software on a virus-free PC.2) Plug the Thumb drive into the uninfected computer.3) Double click on the downloaded file to open the installation wizard.4) Select the USB stick as the location for saving the software file. Do as instructed on the computer screen to finish off the installation process.5) Transfer the flash drive from the clean PC to the infected PC.6) Double-click the anti-malware software EXE file on the USB flash drive.7) Hit the “Scan” button to run a full system scan and remove malware automatically.
Features and Benefits of SafeBytes Anti-Malware
In order to protect your computer or laptop from many different internet-based threats, it is important to install anti-malware software on your computer. But with countless numbers of anti-malware companies out there, these days it is tough to decide which one you should buy for your PC. Some of them do a good job in getting rid of malware threats while some will damage your PC by themselves. When looking for an anti-malware tool, purchase one which gives dependable, efficient, and comprehensive protection against all known viruses and malware. Among few good programs, SafeBytes Anti-Malware is the highly recommended software program for the security-conscious user.
SafeBytes anti-malware is a trustworthy tool that not only secures your system permanently but is also extremely easy to use for people of all ability levels. Through its cutting-edge technology, this software protects your personal computer against infections caused by different kinds of malware and other threats, including spyware, adware, viruses, worms, trojans, keyloggers, potentially unwanted programs (PUPs), and ransomware.
SafeBytes anti-malware provides an array of enhanced features that sets it aside from all others. The following are a few of the great ones:
World-class AntiMalware Protection:This deep-cleaning anti-malware application goes much deeper than most antivirus tools to clean out your PC. Its critically acclaimed virus engine finds and disables hard-to-remove malware that hides deep inside your computer.
Real-time Threat Response: SafeBytes offers completely hands-free real-time protection and is set to check, block and get rid of all computer threats at its first encounter. It will regularly monitor your pc for hacker activity and also gives end-users sophisticated firewall protection.
Safe Web Browsing: SafeBytes checks the links present on a webpage for possible threats and informs you whether the site is safe to visit or not, through its unique safety rating system.
“Fast Scan” Features: Safebytes AntiMalware, with its advanced scanning engine, gives ultra fast scanning which can quickly target any active online threat.
Minimal CPU Usage: SafeBytes is really a lightweight application. It use up a very small amount of processing power as it operates in the background so you are free to use your Windows-based PC the way you really want.
24/7 Online Support: You may get absolutely free 24/7 technical support from their IT experts on any product queries or computer security concerns.
All in all, SafeBytes Anti-Malware is a solid program since it has plenty of features and can identify and eliminate any potential threats. Once you’ve downloaded and installed SafeBytes Anti-Malware, you no longer have to bother about malware or any other security concerns. If you’re searching for the absolute best malware removal application out there, and if you don’t mind spending some money for it, opt for SafeBytes Anti-Malware.
Technical Details and Manual Removal (Advanced Users)
If you want to manually get rid of FlightSearchApp without using an automated tool, it may be possible to do so by deleting the application from the Microsoft Windows Add/Remove Programs menu, or in cases of web browser plug-ins, going to the browser’s AddOn/Extension manager and uninstalling it. You may even want to reset your home page and search providers, as well as delete temporary files, browsing history, and cookies.
Lastly, check your hard disk for all of the following and clean your computer registry manually to get rid of leftover application entries after uninstalls. Please remember that only experienced computer users should try to manually edit the registry because incorrect file removal results in a serious problem or even a PC crash. In addition, some malware is capable of replicating itself or preventing deletion. Doing this in Safe Mode is advised.
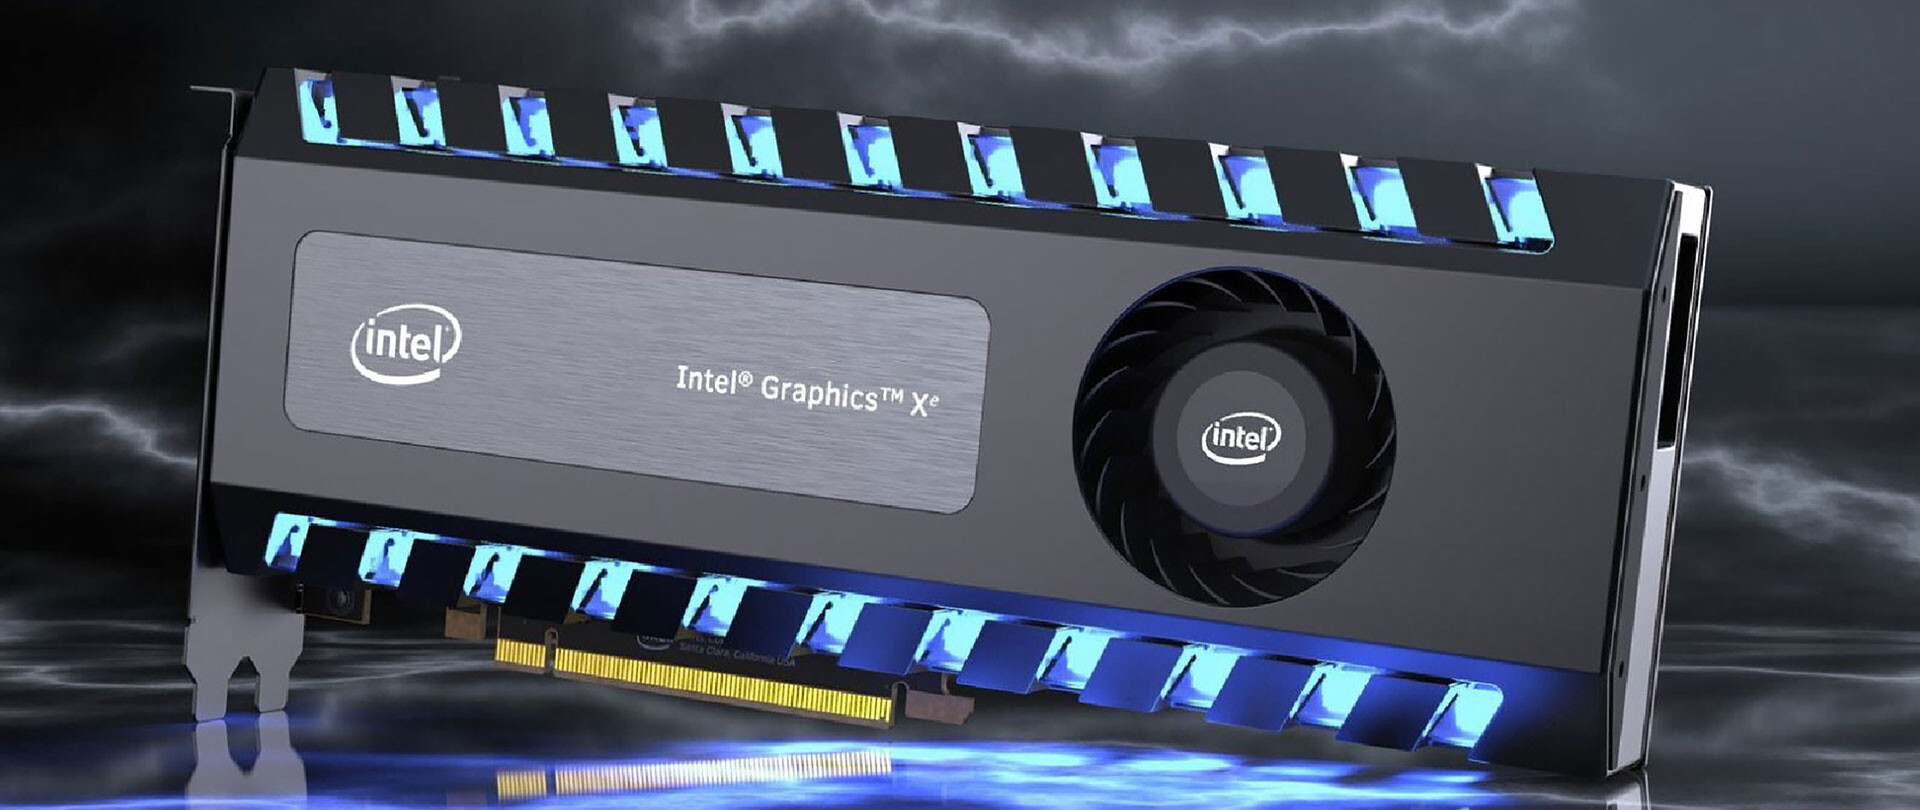
This is not the first time that Intel is trying to enter the GPU field but its adventures so far were, well let us agree not so good. All of that is hoping to be changed with the upcoming ARC GPU. The first generation of Arc graphics, code-named Alchemist and previously known as DG2, will support desktop PCs and laptops and is set to arrive in the first quarter of 2022.
Alchemist will have hardware-based Ray tracing and AI-driven supersampling. This indicates that GPU is aimed to compete in the Hi-end spectrum and battle side by side with Nvidia and AMD on the market. Alchemist will also pack full DirectX 12 Ultimate support.
Intel also released names for the next upcoming future generations of ARC GPUs: Battlemage, Celestial & Druid. More information about ARC products will be released later this year.
“Today marks a key moment in the graphics journey we started just a few years ago. The launch of the Intel Arc brand and the reveal of future hardware generations signifies Intel’s deep and continued commitment to gamers and creators everywhere,” Roger Chandler, Intel vice president, and general manager of client graphics products and solutions.

 Error Causes


 This is not the first time that Intel is trying to enter the GPU field but its adventures so far were, well let us agree not so good. All of that is hoping to be changed with the upcoming ARC GPU. The first generation of Arc graphics, code-named Alchemist and previously known as DG2, will support desktop PCs and laptops and is set to arrive in the first quarter of 2022.
Alchemist will have hardware-based Ray tracing and AI-driven supersampling. This indicates that GPU is aimed to compete in the Hi-end spectrum and battle side by side with Nvidia and AMD on the market. Alchemist will also pack full DirectX 12 Ultimate support.
Intel also released names for the next upcoming future generations of ARC GPUs: Battlemage, Celestial & Druid. More information about ARC products will be released later this year.
“Today marks a key moment in the graphics journey we started just a few years ago. The launch of the Intel Arc brand and the reveal of future hardware generations signifies Intel’s deep and continued commitment to gamers and creators everywhere,” Roger Chandler, Intel vice president, and general manager of client graphics products and solutions.
This is not the first time that Intel is trying to enter the GPU field but its adventures so far were, well let us agree not so good. All of that is hoping to be changed with the upcoming ARC GPU. The first generation of Arc graphics, code-named Alchemist and previously known as DG2, will support desktop PCs and laptops and is set to arrive in the first quarter of 2022.
Alchemist will have hardware-based Ray tracing and AI-driven supersampling. This indicates that GPU is aimed to compete in the Hi-end spectrum and battle side by side with Nvidia and AMD on the market. Alchemist will also pack full DirectX 12 Ultimate support.
Intel also released names for the next upcoming future generations of ARC GPUs: Battlemage, Celestial & Druid. More information about ARC products will be released later this year.
“Today marks a key moment in the graphics journey we started just a few years ago. The launch of the Intel Arc brand and the reveal of future hardware generations signifies Intel’s deep and continued commitment to gamers and creators everywhere,” Roger Chandler, Intel vice president, and general manager of client graphics products and solutions.