If you encounter the “Setup has failed to determine supported install choices” error when trying to downgrade or upgrade your Windows 10 computer, this signifies that there are some compatibility issues with the installation process and that Windows was not able to either downgrade or upgrade to another version.
Usually, this error occurs when you are using the built-in options in Windows 10 upgrade or downgrade to another version of Windows. This option is mostly used as it keeps the user settings as well as data intact. Thus, you need to keep in mind a lot of parameters before you proceed with the installation because if there is any conflict in the process, you certainly won’t be able to downgrade or upgrade your Windows computer. To resolve the issue, here are some suggestions that might help.
Option 1 – Try running in Compatibility mode
This is the first thing you can try to resolve the issue instead of going right ahead on making a bootable device. So if you are downgrading Windows, you can try to run the installer in the compatibility mode for that specific Windows version.
Look for the setup file.
Once you find it, right-click on it and select Properties from the context menu.
After that, go to the Compatibility tab and mark the checkbox for “Run this program in compatibility mode for:” and from the drop-down list, select either Windows 7 or Windows 8.
You also have to check the “Run as administrator” option.
Now click the Apply button and then click OK to save the changes made and check if it has resolved the issue or not.
This option is almost the same as the first one except it is an alternative way of fixing the “Setup has failed to determine supported install choices” error in case the first one didn’t work. In this option, you will troubleshoot the compatibility issue.
Look for the setup file.
Then right-click on it and select the “Troubleshoot compatibility” from the context menu.
After that, click on the “Try recommended setting” option. Once the process is done, the error message should be gone.
Option 3 – Try to use the setup file instead of an image
If you are running the Windows ISO image for the installation, you can try running the setup file instead. This is because when you try to install Windows from an image file directly, it has to be loaded into a virtual CD drive first, and then from there, further operations are carried out. And so, you can just bypass this mechanism to avoid getting the “Setup has failed to determine supported install choices” error.
First, you need to extract the disk file to an accessible location.
After that, go to Sources > Setup.exe.
Now run the setup file to upgrade or downgrade the Windows version. Just make sure that you do run the setup file as an administrator.
Option 4 – Try to do the upgrade or downgrade in a Clean Boot state
Putting your PC in a Clean Boot state can also help when you want to upgrade or downgrade your version of Windows without any trouble because, during this state, you can start the system with a minimum number of drivers and startup programs that will surely help you in isolating the root cause of the issue.
Log onto your PC as an administrator.
Type in MSConfig in the Start Search to open the System Configuration utility.
From there, go to the General tab and click “Selective startup”.
Clear the “Load Startup items” checkbox and make sure that the “Load System Services” and “Use Original boot configuration” options are checked.
Next, click the Services tab and select the “Hide All Microsoft Services” checkbox.
Click Disable all.
Click on Apply/OK and restart your PC. (This will put your PC into a Clean Boot State. And configure Windows to use the usual startup, just simply undo the changes.)
After that, try to install the Windows Updates or upgrade again.
Option 5 – Try to use the Media Creation tool
The Media Creation tool in Windows allows you to use the ISO installation file to make a bootable device that you can use to install Windows on your PC. Note that this is kind of different from the usual installation process as it could erase your computer’s current settings and data on the primary drive. Thus, before you proceed, you need to backup all your data into some removable drive and then use the Media Creation Tool to make a bootable drive.
After making the bootable drive, you need to plug it into your computer and then reboot.
Next, tap the F10 or Esc key to open the boot options.
Now set the boot priority of the removable drive the highest. Once the setup comes forth, follow the next onscreen instructions and install Windows without any problems.
Blue Screen of Death errors or Stop errors are indications that something’s wrong with your computer. So when you encounter one, you must find out what the root cause of the problem is before it gets out of hand. One of the BSOD errors you might encounter on your Windows 10 computer is the “DRIVER IRQL NOT LESS OR EQUAL or SYSTEM THREAD EXCEPTION NOT HANDLED, Netwtw04.sys failed” error.
As you know, system files or .sys files are some of the essential parts of the Windows operating system. It is a repository of system driver settings used by the Windows operating system in order to communicate with the connected hardware and devices. They are essential for the normal functioning of the operating system. A lot of Windows 10 users are facing this particular Blue Screen of Death error whenever they open an app or disconnect external devices from the system.
The Netwtw04.sys file is a part of the Intel PROSet/Wireless Wi-Fi software. And so when you might encounter two kinds of Stop errors for the Netwtw04.sys driver file such as:
“DRIVER_IRQL_NOT_LESS_OR_EQUAL What failed: Netwtw04.sys.” – This kind of error message signifies that a kernel-mode driver tried to access pageable memory at a process IRQL that was too high.
“SYSTEM_THREAD_EXCEPTION_NOT_HANDLED What failed: Netwtw04.sys” – This error message indicates that the root cause of the error might be incompatible drivers with the operating system. In general, the root cause of the Netwtw04.sys BSOD error might be due to several reasons such as corrupted files, incorrect device driver configuration, malicious programs, outdated drivers, bad drivers, corrupted Windows Registry as well as some damaged or corrupted system files.
Whichever of the two error messages you got, you can try the troubleshooting options given below to fix the “DRIVER IRQL NOT LESS OR EQUAL or SYSTEM THREAD EXCEPTION NOT HANDLED, Netwtw04.sys failed” BSOD error.
Option 1 – Try to rollback your Network driver
If you have updated the driver software as of late and you suddenly got this BSOD error, you might have to roll back the device driver – in other words, switch back to the previous working version. To do that, follow these steps:
Tap the Win + R keys to launch the Run window and then type in the “devmgmt.msc” command and hit Enter to open the Device Manager window.
Under the Device Manager, you will see a list of drivers. From there, look for the Network Adapters and expand it.
Next, select the driver entries that are labeled appropriately other than anything in the context of the WAN Miniport.
Then select each one of them and double-click to open a new mini window.
After that, make sure that you’re on the Driver tab and if you are not, just navigate to it then click the Roll Back Driver button to switch back to the previous version of your Network adapters.
Now restart your computer to successfully apply the changes made.
Option 2 – Try to update the Network drivers
If the present Network driver is giving you a headache that is the “DRIVER IRQL NOT LESS OR EQUAL or SYSTEM THREAD EXCEPTION NOT HANDLED, Netwtw04.sys failed” BSOD error, then you need to update the Network drivers. To do so, here’s what you have to do:
Tap the Win + R keys to launch the Run window and then type in the “devmgmt.msc” command and hit Enter to open the Device Manager window.
Under the Device Manager, you will see a list of drivers. From there, look for the Network Adapters and expand it.
Then right-click on each one of the Network drivers and update them all.
Restart your PC and see if it helped in fixing the BSOD error.
Note: If updating the network drivers didn’t help in fixing the problem, you can also try to uninstall the very same drivers and restart your Windows 10 PC. After that, the system itself will reinstall the drivers you just uninstalled. Alternatively, you can also download and install the drivers from the manufacturer’s website directly.
Option 3 – Try running the System File Checker Scan
The SFC or System File Checker scan could detect and automatically repair damaged system files that could be causing the Netwtw04.sys failed BSOD error. SFC is a built-in command utility that helps in restoring corrupted files as well as missing files. It replaces bad and corrupted system files to good system files. To run the SFC command, follow the steps given below.
Tap Win + R to launch Run.
Type in cmd in the field and tap Enter.
After opening Command Prompt, type in sfc /scannow
The command will start a system scan which will take a few whiles before it finishes. Once it’s done, you could get the following results:
Windows Resource Protection did not find any integrity violations.
Windows Resource Protection found corrupt files and successfully repaired them.
Windows Resource Protection found corrupt files but was unable to fix some of them.
Option 4 – Run the DISM Tool
The DISM tool is another command-line tool in the Windows operating system that could help users fix various corrupted system files. To use it, follow these steps:
Open the Command Prompt as admin.
Then type in this command: DISM /Online /Cleanup-Image /RestoreHealth
The DISM command you entered will repair the corrupted system image. Do not close the window if the process takes a while as it will probably take a few minutes to finish.
Option 5 – Run the CHKDSK Utility
Running the CHKDSK utility might also help you resolve the Netwtw04.sys failed BSOD error. If your hard drive has issues with integrity, the update will really fail as the system will think that it’s not healthy and that’s where the CHKDSK utility comes in. The CHKDSK utility repairs hard drive errors that might be causing the problem.
Open Command Prompt with admin privileges.
After opening Command Prompt, execute the following command and hit Enter:
chkdsk /f /r
Wait for the process to be completed and then restart your computer.
There are instances when there are multiple accounts which is the result when there are a lot of users who use the computer. Some may use it more often, while others may seldom use it. Having multiple accounts can be quite confusing and inconvenient especially if it takes a lot of space. Thus, in this post, you will be guided on how you can delete a User Account on your Windows 10 computer, as well as how you can create a backup of the existing profile data and files.
All the data of user accounts can be found at C:/Users, where its folder name will be exactly the same as the name of the user. You can check the exact user’s name by simply using the “net user” command either via Command Prompt or Windows PowerShell. Once you delete a user account, its folder, along with its files, will also be deleted. You can also create a backup for user files and the best way to do that is by copying the folder to other partitions or to an external drive.
Here are two methods you can check out to delete a user account in Windows 10 – you can do it via Windows Account settings or via the command line. For more details, follow each one of the options provided below.
Option 1 – Delete the user account using Windows Account settings
First, go to Settings > Accounts > Family & other users.
Next, select the account you want to delete and click on the Remove button. This will open a confirmation window along with a warning message and two buttons that say, “Delete account & data” and “Cancel”.
Click on the Delete account & data button to delete the user account.
Note: Once you remove a user account, it will also remove all its corresponding data such as items like Documents, Photos, Music, Desktop, and other related folders. Thus, if you have not created a backup, then you won’t be able to recover those files.
Option 2 – Delete the user account using the command line
If you want to delete several user accounts, then doing it via Command Prompt or Windows PowerShell is a lot quicker. To get started, follow these steps:
In the Start Search, type “command prompt” and from the search results that appear, right-click on Command Prompt and select the “Run as administrator” option.
Next, type the “net user” command and hit Enter to execute it. This will show you the exact usernames on the computer.
After that, type the “net user <username> /delete” command and hit Enter to execute it. This will delete the account and all of its data without any warning. You have to replace “<username>” with the name of the user account.
If a program tried and failed to use the Graphics rendering capabilities of a computer, Windows 10 will most likely throw a Blue Screen error that says, “ THREAD_STUCK_IN_DEVICE_DRIVER ”. 0x000000EA is the Stop code for this particular Blue Screen error and could be caused by a bad display driver or bad video card. Whatever the cause is, here are some suggestions you need to check out to resolve this Blue Screen error.
Option 1 – Try to rollback, update, or disable the Graphics card drivers
Since the THREAD_STUCK_IN_DEVICE_DRIVER Blue Screen error has something to do with Graphics card drivers, you can either roll back, update or disable them depending on your preference in order to resolve the error.
First, boot your computer into Safe Mode.
After that, tap the Win + R keys to launch Run.
Type in devmgmt.msc into the box and tap Enter or click OK to open the Device Manager.
After that, a list of device drivers will be displayed. From there, look for the Display Adapters and click on them.
After that, right-click on each entry under the Display Adapters and select the “Uninstall Device” option from the menu.
Now restart your computer.
After restarting your computer, go to the Settings app and Check for Updates in the Windows Update section.
Note: You also have the option to go directly to the website of your graphics card manufacturers like NVIDIA, Intel, or AMD and go to the section called Drivers then check if there’s a new available update – if there is, download and install it.
Option 2 – Try removing hardware or drivers that you’ve installed recently
If you have recently installed some hardware or drivers, you might want to disable or remove them since external devices are proven to be one of the factors that trigger Blue Screen errors like THREAD_STUCK_IN_DEVICE_DRIVER. All you have to do is physically disconnect any external devices that are connected to your computer and then check if it fixes the BSOD error or not.
Option 3 – Run System File Checker at boot time
Once you get to the Welcome Screen part, click on Next.
Afterward, click on the Repair your computer option located on the bottom-left part of the window.
Then click on Troubleshoot.
Next, select the Advanced Options and then Command Prompt.
After opening Command Prompt, type the “sfc /scannow” command and hit Enter to run the System File Checker scan.
Wait until the process is completed and type “exit” to close Command Prompt and then restart your computer to successfully apply the changes made.
Option 4 – Try to run the Blue Screen Troubleshooter
As you know, the Blue Screen troubleshooter is a built-in tool in Windows 10 that helps users in fixing BSOD errors like the THREAD_STUCK_IN_DEVICE_DRIVER error. It can be found in the Settings Troubleshooters page. To use it, refer to these steps:
Tap the Win + I keys to open the Settings panel.
Then go to Update & Security > Troubleshoot.
After that, look for the option called “Blue Screen” on your right-hand side and then click the “Run the troubleshooter” button to run the Blue Screen Troubleshooter and then follow the next on-screen options. Note that you might have to boot your PC into Safe Mode.
Option 5 – Try to manually check the Graphics Card hardware
You might also want to check the physical status of your Graphics card and you can do this by disconnecting the Graphics card or any other external device connected to your computer. Once you’ve removed the external device, check it for any damages. If there’s none, connect it back to your computer and check if the THREAD_STUCK_IN_DEVICE_DRIVER Blue Screen error is fixed or not.
Option 6 – Uninstall any faulty drivers
You can also uninstall any faulty drivers via Device Manager. How? Refer to these steps:
Tap the Win + R keys to launch the Run dialog box.
Then type “devmgmt.msc” in the field and tap Enter to open the Device Manager.
From there, look for any faulty drivers. You can identify them easily as they will be marked with a yellow exclamation point. And then check which entries would not affect the normal functioning of your PC.
Now click on the entries of every faulty driver and click on the Uninstall option.
Once you’ve uninstalled them, restart your computer to allow your computer to reinstall the faulty drivers you’ve just removed.
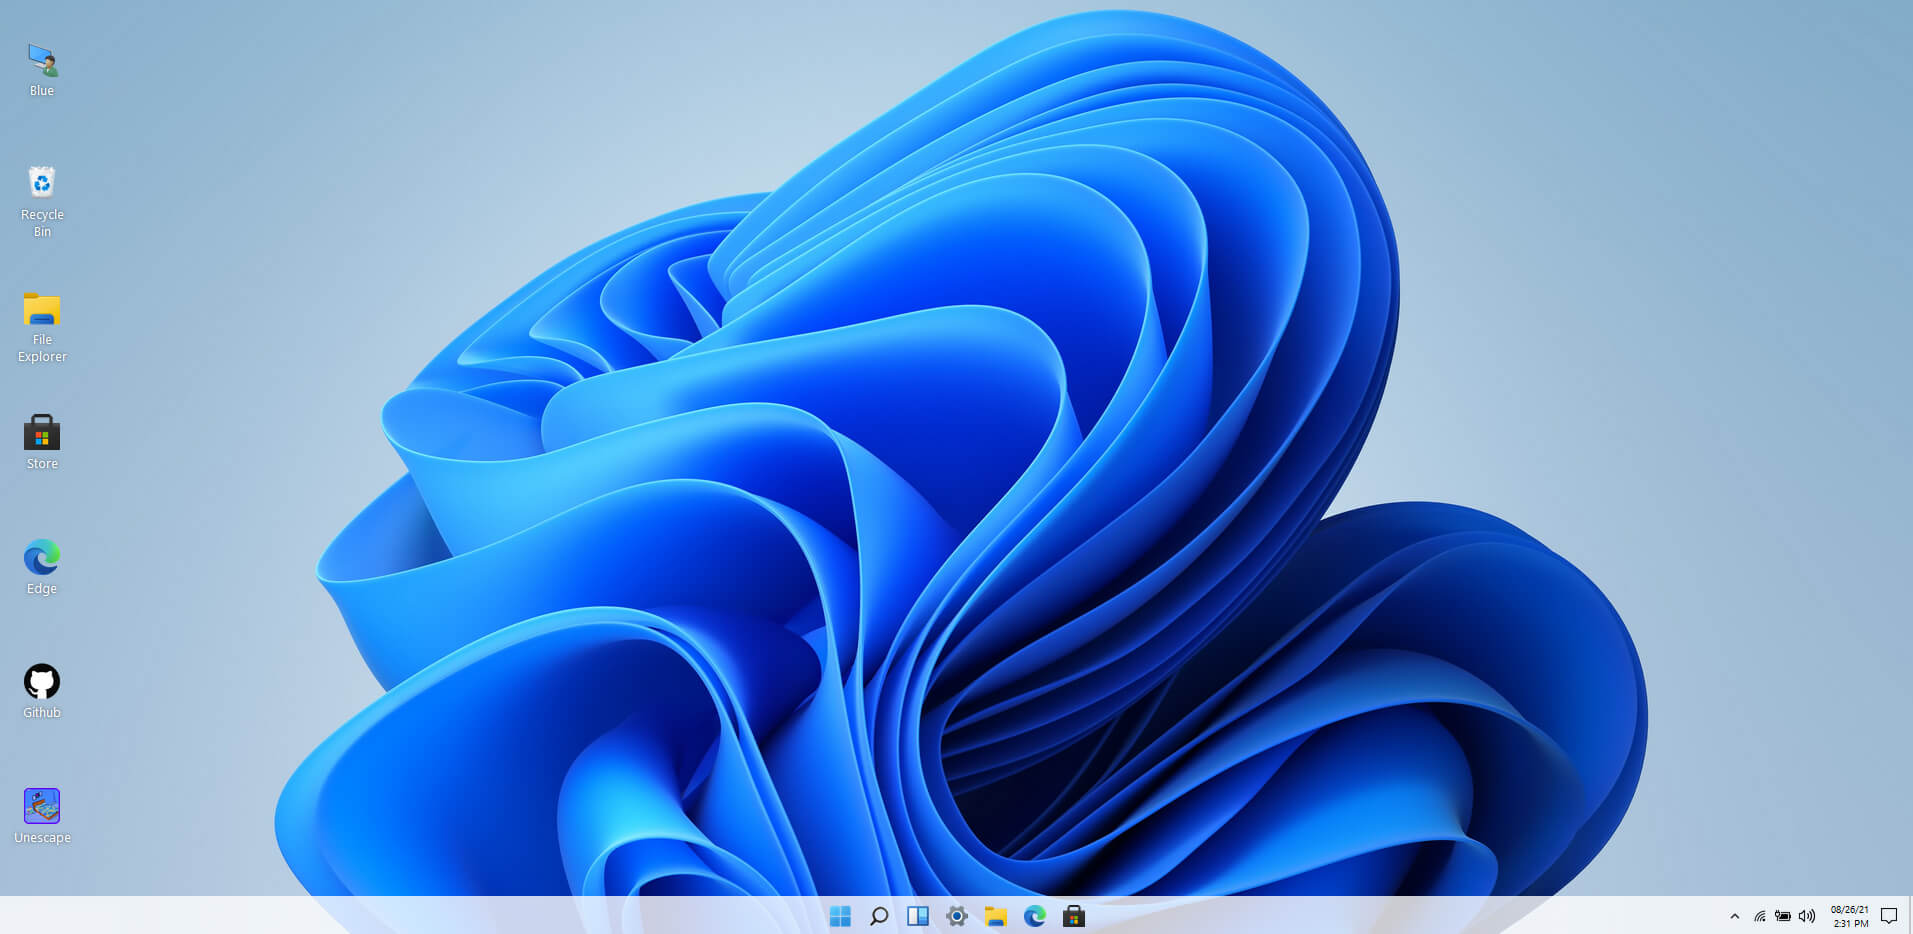
Windows 11 release date is closing in, some people have tried it via insider build, some have decided not to. It has come to our attention that there is a little website made by BlueEdge that offers a virtual Windows 11 desktop.
Opening the Website will put you right inside Windows 11 desktop, now take note that this is not Windows 11, it is a simulation of Microsoft’s newest OS and therefore many things will not work like File Explorer, etc.
One thing you can make sure it is working is UI itself, you can see how you do like the new Taskbar, start menu, widgets, and some other things. You can just pop up on the site and check how you do like the overall new look and feel of Windows 11 UI before installing it or trying it.
We are sure that many more options will come in time but even now you can get a feel of the newest OS.
Windows 11 BlueEdge site: https://win11.blueedge.me/
Error code 0xC004C003 has to do with activating Windows 10 after a clean install. This problem has been a frequent nuisance to users trying to update from Windows 7 or 8.1 following the invite path they got from Microsoft.
Solution
Error Causes
There are several problems that may have caused error code 0xC004C003. The most common of them are:
The product key entered was invalid, and cannot be used to activate the new OS.
The user followed the proper installation procedure, but the Windows update servers were too busy to handle the activation at that moment.
The free upgrade invitation was followed but after the reinstallation, the copy of Windows 10 was still not activated.
The user tried to perform a full clean install of Windows 10 instead of upgrading from Windows to Windows 10
Further Information and Manual Repair
A lot of solving error code 0xC004C003 has to do with the method in which the user has tried to update the system. If one decided to try and update the program before being invited to do so by the update manager, he must wait. Unfortunately, if one chooses to do it on his own and download a clean install, he was never given a product code to authenticate the process.
There are two options to address error code 0xC004C003 — either restore to the previous Windows Operating System or call Microsoft (or visit their Website) and purchase a product key.
The Windows update servers are very busy. There are lots of Microsoft users around the world, and the servers are doing their best to get to each and every one of the users as fast as possible, but they can only move at a certain speed. Your best bet is to sit back and wait a while.
But what if you were invited, and properly downloaded Windows 10, then decided to do a clean install? It is advised that one do not try to enter Windows 7 or 8.1 serial code as this will not work. However, unlike the problem above, these users will NOT need to purchase a product key.
According to Microsoft Support Staff, the installation servers are also very jammed because of the high numbers of installations going on right now. No matter what posts you may read, the key IS genuine, and it is NOT blocked, broken, or invalid.
To check if Windows has been properly activated, open the Command Window. Make sure you are logged into an administrator profile; otherwise this check will not work. Type in “slmgr.vbs/ato” and click Enter and then wait. While waiting, the command will check on the status of the activation.
Windows Script Host will open and show whether or not it is activated. A lot of users have reported that the activation did not work for the first few times. However they later reported after some more attempts, no issue was found in the way the operating system updated and that the activation process went smoothly. This is most likely due to the overload on the Windows Update servers, so bear with Microsoft.
Users have reported that when trying to correct error code 0xC004C003, they have followed the upgrade path and then been told by Microsoft that the key was invalid and they had to purchase a new one. If the upgrade path provided by Windows 7 and Windows 8.1 is correctly followed then there is nothing to worry about Just wait a while and try it again. If there are prolonged issues, speak with a technician by visiting the Microsoft website and contacting the help center by calling the number provided. Give them all relevant information and they will be sure to help accordingly.
The best solution to fix error code 0xC004C003 is to wait. In essence, the user will be waiting to reenter the same product key. According to Microsoft, and many user posts found online, it is recommended to wait a while and then try to activate again. This seemed to be an answer to most users' problems, and seem to work just fine. If the problem persists, take it to a windows repair technician to have it sorted out. If that does not work, use a powerful automated tool to fix the problem.
A surprisingly large amount of things present at your home can and do interfere with your wi-fi signal making it weak so devices are dropping it, having trouble connecting, or being slow.
Hello and welcome to our latest article where we will take a look at all things that are present in a lot of homes but are very bad for your WI-Fi signal.
Bad router placement
Having a router in a bad position can have some really large effects on WI-Fi signal strength and its availability. Usually, we do not give great attention to where we are placing our router but it has been proved over and over again that being close to certain objects does indeed have a great influence on the wireless signal strength and performance.
So, what are these objects and bad positions where we could place the router and effectively kill his Wi-Fi capabilities?
Fish Tanks
Water will block all radio waves including Wi-FI signals and waves themselves, so having a router next to the aquarium or any large source of water is a bad idea. You should always look at water as something bad for your Wi-Fi and move your router away from it as far as possible.
Bookshelves
Paper is another story and example of the dampening effect on radio waves. Did you know that various patterns of paper are used in silent rooms and recording studios in order to eliminate sound reflection from surfaces? Well besides absorbing sound waves, the paper also absorbs Wi-Fi signals and if you have a large bookshelf with a lot of books packed one beside another you just have a great wall of signal absorbing.
Mirrors
The problem with mirrors is in their coating that goes over the glass in order to turn it into the mirror, that coating is metal and as such, it is absorbing signals in large amounts. If you have an old or high-quality mirror that has a silver coating things are even worse since silver will absorb even more waves than modern cheap ones.
TV
Yup, TV is also on this list and for a similar reason as a mirror, although TV does not have coatings of metal, they have something even worse: a large metal plating on the back. Metal plating is there to produce structural integrity of the TV set and provide it with shielding from electromagnetic waves and as such it will prevent Wi-Fi waves as well. Do not place the router behind your TV.
Things that influence signals in homes
Any kind of metal decoration
Now when we covered mirrors and TV because of the metal they have, we must take a look at the metal itself. Any kind of metal stuff that you might have like baskets, figures, statues, frames, etc will effectively block your signal.
Kitchen appliances and Home utilities
Kitchen appliances like refrigerators, microwaves, ovens, stoves, etc. along with home appliances and utilities like dishwashers, washing machines, dryers, etc are large metal objects enclosed in a metal cage that will block signals from spreading further and it is no secret that most kitchens have weaker Wi-Fi because of this reason.
Home gyms
This is a logical conclusion as to everything explained so far if you have a workout room or small gym at home it is probably filled with weights that are metal and have mirrors inside, all of that will interfere and block signals.
Things blocking your Wi-Fi that you have no easy control over
Walls
Thick walls will dampen signals, thick walls from bricks will dampen even more and concrete walls will kill it almost completely. Any kind of metal reinforcement wiring inside walls will reduce and kill signals as well.
Floors and ceiling
This is somewhat important if you have a floor beneath or under the room where is your router located, but for the same reason how walls are blocking your signal floor and ceiling can do it as well, especially since most of the time they are made of some stronger material like concrete with metal fence inside.
Heating systems
If you have a heating system that is composed of metal radiators with water inside, then in terms of Wi-Fi signal strength you have an aquarium but in a metal box, and as such it will greatly reduce signal strength.
Often when we connect to the internet were browsing indexed pages through some well-known search engine, usually Google. But beneath the so-called normal internet lurks deep and dark web. You might have heard of the deep web and dark web if you have some geeky friends and we are here to explain what exactly is the deep and dark web.
The first thing to know is that the deep and dark web is not the same thing and they coexist separately from one another, you could say that beneath the deep web lies the dark web, yet another layer of the internet.
So let us explore first the deep web. What is exactly a deep web?
Deep web, hidden web, or invisible web
as sometimes referenced are part of worldwide web not indexed by search engines, meaning that engines do not basically see and index content of deep web sites.
The content of the deep web is hidden behind HTTP forms and includes many very common uses such as webmail, online banking, private or otherwise restricted access social-media pages and profiles, some web forums that require registration for viewing content, and services that users must pay for, and which are protected by paywalls, such as video on demand and some online magazines and newspapers.
The content of the deep web can be located and accessed by a direct URL or IP address but may require a password or other security access to get past public website pages.
While it is not always possible to directly discover a specific web server's content so that it may be indexed, a site potentially can be accessed indirectly (due to computer vulnerabilities).
To discover content on the web, search engines use web crawlers that follow hyperlinks through known protocol virtual port numbers. This technique is ideal for discovering content on the surface web but is often ineffective at finding deep web content. For example, these crawlers do not attempt to find dynamic pages that are the result of database queries due to the indeterminate number of queries that are possible. It has been noted that this can be (partially) overcome by providing links to query results, but this could unintentionally inflate the popularity of a member of the deep web.
Dark WEB
The dark web is the World Wide Web content that exists on darknets: overlay networks that use the Internet but require specific software, configurations, or authorization to access. Through the dark web, private computer networks can communicate and conduct business anonymously without divulging identifying information, such as a user's location. The dark web forms a small part of the deep web, the part of the Web not indexed by web search engines, although sometimes the term deep web is mistakenly used to refer specifically to the dark web.
The darknets which constitute the dark web include small, friend-to-friend peer-to-peer networks, as well as large, popular networks such as Tor, Freenet, I2P, and Riffle operated by public organizations and individuals. Users of the dark web refer to the regular web as Clearnet due to its unencrypted nature. The Tor dark web or Onionland uses the traffic anonymization technique of onion routing under the network's top-level domain suffix .onion.
Dark & Deep WEB difference
The dark web has often been conflated with the deep web, the parts of the web not indexed (searchable) by search engines. The dark web forms a small part of the deep web but requires custom software in order to access its content. This confusion dates back to at least 2009. Since then, especially in reporting on Silk Road, the two terms have often been conflated, despite recommendations that they should be distinguished.
Darknet websites are accessible only through networks such as Tor ("The Onion Routing" project) and I2P ("Invisible Internet Project"). Tor browser and Tor-accessible sites are widely used among darknet users and can be identified by the domain ".onion". While Tor focuses on providing anonymous access to the Internet, I2P specializes in allowing anonymous hosting of websites. Identities and locations of darknet users stay anonymous and cannot be tracked due to the layered encryption system. The darknet encryption technology routes users' data through a large number of intermediate servers, which protects the users' identity and guarantees anonymity. The transmitted information can be decrypted only by a subsequent node in the scheme, which leads to the exit node. The complicated system makes it almost impossible to reproduce the node path and decrypt the information layer by layer. Due to the high level of encryption, websites are not able to track the geolocation and IP of their users, and users are not able to get this information about the host. Thus, communication between darknet users is highly encrypted allowing users to talk, blog, and share files confidentially.
Darknet
The darknet is also used for illegal activity such as illegal trade, forums, and media exchange for pedophiles and terrorists. At the same time, traditional websites have created alternative accessibility for the Tor browser in an effort to connect with their users. ProPublica, for example, launched a new version of its website available exclusively to Tor users.
If you are trying to connect to the internet using the Microsoft Edge browser but encountered an error message instead that says, “Can’t connect to the proxy server”, read on as this post will show you how you can fix this error. This kind of error in Microsoft Edge could be caused by incorrect proxy settings or worse, malware.
To fix this error, here are some suggestions you need to check out:
Option 1 – Try to check your internet connection
The first thing you can do to resolve the “Can’t connect to the proxy server” error in Microsoft Edge is to check your internet connection. There are times when your internet connection or Wi-Fi router can cause such problems. In such cases, you have to ensure that you have a valid internet source and if you are using a Wi-Fi router, you can try to use another connection and then see if the error is gone or not.
Option 2 – Try to disable the manual proxy set up from the Settings
In case you miss it, there is actually an option in the Settings panel that you can use to set up proxy in your Windows 10 computer. So if you encounter the “Can’t connect to the proxy server” error, you should disable manual proxy for the meantime and check if it fixed the error or not.
Tap the Win + I keys to open the Windows Settings.
Then go to Network & Internet > Proxy.
And on your right-hand side, ensure that the Automatically detect settings are enabled and that the Use a proxy server option under the Manual proxy setup is disabled.
Now try to open any website again and see if the problem’s fixed.
Option 3 – Try disabling the VPN
Like pointed out earlier, if you are using VPN, this could be the reason why you’re getting the “Can’t connect to the proxy server” error so the most obvious thing to do is for you to turn off the VPN and try to load a website in Edge again. And if you use a VPN software that works using their software, you can just completely exit or log-off from its account. On the other hand, if you are using a built-in Windows 10 VPN, you can simply turn it off or delete all the settings you have created there.
Option 4 – Disable the proxy server for your LAN
If your PC was just attacked by some adware or malware as of late, it is possible that it has changed the network settings in the system and might display spam advertisements. Thus, you have to disable the proxy server for your LAN. To do that, refer to these steps:
Tap the Win + R keys to open the Run dialog box.
Then type “inetcpl.cpl” in the field and hit Enter to pull up the Internet Properties.
After that, go to the Connections tab and select the LAN settings.
From there. Uncheck the “Use a Proxy Server” option for your LAN and then make sure that the “Automatically detect settings” option is checked.
Now click the OK and the Apply buttons.
Restart your PC.
Note: If you are using a third-party proxy service, you have to disable it.
Option 5 – Temporarily disable Firewall and third-party antivirus
Firewall and antivirus programs are known to block files the instant it detects a threat to the system. However, there are some cases when it can also block a file even when it’s a safe one. Thus, your antivirus or firewall programs might be the reason why you can’t download anything on your Windows 10 computer. To isolate the issue, you need to temporarily disable both the Firewall and antivirus programs and then check if you can now download anything from the internet. Do not forget to enable them again as disabling them can leave your computer vulnerable to cyber threats.
Option 6 – Clear the browsing data of Microsoft Edge
Open Microsoft Edge.
Then click on the three horizontal dots to open the menu.
From there, click on Settings. And under Settings, click the “Choose what to clear” button under the Clear browsing data section.
Next, check all the checkboxes and then click the Clear button to clear the browsing data in the Edge browser.
Restart Edge.
Option 7 – Try to reset, repair or reinstall Edge via Settings
You can reset, repair or reinstall the Edge browser through Settings.
If none of it helped, you can try the following:
Open File Explorer and then go to this path – C:/Users/YourUsername/AppData/Local/Packages
Note: Before you type in the path in the Address bar, make sure that you put your user account name in place with the “YourUsername”.
Tap Enter to proceed.
Next, look for the folder named “MicrosoftEdge_8wekyb3d8bbwe” then right-click on it.
Click on Properties and uncheck the option “Read-only” under the General tab in the Properties window.
Click on Apply and then OK to save the changes made.
After that, look for the MicrosoftEdge_8wekyb3d8bbwe folder again and delete it. And if a prompt stating “Folder Access Denied” appears on your screen, just click on the Continue button to proceed – doing so will delete most of the content inside the folder except for the folder named “AC”.
Restart your PC.
Now all you have to do is to re-register Microsoft Edge using PowerShell. In the Start Menu, search “Windows PowerShell”.
Right-click on Windows PowerShell from the search results and select the “Run as administrator” option.
Type in this command in the PowerShell windows and tap Enter – Cd C:/Users/YourUsername
Note: Once again, make sure that you key in your user account name in place of “YourUsername.
After that, type in this command and tap Enter – Get-AppXPackage -AllUsers -Name Microsoft.MicrosoftEdge | Foreach {Add-AppxPackage -DisableDevelopmentMode -Register "$($_.InstallLocation)AppXManifest.xml" -Verbose}
Restart your PC.
Option 8 – Scan your computer for malware using Windows Defender
Your computer could be infected with malware which might have triggered the “Can’t connect to the proxy server” error. To fix this, you need to scan your computer using a reliable program like Windows Defender.
Tap the Win + I keys to open Update & Security.
Then click on the Windows Security option and open Windows Defender Security Center.
Next, click on Virus & threat protection > Run a new advanced scan.
Now make sure that Full Scan is selected from the menu and then click the Scan Now button to get started.
Computer crashes are one of the most annoying things that can happen to users. It often loses your data and work, you must spend extra time if you were in the middle of something and can even break Windows itself.
Before we move to the article I just want to say that technically there are no random crashes, there is always a reason why the system hangs up, why you received blue screen, annoying restarts out of nowhere and many more PC crashes. In this article, we will explore many possible reasons why something may occur and offer you straight forward solution on how to escape the situation and prevent it from happening again.
Without further delay, let's begin:
Check switch connectors and power outlets
Yes, sometimes the most basic approach provides the best results, check to see if your power outlet is stable and providing you with constant voltage, if not, maybe you want to invest in a UPS system so you do not face random shutdowns and restarts during work, also while you are at it, check to see if that reset and power switch are connected properly and that they are not dirty or loose.
Clean your PC and check connectors
Dirt can cause many issues with computers, from overheating to shutdowns to blue screens and memory dumps, check to see if your computer is clean enough and that all connectors are connected tight into their respective sockets.
Check the temperature of your CPU
CPU overheating can cause so-called random freezes and blue screens, the computer might shut down or restart also without any visible reason. Check to see if your fan on the CPU is working properly and change the thermal paste if needed.
Check the health of your hard drive
If your hard drive is beginning to go down the path of dying out, many issues can come from this condition. There are many tools on the internet and in Windows itself to check if your hard drive is working properly.
Run antivirus and firewall
Random lock-ups or similar issues can also occur if by any chance you have some malware on your system, run protection software, and keep it updated to make sure the issue does not come from the computer being infected with malicious applications.
Keep system clean
Have a habit to clean regularly system files and registries, keep removing unnecessary files from your computer and regularly update your Windows and applications along with drivers.
Run memory test
Bad RAM bank can cause many issues during the work, check it out to be sure the problem is not RAM itself.
Do not run applications that are too demanding for your system
Some applications require stronger hardware, and some require the latest hardware, if your computer is a little outdated, running a demanding application can cause issues like freezing, restarts, etc.
Remove applications you do not use
This does not seem like anything important but if you are not using a specific application just remove it from the system, why? Sometimes an application has some ties to certain services and if it is outdated can cause issues for newer ones.
Stop installing everything you find on the internet
Yes, that extension for chrome looks cool, yes, that fancy new player seems sick but if it is from an unverified source and from the unknown publisher without any reviews maybe you are better off with it. You can never tell what you might be placing into your system from the internet.
And that's it, 10 reasons and solutions on what to do on random computer freezes, crashes, etc.
If you are using your Google Chrome browser and suddenly notice a constant flickering after you’ve upgraded your Windows 10 computer, read on as this post will help you sort out the issue. A lot of users have reported this screen flickering issue in Chrome after having upgraded their devices to a recent Windows 10 build. The bizarre thing about this problem is that it only affects the Google Chrome browser and when it occurs, the Chrome browser will start to flash or flicker.
According to users who experience the problem in Chrome, it seems to get worse when they try to play videos on YouTube or other streaming sites. To resolve this problem, many users tried to use Chrome in Incognito Mode, cleared the browser cache as well as cookies. They even tried resetting the browser settings and reinstall Chrome but nothing seems to work. Worry not though as there are still other options you can try to fix the problem and they’re easy ones so you’ll have no problem following them.
The screen flickering problem in Chrome appears to be related to the Windows background and color settings as well as incompatible display drivers. This is why it is advised that you have both the video card drivers and Chrome browser updated to prevent the same problem from happening again.
To get started troubleshooting the screen flickering issue in Chrome, refer to the following options.
Option 1 – Try modifying the background and colors settings
Tap the Win + I keys to open the Settings app.
From Settings, go to Personalization to load the Background Preferences and if this window does not appear, just select the Background option from the left side panel.
Next, select a Solid Color as the new background from the drop-down menu.
After that, check if the problem is fixed. This should be fixed especially if the one that’s causing screen flickering is the Windows automatic background switching.
Once you’ve selected the Solid color as the background preference, go to the Colors tab under Personalization. This will open a new window and from there, check the box of the “Automatically pick an accent color from my background” option.
Now close the Settings app and open Chrome again.
Option 2 – Try to update or rollback the Graphics driver
You can try to update your Graphics card driver using the Device Manager in your computer to resolve the blank dialog boxes problem or you can also go directly to the website of your graphics card manufacturers like NVIDIA, Intel, or AMD and go to the section called Drivers then check if there’s a new available update – if there is, download and install it.
To update your Graphics driver via Device Manager, refer to these steps:
First, boot your computer into Safe Mode.
After that, tap the Win + R keys to launch Run.
Type in devmgmt.msc into the box and tap Enter or click OK to open the Device Manager.
After that, a list of device drivers will be displayed. From there, look for the Display Adapters and click on them.
After that, right-click on each entry under the Display Adapters and select the “Uninstall Device” option from the menu.
Now restart your computer.
After restarting your computer, go to the Settings app and Check for Updates in the Windows Update section.
Note: If updating the Graphics driver didn’t fix the problem, you can also try to roll back to its previous version and see if that helps.
Option 3 – Try to disable the Hardware Acceleration
For better performance, Google Chrome uses the Hardware Acceleration by default. Unfortunately, there are just some cases when your hardware, GPU to be specific, might not be able to cope with the requirements, resulting in the black screen issue. And if this is your case, you should try to disable the hardware acceleration from your Google Chrome browser settings panel. To do so, follow the steps below.
Open the Google Chrome settings page.
Click on the Advanced button to get more options.
Look for the option called “Use hardware acceleration when available” and then disable it by toggling the button to the left.
After that, check if the screen flickering issue in Chrome is fixed.
Option 4 – Try to disable “Smooth Scrolling” in Chrome
Disabling “Smooth Scrolling” in Chrome might also help you fix the issue. To do so, follow these steps:
Open Chrome and type “chrome://flags” and hit Enter.
Next, look for a flag named “Smooth Scrolling”. You can scroll down until you find it or search it in the Search Flag bar. Note that Smooth Scrolling is enabled by default in the newer versions of Chrome.
After that, select the drop-down menu and select Disabled.

 Windows 11 release date is closing in, some people have tried it via insider build, some have decided not to. It has come to our attention that there is a little website made by BlueEdge that offers a virtual Windows 11 desktop.
Opening the Website will put you right inside Windows 11 desktop, now take note that this is not Windows 11, it is a simulation of Microsoft’s newest OS and therefore many things will not work like File Explorer, etc.
One thing you can make sure it is working is UI itself, you can see how you do like the new Taskbar, start menu, widgets, and some other things. You can just pop up on the site and check how you do like the overall new look and feel of Windows 11 UI before installing it or trying it.
We are sure that many more options will come in time but even now you can get a feel of the newest OS.
Windows 11 BlueEdge site:
Windows 11 release date is closing in, some people have tried it via insider build, some have decided not to. It has come to our attention that there is a little website made by BlueEdge that offers a virtual Windows 11 desktop.
Opening the Website will put you right inside Windows 11 desktop, now take note that this is not Windows 11, it is a simulation of Microsoft’s newest OS and therefore many things will not work like File Explorer, etc.
One thing you can make sure it is working is UI itself, you can see how you do like the new Taskbar, start menu, widgets, and some other things. You can just pop up on the site and check how you do like the overall new look and feel of Windows 11 UI before installing it or trying it.
We are sure that many more options will come in time but even now you can get a feel of the newest OS.
Windows 11 BlueEdge site: 

 Before we move to the article I just want to say that technically there are no random crashes, there is always a reason why the system hangs up, why you received blue screen, annoying restarts out of nowhere and many more PC crashes. In this article, we will explore many possible reasons why something may occur and offer you straight forward solution on how to escape the situation and prevent it from happening again.
Without further delay, let's begin:
Before we move to the article I just want to say that technically there are no random crashes, there is always a reason why the system hangs up, why you received blue screen, annoying restarts out of nowhere and many more PC crashes. In this article, we will explore many possible reasons why something may occur and offer you straight forward solution on how to escape the situation and prevent it from happening again.
Without further delay, let's begin: