If you suddenly encounter PFN_LIST_CORRUPT Blue Screen of Death error while using your computer then it means that the Page Frame Number or PFN list is corrupted. Page Frame Number is an indexing number used by the hard drive to find out the location of every single file on the physical disk. This kind of Blue Screen error is usually caused by a driver that’s passing a bad memory descriptor list and it can either be temporary or permanent. And so to fix this particular BSOD error, read on as this post contains a couple of suggestions that could help.
Keep in mind that when you get a Blue Screen error like PFN_LIST_CORRUPT, the power connection to your PC must not be interrupted and so if you are using a laptop, it’s best if you connect it to a power source. On the other hand, if creating a dump from 0% to 100% takes up more than 5-10 minutes, then you have to force shut down your computer by pressing and holding the Power Key for 10 seconds or at least until the CPU lights turn off. After you do that, proceed to the troubleshooting tips prepared below.
The Blue Screen troubleshooter is a built-in tool in Windows 10 that helps users in fixing BSOD errors like PFN_LIST_CORRUPT. It can be found on the Settings Troubleshooters page. To use it, refer to these steps:
You can also try to run a System File Checker or SFC scan in order to scan your computer for corrupted files that might be the cause behind the PFN_LIST_CORRUPT error. Once it finds any corrupted system files, it will automatically fix them. To run System File Checker, here’s what you have to do:
The command will start a system scan which will take a few whiles before it finishes. Once it’s done, you could get the following results:
You might also want to run the CHKDSK utility to help you fix any issues with your hard disk. If your hard drive has issues with integrity, the update will really fail as the system will think that it’s not healthy and that’s where the CHKDSK utility comes in. The CHKDSK utility repairs hard drive errors that might be causing the problem.
chkdsk /f /r
Updating the Device drivers can also help you fix the PFN_LIST_CORRUPT Blue Screen error. To do so, follow the steps below.
The PFN_LIST_CORRUPT error might also be caused by OneDrive. Thus, you have to try disabling this program to resolve the problem.

 1. File-infecting Virus
 Error Causes
How about we tell you a time and a money-saving way to fix the error code 0x80070715 on your PC?
The best way to resolve this issue on your system in seconds and also for free is to install Restoro. This is an advanced, powerful, and multi-functional system repair and a PC optimizer tool. It is smoothly integrated with numerous performance-driven utilities like registry cleaner, privacy error detector (anti-virus), Active X and Class error, and system stability detector. With this helper, you can resolve not only the error code 0x80070715 but also other types of PC-related errors. Whether the cause of the error code 0x80070715 on your PC is malware or cluttering cluttered disk, Restoro can be used to resolve them all. Its powerful and intuitive registry cleaner scans the registry and repairs it successfully. It removes junk files, internet history, temporary internet files, invalid entries, and also the files from the uninstalled programs still saved in the system’s registry. It wipes out all the clutter on your hard disk and cleans it in seconds freeing up plenty of space. It repairs the registry resolving the error 0x80070715 quickly. Nonetheless, if the error 0x80070715 is triggered due to viral infection or malware it removes them too. By downloading unknown files, accessing malicious websites, and opening phishing emails viruses can enter your PC. You may not be aware of these until error code 0x80070715 pops on your screen. It is wise to remove viruses right away because these give hackers access to your system which often results in data breaches and exposes users to system security threats. Restoro also works as a powerful antivirus. All malware, spyware, and viruses affecting your PC are scanned with the help of the advanced built-in privacy error detector utility. This utility embedded in the system detects viruses and malware in your system and removes them from your system successfully. Restoro is an easy-to-use repair tool. It has a simple layout and a user-friendly interface. It is easy to navigate through the repair tool, scan for errors and repair them without any hassle. Users of all levels, novice and experienced can use this tool with ease. You don’t need to be technically sound to work around this tool. Here's how to Install and run Restoro PC Fixer: In addition to this, you can run it on any Windows version. It is compatible with practically all versions. No matter what the cause for error code 0x80070715 maybe, you don’t need to get into the nitty-gritty of it and find a specific tool to resolve the issue. All you have to do is install this multi-functional Restoro on your system. Here are the 3 simple steps that you need to follow for successful repair:"The file d3dx9_32.dll is missing" "D3DX9_32.DLL is missing. Replace D3DX9_32.DLL and try again." "File d3dx9_32.dll not found" "D3dx9_32.dll not found. Reinstalling might help fix this." "Missing component d3dx9_32.dll"This error usually pops while using gaming software. The D3dx9_32.dll error is displayed after a game is loaded or before the game-play begins. However, it may also appear in software that uses advanced graphic features.
Error CausesError Causes This is a very interesting decision by Microsoft and I fully support it, this time users will be able to pay less and to choose only applications that they need instead of paying for the whole package and not using it.
 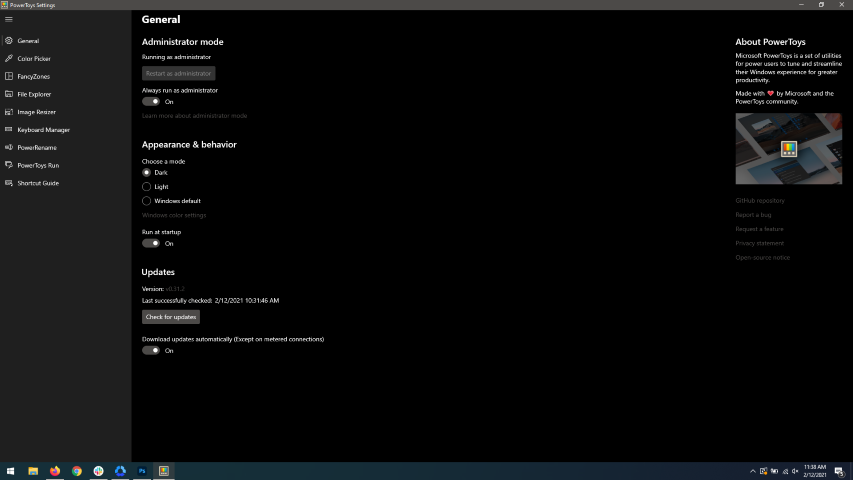 When opened you will be greeted with general settings window. These are settings for power toys themselves, Here you can check for updates, change the looks of power toys, run it on system startup and run them as administrator. Set them up so they best suit your needs.
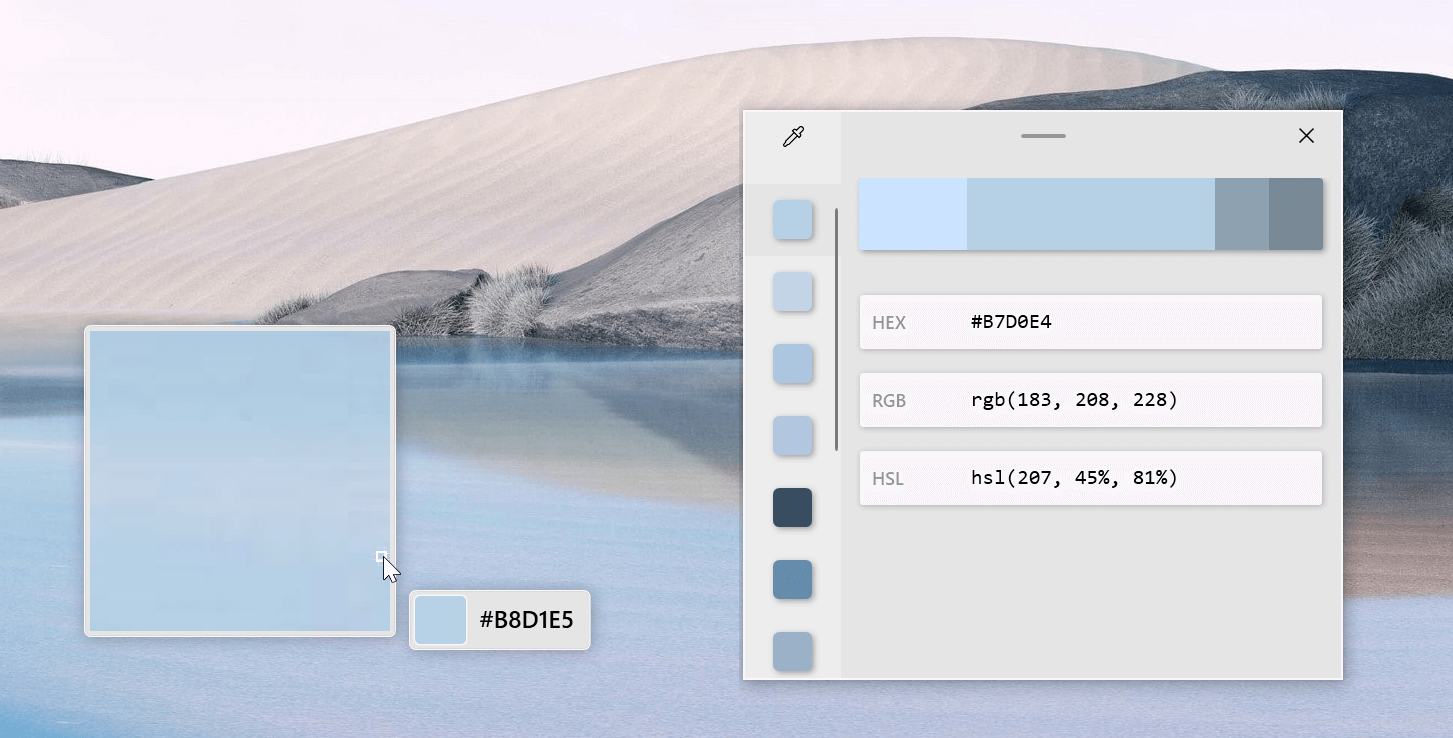 The color picker will let you as the name suggests pick colors, it will sample colors from running applications and windows, snap their values, and place them in the clipboard. A useful application if you are working as a graphic designer, want to create some cool word document, or just want to compare the difference between colors.
After the Color Picker is activated, hover your mouse cursor over the color you would like to copy and left-click the mouse button to select a color. If you want to see the area around your cursor in more detail, scroll up to zoom in. The copied color will be stored in your clipboard in the format that is configured in the settings (HEX by default). The editor lets you see the history of picked colors (up to 20) and copy their representation in any predefined string format. You can configure what color formats are visible in the editor, along with the order that they appear. This configuration can be found in PowerToys settings. The editor also allows you to fine-tune any picked color or get a new similar color. Editor previews different shades of currently selected color - 2 lighter and 2 darker ones. Clicking on any of those alternative color shades will add the selection to the history of picked colors (appears on the top of the colors history list). Color in the middle represents your currently selected color from the history of the colors. By clicking on it, the fine-tuning configuration control will appear, which will let you change the HUE or RGB values of the current color. Pressing OK will add newly configured color into the history of the colors.
The color picker will let you as the name suggests pick colors, it will sample colors from running applications and windows, snap their values, and place them in the clipboard. A useful application if you are working as a graphic designer, want to create some cool word document, or just want to compare the difference between colors.
After the Color Picker is activated, hover your mouse cursor over the color you would like to copy and left-click the mouse button to select a color. If you want to see the area around your cursor in more detail, scroll up to zoom in. The copied color will be stored in your clipboard in the format that is configured in the settings (HEX by default). The editor lets you see the history of picked colors (up to 20) and copy their representation in any predefined string format. You can configure what color formats are visible in the editor, along with the order that they appear. This configuration can be found in PowerToys settings. The editor also allows you to fine-tune any picked color or get a new similar color. Editor previews different shades of currently selected color - 2 lighter and 2 darker ones. Clicking on any of those alternative color shades will add the selection to the history of picked colors (appears on the top of the colors history list). Color in the middle represents your currently selected color from the history of the colors. By clicking on it, the fine-tuning configuration control will appear, which will let you change the HUE or RGB values of the current color. Pressing OK will add newly configured color into the history of the colors.
 FancyZones is a window manager utility for arranging and snapping windows into efficient layouts to improve the speed of your workflow and restore layouts quickly. FancyZones allows the user to define a set of window locations for a desktop that are drag targets for windows. When the user drags a window into a zone, the window is resized and repositioned to fill that zone. When first launched, the zones editor presents a list of layouts that can be adjusted by how many windows are on the monitor. Choosing a layout shows a preview of that layout on the monitor. The selected layout is applied automatically.
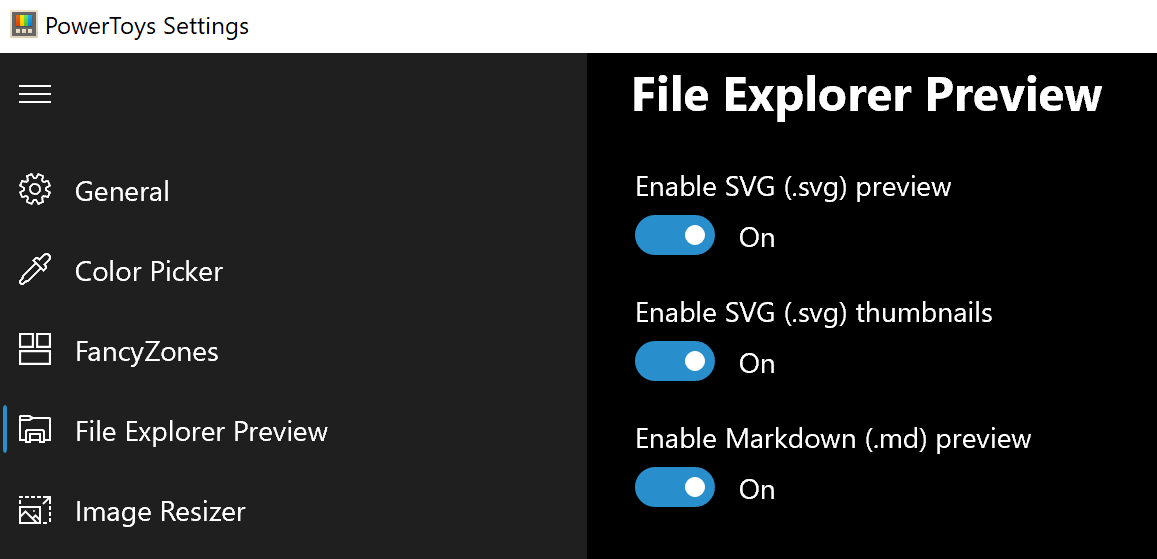 Only 3 options here but maybe some are important to you. This extension lets you enable SVG file preview in File Explorer, enable Markdown preview, and enable SVG thumbnails. Turn on each one you might need.
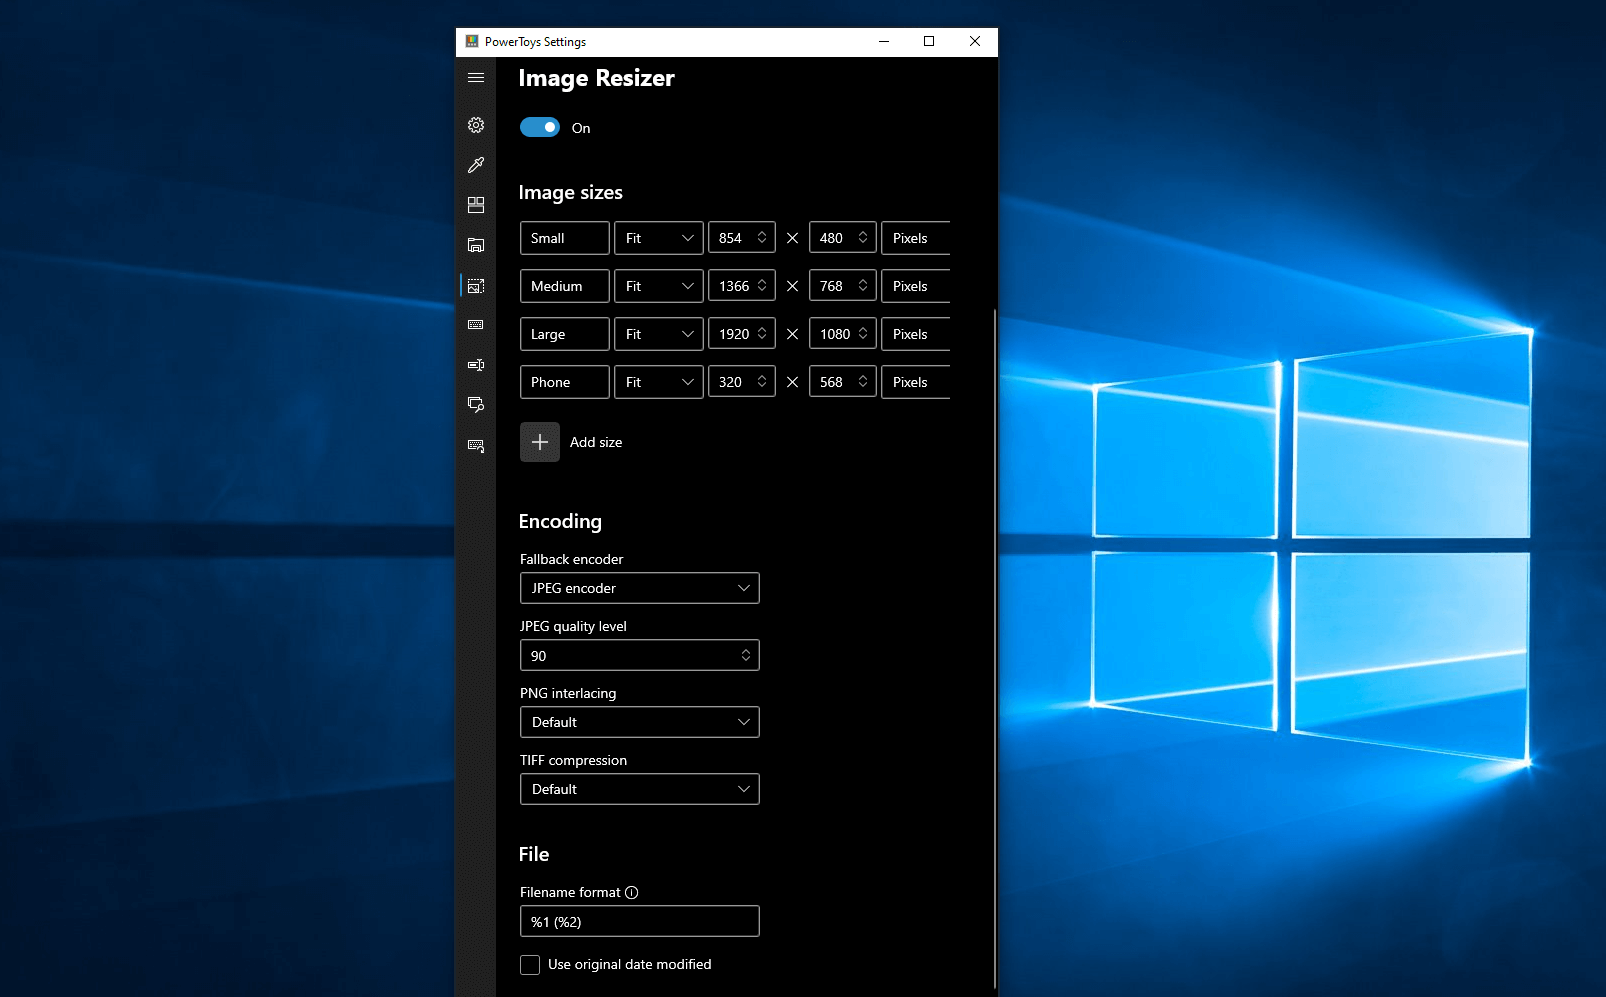 Image Resizer is a Windows shell extension for bulk image-resizing. After installing PowerToys, right-click on one or more selected image files in File Explorer, and then select Resize pictures from the menu. You can specify your own sizes if you want, you can resize when dragging files, you can overwrite files or make new copies of new sizes, and many more options. A very useful tool I am sure plenty of users can use since this eliminates the need for pictures or any other image application for common resizing tasks.
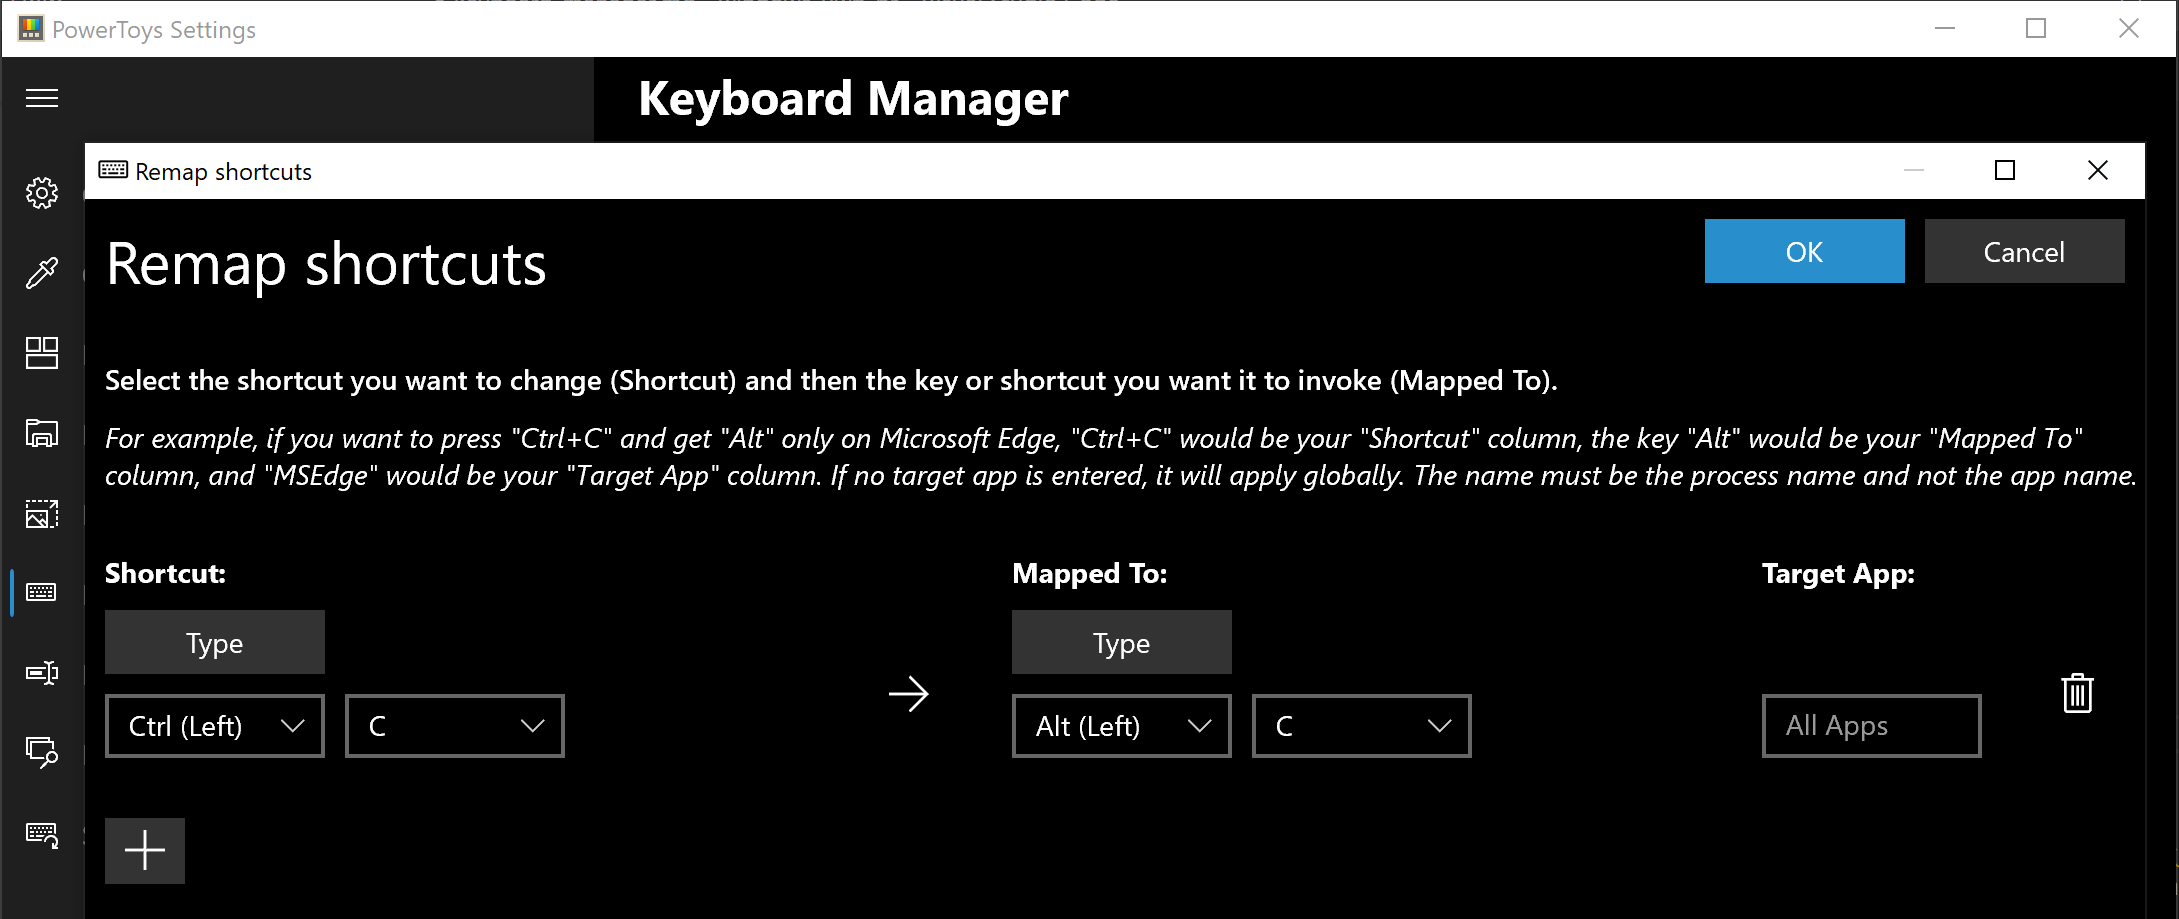 The PowerToys Keyboard Manager enables you to redefine keys on your keyboard. For example, you can exchange the letter A for the letter D on your keyboard. When you select the A key, a D will display. You can also exchange shortcut key combinations. For example, the shortcut key, Ctrl+C, will copy the text in Microsoft Word. With the PowerToys Keyboard Manager utility, you can exchange that shortcut for ⊞ Win+C). Now, ⊞ Win+C) will copy text. If you do not specify a targeted application in PowerToys Keyboard Manager, the shortcut exchange will be applied globally across Windows. PowerToys Keyboard Manager must be enabled (with PowerToys running in the background) for remapped keys and shortcuts to be applied. If PowerToys is not running, key remapping will no longer be applied.
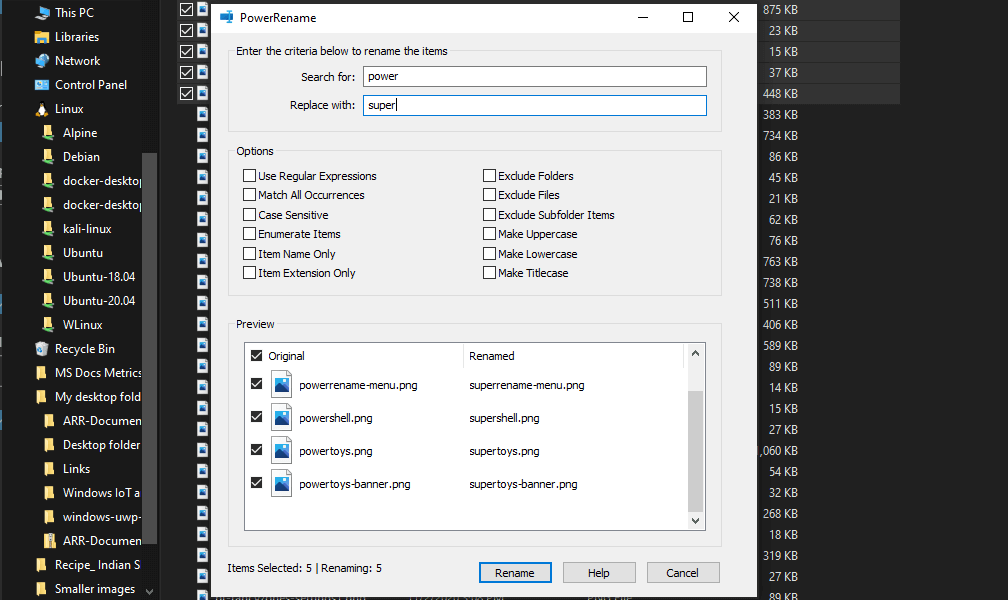 PowerRename is a bulk renaming tool that enables you to:
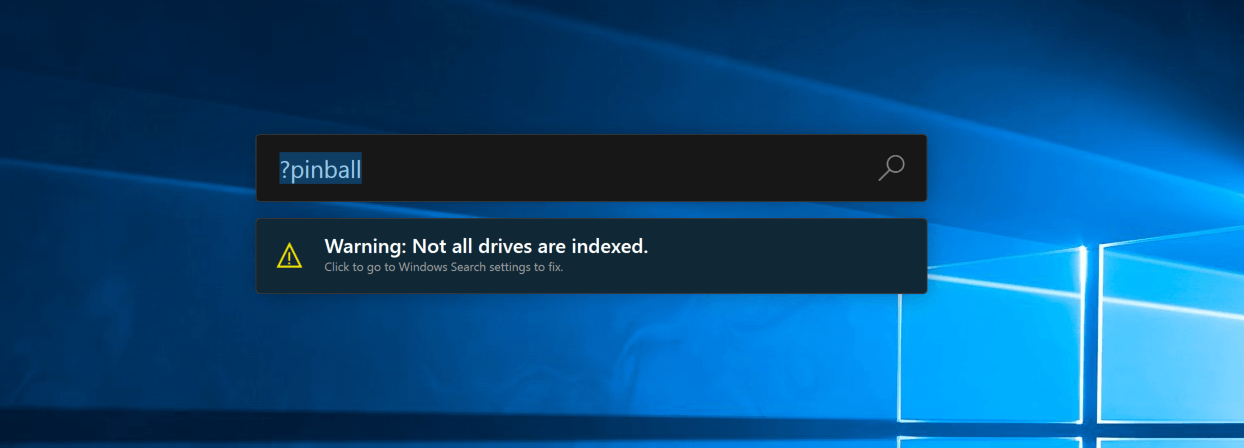 PowerToys Run is a quick launcher for power users that contains some additional features without sacrificing performance.
PowerToys Run features include:
PowerToys Run is a quick launcher for power users that contains some additional features without sacrificing performance.
PowerToys Run features include:
> (for example, > Shell:startup will open the Windows startup folder)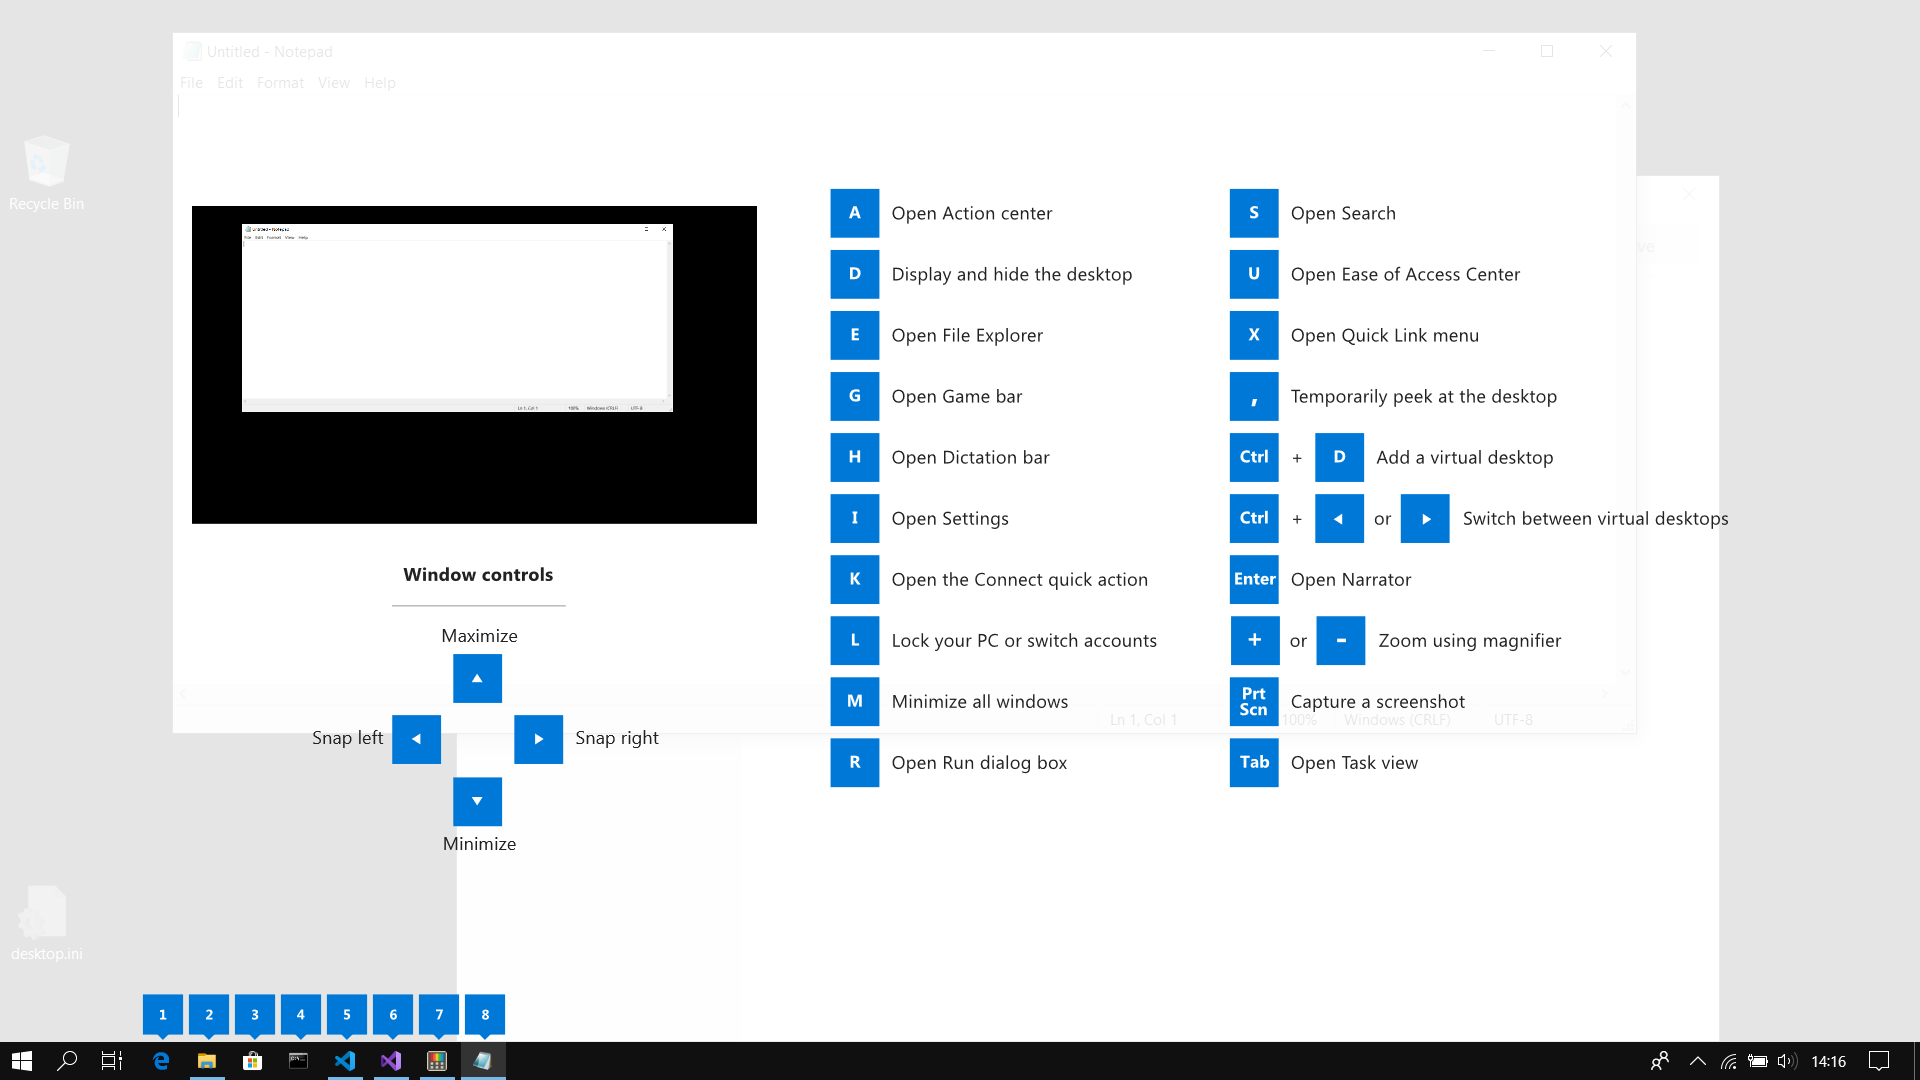 This guide uses PowerToys to display common keyboard shortcuts that use the Windows ⊞ key. Windows key keyboard shortcuts can be used while the guide is being shown and the result of those shortcuts (active window moved, arrow shortcut behavior changes, etc) will be displayed in the guide. Releasing the Windows ⊞ key will make the overlay disappear. Tapping the Windows ⊞ key will display the Windows Start menu.
Hey, you made it till the end, thank you for reading and I hope to see you soon.
This guide uses PowerToys to display common keyboard shortcuts that use the Windows ⊞ key. Windows key keyboard shortcuts can be used while the guide is being shown and the result of those shortcuts (active window moved, arrow shortcut behavior changes, etc) will be displayed in the guide. Releasing the Windows ⊞ key will make the overlay disappear. Tapping the Windows ⊞ key will display the Windows Start menu.
Hey, you made it till the end, thank you for reading and I hope to see you soon. “Error 2738. Could not access VBScript run time for custom action.”It is a type of runtime error associated with VB (Visual Basic) Script. It indicates that the VB script engine is not correctly registered on your computer.
Error Causes