/ipk <ProductKey> or /ato [<Activation ID>]
One of the great remote assistance software that helps you remotely access and control computers is TeamViewer. However, despite how efficient it is, there are still times when it throws up some errors and one of them is when TeamViewer is not able to connect and throws an error that says, “No connection to partner, Partner did not connect to router, Error Code WaitforConnectFailed”.
This kind of error in TeamViewer mostly occurs when the Partner computer is not connected to a network. On the other hand, it could also occur when they are connected to a network so there are various causes for this issue. It could also be that the installation of the program itself was at fault or there is an incompatibility between the TeamViewer versions installed on both the computers and so on.
Although there are several causes for this error, the potential fixes are still the same. You can try to restart the network or allow Full Access Control to TeamViewer or flush the DNS cache. For more information, refer to the following options but before you proceed, make sure that both your Windows 10 computer and TeamViewer program are updated to their latest stable versions.
The first thing you can try to do to fix the error is to simply restart your router. All you need to do is reboot the router from its Admin panel or you can also turn it off manually and turn it back on after a couple of seconds so that it can completely reboot. Once you’re done, try accessing your server again and see if the error is now fixed.
You could also try to flush the DNS configuration in your computer to fix the error. How? Refer to these steps:
On the other hand, you could also try to reset Winsock as well as the TCP/IP.
To run the Network Troubleshooter, refer to these steps:
You might perform a Network Reset to resolve the problem if none of the four given options worked. This will reset the entire network configuration including your IP address. To perform Network Reset, follow these steps:

/ipk <ProductKey> or /ato [<Activation ID>]
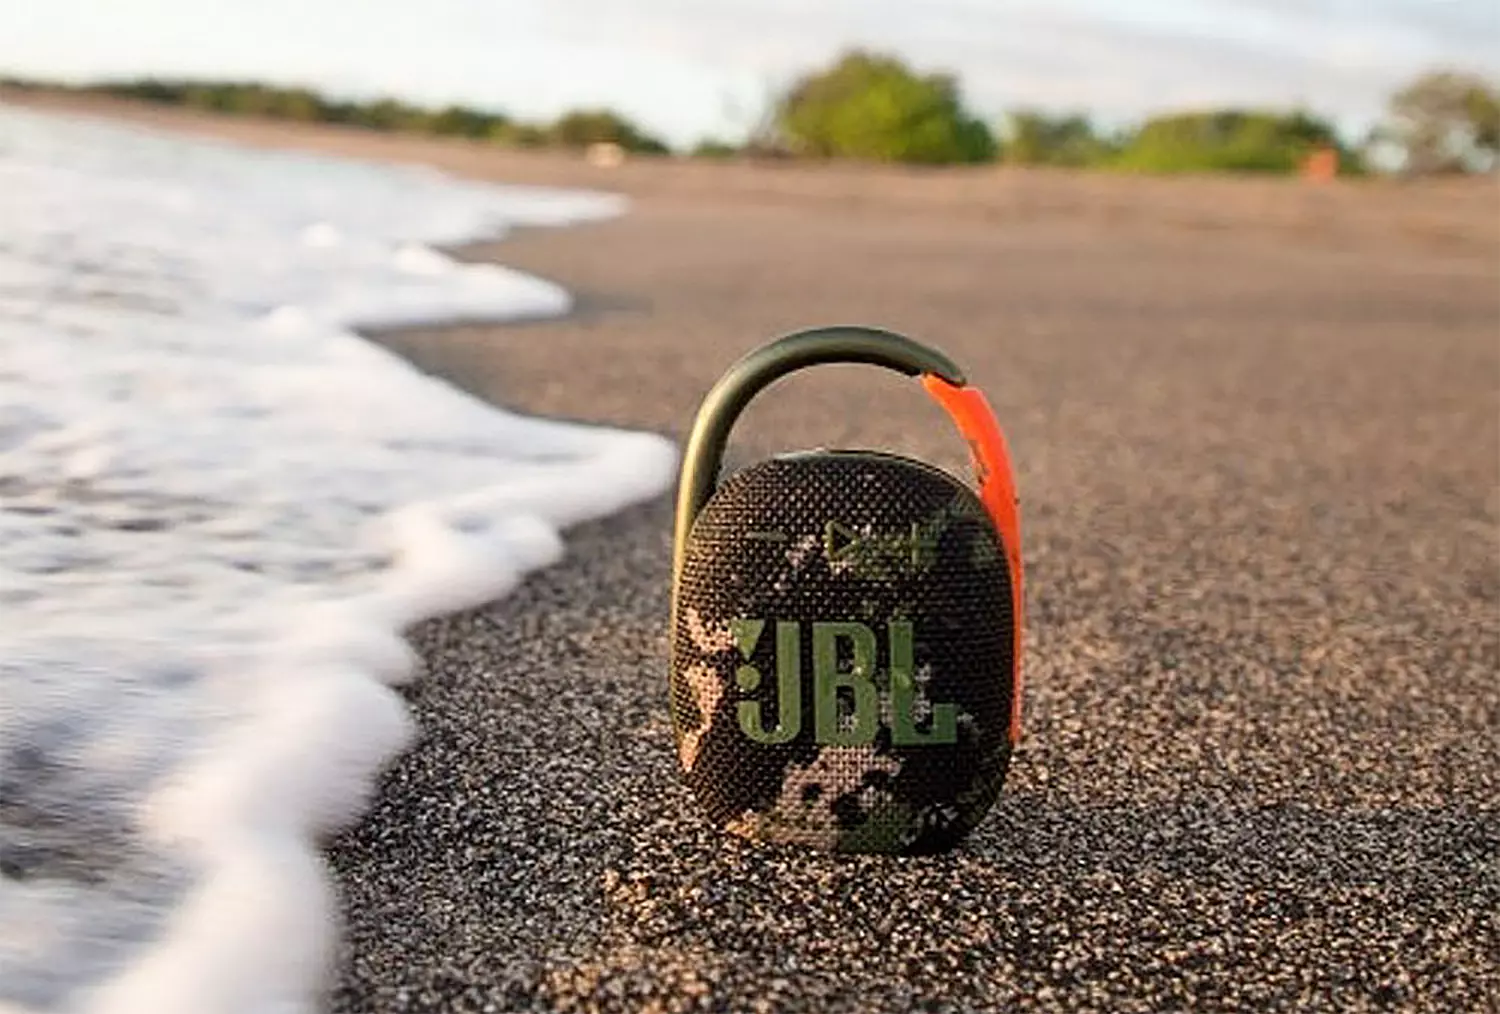
Portable small Bluetooth speakers are nothing new on the market, most of the time they have given the opportunity for music listening during picnics and walks in nature and also replaced some car speaker systems. The latest star in small portable speakers in JBL Clip 4, small in size, waterproof, and with an incredible high-quality sound.
Out of the box and after first look speaker looks great, it has excellent design and is very intuitive to work with. Everything is laid out logically and you can start using it right away without reading instructions.
The sound quality is surprisingly very good and clear. I must say I have not expected this clarity and power from a speaker of this size. The volume range is also incredibly good and will fill most needs even on small picnics outdoors where you can hear it loud enough. One thing to mention is that even on their loudness levels sound is still clear without distortion which, to be honest, is to be expected from someone like JBL.
You can take it where ever you want, Its size and clip make it perfect for beach and pool trips. Speaker is waterproof and gas IP67 rating, meaning that sand and dirt will not affect it either. Do not take this speaker to your diving adventures since that will break it but a depth around 1 meter underwater should be safe. After your trip do not forget to wash Clip 4 with clean water so all dirt, salt, and other stuff are properly cleaned for longer life of the device.
JBL claims that the battery will last 10 hours of continuous play. Note that this is meant probably on the largest volume setting so when you use it on lower settings battery is lasting longer. Playing of course on low volumes will extend playback time even longer but here we come at one feature that I do not like, there is no indication of any kind how much battery is left in the speaker, the only indication is a red light when the battery is almost empty which means you could be outside at that point and did not know that low battery was there in the first place when you were packing. Some battery indication would be a great addon.
The clip itself has been improved from the previous Clip 3 model, it is wider, it goes all the way around the casing, and feels overall better and more stable. Since the clip is now all around casing this means a wider opening can be made making it fit around stuff Clip 3 was not able to.
All in all, Clip 4 is an incredible speaker and one that would highly recommend, the price goes around 79 USD but it can be found even as low as 50 USD on discounts and promotions and if you manage to get one at that price it is a great buy. Sound is good, portability is great, dirt and waterproof are excellent and battery life is really good.
 As previously announced by Google feature to quickly delete the last 15min of browsing history via one button is rolling out now.
For now, only Apple users will be available to use this feature but the Android update is scheduled for later this year, a strange move by Google but it is what it is.
For anyone who is unfamiliar with this feature, basically, Google wants a quick way to remove the last 15min of browsing history as a supposedly stated request to make deleting browsing history much easier.
Google came up with this idea so you can keep the previous history intact but remove just 15min time frame, no additional explanation was given on why 15 but I presume it is some round number that came up as the middle one with research, read telemetry info.
Using quick delete requires being signed into Search with a Google account. Users can access the option by simply tapping on the avatar icon to access the settings then choosing "Delete last 15 minutes."
As previously announced by Google feature to quickly delete the last 15min of browsing history via one button is rolling out now.
For now, only Apple users will be available to use this feature but the Android update is scheduled for later this year, a strange move by Google but it is what it is.
For anyone who is unfamiliar with this feature, basically, Google wants a quick way to remove the last 15min of browsing history as a supposedly stated request to make deleting browsing history much easier.
Google came up with this idea so you can keep the previous history intact but remove just 15min time frame, no additional explanation was given on why 15 but I presume it is some round number that came up as the middle one with research, read telemetry info.
Using quick delete requires being signed into Search with a Google account. Users can access the option by simply tapping on the avatar icon to access the settings then choosing "Delete last 15 minutes."  Interesting information has come out from Microsoft, Windows 11 dark theme will include a different sound theme from its standard light one.
When in dark mode on Windows 11, the system sounds generally become softer, and they echo a bit, creating a more soothing experience that matches the overall look and feel of the dark mode. Flipping back to light mode brings the system sounds back to their normal level.
However, even though the light model has slightly louder sounds than the dark mode, Microsoft has taken great care to make sure the audio is more soothing, according to a report from CNBC.
The designers of Windows 11 took inspiration from an approach called calm technology. Microsoft’s Christian Koehn and Diego Baca wrote about calm technology in a post on Medium. In it, they said, “Windows 11 facilitates this through foundational experiences that feel familiar, soften formerly intimidating UI, and increase emotional connection.”
According to a Microsoft spokesperson in a statement to CNBC, “The new sounds have a much rounder wavelength, making them softer so that they can still alert/notify you, but without being overwhelming.”
Interesting information has come out from Microsoft, Windows 11 dark theme will include a different sound theme from its standard light one.
When in dark mode on Windows 11, the system sounds generally become softer, and they echo a bit, creating a more soothing experience that matches the overall look and feel of the dark mode. Flipping back to light mode brings the system sounds back to their normal level.
However, even though the light model has slightly louder sounds than the dark mode, Microsoft has taken great care to make sure the audio is more soothing, according to a report from CNBC.
The designers of Windows 11 took inspiration from an approach called calm technology. Microsoft’s Christian Koehn and Diego Baca wrote about calm technology in a post on Medium. In it, they said, “Windows 11 facilitates this through foundational experiences that feel familiar, soften formerly intimidating UI, and increase emotional connection.”
According to a Microsoft spokesperson in a statement to CNBC, “The new sounds have a much rounder wavelength, making them softer so that they can still alert/notify you, but without being overwhelming.” “System Restore did not complete successfully. Your computer’s system files and settings were not changed. Details: System Restore failed while scanning the file system on the drive <Partition Letter> The drive might be corrupt. You might want to retry System Restore after running chkdsk /R on this disk. An unspecified error occurred during System Restore. (0x80070013) You can try System Restore again and choose a different restore point. If you continue to see this error, you can try an advanced recovery method.”Whereas in Windows Backup, it states:
“Check your backup, Windows Backup failed while trying to read from this shadow copy on one of the volumes being backed up. Please check in the event logs for any relevant errors. The backup failed, The media is write protected (0x80070013).”On the other hand, you will see the following error message in Windows Update:
“There were some problems installing updates, but we’ll try again later. If you keep seeing this and want to search the web or contact the support for information, this may help: (0x80070013).”There are several suggestions you can check out to fix the error depending on where you encountered it. If you encountered it while running Windows Updates, then you can try to reset the Windows Update components or run the Windows Update Troubleshooter. And if you got the error when running System Restore, you can try to run a System File Checker scan or the DISM tool as well as the CHKDSK utility. Lastly, if you got this error when running the Windows Backup service, you can try to check its status in the Services Manager. Error 0x80070013 in Windows Updates:
 REevil is one of the most active and successful hacking groups connected to Russia and operating all over the world. The group recently demanded a huge bitcoin ransom for an attack targeting IT firm Kaseya in the USA.
Since Tuesday blog and payment site run by REvil group cannot be longer reached without any kind of explanation or why.
The reason behind the disappearance is unknown but has sparked speculation that the group may have been targeted deliberately by authorities.
US President Joe Biden said he raised the issue with Vladimir Putin during a phone call on Friday, after discussing the subject during a summit with the Russian president in Geneva last month.
Mr. Biden told reporters that he had "made it very clear to him...we expect them to act" on information and also hinted the US could take direct digital retaliation on servers used for intrusions.
The timing of Tuesday's outage has sparked speculation that either the US or Russian officials may have taken action against REvil - though officials have so far declined to comment and cyber experts say sudden disappearances of groups are not necessarily uncommon.
The development comes after a series of high-profile ransomware attacks which have hit major US businesses this year.
The FBI accused REvil - also known as Sodinokibi - of being behind a ransomware attack on the world's largest meat processing company JBS last month.
REevil is one of the most active and successful hacking groups connected to Russia and operating all over the world. The group recently demanded a huge bitcoin ransom for an attack targeting IT firm Kaseya in the USA.
Since Tuesday blog and payment site run by REvil group cannot be longer reached without any kind of explanation or why.
The reason behind the disappearance is unknown but has sparked speculation that the group may have been targeted deliberately by authorities.
US President Joe Biden said he raised the issue with Vladimir Putin during a phone call on Friday, after discussing the subject during a summit with the Russian president in Geneva last month.
Mr. Biden told reporters that he had "made it very clear to him...we expect them to act" on information and also hinted the US could take direct digital retaliation on servers used for intrusions.
The timing of Tuesday's outage has sparked speculation that either the US or Russian officials may have taken action against REvil - though officials have so far declined to comment and cyber experts say sudden disappearances of groups are not necessarily uncommon.
The development comes after a series of high-profile ransomware attacks which have hit major US businesses this year.
The FBI accused REvil - also known as Sodinokibi - of being behind a ransomware attack on the world's largest meat processing company JBS last month. “Install applications the easy way and without the hassle, using the Schooldozer downloader. The Schooldozer platform stems from years of experience with installing applications, resulting in a highly optimized process, yielding faster downloads, better user experience, and more successful installations.”In addition, once installed Search.schooldozer.com is installed, it will change the default settings of a browser such as the default search engine, homepage, and new tab page. This is why security experts regard this browser extension as a browser hijacker and a potentially unwanted program. The modification of the browser's settings allows it to control users’ browsing by redirecting them to sponsored sites as well as deliver sponsored content from its affiliated sites in order to gain profit via pay-per-click marketing. And if you think that the ads it displays are harmless, think again for some of these ads can redirect you to suspicious websites that might contain harmful content. What’s more is that this browser hijacker can also keep track and monitor all your browsing activities in order to obtain your browsing data like search queries, what sites you always visit, browsing history, browser type, OS version, and so on. The information collected is then used and may even be shared with its affiliated third parties to deliver more customized and personalized advertisements.