If you are trying to open a program or a game but you suddenly see a dialog box with a message stating that the application was unable to start correctly along with the Error Code 0xC000007B , STATUS INVALID IMAGE FORMAT then this indicates that the application is not compatible with the architecture of your Windows 10 computer or is missing dependencies.
Although error code 0xC000007B can also occur with other various programs, the STATUS_INVALID_IMAGE_FORMAT error code also means that when you try to run an application that’s designed to run on a 64-bit system and hence gets into a termination state. In addition, if you are also pointed to the NTStatus.h file then it means that the error might be caused by some file corruption. Here’s the full context of the error message:
“0xC000007B | STATUS_INVALID_IMAGE_FORMAT | {Bad Image} %hs is either not designed to run on Windows or it contains an error. Try installing the program again using the original installation media or contact your system administrator or the software vendor for support.”
When you see this error message, the first thing you can do is to click on OK to close the application and then try installing the media again to see if it fixes the issue. If not, then you can check out the suggestions given below.
Option 1 – Try installing the application with admin privileges
The first thing you can do to fix the error is to restart your Windows 10 computer and then try installing the application again and this time with admin privileges. Just right-click on the application and select the “Run as Administrator” option. And if your account is a regular one, you need to make sure to ask an admin to help you in installing the application by entering the password when you are prompted to do so.
Option 2 – Install and update Dependencies
There are times when programs and applications need to have drivers and supporting software installed for them to properly work. Although the installation usually takes care of it, it’s time for you to do some manual checks especially if you are getting this issue of abnormal program termination.
1. Install some qualified drivers
A number of high-end games and applications need to have correct and valid drivers for them to work. They just don’t work with general drivers though. Microsoft has this Windows Hardware Quality Labs testing also known as WHQL testing which makes sure that drivers meet the correct experience and pass through the proper testing before certification. Thus, when installing drivers, you need to ensure that they are qualified drivers for your Windows 10 PC.
2. Download and install or update DirectX
As you know, Microsoft DirectX is a suite of technologies developed by Microsoft to provide hardware acceleration for heavy multimedia applications like HD videos and 3D games. Since you are using Windows 10, you have the DirectX 12 version while the earlier Windows versions use the DirectX 11 version.
3. Install the Microsoft DirectX End-user runtime
The Microsoft DirectX end-user runtime gives updates to version 9.0c as well as previous versions of DirectX. To install it, click on this link and download it.
4. Update or install the .NET framework
The .NET framework is used by games and applications during development which means that without the runtime files that are installed in your computer, it definitely won’t work. Thus, you need to install or update this framework. You can also use the .NET setup verification tool to verify it.
Option 3 – Try running the System File Checker Scan
The SFC or System File Checker scan could detect and automatically repair damaged system files that could be causing the Error Code 0xC000007B , STATUS INVALID IMAGE FORMAT error. SFC is a built-in command utility that helps in restoring corrupted files as well as missing files. It replaces bad and corrupted system files with good system files. To run the SFC command, follow the steps given below.
Tap Win + R to launch Run.
Type in cmd in the field and tap Enter.
After opening Command Prompt, type in sfc /scannow
The command will start a system scan which will take a few whiles before it finishes. Once it’s done, you could get the following results:
Windows Resource Protection did not find any integrity violations.
Windows Resource Protection found corrupt files and successfully repaired them.
Windows Resource Protection found corrupt files but was unable to fix some of them.
PFN_LIST_CORRUPT is a blue screen of death error code. It occurs when the PFN (Page Frame Number) list becomes corrupt. The Page Frame Number is basically used by your hard drive to determine your location of each one of your files on the disk.
This error may occur when starting up the program or while using it. Blue screen of death errors occurs without any warnings. The program disrupts all of a sudden and the computer screen turns blue.
Solution
Error Causes
PFN_LIST_CORRUPT Blue Screen error may occur due to multiple reasons. Some of the common reasons include:
Hardware problems
Device driver issues
Registry problems
Viral Infection
It is recommended to resolve the PFN_LIST_CORRUPT Blue Screen of Death error immediately without any delay virtually because this error can be quite fatal to your PC.
It can pose serious threats to your system like system freeze, crash, failure, and valuable data loss. Furthermore, if the error is related to viral infection, it can expose you to privacy issues, data breaches, and cybercrime too.
Further Information and Manual Repair
This is a critical PC error but easy to resolve. You don’t need any technical expertise to fix this error on your PC. Here are some quick and easy methods to resolve PFN_LIST_CORRUPT Blue Screen error:
Method 1: Install Compatible Device Drivers
Sometimes when new hardware is added to the PC, you need to install updated versions of the device drivers to ensure there are no incompatibility issues.
Incompatibility between the hardware and device drivers may generate PFN_LIST_CORRUPT Blue Screen of death error on your screen. To resolve, it is advisable to download and install the latest updated versions of the device drivers from the manufacturer’s website.
Method 2: Scan for Viruses
PFN_LIST_CORRUPT Blue Screen of Death error may occur due to viral infection too. Viruses and spyware enter your PC when you log on to unreliable websites and download programs from there or open phishing emails on your PC.
These viruses corrupt and damage programs and files resulting in such errors. To fix the issue, you need to install a powerful antivirus and ensure all kinds of viruses and spyware are detected and removed from your system.
Method 3: Clean and Restore the Registry
PFN_LIST_CORRUPT Blue Screen error indicates poor PC maintenance. When you don’t clean and remove unnecessary and obsolete files like junk files, bad registry keys, cookies, internet history, temporary files, and invalid entries from the registry, the registry overloads and gets damaged.
These files accumulate taking up a lot of disk space and also corrupt system files. If these files are not removed timely, it results in registry issues like a blue screen of death errors and run-time errors. To remove these files and clean the registry, you need to install a powerful registry cleaner.
Whether the underlying cause for PFN_LIST_CORRUPT Blue Screen of Death error on your PC is viral infection or registry issues, to resolve the BSOD error code in seconds download Restoro.
This is a cutting-edge and multi-functional PC fixer deployed with both an antivirus and a registry cleaner. Additional features include a system optimizer too. It is user-friendly and easy to operate. You can download it on all Windows versions without any hassle. It is safe and bug-free.
The registry cleaner feature scans and removes all unnecessary files, cleans and repairs the registry while the antivirus utility simultaneously removes all kinds of malicious software including spyware, viruses, Trojans, and malware.
Click here to download Restoro now and resolve the PFN_LIST_CORRUPT Blue Screen of Death error immediately!
Error code 0x000000D1 is a serious error that is displayed when Windows automatically shuts down to protect the system against further damage.
Usually, when this error occurs, the message displayed to the users states something like STOP 0x000000D1 DRIVER_IRQL_NOT_LESS_OR_EQUAL.
Solution
What Causes 0x000000D1 Error?
Usually, the STOP 0x000000D1 error code is caused by issues like incompatibilities, third-party drivers, driver conflicts, outdated drivers, malicious drivers, and other related problems.
Speaking technically, the message displayed to the user actually means that the kernel-mode driver has tried to gain access to memory at an unreasonably high process IRQL.
If left unfixed, STOP 0x000000D1 error can become quite serious. Increased frequency of occurrence may not only lead to data loss but can cause system corruption as well. That’s why it is crucial to fix it and to resolve the underlying issues causing it as soon as possible.
Further Information and Manual Repair
There are different ways of quickly fixing this error, some of which are briefly listed below as follows.
The solution advised for advanced users is to start the system and log on to it as the administrator. Then do to Start button. Click on All Programs -> Accessories-> System Tools-> System Restore. Here you will find the option, “Restore my computer to an earlier time”. Click on it and select ‘Next’. A list of restore points will appear in front of you. Select the latest restore point and then click on ‘Next’. The confirmation window will appear again. Click on the Next button again. Restart your computer. Congratulations, you have successfully restored your computer.
Another way that’s more suitable for novice users goes as follows. Download a repair utility tool. Now install the program. You are most likely to come across a Scan button. Once that happens, choose the Fix/Repair button. Your scan will be completed. The error will be removed. You can then restart your computer again to ensure the error is no longer displayed.
Some other suggestions to keep your computer from encountering these problems in the future are outlined below.
Update all your drivers. Obsolete or old hardware or software driversmay also trigger this STOP 0x000000D1 error.
If you have recently installed or modified a driver or hardware and the error has occurred afterward, it is highly likely that the installation or modification has caused it. Revert back to the original settings to steer clear of this driver in the future.
Lately, some users reported getting an error that says, “System doesn’t have any USB boot option, Please select other boot option in Boot Manager Menu” when they tried to reinstall the Windows 10 operating system on their PCs or boot from an installation media. If you have the same problem, then this post should help.
This kind of error is applicable to multiple devices by various OEMs and is mostly due to the Secure boot being enabled, or the Legacy or CSM support being disabled. It could also be that the bootable USB device was not correctly made and so on. Whatever the cause may be, here are some suggestions you need to check out to resolve the “System doesn’t have any USB boot option, Please select other boot option in Boot Manager Menu” error and reinstall Windows 10 successfully.
Option 1 – Disable the Secure Boot in the BIOS
Disabling the Secure Boot in the BIOS settings is definitely recommended to resolve the error. To disable Secure Boot, here’s what you have to do:
First, boot your computer into Windows 10.
Next, go to Settings > Windows Update. From there, check if there is anything that you have to download and install if you see any available updates. Usually, OEMs send and update the list of trusted hardware, drivers, and operating systems for your computer.
After that, go to the BIOS of your computer.
Then go to Settings > Update & Security > Advanced Startup options. If you click on Restart Now, it will restart your computer and give you all the advanced options.
Next, select Troubleshoot > Advanced Options. As you can see, this screen offers you further options including System restore, Startup repair, Go back to the previous version, Command Prompt, System Image Recovery, and UEFI Firmware Settings.
Select the UEFI Firmware Settings which will take you to the BIOS.
From there, go to the Security > Boot > Authentication tab where you should see Secure Boot. Note that every OEM has its own way of implementing the options so it varies.
Next, set Secure Boot to Disabled and set Legacy Support to On or Enabled.
Save the changes made and exit. Afterward, your computer will reboot.
Option 2 – Try to reset the BIOS or the UEFI Settings
If updating the BIOS didn’t help in fixing Error 0199, you can try to reset the BIOS instead.
Start your computer and tap the F10 key during the booting process to enter the BIOS. If it does not work, you can try tapping the F1 or F2 key as well as the Del key.
Once you’re already in the BIOS, tap the F9 key to get the prompt to RestoreLoad default configuration now for the BIOS.
Next, click on Yes and then follow the next on-screen instructions that appear to set the BIOS back to its default settings.
Once you’re done restoring the default settings of the BIOS, restart your computer and then check if it now boots properly.
Option 3 – Make a proper bootable USB Drive/Stick
To make a proper bootable USB drive, you need to use the Windows Media Creation tool. The Media Creation tool in Windows allows you to use the ISO installation file to make a bootable device that you can use to install Windows on your PC. Note that this is kind of different from the usual installation process as it could erase your computer’s current settings and data on the primary drive. Thus, before you proceed, you need to backup all your data into some removable drive and then use the Media Creation Tool to make a bootable drive.
After making the bootable drive, you need to plug it into your computer and then reboot.
Next, tap the F10 or Esc key to open the boot options.
Now set the boot priority of the removable drive the highest. Once the setup comes forth, follow the next onscreen instructions and install Windows without any problems.
Option 4 – Try enabling Legacy or CSM boot support
If the Legacy or CSM boot support is disabled, then it’s no wonder why you’re getting an error. Thus, you need to enable it by following these steps:
Open Settings and go to Update & Security > Advanced Startup options.
Next, click on Restart Now to reboot your computer.
After that, select Troubleshoot > Advanced Options where, you will see more options such as System Restore, Startup Repair, Go back to the previous version, Command Prompt, System Image Recovery, and UEFI Firmware Settings.
From there, enable Legacy Support and then save the changes and exit. This will restart the computer.
Once your computer has restarted, check if the error is now fixed.
The previous Windows versions all came with Microsoft's browser Internet Explorer. A lot of users love it because not only that it is easy to use. It is also very fast. Users didn’t have to worry about compatibility because it is almost always compatible with its Windows Version.
When they introduced Windows 10, they changed the name of the browser from Internet Explorer to Microsoft Edge. It is faster and more user-friendly compared to its predecessors. But after the Creator Update, some experienced receiving the inet_e_resource_not_found error code.
In contrary to what everyone expects, you actually don’t have to uninstall and reinstall the Microsoft Edge App. What you can do is reset the browser in your Apps & Features Settings in your Microsoft Settings.
To reset the browser you can follow the steps below:
Click on the Windows icon and go to settings.
Click on Apps and this will bring you to the Apps & Features page. Look for Microsoft Edge from the list of Apps and click on it.
Choose Advance Option
Scroll down then Under Reset, click on repair or reset. When you repair it will fix the existing problem but the data that caused the problem may still be present and can still cause problems. If you click on reset, it will delete all the cache and cookies that are installed in your browser but it will save your Favorites as well as your bookmarks.
Another way to resolve this is by disabling the feature TCP Fast Open on Microsoft Edge. To disable this, go ahead and follow the steps below:
Open the Microsoft Edge browser.
Type in about: flags on the Address (URL) bar.
Under Networking, uncheck the Enable TCP Fast Open.
Close your Microsoft Edge browser and open a new one.
Flushing the DNS also worked for other Users. Sometimes, the error code the inet_e_resource_not_found is caused by a corrupted DNS cache. There are 2 ways to flush your DNS. The first option is to use the command prompt to run the command.
To access the Command prompt or CMD, you can search for it on Cortana or you can click on the Windows icon to access the Programs, scroll down to the Windows System folder and click on it.
A dropdown menu will show up, click on Command Prompt which is the first on the list.
Type in the code ipconfig /flushdns and press enter.
There will be a message that will show that says Windows IP configuration successfully flushed the DNS Resolver Cache
Exit the CMD by typing exit and press enter.
The easiest way to do this is to Press the keys Window + R on your keyboard. Type in ipconfig /flushdns in the search box and hit enter or click on OK.
These are only some of the ways to resolve the inet_e_resource_not_found. There are other ways to further troubleshoot this issue such as reinstalling your Wifi Adapter Driver or adjusting the DNS Server Address. But most of the time, users are able to resolve the issue with the steps provided above.
The element of system restore is vital in the Windows operating system, and on occasions, it might be a genuine lifesaver. If for some reason you discover that the System Restore is not correctly functioning in Win7 or Windows 8 operating system:
The points of system restore are not be being produced by hand or mechanically,
You are unable to create by hand the restore points
The system restore fails, and you're incapable of restoring your personal computer,
The subsequent are a few tricks that could allow you to solve this issue.
Solution
Error Causes
There are lots of variables that will trigger this malfunction in your Personal Computer. The remedy to the issue will depend on its cause. You ought to attempt the next actions in no sequence.
Further Information and Manual Repair
Physically, strive to make Program Restore points. Subsequently, pay attention to the Error Messages(s) you receive. If none, check to see whether a restore point has been created.
Eliminate the protection applications or anti-virus and then try creating a restore point.
Startup the Computer in Safe-Mode. Oftentimes, non-Ms drivers or providers may restrict the smooth working for System Restore. The other viable choice, try a clean boot and see whether system restore is back to normal.
Run file checker. Quite simply, operate the sfc /scannow from the superuser command line. When the program record test is complete, restart your computer and assess whether system restore is operational.
Run disk check as the administrator. Type chkdsk /f /r and subsequently push Enter. Allow this procedure to finish before attempting a system restore.
Ensure the System Restore function is allowed in the drivers where you need this function allowed. For System Restore point to be saved, you must have free space of around 300 MB on each one of the devices which have the Program Safety perform turned-on.
Ensure that there's adequate space on the drivers where System Restore performs is allowed.
In the search box inside the Start Button, type "Services.msc" (with no quotes) and then push Enter. Ensure that at this time around Process Scheduler Service and the " Volume Shadow Copy " are correctly working, and are set on Automated mode. Make certain you start the System Restore service if it's not set place to automatic mode. Remember that you'll have to restart the computer in this process. Do this and subsequently try again, in case the system needs a reboot.
In the search box, type eventvwr.msc /s subsequently push enter to open the Event Viewer. Double-click on the applications and Services Logs, then assess if you can determine the cause of the error.
Could your network administrator have turned off the System Restore? Contact them. Ask them to re-activate system restore for your computer if they have switched it off.
In today's IT world, if you want a computer for typical day-to-day actions and gaming, there are 3 primary ways you can go. An Apple computer with its proprietary hardware and operating system or a typical machine with Windows or Linux operating system.
Each system has both advantages and disadvantages and picking the right one might be difficult for some users. From hardware differences to specific software and operating system, each system is aimed at a different type of work, and in this article, we will explore each one and help you in choosing the right one for you.
Apple ecosystem
Apple has managed to create a unique ecosystem of its own devices, from its iMac desktop computers to more professional MAC studio and power MAC and all the way to tablet iPad and iPhone are powered by Apple's own operating system that connects all of these devices into one large system. So if you really need one singular ecosystem this is a huge advantage.
The ecosystem on the side, MAC computer systems are great, some would argue best for coding, design, video work, and sound editing. MAC M2 chip is optimized for all of these tasks and a specially tailored operating system is just the icing on the cake. Specific Apple-made software like a logic pro or final cut also helps a lot to position MAC systems on top of the line.
Reading all of this you might think hey this is the computer for me, it does everything! Sadly the truth is not like that. The first thing that is difficult on MAC systems and a maybe big reason that it is not so adopted outside professional working environment is lack of games. If you are a gamer or plan on using MAC for gaming, well I have some bad news. The second big turn-off is that MAC systems tend to be more expensive than PC systems, yes components are of higher quality but rest assured that you will pay for also for branding.
Get MAC as your workstation for serious work and for good tech support, if you need a plain home computer keep reading.
Windows PC machine
There is no better feeling than assembling your own computer, tweaking hardware to make a monster and despite haters hating, Windows is the best all-around operating system on the market. It is supporting the largest variety of hardware and the largest variety of software.
The best platform for serious gaming and streaming Windows machine has cemented itself as a multimedia powerhouse. But, this kind of computer is not alien to being also a professional machine, you can practically do everything that you can do on Apple or Linux machine inside Windows, yes some things might require extra steps or will be slightly slower but in the end, being able to do anything is the greatest strength of Windows machine.
Of course, every system has its flaws and Windows is not immune to that. One of the biggest is being the operating system for every hardware ever made and every software as well while keeping legacy support for old software and hardware, basically, its biggest strength is in the same time its biggest weakness leading to sometimes stability issues. Also being able to place any kind of hardware can also lead to the same stability issues. Executing something a little slower than other systems and having some extra steps can also be looked upon as weaknesses.
Linux system
First and perhaps for some people, the biggest advantage of the Linux operating system is its price, it is completely free! Other advantages include the great server and networking included in the OS itself, the large amount of customization, and unmatched stability. The ability to write scripts inside the OS terminal is also a great thing and coding is much more streamlined and friendlier than on other machines.
The power of Linux is the ability to change anything, even on the system layer, no other operating system will let you change the basic functionality of the OS itself while Linux will let you do this. It is also the only operating system you can fully use by booting it up from a USB stick and having the same experience as it was installed on a local hard drive. Among other OS mentioned earlier, Linux is by far the lightest one, taking the smallest amount of memory among the three.
The bad side of the Linux machine is the steep learning curve, among the three mentioned operating systems rest assured Linux is the most difficult to learn and be comfortable in it. The operating system will require you to know the hardware and how computers work in order to fully use its potential. Other things that place it behind are not so wide hardware support compared to Windows and the somewhat confusing distro model.
Linux versions come in form of different distro packages and first-time users will face many of them being left in awe of which one to choose. Also installing drivers and software via a package system can also be a tedious task as well, often being that some version of the driver will not work on the newer version of the Linux distro.
Get a Linux machine if you are well versed in computer technology, if you want great customization of the OS itself or if you do not want to spend money on OS and software since almost entire Linux software is open source.
First time when your computer is turned ON and when Windows is booting it will wait 10 seconds before starting your startup applications. This 10 second is used to load all of Windows services so everything is running smoothly. If by any chance you do not want to wait for this startup delay and wish to start applications right away then keep on reading and follow this guide precisely.
This guide will require you to play ad tweak with the registry of Windows, it is always recommended to make a registry backup before attempting any tweaks. Also, it is imperative to follow the guide as it is presented step by step.
be aware that this guide will eliminate a 10-second delay for all of your starting applications, there is no way currently to remove delay for only one or a few.
If the key does not exist, make a new one, Go to HKEY_CURRENT_USER\SOFTWARE\Microsoft\Windows\CurrentVersion\Explorer\, right-click on the explorer and choose new > key. Name it Serialize
Right-click on Serialize and choose New > DWORD (32-bit) Value
Name the value StartupDelayInMSec
Double click on StartupDelayInMSec and locate Value data
Set the value to 0
Save changes and Exit Registry editor
Reboot
If you want to reverse changes and enable delay again, go back to the Registry Editor and delete the StartupDelayInMSec value.
Some Windows 7 and Windows 8.1 users reported experiencing a Compare Exchange128 error when trying to upgrade to Windows 10. The error reads, “You can’t install Windows 10 because your processor doesn’t support CompareExchange128”. In order to upgrade to Windows 10 (64-bit), the CMPXCHG16B instruction must be present. If you receive this error, this mostly means that your CPU doesn’t have the CMPXCHG16B instruction.
Solution
Error Causes
The CompareExchange128 error normally occurs due to two possible reasons:
CPU lacks CMPXCHG16b Instruction
Old & Outdated BIOS – Even if your CPU has the CMPXCHG16b instruction, the CompareExchange128 issue can still occur if you have an older BIOS.
Further Information and Manual Repair
One main requirement to upgrade to Windows 10 is for your CPU to have the CMPXCHG16b instruction. You also need the right BIOS version to guarantee a smooth installation. See below on how to manually fix this issue.
NOTE: If you don’t feel confident using the manual methods listed below, it’s highly advisable to get help from an expert technician. If you don’t know someone, you can also use an automated tool to fix this.
Before performing any fixes, try to determine first if the cause of the error is due to your CPU lacking the CMPXCHG16b instruction. You can use a CPU Info tool that provides complete details about your processor, memory, and motherboard. If you’re looking for more in-depth information, you might also try command-line utilities. But, the safest and easiest way to check this is by simply searching online. Try using the search query: <CPU Model> CMPXCHG16b
Method 1 – Update your BIOS
This method will download the latest BIOS from your motherboard’s manufacturer. This makes sure your CPU has the CMPXCHG16b instruction needed to complete the Windows 10 64-bit installation. To update your computer’s BIOS, complete the following steps:
Determine first the current BIOS you have on your computer. Open System Information Windows app and type msinfo32 in the search bar. The BIOS version will appear under the processor speed. Record it somewhere.
Go to the support page of your motherboard’s manufacturer. Find if there’s any update on the BIOS that you’re currently using. If you find one, download the BIOS update file available. Make sure that you’re looking into the right model and you download all the necessary documentation. Otherwise, the BIOS update might not work.
Update your BIOS. Most BIOS update steps are straightforward. Just make sure to follow the steps provided.
Method 2 – Install Windows 10 32-bit version
If updating the BIOS doesn’t work, what you can do is install a 32-bit version of Windows 10 instead of the 64-bit version. Here’s how to do this:
Download and install the 32-bit version of Windows you currently have. If you have a Windows 7 64-bit version, get the 32-bit version of Windows 7. The same goes for Windows 8.1. When you do this, you might want to back up your files first. Remember that installing the 32-bit version works like other installations, and could delete some of your files.
After installing the 32-bit version, go to Updates and install all the necessary updates. This includes upgrading to Windows 10 if you’re asked to.
When you installed the Windows 10 upgrade, you’ll now have the Windows 10, 32-bit version installed. This will be the version activated on Microsoft servers. Despite this, the activated version stored is only applicable to your computer’s hardware, not the version of Windows 10.
Download Windows 10, 64-bit version.
Prepare an empty DVD or USB flash drive. Use Creation Media software then click the Create Installation Media for Another PC option.
Install the 64-bit Windows 10 version you downloaded from Step 4. Make sure not to put anything when you’re asked to input the serial number.
Once the installation is complete, you’ll have the 64-bit version of Windows 10.
Method 3 – Buy a new processor/motherboard
If the above two methods don’t work, there’s a great chance that this error occurs because of an outdated processor/motherboard. Your next possible solution is to buy an updated model that’s fully compatible with 64-bit Windows 10.
Method 4 – Download an automated tool
If all else fails, you might want to consider using this powerful automated tool to quickly fix the problem and any other computer-related issues.
Operating systems now give users a feature that allows them to create separate partitions out of HDD or SSD-based storage in order to store data in an organized manner. This small yet powerful feature has always been supported by Microsoft. However, there are times when users might fill up on some particular very soon. This may result in the lack of space for that partition which makes the entire process of using PCs slower since there is a large chunk of files that has to be indexed in a smaller partition. If you are one of the users experiencing this dilemma, you need to either delete the other partitions to allocate their storage to the partition that is short on storage or simply recreate the partition so that all the useless data will be deleted and you can start afresh with the overflowing partition.
In this post, you will be guided on how you can delete any storage partition from your Windows 10 PC via Disk Management, Command Prompt as well as Windows PowerShell.
Option 1 – Delete storage partition via Disk Management
This is one of the simplest ways you can use to delete a storage partition. Go to the WinX Menu and from there, open Disk Management and then select the Drive you want to get rid of, right-click on it and then select Delete Volume.
Option 2 – Delete storage partition via Command Prompt
Tap the Win + X keys or right-click on the Start button and select Command Prompt (Admin) or you could also type in “cmd” in the Cortana search box and right-click on the Command Prompt icon and then select the “Run as Administrator” option from the context menu.
Once you have Command Prompt pulled up as admin, type in and enter this command – diskpart
After entering this command, the Diskpart Utility will start. Diskpart Utility is a command line-based utility just like Command Prompt but it will get a UAC Prompt after you invoke it so you have to click Yes for the UAC Prompt.
After that, type in list volume and tap Enter to see the list of all the partitions created on your PC. This includes both types of partitions that are visible to a normal user in the File Explorer as well as the ones that are created by Windows 10 by default which helps it in storing the boot files and other essential system files.
You should see a list of all the partitions made on your computer. Select the partition you want to delete by its Unique Identification number as Volume X where X denotes the Unique Identification Number.
Next, type in the select volume number command and hit Enter to select the desired volume.
Then delete the volume you’ve selected and type in the delete volume command and hit Enter to delete the volume you just selected and convert it into unallocated space.
Option 3 – Delete storage partition via Windows PowerShell
Start by tapping the Win + X keys or simply right click on the Start button and select Windows PowerShell (Admin) or you could also type in “windows powershell” in the Cortana search box and right-click on the Windows PowerShell icon and select the “Run as administrator” option.
Once you’ve opened the Windows PowerShell, type in the Get-Volume command and hit Enter to get a list of all the partitions on your PC.
Next, select the drive letter you want to delete and then type in the Remove-Partition –DriveLetter command and hit Enter to delete the selected partition. Note that you need to replace the drive letter with the letter of the partition you want to get rid of.
After that, it will ask you for confirmation. Just hit the Y key for Yes or hit the A key to say Yes to All. This will delete all the partition you’ve selected and will move them in as unallocated space.
And that’s how you delete a Drive Partition or Volume in Windows 10. Note that you should only follow the last two options given in case the Disk Management is not able to fulfill the user requirements.
Having an eMail in today's modern world is no longer a privilege or being geeky, it has surely become a necessity. From Facebook to LinkedIn or Steam many services today require you to have an account in order to use them, and in order to create an account, you need working eMail.
That being said many people today have several eMail accounts, one for social media, one for work, maybe even one for very close friends and family. How creating eMail today is completely free we might end up with several eMail accounts.
eMail clients have also evolved much since their first days and became more than just applications for receiving eMails, today they can take various different tasks having additional features built into them like calendar, batch eMail processing, etc.
Taking all of said into account I am presenting to you within my personal opinion some of the best eMail clients starting with free ones.
Best free eMail clients
Google Gmail
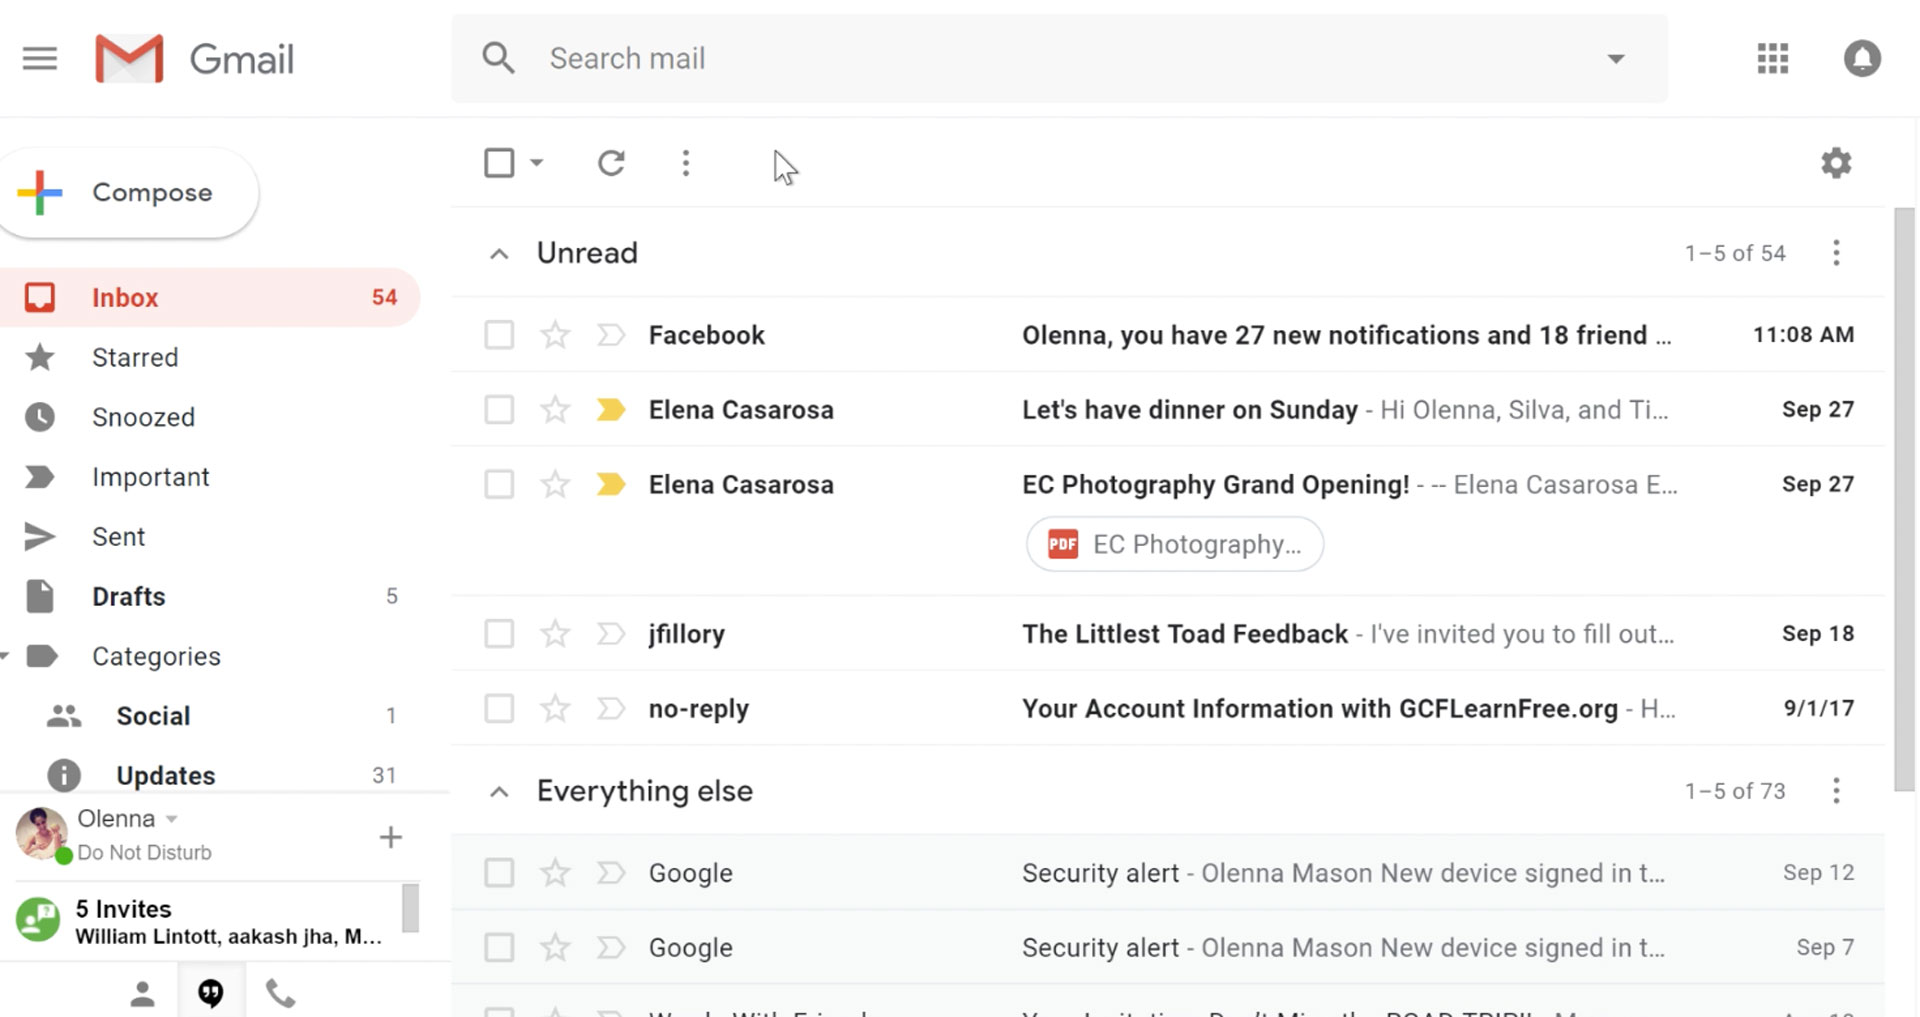
https://gmail.comIt would be very difficult to even start a free eMail list without mentioning Google's Gmail. Introduced all the way back in 2004 as an invite-only service it became over time the most popular email platform largely due to the fact Google is offering free eMail accounts.
There are a lot of good things to be said about Gmail itself, most of the area is clutter-free and the largest space is reserved for eMail itself letting users focus on what is important. WEB client itself means that you do not need to have any application installed on your device, altho via Google chrome, you can use Gmail offline offering you flexibility if needed.
The ability to connect and manage other accounts like Outlook, Yahoo, etc is just making Gmail even more attractive, and the snooze feature is a really neat little detail that will pause eMail notifications if you need to focus on other things.
Lack of organizing messages into folders is a little confusing since Gmail offers its own unique label system but sometimes I need to have old reliable save eMail to folder.
All in all, Gmail is a great service and it offers a great eMail on the go experience.
Mail eMail client
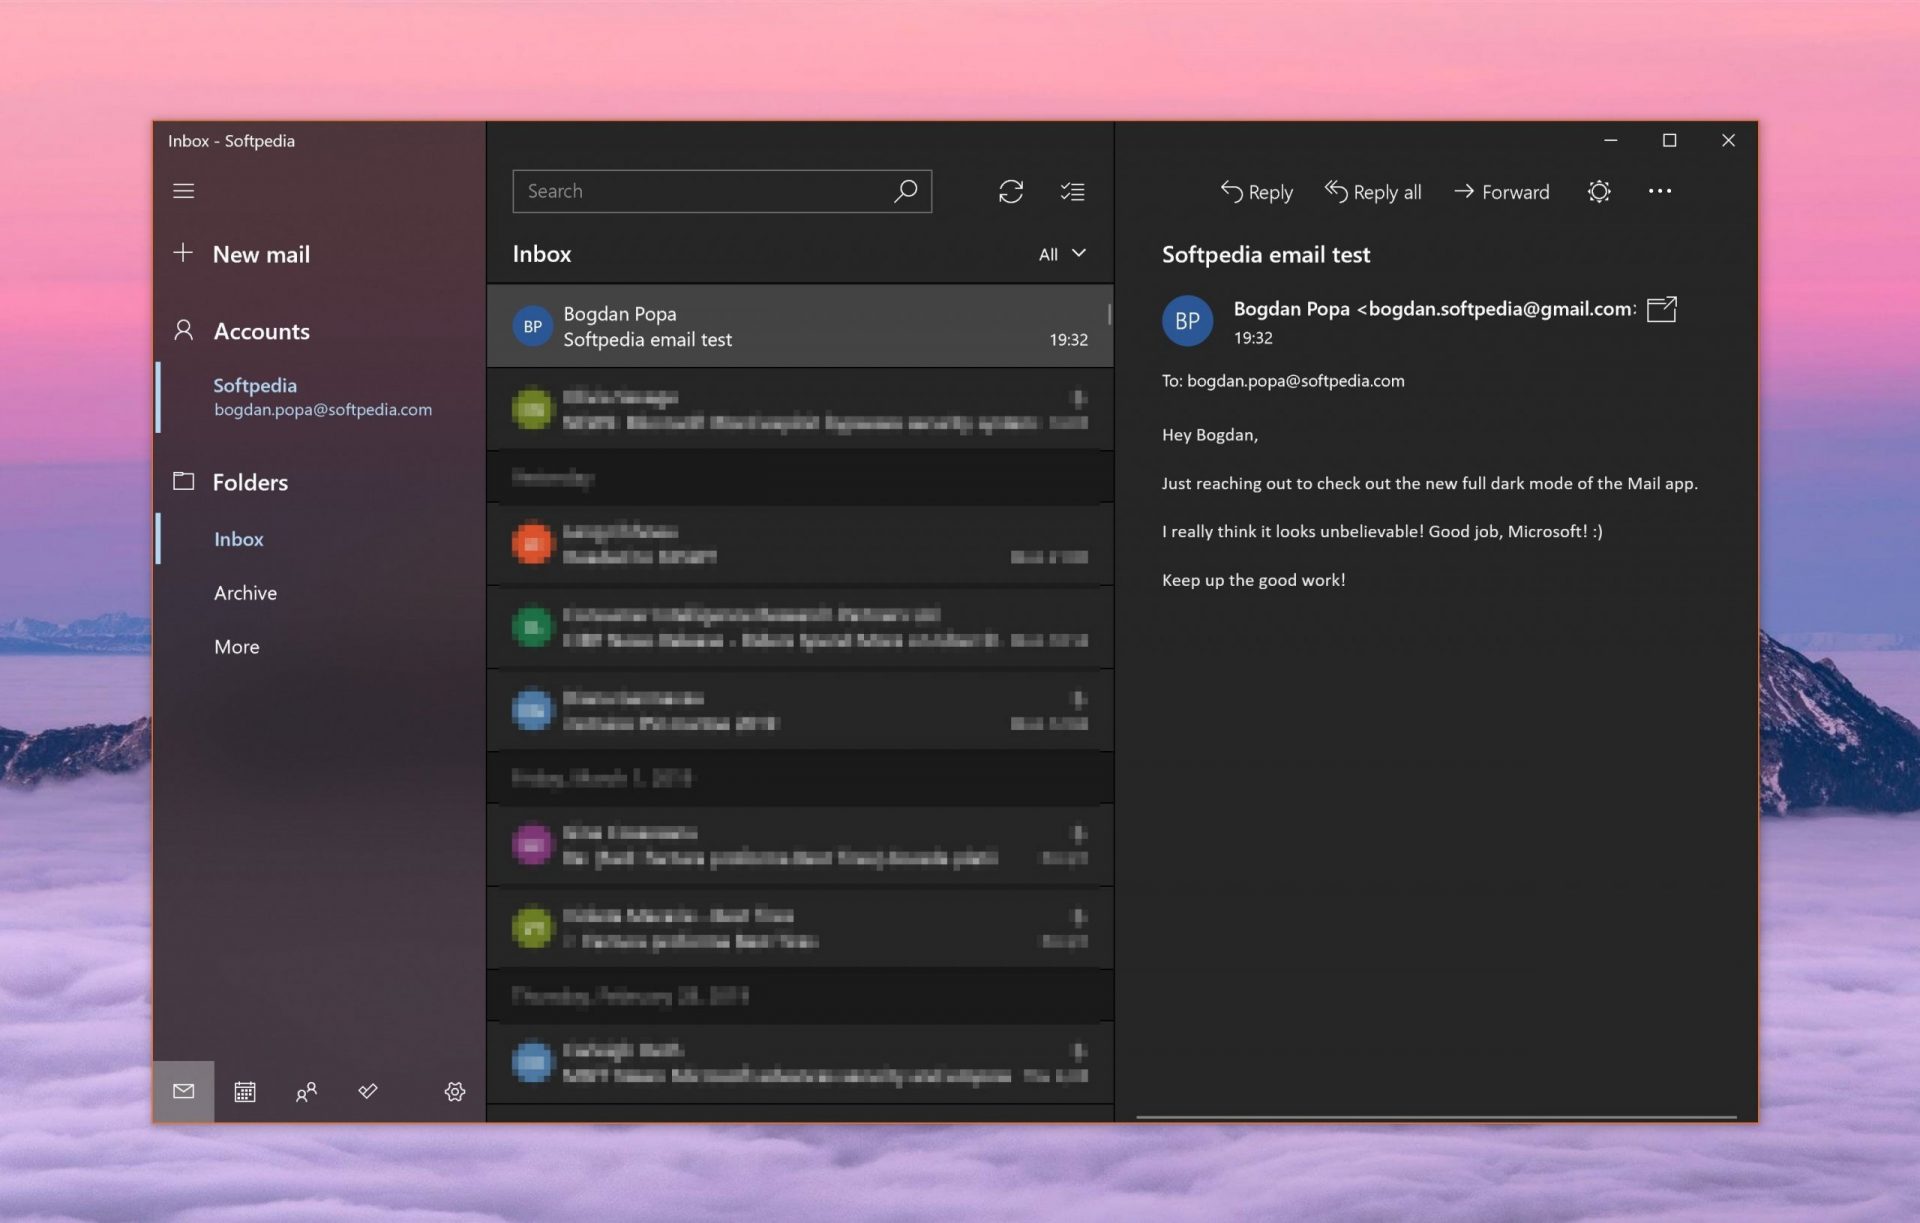
https://www.microsoft.com/en-us/p/mail-and-calendar/Free Windows eMail client simply called Mail is what was once outlook express. Mail itself has the ability to work with other popular accounts like Google Gmail account, Yahoo, iCloud etc. How it comes with Windows OS and it integrates very well with Microsoft Calendar, this eMail client is for many the first choice.
On the negative side, I might say this is a strip-down version of Outlook which is paid solution so some features are missing if we would compare the two.
Overall, a simple and nice eMail client worth your time, especially if you are on the Windows platform.
Mozilla Thunderbird
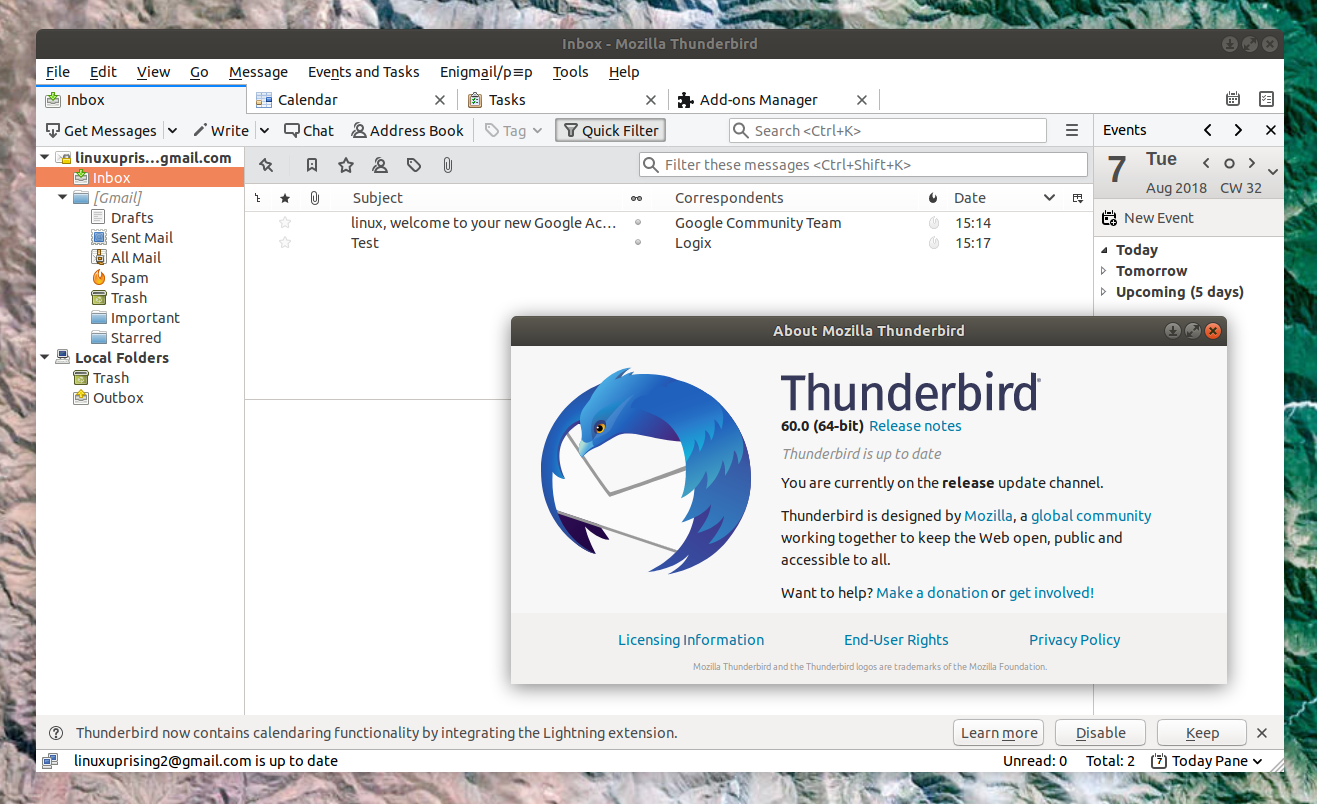
https://www.thunderbird.netGreat eMail client matching in functions against paid and premium solutions of big tech companies. Fueled with plenty of customization options and reskinning ones this eMail client offers a lot for its free price tag.
It is also fueled by Mozilla community focusing on privacy and security. It can work with any mail service and it is lightweight with a clean look, altho the look itself can be heavily customized.
The bad side is that client itself relies on email services to provide cloud-based emails, so if you are receiving your email via a service that does not have a cloud-based service in itself all of your received emails will be locked to the computer where you have received them. Also customizing it can be sometimes a little too technical for the average computer user.
All in all, Thunderbird is one great eMail client and it would be a shame not to use it because of its technical side, if you need a reliable and secure eMail client on a single machine, look no further than Thunderbird.
Paid eMail clients
Microsoft Outlook
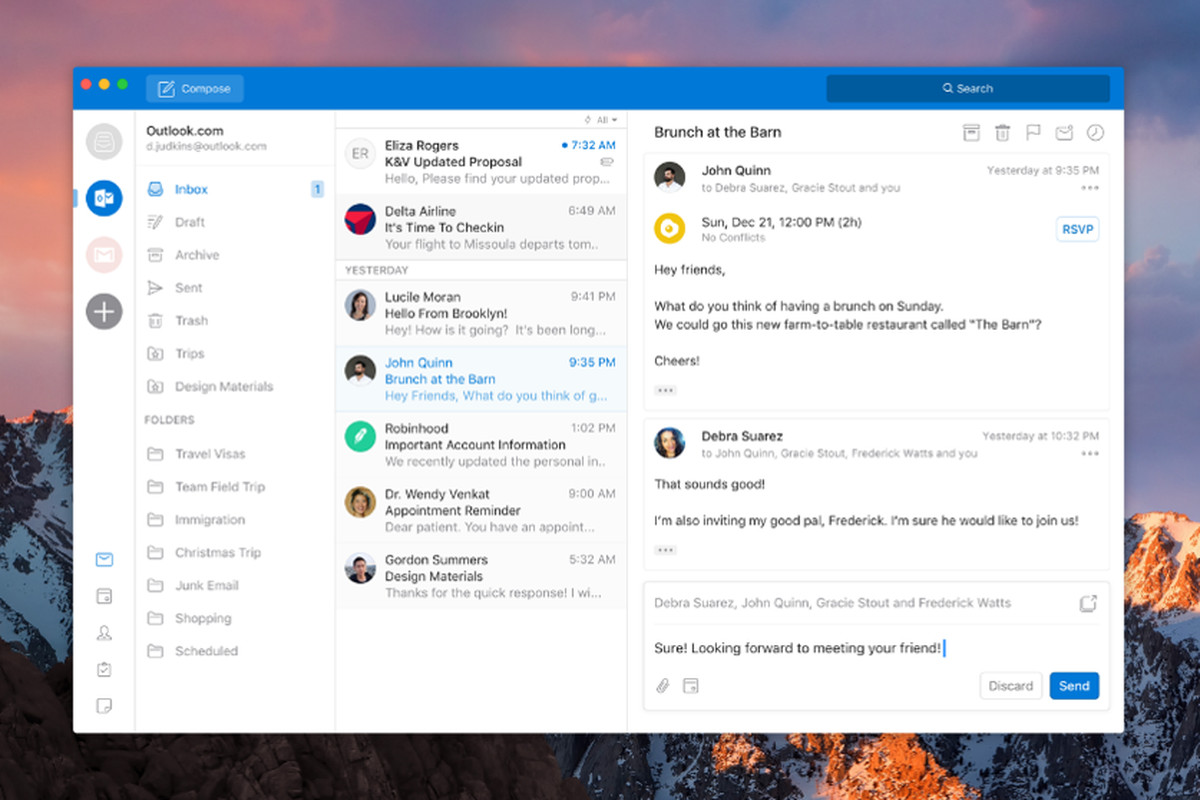
https://www.microsoft.com/en-us/microsoft-365/Outlook comes as a part of the Microsoft Office suite and as one of the oldest eMail clients, it is still widely popular and adopted through many users and businesses. It has tight integration with all Microsoft services and full integration with Calendar making it one of the if not the best eMail client out there.
Outlook also has a free online service completely free for personal use as well.
The downside is that you can not get it as a separate product if you want a business version other than as a part of the Office suite.
The final verdict would be that this is perhaps the best eMail client out but the big downside is that there is no desktop version outside the Office suite.
eM Client
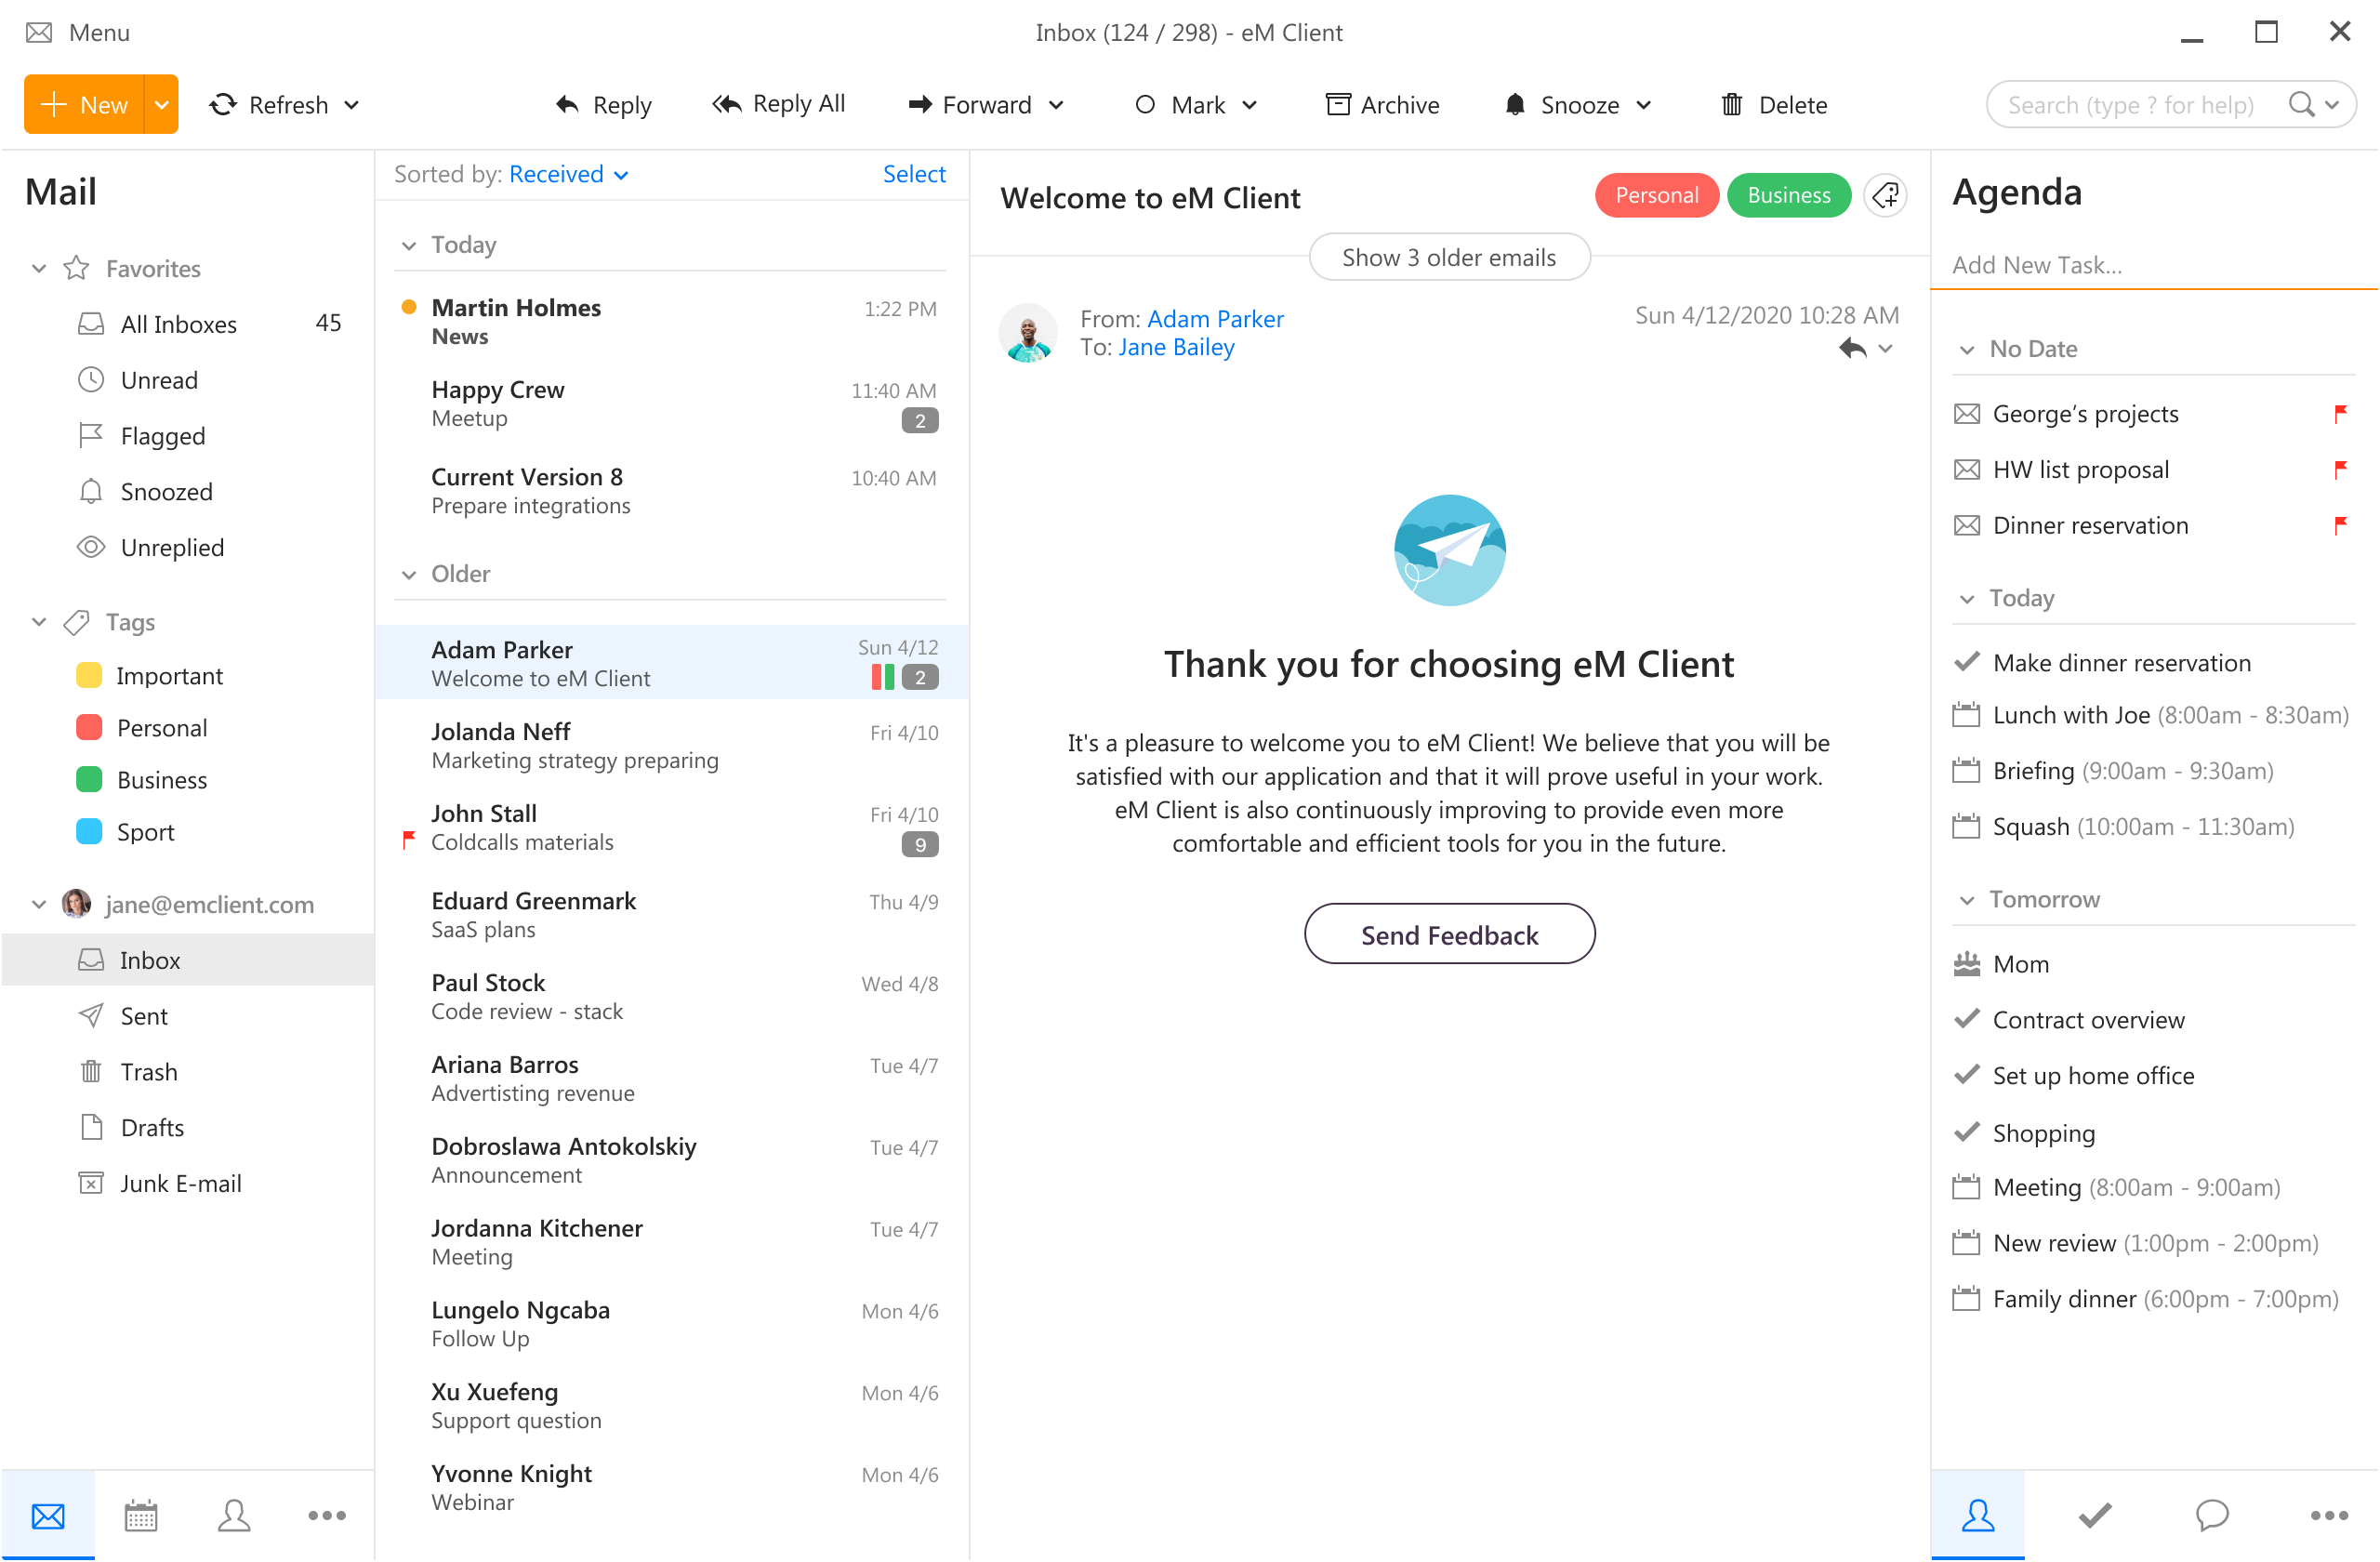
https://www.emclient.com/eM Client offers a wide array of features, including a calendar, contacts, and chat. Support is provided for all the major email services including Gmail, Yahoo, iCloud, and Outlook.com. The latest version also offers PGP encryption, live backup, basic image editing capabilities, and auto-replies for Gmail.
Its automatic system makes it very easy to get emails from other services since there is no manual setting, all that is needed is to type in your email and eM Client will do everything else automatically.
A one-time purchase is not pricy and it could offer some features that some free clients are missing. Go check it out with a free trial and see if it is for you.
Mailbird
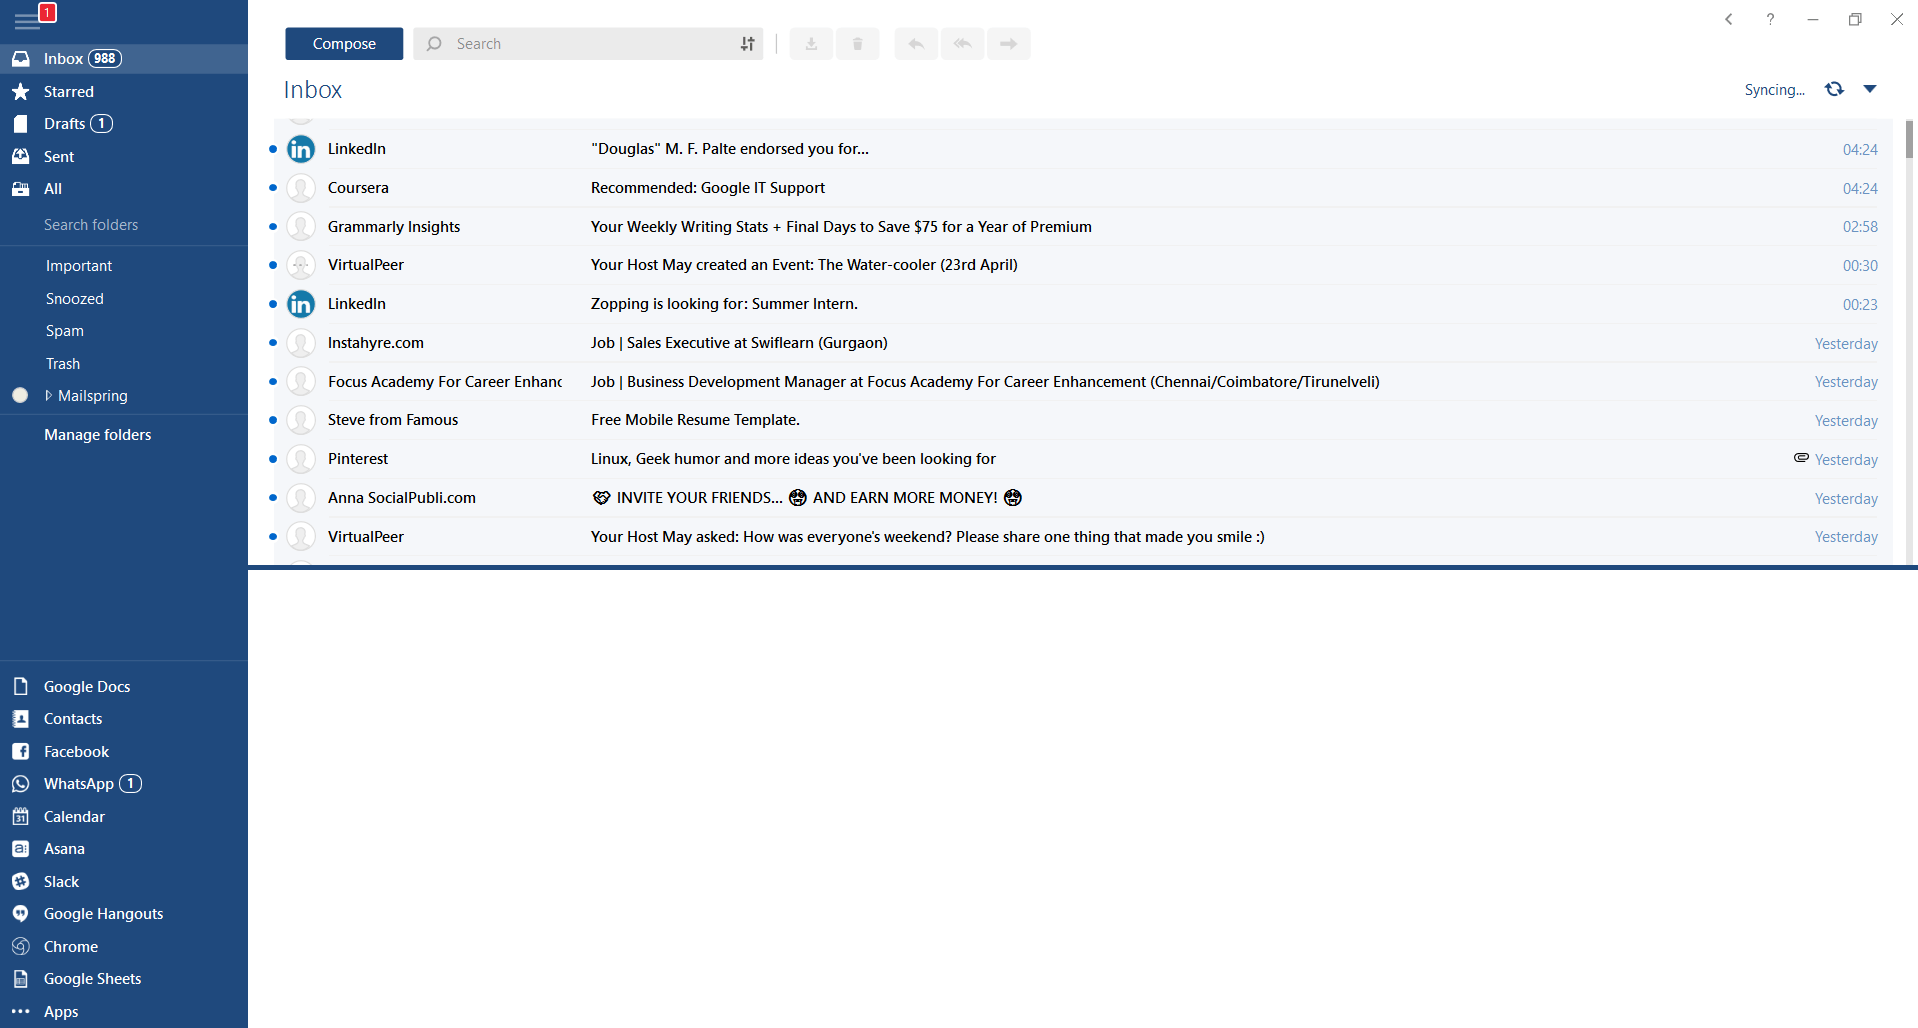
https://www.getmailbird.comThis eMail client's main focus is the simplicity of use with visual appeal while tackling multiple eMail accounts. It has many built-in apps along with a customizable interface. Unlike some more Microsoft-centric email clients, Mailbird Business supports a diverse range of integrated apps, including WhatsApp, Google Docs, Google Calendar, Facebook, Twitter, Dropbox, and Slack, all making for a better-streamlined workflow.
The downside of this client is the yearly subscription plan. I think people, in general, want to get away from software subscription plans so I will include this as a downside but bear in mind it is downside just in terms of a business plan not in the client itself.
Inky
https://www.inky.com/Inky is eMail client if you are looking for security. It uses AI along with machine learning in order to block all types of phishing attacks that can get through to other clients. The proprietary machine learning technology can literally read an email to determine if it has phishing content, and then is able to quarantine the email or deliver it with the malicious links disabled. It also takes things a step further and offers an analytics dashboard, which allows an administrator to see patterns of attacks based on dates, or targeted users.
The downside is that client itself is so much focused on security that sometimes some nonsecurity features get overlooked and provide a poor experience but if you need a good and greatly secured eMail client Inky is one to check out.

 Error Causes


 It would be very difficult to even start a free eMail list without mentioning Google's Gmail. Introduced all the way back in 2004 as an invite-only service it became over time the most popular email platform largely due to the fact Google is offering free eMail accounts.
There are a lot of good things to be said about Gmail itself, most of the area is clutter-free and the largest space is reserved for eMail itself letting users focus on what is important. WEB client itself means that you do not need to have any application installed on your device, altho via Google chrome, you can use Gmail offline offering you flexibility if needed.
The ability to connect and manage other accounts like Outlook, Yahoo, etc is just making Gmail even more attractive, and the snooze feature is a really neat little detail that will pause eMail notifications if you need to focus on other things.
Lack of organizing messages into folders is a little confusing since Gmail offers its own unique label system but sometimes I need to have old reliable save eMail to folder.
All in all, Gmail is a great service and it offers a great eMail on the go experience.
It would be very difficult to even start a free eMail list without mentioning Google's Gmail. Introduced all the way back in 2004 as an invite-only service it became over time the most popular email platform largely due to the fact Google is offering free eMail accounts.
There are a lot of good things to be said about Gmail itself, most of the area is clutter-free and the largest space is reserved for eMail itself letting users focus on what is important. WEB client itself means that you do not need to have any application installed on your device, altho via Google chrome, you can use Gmail offline offering you flexibility if needed.
The ability to connect and manage other accounts like Outlook, Yahoo, etc is just making Gmail even more attractive, and the snooze feature is a really neat little detail that will pause eMail notifications if you need to focus on other things.
Lack of organizing messages into folders is a little confusing since Gmail offers its own unique label system but sometimes I need to have old reliable save eMail to folder.
All in all, Gmail is a great service and it offers a great eMail on the go experience.
 Free Windows eMail client simply called Mail is what was once outlook express. Mail itself has the ability to work with other popular accounts like Google Gmail account, Yahoo, iCloud etc. How it comes with Windows OS and it integrates very well with Microsoft Calendar, this eMail client is for many the first choice.
On the negative side, I might say this is a strip-down version of Outlook which is paid solution so some features are missing if we would compare the two.
Overall, a simple and nice eMail client worth your time, especially if you are on the Windows platform.
Free Windows eMail client simply called Mail is what was once outlook express. Mail itself has the ability to work with other popular accounts like Google Gmail account, Yahoo, iCloud etc. How it comes with Windows OS and it integrates very well with Microsoft Calendar, this eMail client is for many the first choice.
On the negative side, I might say this is a strip-down version of Outlook which is paid solution so some features are missing if we would compare the two.
Overall, a simple and nice eMail client worth your time, especially if you are on the Windows platform.
 Great eMail client matching in functions against paid and premium solutions of big tech companies. Fueled with plenty of customization options and reskinning ones this eMail client offers a lot for its free price tag.
It is also fueled by Mozilla community focusing on privacy and security. It can work with any mail service and it is lightweight with a clean look, altho the look itself can be heavily customized.
The bad side is that client itself relies on email services to provide cloud-based emails, so if you are receiving your email via a service that does not have a cloud-based service in itself all of your received emails will be locked to the computer where you have received them. Also customizing it can be sometimes a little too technical for the average computer user.
All in all, Thunderbird is one great eMail client and it would be a shame not to use it because of its technical side, if you need a reliable and secure eMail client on a single machine, look no further than Thunderbird.
Great eMail client matching in functions against paid and premium solutions of big tech companies. Fueled with plenty of customization options and reskinning ones this eMail client offers a lot for its free price tag.
It is also fueled by Mozilla community focusing on privacy and security. It can work with any mail service and it is lightweight with a clean look, altho the look itself can be heavily customized.
The bad side is that client itself relies on email services to provide cloud-based emails, so if you are receiving your email via a service that does not have a cloud-based service in itself all of your received emails will be locked to the computer where you have received them. Also customizing it can be sometimes a little too technical for the average computer user.
All in all, Thunderbird is one great eMail client and it would be a shame not to use it because of its technical side, if you need a reliable and secure eMail client on a single machine, look no further than Thunderbird.
 Outlook comes as a part of the Microsoft Office suite and as one of the oldest eMail clients, it is still widely popular and adopted through many users and businesses. It has tight integration with all Microsoft services and full integration with Calendar making it one of the if not the best eMail client out there.
Outlook also has a free online service completely free for personal use as well.
The downside is that you can not get it as a separate product if you want a business version other than as a part of the Office suite.
The final verdict would be that this is perhaps the best eMail client out but the big downside is that there is no desktop version outside the Office suite.
Outlook comes as a part of the Microsoft Office suite and as one of the oldest eMail clients, it is still widely popular and adopted through many users and businesses. It has tight integration with all Microsoft services and full integration with Calendar making it one of the if not the best eMail client out there.
Outlook also has a free online service completely free for personal use as well.
The downside is that you can not get it as a separate product if you want a business version other than as a part of the Office suite.
The final verdict would be that this is perhaps the best eMail client out but the big downside is that there is no desktop version outside the Office suite.
 eM Client offers a wide array of features, including a calendar, contacts, and chat. Support is provided for all the major email services including Gmail, Yahoo, iCloud, and Outlook.com. The latest version also offers PGP encryption, live backup, basic image editing capabilities, and auto-replies for Gmail.
Its automatic system makes it very easy to get emails from other services since there is no manual setting, all that is needed is to type in your email and eM Client will do everything else automatically.
A one-time purchase is not pricy and it could offer some features that some free clients are missing. Go check it out with a free trial and see if it is for you.
eM Client offers a wide array of features, including a calendar, contacts, and chat. Support is provided for all the major email services including Gmail, Yahoo, iCloud, and Outlook.com. The latest version also offers PGP encryption, live backup, basic image editing capabilities, and auto-replies for Gmail.
Its automatic system makes it very easy to get emails from other services since there is no manual setting, all that is needed is to type in your email and eM Client will do everything else automatically.
A one-time purchase is not pricy and it could offer some features that some free clients are missing. Go check it out with a free trial and see if it is for you.
 This eMail client's main focus is the simplicity of use with visual appeal while tackling multiple eMail accounts. It has many built-in apps along with a customizable interface. Unlike some more Microsoft-centric email clients, Mailbird Business supports a diverse range of integrated apps, including WhatsApp, Google Docs, Google Calendar, Facebook, Twitter, Dropbox, and Slack, all making for a better-streamlined workflow.
The downside of this client is the yearly subscription plan. I think people, in general, want to get away from software subscription plans so I will include this as a downside but bear in mind it is downside just in terms of a business plan not in the client itself.
This eMail client's main focus is the simplicity of use with visual appeal while tackling multiple eMail accounts. It has many built-in apps along with a customizable interface. Unlike some more Microsoft-centric email clients, Mailbird Business supports a diverse range of integrated apps, including WhatsApp, Google Docs, Google Calendar, Facebook, Twitter, Dropbox, and Slack, all making for a better-streamlined workflow.
The downside of this client is the yearly subscription plan. I think people, in general, want to get away from software subscription plans so I will include this as a downside but bear in mind it is downside just in terms of a business plan not in the client itself.
 Inky is eMail client if you are looking for security. It uses AI along with machine learning in order to block all types of phishing attacks that can get through to other clients. The proprietary machine learning technology can literally read an email to determine if it has phishing content, and then is able to quarantine the email or deliver it with the malicious links disabled. It also takes things a step further and offers an analytics dashboard, which allows an administrator to see patterns of attacks based on dates, or targeted users.
The downside is that client itself is so much focused on security that sometimes some nonsecurity features get overlooked and provide a poor experience but if you need a good and greatly secured eMail client Inky is one to check out.
Inky is eMail client if you are looking for security. It uses AI along with machine learning in order to block all types of phishing attacks that can get through to other clients. The proprietary machine learning technology can literally read an email to determine if it has phishing content, and then is able to quarantine the email or deliver it with the malicious links disabled. It also takes things a step further and offers an analytics dashboard, which allows an administrator to see patterns of attacks based on dates, or targeted users.
The downside is that client itself is so much focused on security that sometimes some nonsecurity features get overlooked and provide a poor experience but if you need a good and greatly secured eMail client Inky is one to check out.