
Activating photo viewer
How technically photo viewer is still in the system but not used we will have to make it available again and this we will do by adding some lines in the Windows registry, that being said, open a notepad and paste the following code as it is in it.Windows Registry Editor Version 5.00 [HKEY_CLASSES_ROOT\jpegfile\shell\open\DropTarget] "Clsid"="{FFE2A43C-56B9-4bf5-9A79-CC6D4285608A}" [HKEY_CLASSES_ROOT\pngfile\shell\open\DropTarget] "Clsid"="{FFE2A43C-56B9-4bf5-9A79-CC6D4285608A}" [HKEY_CLASSES_ROOT\Applications\photoviewer.dll\shell\open] "MuiVerb"="@photoviewer.dll,-3043" [HKEY_CLASSES_ROOT\Applications\photoviewer.dll\shell\open\command] @=hex(2):25,00,53,00,79,00,73,00,74,00,65,00,6d,00,52,00,6f,00,6f,00,74,00,25,\ 00,5c,00,53,00,79,00,73,00,74,00,65,00,6d,00,33,00,32,00,5c,00,72,00,75,00,\ 6e,00,64,00,6c,00,6c,00,33,00,32,00,2e,00,65,00,78,00,65,00,20,00,22,00,25,\ 00,50,00,72,00,6f,00,67,00,72,00,61,00,6d,00,46,00,69,00,6c,00,65,00,73,00,\ 25,00,5c,00,57,00,69,00,6e,00,64,00,6f,00,77,00,73,00,20,00,50,00,68,00,6f,\ 00,74,00,6f,00,20,00,56,00,69,00,65,00,77,00,65,00,72,00,5c,00,50,00,68,00,\ 6f,00,74,00,6f,00,56,00,69,00,65,00,77,00,65,00,72,00,2e,00,64,00,6c,00,6c,\ 00,22,00,2c,00,20,00,49,00,6d,00,61,00,67,00,65,00,56,00,69,00,65,00,77,00,\ 5f,00,46,00,75,00,6c,00,6c,00,73,00,63,00,72,00,65,00,65,00,6e,00,20,00,25,\ 00,31,00,00,00 [HKEY_CLASSES_ROOT\Applications\photoviewer.dll\shell\open\DropTarget] "Clsid"="{FFE2A43C-56B9-4bf5-9A79-CC6D4285608A}" [HKEY_CLASSES_ROOT\PhotoViewer.FileAssoc.Bitmap] "ImageOptionFlags"=dword:00000001 "FriendlyTypeName"=hex(2):40,00,25,00,50,00,72,00,6f,00,67,00,72,00,61,00,6d,\ 00,46,00,69,00,6c,00,65,00,73,00,25,00,5c,00,57,00,69,00,6e,00,64,00,6f,00,\ 77,00,73,00,20,00,50,00,68,00,6f,00,74,00,6f,00,20,00,56,00,69,00,65,00,77,\ 00,65,00,72,00,5c,00,50,00,68,00,6f,00,74,00,6f,00,56,00,69,00,65,00,77,00,\ 65,00,72,00,2e,00,64,00,6c,00,6c,00,2c,00,2d,00,33,00,30,00,35,00,36,00,00,\ 00 [HKEY_CLASSES_ROOT\PhotoViewer.FileAssoc.Bitmap\DefaultIcon] @="%SystemRoot%\\System32\\imageres.dll,-70" [HKEY_CLASSES_ROOT\PhotoViewer.FileAssoc.Bitmap\shell\open\command] @=hex(2):25,00,53,00,79,00,73,00,74,00,65,00,6d,00,52,00,6f,00,6f,00,74,00,25,\ 00,5c,00,53,00,79,00,73,00,74,00,65,00,6d,00,33,00,32,00,5c,00,72,00,75,00,\ 6e,00,64,00,6c,00,6c,00,33,00,32,00,2e,00,65,00,78,00,65,00,20,00,22,00,25,\ 00,50,00,72,00,6f,00,67,00,72,00,61,00,6d,00,46,00,69,00,6c,00,65,00,73,00,\ 25,00,5c,00,57,00,69,00,6e,00,64,00,6f,00,77,00,73,00,20,00,50,00,68,00,6f,\ 00,74,00,6f,00,20,00,56,00,69,00,65,00,77,00,65,00,72,00,5c,00,50,00,68,00,\ 6f,00,74,00,6f,00,56,00,69,00,65,00,77,00,65,00,72,00,2e,00,64,00,6c,00,6c,\ 00,22,00,2c,00,20,00,49,00,6d,00,61,00,67,00,65,00,56,00,69,00,65,00,77,00,\ 5f,00,46,00,75,00,6c,00,6c,00,73,00,63,00,72,00,65,00,65,00,6e,00,20,00,25,\ 00,31,00,00,00 [HKEY_CLASSES_ROOT\PhotoViewer.FileAssoc.Bitmap\shell\open\DropTarget] "Clsid"="{FFE2A43C-56B9-4bf5-9A79-CC6D4285608A}" [HKEY_CLASSES_ROOT\Applications\photoviewer.dll\shell\print] "NeverDefault"="" [HKEY_CLASSES_ROOT\Applications\photoviewer.dll\shell\print\command] @=hex(2):25,00,53,00,79,00,73,00,74,00,65,00,6d,00,52,00,6f,00,6f,00,74,00,25,\ 00,5c,00,53,00,79,00,73,00,74,00,65,00,6d,00,33,00,32,00,5c,00,72,00,75,00,\ 6e,00,64,00,6c,00,6c,00,33,00,32,00,2e,00,65,00,78,00,65,00,20,00,22,00,25,\ 00,50,00,72,00,6f,00,67,00,72,00,61,00,6d,00,46,00,69,00,6c,00,65,00,73,00,\ 25,00,5c,00,57,00,69,00,6e,00,64,00,6f,00,77,00,73,00,20,00,50,00,68,00,6f,\ 00,74,00,6f,00,20,00,56,00,69,00,65,00,77,00,65,00,72,00,5c,00,50,00,68,00,\ 6f,00,74,00,6f,00,56,00,69,00,65,00,77,00,65,00,72,00,2e,00,64,00,6c,00,6c,\ 00,22,00,2c,00,20,00,49,00,6d,00,61,00,67,00,65,00,56,00,69,00,65,00,77,00,\ 5f,00,46,00,75,00,6c,00,6c,00,73,00,63,00,72,00,65,00,65,00,6e,00,20,00,25,\ 00,31,00,00,00 [HKEY_CLASSES_ROOT\Applications\photoviewer.dll\shell\print\DropTarget] "Clsid"="{60fd46de-f830-4894-a628-6fa81bc0190d}" [HKEY_CLASSES_ROOT\PhotoViewer.FileAssoc.JFIF] "EditFlags"=dword:00010000 "ImageOptionFlags"=dword:00000001 "FriendlyTypeName"=hex(2):40,00,25,00,50,00,72,00,6f,00,67,00,72,00,61,00,6d,\ 00,46,00,69,00,6c,00,65,00,73,00,25,00,5c,00,57,00,69,00,6e,00,64,00,6f,00,\ 77,00,73,00,20,00,50,00,68,00,6f,00,74,00,6f,00,20,00,56,00,69,00,65,00,77,\ 00,65,00,72,00,5c,00,50,00,68,00,6f,00,74,00,6f,00,56,00,69,00,65,00,77,00,\ 65,00,72,00,2e,00,64,00,6c,00,6c,00,2c,00,2d,00,33,00,30,00,35,00,35,00,00,\ 00 [HKEY_CLASSES_ROOT\PhotoViewer.FileAssoc.JFIF\DefaultIcon] @="%SystemRoot%\\System32\\imageres.dll,-72" [HKEY_CLASSES_ROOT\PhotoViewer.FileAssoc.JFIF\shell\open] "MuiVerb"=hex(2):40,00,25,00,50,00,72,00,6f,00,67,00,72,00,61,00,6d,00,46,00,\ 69,00,6c,00,65,00,73,00,25,00,5c,00,57,00,69,00,6e,00,64,00,6f,00,77,00,73,\ 00,20,00,50,00,68,00,6f,00,74,00,6f,00,20,00,56,00,69,00,65,00,77,00,65,00,\ 72,00,5c,00,70,00,68,00,6f,00,74,00,6f,00,76,00,69,00,65,00,77,00,65,00,72,\ 00,2e,00,64,00,6c,00,6c,00,2c,00,2d,00,33,00,30,00,34,00,33,00,00,00 [HKEY_CLASSES_ROOT\PhotoViewer.FileAssoc.JFIF\shell\open\command] @=hex(2):25,00,53,00,79,00,73,00,74,00,65,00,6d,00,52,00,6f,00,6f,00,74,00,25,\ 00,5c,00,53,00,79,00,73,00,74,00,65,00,6d,00,33,00,32,00,5c,00,72,00,75,00,\ 6e,00,64,00,6c,00,6c,00,33,00,32,00,2e,00,65,00,78,00,65,00,20,00,22,00,25,\ 00,50,00,72,00,6f,00,67,00,72,00,61,00,6d,00,46,00,69,00,6c,00,65,00,73,00,\ 25,00,5c,00,57,00,69,00,6e,00,64,00,6f,00,77,00,73,00,20,00,50,00,68,00,6f,\ 00,74,00,6f,00,20,00,56,00,69,00,65,00,77,00,65,00,72,00,5c,00,50,00,68,00,\ 6f,00,74,00,6f,00,56,00,69,00,65,00,77,00,65,00,72,00,2e,00,64,00,6c,00,6c,\ 00,22,00,2c,00,20,00,49,00,6d,00,61,00,67,00,65,00,56,00,69,00,65,00,77,00,\ 5f,00,46,00,75,00,6c,00,6c,00,73,00,63,00,72,00,65,00,65,00,6e,00,20,00,25,\ 00,31,00,00,00 [HKEY_CLASSES_ROOT\PhotoViewer.FileAssoc.JFIF\shell\open\DropTarget] "Clsid"="{FFE2A43C-56B9-4bf5-9A79-CC6D4285608A}" [HKEY_CLASSES_ROOT\PhotoViewer.FileAssoc.Jpeg] "EditFlags"=dword:00010000 "ImageOptionFlags"=dword:00000001 "FriendlyTypeName"=hex(2):40,00,25,00,50,00,72,00,6f,00,67,00,72,00,61,00,6d,\ 00,46,00,69,00,6c,00,65,00,73,00,25,00,5c,00,57,00,69,00,6e,00,64,00,6f,00,\ 77,00,73,00,20,00,50,00,68,00,6f,00,74,00,6f,00,20,00,56,00,69,00,65,00,77,\ 00,65,00,72,00,5c,00,50,00,68,00,6f,00,74,00,6f,00,56,00,69,00,65,00,77,00,\ 65,00,72,00,2e,00,64,00,6c,00,6c,00,2c,00,2d,00,33,00,30,00,35,00,35,00,00,\ 00 [HKEY_CLASSES_ROOT\PhotoViewer.FileAssoc.Jpeg\DefaultIcon] @="%SystemRoot%\\System32\\imageres.dll,-72" [HKEY_CLASSES_ROOT\PhotoViewer.FileAssoc.Jpeg\shell\open] "MuiVerb"=hex(2):40,00,25,00,50,00,72,00,6f,00,67,00,72,00,61,00,6d,00,46,00,\ 69,00,6c,00,65,00,73,00,25,00,5c,00,57,00,69,00,6e,00,64,00,6f,00,77,00,73,\ 00,20,00,50,00,68,00,6f,00,74,00,6f,00,20,00,56,00,69,00,65,00,77,00,65,00,\ 72,00,5c,00,70,00,68,00,6f,00,74,00,6f,00,76,00,69,00,65,00,77,00,65,00,72,\ 00,2e,00,64,00,6c,00,6c,00,2c,00,2d,00,33,00,30,00,34,00,33,00,00,00 [HKEY_CLASSES_ROOT\PhotoViewer.FileAssoc.Jpeg\shell\open\command] @=hex(2):25,00,53,00,79,00,73,00,74,00,65,00,6d,00,52,00,6f,00,6f,00,74,00,25,\ 00,5c,00,53,00,79,00,73,00,74,00,65,00,6d,00,33,00,32,00,5c,00,72,00,75,00,\ 6e,00,64,00,6c,00,6c,00,33,00,32,00,2e,00,65,00,78,00,65,00,20,00,22,00,25,\ 00,50,00,72,00,6f,00,67,00,72,00,61,00,6d,00,46,00,69,00,6c,00,65,00,73,00,\ 25,00,5c,00,57,00,69,00,6e,00,64,00,6f,00,77,00,73,00,20,00,50,00,68,00,6f,\ 00,74,00,6f,00,20,00,56,00,69,00,65,00,77,00,65,00,72,00,5c,00,50,00,68,00,\ 6f,00,74,00,6f,00,56,00,69,00,65,00,77,00,65,00,72,00,2e,00,64,00,6c,00,6c,\ 00,22,00,2c,00,20,00,49,00,6d,00,61,00,67,00,65,00,56,00,69,00,65,00,77,00,\ 5f,00,46,00,75,00,6c,00,6c,00,73,00,63,00,72,00,65,00,65,00,6e,00,20,00,25,\ 00,31,00,00,00 [HKEY_CLASSES_ROOT\PhotoViewer.FileAssoc.Jpeg\shell\open\DropTarget] "Clsid"="{FFE2A43C-56B9-4bf5-9A79-CC6D4285608A}" [HKEY_CLASSES_ROOT\PhotoViewer.FileAssoc.Gif] "ImageOptionFlags"=dword:00000001 "FriendlyTypeName"=hex(2):40,00,25,00,50,00,72,00,6f,00,67,00,72,00,61,00,6d,\ 00,46,00,69,00,6c,00,65,00,73,00,25,00,5c,00,57,00,69,00,6e,00,64,00,6f,00,\ 77,00,73,00,20,00,50,00,68,00,6f,00,74,00,6f,00,20,00,56,00,69,00,65,00,77,\ 00,65,00,72,00,5c,00,50,00,68,00,6f,00,74,00,6f,00,56,00,69,00,65,00,77,00,\ 65,00,72,00,2e,00,64,00,6c,00,6c,00,2c,00,2d,00,33,00,30,00,35,00,37,00,00,\ 00 [HKEY_CLASSES_ROOT\PhotoViewer.FileAssoc.Gif\DefaultIcon] @="%SystemRoot%\\System32\\imageres.dll,-83" [HKEY_CLASSES_ROOT\PhotoViewer.FileAssoc.Gif\shell\open\command] @=hex(2):25,00,53,00,79,00,73,00,74,00,65,00,6d,00,52,00,6f,00,6f,00,74,00,25,\ 00,5c,00,53,00,79,00,73,00,74,00,65,00,6d,00,33,00,32,00,5c,00,72,00,75,00,\ 6e,00,64,00,6c,00,6c,00,33,00,32,00,2e,00,65,00,78,00,65,00,20,00,22,00,25,\ 00,50,00,72,00,6f,00,67,00,72,00,61,00,6d,00,46,00,69,00,6c,00,65,00,73,00,\ 25,00,5c,00,57,00,69,00,6e,00,64,00,6f,00,77,00,73,00,20,00,50,00,68,00,6f,\ 00,74,00,6f,00,20,00,56,00,69,00,65,00,77,00,65,00,72,00,5c,00,50,00,68,00,\ 6f,00,74,00,6f,00,56,00,69,00,65,00,77,00,65,00,72,00,2e,00,64,00,6c,00,6c,\ 00,22,00,2c,00,20,00,49,00,6d,00,61,00,67,00,65,00,56,00,69,00,65,00,77,00,\ 5f,00,46,00,75,00,6c,00,6c,00,73,00,63,00,72,00,65,00,65,00,6e,00,20,00,25,\ 00,31,00,00,00 [HKEY_CLASSES_ROOT\PhotoViewer.FileAssoc.Gif\shell\open\DropTarget] "Clsid"="{FFE2A43C-56B9-4bf5-9A79-CC6D4285608A}" [HKEY_CLASSES_ROOT\PhotoViewer.FileAssoc.Png] "ImageOptionFlags"=dword:00000001 "FriendlyTypeName"=hex(2):40,00,25,00,50,00,72,00,6f,00,67,00,72,00,61,00,6d,\ 00,46,00,69,00,6c,00,65,00,73,00,25,00,5c,00,57,00,69,00,6e,00,64,00,6f,00,\ 77,00,73,00,20,00,50,00,68,00,6f,00,74,00,6f,00,20,00,56,00,69,00,65,00,77,\ 00,65,00,72,00,5c,00,50,00,68,00,6f,00,74,00,6f,00,56,00,69,00,65,00,77,00,\ 65,00,72,00,2e,00,64,00,6c,00,6c,00,2c,00,2d,00,33,00,30,00,35,00,37,00,00,\ 00 [HKEY_CLASSES_ROOT\PhotoViewer.FileAssoc.Png\DefaultIcon] @="%SystemRoot%\\System32\\imageres.dll,-71" [HKEY_CLASSES_ROOT\PhotoViewer.FileAssoc.Png\shell\open\command] @=hex(2):25,00,53,00,79,00,73,00,74,00,65,00,6d,00,52,00,6f,00,6f,00,74,00,25,\ 00,5c,00,53,00,79,00,73,00,74,00,65,00,6d,00,33,00,32,00,5c,00,72,00,75,00,\ 6e,00,64,00,6c,00,6c,00,33,00,32,00,2e,00,65,00,78,00,65,00,20,00,22,00,25,\ 00,50,00,72,00,6f,00,67,00,72,00,61,00,6d,00,46,00,69,00,6c,00,65,00,73,00,\ 25,00,5c,00,57,00,69,00,6e,00,64,00,6f,00,77,00,73,00,20,00,50,00,68,00,6f,\ 00,74,00,6f,00,20,00,56,00,69,00,65,00,77,00,65,00,72,00,5c,00,50,00,68,00,\ 6f,00,74,00,6f,00,56,00,69,00,65,00,77,00,65,00,72,00,2e,00,64,00,6c,00,6c,\ 00,22,00,2c,00,20,00,49,00,6d,00,61,00,67,00,65,00,56,00,69,00,65,00,77,00,\ 5f,00,46,00,75,00,6c,00,6c,00,73,00,63,00,72,00,65,00,65,00,6e,00,20,00,25,\ 00,31,00,00,00 [HKEY_CLASSES_ROOT\PhotoViewer.FileAssoc.Png\shell\open\DropTarget] "Clsid"="{FFE2A43C-56B9-4bf5-9A79-CC6D4285608A}" [HKEY_CLASSES_ROOT\PhotoViewer.FileAssoc.Wdp] "EditFlags"=dword:00010000 "ImageOptionFlags"=dword:00000001 [HKEY_CLASSES_ROOT\PhotoViewer.FileAssoc.Wdp\DefaultIcon] @="%SystemRoot%\\System32\\wmphoto.dll,-400" [HKEY_CLASSES_ROOT\PhotoViewer.FileAssoc.Wdp\shell\open] "MuiVerb"=hex(2):40,00,25,00,50,00,72,00,6f,00,67,00,72,00,61,00,6d,00,46,00,\ 69,00,6c,00,65,00,73,00,25,00,5c,00,57,00,69,00,6e,00,64,00,6f,00,77,00,73,\ 00,20,00,50,00,68,00,6f,00,74,00,6f,00,20,00,56,00,69,00,65,00,77,00,65,00,\ 72,00,5c,00,70,00,68,00,6f,00,74,00,6f,00,76,00,69,00,65,00,77,00,65,00,72,\ 00,2e,00,64,00,6c,00,6c,00,2c,00,2d,00,33,00,30,00,34,00,33,00,00,00 [HKEY_CLASSES_ROOT\PhotoViewer.FileAssoc.Wdp\shell\open\command] @=hex(2):25,00,53,00,79,00,73,00,74,00,65,00,6d,00,52,00,6f,00,6f,00,74,00,25,\ 00,5c,00,53,00,79,00,73,00,74,00,65,00,6d,00,33,00,32,00,5c,00,72,00,75,00,\ 6e,00,64,00,6c,00,6c,00,33,00,32,00,2e,00,65,00,78,00,65,00,20,00,22,00,25,\ 00,50,00,72,00,6f,00,67,00,72,00,61,00,6d,00,46,00,69,00,6c,00,65,00,73,00,\ 25,00,5c,00,57,00,69,00,6e,00,64,00,6f,00,77,00,73,00,20,00,50,00,68,00,6f,\ 00,74,00,6f,00,20,00,56,00,69,00,65,00,77,00,65,00,72,00,5c,00,50,00,68,00,\ 6f,00,74,00,6f,00,56,00,69,00,65,00,77,00,65,00,72,00,2e,00,64,00,6c,00,6c,\ 00,22,00,2c,00,20,00,49,00,6d,00,61,00,67,00,65,00,56,00,69,00,65,00,77,00,\ 5f,00,46,00,75,00,6c,00,6c,00,73,00,63,00,72,00,65,00,65,00,6e,00,20,00,25,\ 00,31,00,00,00 [HKEY_CLASSES_ROOT\PhotoViewer.FileAssoc.Wdp\shell\open\DropTarget] "Clsid"="{FFE2A43C-56B9-4bf5-9A79-CC6D4285608A}" [HKEY_CLASSES_ROOT\SystemFileAssociations\image\shell\Image Preview\command] @=hex(2):25,00,53,00,79,00,73,00,74,00,65,00,6d,00,52,00,6f,00,6f,00,74,00,25,\ 00,5c,00,53,00,79,00,73,00,74,00,65,00,6d,00,33,00,32,00,5c,00,72,00,75,00,\ 6e,00,64,00,6c,00,6c,00,33,00,32,00,2e,00,65,00,78,00,65,00,20,00,22,00,25,\ 00,50,00,72,00,6f,00,67,00,72,00,61,00,6d,00,46,00,69,00,6c,00,65,00,73,00,\ 25,00,5c,00,57,00,69,00,6e,00,64,00,6f,00,77,00,73,00,20,00,50,00,68,00,6f,\ 00,74,00,6f,00,20,00,56,00,69,00,65,00,77,00,65,00,72,00,5c,00,50,00,68,00,\ 6f,00,74,00,6f,00,56,00,69,00,65,00,77,00,65,00,72,00,2e,00,64,00,6c,00,6c,\ 00,22,00,2c,00,20,00,49,00,6d,00,61,00,67,00,65,00,56,00,69,00,65,00,77,00,\ 5f,00,46,00,75,00,6c,00,6c,00,73,00,63,00,72,00,65,00,65,00,6e,00,20,00,25,\ 00,31,00,00,00 [HKEY_CLASSES_ROOT\SystemFileAssociations\image\shell\Image Preview\DropTarget] "{FFE2A43C-56B9-4bf5-9A79-CC6D4285608A}"="" [HKEY_LOCAL_MACHINE\SOFTWARE\Microsoft\Windows Photo Viewer\Capabilities] "ApplicationDescription"="@%ProgramFiles%\\Windows Photo Viewer\\photoviewer.dll,-3069" "ApplicationName"="@%ProgramFiles%\\Windows Photo Viewer\\photoviewer.dll,-3009" [HKEY_LOCAL_MACHINE\SOFTWARE\Microsoft\Windows Photo Viewer\Capabilities\FileAssociations] ".cr2"="PhotoViewer.FileAssoc.Tiff" ".jpg"="PhotoViewer.FileAssoc.Jpeg" ".wdp"="PhotoViewer.FileAssoc.Wdp" ".jfif"="PhotoViewer.FileAssoc.JFIF" ".dib"="PhotoViewer.FileAssoc.Bitmap" ".png"="PhotoViewer.FileAssoc.Png" ".jxr"="PhotoViewer.FileAssoc.Wdp" ".bmp"="PhotoViewer.FileAssoc.Bitmap" ".jpe"="PhotoViewer.FileAssoc.Jpeg" ".jpeg"="PhotoViewer.FileAssoc.Jpeg" ".gif"="PhotoViewer.FileAssoc.Gif" ".tif"="PhotoViewer.FileAssoc.Tiff" ".tiff"="PhotoViewer.FileAssoc.Tiff"
Yup, that is a lot of keys and settings but you are almost done. Once you have pasted text into your new notepad document save it but as .REG, you can name it however you want but it has to be .REG extension. Once the file is saved double click on it to merge it into the Windows registry. You might need to turn off UAC for this operation (check our tutorial on this topic) and accept warning messages but once it is done you should now have an old photo viewer as a choice for your default viewing application. All you have to do now is to go to settings and go to default apps, under photo viewer you should see your current default viewing application, probably photos, click on it to see options and choose photo viewer and exit the Settings menu, and you're done.
 Error Causes
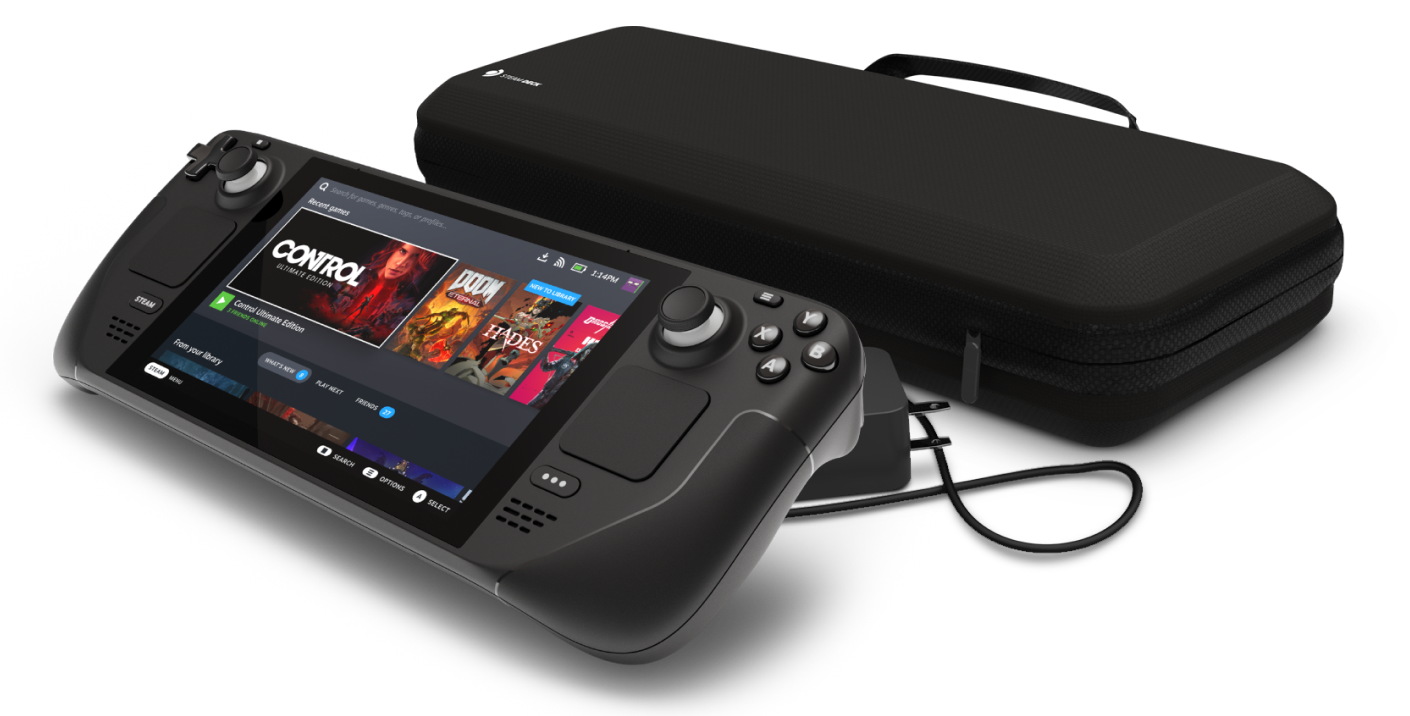 This, of course, means that you will be able to have both Proton and Windows on your device letting you play anything that you wish if the hardware is strong enough. Valve also said that you can launch OS from an SD card! This of course will save space available for games themselves, especially for entry models with less than one available.
All of this information really pushes Deck into the territory of a handheld PC and not just another console and I must admit that this announcement left a smile on my face.
This, of course, means that you will be able to have both Proton and Windows on your device letting you play anything that you wish if the hardware is strong enough. Valve also said that you can launch OS from an SD card! This of course will save space available for games themselves, especially for entry models with less than one available.
All of this information really pushes Deck into the territory of a handheld PC and not just another console and I must admit that this announcement left a smile on my face.  Skinning of applications is not new to PC users, but did you knew you could skin Steam?
With skin, you can customize the UI and style of the client to what you want making it more personal and to your liking. First thing is to find the skin that you would like to install. There are a lot of sites where you could find custom made Steam skins but we would recommend
Skinning of applications is not new to PC users, but did you knew you could skin Steam?
With skin, you can customize the UI and style of the client to what you want making it more personal and to your liking. First thing is to find the skin that you would like to install. There are a lot of sites where you could find custom made Steam skins but we would recommend  10 worst computer viruses in history