One of the most common Blue Screen of Death errors you can encounter on your Windows 10 computer is the Tcpip.sys Blue Screen error. The Tcpip.sys file is a driver file that is associated with the Transmission Control Protocol over Internet Protocol. When you see this kind of BSOD error, you may see any of the following error descriptions:
IRQL_NOT_LESS_EQUAL
KMODE_EXCEPTION_NOT_HANDLED
PAGE_FAULT_IN_NONPAGED_AREA
Whichever error description you got, you need to do use the following instructions below as a reference to obliterate the Tcpip.sys Blue Screen error.
Option 1 – Run the Blue Screen Troubleshooter
The Blue Screen troubleshooter is a built-in tool in Windows 10 that helps users in fixing BSOD errors like Tcpip.sys Blue Screen error. It can be found on the Settings Troubleshooters page. To use it, refer to these steps:
Tap the Win + I keys to open the Settings panel.
Then go to Update & Security > Troubleshoot.
From there, look for the option called “Blue Screen” on your right-hand side and then click the “Run the troubleshooter” button to run the Blue Screen Troubleshooter and then follow the next on-screen options. Note that you might have to boot your PC into Safe Mode.
Option 2 – Try resetting TCP/IP
In case you didn’t notice, the Tcpip.sys file is associated with the TCP/IP protocols in your computer system which is why resetting TCP/IP can help in resolving the Tcpip.sys Blue Screen of Death error especially when the TCP/IP has been modified.
First, you need to type “command prompt” in the Windows Search bar and then right-click on the related search result and select the “Run as administrator” option to open Command Prompt.
After that, type the following command in the elevated cmd window and hit Enter:
netsh int ip reset
Now reboot your computer after the command has been executed and check if it helped to fix the Blue Screen error.
Option 3 – Try to rollback your Network driver
If you have updated the driver software as of late and you suddenly got this BSOD error, you might have to roll back the device driver – in other words, switch back to the previous working version. To do that, follow these steps:
Tap the Win + R keys to launch the Run window and then type in the “devmgmt.msc” command and hit Enter to open the Device Manager window.
Under the Device Manager, you will see a list of drivers. From there, look for the Network Adapters and expand it.
Next, select the driver entries that are labeled appropriately other than anything in the context of the WAN Miniport.
Then select each one of them and double click to open a new mini window.
After that, make sure that you’re on the Driver tab and if you are not, just navigate to it then click the Roll Back Driver button to switch back to the previous version of your Network adapters.
Now restart your computer to successfully apply the changes made.
Option 4 – Try to update the Network drivers
You might also want to try updating all your network drivers in order to fix the Tcpip.sys Blue Screen error. To do so, here’s what you have to do:
Tap the Win + R keys to launch the Run window and then type in the “MSC” command and hit Enter to open the Device Manager window.
Under the Device Manager, you will see a list of drivers. From there, look for the Network Adapters and expand it.
Then right-click on each one of the Network drivers and update them all.
Restart your PC and see if it helped in fixing the BSOD error.
Note: If updating the network drivers didn’t help in fixing the problem, you can also try to uninstall the very same drivers and restart your Windows 10 PC. After that, the system itself will reinstall the drivers you just uninstalled. Alternatively, you can also download and install the drivers from the manufacturer’s website directly.
Option 5 – Try to disable both the Antivirus program and Firewall temporarily
There are times when antivirus programs and the firewall blocks a website that they consider to be malicious or even because of false-positive effects which is why you have to disable these programs temporarily as it might be the reason why you’ve encountered the error when trying to browse the internet.
The touchscreen feature inside Windows 11 is a pretty good thing but sometimes can be very impractical. The screen can easily and constantly get dirty due to fingers touching it all the time and there are users that do not wish or want to have this feature at all.
If you are one of the mentioned users and for any reason, you do not wish to have a touchscreen-enabled then sit back and relax, we have you covered in this tutorial on how to fully disable touchscreen inside Windows 11.
Turn off touchscreen via device manager
Click on the Windows Search icon in the taskbar
Type Device Manager
Click on Device Manager from the list of results
Inside locate Human Interface Devices and click on the right arrow
In the list, find HID-Compliant Touch Screen and select Disable Device
Click on Yes to confirm
Disable it via Windows Terminal
Right-click on the Windows icon in the taskbar
Click on Windows Terminal (admin)
Inside run this command: Get-PnpDevice | Where-Object {$_.FriendlyName -like '*touch screen*'} | Disable-PnpDevice -Confirm:$false
Conclusion
No matter which method you prefer, both of them will disable the touch screen inside Windows 11. Thank you for reading trough article and I hope to see you again. Take care.
One of the most useful tools you can use to repair bad or corrupted sectors in the hard disk of your computer is the CHKDSK utility. However, there are also instances when this Disk Checking tool could encounter some issues and one of them is the error that states, “The type of the file system are RAW, CHKDSK is not available for RAW drives”.
This kind of issue is due to the RAW file format which is not recognized by the Windows operating system that you’ve installed which explains why you’re getting this error when running the CHKDSK utility. You can also encounter this error in case there is something wrong with the drive encryption.
To fix this error, you have to change the File System of the drive. How? Refer to the steps given below.
Step 1: The first thing you need to do is create a bootable Windows 10 media.
Step 2: After that, click on Repair your computer on the first Windows 10 installation setup window.
Step 3: Next, you have to select the operating system partition from the given options and then click on Next.
Step 4: Now select Command Prompt from the System Recovery Options box and then type the following command and tap Enter to initiate the Diskpart utility inside Command Prompt.
diskpart
Step 5: Afterwards, type in either of the following commands to help you in either listing all the Disk connects or all the partitions on those disks formed.
diskpart or list volume
Step 6: Next, you need to select any of the two given commands below depending on the list you entered on the previous step.
select disk # or select volume #
Step 7: After you enter the command, it will select the Disk or the Partition you want to select. Now you have to type and enter the following command to clean your drive.
clean
Step 8: Now enter any of the two following commands.
list disk or list volume
Step 9: Then type the next command below to create a specified partition.
create partition primary
Step 10: Once done, type in the following command to select the newly created partition.
select partition 1
Step 11: Next, type the following command to mark the selected partition as active.
active
Step 12: Finally, restart your computer to successfully apply the changes made and then see if it has fixed the problem or not.
Error 2 is a typical Battle.net error code. Battle.net is a desktop app that allows you to access all Blizzard games.
It enables Blizzard gamers around the world to play multiplayer matches together, online. Error 2 occurs when you are unable to connect to the login server. This error code is displayed in the following format:
Battle.net Error #2: Unable to connect. Please try again later. If the problem persists, please contact technical support.
Solution
Error Causes
Error 2 may be triggered due to several reasons. These include:
Program conflict
Security software conflict
Bad DNS cache entry
Issues with network devices
Viruses and malware
Registry corruption
Error 2 is not a fatal error like the blue screen of death error codes. However, this error may hamper your ability to play Blizzard multi-player games. To overcome this problem it is advisable to fix error 2 immediately.
Further Information and Manual Repair
To resolve this error you don’t need to spend hundreds of dollars to hire a professional and get it fixed. Here are some of the easy do-it-yourself methods to resolve this error on your PC. These methods require no technical expertise or knowledge. Let’s get started:
Method 1
Error 2 may sometimes pop up on the screen due to program conflict. This happens when you have Blizzard games and other programs running on your PC at the same time.
In such a situation, it is advisable to close background applications to resolve conflicts between Blizzard games and other programs running in the background.
Method 2
Sometimes antivirus programs and firewalls can also hinder and interfere with the game’s connection to our servers. In this event, the best way to fix the error is to temporarily uninstall your security software.
Method 3
If error 2 is triggered by the issues with network devices then simply power cycle network devices to re-stabilize the connection.
Power cycling router and modem allow you to reset and reestablish a connection to your ISP. To do this, shut down the computer then power down/unplug the router and the modem.
Allow the modem to sit for 60 seconds, unplugged. Then turn it on and allow it to boot up till the front panel connection lights show a steady connection.
Now turn on the router and do the same as you did with the modem. After that start the computer and allow it to completely boot up. Now try logging on to the Blizzard gaming server.
This will hopefully resolve the issue.
Method 4
Viruses and malware infections can also trigger error 2. In such a situation install an antivirus and remove all malicious programs infecting your PC.
Method 5
If the cause of the error is related to registry corruption, then it is advisable to download Restoro. This is a user-friendly PC Fixer with a registry cleaner. The registry cleaner removes all unnecessary and obsolete files corrupting the registry, cleans and repairs the corrupted registry in a few minutes.
Click here to download Restoro on your PC to resolve error 2. For further information you may be interested in these similar issues:
Internal Error 2771 is an internal error code associated with Kaspersky Internet Security and Antivirus software. This error pops up when Kaspersky Internet Security software fails to install on your PC successfully.
Installation of the software is interrupted and therefore it ends prematurely. This happens mostly when you try to install a new build on an existing installation.
Internal Error 2771 is displayed in one of the following formats:
This error may result on your computer screen due to several reasons. Some of the most common underlying causes include:
A leftover Registry Key
Bad entries from previous Security Package
INFCACHE.1 file corrupted
Conflicts with other security software installed on your system
Further Information and Manual Repair
To successfully overcome this problem and ensure the successful installation of Kaspersky Internet Security software on your system, try the methods given below.
Method 1- Remove the Leftover Registry Key
Sometimes Internal error code 2771 may appear during installation due to the leftover registry key from the previous Kaspersky software removal.
A registry key is often created when uninstalling the previous Kaspersky version from the PC. This key is left behind even after you reboot your system.
This key is called AVP**_post_ uninstall, you need to delete it to ensure the new version of the Kaspersky program is installed successfully on your PC. For this, simply go to the start menu and type Regedit in the search bar.
Now navigate to HKEY_LOCAL_MACHINESOFTWAREMicrosoftWindowsCurrentVersionRun and then look here for the registry key called AVP**_post_ uninstall. In order to delete this file, right-click it and then select delete.
Once uninstalled, reboot your PC and then try installing the Kaspersky Internet Security program again.
Hopefully, this will resolve the issue. If the software installs smoothly, then the error is fixed, in case it still persists, then try other methods illustrated below.
Method 2 - Remove the INFCAHCE.1 Corrupt File
Another reason for the error pop-up may be INFCAHCHE.1 corruption.
This file is basically used to store driver information and inf file locations. However, if it contains corrupted information, then you must remove it.
To do this, go to the start menu and type cmd into the search bar. This will open a command prompt. Here type del C:\Windows\infinfcache.1. Now reboot your PC and try installing Kaspersky software on again.
Method 3 - Fix Software Conflict
Security software conflict can also result in internal error 2771 code display. And when this happens, the installation of Kaspersky prematurely ends.
Security software conflict may occur if you have Comodo Firewall installed on your PC. A firewall is known to cause issues with Kaspersky software programs.
The best way to resolve this issue is to uninstall all security software programs on your PC. Once all security software is removed, then install Kaspersky on your system. If the installation is successfully completed, then reinstall the other software again.
Method 4 - Download Restoro
Error 2771 can also result on your computer screen if traces of the previously installed Kaspersky software still remain in the registry despite the program removal. In such an event it is advisable to download Restoro.
This is a cutting-edge and user-friendly PC Repair Tool deployed with an intuitive interface and a powerful registry cleaner. The registry cleaner scans your entire PC in seconds and detects all registry-related problems.
It removes all the bad entries, invalid registry keys, traces of previously uninstalled programs, junk files, and cookies that are known for registry corruption. It takes just a few clicks to perform this process.
Once all traces are removed, you can install the new version of the Kaspersky Internet Security program on your PC without interruption.
Click here to download Restoro and be on your way to resolve Internal Error 2771 on your computer!
Fooriza is a browser extension for Google Chrome. This extension offers users the latest trending news from the internet. These news widgets are usually sponsored content that the application displays based on your search history or visited links. While this extension is not that dangerous on its own, it usually comes bundled with other Potentially Unwanted Programs and Browser Hijackers that could pose a security risk.
When installed this extension changes your default search engine to yahoo. And while active you might see some additional ads injected into the search results.
Due to its bundled nature with other PUP-s and the potential dangers that might come with them, several anti-virus scanners have detected this extension as a Browser Hijacker and are marked for removal.
About Browser Hijackers
Browser hijackers (also called hijackware) are a kind of malware that alters internet browser configurations without the user’s knowledge or consent. These kinds of hijacks appear to be increasing at a worrying rate around the world, and it could be really nefarious and often dangerous too. They’re made to interfere with browser functions for many different purposes. In general, hijackers are programmed for the benefit of internet hackers often through revenue generation from forced advert clicks and site visits. However, it isn’t that harmless. Your internet safety is compromised and it is extremely irritating. Additionally, hijackers can make the whole infected system vulnerable – other destructive malware and viruses would seize these opportunities to get into your PC effortlessly.
Indications of browser hijack
Signs that your web browser is hi-jacked include:
1. your browser’s home page is suddenly different2. you find yourself constantly directed to a different web page than the one you actually intended3. default web engine is changed4. you’re getting new toolbars you haven’t seen before5. you may find numerous pop-up ads on your computer screen6. your web browser gets sluggish, buggy, and crashes frequently7. you are blocked to access those sites of anti-malware solution providers.
Exactly how browser hijacker finds its way to your computer
Browser hijackers infect computer systems in numerous ways, including via a file-share, a drive-by download, or an infected e-mail attachment. They are usually included with toolbars, BHO, add-ons, plug-ins, or browser extensions. Also, some freeware and shareware can put the hijacker in your PC through “bundling”. Some of the most well-known hijackers are Fooriza, Babylon Toolbar, Conduit Search, OneWebSearch, Sweet Page, and CoolWebSearch.
Browser hijacking could lead to serious privacy issues and even identity theft, disrupt your web browsing experience by taking control over outbound traffic, drastically slows down your personal computer by consuming lots of resources, and cause system instability also.
Browser Hijacker Malware – Removal
Some hijackers can be simply removed by deleting the freeware they came with or by deleting any add-ons you have recently added to your system. At times, it can be a challenging task to discover and remove the malicious program since the associated file will be running as part of the operating system process. You should think of carrying out manual repairs only if you happen to be a tech-savvy person since there are potential risks associated with messing around with the computer registry and HOSTS file.
Installing and running antivirus software on the affected system can automatically erase browser hijackers and other malicious applications. SafeBytes Anti-Malware detects all kinds of hijackers – such as Fooriza – and eliminates every trace quickly and efficiently.
What To Do If You Cannot Install Safebytes Anti-Malware?
Every malware is bad and the degree of the damage will vary greatly with regards to the type of infection. Some malware is designed to interfere with or prevent things that you wish to do on your personal computer. It may not allow you to download anything from the internet or prevent you from accessing some or all of the websites, in particular the antivirus websites. If you are reading this, you probably have infected by malware that prevents you from installing a computer security application like Safebytes Anti-Malware. There are a few actions you can take to get around this problem.
Get rid of malware in Safe Mode
If the malware is set to load at Windows start-up, then booting in Safe Mode should avoid it. Just minimal required programs and services are loaded when you boot your PC in Safe Mode. The following are the steps you should follow to eliminate malware in Safemode.
1) At power on, press the F8 key while the Windows splash screen starts to load. This will bring up the Advanced Boot Options menu.2) Choose Safe Mode with Networking with arrow keys and press Enter.3) When you are into this mode, you should have access to the internet again. Now, obtain the malware removal program you need by using the internet browser. To install the software, follow the guidelines within the installation wizard.4) Once the software is installed, allow the diagnostic scan to run to eliminate viruses and other malware automatically.
Use an alternate web browser to download the anti-malware application
Some malware might target vulnerabilities of a specific web browser that block the downloading process. The ideal way to overcome this problem is to select an internet browser that is known for its security measures. Firefox contains built-in Malware and Phishing Protection to help keep you secure online.
Run anti-malware from your USB drive
Another option is to make a portable anti-malware program on your USB stick. Do these simple actions to clean up your affected PC using a portable antivirus.
1) On a clean PC, install Safebytes Anti-Malware.2) Put the USB drive into the clean PC.3) Double-click the executable file to run the installation wizard.4) When asked, choose the location of the USB drive as the place in which you would like to put the software files. Follow the instructions on the computer screen to finish off the installation process.5) Disconnect the USB drive. You may now use this portable anti-virus on the affected computer.6) Double-click the antivirus program EXE file on the pen drive.7) Press the “Scan” button to run a full system scan and remove malware automatically.
How SafeBytes Anti-Malware Keep your Machine Virus Free
Nowadays, an anti-malware program can protect your PC from different types of internet threats. But how to decide on the best one amongst plenty of malware protection application that’s available out there? As you might be aware, there are many anti-malware companies and tools for you to consider. A few of them do a good job in removing malware threats while many will ruin your computer by themselves. When searching for an antimalware program, purchase one that gives dependable, efficient, and complete protection against all known viruses and malware. Among few good applications, SafeBytes Anti-Malware is the highly recommended program for the security-conscious individual.
SafeBytes anti-malware is a very effective and easy-to-use protection tool that is designed for end-users of all levels of IT literacy. With its cutting-edge technology, this application will assist you to get rid of several types of malware including computer viruses, trojans, PUPs, worms, adware, ransomware, and browser hijackers.
SafeBytes anti-malware takes computer protection to a whole new level with its enhanced features. These are some of the great features included in the software.
Active Protection: SafeBytes provides real-time active checking and protection against all known computer viruses and malware. This utility will constantly monitor your PC for any suspicious activity and updates itself regularly to keep abreast of the latest threats.
Robust, Anti-malware Protection: Using its advanced and sophisticated algorithm, this malware elimination tool can detect and remove the malware threats hiding in the computer system effectively.
Extremely Speed Scanning: This application has got one of the fastest and most efficient virus scanning engines in the industry. The scans are highly accurate and take a short amount of time to complete.
Web Filtering: SafeBytes checks the links present on a web page for possible threats and alerts you whether the website is safe to explore or not, through its unique safety rating system.
Light-weight: SafeBytes gives total protection from online threats at a fraction of the CPU load because of its enhanced detection engine and algorithms.
24/7 Assistance: You may get high levels of support round the clock if you’re using their paid software.
All in all, SafeBytes Anti-Malware is a solid program as it has lots of features and can identify and remove any potential threats. You now may understand that this particular software does more than just scan and delete threats on your computer. So if you’re trying to find a comprehensive antivirus program that’s still simple enough to use, SafeBytes Anti-Malware is just what you need!
Technical Details and Manual Removal (Advanced Users)
If you want to perform the removal of Fooriza manually rather than employing an automated software tool, you may follow these steps: Go to the Windows Control Panel, click the “Add or Remove Programs” and there, choose the offending program to remove. In case of suspicious versions of browser plug-ins, you can easily remove them through your web browser’s extension manager. It is also advised to factory reset your browser to its default condition to fix corrupt settings.
Finally, examine your hard disk for all of the following and clean your computer registry manually to remove leftover application entries following uninstalls. Please note that only experienced computer users should try to manually edit the system files mainly because deleting any single vital registry entry leads to a major problem or even a computer crash. Moreover, some malware keeps replicating which makes it tough to remove. Doing this malware-removal process in Safe Mode is recommended.
Disk partitioning is a concept that’s been around for so long, but is still only familiar to few. If done right, it can help get your computer in perfect order.
Today we bring you a simple definition of disk partitioning, its pros and cons, and a quick tip on how to do it properly to reap its full benefit!
Definition and purpose
The simplest way to define disk partitioning would be: it’s exactly what it sounds like. It means taking a hard disk drive and separating it into different segments. These segments are called partitions. You can visualize it as cutting a cake into smaller pieces - not necessarily of the same size, though.
So what is the purpose of these pieces?
Well, when you first get a hard drive, it’s basically just a bunch of unallocated storage space. Until there’s at least one partition, this space is unusable to your operating system. Once you create a partition, your OS will recognize it as usable storage space.
You can choose to create a single partition and use it for all your files, from program files to personal data. A lot of off-the-shelf computers come with one primary partition like this and a small secondary one reserved for recovery purposes.
Whether or not you want to split your disk into more than one segment is up to you. We would generally recommend it, though. The whole point of partitioning is for each segment to have its own purpose.
So treating all your storage space as a single unit containing different file types would be like constructing an office building with only one massive room for everything - day-to-day work, conferences, interviews, etc. And all of this for different departments of the company. You can see how this might get a little messy.
Creating multiple partitions eliminates the task of running several different types of files from the same place. This takes a heavy load off the entire process of accessing data.
Disk partitioning also brings a ton of other benefits to the table. An important disclaimer, though: there are disadvantages too. We will walk you through both sides to help you get an objective idea and make an informed decision.
Source: Kina on Unsplash
What are the benefits of disk partitioning?
1. Better file organization
This is the most obvious and perhaps the biggest advantage of partitioning your hard drive.
As we already mentioned, partitioning allows you to create separate segments for different file and data types. You wouldn’t want to use the same partition for your system files and for games, would you?
If organization and time management are important to you, then multiple partitions are the right solution. Searching for specific files will be much easier overall. Say you have one hard drive, but three partitions: C for the system files alone, D for multimedia files and documents, and E for games and apps. Your computer loads the system from C without interference from the other two, and you know exactly where to look when searching for a file.
2. Easy reinstallation
File management isn’t the only thing made faster and simpler thanks to partitioning. If you opt for creating multiple segments on your drive, reinstalling Windows will be easy peasy.
That’s because all you need to do is format the partition your system is on. Then you reinstall the OS on it, and there you go. Now you have a clean installation, with all your files saved on other partitions intact. You can even make a copy of your system partition, so you can revisit the exact same installation in the future if you want. And the whole time your pictures, music, documents stay exactly where you left them.
Source: Andrew M on Unsplash
3. Possibility of using multiple file systems
By now you’ve understood that partitions function completely separately. This means that, if for some reason you need multiple file system capabilities, partitioning will allow that.
One segment could be used for, say, an NTFS file system, while another could run ext or APFS.
4. Running different OSes
You’re an avid Windows user but need to use Linux on the side? No problem. You don’t need to buy a separate computer or anything. The possibility of running different file systems also means you can use partitioning to run multiple operating systems.
Doesn’t that sound enticing? One machine for multiple totally different uses!
5. Backup and recovery made simple
Data loss can happen on any disk, partitioned or not. However, it’s much easier to get it back on a partitioned one. You know where you stored what, and each partition can be backed up exactly as it is. It’s also a lot faster to back up single partitions than entire hard drives.
Ultimately this also means a faster path to recovery. If you lose or accidentally delete important files and data, you might want to use a recovery tool like Recuva to scan for them and get them back. Recuva is even powerful enough to recover data from damaged hard drives. But no matter how powerful, scanning a whole drive is strenuous for any recovery tool. Scanning independent partitions is a lot more convenient than that, and will get you to your goal more efficiently.
6. Optimized performance
Now, let’s keep in mind that computer performance is influenced by a number of factors. Partitioning alone isn’t what makes it better or worse. However, it can contribute to optimization. It’s easier for your computer to scan, say, a 40 GB partition to fetch the system file it needs than scanning the entire capacity of your drive.
7. Improved security (possibly*)
Separate partitions can help make your system more secure. Firstly, they minimize file corruption. If one partition gets corrupted, the others should remain unaffected. And keeping in mind the previous point about backup and recovery, ‘fixing’ the damaged partition would be much easier than fixing the entire hard drive.
Partitioning also improves security in terms of malware protection. A malicious attack on one partition is easier to deal with than malware on the whole drive. If your system partition gets infected, you can simply reinstall your OS and that should do the trick.
*Do keep in mind that partitioning can’t defend you against more advanced attacks. So make sure not to give in to a false sense of security.
What are the disadvantages of partitioning?
1. Data is still vulnerable
Yes, it’s easier to back up and recover data from independent partitions. And yes, partitioning may help protect separated files and data to a higher degree. But remember: everything is still on a single physical drive. So while digital errors and issues may be easier to deal with on partitioned drives, physical damage obviously won’t be.
If your hard drive is destroyed in some way, all data on it will be gone. That’s why, if you have crucial files on your PC, it’s important to give them the proper backup treatment before it’s too late.
2. Disbalance of space
Allocating storage space on separate partitions may be a little more tricky than you think. You may fill up one partition a lot faster than another. So on one side you’re struggling with space, and on another you have too much of it to spare. Imagine nearly filling up your system partition and then it turns out you need a lot more space for its updates than you thought.
That’s why you really have to be sure you actually have enough files of different types that you need help managing efficiently. Otherwise you’ll just create a struggle and disbalance in terms of storage.
3. Increased risk of error
If done incorrectly, partitioning can lead to more harm than good. Aside from space disbalance, there is an increased risk of incorrect partition sizes and formatting. Plus, human error is also a factor: in a moment of distraction, you may erase one partition when you meant another. Undoing such mistakes will definitely be tedious and time-consuming.
4. SSDs eliminate the need of partitioning
SSDs (solid-state drives) don’t function in the same way that HDDs do. They have faster read times and can organize files on their own. This quite literally eliminates the need for organization on your part.
Partitioning: yes or no?
The bottom line is that multiple partitions might not be necessary for the average user. But if you’re planning on storing many file types or different file and operating systems on the same PC, then you should give it a shot. It’s also an excellent solution for businesses, of course.
And if our pros and cons list isn’t enough to help you decide, you can always send us a message and we’ll help you make the right choice.
Decided to partition your hard drive?
If you’ve decided to give it a go, you definitely should make sure to do it right.
The two most effective and reliable ways to partition are using the built-in options on Windows or investing in a dedicated partitioning tool, like the EaseUS Partition Master. Which one you'll opt for depends on your specific needs.
Option 1 may be more suitable for users with at least some level of experience. In this case, you’d have to know exactly which steps to take without making errors. This is done in Disk Management on Windows 10/11. From there, you can select the partitions you’d like to split into different volumes of selected sizes.
If this is your first time partitioning, we highly suggest you either consult professionals for this or move on to option 2. The EaseUS partitioning software is specifically designed for beginners, with an intuitive interface helping you succeed in the process. All you need to do is pick the Partition Master package tailored to your needs and follow their guide.
Each package offers technical support as well, and even free upgrades (to varying degrees based on your subscription). Plus, all of this is valid for not one, but two PCs.
It’s the perfect solution for a smooth and error-free partitioning process. If you want to organize your hard drives efficiently and make the most of all your space without doing irreparable damage, it’s definitely worth the investment.
Back in the mid-'90s, when the US Navy was looking into ways to securely communicate sensitive intelligence information, a mathematician and two computer scientists emerged from the Naval Research Lab with something called "onion routing." It was a new kind of technology that would protect your internet traffic with layers of privacy. By 2003, The Onion Routing project, acronym Tor, was in the hands of the public, where its vast network of users the engine enabling Tor has since continued to grow.
Today, thousands of volunteers all over the world are connecting their computers to the internet to create the Tor network by becoming "nodes" or "relays" for your internet traffic.
What is Tor?
At a basic level, Tor is a type of internet-connected network with its own internet browser. Once you connect to the internet with the Tor browser, your internet traffic is stripped of its first layer of identifying information as it enters the Tor network and is then sent bouncing through those relay nodes, which serve to encrypt and privatize your data, layer by layer like an onion. Finally, your traffic hits an exit node and leaves the Tor network for the open web.
Once you're in the Tor network, it's nearly impossible for others to track your traffic's manic pinballing path across the globe. And once you leave the Tor network via an exit node, the website you view (assuming it has HTTPS in front of its address) isn't sure which part of the world you're hailing from, offering you more privacy and protection.
Because Tor is a volunteer-run network, speed can often be an issue. As your traffic moves from node to node, you're likely to notice more speed loss than you would, for instance, with most commercial virtual private networks. This becomes particularly noticeable if you try to watch streaming Netflix content over Tor or make voice-over-IP phone calls or video calls with an app like Zoom. Tor technology isn't necessarily built to provide seamless audio-video experiences.
Tor and plugins
Speaking of videos, there are also limits to the amount of privacy Tor can offer you if you enable certain browser media plugins like Flash. Likewise, your browser's JavaScript plug-in which enables you to view a lot of websites' embedded media can still leak your IP address information. Torrenting files with Tor also exposes you to privacy risks. Because of these risks, Tor's privacy settings have these kinds of plug-ins disabled by default.
If you're just looking to do general, daily internet perusal using a browser that will better hide your traffic from spying eyes, Tor probably isn't the best choice due to its slow speeds and incompatibility with most embedded media. But if you're concerned enough about privacy around a particular topic of internet research (and you don't have a VPN), Tor is probably the best choice for you.
If you would like to read more helpful articles and tips about various software and hardware visit errortools.com daily.
So far I believe each person on this planet has at least heard of Marvel superhero movies, perhaps even watched a few of them, and no wonder. Movies are spawning now over 20 titles and they are not really released as events described in them.
Throw into mix TV series and you can get confused pretty fast. Now it was officially stated that all TV series that were released before Wanda vision is no canon in Marvel cinematic universe which simplify thing a little but there are still series that are.
So without further blabbering around here is a list of Marvels films and TV series in chronological order:
Captain America: The First Avenger
Captain Marvel
Iron Man
Iron Man 2
The Incredible Hulk
Thor
The Avengers
Iron Man 3
Thor: The Dark World
Captain America: The Winter Soldier
Guardians of the Galaxy
Guardians of the Galaxy Vol. 2
Avengers: Age of Ultron
Ant-Man
Captain America: Civil War
Spider-Man: Homecoming
Doctor Strange
Black Panther
Thor: Ragnarok
Ant-Man and The Wasp
Black Widow
Avengers: Infinity War
Avengers: Endgame
WandaVision
The Falcon and The Winter Soldier
Spiderman: Far From Home
Loki
And there you go, if you have someone who has not yet seen movies or you would like to view that as the story is revealed and not by the date they were released now you can easily with this list.
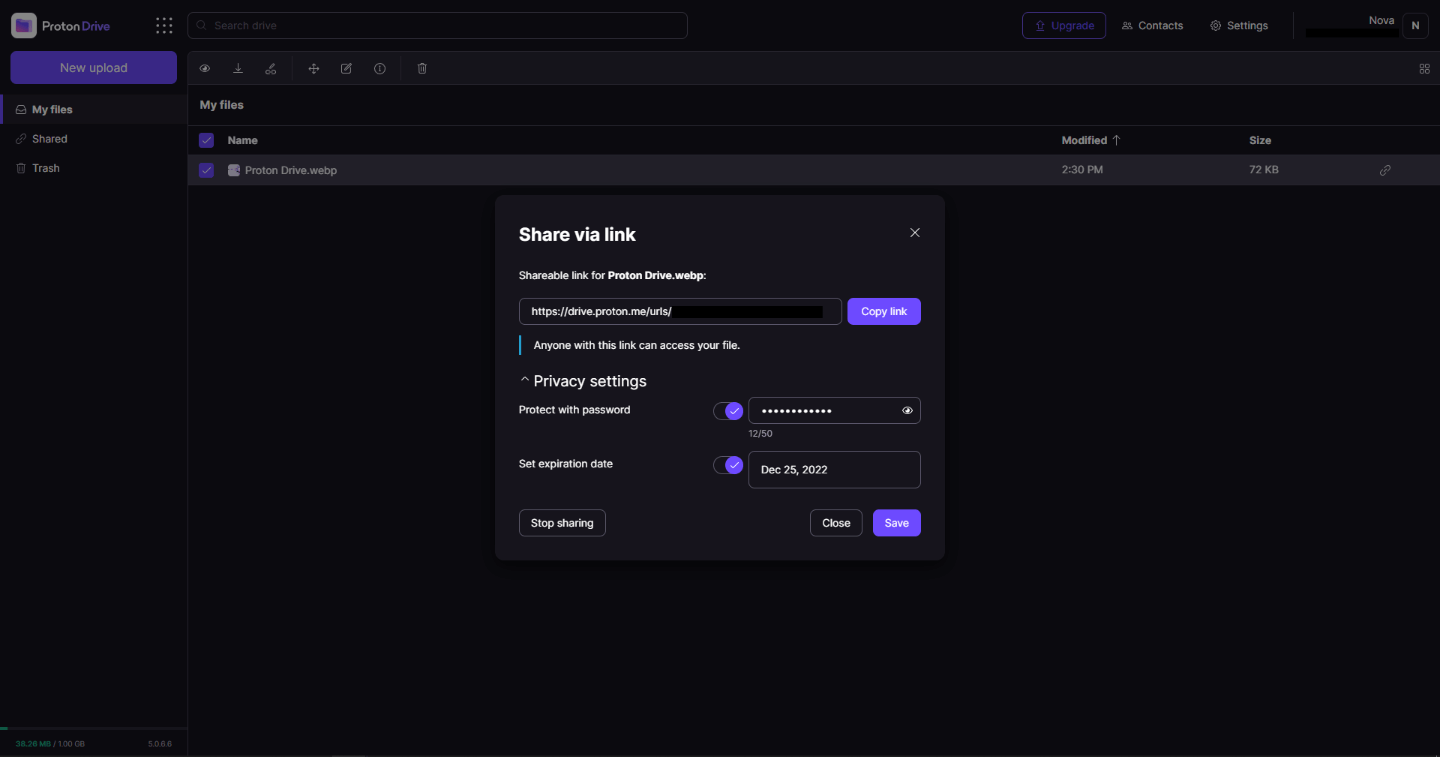
In 2014 Proton mail started as an end-to-end encrypted email service offering secure and private email services. Proton mail is still live and going with the same dedication to privacy and security but the company has expanded its offering into cloud storage drive services.
Starting as a public beta at the end of 2020, Proton Drive is keeping its privacy and security policy philosophy with the new service. Proton Drive is the newest service besides Proton Calendar, Proton VPN, and Proton Mail.
Drive has end-to-end encryption for everything on it including files themselves, filenames, folder structure, folder names, extensions, and file sizes. This means that you and only you can access your files. Servers are located in Geneva, Switzerland and they are under Swiss privacy laws making sure that your files are protected. Proton services in general are all open source so anyone can take a look at them to be sure that nothing is lurking under the hood. For now, sync is done either via the android app or web interface but the desktop client will come soon since currently, it is under development.
Sadly free plan of Proton Drive will give you only 1GB of storage which is much less than other services and sadly payments plans are also not so jaw-dropping going for $4 USD per month for a 200GB plan or with Proton ultimate subscription that will set you $10 behind but you will get 500GB of drive storage. Of course, if you value privacy for your files these options are good but if you do not mind that part other services have much better options.
All in all Proton Drive is a great cloud storage solution if you need privacy and well worth the investment. With the ultimate subscription, you will get enough space for most people and company needs with other services and guaranteed privacy and security, on the other hand, if you just need a large amount of cloud storage not caring too much about privacy other options are better.
If you are tried encrypting or decrypting a file using the default EFS engine but you receive an error message instead saying, “Error Applying Attributes, An error occurred applying attributes to the file: The specified file could not be decrypted”, read on as this post will help you sort out the problem. If you encounter this error you can use the error code in it. You will most likely get error code 0x80071771. This kind of error occurs when the File Explorer’s copy and paste feature was not able to read the source file being encrypted or decrypted. It could also occur if you try to access a file that has been on another computer previously.
To fix error code 0x80071771 when decrypting or encrypting a file, refer to the instructions provided below.
Step 1: You need to check first if you can decrypt the files encrypted by EFS. However, if you can’t, just proceed and then take full control of the file.
Step 2: To take control of the file, open File Explorer and right-click on the partition, and then click on Properties.
Step 3: After that, click on the Edit button under the Security tab.
Step 4: Next, make sure that “Everyone” is selected under the Group or user names section.
Step 5: Afterwards, the Permissions for Everyone section will be activated. Just make sure that all the checkboxes for Allow are checked and then click on the Apply button.
Step 6: Once you’re done, click on the Advanced button. This will open a new window labeled Advanced Security Settings. From there, click on the Change link under the Owner section.
Step 7: Now type your account name in the field and click on Check Names to verify the account name and click OK.
Step 8: After that, select the “Replace owner on sub-containers and objects” option and then click OK.
Step 9: Next, select Administrators in the Group or User names list and select Full Control in the Permissions for Administrators panel and click OK.

 If you are one of the mentioned users and for any reason, you do not wish to have a touchscreen-enabled then sit back and relax, we have you covered in this tutorial on how to fully disable touchscreen inside Windows 11.


 So far I believe each person on this planet has at least heard of Marvel superhero movies, perhaps even watched a few of them, and no wonder. Movies are spawning now over 20 titles and they are not really released as events described in them.
Throw into mix TV series and you can get confused pretty fast. Now it was officially stated that all TV series that were released before Wanda vision is no canon in Marvel cinematic universe which simplify thing a little but there are still series that are.
So far I believe each person on this planet has at least heard of Marvel superhero movies, perhaps even watched a few of them, and no wonder. Movies are spawning now over 20 titles and they are not really released as events described in them.
Throw into mix TV series and you can get confused pretty fast. Now it was officially stated that all TV series that were released before Wanda vision is no canon in Marvel cinematic universe which simplify thing a little but there are still series that are.