If you get an Error Code 15 or Error Code 16 while you are browsing the web and you notice that your access is blocked to a particular website, then read on as this post will guide you in resolving this problem. Both Error Code 15 and Error Code 16 have the same message that states, “Access Denied: This request was blocked by the security rules”.
Note that the error depends on what kind of browser you are using, as well as the operating system and network that you are using. On the other hand, the fixes for this error are the same and there is a handful of them that you can check out just make sure to follow each one of them carefully.
The first thing you can try is to sync the Date and Time of your computer as the wrong Date and Time settings are one of the most common causes of connection problems like Error code 15 or Error code 16. This is because of the incompatibility between the SSL Certificate validation date and the System Clock. Thus, you have to sync your System Clock. Refer to the steps below to do so.
Resetting the affected browser might help in fixing Error Code 15 or Error Code 16.
Firewall and antivirus programs are known to block files the instant it detects a threat to the system. However, there are some cases when it can also block a file even when it’s a safe one. Thus, your antivirus or firewall programs might be the reason why you can’t download anything on your Windows 10 computer. To isolate the issue, you need to temporarily disable both the Firewall and antivirus programs and then check if you can now download anything from the internet. Do not forget to enable them again as disabling them can leave your computer vulnerable to cyber threats.
You can also try to disable the Proxy server for your LAN to fix Error code 15 or Error code 16 especially if your computer was attacked by some malware or adware recently. In such cases, there is a chance that the malware or adware has changed your network settings in order to generate intrusive advertisements. Thus, you have to disable the proxy server and you can do that by following these steps:
Note: If you are using a third-party proxy service, you have to disable it.
If you are using a VPN application, there are times when it causes some issues like this error. If that’s the case, you can try to disable your VPN temporarily and see if the error is resolved or not and if turns out that your VPN is the culprit, you have to uninstall it and install a new one or its latest version. To uninstall it, follow the steps below.

 For people not familiar with recent events, the state of California has sued Blizzard for various things including discrimination and offensive behavior. Later Blizzard executives were caught shredding some evidence and things just started to go to worse from there.
After much drama, many people believed that this is the end for Blizzard entertainment and that they would not be able to recover from this since the community has sided with California and Blizzard has received a large punch as many subscribed WOW players have left the game.
Things are not so grim as they were looking as their Diablo 2 remake has made moderate success despite being released in these troubling times and there are rumors of Overwatch 2 planned release date as of the first quarter of 2022.
For people not familiar with recent events, the state of California has sued Blizzard for various things including discrimination and offensive behavior. Later Blizzard executives were caught shredding some evidence and things just started to go to worse from there.
After much drama, many people believed that this is the end for Blizzard entertainment and that they would not be able to recover from this since the community has sided with California and Blizzard has received a large punch as many subscribed WOW players have left the game.
Things are not so grim as they were looking as their Diablo 2 remake has made moderate success despite being released in these troubling times and there are rumors of Overwatch 2 planned release date as of the first quarter of 2022.

There is a lot of software on the market today, but from time to time we discover something extraordinary and unique worth sharing and today we have a threat for you. Ventoy is a tool that will help you with system reinstallations and system maintenance once and for all.
If you are a computer user that has multiple operating systems or you are installing and maintaining different hardware via different OS there is a high chance that you have multiple USB sticks with different operating systems on them.
Now the problem with that is that there are probably too many unlabeled sticks around or you do not have enough so you keep making system USBs depending on which one you might need.
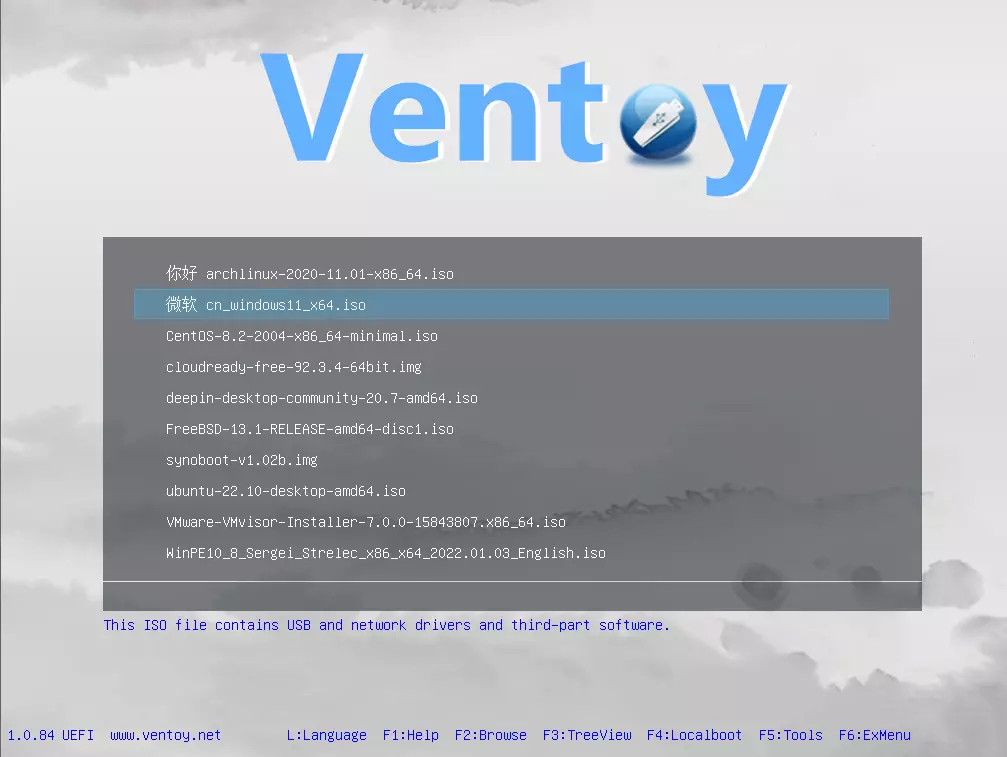
Ventoy solves all of these problems by letting you have as many operating systems images as your USB has capacity. The only thing you need to do is get the software here: https://www.ventoy.net/en/index.html and make a USB with it, then you can freely just copy your ISO images onto the USB and once it is inserted into the computer you will be given a menu to choose which one you would like to start with, simple as that.
Error code 0x000000D1 is a serious error that is displayed when Windows automatically shuts down to protect the system against further damage.
Usually, when this error occurs, the message displayed to the users states something like STOP 0x000000D1 DRIVER_IRQL_NOT_LESS_OR_EQUAL.
 What Causes 0x000000D1 Error?
Usually, the STOP 0x000000D1 error code is caused by issues like incompatibilities, third-party drivers, driver conflicts, outdated drivers, malicious drivers, and other related problems.
Speaking technically, the message displayed to the user actually means that the kernel-mode driver has tried to gain access to memory at an unreasonably high process IRQL.
If left unfixed, STOP 0x000000D1 error can become quite serious. Increased frequency of occurrence may not only lead to data loss but can cause system corruption as well. That’s why it is crucial to fix it and to resolve the underlying issues causing it as soon as possible.
CHKDSK [volume [[path] filename]] [/F] [/V] [/R] [/X] [/C] [: size]]Note: In the command given above, “[/F]” will try to fix the system errors while “[/R]” will be the one to fix the bad sectors.