A Quick Method To Fix Error Code 0x80070002

What is 0x80070002 Error Code?

0x80070002 error message triggers Windows update problems.

This error code pop prevents you from successfully updating Windows operating system and its installed components. Windows update is necessary to keep the system up to date and efficient.

It also helps you close security holes in your system and prevents your system from being infected by viruses or hacked.

Solution

Restoro box imageError Causes for 0x80070002

This error code pops up on the screen and results in an unsuccessful Windows update, when either your system has wrong date/time settings or when Windows update temporary folder is corrupted.

The latter cause is the one to be worried about as it usually results from malware, viral infection, and registry corruption and damage. If this error code is not fixed timely it can lead to system crash and failure too.

Further Information and Manual Repair of 0x80070002

The best way to fix the 0x80070002 Windows update error code is to download Restoro on your system. Restoro is a new, powerful, intuitive, and cutting-edge PC fixer that serves as both a registry cleaner and a system optimizer.

It is integrated with multiple performance-boosting and highly functional utilities. With this helper, you can resolve the maximum number and types of PC issues in a few seconds.

This tool spares you from the hassle of finding and detecting the underlying cause of the error 0x80070002. Its intuitive built-in technology automatically detects and identifies the error and its causes and repairs it right away.

Restoro includes utilities like registry cleaner, privacy issue detector, Active X and Class cleaner, and system stability scanner.

The registry cleaner feature assists users to clean up registry clutter.

This includes clearing junk files, temporary files, and invalid registry entries which take up all the disk space causing the registry to get corrupted and hampering Windows updates. It repairs the corrupt registry in no time allowing you to perform successful Windows updates.

Restoro Privacy Features

Nonetheless, if the error 0x80070002 occurs due to malware, Restoro will scan and repair it too. Its advanced privacy error anti-virus built-in feature scans for all types of malware, spyware, and viruses quickly and removes them from your PC.

This ensures that your PC remains safe from malicious malware that can cause unsuccessful Windows updates and error codes like 0x80070002.

Restoro is compatible with all Windows versions. It has a sophisticated and easy-to-use layout making it easier for users of all levels to use it without any complexity or hassle. It is safe and efficient.  It also helps boost the speed of your PC thus lowering boot time tremendously.

For user safety, Restoro advises users to create backup files. This helps retrieve valuable data and files in the event of data loss during repair which rarely happens; but in case it does, you don’t have to suffer from a big loss.

Get Restoro

To get started, all you have to do is download and install Restoro on your system. After downloading, run it on your PC for a scan.

Once the scanning is complete, a comprehensive scan report will be displayed on your screen showing you the errors affecting your system including 0x80070002 errors that you’ve been experiencing when performing Windows updates.

To resolve issues on your PC right away, simply click on repair.  This will repair the error 0x80070002 issues on your PC in seconds. After your PC is repaired, you can then perform a Windows update again. It will be executed successfully.

Click here to download Restoro today!
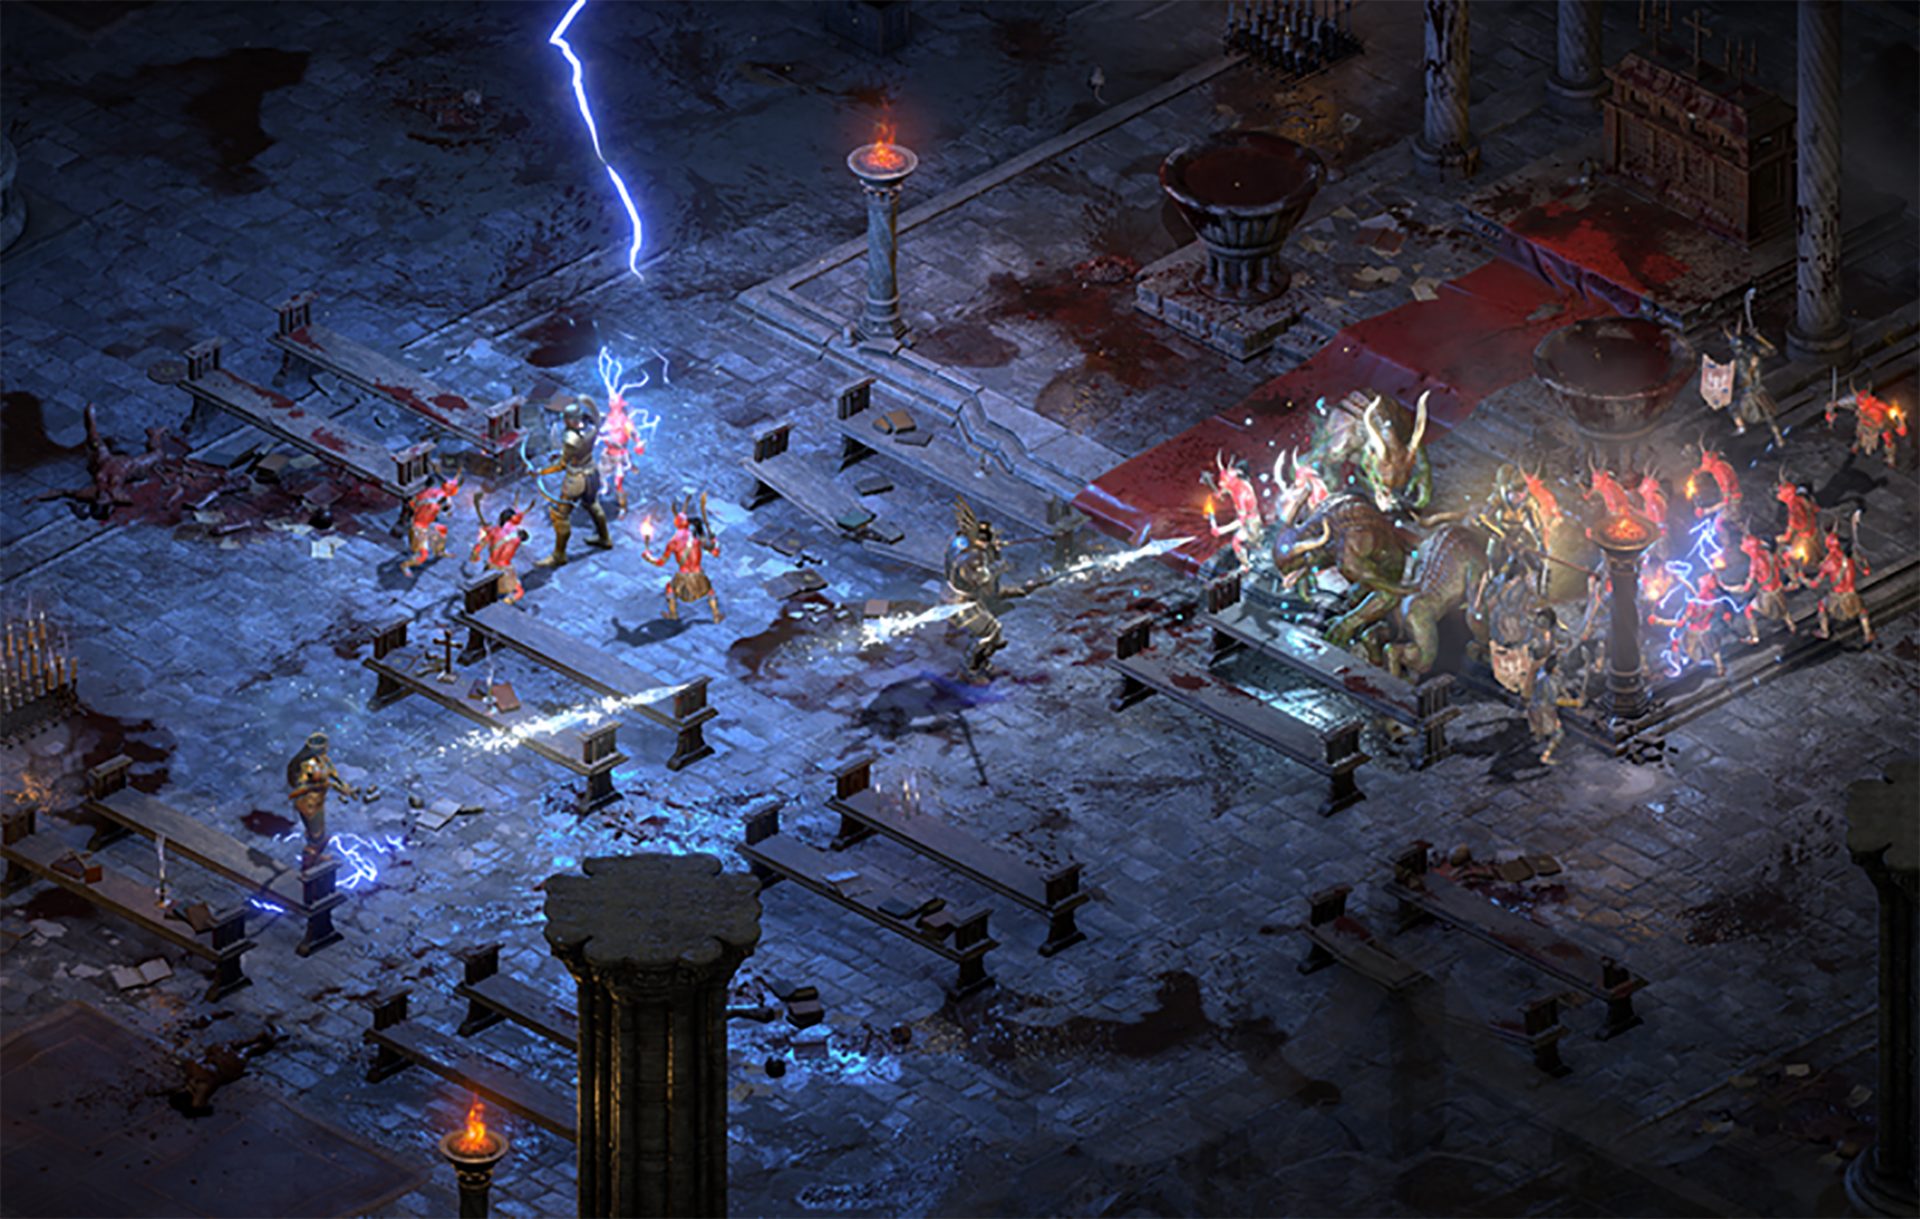
Do You Need Help with Your Device?

Our Team of Experts May Help
Troubleshoot.Tech Experts are There for You!
Replace damaged files
Restore performance
Free disk space
Remove Malware
Protects WEB browser
Remove Viruses
Stop PC freezing
GET HELP
Troubleshoot.Tech experts work with all versions of Microsoft Windows including Windows 11, with Android, Mac, and more.

Share this article:

You might also like

Fix BAD_SYSTEM_CONFIG_INFO error in Windows
If you encounter the BAD_SYSTEM_CONFIG_INFO Blue Screen error in your Windows 10 PC, then read on as this post will guide you in fixing this issue. Usually, this kind of Blue Screen error is caused by some issues with the Boot Configuration Data file. The main issue inside of the Boot Configuration Data file is that either some boot order files or older files might be in conflict with the newer ones or the stable ones and thus triggering the BAD SYSTEM CONFIG INFO Blue Screen error. This kind of Stop error also indicates that there is an error in the Windows Registry which is why you need to update potential culprit drivers as well as edit some entries in the Registry if need be. But before you get started, make sure that you create a System Restore Point first. After creating a System Restore Point, try to boot your computer into Safe Mode and then restart your computer normally. However, if it doesn’t work, proceed to the given options below.

Option 1 – Run System Restore

Performing System Restore might help you in fixing the BAD SYSTEM CONFIG INFO Blue Screen error. You can do this option either by booting into Safe Mode or in System Restore. If you are already in the Advanced Startup Options, just directly select System Restore and proceed with the next steps. And if you have just booted your PC into Safe Mode, refer to the steps below.
  • Tap the Win + R keys to open the Run dialog box.
  • After that, type in “sysdm.cpl” in the field and tap Enter.
  • Next, go to the System Protection tab then click the System Restore button. This will open a new window where you have to select your preferred System Restore point.
  • After that, follow the on-screen instructions to finish the process and then restart your computer and check if the problem is fixed or not.

Option 2 – Update or rollback your device drivers

If the first option didn’t work for you, then it’s time to either update or roll back the device drivers. It is most likely that after you updated your Windows computer that your driver also needs a refresh. On the other hand, if you have just updated your device drivers then you need to roll back the drivers to their previous versions. Whichever applies to you, refer to the steps below.
  • Open the Devices Manager from the Win X Menu.
  • Then locate the device drivers and right-click on them to open the Properties.
  • After that, switch to the Driver tab and click on the Uninstall Device button.
  • Follow the screen option to completely uninstall it.
  • Finally, restart your computer. It will just reinstall the device drivers automatically.
Note: You can install a dedicated driver on your computer in case you have it or you could also look for it directly from the website of the manufacturer.

Option 3 – Try fixing the Windows Registry files

In order to fix the Windows Registry files, you need to make a bootable Windows 10 USB drive and then boot your PC using it. To do so, refer to the steps below.
  • Once you see the Welcome Screen, click on Next.
  • Then click on the “Repair your computer” option located on the bottom-left section of the window.
  • Next, click on Troubleshoot > Advanced Options > Command Prompt.
  • After opening Command Prompt, execute each one of the commands listed below in the sequence that they are given:
    • CD C:WindowsSystem32config
    • ren C:WindowsSystem32configDEFAULT DEFAULT.old
    • ren C:WindowsSystem32configSAM SAM.old
    • ren C:WindowsSystem32configSECURITY SECURITY.old
    • ren C:WindowsSystem32configSOFTWARE SOFTWARE.old
    • ren C:WindowsSystem32configSYSTEM SYSTEM.old
  • After executing the commands given above, type in the next ones below and make sure to execute them in the given sequence below.
    • copy C:WindowsSystem32configRegBackDEFAULT C:WindowsSystem32config
    • copy C:WindowsSystem32configRegBackSAM C:WindowsSystem32config
    • copy C:WindowsSystem32configRegBackSECURITY C:WindowsSystem32config
    • copy C:WindowsSystem32configRegBackSYSTEM C:WindowsSystem32config
    • copy C:WindowsSystem32configRegBackSOFTWARE C:WindowsSystem32config
  • Now type “exit” to close Command Prompt.
  • Restart your PC for the changes to take effect.

Option 4 – Run a Memory Check to test RAM

On the other hand, you can also fix the BAD SYSTEM CONFIG INFO Blue Screen error by running a Memory Check using the Windows Memory Diagnostic. Refer to these steps to do so.
  • Tap the Win + R keys to open the Run dialog box.
  • Then type “mdsched.exe” in the field and hit Enter to open the Windows Memory Diagnostic.
  • After that, the Windows Memory Diagnostic will give out two options such as:
  1. Restart now and check for problems (recommended)
  2. Check for problems the next time I start my computer
  • Select any of the given options. After that, your computer will restart and check for memory-based issues upon the restart. If there are any issues, it will automatically them.

Option 5 – Rebuild BCD files and repair MBR files

Like what you did on the third option above, you also have to make a bootable Windows 10 USB drive for this option and then boot your Windows 10 PC using it.
  • Once you get to the Welcome Screen part, click on Next.
  • Afterward, click on the Repair your computer option located on the bottom-left part of the window.
  • Then click on Troubleshoot.
  • Next, select the Advanced Options and then Command Prompt.
  • Once Command Prompt has been pulled up, enter each one of the following commands and in the sequence that they are given to rebuild BCD files and repair MBR files:
    • bootrec /repairbcd
    • bootrec /osscan
    • bootrec /repairmbr
  • Now type “exit” to close Command Prompt and then restart your computer to successfully apply the changes made.
Read More
Disable Windows insider in Windows 10
In their search for making Windows, a better operating system Microsoft has come up with an insider program that will collect telemetry and send it to Microsoft in order to provide enough information to make a better OS. Being in an insider program is per choice basis and it is not forced to anyone. This guide will cover how to turn off the insider program since its constant updates and telemetry can slow down the internet. So if you decided that you no longer want to be part of this program here is how to turn it off.
  • Press ⊞ WINDOWS + R to open the run dialog keyboard with windows and r marked
  • Type in dialog gpedit.msc and press ENTER
  • You will find yourself in the Local Group Policy Editor Window. Inside windows find: Computer Configuration > Administrative Templates > Windows Component > Windows Update > Windows Update for Business
  • Move to the right pane and double-click on the Manage Preview Builds option
  • Inside the Manage Preview Builds window, check the Enabled radio button
  • Go to the Options section, and using the drop-down menu, set the preferred release channel
  • Select Apply and then OK
Read More
Steam beta introduces no rollback game updates
The latest steam beta update has introduced code that will prevent downloading and installing previous game versions via the steam client. steamFor many people that are playing online games, this is not such a big deal since they always must have the latest version in order to play their games but for other ones, this has arrived as a bit of a problem. Many people preferred older game versions since often updates can change certain mechanics inside the game making it different as an experience or introduce some elements that not everyone likes. So far, people could use the steamDB site to find depo of the game versions you would like to play and download it but if this beta code goes live that will not be an option anymore. Now, playing old games without updates could also be used for nostalgic reasons and these people have also been cut off with this update. It is important to point that update is still in beta client only but users have already started to voice their opinions asking Valve not to place it live. In the end, it will all depend on Valve’s decision will they listen to their customers or decide to push updates on live service.
Read More
Fix Hello Errors 0x801c004d or 0x80070490
As you know, Windows Hello offers you quick access to computers since you can log in to your Windows devices three times faster compared to passwords with the help of the camera via Face recognition and fingerprint reader. This way, Windows Hello will recognize you right away. However, there are also times when you might encounter some problems when using Windows Hello. For one, if you are trying to add the PIN method to Windows Hello on your Windows 10 computer but you suddenly encountered an error code of 0x801c004d or if you are trying to use your existing pin and you encounter an error code of 0x80070490 along with an error message that says, “Not recognized”, then read on as this post will guide you on how you can fix both of these errors. Here is the complete content for both errors:
  • 0x801c004d – Unable to enroll a device to use a PIN for login”
  • 0x80070490 - Not recognized, Pin and fingerprint are no longer options for signing in”
If you got any of these two errors, there are several potential fixes you can check out to resolve them. You can try to check for any Windows Updates or create the PIN again or check the CNG Key Isolation Service. You could also try to reset the TPM or create a new User Account. For more information, follow the instructions provided below.

Option 1 – Try checking for any available Windows Updates

The first thing you can do is to check for any available Windows Updates. It is possible that your computer may be outdated and is the reason why you’re having troubles with Windows Hello. To check for Windows Updates, just go to Settings and from there, head over to the Update and Security section and click on Windows Updates located on the left pane, and then click on the Check for Updates option. Wait until the process of checking updates is completed and if it finds new updates, install it. After you install the new Windows Updates, check if you can now add the PIN on Windows Hello or not.

Option 2 – Try creating the PIN again

The next thing you can do is to create the PIN again by signing out and signing in again and then try creating the PIN once more. If this does not work, you can try restarting your computer and creating the PIN again. You could also try removing the PIN and then change it.
  • Remove the PIN by going to Settings > Accounts > Sign-in options.
  • From there, go to the PIN section and click on the Remove button.
  • You will be asked to verify your account to proceed in removing the PIN, enter your credentials.
  • Restart your computer and then set up a new PIN.
  • Once you’re done, restart your computer and check if the error is gone now.

Option 3 – Try checking the CNG Key Isolation Service

The CNG Key Isolation Service is the one that stores and uses long-lived keys in a secure process complying with the common criteria requirements and it is possible that the error could be related to this service. This service is hosted in the LSA processes and provides key process isolation to private keys and associated cryptographic operations as required by the common criteria. Thus, you need to check this service to see if it’s the one that’s causing the error.
  • Tap the Win + R keys to open the Run dialog box and type “services.msc” in the field and hit Enter to open the Windows Services Manager.
  • Next, locate the “CNG Key Isolation Service” and once you find it, double click on it to open its Properties box.
  • After opening its Properties, check its Startup type and select Manual. This is the default setting and if it is Disabled, then it’s no wonder why you’re getting errors with Windows Hello, thus, you need to enable it.
  • Once done, restart your computer and check if you can now add the PIN to Windows Hello. If you still get the error, then you might want to try setting the CNG Key Isolation Service from Manual to Automatic and then click on the Start button and see if it fixes the error or not.

Option 4 – Try to reset the Trusted Platform Module or TPM

You might also want to try resetting the Trusted Platform Module or TPM to fix the error. You can do this by opening Windows PowerShell and then executing the “Clear-Tpm” command. After that, check if the error is now resolved.

Option 5 – Try to create a new User Account

You could also try to create a new User Account on your Windows 10 computer to fix the Windows Hello error. Once you have created a new local user or administrator account in Windows 10, check if you are now able to add the PIN from this newly created user account.
Read More
A Guide to Fixing 0x80042109 Error Code

0x80042109 - What is it?

0x80042109 is a Microsoft Outlook error. The 0x80042109 error code occurs mostly while sending emails. The error message is often displayed in the following format:

“Sending reported error (0×80042109): Outlook cannot connect to your outgoing (SMTP) e-mail server.”

Solution

Restoro box imageError Causes

It is not easy to narrow down the cause for the error code 0x80042109. This error can occur due to many reasons. This includes:
  • Corrupt emails and PST files
  • Incorrect Outlook account settings
  • Unavailability of the mail server
  • Incomplete Outlook installation
  • Spyware or viral infection

Further Information and Manual Repair

To resolve the 0x80042109 error code on your PC, here are some easy and effective DIY solutions you can try:

Method 1 - Check Mail Settings

Check your mail settings to see if your outgoing server SMTP is selected or not. If it is not, then it could be the reason for the issue. To check mail settings and select the option, here’s what you need to do:
  1. Click Tools, select Account Settings, and then POP 3 account and click change.
  2. Now check your name field and email address.
  3. Check the incoming and outgoing mail server fields and make sure that it is correct.
  4. Now click on the outgoing server and make sure that the option ‘My Outgoing Server (SMTP) requires Authentication is selected.
  5. After that, click Advanced and tick the option that says ‘This server requires an encrypted connection (SSL).
  6. Now click OK to confirm settings.

Method 2 - Reinstall Outlook on your PC

The error may also occur due to incorrect Outlook installation. Therefore reinstall it on your PC. To do this first you will have to uninstall the software and then re-install it. Once the software is reinstalled try sending the email again. If it is sent successfully, then this means the error is related to incomplete installation. However, if the error still persists then it is advisable to restore the points by going to the System Restore option and choosing the option ‘Restore My Computer to an Earlier Time’ point. This will revert the changes.

Method 3 - Try Disabling Firewall

If you have firewall program installed on your PC, then try disabling it and then send an email through your Outlook account.

Method 4 - Scan for Viruses

Another way to resolve the error code is to scan for viruses. Viral infection and spyware and also affect your Outlook account and activities. However, installing an antivirus on your PC may slow down its performance as such programs are notorious for doing that. Therefore, it is advisable to download Restoro. Restoro is a next generation and a highly advanced PC Fixer embedded with powerful and multiple utilities including an antivirus and a system optimizer. Its intuitive algorithm enables it to scan your entire PC and remove all kinds of malicious software affecting your system including malware, adware, spyware, viruses and Trojans. The system optimizer utility works simultaneously and ensures your PC performs at its optimum speed. It is safe, bug-free, and efficient. It has a user-friendly interface which makes it simple and very easy to operate. You can download it on all Windows versions. Click here to download Restoro to resolve error 0x80042109 today!
Read More
How to Fix Error Code 0xC004C003 When Installing Windows 10

What is Error Code 0xC004C003?

Error code 0xC004C003 has to do with activating Windows 10 after a clean install. This problem has been a frequent nuisance to users trying to update from Windows 7 or 8.1 following the invite path they got from Microsoft.

Solution

Restoro box imageError Causes

There are several problems that may have caused error code 0xC004C003. The most common of them are:
  • The product key entered was invalid, and cannot be used to activate the new OS.
  • The user followed the proper installation procedure, but the Windows update servers were too busy to handle the activation at that moment.
  • The free upgrade invitation was followed but after the reinstallation, the copy of Windows 10 was still not activated.
  • The user tried to perform a full clean install of Windows 10 instead of upgrading from Windows to Windows 10

Further Information and Manual Repair

A lot of solving error code 0xC004C003 has to do with the method in which the user has tried to update the system. If one decided to try and update the program before being invited to do so by the update manager, he must wait. Unfortunately, if one chooses to do it on his own and download a clean install, he was never given a product code to authenticate the process. There are two options to address error code 0xC004C003 — either restore to the previous Windows Operating System or call Microsoft (or visit their Website) and purchase a product key. The Windows update servers are very busy. There are lots of Microsoft users around the world, and the servers are doing their best to get to each and every one of the users as fast as possible, but they can only move at a certain speed. Your best bet is to sit back and wait a while. But what if you were invited, and properly downloaded Windows 10, then decided to do a clean install? It is advised that one do not try to enter Windows 7 or 8.1 serial code as this will not work. However, unlike the problem above, these users will NOT need to purchase a product key. According to Microsoft Support Staff, the installation servers are also very jammed because of the high numbers of installations going on right now. No matter what posts you may read, the key IS genuine, and it is NOT blocked, broken, or invalid. To check if Windows has been properly activated, open the Command Window. Make sure you are logged into an administrator profile; otherwise this check will not work. Type in “slmgr.vbs/ato” and click Enter and then wait. While waiting, the command will check on the status of the activation. Windows Script Host will open and show whether or not it is activated. A lot of users have reported that the activation did not work for the first few times. However they later reported after some more attempts, no issue was found in the way the operating system updated and that the activation process went smoothly. This is most likely due to the overload on the Windows Update servers, so bear with Microsoft. Users have reported that when trying to correct error code 0xC004C003, they have followed the upgrade path and then been told by Microsoft that the key was invalid and they had to purchase a new one. If the upgrade path provided by Windows 7 and Windows 8.1 is correctly followed then there is nothing to worry about Just wait a while and try it again. If there are prolonged issues, speak with a technician by visiting the Microsoft website and contacting the help center by calling the number provided. Give them all relevant information and they will be sure to help accordingly. The best solution to fix error code 0xC004C003 is to wait. In essence, the user will be waiting to reenter the same product key. According to Microsoft, and many user posts found online, it is recommended to wait a while and then try to activate again. This seemed to be an answer to most users' problems, and seem to work just fine. If the problem persists, take it to a windows repair technician to have it sorted out. If that does not work, use a powerful automated tool to fix the problem.
Read More
Windows computer doesn’t recognize second GPU
A lot of Windows users, use a second GPU for their computer systems, especially gamers above the dedicated graphics card. The operating system is set such that the dedicated high-end graphics card is set to default but there are times when the system does not recognize or detect the second graphics card. Even though every computer system comes with an integrated graphics card, for the most part, it is insufficient for graphics-intensive games and software which is why if you have an extra dedicated graphics card and your computer does not seem to detect or recognize it, then this post is for you. It could be that the dedicated graphics card has failed or it could also be an issue with the drivers and so on. Follow the suggested options below to resolve the problem.

Option 1 – Update your Graphics drivers

  • First, boot your computer into Safe Mode.
  • After that, tap the Win + R keys to launch Run.
  • Type in msc into the box and tap Enter or click OK to open the Device Manager.
  • After that, a list of device drivers will be displayed. From there, look for the Display Adapters and click on them.
  • After that, right-click on each entry under the Display Adapters and select the “Uninstall Device” option from the menu.
  • Now restart your computer.
  • After restarting your computer, go to the Settings app and Check for Updates in the Windows Update section.
Note: You also have the option to go directly to the website of your graphics card manufacturers like NVIDIA, Intel, or AMD and go to the section called Drivers then check if there’s a new available update – if there is, download and install it.

Option 2 – Update the BIOS

Take note that you have to be careful when modifying something in the BIOS. So if you don’t know much about it, it’s best if you skip on this option and try the other ones instead. However, if you are well-versed in navigating the BIOS, then follow the steps below.
  • Tap the Win + R keys to open the Run dialog box.
  • Next, type “msinfo32” in the field and press Enter to open System Information.
  • From there, you should find a search field on the bottom where you have to search for the BIOS version and then press Enter.
  • After that, you should see the developer and version of the BIOS installed on your PC.
  • Go to your manufacturer’s website and then download the latest version of BIOS on your computer.
  • If you are using a laptop, make sure that you keep it plugged in until you have updated the BIOS.
  • Now double click on the downloaded file and install the new BIOS version on your computer.
  • Now restart your computer to apply the changes made.

Option 3 – Try changing the GPU settings

  • Right-click on any empty space on your Desktop and select Graphics Properties. Note that the Graphics Properties screen depends on the graphics drivers installed on your computer and are system-specific as they may be different for other systems but they aren’t hard to find.
  • After that, make sure that the dedicated Graphics card is selected as Default under the Select Display drop-down.
  • If the Graphics card isn’t set as Default, set it and click Apply and Exit.

Option 4 – Try disabling the driver for the integrated Graphics card

  • Tap the Win + R keys to open the Run dialog box.
  • Next, type “devmgmt.msc” in the field and hit Enter to open the Device Manager.
  • From there, expand the list of Display Adapters and then right-click and select Disable device for the Integrated Graphics card. However, if the dedicated Graphics card fails, the display won’t work so you need to restart the system and enable it.
Read More
How to Fix Windows Setup Error 0x80300002
Installing a Windows 10 upgrade is definitely not an easy task since the process is not always smooth sailing and you could encounter some errors when doing so. This isn’t unusual since there are various software configurations and hardware configurations as well as services it depends on in order to properly work. So if any of them malfunctions or becomes corrupted, it will affect the process which will result in errors like the error code 0x80300002. When you encounter this kind of Windows Update error, you will see the following error message on your screen:
“We couldn’t install Windows in the location you choose. Please check your media drive. Here’s more info about what happened: 0x80300002”
You can encounter this kind of error if there is corruption in the partition table of the drive where the installation is in progress. In addition, corruption on the Media device could also cause this problem. So if you encounter this error when running Windows Setup, read on as this post will guide you in fixing it. There are several ways to resolve this issue. The first thing you can do is to verify the compatibility between the BIOS and the installation media. You could also try recreating all the partitions as well as recreating the bootable USB drive. For more detailed information, follow the given options below.

Option 1 – Check if the BIOS is compatible with the installation media

The first thing you can do to fix the error is to check if there are any compatibility issues between the BIOS and the installation media you’re using. This is actually one of the most likely reasons why you’re getting the error since this is a complicated point for the Windows installation process. If the installation media is based on GPT, then your BIOS must be based on UEFI. So if you have your bootable media with the MBR partitioning, you need to set your BIOS to Legacy.
  • In the Windows Search box, type “command prompt” and from the search results that appear, right-click on Command Prompt and select the “Run as administrator” option.
  • After that, execute this command: exe /convert /allowfullOS
  • Now, wait until the process is completed since you can track its process on your screen.
  • Once it’s done, go to Settings > Update & Security > Advanced Startup options and from there, click on Restart Now. This will restart your computer and give you advanced options.
  • Next, select Troubleshoot > Advanced Options where you will see further options including System Restore, Startup Repair, Go back to the previous version, Command Prompt, System Image Recovery, and UEFI Firmware Settings.
  • Now select the “Legacy” option. This will take you to the BIOS. Boot Mode is typically available under Boot > Boot Configuration. Once you’re there, set it to Legacy and then save the changes you’ve made. After that, your computer will restart.

Option 2 – Try recreating a new bootable drive

  • Insert your USB drive into your PC.
  • Tap the Win + R keys to open the Run dialog box and type in “cmd” and tap Enter to open the Command Prompt. Alternatively, you can also search for “cmd” in the Cortana search box to open Command Prompt.
  • Once you’ve opened CMD, type in this command to open the DISPART utility – diskpart
  • After that, you should see a new black and white window that would say, “DISKPART>”.
  • Next, type in “list disk” in the command line and tap Enter to see the list of all the Storage devices as well as your hard disk connected to your PC. Here, you have to identify your disk’s number.
  • Type in this command where “X” is the disk number you have identified and then tap Enter – disk X
  • Type in this command and hit Enter to clear the table records and all the visible data on the drive – clean
  • Now you have to recreate a new primary partition of the drive so you’ll have to type in this command and tap Enter right after – create part pri
  • A new primary partition has been created so you have to select it by typing this command and tapping Enter – select part 1
  • Now you have to format it to make it visible to normal users by typing – format fs=ntfs quick
Note: If your platform supports the Unified Extensible Firmware Interface or UEFI, replace the “NTFS” with “FAT32” in the command on Step 10.
  • After that, type in this command and tap Enter after – active
  • Finally, type this command and hit Enter to exit the utility – exit
  • After you prepare the image for the operating system, save it to the root of your USB Storage device.

Option 3 – Try to recreate all the partitions

If none of the first two options given above worked, then you can try to recreate all the partitions instead. All you have to do is restart the Windows installation process and wait until you get to the part that says, “Where do you want to install Windows?”. From there, you will see options like delete, format, extend, create new partitions, and many more. Now you have to select the Delete all the partitions options and then use the “New” button to create new partitions. Just make sure that you have one primary partition at least where you can install Windows 10. After that, continue the installation of Windows on the new partition. Keep in mind that when you create a new partition, it also recreates the partition table configuration which means that the chances of getting an error are very unlikely.
Read More
How to Fix Runtime Error 339

What is Runtime Error 339?

Runtime Error 339 is a common error code format that appears when a computer overloads with too much data. However, in some cases, it may occur due to the missing registry keys, DLL files, or during installation. It may lead some programs to shut down all of a sudden and may also corrupt files on the system.

Solution

Download Available to Completely Repair Runtime Error 339

Restoro box imageError Causes

This error code is alarming as it is a critical sign of an unstable system followed by improper maintenance of the computer. The potential risks associated with the Runtime Error 339 include:
  • System startup issues
  • Slow PC performance
  • System crash and failure
  • System file corruption
Therefore, to avoid these risks and system failure, it is advisable to fix the runtime error 339 immediately.

Further Information and Manual Repair

If you have a Runtime Error 339 issue on your computer, here is a great way how you can fix it right away:

Scan For Viruses

Improper maintenance of the computer indicates that your system might be exposed to viruses and malware. Viruses can modify the Windows registry and lead to Runtime Error 339. Therefore, first, it is important to scan for viruses on your PC.

Identify Software that Causes Errors

Scanning will help you identify software that produces this error on your PC. Once you identify them, either uninstall them or update the program. To uninstall the program, go to the Control Panel and then click on the Add/Remove program if you have Windows XP, if not then click on the Programs and Features item. Now delete the program from your system.

Obtain the Latest Version of the Installer and Re-install the Deleted Program

Once you get your hands on the latest version of the installer, run it on your system by following the on-screen instructions. Install the program. There is also another way to fix Runtime Error 339 and that is by downloading the Runtime Error tool.

Use a Professional Runtime Error Fixer Tool

To fix the error you can also use a professional Runtime Error fixer tool to scan for viruses on your PC. It is available for free download here. Download the tool and install it on your computer. Simply scan your PC after installation. Click the repair button once the scan is complete. This tool fixes problems in just a few minutes.
Read More
Best online learning websites for everything
Building your skill set could be a very important thing, especially in today’s world, and what’s the best way other than online learning classes. You are not exposing yourself to pandemics, staying safe in the warmth of your home and most of the courses are free. Presented here are sites that I believe will and can help you with your goal of learning desired material whatever that might be. Sites are listed in no particular order with a description of what each has to offer.

Coursera

https://www.coursera.org/ courseraCoursera was one of the pioneers when it comes to college education online. When it started all courses were free and offered certificates if the taker has done tasks with a passing grade. Today not everything is free but still, there are tons of free courses that can help you to learn something new and to advance in your work or hobby. Google is using the Coursera platform to deliver its courses to the audience and besides google a lot of academic professors from Princeton, Stanford, John Hopkins and many more are presently offering their course material.

edX

https://www.edx.org/ edx online learningedX has evolved from MITx, MIT’s free initiative to place some free academic lectures from its classrooms free into the world. Since it was rebranded into edX it started including other big university names like Berkeley, University of Texas System, Harvard, and many more. Since its infant days, edX has expanded and included many areas that it offers coursework from arts to science. Certificated today are mostly not free but course videos are, so if you care to learn and not wave certificates around this is a great place to do it.

Udemy

https://www.udemy.com/ udemyUdemy has a little different approach to course material than previously mentioned websites. Teachers on Udemy are mostly people that are working in a given field. Programmers will teach programming, fitness instructors will teach training, etc. There are vas variety of topics even on lifestyle, hobbies even gaming to more serious ones like software developing hardware, etc. There are free courses but mostly are one-time purchases with unlimited access to course material and with frequent discounts udemy might be a good place to look if you can find anything interesting.

Alison

https://alison.com/ alisonAlison is kind of Udemy if we are talking about course material and who is teaching, the difference however is that it has more free content and it is one of the rare websites on this list that has Language courses. Courses vary from beginner level to more advanced ones.

Udacity

https://www.udacity.com/ udacity online learningUdacity was also one of the earlier websites to offer free courses, in today’s world it still has free material but there is also paying one. The big difference from other competitors is that Udacity focuses mostly on programming, data science, and web development and it is very strong in this field. There are no courses about art. Music or similar, mostly IT stuff is covered here. If this is something that interests you, make a free account and give it a go.

Codecademy

https://www.codecademy.com/ codecademyCodecademy is a website mainly focused on teaching you how to code. Pro plan is there but there are a lot of basic and free courses on the mentioned subject. The curriculum is really wide covering Python, R, Java, JavaScript, SQL, Ruby, C#, C++, Swift, PHP, HTML, CSS and more so I am sure that if you are interested in coding this would be a pretty good place to find things. Besides pure language coding courses site offers also, Cybersecurity, Web design, Data science, web development, Game Development, Mobile Development, and many more courses on provided subjects.

Academic Earth

https://academicearth.org/ academic earthAcademic Earth has been built with one simple premise: Everyone deserves access to education. Lead by this kind of mindset on Academic Earth you will find well, academic courses similar to ones found on edX and Coursera, but from mentioned sites here all courses are free and you will find only academic ones, there are no entrepreneur or expert courses here, just pure academic ones. If you wish to see and learn something the way it is taught in Harvard, Berkeley, MIT, etc this is the place for you.

Khan Academy

https://www.khanacademy.org/ khan academyKhan academy is completely free and it is offering courses matching certain grades for children. It is offering courses for all 8 years of elementary school, math courses for high school and college with some coursework on topics like science, arts & humanities, reading, life skills, etc. Despite not being on the same level as some university courses presented on other mentioned websites Khan Academy is a good place to learn a lot of basic skills that you could build upon later.

Conclusion

I hope that I have helped you in some way to expand your skill set and learn something new with provided sources and I hope to see you again on errortools.com
Read More
1 2 3 171
Logo
Copyright © 2023, ErrorTools. All Rights Reserved
Trademark: Microsoft Windows logos are registered trademarks of Microsoft. Disclaimer: ErrorTools.com is not affiliated with Microsoft, nor claims direct affiliation.
The information on this page is provided for information purposes only.
DMCA.com Protection Status