
Enter Cooler Master XG850 PLUS PLATINUM, a new, in-house designed power supply from Cooler Master. I will admit that in last years I was a big fan of Cooler Master and their components, well not all but power supply and PC cases were always products from them that I liked and used. The latest power supply from them does not disappoint and I must say that I like it very much, it is hi-quality, it is silent, it has a large LCD display where you can see its current state and also has some RGB lights so it looks cool in your case.

Technical specifications
So without further detours here are the technical specifications and then we will talk a little about it.
| Model: MPG-8501-AFBAP-X |
| ATX Version: Intel ATX 12V Ver. 2.53 |
| PFC: Active PFC |
| Input Voltage: 100-240V |
| Input Current: 12-6A |
| Input Frequency: 50-60Hz |
| Dimensions (L x W x H): 160 x 150 x 86 mm |
| Fan Size: 135mm |
| Fan Speed: 1800 RPM |
| Noise Level @ 100%: ≤ 25 dBA |
| Efficiency: ≥ 92% @ Typical Load |
| 80 PLUS Rating: 80 PLUS Platinum |
| ErP 2014 Lot 3: Yes |
| Operating Temperature: 0-50°C |
| Power Good Signal: 100 - 150 ms |
| Hold Up Time: ≥ 16ms |
| MTBF: >100,000 Hours |
| Protections: OPP, OVP, OCP, UVP, SCP, OTP, Surge, and Inrush Protection |
| Regulatory: TUV, cTUVus, CE, BSMI, FCC, CCC, EAC, UKCA |
| ATX 24 Pin Connectors: 1 |
| EPS 4+4 Pin Connectors: 1 |
| EPS 8 Pin Connector: 1 |
| SATA Connectors: 12 |
| Peripheral 4 Pin Connectors: 4 |
| PCI-e 6+2 Pin Connectors: 6 |
| USB Protocol 10P: 1 |
| Series: XG Series |
| 80 Plus: Platinum |
| Modular: Full Modular |
| Wattage: Above 750W |
Opinion about Cooler Master XG850 PLUS PLATINUM
If we put aside the technical characteristics of the power supply itself we are left with visual and real working experience. Now real working experience will not be covered here since yea it is working great but it needs some time and a long period of testing in order to be able to say that it is indeed reliable and great but considering I have never had any issues personally with power supplies from Cooler Master I will assume that this one is also very reliable and hi-quality.
That leaves us basically with looks and feels of supply itself and I must say that I like it, and I mean I like it a lot. It feels hi-quality and it looks hi-quality. The LCD display is very good looking and it is very crisp and readable. With power supply some proprietary software so you can choose what you want on display on the screen and also you can control RGB and display colors with it.
I have not opened the power supply to see how it looks inside but from what I could see I think this would be my new power supply if I were building a new PC now. I recommend it and if you decide to get it I hope it will serve you long long time.
Thank you for reading and I hope to see you next time.
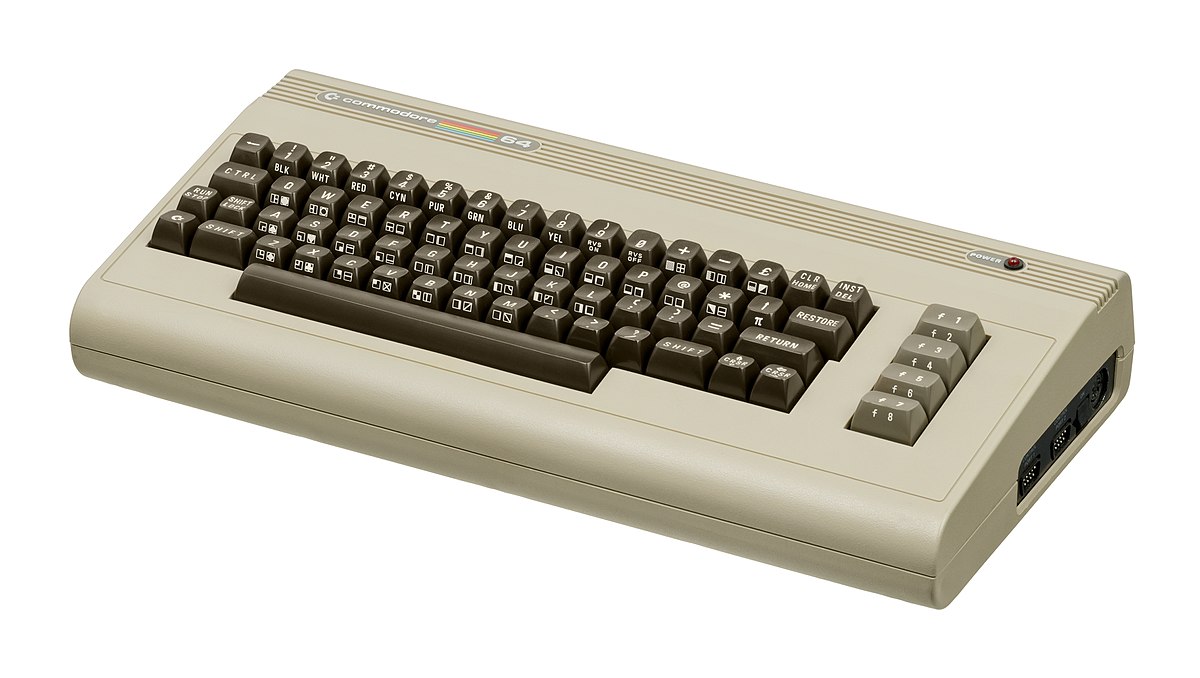 History of Commodore
 With sales booming and the early reliability issues with the hardware addressed, software for the C64 began to grow in size and ambition during 1984. This growth shifted to the primary focus of most US game developers. The two holdouts were Sierra, who largely skipped over the C64 in favor of Apple and PC compatible machines, and Broderbund, who was heavily invested in educational software and developed primarily around the Apple II. In the North American market, the disk format had become nearly universal while cassette and cartridge-based software all but disappeared. So most US-developed games by this point grew large enough to require multi-loading.
At a mid-1984 conference of game developers and experts at Origins Game Fair, Dan Bunten, Sid Meier, and a representative of Avalon Hill said that they were developing games for the C64 first as the most promising market. By 1985, games were an estimated 60 to 70% of Commodore 64 software. Over 35% of SSI's 1986 sales were for the C64, ten points higher than for the Apple II.
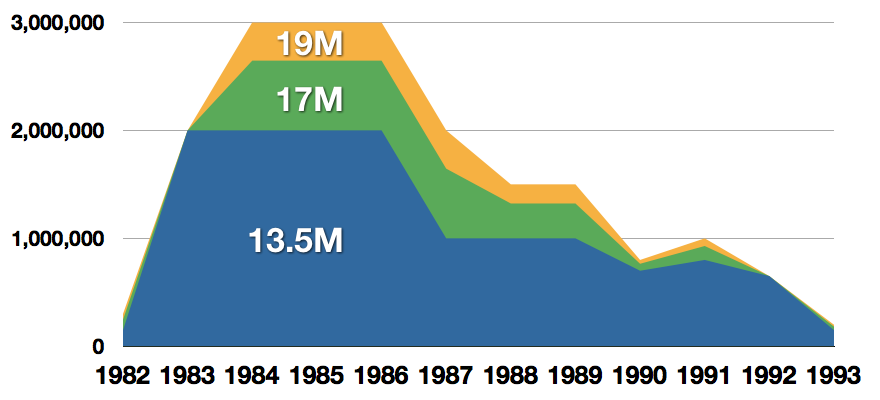
Everything was great for Commodore but the industry was moving forward and by the year 1988, PC compatible computers were stated to be the largest and fastest-growing home entertainment systems pushing C64 on to second place. Also, Nintendo’s gaming system has started to take hold in the world with amazing 7 million systems sold in 1988 only.
By the year 1991, many developers exited the gaming market for Commodore 64 home computer system and its popularity started to fall due to lack of software and not so many hardware changes.
With sales booming and the early reliability issues with the hardware addressed, software for the C64 began to grow in size and ambition during 1984. This growth shifted to the primary focus of most US game developers. The two holdouts were Sierra, who largely skipped over the C64 in favor of Apple and PC compatible machines, and Broderbund, who was heavily invested in educational software and developed primarily around the Apple II. In the North American market, the disk format had become nearly universal while cassette and cartridge-based software all but disappeared. So most US-developed games by this point grew large enough to require multi-loading.
At a mid-1984 conference of game developers and experts at Origins Game Fair, Dan Bunten, Sid Meier, and a representative of Avalon Hill said that they were developing games for the C64 first as the most promising market. By 1985, games were an estimated 60 to 70% of Commodore 64 software. Over 35% of SSI's 1986 sales were for the C64, ten points higher than for the Apple II.
Everything was great for Commodore but the industry was moving forward and by the year 1988, PC compatible computers were stated to be the largest and fastest-growing home entertainment systems pushing C64 on to second place. Also, Nintendo’s gaming system has started to take hold in the world with amazing 7 million systems sold in 1988 only.
By the year 1991, many developers exited the gaming market for Commodore 64 home computer system and its popularity started to fall due to lack of software and not so many hardware changes.
 Commodore announced that the C64 would be finally discontinued in 1995.
However, only one month later in April 1994, the company filed for bankruptcy. When Commodore went bankrupt, all production on their inventory, including the C64, was discontinued, thus ending the C64's 11 and a half year production.
Commodore announced that the C64 would be finally discontinued in 1995.
However, only one month later in April 1994, the company filed for bankruptcy. When Commodore went bankrupt, all production on their inventory, including the C64, was discontinued, thus ending the C64's 11 and a half year production.
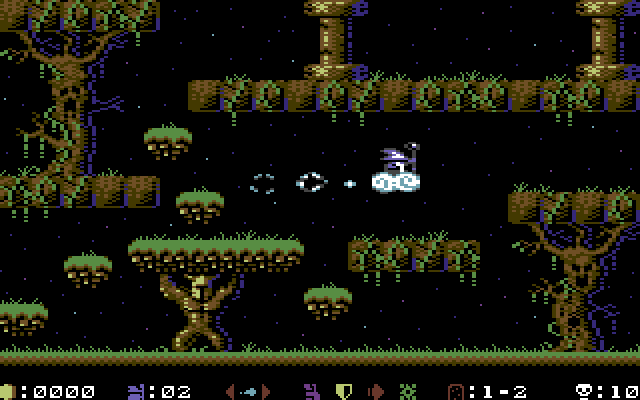 Zak McKracken and the Alien Mindbenders
 If you are not keen on spending money for reliving and checking games or software of C64 here are some links to help you to at least experience part of it completely free.
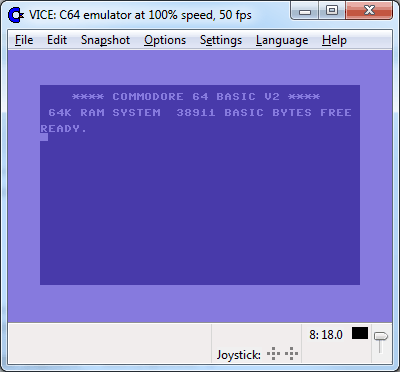
Commodore 64
If you are not keen on spending money for reliving and checking games or software of C64 here are some links to help you to at least experience part of it completely free.
Commodore 64 
