MSI.chm error is a common Windows Error code that occurs when the Windows OS becomes overloaded with invalid system references.
Solution
Error Causes
The MSI.chm error is normally triggered by the following causes:
Poor PC maintenance
You may experience the MSI.chm error if you don’t pay attention to its maintenance. This usually happens when you don’t run antivirus software or update programs and drivers frequently.
Registry files get corrupt and damaged
This error may also occur when the registry files of your PC get corrupt and damaged. This normally happens due to continuous writing, editing and deleting of information from your PCs registry over time as programs are installed, modified and deleted.
Other causes include: malware and system conflicts.
Further Information and Manual Repair
When you come across the MSI.chm error on your PC, it is advisable to repair it immediately without any delays. If you procrastinate in repairing this error, your PC is likely to be exposed to risks like:
Slow PC performance
System failure and crashes
Nonetheless, to resolve this error you don’t have to get the assistance of an IT professional. The MSI.chm is easy to repair and you can resolve it in no time even if you aren’t technically adept.
Here are some of the best ways to repair the MSI.chm error on your PC successfully in the shortest time:-
Cause: Corrupt and Damaged Registry Files
Quick Fix: If you think the MSI.chm Windows error on your system is related to Windows registry issues, then the best way to resolve this error is to download and install a Registry cleaner tool. A word of advice here is to always download such tools from a reliable and a trusted website.
Once you download the Restoro, run it on your PC to scan for errors. The scanning will usually take a couple of minutes. So, it is advisable to be patient. After the scanning is complete, you will see a detailed scanning report highlighting the registry errors on your PC.
Now to resolve the MSI.chm error that has occurred on your PC due to registry issues, click on the ‘Repair’ button to fix the error.
Once the repairing process is complete, restart your PC.
Restoro helps you not only fix the MSI.chm error but it also helps improve the speed of your PC, and protects it from failure and crashes.
Cause: Poor PC Maintenance
Quick Fix: If the cause of the MSI.chm error is poor PC maintenance, then the best way to resolve the error is to update the drivers. You can do this by installing the latest drivers for the devices that you think are now old and need to be updated.
Here’s what you need to do:
First find which devices don’t have drivers installed. For this go to the start menu and then click on the Control Panel. Now open the Device Manager. The Device Manager will list down all the devices that don’t have drivers installed with yellow exclamation point icons next to the device name.
As for the updates, the general rule of thumb if the driver does not support the program you are trying to run, then this means that you probably need to update the driver to ensure compatibility. For example your video card driver does not support a newly launched game, then you definitely need a driver update to play the game on your PC.
To install or update drivers on your PC, you can either get CDs from the market or you can download updated versions of the drivers from the main manufacturer’s website for free.
You can also use automated solution for all of your driver issues:
So, next time when you or your friends encounter this problem, try these quick fixes to repair the error without any hassle.
Isn’t it annoying when you get an error message pop up stating ‘Cannot find propsys.dll” or “propsys.dll not found” when you start your computer or open a particular program?
The propsys.dll file is crucial to the Windows operating system. This file is located in one of the following locations: "C:\Windows", C:\Program Files, C:\WINDOWS\system32, or C:\Program Files\Common Files". And the propsys.dll error indicates that the propsys digital library file is damaged and corrupt.
The propsys.dll error may lead to a very unstable operating system.
It may also hamper your ability to access many programs on your computer, lead to program and system crash and slow down the system’s performance. Therefore, to avoid these system threats, it is advisable to fix the error immediately.
Solution
Error Causes
The common causes of propsys.dll file error are:
Registry problem
The propsys.dll file is damaged due to a virus or spyware
Improper software removal
Hardware Failure
The propsys.dll error message is displayed in either of the following forms:
Propsys.dll not found
Cannot find [Path]propsys.dll
This application failed to start because propsys.dll was not found. Reinstalling the application may fix this problem
The propsys.dll file is missing
Further Information and Manual Repair
There are many ways to fix the propsys.dll error. However, for optimum results from the fix, you must first identify the cause of the error and then choose the solution accordingly.
Recommended Solution for Registry Issue
If you use your system daily the resulting wasted/invalid/junk entries may dilate the registries.
This can result in registry malfunctioning which may result in a propsys.dll error on your screen. When this happens, it is advisable to use a registry cleaner to fix the problem.
Registry cleaner helps clean up the junk entries and repairing the corrupted registries.
For this, you will first have to download a registry cleaner repair tool. Download and install the software on your computer. After downloading it, click the start scan button to run. This helps scan and diagnose system errors on your computer in seconds.
Once the scanning is complete, click on the fix button to repair the registry problem.
Recommended Solution for File Damage and Corruption
Use the ‘System Restore’ option to restore corrupt and damaged files. The ‘System Restore’ function will help you get a fresh copy back and simultaneously help fix the error. Here’s how to use and access the ‘System Restore’ function on your computer:
Simply go to the start menu and in the search box type restore. Once you type, it will show you the system restore option. Now select ‘choose a different restore point’. After this, you will be presented with a list of restore points.
Choose a point that you believe happened before the propsys.dll error. Confirm your selection and restart.
Another alternative solution for file damage is to run a virus scan of your entire system; the damage could be related to a virus or malware infection.
Recommended Solution for Hardware Failure
If a propsys.dll error occurs due to hardware failure, then it is advisable to update the drivers for hardware devices that you think are related to propsys.dll. For example, if you receive the propsys.dll error when you play a 3D video game, then try updating the driver for your video card.
A lot of controversies and mixed emotions have come from statements about Windows 11 minimum system requirements, especially ones linked to TPM.
Naturally, each time some software company giant announces how things are must have there are people who go out and prove them wrong.
This time Raspberry Pi community was one which demonstrated that not only Raspberry Pi does not have a TPM module, it can run the full desktop version of Windows 11
Raspberry Pi 4 and things you need for Windows 11 installation
In order to actually install Windows 11 on your Pi, there are certain things that you will need. Check out the below list and prepare everything.
Raspberry Pi 4 4GB or 8GB
A 32GB or larger SSD via a USB 3 caddy. Best for performance or 16GB or larger microSD card
USB boot enabled, see below.
A micro SD card with the latest Raspberry Pi OS
Windows 10 PC
USB to Ethernet or WiFi dongle
Bluetooth dongle (if you want Bluetooth)
Keyboard, mouse, HDMI, and power for your Raspberry Pi
Configuring Pi to boot from SSD
In order to boot from SSD be sure that firmware and bootloader are up to date on the latest version and upgrade if needed. Be aware that this firmware update can only be performed using the official Raspberry Pi OS.
Also if you are eager and want to use a standard microSSD card instead of an SSD to run Windows 11 feel free to skip this entire section.
Boot from microSSD with the latest Raspberry Pi OS on it.
Update firmware and OS using the terminal by typing
sudo apt updatesudo apt full-upgradesudo rpi-update
Reboot your Pi
Install the latest version of bootloader again using the terminal with the command
sudo rpi-eeprom-update -d – a
Reboot Pi
Launch raspi-config on your Pi via terminal with
sudo raspi-config
Select option 3 (Boot options – Configure options for start-up) from boot options
Select Boot ROM version and press ENTER
Select latest and then OK
Select NO when prompted to reset boot ROM to defaults on the latest version boot ROM selected screen. Press OK
Select Boot order and press ENTER
Select USB Boot and click on OK and remove microSD card from Pi
Select Finish and click on NO when prompted to reboot
Creating Windows 11 installation image for Pi 4
In order to install Windows 11 on our Pi, we must create an installation image, follow the steps below explaining the process.
Download Windows on Raspberry imager and extract it into the win11 folder
Open Imager and allow it to make changes to your computer, set your language, and click on next
Select storage drive where you would like to install Windows
Set device type and click on next
Select our Windows 11 ISO image we created and click on next
On the drivers screen select Use the latest driver package available on the server
On UEFI firmware select screen choose Use the latest firmware available on the server
On configuration screen click on next
Check your setting on the installation overview and if everything is ok click on install
Wait for the whole process to be finished
Once the process is completed, close Windows on Raspberry imager, take out SSD or microSSD card from PC and connect it on your Pi along with Pi peripherals.
Setting Windows 11 on Pi
In order to actually use Windows 11 on our Raspberry Pi we now have to set up the Windows 11 install using the standard post-installation setup sequence.
Power up Pi and press ESC when prompted
Go to Device manager and press ENTER
Select Raspberry Pi Configuration
Select Advanced configuration
Set Limit RAM to 3GB to a disabled state, press F10 to save, and ESC to exit.
Select Display configuration
Set the resolution to desired option and press ENTER, F10 to save, and ESC to exit
Go to CPU configuration
Check if the CPU clock is set to default, if not set it
Press ESC to go back all the way to the main menu
Select Continue to exit BIOS and boot your Raspberry Pi with Windows 11 on it
And there you have it, fully working Windows 11 OS on Raspberry Pi despite what Microsoft says
Note that due to lack of some drivers performance can be less than optimal, for example, full HD videos will not work since there are no compatible graphic drivers for Pi and some other stuff like Wi-Fi will also cause some issues but overall Windows 11 is working pretty well.
Solimba is a bundled executable program. It was created to be launched as a promotional tool to get advertisements loaded on a user’s system, upon installation. As a bundle, Solimba offers installation of various programs, with the objective of promoting various products and services. It utilizes unethical techniques, as in the case with adware tactics to influence or for want of a better word, hijack an Internet Browser to affect a website’s result on a search results page. In this assessment, Solimba distributed ads on Internet Explorer, Chrome, and Mozilla browsers, by hijacking various Internet Browsers to change the user's experience. (Images are shown below)
Technical details about Solimba PUP include:
Digital Signature: POPELER SYSTEM, S.L.
Entry Point: 0x0000C1DC
Assessment of Solimba Potentially Unwanted Program
Solimba PUP is all about the ads. Once this executable is installed, it penetrates your computer system and sends ads all over your Internet Browser – Chrome, Internet Explorer, Mozilla Firefox, and the likes.
For this assessment of Solimba.exe PUP, two installations were carried through. In layman's terms, I actually installed Solimba on two occasions to decipher the true nature of the PUP. It was shocking to find that both installations revealed different bundled programs and advertisements. In the first instance (as shown below), Solimba proved more aggressive in featuring ads for revenue advancements.
It’s important to note that hijacked results resulting from the installation of Solimba. This affected the results of the website on the Internet browser to boost its ranking, even without the use of a search engine. The advertisement displayed on the Internet Explorer search page routes the user to a software installation website. The utility tool in question was a “Windows 8.1 PC Repair” tool used to identify threats present on the Windows 8.1 OS.
The advertisement displayed on the Chrome Browser search page routes the user to a health and beauty magazine website. This site advocates health and beauty, especially issues concerning weight loss. Several ads were visible on-site, displaying products to assist people in losing weight.
During my installation of Solimba, the installation wizard underscored that four programs would be downloaded. These programs included N8Fanclub.com_KinoniRemoteDesktop, Lolliscan, PaceItUp, and SearchProtect. Interestingly, only two programs from the list were apparent or obvious. An N8Fanclub.com_KinoniRemoteDesktop file was made on the Desktop and SearchProtect was seen in “All Programs”, along with files stored on the computer’s Local Drive. The other programs that were “supposedly” installed remained concealed. A test was done to determine whether these were counted as extensions or add-ons to the varying web browsers but nothing was found on any of the tested browsers – Google Chrome, Internet Explorer, and Mozilla Firefox.
Description of 4 Installed Files
N8Fanclub.com_KinoniRemoteDesktop
When this file was initially found on the Desktop, a rootkit came to mind. A rootkit was used as a means to an end. Whoever was on the receiving end of this unwanted file would be able to connect to an infiltrated system without the knowledge of the user. After running the file to determine its behavior, nothing much happened. A message appeared indicating that the software couldn’t execute on the computer. That was pretty tricky since, to begin with, I didn’t place that specific file on the desktop but it came along with the territory and so I had to accept it.
Further research online into N8Fanclub.com_KinoniRemoteDesktop proved very rewarding. A search of the entire file name was not able to do the trick so I had to do research on both terms separately. After landing on N8Fanclub.com, I was nicely asked to disable my adblocker.
There seemed nothing harmful about the site. However, due to the fact that it was not what I initially installed, the program was an unwanted program. That’s exactly what Solimba does. It installs several other programs that were not requested by the user in an attempt to make money from advertising. The mere fact that this program got installed meant that it was to promote an online service.
KinoniRemoteDesktop
was a separate program. It was combined with N8Fanclub as a way to allow users to use their PC computer “as if they were sitting in front of it.” A user would be able to make use of a full web browser, watch Flash videos, play games, and even use office applications. This would be done from the user’s Nokia device. This is an advertisement at its best.
Lolliscan
This program did not allow me to see much since it didn’t leave a physical trace behind. However, during the installation, Lolliscan was listed as one of the four programs that would be installed. Overall, Lolliscan supposedly should be able to save people money since this form of the ad focuses on showing coupons when visiting sites such as Amazon. While this seems like a good deal, this ad will invade your personal space and distribute pop-ups at the most inopportune times.
PaceItUp
As the name states, PaceItUp is software added to a browser with the intent to speed your computer. Quite the contrary, PaceItUp does the total opposite since it installs bundled programs that slow down a computer system. PaceItUp is also known for displaying ads and tracking what the user does on his/her computer system.
SearchProtect
It’s known for hijacking your computer’s homepage. In fact, this addition is very stubborn and often possesses a challenge when a request to uninstall is made.
Further Information on Solimba
The second installation of Solimba also had its own dose of bundles to display. In comparison to the first installation, two programs from the bundle were different while two remained the same.
two additional programs were installed along with the second installation of this bundle. These were dubbed Optimizer Pro and GamesDesktop. SearchProtect and N8Fanclub.com_KinoniRemoteDesktop remained triumphant and unbeatable. They were repeated within the installation.
To completely remove Solimba from your computer, click here to download and install Spyhunter.
Hello and welcome everyone. In today's article, you will learn how to lock folder and content in it.
Please be aware of few things:
The method is shown here works, but you need to be careful and follow step by step or you will damage your files permanently,
If you forget your password, you can not access your files anymore
Your files altho protected can still show up in recent files of some applications
All of that being said, let us start with locking the local folder on the computer with the password.
Go to the folder where you have files that you would like to hide and lock with a password. Enter the folder and create the new text file inside it. Skip the name for now and go inside it. Copy and paste the following code inside the file:
cls@ECHO OFFtitle Folder Lockerif EXIST "Control Panel.{21EC2020-3AEA-1069-A2DD-08002B30309D}" goto UNLOCKif NOT EXIST Locker goto MDLOCKER:CONFIRMecho Are you sure u want to Lock the folder(Y/N)set/p "cho=>"if %cho%==Y goto LOCKif %cho%==y goto LOCKif %cho%==n goto ENDif %cho%==N goto ENDecho Invalid choice.goto CONFIRM:LOCKren Locker "Control Panel.{21EC2020-3AEA-1069-A2DD-08002B30309D}"attrib +h +s "Control Panel.{21EC2020-3AEA-1069-A2DD-08002B30309D}"echo Folder lockedgoto End:UNLOCKecho Enter password to Unlock folderset/p "pass=>"if NOT %pass%==Your-Password-Here goto FAILattrib -h -s "Control Panel.{21EC2020-3AEA-1069-A2DD-08002B30309D}"ren "Control Panel.{21EC2020-3AEA-1069-A2DD-08002B30309D}" Lockerecho Folder Unlocked successfullygoto End:FAILecho Invalid passwordgoto end:MDLOCKERmd Lockerecho Locker created successfullygoto End:End
Now locate this line of code in the document: if NOT %pass%==Your-Password-Here goto FAIL and replace Your-Password-Here with your password.
!!! Write down somewhere your password, if you lose it you will lock the folder even for you !!!
Save the file as FolderLocker.bat and double-click on it to execute it.
If everything was done correctly, a new folder with the name: Locker
Move files that you want to hide and protect inside that folder.
Double click again on FolderLocker.bat
The command prompt will appear with the question do you want to lock the folder, press Y, and press ENTER. The command prompt will close and the Locker folder will disappear.
In order to unhide and access the folder, you will need to double click on FolderLocker.bat again but this time command prompt with ENTER your password will appear. Type in your chosen password and the folder is back. If you wish to hide and lock it again just double click on FolderLocker.bat again, confirm with Y and it is hidden again.
The Google Chrome browser checks the SSL Security Certificate of the website that you are trying to open. However, if Chrome is not able to check the certificate then you might encounter an error related to the SSL Certificates which you might face when browsing the web. This particular error is the ERR BAD SSL CLIENT AUTH CERT error which is caused by many factors such as the computer’s Time, Cached Data is corrupt, Date is out of sync, as well as third party software installed in your computer is the one that’s blocking the site and many more.
The ERR_BAD_SSL_CLIENT_AUTH_CERT error might also be coming from the website’s end. It could be that the server is rejecting the certificate the client website is sending. The certificate might have already expired or the server may not trust its issuer – whichever the case may be, here are some options you can check out to fix the error.
Option 1 – Sync Date and Time
The first thing you can try is to sync the Date and Time of your computer as the wrong Date and Time settings are one of the most common causes of connection problems like the ERR_BAD_SSL_CLIENT_AUTH_CERT error. This is because of the incompatibility between the SSL Certificate validation date and the System Clock. Thus, you have to sync your System Clock. Refer to the steps below to do so.
Right-click on the Taskbar and click on the Adjust Date and Time option.
Next, click on the Sync Now button to synchronize the Date and Time with the Microsoft Servers.
Now make sure that the Time Zone that’s set on the same page is correct.
Option 2 – Try clearing the browser data
There are times when some data in the browser is conflicting with the loading of the website and triggers errors like ERR_BAD_SSL_CLIENT_AUTH_CERT. And so you can try to clear your browser’s data. This might be a very basic solution but oftentimes it works in fixing this kind of error in Google Chrome. Follow the steps below to clear the data in your browser.
Open your Google Chrome browser.
After that, tap the Ctrl + H keys. Doing so will open a new panel that allows you to delete the browsing history and other data in your browser.
Now select every checkbox that you see and click on the Clear browsing data button.
Then restart your Chrome browser and check if you can now open any website or not.
Option 3 – Try to check and fix any possible conflicts with third-party programs
Third-party programs like internet protection software could be interrupting the connection and causing the error. For some unknown reason, your antivirus program or firewall might be detecting the webpage you are trying to open as malicious or with less credibility which is why it is blocking the browser from opening the website. To fix that, if you have third-party programs installed like VPN, security software, or any add-on, or firewall, you can disable them temporarily and see if it fixes the problem and you’re able to pull up the website. After a while, you have to enable them back and configure their settings so that the website won’t get blocked again.
If you were using Google Chrome when you got the ERR_BAD_SSL_CLIENT_AUTH_CERT error, then you need to follow the protocol fixes for SSL3/TLS and QUIC which are usually some of the reasons that cause the SSL version / Cipher Mismatch. It also has a few fixes for Windows 10 computer where you can clear the certificates and make sure that your computer date and time is in sync with your time zone and so on.
If you were using Edge or Internet Explorer when you got the error, then you have to follow the steps below.
Type “Internet” in the search box of your browser. After that, you should see the Internet Options from the search results.
Next, open the Internet Properties window and switch to the Advanced tab and then scroll down to the Security section.
From there, check the “Use TLS 1.1” checkbox as well as the “Use TLS 1.2” checkbox and then click OK to save the changes made.
Restart the browser.
On the other hand, if you were using Firefox when you go the error, here’s what you have to do.
Open Firefox and in the address bar, type “about:config” and hit Enter.
If a warning appears, just click on the “I accept the risk!” button to proceed.
Next, type in “TLS” in the search field and hit Enter.
Then look for “security.tls.version.min” and double click on it and set its integer value to 3 to force the protocol of TLS 1.3.
Now click OK and restart Firefox and do the same thing with SSL.
Option 5 – Try to update Google Chrome
You might also want to try updating your browser to its latest version and have it installed in your computer. After you install the update, check if you can now open the website you were trying to open earlier.
Option 6 – Get rid of any conflicting browser extensions
Open Chrome and press Alt + F keys.
Go to More tools and click Extensions to look for any suspicious browser extensions or toolbars.
Click the Recycle bin and select Remove.
Restart Chrome and press Alt + F keys again.
Proceed to On Startup and mark Open a specific page or set of pages.
To check if the browser hijacker is still active, click Set pages, if it is active, overwrite the URL.
Note: If removing the browser extensions or toolbars didn’t work, you can also try to reset your Google Chrome browser.
Open Google Chrome, then tap the Alt + F keys.
After that, click on Settings.
Next, scroll down until you see the Advanced option, once you see it, click on it.
After clicking the Advanced option, go to the “Restore and clean up option and click on the “Restore settings to their original defaults” option to reset Google Chrome.
Updating your Windows 10 computer does not always go smoothly as there are some errors you can encounter along the way. One of these Windows Update errors is the error code of 0x80246008. This kind of error can occur during different phases of an update that’s being downloaded or installed and even when an update is being initialized.
If you narrow down the cause of this Windows Update error, you’ll most likely see that it is related to the deliverability of a file to a computer from the servers of Microsoft. In other words, the error might be due to conflicts from programs like Firewall as well as third party programs like Antivirus or it could also be due to corrupted disk image or system files or it could be that any of the supporting Windows Update components and services are not working properly. Whatever the cause may be, the potential fixes provided in this post can be applicable to Windows Updates as well as the Microsoft Store.
Refer to the suggestions provided below to resolve the Windows Update Error 0x80246008 but before you proceed, make sure that you create a System Restore point first.
Option 1 – Apply some tweak in the Windows Registry from Command Prompt
Tap the Win + X keys and select Command Prompt (Admin) to open Command Prompt with admin privileges.
Next, navigate to the root location of the bootable device inside the Command Prompt command line.
Once you’re in the root location, type the following command and tap Enter to execute it:
After that, close the Command Prompt command line and then tap the Win + R keys to open Run utility.
In the field, type “services.msc” and click OK or tap Enter to open the Windows Services Manager.
From there, look for the following services:
Windows Update – Manual (Triggered)
Background Intelligent Transfer Service – Manual
Now open their Properties and make sure that their Startup type is as mentioned above and that they are running. If they are not running, just click on the Start button.
Option 2 – Run the System File Checker Scan
If the registry tweak didn’t work, you can run a System File Checker scan instead. It is a built-in command-line utility that replaces bad and corrupted system files to good system files that might be the cause why you’re getting the error when you try updating your computer. To run the SFC command, follow the steps given below.
Tap Win + R to launch Run.
Type in cmd in the field and tap Enter.
After opening Command Prompt, type in sfc /scannow
The command will start a system scan which will take a few whiles before it finishes. Once it’s done, you could get the following results:
Windows Resource Protection did not find any integrity violations.
Windows Resource Protection found corrupt files and successfully repaired them.
Windows Resource Protection found corrupt files but was unable to fix some of them.
Restart your computer.
Option 3 – Run the Windows Update Troubleshooter
If the System File Checker wasn’t able to resolve the Windows Update error, you could also try running the Windows Update Troubleshooter as it could also help in fixing any issues related to Windows Update including this one. To run it, go to Settings and then select Troubleshoot from the options. From there, click on Windows Update and then click the “Run the troubleshooter” button. After that, follow the next on-screen instructions and you should be good to go.
Option 4 – Try to disable your antivirus program
Disabling the antivirus program or any security software installed in your computer is always a good idea you can try when the Windows Update process does not go smoothly. So before you try updating your computer again, make sure to disable the antivirus or security program and once the Windows Update is done, don’t forget to enable the antivirus program back again.
Option 5 – Try deleting the files from the SoftwareDistribution folder and resetting the Catroot2 folder
The downloaded Windows Updates are placed in a folder called “SoftwareDistribution”. The files downloaded in this folder are automatically deleted once the installation is completed. However, if the files are not clean up or if the installation is still pending, you can delete all the files in this folder after you pause the Windows Update service. For complete instructions, refer to the steps below.
Open the WinX Menu.
From there, open Command Prompt as admin.
Then type in the following command – don’t forget to hit Enter right after typing each one of them.
net stop wuauservnet start cryptSvcnet start bitsnet start msiserver
After entering these commands, it will stop the Windows Update Service, Background Intelligent Transfer Service (BITS), Cryptographic, and the MSI Installer
Next, go to the C:/Windows/SoftwareDistribution folder and get rid of all the folders and files thereby tapping the Ctrl + A keys to select them all and then click on Delete. Note that if the files are in use, you won’t be able to delete them.
After resetting the SoftwareDistribution folder, you need to reset the Catroot2 folder to restart the services you just stopped. To do that, follow these steps:
Type each one of the following commands.
net start wuauservnet start cryptSvcnet start bitsnet start msiserver
After that, exit Command Prompt and restart your computer.
Finally upgraded to Microsoft’s newest OS, but the performance is a bit sluggish? Here are a few useful tips you may not have thought about that could significantly transform your experience!
How to speed up Windows 11?
1. Disable startup programs
There are many programs that launch right on startup that really aren’t essential. This, in turn, causes your PC to launch and run more slowly.
To check which programs are enabled on startup, go into the Task Manager and select the Startup tab. Find every program that doesn’t need to launch immediately, right-click on it and press ‘Disable’.
This will not shut down the program in that instant. It’ll just prevent it from running automatically as you turn on your PC. You can always launch it manually when you need it.
2. Expand your memory and storage
If you want your PC to run super smoothly, you need to have enough memory to support that. This is especially significant for those of you who love to multitask. Upgrading your RAM gives your PC more space to store the temporary data it needs to complete processing tasks. In other words, processing takes a lot less time.
Your long-term storage is equally important. Hopefully at this point you’re already using SSD over HDD, since this type of storage offers a faster boot time.
Credit: Marc Pezin on Unsplash
In any case, we recommend expanding your storage capacity. The more files and data you store, the more there is to load, significantly influencing your PC’s speed. Larger storage capacity means new data and essential updates can be stored comfortably, preventing any strain on your PC’s performance.
3. Clean up disk space
If you aren’t willing to upgrade your storage just yet, the least you can do is clean up your storage right now.
Aside from manually deleting stuff you no longer need, you can also get rid of temporary files that clutter up your storage and eat up performance for no reason. To get to them, click Windows + X and select ‘Run’ (or just type it in the search bar).
A small window will pop up, where you need to type %temp%. This will take you to a whole folder full of all the temporary files you can remove without thinking twice.
For those who upgraded from Windows 10, there’s a neat trick to get rid of potential leftover files you don’t need on your brand new iteration. Only do this if you’re 100% sticking with Windows 11, though. Go to System > Storage > Temporary files. Make sure to only leave ‘Previous Windows Installation’ and ‘Windows Update Clean-up’ checked and click on ‘Remove files’.
Lastly, make use of Windows 11’s fantastic Storage Sense feature. Turning it on will enable your PC to constantly watch out for junk or unused files to optimize your PC’s performance to the maximum.
4. Install pending updates
This one should go without saying, but pending updates can be detrimental to your Windows 11 performance. The longer you leave them untouched, the more bugs the outdated programs and patches can cause. So, make sure to regularly check for updates and install them as soon as they’re available.
5. Disable visual effects
As cool as visual effects, animations, shadows and transparency are, they can also put quite a toll on your computer’s speed. On a newer setup this generally shouldn’t be a problem, but if you do notice a drop in performance, definitely consider turning off some of these settings.
To do this you can go to the Control Panel, System Properties and click the ‘Advanced’ tab. In the Performance section, choose Settings. If you’d like a quicker way to get to the dialog (Performance Options) with Visual Effects, you can also type sysdm.cpl in the search bar.
Once there, you can either have your PC choose what’s best, choose the best appearance or the best performance. The other option is to manually toggle the effects off and on. The biggest obstacles to speed are taskbar animations, window shadows, control/element animations and animations upon minimizing/maximizing.
Credit: Windows on Unsplash
In the same vein, you should go to Settings > Personalization > Colors and disable Transparency, to prevent your computer from doing overtime just to hit the aesthetic appeal.
6. Get rid of bloatware
Bloatware is one of the biggest culprits of slow computer speed.
Pre-installed software that’s pretty much useless but takes up valuable system resources has been around since day one. No matter which device or platform you’re talking about. Luckily, a lot of it is removable, making it easy to lighten the load on your device.
To boost your Windows 11 computer, go to Settings > Apps > Installed apps.You’ll probably see a bunch of apps you don’t want or need. Click on the three dots next to each one you want to remove and press ‘Uninstall’.
Aside from helping optimize performance, removing bloatware has another great benefit. Unfortunately, often this pre-installed software is quite vulnerable, exposing you to great risk of cyberattacks. So, removing it definitely improves your device’s security and gives you at least some peace of mind.
Summary
These are a few of our fastest tips for boosting performance. There are other, more complex and time-consuming ways, of course. If you’ve tried these quick ones and still need advice on how to improve your PC’s speed, feel free to reach out!
Bluetooth troubleshooting, I believe firmly that each one of us who has Bluetooth sooner or later had some issues with it, after all, it seems that it is in nature of radio transmitters to from time to time due to nature of signal and nature of Windows loose communication between them and can cause device which seems to work properly but can not establish the connection.
Most of the time Bluetooth issues are like that, the signal gets lost, the connection is broken, and establishing it again can be sometimes real pain, luckily for you, we have experience in this field and are here to help you and provide you with tips how to solve Bluetooth connection issues based on our own struggles.
Check if BlueTooth is ON
Yes, this seems stupid and sounds a lot like is it plugged in but here me out. Due to lost connections and different power plans setting inside your Windows, your Bluetooth receiver might be actually turned OFF thus preventing your other device to find your computer. Checking to see if Bluetooth has been by some accident turned OFF and switching it back ON should be the first thing to do and this could be a simple solution for your problem.
Restart the BlueTooth device.
Yup, another of these have you tried turning it OFF and turn it back ON advice which seems like tech cliche but in the case of Bluetooth, this can actually solve your problem. Radio signals and radio connections are not the same kinds of beasts like cable ones and sometimes Bluetooth device remembers certain information and can cause conflict. Turning it OFF and then back ON will clear its memory and cache and you will be ready for a new start hopefully solving your issue along the way.
Check power supply
If your Bluetooth device does not have a battery indicator, it would be wise to check on the battery status of the device. Sometimes we forget to charge batteries, sometimes someones have drained them. Checking the battery or just checking if the power supply is working properly should not be overlooked and it definitely should be on your to-do list of quick solutions.
Restart PC
Sometimes most simple solutions work and if restarting your Bluetooth device did not work, maybe restarting your PC will. When you restart the PC, you clear the cache and many other things that could potentially be the reason for connection issues.
Checks BlueTooth device distance from computer or interference from obstacles
The Bluetooth device operates via radio waves, and like wi-fi, if the distance from the computer is too large or you have some thick walls in between signal will degrade and be almost useless. Be aware that your PC might catch device waves and detect them but the signal itself could be too weak for the connection to work properly. Take the device and move it closer to the PC to see if the problem will go away, if it does issue was in distance or walls.
Reinstall or update device drivers.
Sometimes the issue could be in Windows update and old drivers, make sure that all of your drivers are updated with the latest version and that Windows itself has the most recent update in it. Trying to reinstall device cold also solve some the issue.
Remove and Pair deice again
if you tried all previous steps, try removing the device from Windows and then pairing it again. This could solve the issue since Windows itself could have mistakenly saved it like something else and can not recognize it.
Use Windows troubleshooter
If everything else failed, right-click and go to troubleshoot. Windows troubleshooter will try to find the issue and direct you to a solution.
If sadly none of these things do work, you should contact the device manufacturer since it is a very good chance that the problem is one of a hardware nature.
If you notice that your tabs in your Firefox browser keep on crashing recently, then there might be something wrong with your browser. Every time any of your tabs crashes, you might encounter an error message saying, “Gah, Your tab just crashed”. If you encounter this kind of error message then it is most likely that your Firefox Profile is having some issues with the existing installation of Firefox.
The “Gah, Your tab just crashed” error rarely happens but when it does, it can get quite annoying as you won’t get to browse the internet peacefully. So to fix it, here are some suggestions you could check out.
Option 1 – Try disabling multi-process tabs in Firefox
Since Mozilla has one process for Firefox itself, while one process handles all the tabs, you have the option to disable these multi-process tabs in Firefox. To do that, follow these steps:
In the address bar of Firefox, type “about: config” and hit Enter.
Next, look for the following configurations and set them to false.
tabs.remote.autostart = false
tabs.remote.autostart.2 = false
After that, double-click on the toggle switch between true and false.
Option 2 – Try checking your Add-ons
In this option, you need to start Firefox in Safe Mode and then check if the problem is fixed. If it is, you may have to check your Firefox add-ons as well as extensions as one of them might be the one that's causing the “Gah, Your tab just crashed” error.
Option 3 – Downgrade the Firefox version you’re using
It could be that the current version of Firefox you’re using has some issues so you might have to downgrade it, especially if you are already using the latest version. To downgrade your Firefox browser, go to the directory of the other versions and languages and select an older version that worked for you. After that, you have to disable automatic Firefox updates.
First, click the menu button and select Preferences.
Next, go to the Firefox Updates section under the General panel.
Then select the radio button labeled “Check for updates but let you choose to install them”. This will ensure that you will not have the same issue with the new update.
Note that this is only a temporary fix since updating your programs, including browsers.
Option 4 – Try sending Crash Reports
You might want to send crash reports to Mozilla. This way, Mozilla might come up with some fix to resolve the problem. All you have to do is type “about: crashes” in the address bar. This will list all the crash reports. Now send it to Mozilla using the built-in interface. Although this won’t instantly fix the problem, a lot of user finds it useful. And besides, the issue will get fixed in future releases or with minor updates.
As you know, Microsoft Store is the ultimate source of applications for Windows 10 devices and it’s turning to be the hub for various applications. In fact, aside from applications, it has also become a source for movies, books, TV and even buying hardware directly from Microsoft and many more. Although downloading goes smoothly most of the time, depending on your internet connection, there are also times when you might experience slow download speeds while downloading apps and other things in the Microsoft Store.
There are several factors that could be causing this kind of issue. It can be due to the Microsoft Store app itself or it could be enforced speed limiter on the application or it could be due to a corrupted Microsoft Store cache, or it could be due to the Windows Update service running in the background, and so on. To fix this problem, you can try to reset the Microsoft Store cache, or set the bandwidth limit for downloads, or try to re-register the Microsoft Store app via Windows PowerShell.
Before you proceed with the troubleshooting options provided below, make sure that your internet connection is stable enough to download apps and games. You also have to check if there is an update or a massive download in progress. Once you have these things covered, follow the given options below.
Option 1 – Try to reset the Microsoft Store cache
Just like browsers, Microsoft Store also caches as you view apps and games so it is most likely that the cache is no longer valid and must be removed. To do so, follow the steps below.
Right-click on the start button and click on Command Prompt (administrator).
Next, type in the command, “exe” and tap Enter. Once you do, the command will clear the cache for the Windows Store app.
Now restart your PC and afterward, try opening Microsoft Store again and then try to install your app or update your computer again.
Option 2 – Try to set the bandwidth limit for downloads
Tap the Win + I key combination to open the Windows Settings app.
After that, navigate to Update & security > Windows Update.
From there, select the Advanced options located on the right-side panel.
Next, select Delivery Optimization and check the box for “Limit how much bandwidth is used for downloading updates in the background under the Download settings section and then set the slider to 100%.
Option 3 – Try to re-register the Microsoft Store app via Windows PowerShell
Tap the Win + X key combination or right-click on the Start button and click on the Windows PowerShell (Admin) option.
If a User Account Control or UAC prompt appears, just click on Yes to proceed and open the Windows PowerShell window.
Next, type in or copy-paste the following command to re-register the Microsoft Store app and tap Enter:


 Error Causes
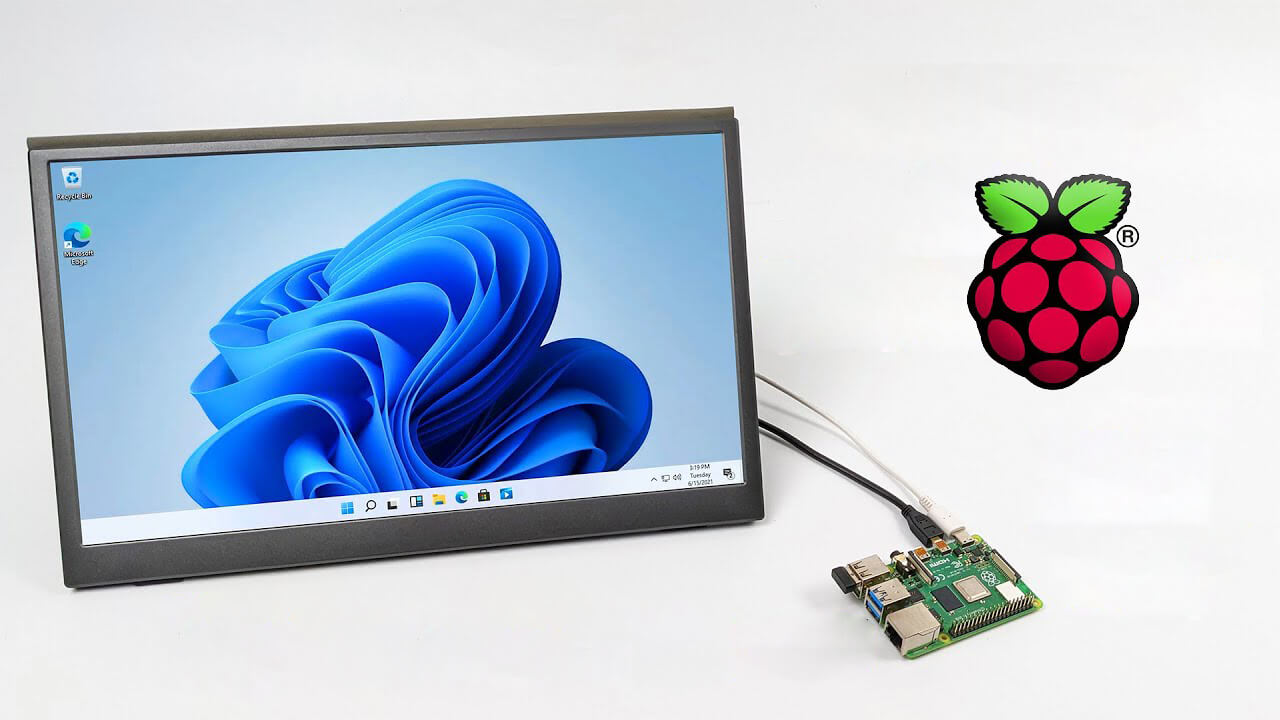 Raspberry Pi 4 and things you need for Windows 11 installation

