Fix Failed to register a VB Script DLL file on Windows 10
When you try to open Outlook 20016 and other programs on your Windows 10 PC and end up getting an error instead saying, “Failed to register a VB Script DLL. Reinstall or run Regsvr32.exe Vbscript.dll to self-register”, read on as this post will help you resolve the problem and help you re-register the vbscript.dll file. Follow each one of the steps below carefully to fix the problem.
Step 1: In the Start search, type “cmd” and from the search results that appear, right-click on Command Prompt and select the “Run as administrator” option from the context menu.
Step 2: After opening Command Prompt as admin, type the regsvr32.exe vbscript.dll command and hit Enter to execute it.
Step 3: After entering the command, it will re-register the concerned DLL file using the regsvr32.exe, a Windows OS tool. The Regsvr32 tool is a command-line utility that allows users to register or unregister OLE controls like the DLL and ActiveX (OCX) controls in the Windows operating system. After the command you entered has successfully run, you will see a message saying, “DllRegisterServer in vbscript.dll succeeded.”
On the other hand, if re-registering the DLL file didn’t work, you might have to log on to your computer using an administrator account and then try re-registering the DLL file once more. But before you do that, you need to create a system restore point first so that if anything goes wrong, you can always undo the changes you’ve made. After creating a system restore point, double-click on the downloaded .reg file to add its contents to the Registry. After that, try opening the program you were trying to open but weren’t able to because of the error.
If it doesn’t work, you can always reinstall the affected programs that throw up the error and see if it resolves the problem. You could also seek the help of a one-click solution to fix the problem for you. This program is a useful tool that does not only repair corrupted registries and optimize your PC’s overall performance but also resolves any DLL issues like the Failed to register a VB Script DLL. Reinstall or run Regsvr32.exe Vbscript.dll to self-register” error. Aside from that, it also cleans out your computer for any junk or corrupted files that help you eliminate any unwanted files from your system. This is basically a solution that’s within your grasp with just a click. It’s easy to use as it is user-friendly. For a complete set of instructions for downloading and using it, refer to the steps below.
This post will guide you in fixing a particular problem where your Windows 10 computer does not even let you turn it on and it appears as soon as it starts to boot the operating system and it displays an error message that says, “The Boot Configuration Data for your PC is missing or contains errors, Error code 0xc0000185”. On the other hand, it may also display a different error message saying, “The operating system couldn’t be loaded because a required file is missing or contains errors”.
There are various suggestions you can try to resolve this error. You could check the physical status of your hardware or rebuild the Boot Configuration Data, use the Automatic Startup Repair or System Restore, or better yet, reset your Windows 10 computer.
Since your computer will not boot, you will have to either try to get into the Advanced Startup Options screen, boot Windows 10 in Safe Mode, or use a bootable Windows 10 media to boot your computer.
Option 1 – Try to rebuild the BCD files
The first thing you can do to resolve the issue is to Rebuild Boot Configuration Data or BCD files.
You can start by booting into the installation environment for Windows 10 from an installation media.
After that, click on Repair your computer and on the blue screen, select Troubleshoot and then select the Advanced options menu.
From there, select Command Prompt and once you open it, enter each one of the commands given below by sequence.
bootrec /FixMbr
bootrec /FixBoot
bootrec /ScanOS
bootrec /RebuildBcd
Once you’re done executing the commands given above, type “exit” to close the Command Prompt window and then restart your computer and see if it fixed error code 0xc000014c.
Option 2 – Try to run Automatic Startup Repair
In this option, you need to boot your computer into the Advanced Startup Options and from there, run the Automatic Startup Repair and then wait until the process is completed.
Option 3 – Try running System Restore in Advanced Startup Options
Since you probably can’t boot into your Windows 10 computer, you can try to run System Restore again in the Advanced Startup Options.
Boot your computer into the Advanced Startup Options screen.
From there, you will see some options to troubleshoot when you can’t log in to Windows in the usual way.
Now select Troubleshoot > Advanced Options > Command Prompt.
After that, type “rstrui” and hit Enter to execute the command which will start the System Restore process.
Option 4 – Try to perform repair install by creating a Windows 10 installation media
Click this link and then click the Download Tool Now button.
Next, click the “Use the tool to create installation media (USB flash drive, DVD, or ISO file)…” option and follow the next given instructions on the screen.
Now select the ISO file option in step 5.
After that, you should now have an ISO file.
Next, go to the location where you’ve downloaded the ISO file.
Then right-click on the Windows 10 ISO file and select the Open with option and then select File Explorer.
Now click on “setup.exe” and follow the next instructions that appear on the screen. When asked, you have to select either Nothing (clean install) or Keep personal files only option. Take note that you must not select the “Keep personal files, apps, and Windows settings since it doesn’t really work.
Option 5 – Try to physically check the hardware
You should also check the physical status of the hardware in your computer. You can clean the dust off the hardware components like the Network Card of the computer. You might want to use a small blower or you could also use a soft cloth and run the components gently. Make sure that you don’t damage any parts with moisture or cause harm to any circuits while you carry out this task.
Javaw.exe is a type of executable file or a process used by Sun Microsystems. It is in charge of executing programs created with Java on Windows PC. It is a part of the Oracle Java Runtime Environment.
The javaw exe error hampers your ability to run programs supported by Java.
Common Javaw.exe error messages include:
"Javaw.exe Application Error."
"Javaw.exe is not a valid Win32 application."
“Cannot find javaw.exe.""Javaw.exe not found."
"Error starting program: javaw.exe."
"Javaw.exe is not running.""Javaw.exe failed."
"Javaw.exe has encountered a problem and needs to close. We are sorry for the inconvenience."
Solution
Error Causes
There can be many reasons for javaw.exe error code on your PC such as:
Viral infection
Malware attack
Invalid registry entries
Ignoring such error messages is not wise. You must resolve it right away as such errors can lead to serious PC threats like system failure and data security threats.
Further Information and Manual Repair
Scan the Javaw.Exe File For Malware
To fix Java Exe error on your system, first you need to find out the cause of the error. Is it triggered by malware or invalid registry entries? The best way to identify the cause is to check your system’s CPU usage.
This can be done through assessing the Task Manager by pressing Ctrl+Alt+Del all at the same time. After that, click ‘Processes and locate the javaw.exe file. Remember this file does not require too much memory, so abnormal memory usage is a surefire sign that the java.exe file on your system is a virus.
To resolve it, download an antivirus and run it to scan and remove viruses from your PC. However, running an antivirus may slow down your PC performance.
On the other hand, if you find the memory usage is fine, then this means the error is not caused by malware but it occurred either due to old version system files on your PC or registry corruption.
Update the Javaw.Exe File
To remove the old version files, go to the start menu. Click Control Panel and then Add/Remove programs.
Here find the Java program and uninstall it. Now after the program is completely uninstalled, go to Java’s official website and download the latest version of your desired program. Restart your PC after the installation is successfully complete.
Clean & Repair Registry
If the problem still persists, then the javaw exe error is mostly likely triggered due to registry corruption. The best way to resolve it is to clean and restore the registry. You can do it manually but you may find the manual procedure slightly time-consuming and complex especially you are not a computer programmer.
Therefore we recommend you download Restoro.
Why Restoro?
Whether the javaw exe error occurs due to viral infection, invalid entries, or registry corruption, Restoro takes care of all. This is a new, cutting edge, and multi functional PC fixer deployed with multiple performance-boosting and system repair utilities including a powerful registry cleaner, an antivirus, a system optimizer, and Active X controls, and a Class ID detector.
The registry cleaning utility wipes out all the unnecessary files, clearing up the cluttered disk. It cleans the registry and restores it.
Simultaneously, the antivirus feature detects and scans all malicious software infecting your PC and removes them right away. The system optimizer module boosts the speed of your system and ensures your PC performs at its optimum pace.
This is a safe, efficient, and bug-free tool. It has a user-friendly interface and easy navigation. Furthermore, it is compatible with all Windows versions.
Click here to download Restoro and resolve Javaw exe error on your PC today!
People are becoming more and more concerned with their privacy and Facebook's flagship messaging application is caught between it all. While still widely popular it has becoming to lose its ground due to many unanswered questions about privacy encryption.
Lucky for all of us there are alternatives for more secure messaging.
SIGNAL
Arguably the most secure of all well-regarded messaging apps, Signal is the favorite of the European Commission, as well as newsrooms around the world. While Signal doesn’t disclose how many daily or monthly users the app has, Google’s Play Store says it has been installed more than 50 million times. While using Signal, each voice or video call connected through the app includes full end-to-end encryption.
Signal takes an extra step by hiding message metadata so that the location of the original message is missing. While it asks for your mobile number, that number isn’t used with your profile. Instead, it acts as a numeric username. Once registered, you will find 1-1 chat, audio, and video calls, disappearing or “secret” chats, and a privacy lock so nobody can access the app even if they have your phone. Best of all, it’s completely free to use.
TELEGRAM
One of the biggest competitors to Facebook Messenger (and WhatsApp), Telegram is a very strong alternative. With more than 400 million users, it offers an interface that should feel right at home for anyone coming from Messenger. Telegram offers some huge benefits over Messenger, including features like groups that can hold up to 200,000 members for a chat. There is no limit on your media or chat size, and you can share all types of files between users and in groups.
From a privacy standpoint, Telegram has robust security, but it is worth noting that only “secret” messages are end-to-end encrypted and can self-destruct. Non-secret messages can be stored on Telegram’s servers so you can pick them up between your devices quickly. That’s a consideration worth knowing prior to making Telegram your default Messenger replacement. Telegram is free across all platforms.
THREEMA
Rising in popularity, Threema is another privacy-focused alternative that has quickly become a competitor to Facebook Messenger. This paid service ($2.99 on both App Store and Play Store) is a pay-once, use forever option. Once you pay the small fee, you gain all of Threema’s touted privacy options, like open-source end-to-end encryption for both messages and calls.
Like Signal, Threema won’t require you to link any phone numbers or emails to your account. All chats are handled anonymously, and the service generates a random user ID when you first open and register for the app. No data is collected from any of your chats and no ads are shown.
The Swiss-made app does have its own servers hosted in Switzerland, which do not store any chat messages. Another privacy benefit of Threema is the notion that all of your contact lists, groups, and user profiles are hosted on your device, not on the Swiss servers. Because of that, Threema can once again state that none of your personal info is stored anywhere they have access.
The Recycle Bin is undeniably an important place to make files ready for deletion. To put it simply, it assumes some importance but there are times when it displays an unpredictable behavior. For instance, it just suddenly goes missing and even Cortana is unable to find it. A lot of users have experienced the missing Recycle Bin issue in their Windows 10 computers. If you are one of these users, you might have wondered where the Recycle Bin icon has gone and how you can get it back. Worry not, as this post will provide you a couple of options you can try to bring back Recycle Bin in your Windows 10 computer.
Follow the given options below to get started.
Option 1 – Try to restore Recycle Bin
It could be that you have disabled the Recycle Bin by accident which is why Windows was not able to show it on your desktop. To restore Recycle Bin, follow these steps:
First, click on the Start button and select Settings.
Next, select the Personalization setting and then select Themes from the left pane.
After that, click on the “Desktop icon settings” link under the “Related Settings” heading. This will display a list of icons in the Desktop Icons window.
From there, make sure that you check the checkbox for “Recycle Bin” to make it appear on your Desktop screen once again.
Option 2 – Try to recreate the Recycle Bin
If the first option didn’t work, then it could be that Recycle Bin might have been deleted which is why you fail to restore it. And to resolve this problem, you need to recreate Recycle Bin. Refer to the following steps to do so:
You need to launch the Windows File Explorer first and go to the View tab.
From this tab, select Options and click on the drop-down arrow and then select the “Change folder and search option”.
Afterward, switch to the View tab when the Folder Options window appears on your screen and select the “Show hidden files, folders, and drives” option.
And then unmark the checkbox next to the “Hide protected operating system files (Recommended)” option and click on both the Apply and OK buttons, respectively.
Next, go back to the File Explorer and click on “This PC” located on the left bar and go to the C: drive.
From there, you will find a file named “$Recycle.Bin” located at the top.
Open this folder to access its contents and you should see the Recycle Bin icon located at the top.
After that, right-click on the Recycle Bin icon and click on the “Send To” option and then click on “Desktop (create shortcut)”.
It will then confirm and recreate the Recycle Bin icon on your Desktop screen.
Note: Even though this icon is quite similar to the original one, it actually differs from it. The difference is that you won’t see if fill up when you delete files and you can’t simply empty it by right-clicking on the shortcut. On the other hand, you can still drag items into it just like with the original one. So when you want to empty the content of the newly restored Recycle Bin, you just have to double-click on the shortcut and right-click on the recycle bin in the window that appears, and select the “Empty Recycle Bin” option. In addition, now that you’ve set up the Recycle Bin shortcut, you have to re-activate the “Hide protected operating system files” to keep the important files and folders in your computer hidden.
Option 3 – Try to repair the Recycle Bin
If both the first two options failed to restore the missing Recycle Bin, then you can try repairing it instead. There are times when the Recycle Bin is removed from the Desktop screen due to some corrupted Windows system files. To fix these corrupted system files, you can run the DISM tool. This tool is known to repair potentially corrupted files in your system as having them could also system issues like the missing Recycle Bin. To repair these corrupted system files, you can run the DISM commands:
Tap the Win + X keys and click on the “Command Prompt (Admin)” option.
After that, input each one of the commands listed below sequentially to execute them:
Dism /Online /Cleanup-Image /CheckHealth
Dism /Online /Cleanup-Image /ScanHealth
Dism /Online /Cleanup-Image /RestoreHealth
Once you’ve executed the commands given above, restart your computer and check if the problem is now fixed.
Option 4 – Make sure that you are not in Tablet Mode
Since Windows 10 is designed to work on both desktop and mobile devices, it could be that your computer has slipped into Tablet Mode which explains why you’re not seeing the Recycle Bin. To check if your computer is really in Tablet Mode, follow these steps:
Go to the Start menu and select Settings.
Next, select the System setting and from the left pane select the Tablet Mode.
From there, make sure that the buttons next to the options given below are set to the off position:
This is not the first time that Intel is trying to enter the GPU field but its adventures so far were, well let us agree not so good. All of that is hoping to be changed with the upcoming ARC GPU. The first generation of Arc graphics, code-named Alchemist and previously known as DG2, will support desktop PCs and laptops and is set to arrive in the first quarter of 2022.
Alchemist will have hardware-based Ray tracing and AI-driven supersampling. This indicates that GPU is aimed to compete in the Hi-end spectrum and battle side by side with Nvidia and AMD on the market. Alchemist will also pack full DirectX 12 Ultimate support.
Intel also released names for the next upcoming future generations of ARC GPUs: Battlemage, Celestial & Druid. More information about ARC products will be released later this year.
“Today marks a key moment in the graphics journey we started just a few years ago. The launch of the Intel Arc brand and the reveal of future hardware generations signifies Intel’s deep and continued commitment to gamers and creators everywhere,” Roger Chandler, Intel vice president, and general manager of client graphics products and solutions.
Hello and welcome to our software series review. Weel this time we could say this is more of a service review since the application we are going through today is online and you can use it freely without ever needing to install it.
When we choose software that we are going to review and recommend we really try to recommend something that is worth your time and money, Cartoonize fits in both categories in my opinion.
First of all basic plan of this graphic software is completely free and as mentioned it is working online, also as one more feature basic plan does not even require you to have an account of any kind, all you need to do is go to the website of the application and you can start using it right away. There is also paid plan for extra features if you need them billed monthly or annually.
Features
First things first, this is not Photoshop or GIMP and it does not aim nor want to be. This is something else, directed and pointed at the different types of users. This application is aimed at people that want to make some quick graphics and post them on social media and it does that very well. Even without knowledge to use graphic software this one is so well designed and straightforward that even a complete newcomer can do something right away.
So as the application that wants to be used by people that want to place some cool pictures or ads on their social media what it offers. For starters simplicity and ease of use, every option that you can use is on the left side of the screen nicely packed into the vertical toolbox. Inside the toolbox, you have access to various tools, effects, and filters that you can apply to your image.
Tools explained
Image manager
The first section on the tool panel is the image manager, here you can upload your images, delete them, search stock images, and so forth. nothing more to say about this one as it is only a basic file manager.
Edit
In this tool panel, there are a lot of basic settings for your image manipulations divided into 3 sections: Basics, Enhance, and Creative. In the basic section, you can crop, resize and rotate your image. Enhance panel will let you set exposure, color, vibrance, tint, and details (sharpen). Finally, the Creative part will let you remove the background with AI in a single click, replace colors in the image, and add a vignette and round image.
Effects
In the effects panel, you will be given 4 options to choose from Cartoonizer, Digital art, Sketcher, and painting. Each option once clicked will open another set of options tied to chosen preset where you will be able to choose a different style from chosen template. Once you click on the desired template it will be applied to your image and in the upright corner, you will have edit options to tweak it to your liking. You can play around as much as you want because only once you click on the apply button, the effect will be applied to your image.
Filters
Same as in the effects tool panel here you will also get a series of different filters that you can apply to your image. As in the previous tool once clicked on the chosen filter, you will be given options for its variations and details edits. How there is really plenty of filters options and combined with its own presets I will not focus on explaining what each one is doing since picture thumbnails are pretty accurate and just one look at them will explain to you everything you need to know.
Overlays
In the overlays panel, you can as the name says overlay different kinds of effects on your image. You can add snow, fog, sun flares rain, and many more. Presets work identically to previous effects and filters.
Masks
If you want to place your image in a certain shape or in-text this is the section for you. You will be presented with sections as custom text, shapes, brushes, floral, animals, and patterns. Each section will once again lead to plenty of variations on the chosen subject where you can pick one that you like the most and tweak its options.
Text
As the name suggests, this section is to add text to your picture or design. If you are making some cool ad for Facebook, Instagram, or other social media I believe that you will spend most of your time in this section adding text and tweaking it so it looks best. You have all the tools that you will need to make a catchy title or smaller block of text and you can add multiple texts to your picture tweaking their own visual appearance, the font used, color, and some effects like a drop shadow.
Draw
In the draw section, you will be able to freely draw whatever you like with your mouse or pen if you have one. you have basic options for a brush and eraser so you can erase stuff. Pretty basic tool but it gives a nice touch to underline something, circle it, etc.
Graphics
This panel will let you place various already made graphic assets into a picture. You have hearts, hats, glasses, etc. There really are tons of premade graphics along with thematic ones like new year, st. Patric day and more.
Frames
As the name suggests this section will place a frame of your choice around your picture. You can choose the style of frame, position, color, and many more. There are various styles and each style has its own options.
Conclusion
Cartoonize is a great online application that will let you quickly and easily do cool and nice image edits. As mentioned you can also add various effects, text, and graphics and use this app to make some quick and nice ads for social media. You have the option to publish to your social media right from the app in the save dialog but you can also of course download your image or design to your local computer.
Please note that for this review we used the pro, paid version so all of the features were unlocked. We wanted to give you a full overview of the full potential of the app. In my opinion, the small monthly fee that they charge is well worth it when you see all things that you can do with it.
Go to the cartoonize website and check it out, basic option is completely free and it does not even require making an account. Have fun, be creative and take care, I hope to see you again tomorrow.
Encountering errors is never a pleasant experience and fixing errors can sometimes take a large amount of time. Also depending on your expertise and knowledge about computers and the operating systems themselves could be determining factor would you try to wrestle with error.
We will explore and analyze the advantages of both methods so you can choose and know when to apply one and when to reach for the other.
Advantages of manual method
Full control is the main advantage of manually solving errors, when you go deep dive into manually fixing problematic issues you are one that has control. Complete freedom is also another, sometimes fixing things can be done in several different ways and when you are the man behind the wheel, you are the one that can choose how to approach and what solution to apply in order to solve the issue.
Disadvantages of using manual method
The main disadvantage that some users might encounter is that they will need to know ins and outs of computer and operating systems' workings. Of course, the more complicated errors, the more knowledge it will require in order to apply the proper fix. There is also a risk to break something else if the person that is doing the fixing is not fully competent so this is also something to think about.
Another thing that goes against manual fixing is the time it will require in order to actually fix it, some more complex stuff will probably depend on searching for some external resources like searching for compatible drivers for example, or navigating complex registry keys inside Windows.
Advantages of automatic solutions
If you are a user that has no knowledge about how the operating system works, if you do not know what is a registry or how to properly navigate through the Windows folder then the automated solution is for you. The main advantage of automated systems is that you can easily fix errors without any kind of technical knowledge and usually with just one click of a button.
Saving time is also one of the advantages of fully automated solutions because they will work much faster than manually locating the problem and then fixing it. Also, most of these systems will have in place active monitoring that will check always if your system is in top form and alert you when something is not right.
Disadvantages of one-click solutions
Automated solutions are great, they can solve various issues and errors without any knowledge from the user, but they are not perfect. Like security suites sometimes an automated system can misinterpret something as an error when in fact it is not and fixing it could mean some apps not working anymore, luckily you can choose would you like to apply the suggested solution. So if you are using one do not just click fix without looking at what it is trying to fix and maintain.
Another problem with this is the price it is carrying, manually solving your computer error will cost you your time and knowledge but good automated software will come with a price tag. Some people might not be too happy to pay for this kind of application but at the end of the day, it will still be cheaper than a professional technician. The last thing that you should be aware of is that in order for the app to do its work properly it will need to be active all the time, now for modern computers, this is not the issue but for some older ones with a small amount of memory might lead to some slowing them down. This is a price to be paid in order to have your system always errors free.
Should you use an automated solution at all?
This depends on your knowledge and time available, professional IT technicians will not need this type of solution nor will power users but for most common people this will offer computers free of errors for an affordable price.
Error 1706 is a Windows PC error. It occurs when you insert a Microsoft CD-ROM either to repair an Office or to install a feature set to Installed on First Use. The error message is displayed in the following format:
Error 1706. Setup cannot find the required files. Check your connection to the network, or CD-ROM drive. For other potential solutions to this problem, see C:\Program Files\Microsoft Office\Office101033\Setup.hlp.
Solution
Error Causes
Error 1706 may occur due to several reasons. These include:
You originally installed MS Office from a network administrative installation
You are trying to use Office CD-ROM when the error is prompted by the Windows Installer for an Office source location
Viral Infection
Further Information and Manual Repair
The good news is that this error code is not fatal. However, to avoid inconvenience, it is recommended to resolve the error right away. To fix the problem you don’t have to be a computer programmer or hire one. In fact, this error code can be resolved quite easily.
Here are some of the best and easiest do it yourself methods to resolve error 1706 on your PC:
Method 1
To resolve this issue find a different administrative installation for the Office source file location.
To do this, go to the start menu and then click run. In the open box, simply type this command line new network pathSetup.exe /fvm package name.msi and press OK to continue and update changes. Once the update is complete and finished press OK to save and proceed.
Please note after you follow these steps, the Windows Installer uses this new server location whenever it needs to reinstall, repair, or add a feature to your Office Installation.
Method 2
Another alternative method to resolve this method is to use CD-ROM for the Office Source Location. To do this you will have to remove Office and then re-install Office from the CD-ROM.
Here are the steps to remove the Office program. First, quit all Office programs.
Go to the Control Panel then click on the Program and Features option.
Now double click the Add/Remove programs and remove the entry for the Microsoft Office 2003 or Microsoft Office XP product installed on your PC.
After that, click on the Maintenance Mode Options dialog box, select Uninstall Office, and then click Next to proceed.
Click Yes to confirm changes.
Now insert Office 2003 or Office XP CD-ROM and follow the setup dialog boxes to reinstall the program on your system from CD-ROM.
Download Restoro to Correct Registry Errors
However, to ensure the installation is successful this time around, it is advisable to clean the registry and ensure the uninstalled program is not located in the registry.
To do this, download Restoro and run it on your computer. This is a powerful PC Fixer integrated with a registry cleaner.
The registry cleaner wipes out all the unnecessary files and uninstalled program files saved in the registry. Once the registry is cleaned, try reinstalling MS Office again. This will resolve the error 1706.
Click here to download Restoro and repair error 1706.
Shortcut virus is an easily spreadable and annoying combination of Worm and Trojan that hides all of your files and folders and then replaces them with shortcuts that look identical to replaced files and folders.
Once disguised it will wait patiently for a user's click and once that happens it will replicate itself and further infect the system. This rapid spread can lead to stolen personal data, some system hick-ups, and other system-related issues.
This malware mainly affects physical file transfer devices like for example and most USB drives, hard drives, and SD memory cards and it can easily transfer itself to the computer.
The advantage of this shortcut virus comparing it to others is that it is mostly undetected by a vast variety of antivirus software. So running just anti-virus software maybe not be enough to remove it from your system. Luckily for all unfortunate users that have caught this annoyance, it can be easily removed fully manually in a short time.
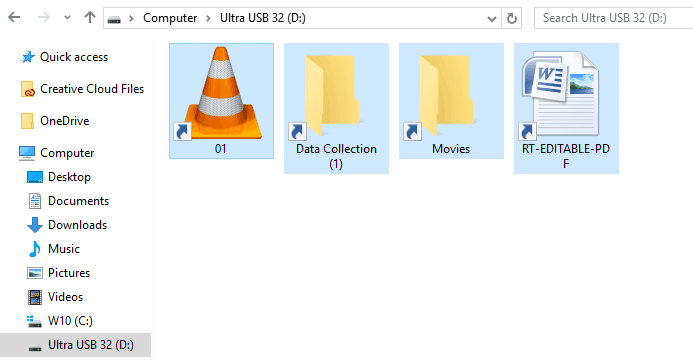
How to Remove Virus from USB and other removable media
Firstly plugin USB, SD, or removable drive. The infection will transfer to your computer when the infected drive is plugged in so before we go to clean the computer itself, clean each removable drive that you have. Also know that infection will spread from computers into removable devices as well if it is not cleaned.
Open the File Explorer and remember under which letter is removable drive registered. Open Command prompt but with administrator privileges and go to infected rive by typing its letter followed with “:” (for example D:) and press ENTER
Once you have successfully gone to infected drive type in command prompt:
Attrib -s -r -h /s /d *.*
This will unlock all original files back into removable storage, next copy all files to your computer, and format the removable drive. Once the format is complete, unplug the removable device. Continue to clean all devices with the same method.
How to Permanently Remove a Shortcut Virus from Your PC
Now once we have cleaned all removable devices it is time to fully clean the PC
Firstly open the task manager ( CTRL + SHIFT + ESC ), in the process tab find wscript.exe or wscript.vbs, right-click on it (or both if present), and select End Task. Now close the task manager and press Start. Inside start typing in registry editor to search for it and once found open it.
Find the following key inside the registry editor:
HKEY_CURRENT_USER/Software/Microsoft/Windows/CurrentVersion/Run
In the right panel, look for any strange-looking key names, such as odwcamszas, WXCKYz, OUzzckky, etc. For each one, run a Google search to see if it's related to shortcut viruses.
If any returns a positive match, right-click on them and select Delete. !!! Accidentally deleting an important key can cause Windows to become unstable, so double-check everything !!!.
Close the Registry Editor
Now press ⊞ WINDOWS + R to open the run dialog and type in it Msconfig followed by ENTER. Once the System Configuration window opens go to the Startup tab. In the Startup tab, look for any strange-looking .EXE or .VBS programs, select each one and click Disable. Close the Window.
Once again open the run dialog and type inside %TEMP% and press ENTER in order to open the Windows temp folder. Inside this folder delete everything.
Next in the File explorer go to
C:\Users\[username]\AppData\Roaming\Microsoft\Windows\Start Menu\Programs\Startup
Look for any strange-looking .EXE or .VBS files and delete them.
If you are trying to save a file in a PDF format on your Windows 10 computer but then the PDF text content in an Adobe file suddenly disappears, then read on. This post will give you more insight into this issue. This kind of issue is rare and mostly occurs in forms that you can fill upon. In such a case, the text you enter in the form vanishes right after you click the Save button.
One of the benefits of working with PDF files is that it has the ability to compress high-quality files to relatively small file sizes. This is really useful especially when you are saving hard drive space and you’re working with limited storage resources. However, these files can contain layered content if they are created from layered documents using applications like Adobe InDesign. Consequently, a single page of the PDF file can contain different layers with different content. So if you try to save or print a PDF file that contains layered content, the elements will disappear from the PDF. To resolve this issue, you can try to merge or flatten the file since it will help keep the changes in the PDF file. On the other hand, you can no longer make any alterations or form data once you flatten the file. Another thing to keep in mind is that merging or flattening the file can’t be undone so you might want to save another copy of the file before you proceed.
Option 1 – Print to PDF
First, you have to open the desired PDF file and tap the Ctrl + P keys to open the Print dialog box.
After that, select the “Microsoft Print to PDF” option as the printer.
Once the action is confirmed, it will regenerate another version of the PDF file with the default settings and merge all the existing layers into a single layer.
On the other hand, you can also click on the “File” menu of the PDF file and select Print.
From there, click on the Print button and select “PostScript (*.ps)” as the “Save as” type to save a PostScript copy of the original PDF file.
Once you’re done, double click on the .ps file to open the file in the Adobe Distiller which will flatten the file automatically and convert it to a PDF file with only one visible layer.
Option 2 – Save the PDF file as an Optimized PDF file
If you are using the Acrobat Reader Pro version such as the Acrobat Pro, Foxit, and so on, you can try to flatten the layers by saving the PDF file as an Optimized PDF file. Refer to these steps to do so:
Select File > Save as > Optimized PDF.
Next, select the Transparency checkbox from the Settings window that opens.
Then click on the Save button to apply and save the changes made. After that, the PDF text content should not disappear when you try to save a file on your Windows 10 computer.


 This is not the first time that Intel is trying to enter the GPU field but its adventures so far were, well let us agree not so good. All of that is hoping to be changed with the upcoming ARC GPU. The first generation of Arc graphics, code-named Alchemist and previously known as DG2, will support desktop PCs and laptops and is set to arrive in the first quarter of 2022.
Alchemist will have hardware-based Ray tracing and AI-driven supersampling. This indicates that GPU is aimed to compete in the Hi-end spectrum and battle side by side with Nvidia and AMD on the market. Alchemist will also pack full DirectX 12 Ultimate support.
Intel also released names for the next upcoming future generations of ARC GPUs: Battlemage, Celestial & Druid. More information about ARC products will be released later this year.
“Today marks a key moment in the graphics journey we started just a few years ago. The launch of the Intel Arc brand and the reveal of future hardware generations signifies Intel’s deep and continued commitment to gamers and creators everywhere,” Roger Chandler, Intel vice president, and general manager of client graphics products and solutions.
This is not the first time that Intel is trying to enter the GPU field but its adventures so far were, well let us agree not so good. All of that is hoping to be changed with the upcoming ARC GPU. The first generation of Arc graphics, code-named Alchemist and previously known as DG2, will support desktop PCs and laptops and is set to arrive in the first quarter of 2022.
Alchemist will have hardware-based Ray tracing and AI-driven supersampling. This indicates that GPU is aimed to compete in the Hi-end spectrum and battle side by side with Nvidia and AMD on the market. Alchemist will also pack full DirectX 12 Ultimate support.
Intel also released names for the next upcoming future generations of ARC GPUs: Battlemage, Celestial & Druid. More information about ARC products will be released later this year.
“Today marks a key moment in the graphics journey we started just a few years ago. The launch of the Intel Arc brand and the reveal of future hardware generations signifies Intel’s deep and continued commitment to gamers and creators everywhere,” Roger Chandler, Intel vice president, and general manager of client graphics products and solutions. 

 Once disguised it will wait patiently for a user's click and once that happens it will replicate itself and further infect the system. This rapid spread can lead to stolen personal data, some system hick-ups, and other system-related issues.
This malware mainly affects physical file transfer devices like for example and most USB drives, hard drives, and SD memory cards and it can easily transfer itself to the computer.
The advantage of this shortcut virus comparing it to others is that it is mostly undetected by a vast variety of antivirus software. So running just anti-virus software maybe not be enough to remove it from your system. Luckily for all unfortunate users that have caught this annoyance, it can be easily removed fully manually in a short time.
Once disguised it will wait patiently for a user's click and once that happens it will replicate itself and further infect the system. This rapid spread can lead to stolen personal data, some system hick-ups, and other system-related issues.
This malware mainly affects physical file transfer devices like for example and most USB drives, hard drives, and SD memory cards and it can easily transfer itself to the computer.
The advantage of this shortcut virus comparing it to others is that it is mostly undetected by a vast variety of antivirus software. So running just anti-virus software maybe not be enough to remove it from your system. Luckily for all unfortunate users that have caught this annoyance, it can be easily removed fully manually in a short time.