Due to the latest android malware security analyst, there are alarmingly 5.8 million downloads of applications that will steal your Facebook data, your Facebook login credentials!
Russian anti-malware company Dr.Web has found Trojan apps that steal your Facebook login credentials by tricking users into entering their private information in order to eliminate in-app ads.
All of the applications have been removed from the play store and cannot be installed anymore but please do check your phone in order to remove them from your phone as well.
List of malware applications:
If by any chance you have any application from this list, consider uninstalling it from your phone for security reasons.
PIP Photo
Processing Photo
Rubbish Cleaner
Inwell Fitness
Horoscope Daily
App Lock Keep
Lockit Master
Horoscope Pi
App Lock Manager
During the investigation, Dr.Web analysts found an additional Trojan app that had previously made its way onto the Google Play Store. Image editing software app EditorPhotoPip had already been removed but could be downloaded through aggregator websites.
If you are using your computer and you notice that Hard drive shows high space utilization even if you only have a few applications installed on your computer, then you’ve come to the right place as this post will guide you on what you can do to sort this problem.
Upon noticing the odd state of your hard drive and you check the actual volume that’s occupied by the apps in your drive and you see that they are not really occupying a lot of space. This kind of issue could indicate that your hard drive is not showing the correct value for the free storage space of the drive-in your Windows 10 computer.
This kind of problem could be passed off as a system bug, however, it could also be a serious problem. In fact, as you are aware, there are hidden folders and files in your computer that could be occupying space and since most of them are associated with system applications, you might not realize it unless you thoroughly check the folders.
The most common causes of the issue are as follows:
The system information folder might be utilizing a lot of space. If you wonder where the information for the system restore points is stored, they are stored in the system information folder which in turn is stored in the drive as a hidden file.
An issue with system maintenance could cause the problem.
Malware or some other software might have created an undetectable hidden file.
Space could be occupied by the trashbin folder.
These hidden files could occupy significant space in the folder, thus slowing down the system and impacting its performance. If you face this issue, try our suggestions and see if they help you.
Run ChkDsk
Clear all Junk files
Reduce the space occupied by the system restore points
Run the System Maintenance troubleshooter
Option 1 – Run CHKDSK utility to check the drive for errors
When it comes to some issues concerning the hard drive or removable devices, there is a utility in Windows that might help which is called “chkdsk”. To use it, follow the steps below.
Tap the Win + S keys to open the Search box.
Then type “command prompt” in the field and from the search results that appear, right-click on Command Prompt and select “Run as administrator”.
After opening an elevated command prompt, copy and paste the following command and hit Enter:
Note: In the command given above, “[/F]” will try to fix the system errors while “[/R]” will be the one to fix the bad sectors.
Now if you are prompted to run CHKDSK after your reboot your PC, just tap Y and reboot your PC.
If CHKDSK is not able to find any errors, tap the Win + E keys and navigate the access window. From there, right-click on the concerned drive and click on Properties.
After opening Properties, click on the tab Tools and then click on the “Check” button under the Error-checking section.
Wait until the process is completed and then restart your computer.
Option 2 – Try to delete the temporary files
The error could be caused by some temporary or junk files in your computer and so you need to clear them up to fix the problem. You can achieve that using the Storage Sense feature.
Open Setting > System > Storage from the WinX Menu.
From there, you will see a list of all the local and connected storage devices along with the details on the free space. Make sure that Storage Sense is on.
Next, find a link that says “Free Up Space” and click it to open.
After that, a screen which is the built-in program in Windows 10 will appear and will scan your computer for the following junk files so you can free up disk space:
Windows Upgrade Log Files
The system created Windows Error Reporting Files
Thumbnails
Temporary Internet Files
Previous Windows Installation Files
Delivery Optimisation Files
DirectX Shader Cache
Choose the files you want to get rid of and then click on the remove files option. Note that you’ll have an idea of the total size as you select any of the junk files listed above.
Now go to the “Free Up Space Now” section and click the Clean Now button. This will get rid of all the temporary or junk files in your computer and should hopefully fix the error.
Option 3 – Try to reduce the space occupied by the system restore points
In case you don’t know, system restore points actually occupy a significant space in your computer which is stored in the System Information folder. Thus, you need to check the size of this folder and unhide the folders and files and then click on the folder. The size of the folder should be displayed in the right pane of the window. To fix the storage space problem, you could delete all the old System Restore Points as well as Previous versions of files or you could also restrict the disk usage of the System Restore points.
Option 4 – Try to run the System Maintenance troubleshooter
The problem could also be caused by the System Maintenance and to fix it, you have to run the System Maintenance troubleshooter by following these steps:
In the Windows Search bar, type “control panel” and double click on Control Panel from the search results.
Next, go to this path: Control PanelAll Control Panel ItemsTroubleshootingSystem and Security.
After that, click on the System Maintenance troubleshooter to run it.
Once the process is completed, restart your computer.
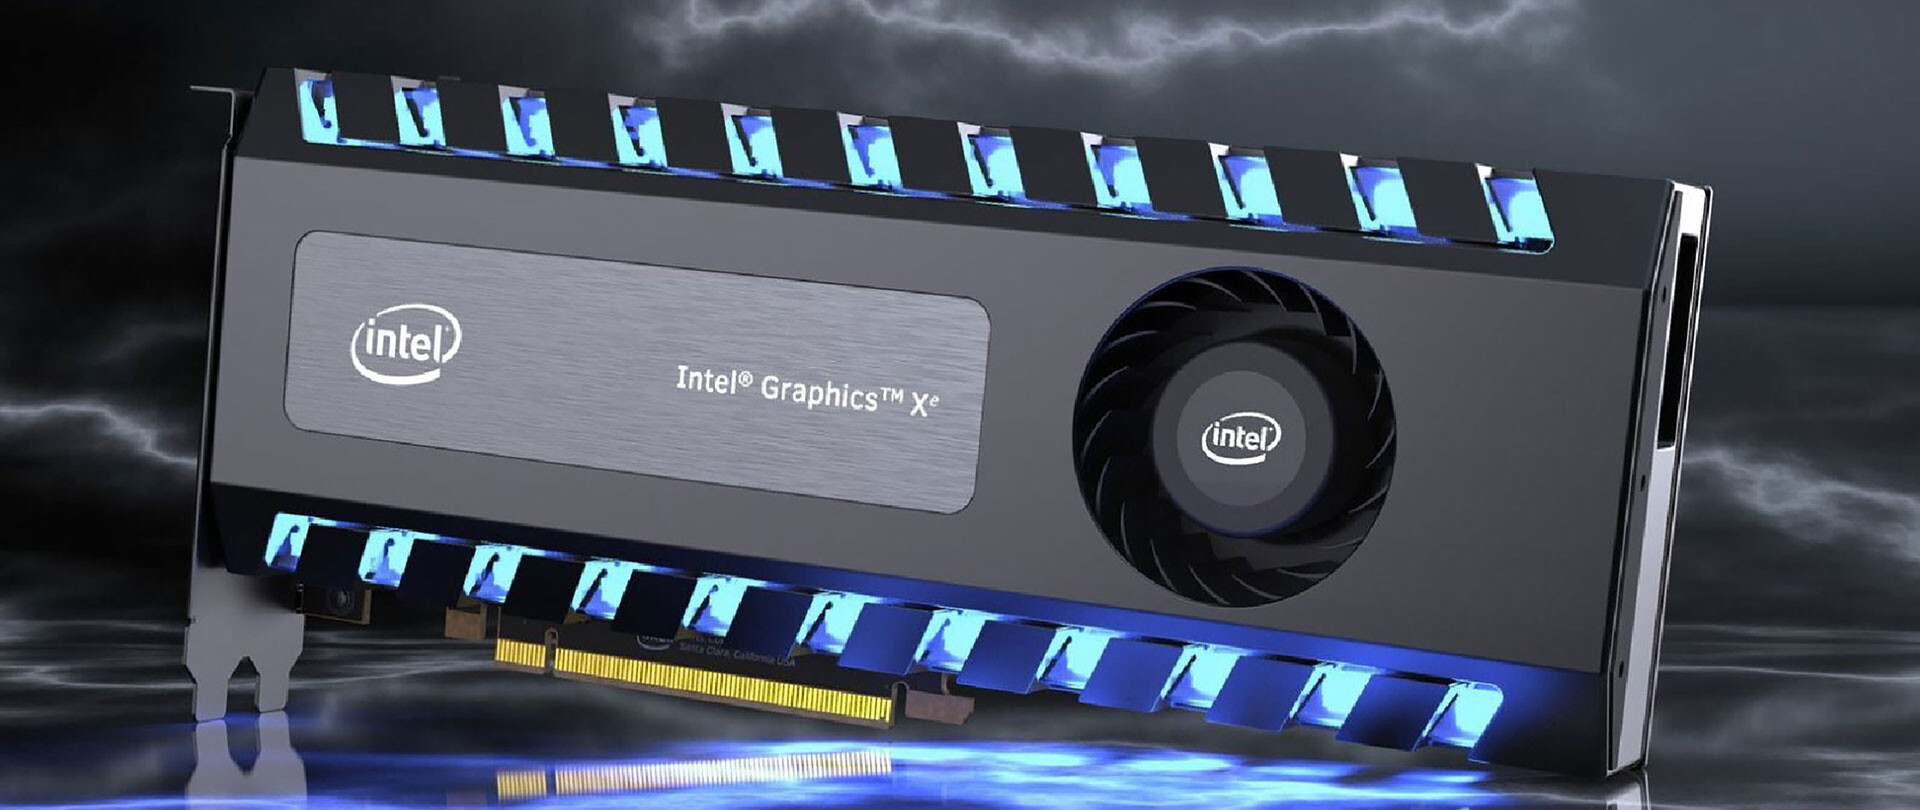
This is not the first time that Intel is trying to enter the GPU field but its adventures so far were, well let us agree not so good. All of that is hoping to be changed with the upcoming ARC GPU. The first generation of Arc graphics, code-named Alchemist and previously known as DG2, will support desktop PCs and laptops and is set to arrive in the first quarter of 2022.
Alchemist will have hardware-based Ray tracing and AI-driven supersampling. This indicates that GPU is aimed to compete in the Hi-end spectrum and battle side by side with Nvidia and AMD on the market. Alchemist will also pack full DirectX 12 Ultimate support.
Intel also released names for the next upcoming future generations of ARC GPUs: Battlemage, Celestial & Druid. More information about ARC products will be released later this year.
“Today marks a key moment in the graphics journey we started just a few years ago. The launch of the Intel Arc brand and the reveal of future hardware generations signifies Intel’s deep and continued commitment to gamers and creators everywhere,” Roger Chandler, Intel vice president, and general manager of client graphics products and solutions.
Bluetooth perhaps is slowly becoming an outdated feature but sometimes you can really used it and need it.
By default, in Windows 11 Bluetooth is turned OFF so if you need it, you will need to turn it ON first. Luckily turning it ON is easy and we will guide you through the process
Turning Bluetooth using the Quick Settings menu
The easiest and fastest way to turn the Bluetooth ON is using the quick setting menu:
Click on indicator icons located left of date and time in Taskbar
Click on the Bluetooth icon (if the icon is not displayed, click on the pencil icon, then click on Add and add Bluetooth icon from the list)
Right-click on the Bluetooth icon and select go to Settings
Go to Adding a Bluetooth Device to Windows 11 section
Switch it ON via Windows Settings
Open Windows settings by using ⊞ WINDOWS + I combination
Click on Bluetooth & Devices
Inside settings turn Switch to ON beside Bluetooth
Click + Add Device large button on top
Click Bluetooth
Select device in the list of found devices (make sure device is turned ON, it has Bluetooth sharing ON, and that it is in pairing mode)
If the device needs the password, type it in
When the message Your device is ready to go is showed on the screen click on the Done
Advice on Bluetooth devices
Note that the Bluetooth devices you connect to Windows 11 stay linked to your PC unless you pair them with a different PC, smartphone, or tablet later.
After a time, most Bluetooth devices power down automatically to save battery life. To continue where you left off, either power the Bluetooth device up (if it has a power button) or press a button on a keyboard or mouse, and it should automatically turn on and reconnect with your PC.
If you’re having trouble connecting your Bluetooth device, make sure that Windows 11 is fully updated and that you’ve installed any drivers that came with your device.
Make sure that the device is fully charged or that it has a fresh set of batteries.
while Windows is searching. You’ll need to remove the device from Windows 11 first and then attempt to pair it with your PC again.
Removing devices
If you need to remove (un-pair) a Bluetooth device, just open Windows Settings and navigate to Bluetooth & Devices. Locate the name of the device that you want to remove, click the three dots button in the corner of its square and select Remove Device.
High Dynamic Range or HDR is a technique that’s used to create lifelike videos which have improved and better dynamic range, especially when it comes to details. And as you know, Windows 10 supports the steaming of HDR videos as long as the display supports it and it comes with the option to enable the HDR Playback for Windows 10 Video Streaming apps. However, before you can get the best viewing experience, you need to calibrate the display further for HDR video on your Windows 10 PC.
Take note that even when you have the HDR Playback feature enabled on your computer, you still need a display that supports it. To make sure that your display supports this feature, you can use the DirectX Diagnostic Tool to have the display correctly wired and have the latest WDDM 2.4 drivers installed as well as set the other settings properly.
Once you’ve made sure that your computer’s display really supports HDR and you’ve already enabled the HDR Playback feature, now it’s time for you to calibrate. Remember that when you calibrate the display, you should make an external monitor your primary display if you are using it for HDR and then adjust the settings to your liking. And if you are calibrating for primary display, you need to disconnect all other displays.
Follow the given steps below to calibrate the display of your PC.
Step 1: You need to open the Video Playback first. To do so, navigate to Settings > Apps > Video Playback.
Step 2: Under the Video Playback settings, uncheck the “Don’t increase display brightness when watching HDR video on battery” checkbox or plug in your PC.
Step 3: Next, click the “Change calibration settings for HDR video on my built-in display” link located on the right side.
Step 4: After that, click on the Play button located on the left side to play the video. Then move the sliders to the left or right so you can start to calibrate. Once you see that the quality of the image is to your preference, stop.
Note: Just a tip when calibrating – you just have to find the right balance between the details in the darker parts of a scene. For instance, you have Mountains in the background and buildings in the front – you need to drag the slider to the right to add more details to the snow on the mountain or drag the slider to the left to add more details to the buildings. After that, you can pause the video and exit the full-screen mode. Keep in mind that the quality of HDR depends on you as it is a personal choice. Some users might like a brighter shade while other ones want the darker shade so it really depends on your taste. If you are not satisfied with how your HDR turned out, you can just try calibrating the display again. Simply go back to the default HDR video calibration and click or tap the Reset calibration button.
Another thing to remember. First, you can only see HDR content on the full screen and if you’re using a laptop, you need to make sure to watch videos when plugged in and check that the battery settings won't’ lower the brightness.
If you suddenly noticed that your Onscreen keyboard in Windows 10 has become completely white or transparent for some reason, then you’ve come to the right place as this post will guide you on what you can do to resolve this kind of issue in your computer.
As you know, the on-screen keyboard is included in Windows 10 and has an executable file named “osk.exe”. The on-screen keyboard is a part of the Ease of Access feature in Windows 10 which allows users to navigate the computer with the help of the mouse instead of the physical keyboard. However, there are times when you might encounter some issues when using the on-screen keyboard. One of the issues reported recently is that the on-screen keyboard becomes transparent or it only displays the borders but there is no way for you to access it. You also won’t be able to move it from the view completely. To fix this problem, there are several suggestions you can check out. You can try to check the Fade button or run the Windows Touch Keyboard troubleshooter. You can also restart its process in the Task Manager. For more details, refer to each one of the given options below.
Option 1 – Try to check the Fade button
The first thing you can do is to check the Fade button on the on-screen keyboard. You can find it at the bottom right corner of the keyboard. If it is enabled, then it’s probably the reason why your on-screen keyboard is transparent as it lets it fade in the background. Thus, you have to disable it to resolve the problem.
Option 2 – Try to run the Windows Touch Keyboard troubleshooter
The next option you can check out is running the Windows Touch Keyboard troubleshooter. This troubleshooter will help you identify the problem and would fix them automatically.
Option 3 – Try to restart the process of the on-screen keyboard via Task Manager
The next thing you can do is to restart the on-screen keyboard’s process in the Task Manager. Just follow the steps below.
First, tap the Ctrl + Shift + Esc keys to open the Task Manager.
Next, go to the Processes tab and look for the option that says, “Accessibility On-screen Keyboard”.
Once you found it, click on the drop-down arrow next to it and right click on the “On-screen Keyboard” option, and select End task to end its process.
After that, tap the Win + R keys to launch the Run utility and type “osk.exe” in the field, and then hit Enter to open the on-screen keyboard.
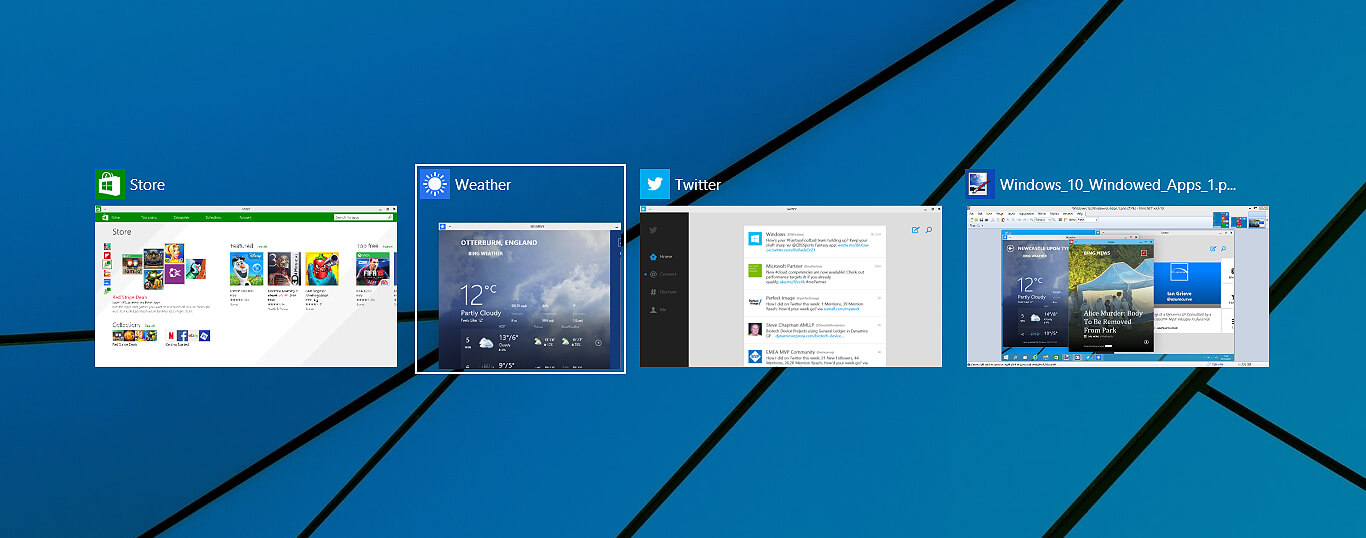
Lately, Microsoft has trying to fix Print Nightmare with various methods and patches. The last patch has seemingly fixed Print Nightmare but it has broken the Alt-tab key combination.
It has been reported that the latest patch has broken famous key combinations for quickly switching from window to window. It seems that combination is not working or it is switching to desktop, even going to blank screen if switching from the full-screen game.
Fixing the issue
Luckily this issue is easily fixable.
The first and easier fix for this issue is surprising to turn off the news and info widget, right-click on it and choose News and interests and then click on turn off.
The second solution would be to uninstall the update. Go to Settings, then to Update & Security, and from there view Update History and remove the update.
It really sucks when you can’t fully enjoy the newest version of your favorite OS.
Windows 11 is still relatively fresh and consequently has some annoying little bugs that really ruin our experience. The good news is that you’re not alone and most of them are easy to fix.
Here are 5 commonly reported Windows 11 issues and what you can do to get rid of them.
1. Windows 11 audio problems
One of the absolute most irritating things in the world is struggling with the sound on your computer. Windows 11 users have reported facing the issue of low or no sound. If you’re currently experiencing the same frustration, you can be relieved. Chances are fixing it will only take a few minutes.
The first thing to check would be whether you accidentally muted your device by pressing the mute button on your keyboard. Yes, we know it sounds a lot like the old “have you tried turning it off and on again?” But it’s important to leave no stone unturned, and the most obvious things are usually the ones we easily overlook.
Moreover, if you have several audio output sources, check whether the right one is selected. You can do this via the Action Center or through Settings. If you want to use the same source every time, we also recommend you set it as the default one.
It’s also important to have a good, up-to-date audio driver. More often than not, this will be the true cause of your audio struggles. Make sure to update your driver, and if that doesn’t work out, you can always un- and reinstall it or install a different one.
Lastly, if all attempts remain unsuccessful, run the audio troubleshooter to figure out what’s actually going wrong.
2. Unable to find files
Such a powerful new operating system, yet it can’t seem to do the simplest thing imaginable? The File Explorer not responding on Windows 11 is one of the most frustrating and most common problems with Microsoft’s newest iteration of its awesome OS.
However, 9/10 times it can be fixed by simply restarting your PC. You could also try killing the Windows Explorer process in the Task Manager and then rerunning it.
If these don’t help, check whether there are any pending Windows 11 updates. A single missing update can compromise your PC’s functionality, so always make sure to install them all on time.
Should none of that work, then there are other ways to solve the File Explorer problem. However, then the issue is probably a bit deeper and it’s no longer in the ‘easy fix’ territory.
3. Start menu not working
Just like the File Explorer, the Start menu is a fundamental element of your OS. So, it’s only natural that its malfunction grinds your gears. It may be more customizable than on previous Windows versions, but it doesn’t always work smoothly.
If you’re facing the so-called Start menu critical error, there are a few things this could be caused by. Usually it means you turned off your system while an important update was still being installed, there is a corrupt file on your PC, or Windows forcefully stopped a program.
Whatever the reason, the solution should be pretty simple. Try the basic steps: restarting your File Explorer (like we explained above) and signing out and back into your account. If that doesn’t do anything, you may want to try uninstalling third-party start menu apps (if you have any), since they can interfere with your default programs’ functionality.
Now, those are the easy fixes. If you get nowhere with them, you might need to identify the root cause and search for more complex solutions than that.
4. Snipping tool not working
Our beloved screenshot tool was introduced with Windows 10 and Microsoft decided to keep it. However, you were probably just as disappointed as us when you tried to run it and failed.
Normally, this can be fixed by installing the latest Out-of-band (OOB) update, or even pending updates in general. Even if your system appears to be up-to-date, run the checker just in case.
Another cool thing Windows 11 lets you do is ‘Repair’ and ‘Reset’, which is the easiest way to troubleshoot your Snipping tool. If this fails, you can also try the good old un- and reinstall method. Simply uninstall the tool through the Control Panel and reinstall it from the Microsoft Store.
Furthermore, in the case of an upgrade from Windows 10 to 11, it may be that the old Snipping tool version is interfering with the launch of the new one. If you don’t care that much about the additional options available with the enhanced screenshot tool, you can use the old version instead.
Simply go to your C Drive, find the Windows.old folder, search for the tool and open it from there. Make sure to pin it to your taskbar as well, if you know you’re going to use it often.
5. Can’t install the latest update
The latest Windows 11 version, 22H2, has brought tons of enhancements to our dearest operating system. Unfortunately, a lot of users still haven’t had the opportunity to experience it. A mere update of your OS version should be the one thing that goes smoothly, but sometimes that’s not the case.
Failure to install 22H2 can be caused by a few things. Most commonly, the issue is caused by lack of storage space or corrupted files, but there could be other culprits.
There are a couple of things you could try. For example, it’s crucial that your drivers be up-to-date and some important services be enabled. These are: Windows Modules Installer, Background Intelligent Transfer Service, Cryptographic Service, Windows Update services.
To enable them, search ‘Services’, find the service you need and right-click on it. Open ‘Properties’ and select the startup type ‘Automatic’.
It may also be necessary to unplug all peripherals that aren’t crucial and disable third-party antivirus tools until after the update is finished.
Ultimately, you can run the Windows Update troubleshooter to detect and fix other possible issues.
Summary
Tiny bugs like these are nothing out of the ordinary. That said, we still all hate when they happen.
Hopefully some of our solutions have helped you to a smoother Windows 11 experience. But if you’re still struggling, feel free to reach out to us. We’d be happy to help!
To understand Logon.scr application error, it is first important to understand the function of logon.scr. Logon.scr is an important file that is located in the Windows\System32 folder. It guarantees Windows systems stability.
Logon.scr application error occurs when logon.scr file gets corrupt. It is a common system error that can happen in most Windows platforms. It usually pops up during system start-ups and when trying to launch certain programs.
Some of the common systems of this error code include: system halt, freeze, no application icons are visible on the desktop, random blue screen of death and system performance decreases dramatically.
Solution
Error Causes
Two of the most common causes of logon.scr application error is:
Corrupted and damaged logon.scr file
Viral infection
It is advisable to fix this error code immediately because it leads to serious damages. It is fatal and can result in a system crash; therefore resolve it right away.
Further Information and Manual Repair
To resolve this issue on your computer you don’t have to spend hundreds of dollars to hire a professional for the job. The good news is that it can be repaired easily and does not require any technical expertise.
Here are some of the most effective and easy DIY methods to resolve the error on your screens.
Method 1 - Replace the Damaged and the Corrupted Logon.scr File
Whether the file gets corrupted or is accidentally deleted, the best way to fix the issue is to download the Logon.scr file again from a reliable website and install in the following location C:\Windows\System32.
Alternatively you can also get the file copy form another proper functioning computer by using flash drive if you don’t have an internet connection to download the logon.scr file online.
Method 2 - Restore Points by Applying System Restore of Windows
Another way to resolve this is to restore points to bring back your system to the previous state before the error occurred. To do this, simply click the start button and type ‘System Restore’.
Now click System Restore in the result and click next. Select the restore point in the list and click the next button to proceed. To activate changes reboot your PC.
Method 3 - Scan and Remove Viruses
If Logon.scr application error still persists, then it could be due to viruses. To resolve, install a powerful anti-virus. Scan your entire PC and remove viruses.
Method 4 - Repair the Registry
Corrupt and damaged Logon.scr file also triggers issues with the registry. DLL files and other important files like Logon.scr application files may get damage due to too many bad and invalid registry entries.
Registry stores all the activities performed on the PC including unnecessary files like junk files and cookies. If these are not removed timely, these files accumulate and corrupt important files. Therefore, to fix the error it is advisable to clean and repair the registry.
The best way to go about is to download Restoro. This is a user-friendly and multi-functional PC Fixer deployed with a registry cleaner. It scans for all registry errors and removes all the invalid entries. It cleans the registry and repairs the damaged files thereby resolving the issue in seconds.
Click here to download Restoro and resolve the Logon.scr application error now!
California's Department of Fair Employment & Housing has widened its anti-discrimination lawsuit against Activision Blizzard and claims the publisher has been shredding vital documents relevant to the ongoing investigation.
A recent report from Kotaku described the department as offering poorly paid, highly insecure positions, with a culture of hostility towards LGBTQ+ testers. The DFEH's rewording of "employees" to "workers" now hopes to take these contractors' experiences into account.
"As a contract employee, I feel there's a lot of pressure to excel, impress, and move through the ranks as fast as you can before your contract ends and you're forced to go 3 months without income or find another job," Axios reports one worker saying. "I take pride in what I do, but it feels like it's never enough."
Activision's contentious hiring of union-busting third-party law firm WilmerHale "directly interferes" with its own investigation, it says. By going to WilmerHale, Activision appears to be claiming that all work related to the investigation is privileged and can't be shared with DFEH.
The suit also claims that Activision HR shredded documents related to "investigations and complaints", against its legal obligation to retain them during the investigation. The relevant parts of the updated lawsuit were shared by Axios reporters Stephen Totilo and Megan Farokhmanesh, the former also noting that the DFEH "fixed their misspelling of Bill Cosby's name".
"DFEH is also informed and aware that documents and records have not been maintained as required by law or by the DFEH's Document Retention Notice," the complaint reads, "including but not limited to documents related to investigations and complaints were shredded by human resource personnel and emails are deleted thirty days after an employees separation."
Speculation and answer from Activision Blizzard
Blizzard employee Jessica Gonzalez suspects that the costs of fines associated with destroying these documents may have been an easier blow for Blizzard to take than any penalties drawn from their existence in helping the lawsuit go through.
In an email to Kotaku, Activision denied the shredding allegations and issued a statement outlining steps it had taken to improve company culture—including the ousting of high-level executives like Blizzard president J. Allen Brack. The full statement reads:
"Throughout our engagement with the DFEH, we have complied with every proper request in support of its review even as we had been implementing reforms to ensure our workplaces are welcoming and safe for every employee. Those changes continue today, and include:
Several high-level personnel changes
Revamped hiring and recruiting practices requiring diverse interview panels
Greater transparency on pay equity
Expanded and improved training and investigative capabilities for human resource and compliance staff
Created investigation teams outside of business units to support greater independence
Restructured divisions to support greater accountability
Enhanced review processes to include evaluation of managers by employees
Clear boundaries on workplace behavior with a zero-tolerance approach to harassment and other actions that diminish or marginalize.
"We strive to be a company that recognizes and celebrates the diverse talents and perspectives that lead to the creation of great, globally appealing entertainment. We have provided the DFEH with clear evidence that we do not have gender pay or promotion disparities. Our senior leadership is increasingly diverse, with a growing number of women in key leadership roles across the company.
"We share DFEH’s goal of a safe, inclusive workplace that rewards employees equitably and is committed to setting an example that others can follow."
California and RIOT
Beyond Activision Blizzard, California's DFEH has also probed into League of Legends creator Riot Games, accusing the studio of dragging its heels over sexual harassment allegations dating back to 2019. Riot denied the allegations, telling us that it "will never retaliate against anyone for talking to any government agency".
Chedot is a Chromium-based Browser that replaces your default System Internet Browser. This browser offers users tools for downloading videos, faster browsing, and custom searches.
From the publisher: A feature of our browser is a high speed on slow computers, high speed download on a poor internet, support resuming file download when connection is broken and the download in multiple threads, the ability to go on blocked websites and downloading videos from video sites.
While this may seem interesting and good at start, this browser has been marked as a Potentially Unwanted Program. It monitors user activity, collects web traffic data, and user information. While using Chedot you may see additional ads throughout your browsing sessions.
About Potentially Unwanted Applications
Exactly what is a Potentially Unwanted Program (PUP)?
People have encountered it – you download a free software, you then discover some unwanted applications on your computer system or discover a strange toolbar has been included with your browser. You didn’t have them installed, so how did they appear? These unwanted applications, which are called Potentially Unwanted Programs, or PUP in short, usually tag along as a software bundle when downloading the application and could cause serious problems for computer users.
PUP does not involve malware in the traditional sense. What normally makes a PUP different from malicious software is the fact that when you download one, you’re doing it with your consent – although in most cases unintentionally and reluctantly. But, there is no doubt that PUPs remain bad news for computer users as it can be incredibly damaging to the PC in many ways.
How do unwanted programs affect you?
Unwanted programs come in many forms. More commonly, they will be found in adware bundlers which are known to utilize aggressive and misleading advertising. The majority of bundlers install many adware applications from a number of vendors, each of which features its own EULA policy. Safebytes Anti-malware completely removes this threat and safeguards your PC against PUP or malware infection. PUPS also appear in the form of undesirable toolbars or internet browser plug-ins. Not just they needlessly use up space on your screen, toolbars can also manipulate search results, track your web browsing activities, decrease your internet browser’s performance, and slow down your web connection to a crawl.
They could seem harmless but PUPs are generally spyware. They may include dialers, keyloggers, and also other software built inside them that could monitor you or send out your sensitive information to 3rd parties. Because of this unwanted program, your application may freeze, your security protections can get disabled that could leave your computer susceptible, your system could get ruined, and this list goes on and on.
Tips for preventing PUPs
• Study cautiously prior to agreeing to the license agreement as it could have a clause about PUPs.• Always opt for the custom if you are given an option between Recommended and Custom Installations – never click Next, Next, Next thoughtlessly.• Install an advert blocker/pop-up blocker; Deploy anti-malware products such as Safebytes Anti-malware. These software programs will establish a wall between the computer and online criminals.• Be alert when you download and install freeware, open-source software, or shareware. Avoid downloading and installing browser extensions and applications you are not knowledgeable about.• Always download software from reliable sources like official sites as opposed to untrustworthy sharing space. Avoid torrents and peer-to-peer clients.
What To Do If You Cannot Download Safebytes Anti-Malware?
All malware is bad, but certain types of malware do much more damage to your PC than others. Some malware sits in between your computer and the net connection and blocks some or all internet sites that you really want to check out. It will also block you from installing anything on your PC, especially anti-malware applications. So what to do when malicious software keeps you from downloading or installing Safebytes Anti-Malware? Although this type of issue will be tougher to get around, there are some actions you can take.
Install the antivirus in Safe Mode
In Safe Mode, you can adjust Windows settings, un-install or install some software, and get rid of hard-to-delete viruses. In the event the virus is set to load immediately when PC starts, shifting into this mode may well prevent it from doing so. In order to get into Safe Mode or Safe Mode with Networking, press the F8 key while the PC is booting up or run MSConfig and look for the “Safe Boot” options under the “Boot” tab. Once you’re in Safe Mode, you can try to install your antivirus program without the hindrance of the virus. Now, you can run the anti-malware scan to eliminate computer viruses and malware without any hindrance from another malicious application.
Download the antivirus software using a different browser
Some viruses might target vulnerabilities of a specific browser that block the downloading process. If you suspect that your Internet Explorer happens to be hijacked by a virus or otherwise compromised by cybercriminals, the best approach is to switch over to an alternate web browser like Chrome, Firefox, or Safari to download your chosen security software – Safebytes Anti-Malware.
Make a bootable USB anti-virus drive
Here’s another solution which is creating a portable USB anti-virus software that can scan your system for malware without the need for installation. Follow these steps to run the anti-virus on the affected PC.
1) Download Safebytes Anti-Malware or Windows Defender Offline onto a clean computer.2) Plug the USB drive into the uninfected PC.3) Double-click on the downloaded file to open the installation wizard.4) Choose the drive letter of the flash drive as the place when the wizard asks you exactly where you would like to install the anti-virus. Follow the on-screen instructions to complete the installation process.5) Now, transfer the pen drive to the infected PC.6) Double-click the EXE file to run the Safebytes tool from the flash drive.7) Press the “Scan Now” button to start the virus scan.
SafeBytes Anti-Malware - More Protection For You
These days, an anti-malware tool can protect the computer from different forms of online threats. But wait, how to choose the right one amongst various malware protection software that is available on the market? Perhaps you might be aware, there are lots of anti-malware companies and products for you to consider. Some of them are good, some are decent, while some will affect your computer themselves! You must be careful not to pick the wrong product, especially if you purchase premium software. When it comes to commercial anti-malware software options, many people opt for popular brands, like SafeBytes, and they are very happy with it.
Safebytes is among the well-established computer solutions firms, which provide this all-inclusive anti-malware software. Using its cutting edge technology, this application can help you eradicate multiples types of malware which includes computer viruses, worms, PUPs, trojans, adware, ransomware and browser hijackers.
SafeBytes has outstanding features when compared with various other anti-malware programs. Below are a few of the great ones:
Real-time Protection: Malware programs aiming to enter the computer are discovered and stopped as and when detected by the SafeBytes active protection shields. It’ll examine your computer system for suspicious activity regularly and shields your personal computer from unauthorized access.
Optimum AntiMalware Protection: Safebytes is built on the best virus engine within the industry. These engines can find and remove threats even during the initial stages of a malware outbreak.
“Fast Scan” Features: SafeBytes’s high speed malware scanning engine lessens scan times and extends battery life. Simultaneously, it’ll effectively identify and remove infected files or any online threat.
Web Filtering: SafeBytes provides instant safety rating to the webpages you are about to check out, automatically blocking harmful sites and to ensure that you’re certain of your online safety while browsing the internet.
Lightweight: SafeBytes is really a lightweight tool. It use up an extremely small amount of processing power as it operates in the background therefore you will not observe any system performance difficulties.
Premium Support: For any technical concerns or product support, you can obtain 24/7 professional assistance via chat and e-mail.
Technical Details and Manual Removal (Advanced Users)
If you don’t wish to use malware removal software and prefer to get rid of Chedot manually, you could possibly do so by going to the Windows Add/Remove Programs menu in the Control Panel and deleting the offending program; in cases of browser extensions, you may uninstall it by visiting the browsers Add-on/Extension manager. It’s also highly recommended to factory reset your browser to its default state to fix corrupt settings.
To make sure of complete removal, find the following registry entries on your computer and delete it or reset the values accordingly. Please keep in mind that only advanced users should try to manually edit the system files mainly because deleting any single critical registry entry results in a major problem or even a system crash. Furthermore, certain malware keeps replicating which makes it tough to get rid of. You’re encouraged to do this procedure in Safe Mode.

 This is not the first time that Intel is trying to enter the GPU field but its adventures so far were, well let us agree not so good. All of that is hoping to be changed with the upcoming ARC GPU. The first generation of Arc graphics, code-named Alchemist and previously known as DG2, will support desktop PCs and laptops and is set to arrive in the first quarter of 2022.
Alchemist will have hardware-based Ray tracing and AI-driven supersampling. This indicates that GPU is aimed to compete in the Hi-end spectrum and battle side by side with Nvidia and AMD on the market. Alchemist will also pack full DirectX 12 Ultimate support.
Intel also released names for the next upcoming future generations of ARC GPUs: Battlemage, Celestial & Druid. More information about ARC products will be released later this year.
“Today marks a key moment in the graphics journey we started just a few years ago. The launch of the Intel Arc brand and the reveal of future hardware generations signifies Intel’s deep and continued commitment to gamers and creators everywhere,” Roger Chandler, Intel vice president, and general manager of client graphics products and solutions.
This is not the first time that Intel is trying to enter the GPU field but its adventures so far were, well let us agree not so good. All of that is hoping to be changed with the upcoming ARC GPU. The first generation of Arc graphics, code-named Alchemist and previously known as DG2, will support desktop PCs and laptops and is set to arrive in the first quarter of 2022.
Alchemist will have hardware-based Ray tracing and AI-driven supersampling. This indicates that GPU is aimed to compete in the Hi-end spectrum and battle side by side with Nvidia and AMD on the market. Alchemist will also pack full DirectX 12 Ultimate support.
Intel also released names for the next upcoming future generations of ARC GPUs: Battlemage, Celestial & Druid. More information about ARC products will be released later this year.
“Today marks a key moment in the graphics journey we started just a few years ago. The launch of the Intel Arc brand and the reveal of future hardware generations signifies Intel’s deep and continued commitment to gamers and creators everywhere,” Roger Chandler, Intel vice president, and general manager of client graphics products and solutions. 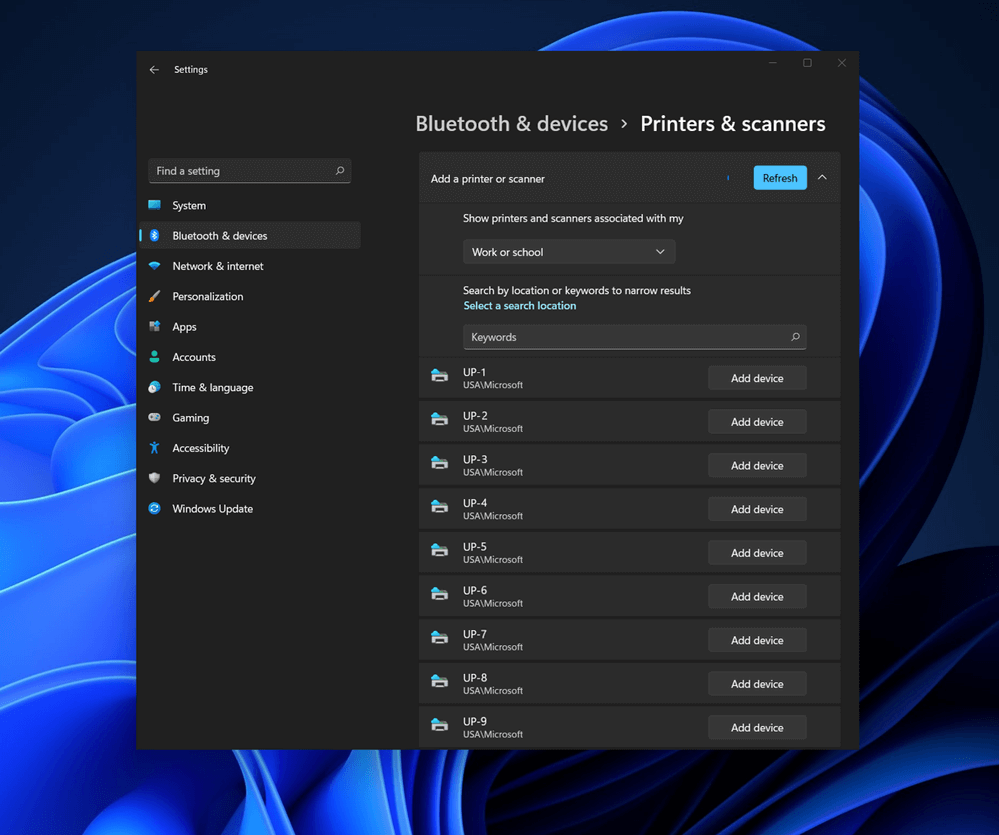 Bluetooth perhaps is slowly becoming an outdated feature but sometimes you can really used it and need it.
By default, in Windows 11 Bluetooth is turned OFF so if you need it, you will need to turn it ON first. Luckily turning it ON is easy and we will guide you through the process
Bluetooth perhaps is slowly becoming an outdated feature but sometimes you can really used it and need it.
By default, in Windows 11 Bluetooth is turned OFF so if you need it, you will need to turn it ON first. Luckily turning it ON is easy and we will guide you through the process
 Lately, Microsoft has trying to fix Print Nightmare with various methods and patches. The last patch has seemingly fixed Print Nightmare but it has broken the Alt-tab key combination.
It has been reported that the latest patch has broken famous key combinations for quickly switching from window to window. It seems that combination is not working or it is switching to desktop, even going to blank screen if switching from the full-screen game.
Lately, Microsoft has trying to fix Print Nightmare with various methods and patches. The last patch has seemingly fixed Print Nightmare but it has broken the Alt-tab key combination.
It has been reported that the latest patch has broken famous key combinations for quickly switching from window to window. It seems that combination is not working or it is switching to desktop, even going to blank screen if switching from the full-screen game.


 California's Department of Fair Employment & Housing has widened its anti-discrimination lawsuit against Activision Blizzard and claims the publisher has been shredding vital documents relevant to the ongoing investigation.
A recent report from Kotaku described the department as offering poorly paid, highly insecure positions, with a culture of hostility towards LGBTQ+ testers. The DFEH's rewording of "employees" to "workers" now hopes to take these contractors' experiences into account.
"As a contract employee, I feel there's a lot of pressure to excel, impress, and move through the ranks as fast as you can before your contract ends and you're forced to go 3 months without income or find another job," Axios reports one worker saying. "I take pride in what I do, but it feels like it's never enough."
Activision's contentious hiring of union-busting third-party law firm WilmerHale "directly interferes" with its own investigation, it says. By going to WilmerHale, Activision appears to be claiming that all work related to the investigation is privileged and can't be shared with DFEH.
The suit also claims that Activision HR shredded documents related to "investigations and complaints", against its legal obligation to retain them during the investigation. The relevant parts of the updated lawsuit were shared by Axios reporters Stephen Totilo and Megan Farokhmanesh, the former also noting that the DFEH "fixed their misspelling of Bill Cosby's name".
"DFEH is also informed and aware that documents and records have not been maintained as required by law or by the DFEH's Document Retention Notice," the complaint reads, "including but not limited to documents related to investigations and complaints were shredded by human resource personnel and emails are deleted thirty days after an employees separation."
California's Department of Fair Employment & Housing has widened its anti-discrimination lawsuit against Activision Blizzard and claims the publisher has been shredding vital documents relevant to the ongoing investigation.
A recent report from Kotaku described the department as offering poorly paid, highly insecure positions, with a culture of hostility towards LGBTQ+ testers. The DFEH's rewording of "employees" to "workers" now hopes to take these contractors' experiences into account.
"As a contract employee, I feel there's a lot of pressure to excel, impress, and move through the ranks as fast as you can before your contract ends and you're forced to go 3 months without income or find another job," Axios reports one worker saying. "I take pride in what I do, but it feels like it's never enough."
Activision's contentious hiring of union-busting third-party law firm WilmerHale "directly interferes" with its own investigation, it says. By going to WilmerHale, Activision appears to be claiming that all work related to the investigation is privileged and can't be shared with DFEH.
The suit also claims that Activision HR shredded documents related to "investigations and complaints", against its legal obligation to retain them during the investigation. The relevant parts of the updated lawsuit were shared by Axios reporters Stephen Totilo and Megan Farokhmanesh, the former also noting that the DFEH "fixed their misspelling of Bill Cosby's name".
"DFEH is also informed and aware that documents and records have not been maintained as required by law or by the DFEH's Document Retention Notice," the complaint reads, "including but not limited to documents related to investigations and complaints were shredded by human resource personnel and emails are deleted thirty days after an employees separation."