Bttray.exe is basically a Bluetooth Tray Application. Bluetooth Tray Application is developed by WIDCOMM.
It provides a system tray icon that allows users to see the status of their Bluetooth connections at a glance. It allows you to easily access the configuration and settings for the Bluetooth products enabling you to change the configuration of the Bluetooth devices.
The bttray.exe application error may pop up on your computer screen due to some issue with the Bluetooth software. The process fails to initialize and therefore stops working.
Bttray.exe application error code is displayed in the following format:
Though this is not a fatal or critical computer error it is advisable to resolve it otherwise it will hamper your access to Bluetooth software and cause you a great deal of inconvenience.
 Error Causes
Bttray.exe application error code may be triggered due to one of the reasons stated below:
If you experience a bttray.exe application error code on your system, it is recommended to fix it right away.
To resolve this error you don’t have to be a computer programmer or a technical whiz or have to hire a professional and spend hundreds of dollars in repair. It is easy to fix, simply follow the manual methods given below:
If the Bluetooth Software is damaged or outdated, the bttray.exe will also not work. If this is the cause of the error code, then simply reinstall Bluetooth software on your system.
To do this, first, uninstall the current software and then download the latest version of the Bluetooth Software on your PC. To uninstall click start, go to the control panel, and then programs. Now select Bluetooth software and click uninstall to remove it.
After that, install the latest version and update it. To activate changes
Sometimes the bttray.exe application error code may pop up due to malware and viral infection. To fix it, download a powerful antivirus. Scan and remove malware to resolve.
The registry basically saves all the activities being performed on the PC including junk and obsolete files. If the registry is not clean frequently, unnecessary files like cookies, junk files, temporary files, and internet history can take up a lot of space and cause the registry to damage.
Due to this error code like the bttray.exe application can also pop up. To resolve, clean the registry. You can do it manually but that may be difficult and time-consuming if you are not a computer programmer. However, a good alternative would be to download Restoro.
This is a user-friendly and next-generation PC Fixer deployed with multiple utilities like a registry cleaner and an antivirus. Simply run it to remove viruses and clean the registry.
Click here to download Restoro and resolve the bttray.exe application error now!

 In run dialog type RegEdit and press ENTER
 In registry editor find HKEY_LOCAL_MACHINE\SYSTEM\CurrentControlSet\Services\LanmanServer\Parameters
Right-click on Parameters> New> DWORD 32
Name it IRPStackSize and change the value to 32
Save and reboot your computer.In run dialog type RegEdit and press ENTER
In registry editor find a key Computer\HKEY_LOCAL_MACHINE\SYSTEM\CurrentControlSet\Services\Tcpip\Parameters
Right-click on Parameters> New> DWORD 32
Name it DefaultTTL and change the value to 64
Save and RebootIn run dialog type RegEdit and press ENTER
In registry editor find a key Computer\HKEY_LOCAL_MACHINE\SYSTEM\CurrentControlSet\Services\Tcpip\Parameters
There should be a DWORD Value, TCP1323Opts, if not, then create it. Right-click on Parameters> New> DWORD (32-bit) Value.
Double-click on it and change its value to 1
Save and reboot
In registry editor find HKEY_LOCAL_MACHINE\SYSTEM\CurrentControlSet\Services\LanmanServer\Parameters
Right-click on Parameters> New> DWORD 32
Name it IRPStackSize and change the value to 32
Save and reboot your computer.In run dialog type RegEdit and press ENTER
In registry editor find a key Computer\HKEY_LOCAL_MACHINE\SYSTEM\CurrentControlSet\Services\Tcpip\Parameters
Right-click on Parameters> New> DWORD 32
Name it DefaultTTL and change the value to 64
Save and RebootIn run dialog type RegEdit and press ENTER
In registry editor find a key Computer\HKEY_LOCAL_MACHINE\SYSTEM\CurrentControlSet\Services\Tcpip\Parameters
There should be a DWORD Value, TCP1323Opts, if not, then create it. Right-click on Parameters> New> DWORD (32-bit) Value.
Double-click on it and change its value to 1
Save and reboot
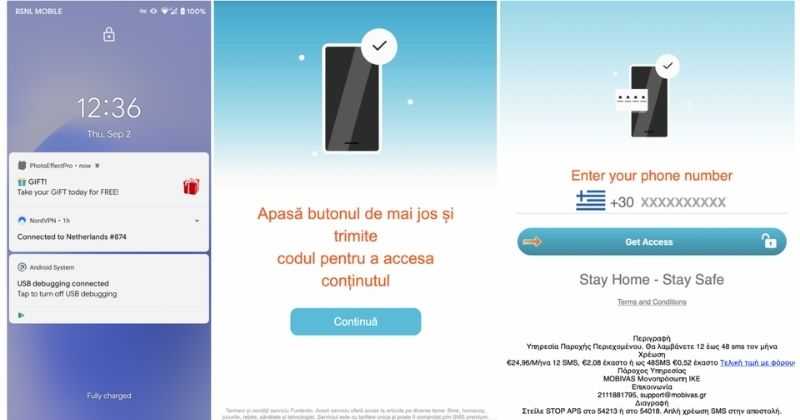 According to Zimperium zLabs, this malware that was recently detected has been doing its scams and attacks even in November of 2020 and has thus far accumulated hundreds of thousands of dollars in its scam.
On the surface it looks very harmless, asking for typical permissions like internet access, calls, and other related needed functions, and then it waits. After few months the real attack happens when users get charged with premium service they never subscribed to in the first place.
According to Zimperium zLabs, this malware that was recently detected has been doing its scams and attacks even in November of 2020 and has thus far accumulated hundreds of thousands of dollars in its scam.
On the surface it looks very harmless, asking for typical permissions like internet access, calls, and other related needed functions, and then it waits. After few months the real attack happens when users get charged with premium service they never subscribed to in the first place.
“Updates failed There were problems installing some updates, but we’ll try again later. If you keep seeing this and want to search the web or contact support for information, this may help: 2018-07 Cumulative Update for Windows 10 Version 1803 for x64-based Systems (KB4345421) – Error 0xca00a000”This kind of Windows Update error pops up when Windows has missed installing one of the cumulative updates needed or when there is some problem with the driver that won’t let the installation of the updates push through. There are also instances when the system files are modified with incorrect permission that may result in the Windows update error 0xca00a000. Thus, you need to fix the trusted installer permission as well as resolve the issue with the driver. To do these things, you need to follow the options laid out below.
SC config trustedinstaller start=auto
net stop wuauserv net stop bits
net start wuauserv net start bitsSince the folder has already been flushed, it will be populated afresh the instant your restart your computer and open Windows Update.
“Out of memory or system resources, Close some windows or programs and try again.” “There is not enough memory to complete this operation – copying files.”These errors are caused by the Desktop Heap limitation when there is no longer enough memory to complete the operation while copying the files. If you encounter any of these errors, you will be guided in this post with the help of some potential fixes that can increase its limit and will hopefully fix this error on your Windows 10 computer. You may try to close all the open windows and programs and then try copying the file again and see if that helps. If not, then proceed to the instructions given below. But before you do that, make sure that you create a System Restore point first. This way, you can undo the changes you’ve made any time in case there are some unwanted changes you want to reverse. After you create a System Restore point, refer to the steps provided below. Step 1: Tap the Win + R keys to open the Run utility and type “Regedit” in the field and tap Enter to open the Registry Editor. Step 2: Next, navigate to this registry key: ComputerHKEY_LOCAL_MACHINESYSTEMCurrentControlSetControlSession ManagerSubSystems Step 3: Now double click on the DWORD named Windows to modify it. Step 4: Change the values for SharedSection in the Value Data field. It should be in the format of “SharedSection=aaaa,bbbb,cccc”. Note that you have to change the value of “bbbb” and “cccc”. So in case you are using an x86 operating system, set the value of bbbb to 12288 and then set the value for cccc to 1024. On the other hand, if you are using an x64 operating system, set the bbbb value to 20480 and the cccc value to 1024. Step 5: Exit the Registry Editor and restart your computer to successfully apply the changes made. Note: The bbbb value in the SharedSection registry is the size of the desktop heap for each interactive window station while the cccc section of the SharedSection value is the size of the desktop heap for each non-interactive window station. In addition, you must keep in mind that setting the value of bbbb to more than 20480 KB is not really recommended. On the other hand, there is another tool that could help in resolving the Out of Memory error. This tool is called the Memory Diagnostic tool in windows can help resolve the Out of Memory error by checking and automatically fixing any memory-based issues. To run it, refer to these steps:
 Jokes aside, I truly believe that choosing to upgrade your System to Windows 11 at this point in time is a bad decision and I will explain why I do believe it.
Some users installing or upgrading to Windows 10 experienced the theKMODE_EXCEPTION_NOT_HANDLED Blue Screen of Death (or commonly known as BSOD) error. This error can be due to different types of things, ranging from software to driver issues. When you experience this BSOD error while trying to install Windows 10, it will prompt you to restart your computer every single time you experience it. In most cases, you will also not be able to proceed with the Windows 10 set-up.
Error CausesThe “KMODE_EXCEPTION_NOT_HANDLED” error is normally caused by:
You won’t be able to successfully upgrade or set up Windows 10 if you continue to encounter this BSOD error. Note that this error will always prompt your computer to restart every time it happens, preventing you from completing the Windows 10 set-up.
If you’re not tech-savvy or not capable of debugging this issue, it’s highly advisable to proceed with the basic troubleshooting techniques available in this link.
After troubleshooting, below you’ll find a few solutions to rectify the issue.
Two common causes of the KMODE_EXCEPTION_NOT_HANDLED issue are hardware incompatibility and faulty device driver or system service.
If you experience this error, check first if any of your newly installed hardware is compatible with Windows 10. You can find the required hardware for Windows 10 from this link.
If all your hardware is compatible with Windows 10, you might need to check the device driver or system service. Review the bug check message. If any of the drivers you have is listed in the message, either disable or uninstall them before upgrading or setting up Windows 10.
You might also find it useful to check the System Log available in the Event Viewer for other error messages that can help you figure out the driver or device that’s causing the error. Running hardware diagnostics can also be useful.
Other troubleshooting steps include:
If you still experience the error after doing the methods above, you might want to try a powerful and trusted automated tool to fix the job.