Error 0X800F080C is tied to corrupted system files and .NET framework issues. In this article, we will focus on how to fix it starting first with .NET fixes and then moving to system-related ones. Follow the guide step by step so you can fix this error fast and easily.
As previously stated 0X800F080C error can occur due to issues with .NET framework, 3.5 framework to be more precise and there are two ways we can fix this error. Follow the guide below as presented:
First thing is to try and install the framework from Window features itself. Sometimes installation and activation of .NET 3.5 in other ways can result in this error. To install it do the following:
Press ⊞ WINDOWS + R to open the run dialog
Inside run type in appwiz.cpl and press ENTER to open up the Programs and Features menu
Inside the Programs and Features menu click on Turn Windows features on or off.
Check the box associated with .NET Framework 3.5 (this package includes .NET 2.0 and 3.0)
Press OK
Click on YES and wait for the package to be installed then reboot your PC
If the previous step was not successful or you already had .NET 3.5 installed then run the troubleshooter in order to fix issues.
Go to the official Microsoft .NET framework repair tool website here and download it.
Once downloaded install the tool and follow onscreen instructions.
If the previous solution has not provided you with results then you have system file corruption that needs to be fixed. Move from one solution to another as presented below:
SFC scan is a built-in Windows tool for solving corrupted system files issues, it is fully automated and does not require from the user any kind of knowledge or information. To run it and scan the system do the following:
Press ⊞ WINDOWS + X to open the secret menu
Left-click on the command prompt (admin)
In command prompt type SFC /SCANNOW and press ENTER
Wait for the process to finish, do not interrupt it and once it is done, restart your computer
DISM scan is similar to SFC scan but it tackles different types of system file corruption and it is recommended to run it also after SFC has been completed. Please note that for DISM scan to be successful you will need a stable internet connection since DISM will replace corrupted files with new ones downloaded from Microsoft. To run it do the following:
Press ⊞ WINDOWS + X to open the secret menu
Left-click on the command prompt (admin)
inside command prompt type: exe /online /cleanup-image /scanhealth followed by ENTER, then type: Dism.exe /online /cleanup-image /restorehealth also followed with ENTER.
Leave scan to finish and reboot your PC

 Hardware under the hood
 If we are to believe news from Intel, new series of processors based on Alder Lake architecture are about to be released somewhere in October. Alder Lake is the 12th Generation Core of Intel processors and it is meant to have all advantages of the current CPU structure.
I9 is aimed to pack a punch against its competitors with technology including eight high-performance Golden Cove cores (P-cores) with Hyper-Threading and eight energy-efficient Goldmont (E-cores) equipped with a 30MB L3 cache and operating at high clock speeds.
During the benchmark test, the new CPU outperformed all of Intel’s previous Rocket Lake structure processors which is logically expected but the big surprise came from results that indicate better performance than Apple’s new M1 processor even in single-threaded performance which is supposed to be best in that field.
Another surprise was really beating AMD Ryzen 9 in each field. If we take into account that i9 has 16 cores in total and can process 24 threads against Ryzen 9 with 16 Cores and 32 threads this is an impressive feature.
Now truth to be told Alder lake has massive L3 cache and microarchitectural advantages and consumes much more power but the results of performance are high. Also, note that this early CPU is not really a mass production one and maybe some things will still change but early results are very satisfactory.
We will see what will price tag be since in this age of shortage and competition that will also play a big role in its overall success. Speaking of competition I eagerly await AMD’s response to this, in any way it seems that the CPU market is for some turbulence which is always a good thing for the final customer and I welcome it.
If we are to believe news from Intel, new series of processors based on Alder Lake architecture are about to be released somewhere in October. Alder Lake is the 12th Generation Core of Intel processors and it is meant to have all advantages of the current CPU structure.
I9 is aimed to pack a punch against its competitors with technology including eight high-performance Golden Cove cores (P-cores) with Hyper-Threading and eight energy-efficient Goldmont (E-cores) equipped with a 30MB L3 cache and operating at high clock speeds.
During the benchmark test, the new CPU outperformed all of Intel’s previous Rocket Lake structure processors which is logically expected but the big surprise came from results that indicate better performance than Apple’s new M1 processor even in single-threaded performance which is supposed to be best in that field.
Another surprise was really beating AMD Ryzen 9 in each field. If we take into account that i9 has 16 cores in total and can process 24 threads against Ryzen 9 with 16 Cores and 32 threads this is an impressive feature.
Now truth to be told Alder lake has massive L3 cache and microarchitectural advantages and consumes much more power but the results of performance are high. Also, note that this early CPU is not really a mass production one and maybe some things will still change but early results are very satisfactory.
We will see what will price tag be since in this age of shortage and competition that will also play a big role in its overall success. Speaking of competition I eagerly await AMD’s response to this, in any way it seems that the CPU market is for some turbulence which is always a good thing for the final customer and I welcome it. Hello all the wonderful people and welcome to our new article where we take a little different turn than usual and discuss why keeping old electronics around the house is not such a good idea. We all have some drawer or in some bag around the house and in the end of the day if that electronic has battery inside it is probably not the smart thing to keep it.
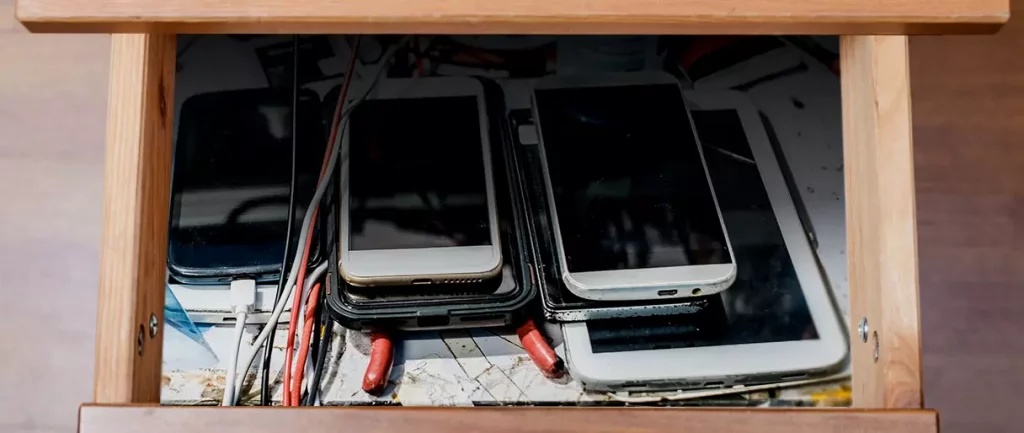
So naturally, the question comes why it is a bad idea to have old electronics with batteries in them? Well unlike a battery failure with, say, some AA batteries jammed in the back of an old toy, the risk with a lithium-ion battery failing isn’t just some leaking and corrosion in the battery compartment, it’s a potential fire as the battery swells up and the gases (combined with the stored energy) turn the battery into a potential fire hazard.
Good thing is that the battery will not explode just like that, it will swallow over time and get bigger and bigger until the breaking point is reached and all the fire breaks lose. So if by any chance you have some old gadgets lying around you can check up on them and see if has swelling process started, if yes, dispose properly of that piece of the old device immediately.
If you’re not ready to get rid of the gadget then it’s best to charge it properly for storage. Proper charging keeps the battery cells and circuits in optimum health.
While recommendations vary by manufacturer and application, the general consensus is that lithium-ion batteries should be charged to approximately 40%. (Some manufacturers recommend charging 50% or 60% instead.)
Really, the important part here isn’t the exact percentage. What’s important is ensuring that the battery is charged to roughly half capacity and not stored with a completely discharged or completely full battery.
Discharge rates on lithium-ion batteries in completely powered-off devices are very slow, but you should still plan to top off the charge every 12-18 months or so to keep it around 50%.
If you wanted to go above and beyond, a metal storage container with a snug lid on a basement shelf with a desiccant pack inside to control the moisture would offer optimum conditions.
0x80004001 is an error code that Windows users encounter quite commonly.
This error usually occurs when users try to update an old Windows application or attempt to run a certain application. When this error appears on the screen, the system automatically restarts to stop further processing. The error results in a blue screen after the system boots.
This blue screen is known as the Blue Screen of Death.
There are different files in the Windows operating system responsible for its smooth functioning. Sometimes problems like viruses or incorrect register entries corrupt or damage these files. This is when this 0x80004001 error appears.
Simply put, some of the most common causes that trigger 0x80004001 error are listed below as follows.
Irrespective of what causes this error, it is of utmost importance to troubleshoot it as soon as possible.
While there are several ways of troubleshooting this error, the two most useful approaches have been listed below as follows.
Use any of the methods listed above to get rid of the 0x80004001 error once and for all.
The program can’t start because MSVCR71.dll is missing from your computer, Try reinstalling the program to fix this problem.If by any chance you have encountered this error know that you are not alone and that this is a solvable error. In this guide, we will show you how to fix this error. Usually, the MSVCR71.dll missing error is met when a new application is installed. So let us dive right into it and solve it.
‘Connection timed out. A connection attempt failed because the connected party did not properly respond after a period of time, or established connection failed because connected host failed to respond.’
 Error Causes
takeown /f FileNameAndPathNote: In the given command, “FileNameAndPath” represents the name and the path of the corrupted file. For instance, the corrupted file is named “wuapi.dll”, then you need to type “takeown /f C:/Windows/System32/wuapi.dll” Step 5: Next, you need to grant administrators full access & control to the corrupted file and you can do that via Command Prompt again. Step 6: In the elevated Command Prompt, type and enter the following command to execute it:
icacls FileNameAndPath /GRANT ADMINISTRATORS:FNote: We’re going to use the wuapi.dll again as an example. So the command should be like this: icacls “C:/Windows/System32/wuapi.dll /grant administrators: F”. Step 7: Now all that’s left to do is replace the corrupted system file with a good copy from a trusted source. Once you have a copy, open an elevated Command Prompt again and execute the following command:
copy NewFileLocation FileNameAndPathNote: In the command given above, the “NewFileLocation” is the location where you have saved the copy of the file. For instance, if you’ve saved it on your desktop, this is how it should look: “copy C:/Users/<username>/Desktop/wuapi.dll C:/windows/system32/wuapi.dll”