

Instaling and removing applications from your Windows can sometimes leave some traces that are unpleasant and can cause annoyances. One of these annoyances is the program in the startup section of the task manager.
If you ever opened task manager and went into the startup section trying to disable some of the startup items on your Windows boot there might be a chance that you have experienced and seen a program without any icon or information about it just sitting there.
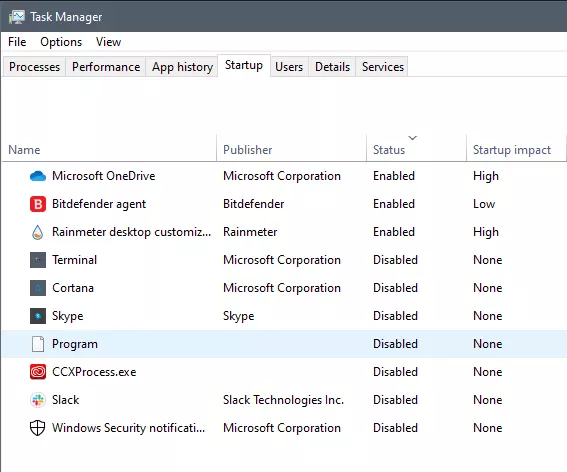
This is due to some applications being removed from the system but for some reason, it still shows itself in startup and it is quite annoying. So here we will show you how to get rid of this annoyance so your startup is clean again without junk in it.
Removing a program from startup
Locating the source of the issue
The first thing of course is to open the task manager itself and navigate to the startup tab. Inside the startup tab right-click on the column header and tick or enable Startup type and command line. Now you will see the location of the supposed file (that is missing or you could just go there by right-clicking on the item, but here it is greyed).
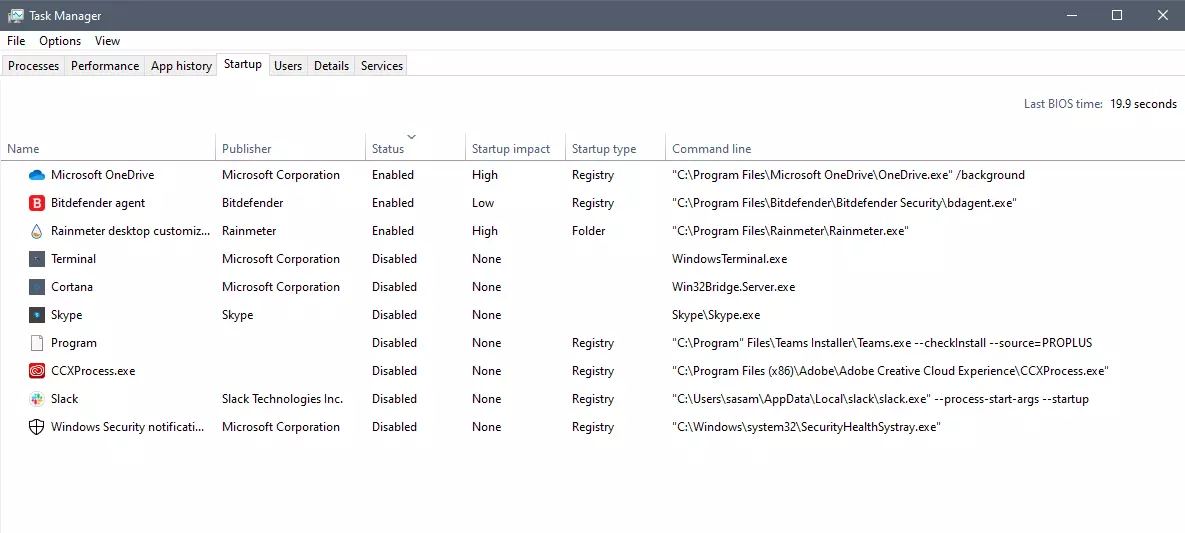
99% of the time startup type will be registry since the file is missing, if it was a file fix would be just to simply delete the file in the folder but since it was installed and not properly removed registry key is still present but the file cannot be found. After confirmation that the file is indeed missing and that the startup type is registry open the registry editor by typing Regedit in search and pressing enter.
Removing the key from registry
Inside Registry editor navigate to: HKEY_CURRENT_USER\SOFTWARE\Microsoft\Windows\CurrentVersion\Run. Inside on right part, you will see all auto-start entries added by installed applications.
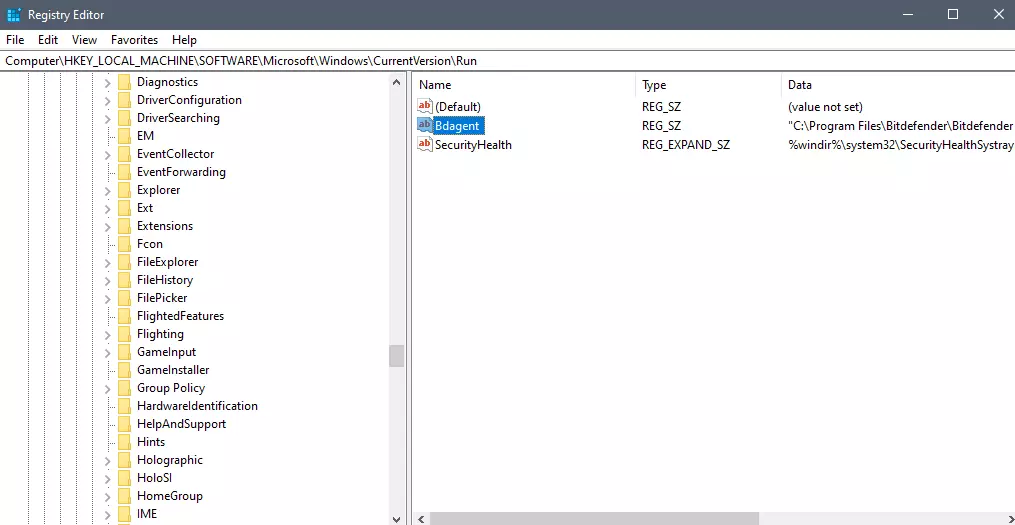
Locate one that is causing issues by comparing its path with the path inside the task manager command line and delete the key. Once the key is deleted right-click on RUN on the left part and choose HKEY_LOCAL_MACHINE to quickly jump on that key location and repeat the process of key deletion if needed. HKEY_LOCAL_MACHINE will delete startup entry for all users and sometimes entry will not be present here since the application is not installed for all users or there are no other users on the machine.
After the procedure is finished, reboot your systems in order to apply changes.
