Booting the Windows computer system includes loading it from the various boot devices such as drivers, network as well as USB drives when the computer is turned on. The instant the startup sequence is done loading the operating system the system hardware will be ready to perform some complex operations – in this process, the Boot Log in Windows 10 is a record that maintains the list of success or failure of many pieces of Windows 10 system during the booting process. In other words, the Boot Log is the one that keeps a record of all that has happened while loading from the computer storage system to the memory during the boot process. It is available for several devices like network, hardware devices, and the operating system which assist in detecting issues during the boot process and other issues with regards to troubleshooting. Through Boot Log, you’ll know which drivers were unloaded and loaded from the start of the system during the boot process. You have the option to either disable or enable this feature on your Windows 10 PC.
Named as “ntbtlog.txt”, the log file lists all the successfully loaded processes and the unsuccessful ones during the boot process. It is saved to the drive C:Windowsntbtlog.txt. As mentioned, you can enable or disable this feature in two ways – the first one is by using the System Configuration or MSConfig while the second one is using the Command Prompt. In this post, we’ll show you how you can enable or disable Boot Log in Windows 10 either way.
Option 1 – Enable or Disable Boot Log using System Configuration
Enable Boot Log:
Tap the Win + R keys to open the Run dialog box.
Then type in “msconfig” and click OK to open System Configuration.
After that, go to the boot tab and check the checkbox labeled “Boot Log” under the Boot options so that you can enable the Boot Log feature.
Then click on OK to save the changes made.
Next, click on the Restart button in the prompt window to get started with the Boot Log process.
After restarting your PC, go to C:Windowsntbtlog.txt to open the boot log.
Note: As pointed out earlier, the log file contains a list of all the successfully loaded drivers and also the list of drivers that failed to load during the boot process and every time you restart the system, the boot log file will keep on updating and will eventually increase the list of entries. For you to locate the drivers and make your troubleshooting a lot easier, I advised disabling the boot log after troubleshooting. To disable the boot log using System Configuration, refer to the steps below.
Disable Boot Log:
Tap the Win + R keys to open the Run dialog box.
Then type in “msconfig” and click OK to open System Configuration.
After that, go to the boot tab and unmark or uncheck the checkbox labeled “Boot Log” under the Boot options so that you can disable the Boot Log feature.
Then click on OK to save the changes made.
Option 2 – Enable or Disable Boot Log using Command Prompt
Enable Boot Log:
Go to the Start Menu and then type in “command prompt” in the search bar.
After that, right-click on the Command Prompt option and select the “Run as administrator” option.
After opening Command Prompt, type in “bcdedit” and tap Enter.
Note: You have to find the Identifier of the current operating system first to enable the Boot log. You can find it under the Windows Boot Loader section in the “Description” field and in this case, it’s Windows 10. You can also find the operating system identifier under the Windows Boot Loader section next to the field name identifier.
To check if the boot log entry is disabled or enabled, go check the “Bootlog” field under the Windows Boot Loader. And if it turns out that the “bootlog” entry is enabled, the entry will be “Yes”. Otherwise, the entry will be “No”.
Next, type in the following command with the operating system identifier to enable the boot log.
bcdedit /set {identifier} bootlog Yes
Note: In the command given above, make sure that you replace the given system identifier with your computer’s system identifier. For instance:
In this example, the identifier was replaced with the actual operating system identifier as current.
bcdedit /set {current} bootlog Yes
Afterward, restart the system to start the Boot log process.
After the restart, go to C:Windowsntbtlog.txt to open the boot log.
Note: Every time you restart your computer, the boot log file will keep on updating which will increase the size of the log eventually. So if you want seamless and easier troubleshooting, it is advised to disable the Boot log after you troubleshoot. To disable it using the Command Prompt, here’s what you have to do.
Disable Boot Log:
Go to the Start Menu and then type in “command prompt” in the search bar.
After that, right-click on the Command Prompt option and select the “Run as administrator” option.
Once the Command Prompt is opened, type in the following command and then tap Enter to disable the boot log feature.
bcdedit/ set {identifier} bootlog No
Note: In the command given above, you need to replace the given system identifier with your computer’s system identifier. For instance:
In this example, the {identifier} was replaced with the actual operating system identifier as {current}.
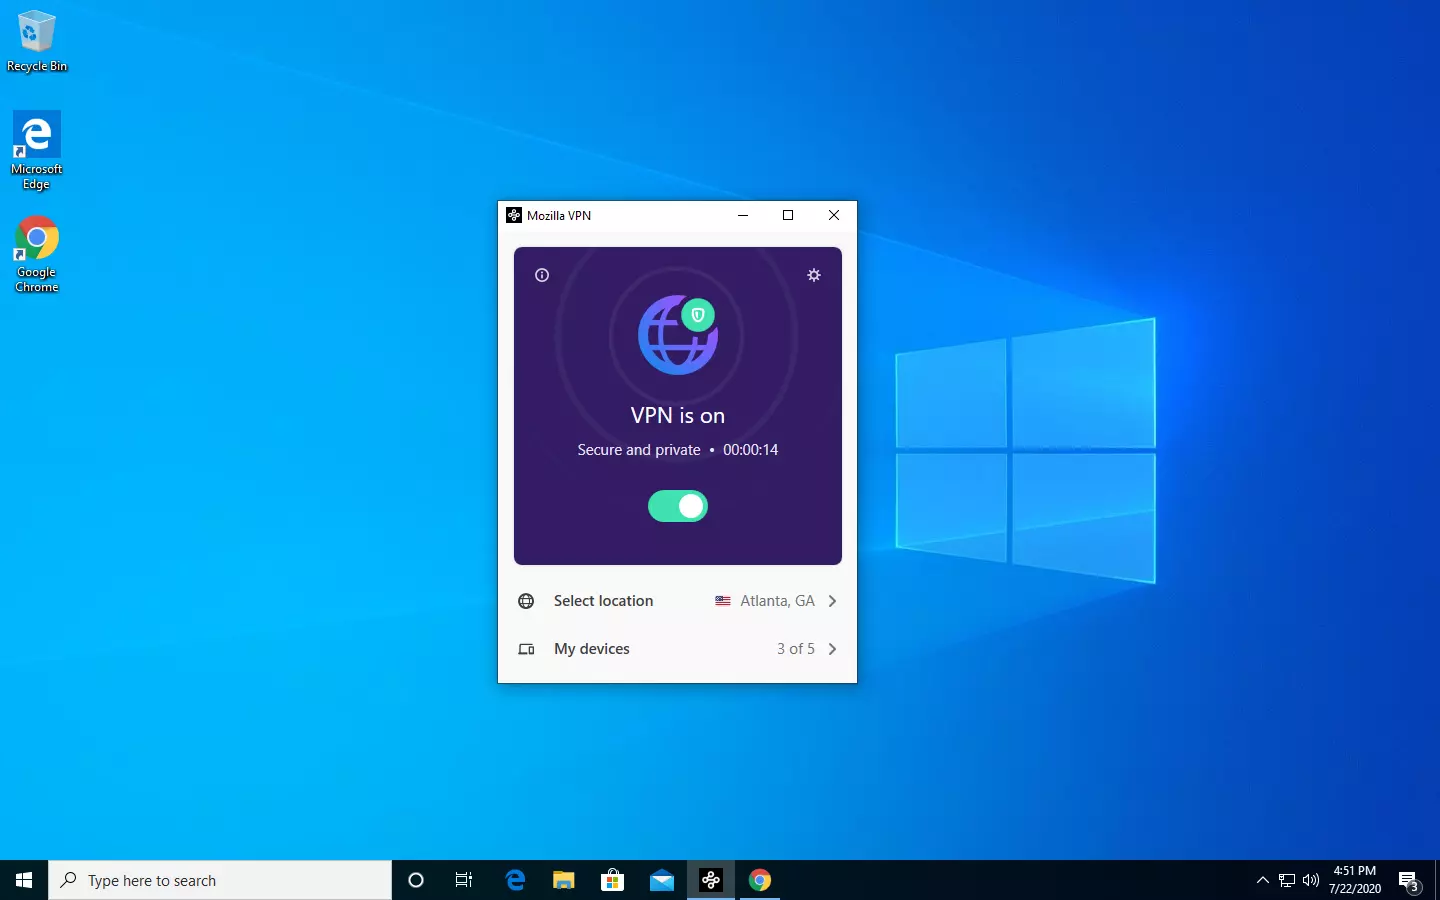
The new thing from Mozilla is not a browser, it is a VPN!
Besides Firefox, Mozilla offers now Firefox Relay, an app helping you to mask your email and phone number, and a new Mozilla VPN.
Mozilla has recently announced a new subscription model that will let you use all products together for $6.99 per month. Although this is a little more expensive than the competition that goes around for $5 per month note that with this subscription you are having access to all services, not just VPN.
VPN will not only hide your IP address but will also make sure websites cannot access your real location and it encrypts all of your network activity. Relay will give you protection against spam, serving as a shield for your email and limiting spammers from access to your real email address and phone number. With Mozilla subscription will let you use both services.
Operating systems now give users a feature that allows them to create separate partitions out of HDD or SSD-based storage in order to store data in an organized manner. This small yet powerful feature has always been supported by Microsoft. However, there are times when users might fill up on some particular very soon. This may result in the lack of space for that partition which makes the entire process of using PCs slower since there is a large chunk of files that has to be indexed in a smaller partition. If you are one of the users experiencing this dilemma, you need to either delete the other partitions to allocate their storage to the partition that is short on storage or simply recreate the partition so that all the useless data will be deleted and you can start afresh with the overflowing partition.
In this post, you will be guided on how you can delete any storage partition from your Windows 10 PC via Disk Management, Command Prompt as well as Windows PowerShell.
Option 1 – Delete storage partition via Disk Management
This is one of the simplest ways you can use to delete a storage partition. Go to the WinX Menu and from there, open Disk Management and then select the Drive you want to get rid of, right-click on it and then select Delete Volume.
Option 2 – Delete storage partition via Command Prompt
Tap the Win + X keys or right-click on the Start button and select Command Prompt (Admin) or you could also type in “cmd” in the Cortana search box and right-click on the Command Prompt icon and then select the “Run as Administrator” option from the context menu.
Once you have Command Prompt pulled up as admin, type in and enter this command – diskpart
After entering this command, the Diskpart Utility will start. Diskpart Utility is a command line-based utility just like Command Prompt but it will get a UAC Prompt after you invoke it so you have to click Yes for the UAC Prompt.
After that, type in list volume and tap Enter to see the list of all the partitions created on your PC. This includes both types of partitions that are visible to a normal user in the File Explorer as well as the ones that are created by Windows 10 by default which helps it in storing the boot files and other essential system files.
You should see a list of all the partitions made on your computer. Select the partition you want to delete by its Unique Identification number as Volume X where X denotes the Unique Identification Number.
Next, type in the select volume number command and hit Enter to select the desired volume.
Then delete the volume you’ve selected and type in the delete volume command and hit Enter to delete the volume you just selected and convert it into unallocated space.
Option 3 – Delete storage partition via Windows PowerShell
Start by tapping the Win + X keys or simply right click on the Start button and select Windows PowerShell (Admin) or you could also type in “windows powershell” in the Cortana search box and right-click on the Windows PowerShell icon and select the “Run as administrator” option.
Once you’ve opened the Windows PowerShell, type in the Get-Volume command and hit Enter to get a list of all the partitions on your PC.
Next, select the drive letter you want to delete and then type in the Remove-Partition –DriveLetter command and hit Enter to delete the selected partition. Note that you need to replace the drive letter with the letter of the partition you want to get rid of.
After that, it will ask you for confirmation. Just hit the Y key for Yes or hit the A key to say Yes to All. This will delete all the partition you’ve selected and will move them in as unallocated space.
And that’s how you delete a Drive Partition or Volume in Windows 10. Note that you should only follow the last two options given in case the Disk Management is not able to fulfill the user requirements.
Strangely enough, Windows 11 does not feature any typical icon on its desktop when installed. No My PC, no Recycle Bin, nothing, just plain and clean wallpaper. Personally, I like this clean look and feel but of course, there are a lot of users that are used to have some system-related icons on their desktop for easy access.
Do not sweat, we will turn them back on with ease. The best part is that you can choose which one would you like. So let’s dive right into it and get the icons back for the old Windows feel and look.
Showing selected Icons desktop
Right-click on Desktop and select Personalize
Select Themes from the list of personalization items
Inside themes scroll down and click on Desktop Icon Settings
Desktop Icon Settings will open and inside it, place checkmarks beside icons that you would like to appear on the desktop and click OK
Close settings
As always settings and choices will be automatically applied and icons will appear right away on the desktop.
As you probably know, Windows 10 does not offer lots of choices for its Regional settings depending on where you are and what locale you work with or belong to. The standard region settings for Windows 10 allow users to select one set of formats for the calendar and more. However, this has somewhat changed in the Windows 10 v1809. If you don’t want such a change, you can just override the default regional format settings in the Windows 10 Improved local experience. So in this post, you will be guided on how you can do such a thing.
Follow the given instructions below to override the default Regional Format settings in Windows 10.
Step 1: Go to Settings > Time and Language > Region.
Step 2: From there, the default region is what Windows and apps might use to provide you with local content. However, this won’t be much of use if you work for a different locale and need to have different format settings like Calendar, Dates, Times, Currency, and First day of the week, all of which you can modify under the Regional format.
Step 3: You need not reboot your Windows 10 computer after changing. On the other hand, some of the apps will have to close and launch again in order to apply the new format. Thus, if you need to use apps that are of different locales, you will only see the changes after you re-launch the app.
Note: You can also select a different language that makes more sense to you. In other words, if you prefer more common words to standard words for your Windows 10 computer, then this is definitely the way to do it. This local format will be used for messages, menus, navigation, settings, and other topics.
Step 4: Look for a link that says “Add a Windows display language with local experience packs” under Languages.
In case you don’t know, Local Experience Packs are Microsoft Store apps that deliver Windows display language quality improvements. So once you click the link, it will download the packs from the Microsoft Store. In addition, Windows has already begun using AI or Artificial Intelligence as well as neural network-based Machine Learning for Windows localization. And as the number increase, the Machine language improvements and feedback from users will help in making the translations a lot better and make them available to even more languages. All in all, it’s pretty much an interesting and a good move for Microsoft as the demands for topics and machines to be available in local languages have been increasing for the past couple of years.
Two monitor systems are not such a rarity like they were just a couple of years ago. More and more people are finding out the benefits of having 2 screens instead of one no matter if you play games or do serious work. So how technology has moved forward and new norms so have Windows and we can now set different wallpapers to different screens very easy, a task which was very difficult in the past.
Go to the Personalization option in the Control Panel.
Right-click on your home screen and select the Personalize option from the menu.
In the new window, you can browse for images you wish to set as wallpaper on both of your monitors. This way, the images would be preloaded in the “Choose your picture” option.
Right-click on the image. Doing this will open a new menu that will allow you to set wallpapers for each screen. There is also another option called “Choose a fit” which gives you the option to select the fit of the wallpaper.
Choose one wallpaper for “monitor 1” and a different wallpaper for “monitor 2.” You will now see your dual-screen setup customized with two different wallpapers.
Bad_Pool_Header is one of the types of BSOD (Blue Screen of Death) error codes. This error triggers a problem with Windows memory allocation.
When this error message occurs, the screen turns blue and locks the user out of the application running on the system. The computer shuts down or restarts.
Solution
Error Causes
There is no one particular cause for the occurrence of the Bad_Pool_Header error code. It may appear on your system due to multiple reasons such as:
Device driver issues
Cluttered disk
Disk writing issues
Faulty memory hardware
Driver issues and disk writing issues occur when your try to update new driver versions.
During this process, users often forget to remove the files of the uninstalled version from the registry. And due to the presence of the uninstalled driver files in the registry updating and disk writing becomes an uphill task which leads to the Bad_Pool_Header display on the computer screen.
The main database of your system is the registry so you need to keep it clean to avoid disk cluttering. The hard disk clutters because the registry saves all the activities that you perform in your system. It saves junk files, internet history, invalid entries, and other unnecessary files.
This occupies a lot of your disk space thus resulting in disk cluttering and faulty memory hardware issues triggering the Bad_Pool_Header.
Ignoring the Bad_Pool_Header error is not wise. It is advisable to repair the Bad_Pool_Header right away as it can lead to serious threats like system failure and data loss.
Further Information and Manual Repair
The easiest, time and money-saving way to resolve the Bad_Pool_Header error on your system is to install Restoro.
This is a high and multi-functional repair tool that features a powerful inbuilt registry cleaner, anti-virus, and a system optimizer. This tool is the one-stop solution for all your PC-related errors including the Bad_Pool_Header blue screen of death error.
Whether it’s a driver issue, faulty memory, or cluttered disk, all the causes triggering the Bad_Pool_Header error code fall under the registry which is why it is recommended to install Restoro.
Its innovative and powerful registry cleaner scans detect and repair all the errors related to the registry in one go including the Bad_Pool_Header errors.
With this helper, you can easily remove all the unnecessary files cluttering your hard disk and damaging your registry. It wipes out the clutter in seconds and frees up disk space.
Why Should You Clean The Registry?
Sometimes the registry also gets cluttered by malicious software like viruses, spyware, and malware. These may also take up your disk space and prevent you to perform disk writing successfully and also corrupt the registry.
The privacy error finding utility embedded in Restoro helps you scan for such malicious software on your system and removes them immediately. It lends the software anti-virus properties.
When it comes to using repair tools, many users who are not technically sound often worried.
They think it may be difficult to operate. If you think the same way, let us tell you that Restoro is very easy to use. It is integrated with a high-functional yet user-friendly interface complemented by simple navigation.
Restoro Special Features
This makes it simple for all levels of users to operate it regardless of whether they are technically adept or not.
Restoro is compatible with all Windows versions. You can download it with ease and run it for scans on any Windows version you have installed on your system.
To get started, all you have to do is:
Error code 652 is a runtime error. It hampers you from accessing and running your program on your system. If not resolved, it can also lead to program corruption.
Solution
Error Causes
Runtime Error 652 can occur due to several causes. These include:
Conflict of color depth within icons, the desktop, or a particular application in the Visual Basic environment. This happens when the Image
List control consists of more colors than the depth of what Windows can support.
Other causes include:
Malicious software and malware attack
Conflict with Terminate
Invalid or corrupt registry
Further Information and Manual Repair
If you are not a computer programmer and don’t have any sound technical expertise, then you might think of hiring a professional to resolve the error on your PC. But this can be costly as you may have to pay hundreds of dollars to the technician.
However, an alternative way to resolve the error code 652 is to download the Total System Care. This PC repair tool is integrated with an intuitive registry cleaner and a powerful anti-virus. It is safe, efficient, user-friendly, and available for free.
Restoro is a multi-functional error tool and a one-stop solution to resolve practically all kinds of PC-related problems. By running this repair tool, you can fix runtime error code 652 on your system in seconds.
Restoro
What makes Restoro a hot favorite among PC users is that it is simple and easy to use.
To operate this PC fixer, you don’t need to have the sound technical knowledge or be adept at computer programming. It can be used by all levels of PC users including beginners and intermediates.
It has a neat and clean layout with simple instructions and navigation making it easy for users to resolve even the mightiest errors in just a few clicks.
Restoro features
Whether the underlying reason for the error code 652 is malicious software or registry corruption, Restoro takes care of all. Registry corruption occurs due to unnecessary files and data overload in the hard disk. This includes junk files, internet history, invalid registry entries, and bad registry keys.
The registry cleaner embedded in Restoro intuitively detects and scans all registry issues.
It wipes and clears the hard disk from all the unnecessary and obsolete files and thus cleans up your disk space. It repairs the corrupt registry and also boosts your PC’s performance.
Thus it not only repairs the error code 652 but also resolves system slowdown issues by optimizing your system’s speed.
With the help of its in-built anti-virus, it removes all the malicious software on your system that could be triggering the error code 652.
Data security threats such as malicious software are detected and scanned and listed under the privacy error utility.
It is compatible with all Windows versions including both the latest and old versions. You can run it to scan error code 652 on any Windows version you have installed on your computer.
Restoro for error Code 652
Furthermore, as mentioned above Error Code 652 is safe to use. It is bug-free and besides, it offers users outstanding data safety. It has a backup file feature that helps you save and create backup copies of all the data you have on your system. This is carried for safety purposes.
It enables users to retrieve and recover data in case the data and files are lost during the repair thus sparing you from a big loss.
The error code 652 may be critical but it can be resolved in seconds with Restoro. Here’s how:
To get started click here to download and install Restoro on your system
Once installed, run it to scan for errors. It will take only a few seconds to scan your entire PC.
Then simply create a backup and click on repair to resolve and resume your desired program.
For best results, it is advised to run Restoro on the computer often. This will help you detect PC errors and repair them timely. It will help you ensure proper PC maintenance, health, and performance.
If you are getting this error even if STEAM.EXE is present on your system then follow the easy guide to solve the issue.
Scan your system for malware
Scan your complete system for viruses and other malware. If all the scans come negative then move to the next step.
Disable your anti-virus software
Some anti-virus and anti-malware software can detect steam as a potential threat and block it. Turn off your protection software and try to run Steam once all your protection is disabled. If this works you will need to either place Steam in the applications exception list or to move to another protection software.
Remove administrator privileges from steam client
Right-click on steam.exe and choose properties, go to the compatibility tab, and uncheck run this program as administrator. Try to run Steam again.
Delete Steam registry value
If everything else failed try deleting the registry value for steam. Open registry editor and locate key:
HKEY_LOCAL_MACHINE\SOFTWARE\Microsoft\Windows NT\CurrentVersion\Image File Execution Options
Double click on Image File Execution, find steam on left, right-click on it, and choose delete. Save and exit the registry editor.
The New and upcoming HAF 700 Evo from Coller master is a beast of a case, but so is its price. The case itself is still not released but as sources say it will be soon, well at least we hope so. The price will be around $500 which is a little on the expensive side of things but the features it is bringing are very impressive.
HAF 700 EVO Size and its advantages
HAF stands for High Airflow and with this case, you are going to get it but first let us talk about other characteristics of the case. Firstly case is ATX full tower, pretty big going 24.64 x 11.45. x 26.22 inches in size but like all full tower cases it can hold all motherboard types including Mini-ITX, Micro-ATX, ATX, E-ATX. The large case size also lets you place a pretty big GPU, going to 19.29 inches (490 mm) in its length covering currently all available Graphic cards on market.
Being a very big computer case is not just placing motherboard and big GPU, there are other great advantages of it, firstly that you can go wild with your CPU cooler, going all the way to 6.5 inches in cooler height will satisfy all users and having 12x 2.5 or 3.5-inch internal bays will. And if even that is not enough you have 8 expansion slots available.
Inside HAF 700 EVO
Inside the casing you will also find 2 front fans with 200mm diameter, 2 rear fans sized 120mm, and 1 bottom fan of 120mm. You can also manually mount standard 120mm fans on top of the case for maximum airflow.
Front panel and outsides
The front side is filled with 4x USB 3.2 Gen 1 Type-A (5 Gbps), 1X USB Type-C (up to 10Gbps), 3.5mm both headphone and audio jack along with a reset switch. Also, the circle in the very front is a hi-resolution LCD customizable display, you know, just to add more flavor and personal touch to the case. Fron is also filled with glass panels emitting RGB light.
Of course, you must also have a Tempered Glass Side Panel and well weight of 53.57 pounds (24.3 kg), yup you read that correctly, beside its hefty price tag this cooler master beast also is pretty heavy. Granted all of the weight comes from the glass front panel it is still a little hard on moving and taking out of the box.
This is also the case where you will not need a single screwdriver, everything is made to be assembled with your hands alone pushing easy assembly into the front row.
Conclusion
So in the end what are my thoughts about this expensive and heavy PC case? Would I recommend it? The answer to that question could depend really on your budget, let us be really honest here if you can afford it, YES, wholeheartedly I would recommend the case, it is great, it feels great, it looks great and the airflow is amazing. However, if you are tight on a budget, there are other great cases with excellent airflow and you might want to skip this one.
RAM drive is basically a hard drive made of your RAM memory. Altho this kind of drive can not and is not available to save any data when the computer is shut down its advantage is lightning fast speed since the application is installed in RAM itself, it is loading from there and executing from there.
Creating this kind of drive which will use your RAM memory, well part of it can not be done natively in Windows, you will need some kind of application for this task. Luckily there is a free open source application for this kind of task.
ImDisk, you can download the application here.
ImDisk Toolkit is an application for managing virtual drives. It also includes a utility that allows the creation of RAM drives.
Download the application and install it, make sure that you select all components on the installation selection screen. After installation is finished double click on icon labeled RamDisk Configuration.
Once the application is running adjust the disk size in the box at the top of the window for your RAM drive. Click “OK” at the bottom of the window. This will create your RAM drive, which is just a virtual disk that’s assigned to your computer’s RAM. The process happens transparently, so there’s nothing you need to do. If you get a warning about shutdown settings, click on the “Shutdown Settings” button. Then unlock the settings pane with your administrator password. Finally, uncheck the checkbox next to “Turn on fast startup (recommended)” and click “Save Changes” at the bottom of the window. Your RAM drive is now ready for use.
Fast Startup speeds up the process of turning on your computer by saving a system state between completely off and hibernation to your hard drive. This happens when the computer writes the contents of your RAM to a stable hard drive. As you may guess, this could mess with your RAM drive’s ability to preserve and track its data. With Fast Startup off, boots may take slightly longer, but it’s doubtful that you’ll notice much.
Disabling a fast startup will satisfy the warning window, but let’s consider why. This will also allow ImDisk to save your RAM drive’s data to an image file when you shut down your computer. If you don’t, the contents of your RAM drive will be erased completely every time, with no saved image storage.
It would also disable the RAM drive’s ability to load the previous content. Basically, the drive would act much more like RAM and much less like a disk. Depending on your use case, that may be disappointing or unusable.
You can access and use it just like any normal hard drive. It shows up in Windows’s file explorer just like any other drive. However, a Ram drive is exponentially faster than traditional types of storage. And we mean exponentially. Whereas an SSD might offer 300 to 500 MB when reading from the disk, a RAM drive can offer more than 5000 MB, even on mediocre memory sticks.