
Error Code “Windows 10 isn’t activated after upgrading for free” – What is it?
Windows 10 isn’t activated error occurs when Windows users attempt to upgrade to Windows 10 for free and end up in a non-activated state. It is a Windows 10 activation error affecting PC owners who attempt to upgrade their Windows 7 or Windows 8.1 operating systems. A message box will appear with the following message: “Windows 10 isn’t activated after upgrading for free from Windows 7 SPI or Windows 8.1 update.”
Common symptoms of this error code include the following:
- Inability to upgrade for free to Windows 10
- The appearance of activation error code in the message box
Solution
 Error Causes
To understand the cause of this activation error, users will need to understand activation within Windows. Activation is a process that allows Windows to verify that you are upgrading your operating system based on the Microsoft Software Licensing Terms. These terms specify, for instance, the number of devices upon which you can use Windows.
Once you have a genuine copy of Windows and you are following the terms mentioned earlier, you should be able to activate and complete the upgrade to Windows 10. However, the activation fails when these conditions are not met. Note also that the error may occur if users fail to upgrade to Windows 10 before reinstalling, requiring them to repeat the installation process by first going back to the previous version of Windows present on their system. Once the upgrade process is not done as should, you might encounter other Windows 10 errors such as error code 0xc0000142
If you see this error code, “Windows 10 isn’t activated after upgrading for free” proceed to rectify it using manual repair methods below.
Further Information and Manual Repair
To fix this activation error code in Windows 10, users will need to employ at least one manual repair procedure. This process can successfully be completed by non-technical Windows users. However, you may also consider getting assistance from a Windows repair technician if you are not certain you have the requisite skills needed to complete the manual repair tasks below.
The main methods to resolve the error code “Windows 10 isn’t activated after upgrading for free from Windows 7 SPI or Windows 8.1 update” is as follows:
Method One: Manually Activate Windows
If you attempted upgrading for free to Windows 10 and ended up with the activation error you will need to first perform a manual activation. Follow the steps below to complete the process.
- Step one: Tap or click the Start button
- Step two: Select Settings then Update & security
- Step three: Select Activation
- Step four: Once activation status is Connect to the Internet to activate Windows, click or tap Activate
The steps above enable users to successfully activate Windows 10 if the issue involves a connection problem. However, if Windows is not activated, it may mean your copy of Windows is not genuine. This may require you purchase a copy of Windows to rectify the issue. However, if you have a genuine copy of Windows proceed by applying the steps found in method two.
Method Two: Use Product Key to Verify Copy of Windows
A valid product key is one way you can verify your copy of Windows is genuine. This will enable you to complete activation and allow you to access the free upgrade to Windows 10. Follow the steps below.
- Step one: Click or tap the Start button
- Step two: Select Settings then Update & security
- Step three: Click Activation
- Step four: Select Change Product Key then type in the product key. (Ensure you type the 25 characters in the correct order.)
Method Three: Use an Automated Tool
Error codes in Windows often occur due to poor maintenance of one’s PC. To improve your system and reduce your machine’s risk of experiencing error codes, download a powerful automated tool. This tool is both powerful and user-friendly, making its benefits accessible to even the most non-technical Windows users.
 Windows 11 will bring some old applications in new looks and some will get additional features as well. One of the old apps that will get new stuff is a calculator.
The calculator was always a way to go application for quick calculations but Microsoft aims to expand on that and make the calculator a little more useful.
The first thing that you will notice is the calculator look, the calculator has now an application theme setting that allows you to change the look of the application. It comes in standard and professional mode as usual but this time calculator will come with features that will enable it to handle some programming and engineering tasks.
The new calculator features a full graphing mode that lets you visually analyze a graph to identify key features. It also packs a deep converter that can switch between more than 100 units and currencies.
Windows 11 will bring some old applications in new looks and some will get additional features as well. One of the old apps that will get new stuff is a calculator.
The calculator was always a way to go application for quick calculations but Microsoft aims to expand on that and make the calculator a little more useful.
The first thing that you will notice is the calculator look, the calculator has now an application theme setting that allows you to change the look of the application. It comes in standard and professional mode as usual but this time calculator will come with features that will enable it to handle some programming and engineering tasks.
The new calculator features a full graphing mode that lets you visually analyze a graph to identify key features. It also packs a deep converter that can switch between more than 100 units and currencies.

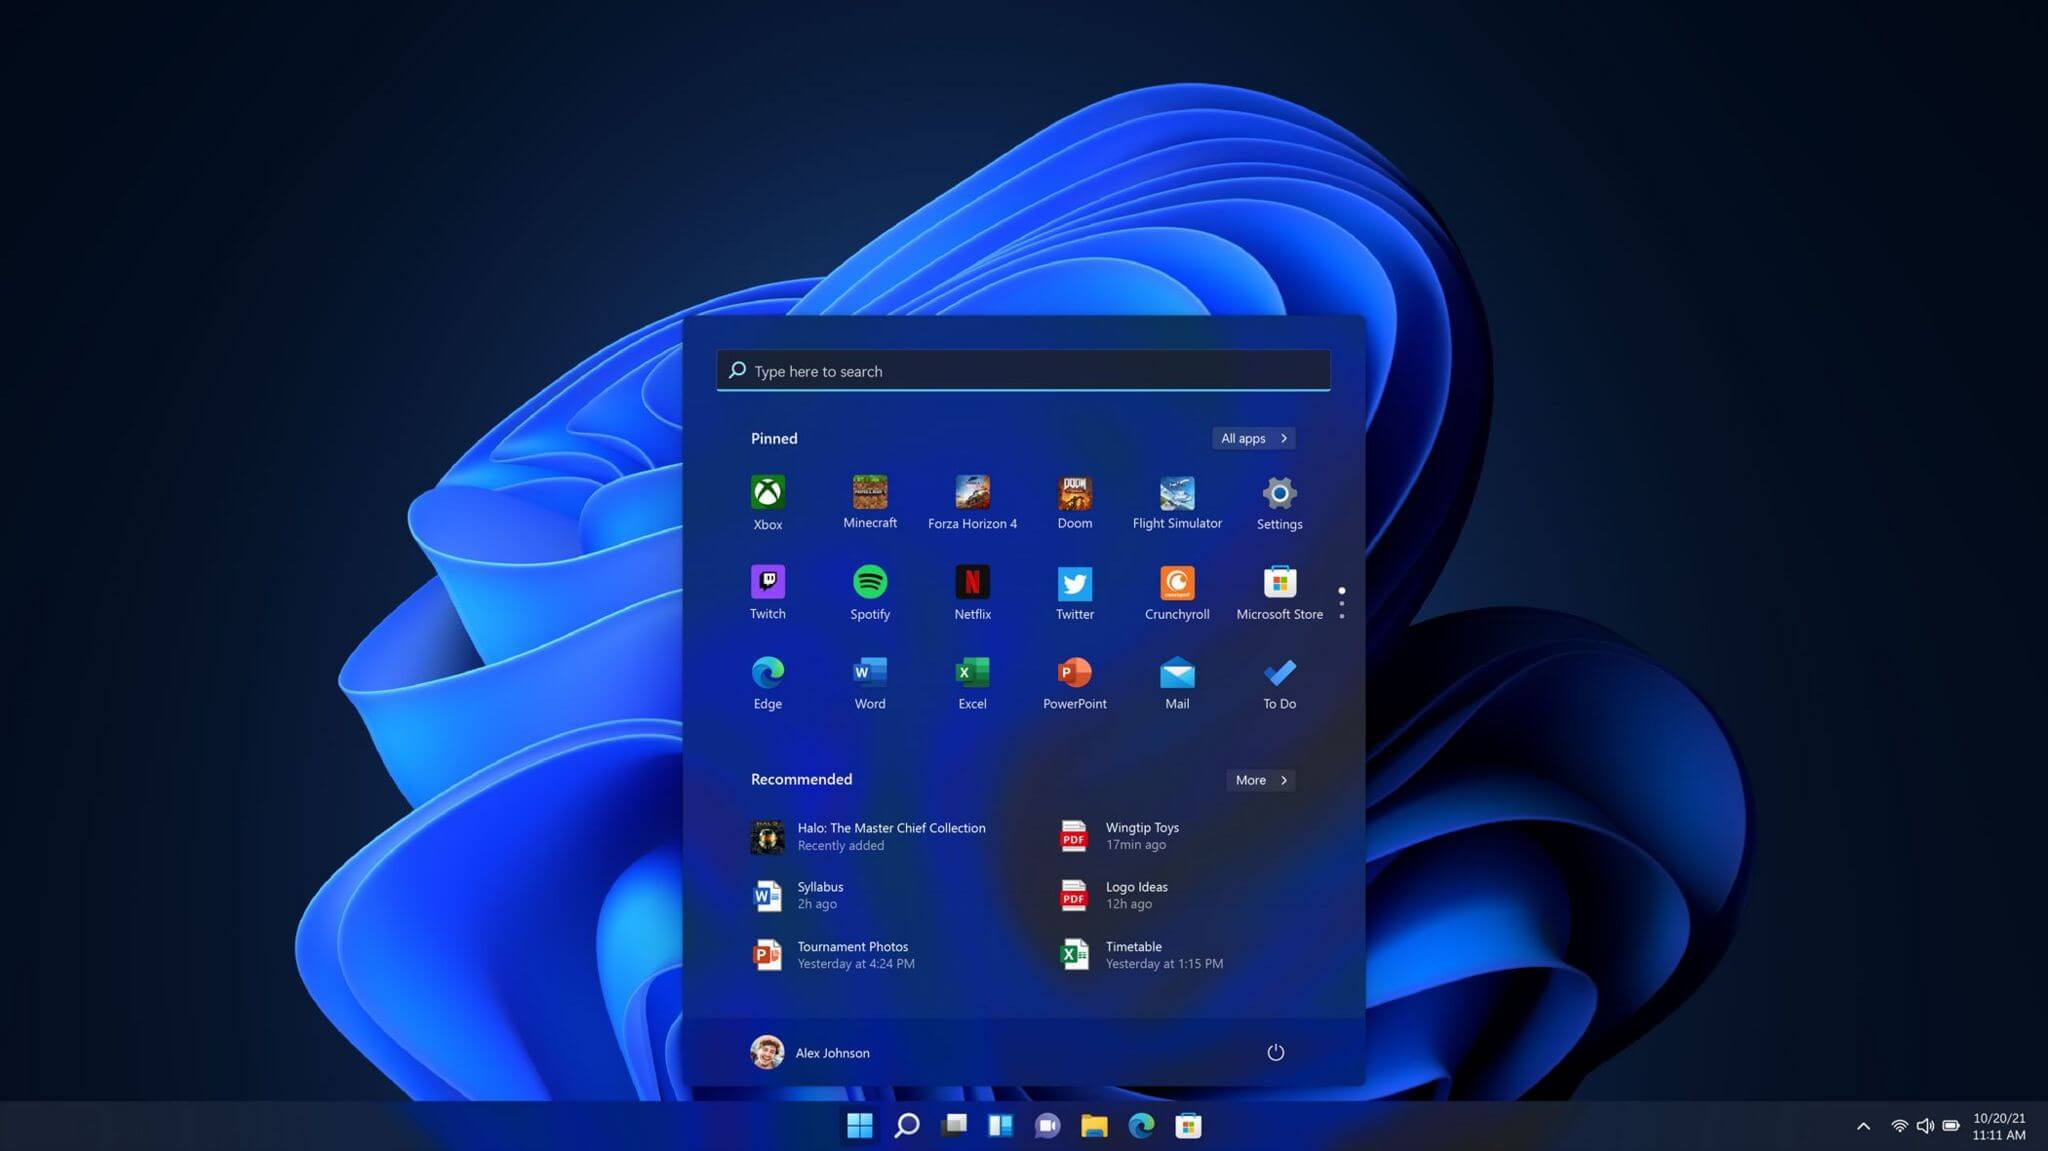 One of the first things that everyone saw when Microsoft has unveiled Windows 11 is its Start menu. Funny enough this is what has caused most of the divide among users, some find it interesting, and some do not like it. Truth is, it is different, and it is centered in the middle instead of the lower left part of the screen.
It has been confirmed however that the Start menu can be moved to any part of the screen so if you want, you could place it on the lower left as it has always been.
Live tiles do not longer exist in the Start menu, instead, we have styled simple icons.
One of the first things that everyone saw when Microsoft has unveiled Windows 11 is its Start menu. Funny enough this is what has caused most of the divide among users, some find it interesting, and some do not like it. Truth is, it is different, and it is centered in the middle instead of the lower left part of the screen.
It has been confirmed however that the Start menu can be moved to any part of the screen so if you want, you could place it on the lower left as it has always been.
Live tiles do not longer exist in the Start menu, instead, we have styled simple icons.
 If you have used the cascade option in previous Windows versions then it is most likely that you will like the new Snap controls.
You can quickly snap windows side by side, or arrange them in sections on your desktop just by hovering over maximize button on the title bar.
If you have used the cascade option in previous Windows versions then it is most likely that you will like the new Snap controls.
You can quickly snap windows side by side, or arrange them in sections on your desktop just by hovering over maximize button on the title bar.
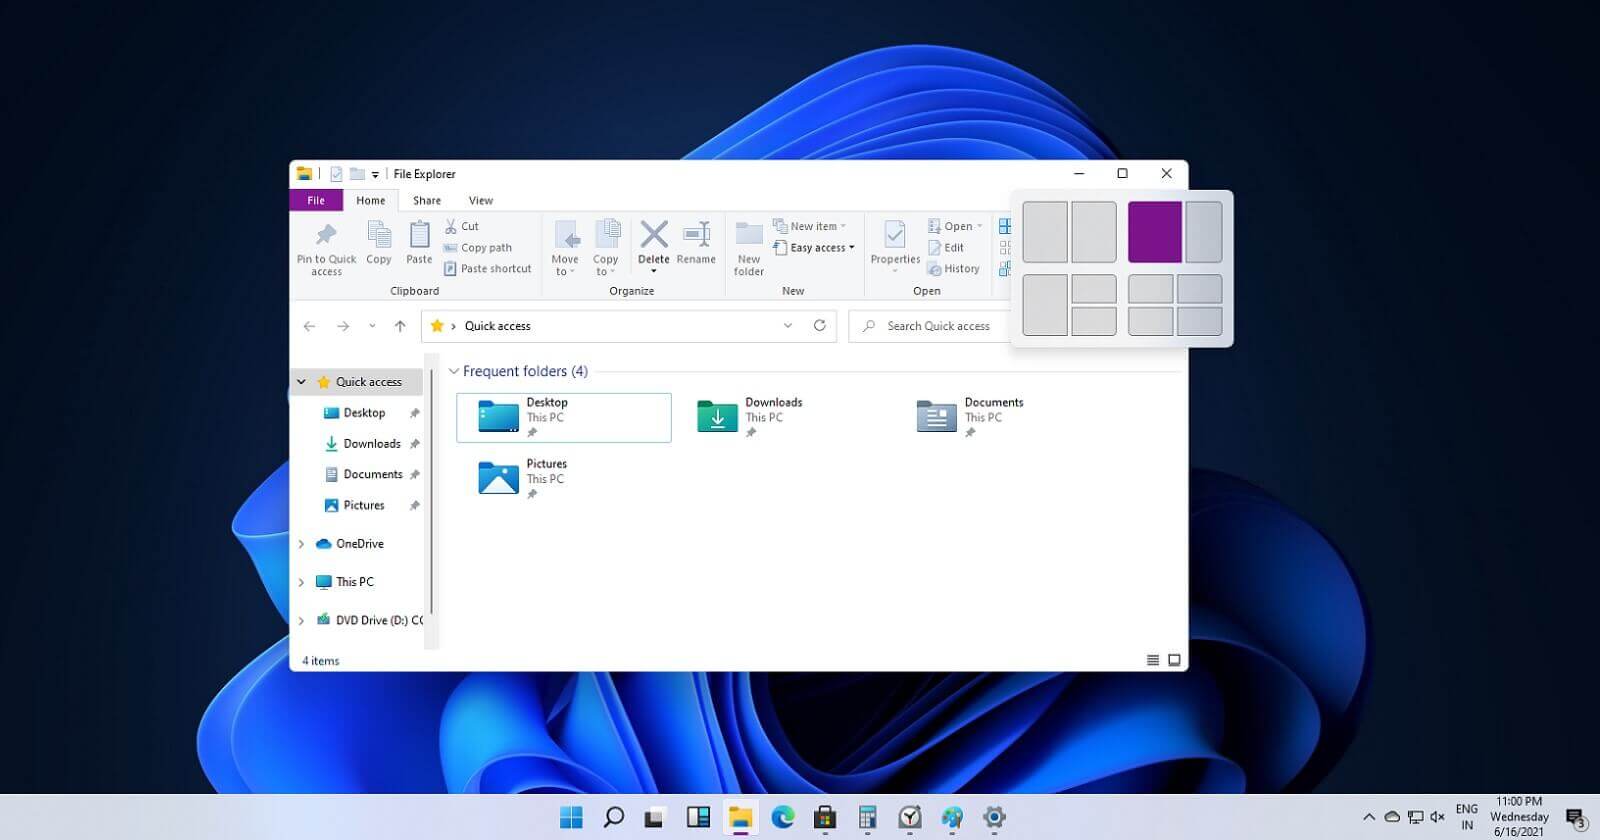
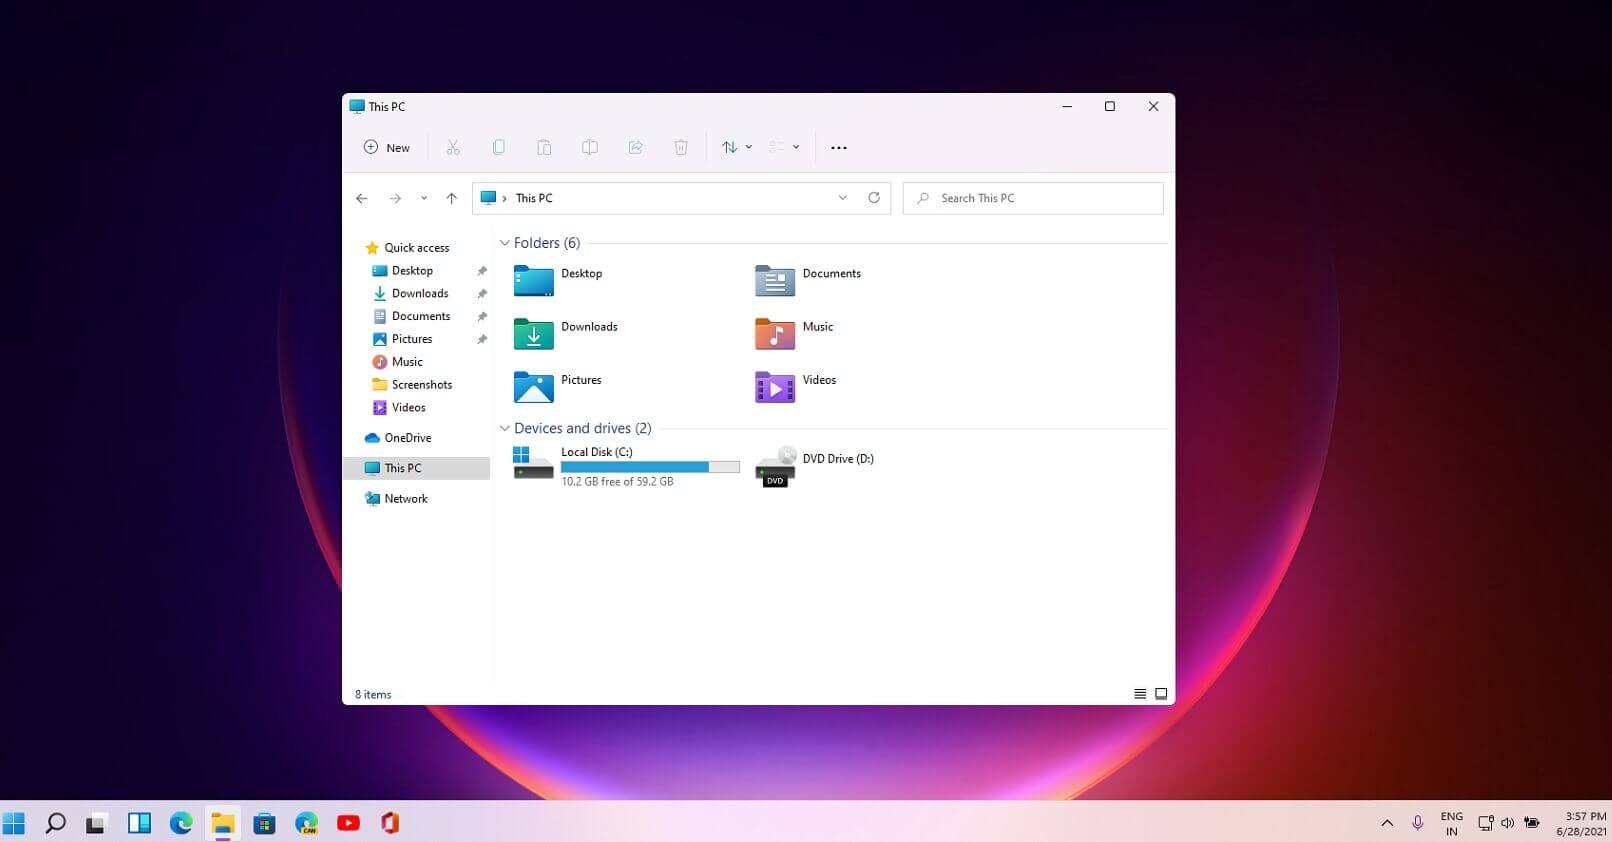 File explorer has gone through some visual and design changes, the ribbon on top has been completely removed and replaced with a header-like feature with a slick and clean design.
The header contains a nice organized and designed single row of icons like cut, paste, copy, rename, delete, and new folder icons.
File explorer has gone through some visual and design changes, the ribbon on top has been completely removed and replaced with a header-like feature with a slick and clean design.
The header contains a nice organized and designed single row of icons like cut, paste, copy, rename, delete, and new folder icons.
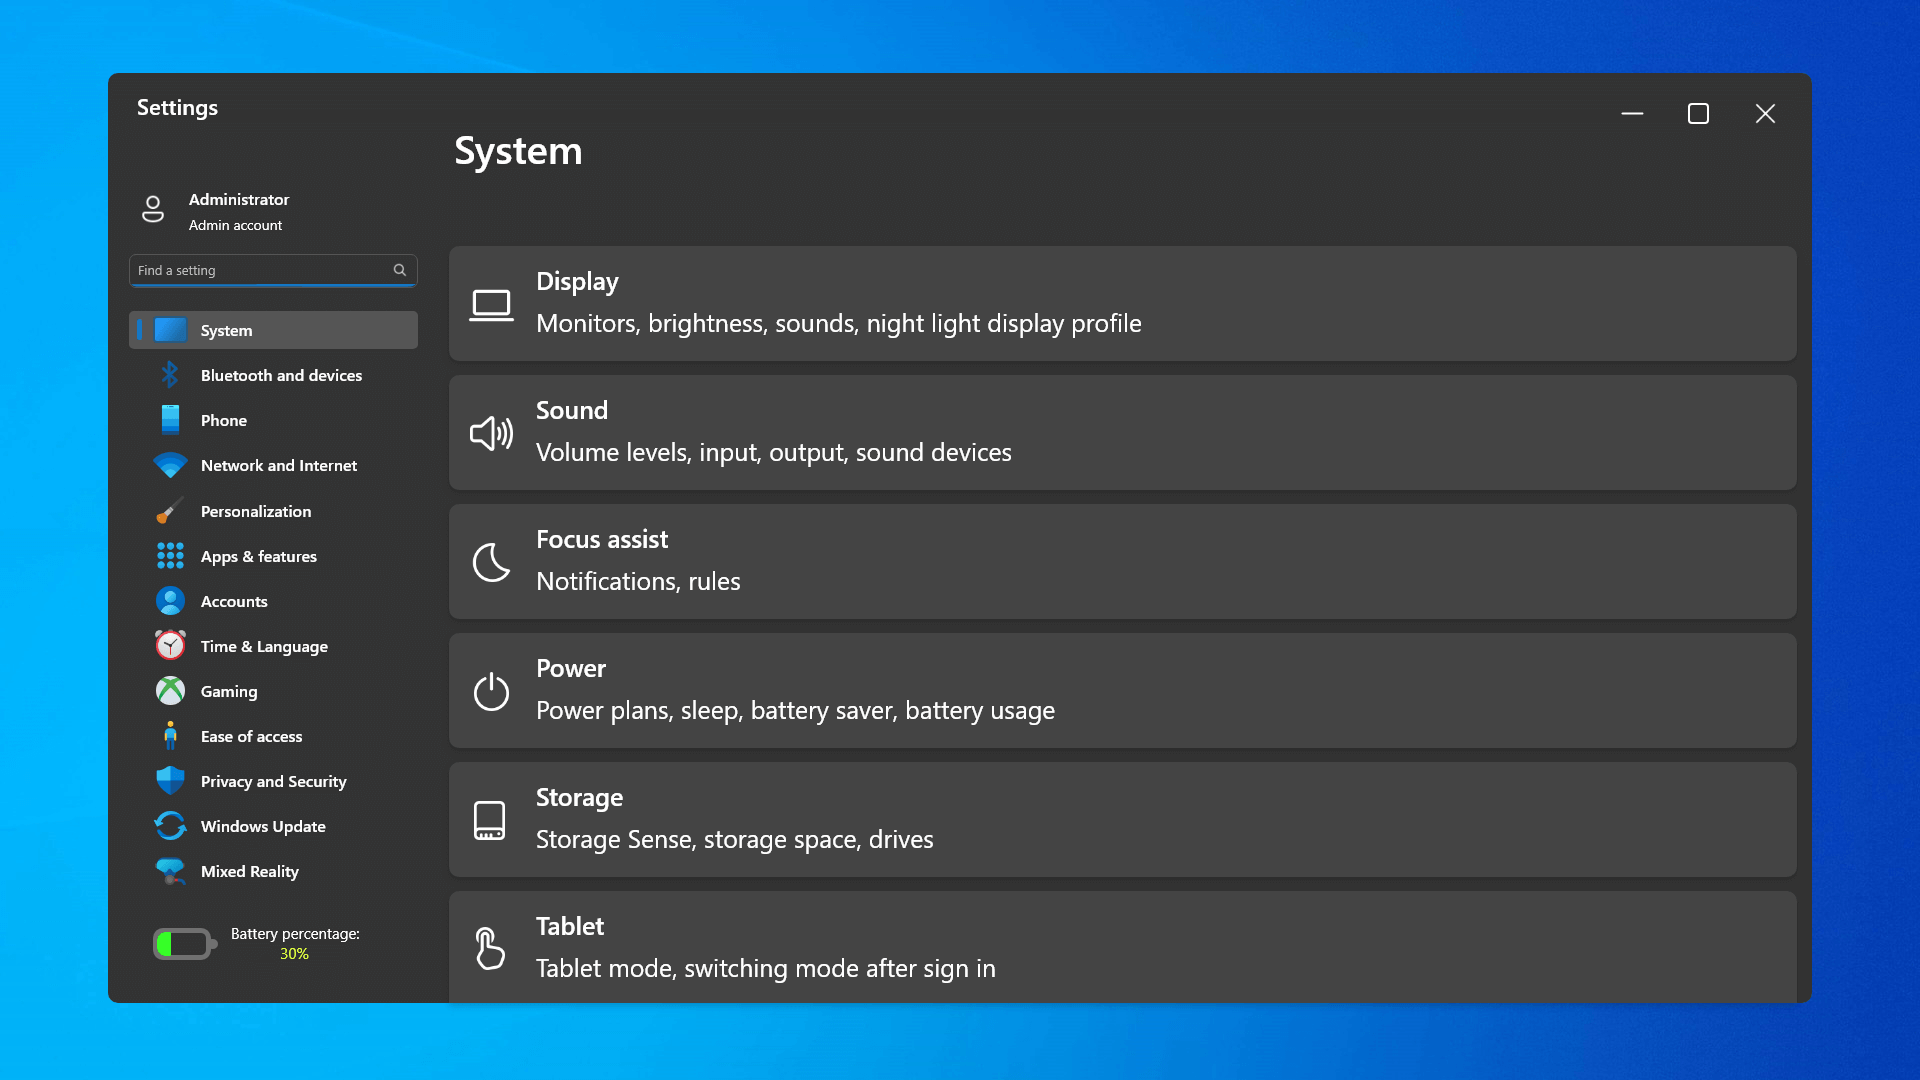 The settings app also has gone through visual and design changes. It has a new design that is very visually appealing and navigation has been simplified and more organized. Finding the right and desired setting is much faster and clearer now.
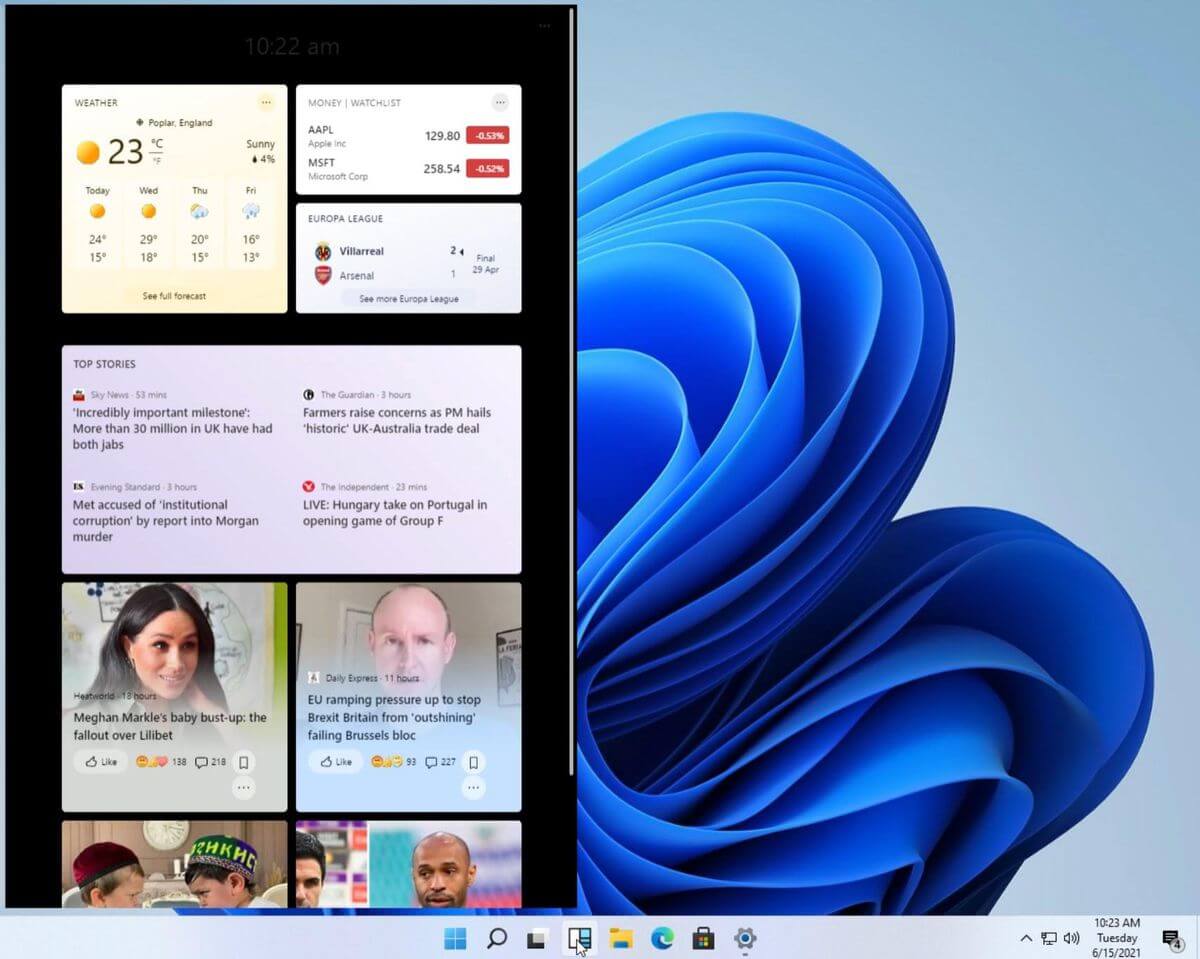 Yes, widgets are back but not like you remember them.
Instead of being all-time present at your desktop like once they used to be, now there is a button on the taskbar which brings the widget bar up that contains desired widgets. This way they are easily accessible and do not clutter desktops.
So far we have weather, news, calendar, and stocks widget but we will see how development on these goes. I expect to have community-made widgets like in old days for all of our needs.
Yes, widgets are back but not like you remember them.
Instead of being all-time present at your desktop like once they used to be, now there is a button on the taskbar which brings the widget bar up that contains desired widgets. This way they are easily accessible and do not clutter desktops.
So far we have weather, news, calendar, and stocks widget but we will see how development on these goes. I expect to have community-made widgets like in old days for all of our needs.
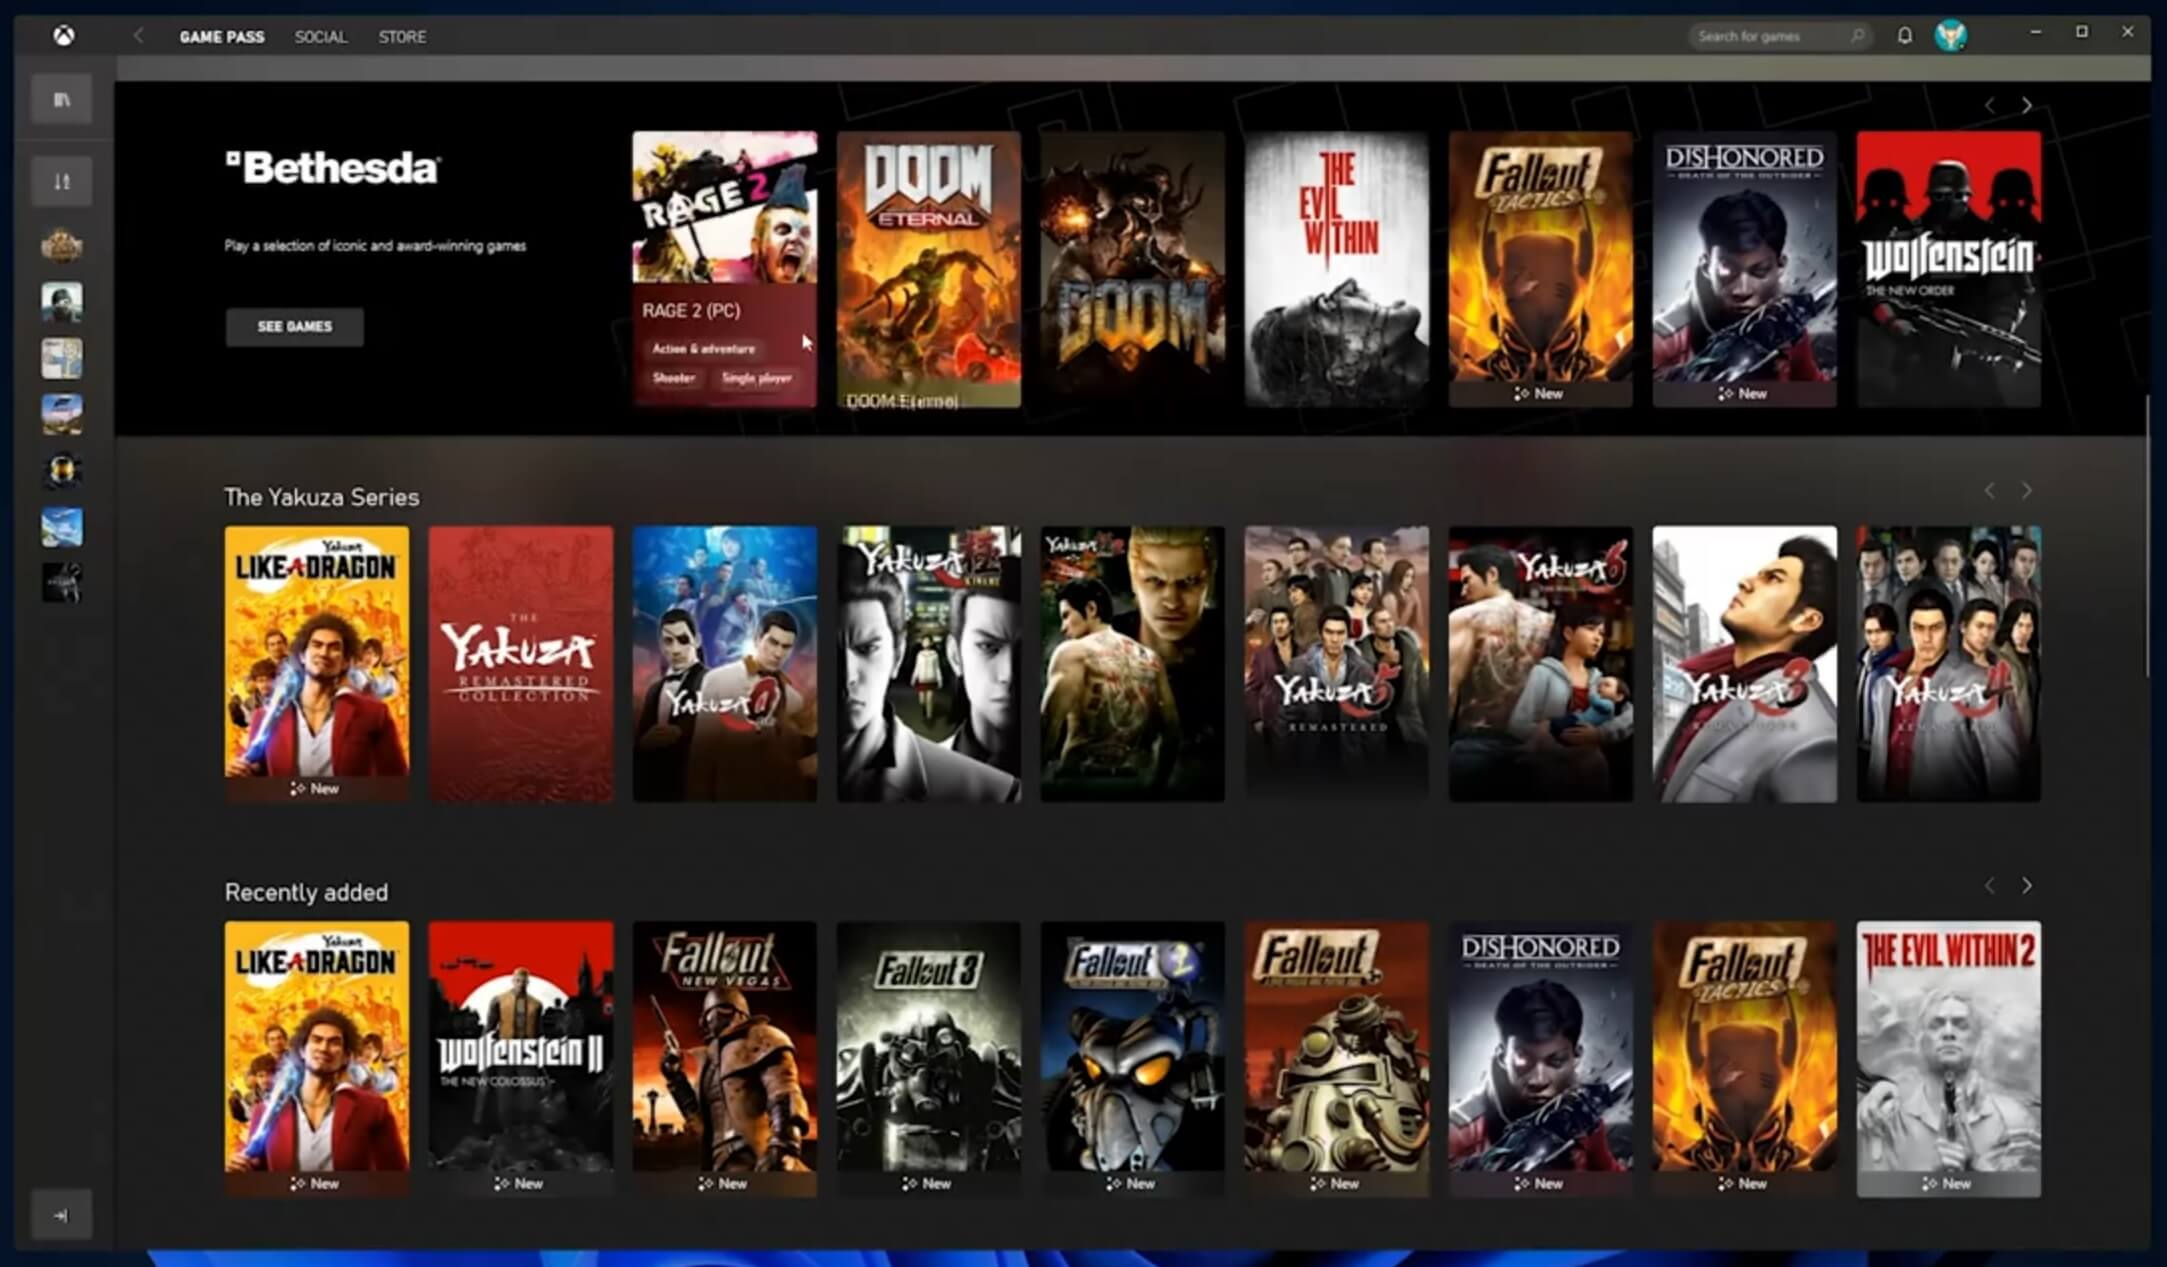 The new Xbox app is now integrated into Windows 11, offering quick access to Xbox Game Pass games, the social parts of the Xbox network, and the Xbox store.
 As widely known by now Windows 11 will require you to have a TPM 2.0 module capable CPU in order to install it.
This system requirement has caused a lot of controversies but essentially it seems that MS's goal is to protect your personal data by using this module.
The upside of course is that your data will be protected much more than in previous Windows versions, the downside, of course, will be that you will need newer hardware to run OS on it.
and that is essentially it, keep on tuned on more Windows 11 information and overall articles tied to PC and technology here at errortools.com
As widely known by now Windows 11 will require you to have a TPM 2.0 module capable CPU in order to install it.
This system requirement has caused a lot of controversies but essentially it seems that MS's goal is to protect your personal data by using this module.
The upside of course is that your data will be protected much more than in previous Windows versions, the downside, of course, will be that you will need newer hardware to run OS on it.
and that is essentially it, keep on tuned on more Windows 11 information and overall articles tied to PC and technology here at errortools.com 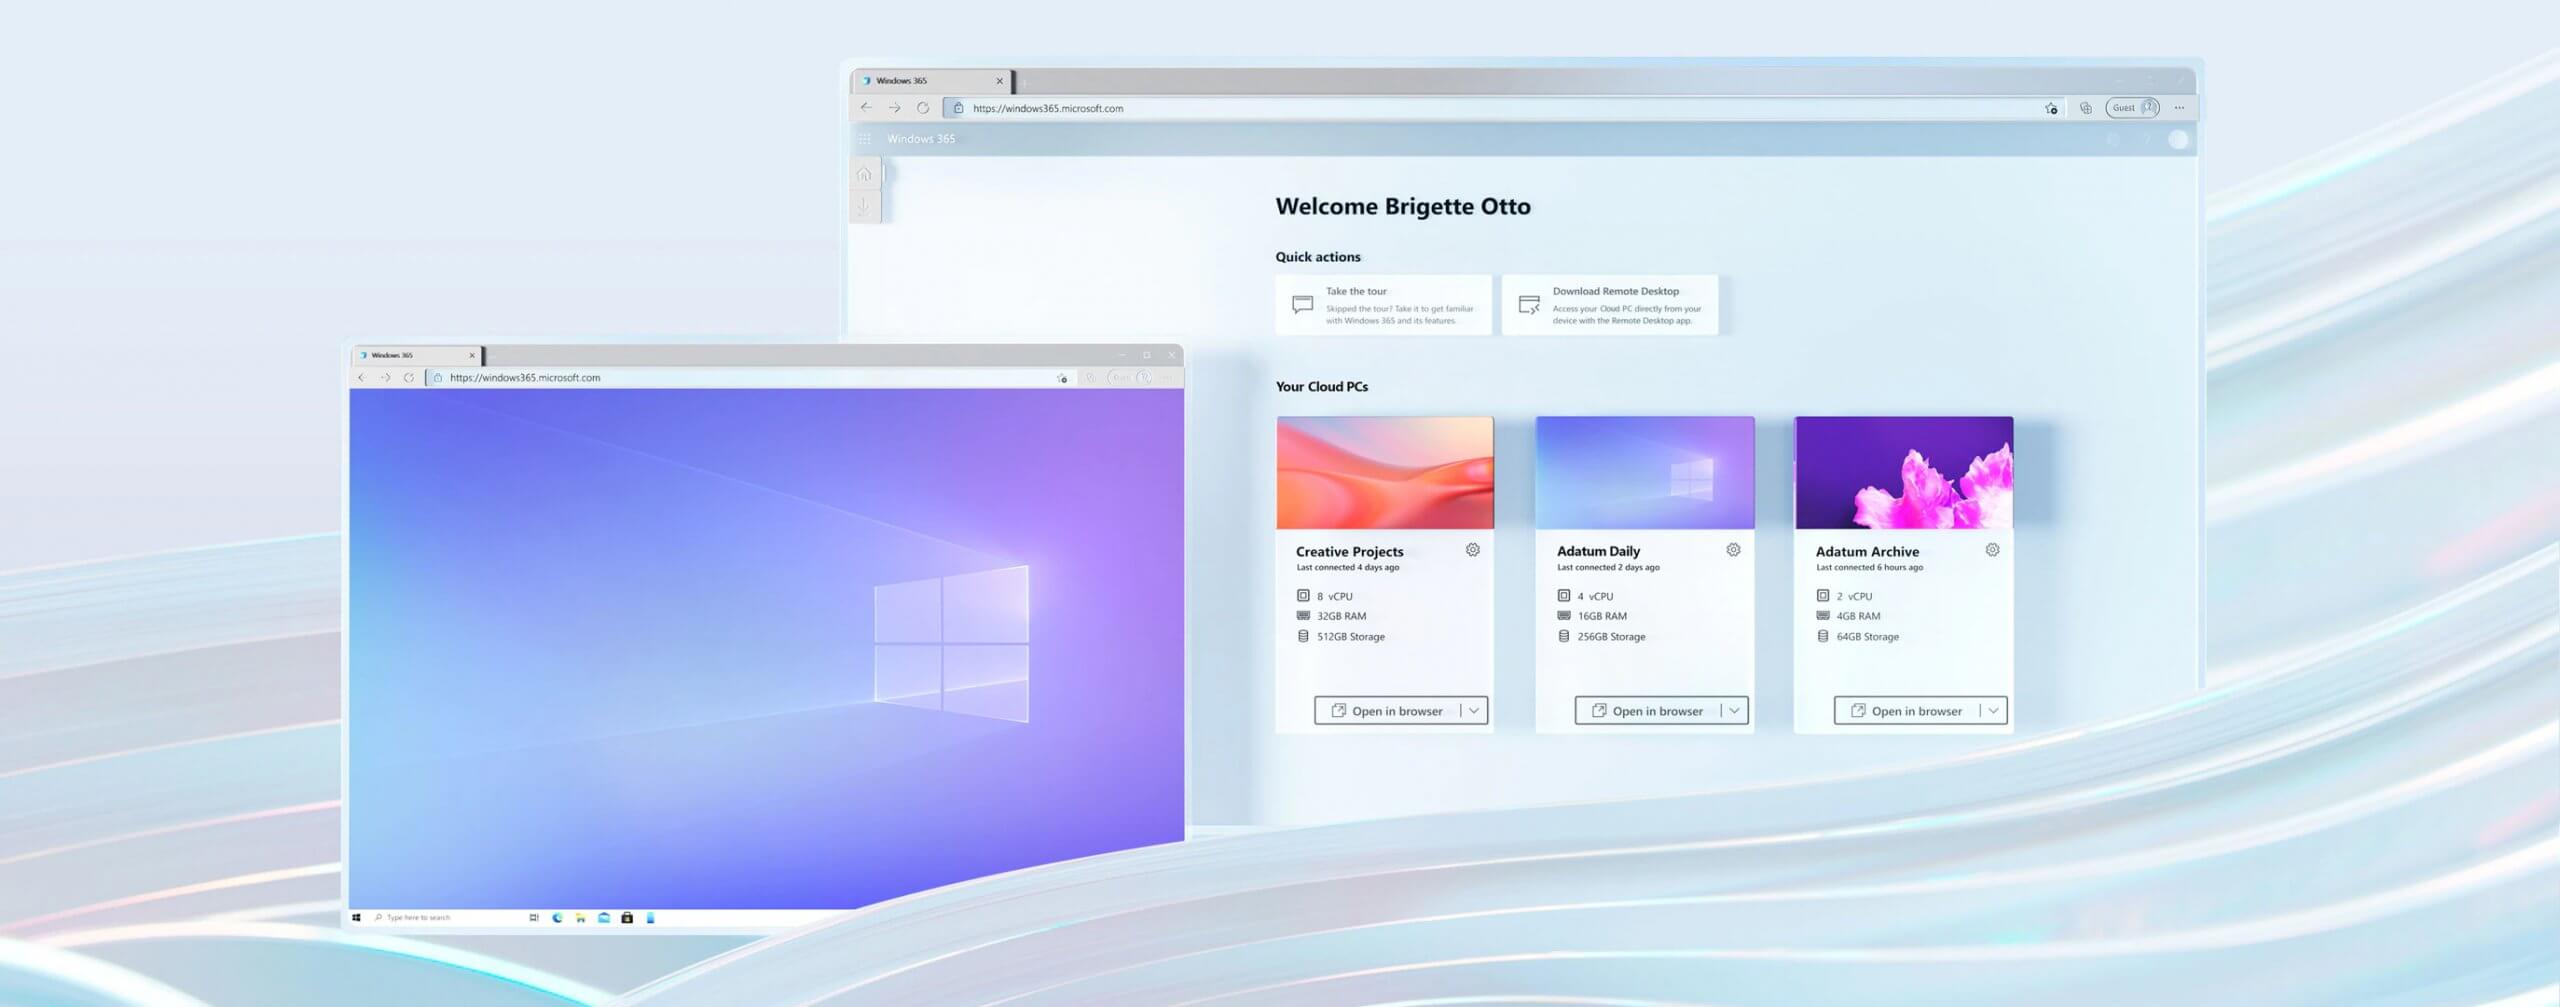 Microsoft has announced Windows 365, a new cloud-based operating system aimed mainly at businesses of all sizes.
Just after Windows 11 announcement and presentation, we are seeing another Windows announcement from Microsoft. Dive into the following text in order to find out what exactly is new Windows 365, its role in today's IT world, and do you need it?
Microsoft has announced Windows 365, a new cloud-based operating system aimed mainly at businesses of all sizes.
Just after Windows 11 announcement and presentation, we are seeing another Windows announcement from Microsoft. Dive into the following text in order to find out what exactly is new Windows 365, its role in today's IT world, and do you need it?