How summer is slowly slipping away and winter is coming people will spend more time indoors, and on top of that delta variant of Covid-19 is rampaging through the world. Being the gamer is now maybe the best time to be, sitting in the comfort of your home, safely isolated from viruses and people, just pushing buttons and emerging yourself in a vast world and new adventures.
But games cost money, and sometimes being a gamer can be expensive, also the COVID situation makes it even more difficult to spend some time with friends. Do not worry, we are here to help.
I am presenting you the list of MMO games that you should try or play during this COVID Winter, and since they are MMO games, you can play them with your friends and hang out in the virtual world. Some of them are also free to play so they will not cost you any money to enjoy them.
The following list is not set in any particular order and remember that this is not a ranked list. There is no best MMO and I will not try to place any of these titles as one dominant, I will just point their style and who they might be for, it is up to you to decide which one you will pick and enjoy.
Best MMO’s in no particular order
EVE Online

EVE Online is one of the earliest MMO games out there but since its release, it is still actively developed and is receiving updates. This science-fiction Sandbox will offer space lovers everything they need and more. Large scale PvP, mining, pirating, etc. It can be daunting and complex for beginners but take your time to get familiar with its systems and you will be rewarded greatly with an immersive and complex game worth the time. Open PvP in some zones might not be everyone’s cup of tea and seeing only your ship might be a turn-off for some players, but if you do not mind these things give it a go. It is free to play with an item shop.
Final Fantasy XIV

FF14 had a tough start, so tough that it was scrapped and destroyed and has been remade again and that idea was great. The game now is better than ever and at this time it is experiencing large players from other games surging into it. This on the rails fantasy MMO will offer you a great story and great leveling experience. It has a free trial where you can play the whole original game for free but if you wish to continue playing you will have to buy the expansion and pay a monthly subscription but the content is well worth the money.
World of Warcraft

Let’s be honest, not a single list of MMO games cannot be without a once greatest and most successful MMO ever made, World of Warcraft. But instead of me praising the game why it was the greatest and why you should play it and how great it is I am going to take a little different approach. I am going to recommend you World of Warcraft classic, yup, you read it correctly, classic. Now World of Warcraft is a retail game with a subscription service but with that one subscription you will be able to access three games in the World of Warcraft universe: World of Warcraft retail (standard game), World of Warcraft Classic (vanilla WOW without expansions offering you experience as it once was when it was released) and World of Warcraft the Burning Crusade classic (same as WOW classic but with the first expansion the Burning Crusade). Among all solutions, I would really urge you to play either WOW classic or WOW TBC classic simply for reason that they are far superior games in comparison to typical retail ones, but if you like easier game go for retail, it is included in the sub anyway.
Guild Wars 2

Guild Wars 1 was one of my favorite games and I sank a lot of times in it and once Guild Wars 2 came I must admit I was pleasantly surprised with it and I would recommend it highly. The base game is completely free to play with only expansion to be purchased and it is buy to play model without monthly fees. It has specific mechanics different from other games and interesting classes to try. The living world is a great feature of the game and it is still very strong with its player base.
Star Wars: old republic

This game is made for people who enjoy, love, and like Star Wars. Mechanically besides being able to have henchmen with you and space battles (which I do not really like how they are done) game itself does not offer anything special. Where it shines is in the story and overall Star Wars experience. If you look at this game as a single-player game with multiplayer dungeons you will have a great time, since the story is really good but sadly end game lacks in comparison.
Elder Scrolls Online

I am going to admit something here, I was not fond of the idea to make the beloved Elder Scrolls series into MMO, but in time I gave it a go and I am really glad I did. This game is great and it is getting better and better as time progresses. It is buy to play without monthly fees and basic game free, same as FF14 but without fees. It has a decent community and offers a really good Elder Scrolls experience and now it is packing Morrowind expansions and other great areas. Highly recommended for any Elder Scrolls fan.
Lord of the Rings Online

This one is troublesome to recommend, on one side you have free to play games deeply inside Tolkien Lord of the Rings lore, on the other side, you have outdated graphics and some stupid item shop decisions like buys specific classes. But if you look past stupid item shop decisions and can live with playing free class in the game you will be pleasantly surprised. The game itself is surprisingly good, the story is great as expected from the game infused with lore taken from one of the best books series ever written, and the feeling when visiting iconic landscape is epic. But if I need to be real as I should, I would recommend this one to people appreciate good story and lore and ones that are fans of Lord of the Rings itself.
Neverwinter

Neverwinter is a premium and licensed D&D MMO game and it is well strange. The free-to-play model of the game will let you enjoy it until you hit the end game, then you will have to shell real money if you want to be competitive but the journey until then is great. I would recommend it to D&D lovers and people that love to try other people's maps, yup you read it correctly. Neverwinter has a map editor making it one of a kind MMO game where you can create your own dungeons and post them for other players to play, this user-generated content makes it a very specific beast in this list, and for that feature alone it has my recommendation.
Tera

Another one of the older titles, Tera will offer you nor depth nor anything new in terms of leveling, quests, or end game except… the COMBAT. This is maybe the greatest MMO Combat game ever created and it is quite fascinating that even after so many years no other game has managed to create a better combat system than one of Tera. If you enjoy action combat and like some specific aesthetics Tera is a game for you.
Albion

Albion is a sandbox game with open-world PvP and building mechanics where you can build your own forest, house, etc. You know, sandbox stuff, including a lot of crafting and well, other sandbox stuff. If you want great quests and some occasional play then skip Albion, this game is made for a more hardcore player base not being afraid to die and spend some time crafting and going through the economy. The best comparison might be with EVE but in fantasy settings.
Black Desert

Black Desert is also a sandbox game but different from Albion, here you can organize and hire a workforce and send them to different nodes on a map to harvest resources and build an economy while you are on some epic adventure. Housing is also included but you can buy already made houses instead of making your own in the world. Combat is a game that comes very close to Tera combat and it is very enjoyable. The end game is money sink and PvP based so be careful when choosing this one.
Secret World Legends

If you like occult and supernatural with new world order themes and conspiracy theories, Secret World Legends is the game for you. Somewhat little clunky its setting and story really set it apart in many many ways. It has semi-action combat and it is free to play with item shop but all the content can be experienced for free. Recommended for fans of deeper gameplay and horror lore.
Runescape

When I said no MMO list can be without World of Warcraft, it also cannot be without Runescape, one of the oldest games it was revamped with newer mechanics and graphics, free to play all the way and you can also pick old school Runescape if you really want to go all the way on a nostalgia trip. I would recommend a newer one for newer players, the game offers a great story and unusual quests infused with puzzles and interesting storylines. If you like really good quest design without fetch and grind quests along with interesting story this is a game for you.
AION

Last on my list would be AION, a very interesting game made also a long way back, but the fact that is completely free with the cosmetic shop will make it as one to recommend since you can experience the whole game for free. It has some limited flying mechanics in it and later game zone are open PvP zones, story is interesting and leveling process is enjoyable. Also game itself is not really easy and if not careful you can get yourself in danger quite quickly. Recommended for old-school feeling.
Conclusion
That's it, there are many more MMO games out there but some are on verge of closing down and some are plainly bad. I hope that I have made your choice easier and that you will find one or a few from this list to spend your time in it. Remember, stay safe and take care of yourself.

 EVE Online is one of the earliest MMO games out there but since its release, it is still actively developed and is receiving updates. This science-fiction Sandbox will offer space lovers everything they need and more. Large scale PvP, mining, pirating, etc. It can be daunting and complex for beginners but take your time to get familiar with its systems and you will be rewarded greatly with an immersive and complex game worth the time. Open PvP in some zones might not be everyone’s cup of tea and seeing only your ship might be a turn-off for some players, but if you do not mind these things give it a go. It is free to play with an item shop.
 FF14 had a tough start, so tough that it was scrapped and destroyed and has been remade again and that idea was great. The game now is better than ever and at this time it is experiencing large players from other games surging into it. This on the rails fantasy MMO will offer you a great story and great leveling experience. It has a free trial where you can play the whole original game for free but if you wish to continue playing you will have to buy the expansion and pay a monthly subscription but the content is well worth the money.
 Let’s be honest, not a single list of MMO games cannot be without a once greatest and most successful MMO ever made, World of Warcraft. But instead of me praising the game why it was the greatest and why you should play it and how great it is I am going to take a little different approach. I am going to recommend you World of Warcraft classic, yup, you read it correctly, classic. Now World of Warcraft is a retail game with a subscription service but with that one subscription you will be able to access three games in the World of Warcraft universe: World of Warcraft retail (standard game), World of Warcraft Classic (vanilla WOW without expansions offering you experience as it once was when it was released) and World of Warcraft the Burning Crusade classic (same as WOW classic but with the first expansion the Burning Crusade). Among all solutions, I would really urge you to play either WOW classic or WOW TBC classic simply for reason that they are far superior games in comparison to typical retail ones, but if you like easier game go for retail, it is included in the sub anyway.
 Guild Wars 1 was one of my favorite games and I sank a lot of times in it and once Guild Wars 2 came I must admit I was pleasantly surprised with it and I would recommend it highly. The base game is completely free to play with only expansion to be purchased and it is buy to play model without monthly fees. It has specific mechanics different from other games and interesting classes to try. The living world is a great feature of the game and it is still very strong with its player base.
 This game is made for people who enjoy, love, and like Star Wars. Mechanically besides being able to have henchmen with you and space battles (which I do not really like how they are done) game itself does not offer anything special. Where it shines is in the story and overall Star Wars experience. If you look at this game as a single-player game with multiplayer dungeons you will have a great time, since the story is really good but sadly end game lacks in comparison.
 I am going to admit something here, I was not fond of the idea to make the beloved Elder Scrolls series into MMO, but in time I gave it a go and I am really glad I did. This game is great and it is getting better and better as time progresses. It is buy to play without monthly fees and basic game free, same as FF14 but without fees. It has a decent community and offers a really good Elder Scrolls experience and now it is packing Morrowind expansions and other great areas. Highly recommended for any Elder Scrolls fan.
 This one is troublesome to recommend, on one side you have free to play games deeply inside Tolkien Lord of the Rings lore, on the other side, you have outdated graphics and some stupid item shop decisions like buys specific classes. But if you look past stupid item shop decisions and can live with playing free class in the game you will be pleasantly surprised. The game itself is surprisingly good, the story is great as expected from the game infused with lore taken from one of the best books series ever written, and the feeling when visiting iconic landscape is epic. But if I need to be real as I should, I would recommend this one to people appreciate good story and lore and ones that are fans of Lord of the Rings itself.
 Neverwinter is a premium and licensed D&D MMO game and it is well strange. The free-to-play model of the game will let you enjoy it until you hit the end game, then you will have to shell real money if you want to be competitive but the journey until then is great. I would recommend it to D&D lovers and people that love to try other people's maps, yup you read it correctly. Neverwinter has a map editor making it one of a kind MMO game where you can create your own dungeons and post them for other players to play, this user-generated content makes it a very specific beast in this list, and for that feature alone it has my recommendation.
 Another one of the older titles, Tera will offer you nor depth nor anything new in terms of leveling, quests, or end game except… the COMBAT. This is maybe the greatest MMO Combat game ever created and it is quite fascinating that even after so many years no other game has managed to create a better combat system than one of Tera. If you enjoy action combat and like some specific aesthetics Tera is a game for you.
 Albion is a sandbox game with open-world PvP and building mechanics where you can build your own forest, house, etc. You know, sandbox stuff, including a lot of crafting and well, other sandbox stuff. If you want great quests and some occasional play then skip Albion, this game is made for a more hardcore player base not being afraid to die and spend some time crafting and going through the economy. The best comparison might be with EVE but in fantasy settings.
 Black Desert is also a sandbox game but different from Albion, here you can organize and hire a workforce and send them to different nodes on a map to harvest resources and build an economy while you are on some epic adventure. Housing is also included but you can buy already made houses instead of making your own in the world. Combat is a game that comes very close to Tera combat and it is very enjoyable. The end game is money sink and PvP based so be careful when choosing this one.
 If you like occult and supernatural with new world order themes and conspiracy theories, Secret World Legends is the game for you. Somewhat little clunky its setting and story really set it apart in many many ways. It has semi-action combat and it is free to play with item shop but all the content can be experienced for free. Recommended for fans of deeper gameplay and horror lore.
 When I said no MMO list can be without World of Warcraft, it also cannot be without Runescape, one of the oldest games it was revamped with newer mechanics and graphics, free to play all the way and you can also pick old school Runescape if you really want to go all the way on a nostalgia trip. I would recommend a newer one for newer players, the game offers a great story and unusual quests infused with puzzles and interesting storylines. If you like really good quest design without fetch and grind quests along with interesting story this is a game for you.
 Last on my list would be AION, a very interesting game made also a long way back, but the fact that is completely free with the cosmetic shop will make it as one to recommend since you can experience the whole game for free. It has some limited flying mechanics in it and later game zone are open PvP zones, story is interesting and leveling process is enjoyable. Also game itself is not really easy and if not careful you can get yourself in danger quite quickly. Recommended for old-school feeling.
 Option to right-click on the taskbar and launch task manager is gone but do not worry there are other same and simple ways you can launch it.

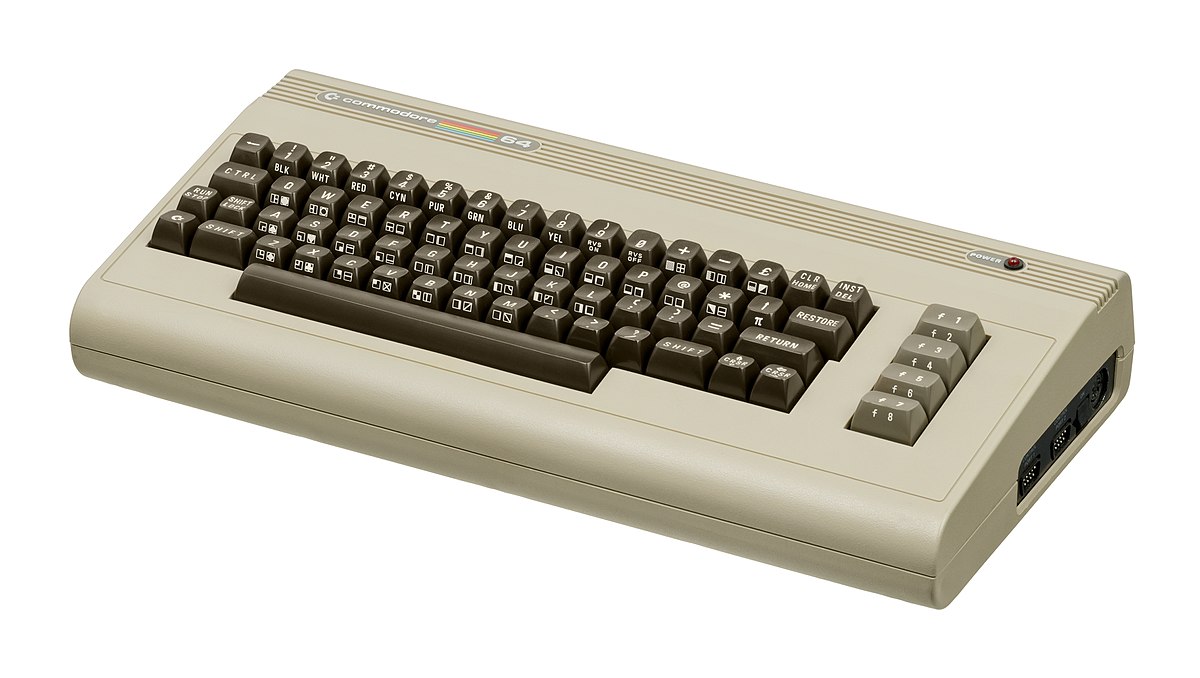 History of Commodore
 With sales booming and the early reliability issues with the hardware addressed, software for the C64 began to grow in size and ambition during 1984. This growth shifted to the primary focus of most US game developers. The two holdouts were Sierra, who largely skipped over the C64 in favor of Apple and PC compatible machines, and Broderbund, who was heavily invested in educational software and developed primarily around the Apple II. In the North American market, the disk format had become nearly universal while cassette and cartridge-based software all but disappeared. So most US-developed games by this point grew large enough to require multi-loading.
At a mid-1984 conference of game developers and experts at Origins Game Fair, Dan Bunten, Sid Meier, and a representative of Avalon Hill said that they were developing games for the C64 first as the most promising market. By 1985, games were an estimated 60 to 70% of Commodore 64 software. Over 35% of SSI's 1986 sales were for the C64, ten points higher than for the Apple II.
Everything was great for Commodore but the industry was moving forward and by the year 1988, PC compatible computers were stated to be the largest and fastest-growing home entertainment systems pushing C64 on to second place. Also, Nintendo’s gaming system has started to take hold in the world with amazing 7 million systems sold in 1988 only.
By the year 1991, many developers exited the gaming market for Commodore 64 home computer system and its popularity started to fall due to lack of software and not so many hardware changes.
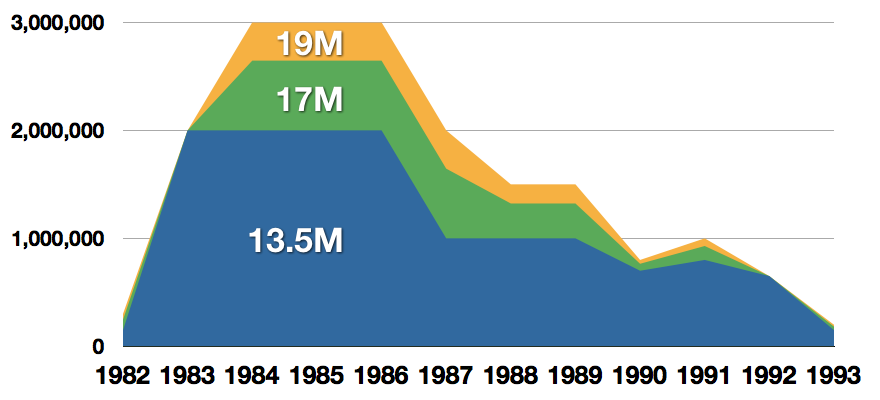 Commodore announced that the C64 would be finally discontinued in 1995.
However, only one month later in April 1994, the company filed for bankruptcy. When Commodore went bankrupt, all production on their inventory, including the C64, was discontinued, thus ending the C64's 11 and a half year production.
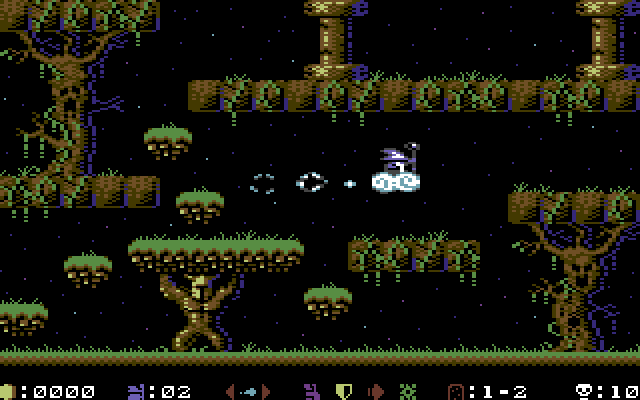 Zak McKracken and the Alien Mindbenders
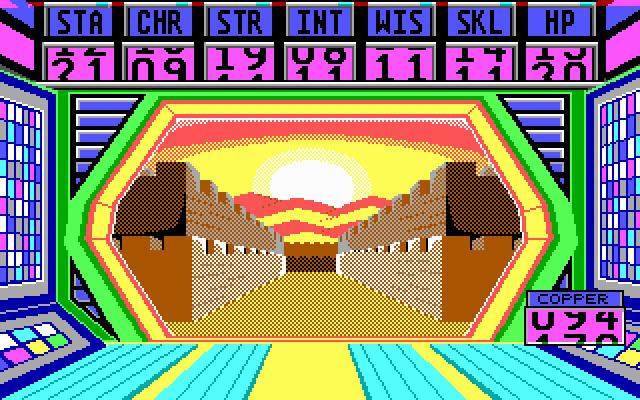
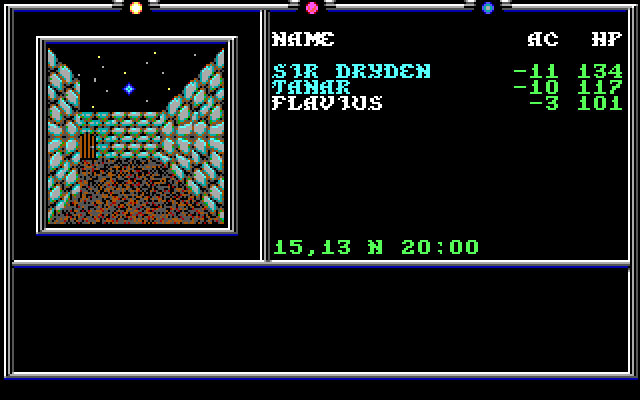
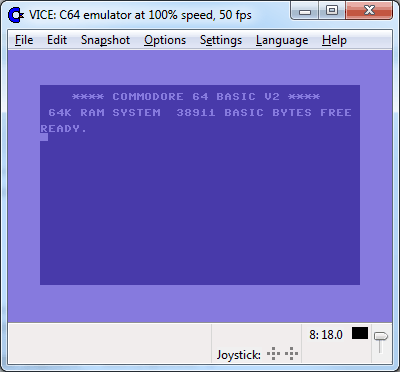 If you are not keen on spending money for reliving and checking games or software of C64 here are some links to help you to at least experience part of it completely free.
Commodore 64