Logo

Windows 10 exploit using App installer

Scammers have decided to target Windows’s 10 App installer process in order to infect your computer and steal your data.

windows 10 mail exploitAs in most usual online scams, everything starts with a strange email containing threats and other poorly written and composed speech. At the end of the given email, there would be a link claiming that you, of course, need to read it and follow instructions about the threat, if you click the link it will open a web page where you will have an innocent-looking PDF file with more information about the threat itself.
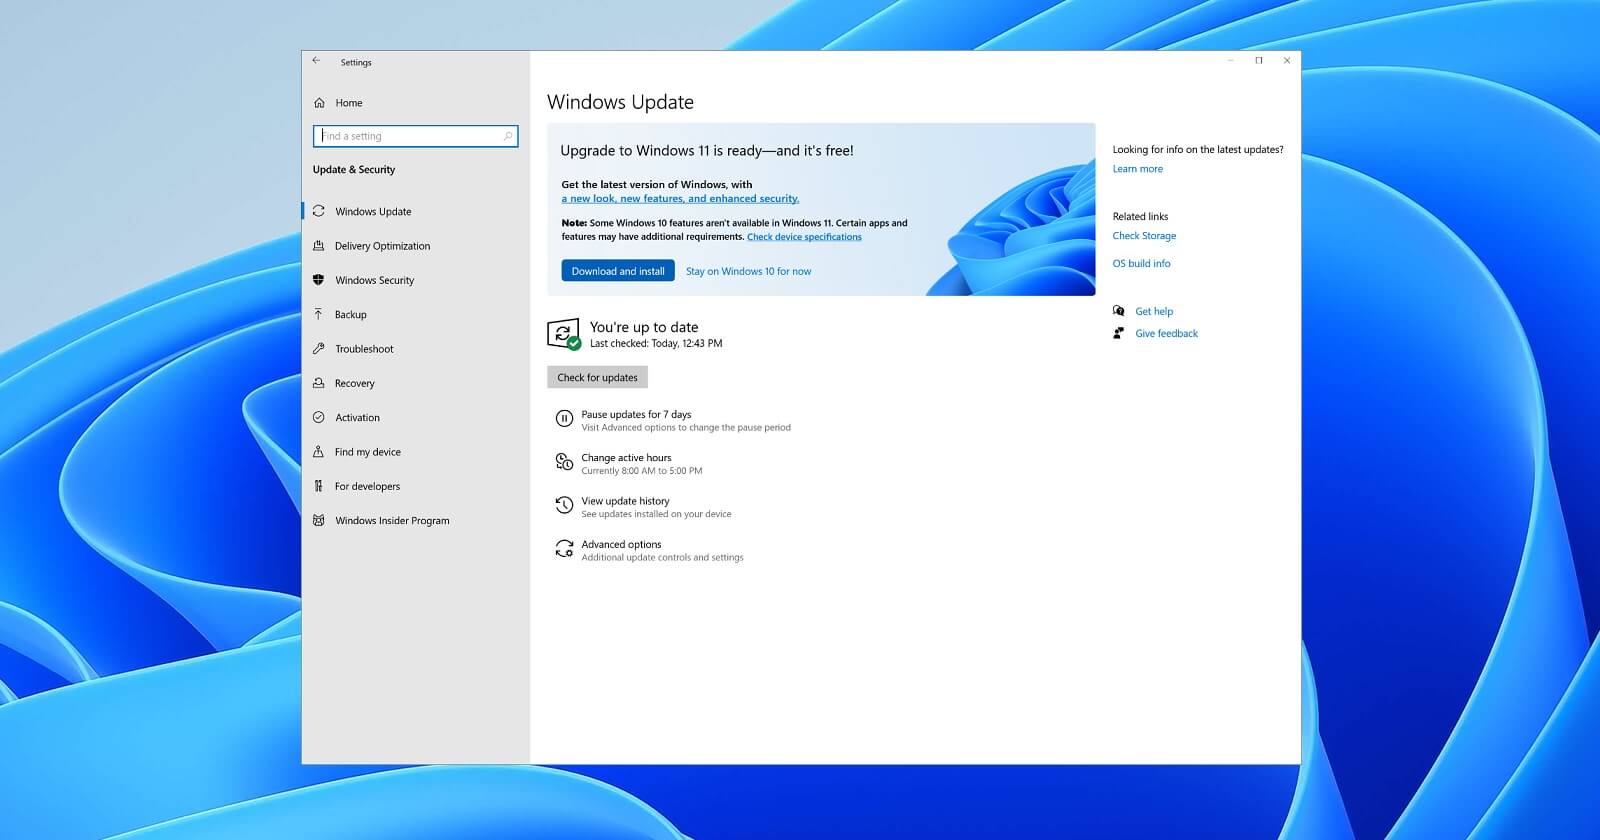
If you click on a seemingly innocent PDF file it will summon Windows 10's AppInstaller.exe tool, kickstarting a download-and-run process that'll put you in a bad place very quickly. From there, you'll have to deal with the dangers of malware BazarBackdoor, including data and credential theft.

This kind of scam is nothing new but the interesting thing here is that it uses App installer and by clicking on a link you are opening and giving permission for a malicious crook to use it. So, stay safe and do not click on any links from unknown emails no matter what.

Do You Need Help with Your Device?

Our Team of Experts May Help
Troubleshoot.Tech Experts are There for You!
Replace damaged files
Restore performance
Free disk space
Remove Malware
Protects WEB browser
Remove Viruses
Stop PC freezing
GET HELP
Troubleshoot.Tech experts work with all versions of Microsoft Windows including Windows 11, with Android, Mac, and more.

Share this article:

You might also like

Fix Failed to create a graphics device Error
As you know, the Windows 10 operating system has support for a dedicated high-end graphics processor that brings in capabilities inside to support Graphics Cards from NVIDIA or AMD. This helps the operating system to function in a much better way by segregating the graphics-intensive operations from the CPU to a dedicated processor. However, there are times when it also experiences some issues that lead to some errors like the “Failed to create a graphics device” error. It is possible that your computer has more than one screen or graphics card which is why you’re getting this error. To fix it, you need to try reinstalling DirectX or reinstall the Graphics Card driver. You could also try to manually check the hardware or power cycle of your computer. To start troubleshooting the “Failed to create a graphics device” error, follow the given suggestions below.

Option 1 – Try running the DirectX Diagnostic Tool

Since the error has something to do with the DirectX Graphics APIs, you can run the DirectX Diagnostic tool to resolve the problem.

Option 2 – Try updating or re-installing DirectX

If the DirectX Diagnostic tool didn’t work, you can try to update or reinstall DirectX instead. This can help in fixing the problem because when you reinstall or update DirectX, it will replace the incompatible or corrupted components of DirectX from your computer.

Option 3 – Update or reinstall the Graphics card drivers

  • First, boot your computer into Safe Mode.
  • After that, tap the Win + R keys to launch Run.
  • Type in MSC into the box and tap Enter or click OK to open the Device Manager.
  • After that, a list of device drivers will be displayed. From there, look for the Display Adapters and click on them.
  • After that, right-click on each entry under the Display Adapters and select the “Uninstall Device” option from the menu.
  • Now restart your computer.
  • After restarting your computer, go to the Settings app and Check for Updates in the Windows Update section.
Note: You also have the option to go directly to the website of your graphics card manufacturers like NVIDIA, Intel, or AMD and go to the section called Drivers then check if there’s a new available update – if there is, download and install it.

Option 4 – Try to physically check the hardware of your computer

You might also want to check the physical status of the hardware in your computer. You can clean the dust off the hardware components like the Graphics Card of the computer. In doing so, you have to use a small blower or you could also use a soft cloth and run the components gently. Make sure that you don’t damage any parts with moisture or cause harm to any circuits while you carry out this task.

Option 5 – Try to power cycle your computer

You could also try to power cycle your computer to fix the error. To do that, you have to turn off your computer in a way that the power is completely cut off and all the fresh configurations of files are loaded when your computer is booted up. The first thing you have to do is to shut down your computer and if you are using a laptop with a removable battery, you must remove the battery for a couple of minutes before you plug it back in and boot your laptop. On the other hand, if you are using a desktop computer, press and hold the power button until the CPU goes off and take out the power cable for a minute or so and then plug it back in. Boot your computer and see if the error has been resolved.
Read More
Best graphic design software for 2022

2021 is nearing toward the end and with just a couple of days remaining in this year, we are happy to look forward to the next year. So in large anticipation of what will next year bring us, we are taking a good design look at this one and making a list for you of what graphic design software you should learn and use in the upcoming 2022.

graphic design softwareBefore we dive into it in more detail and predictions please be aware that this article is based upon my personal opinion drawn from the research of current trends and standards. That being said let's dive right into details.

Adobe Photoshop

Whether you like it or not, Adobe has cemented itself with its flagship application Photoshop and how things are looking this situation will not change any time soon. Photoshop is an extraordinary pixel manipulation software that has the ability to work with both animations and vector graphics as well making it a great single application for all-around design needs. It has been industry-standard design software for the web, print, and all other kinds of design all over the globe and this will not change in near future. With its constant updates and expansion of its abilities, this is a must-have tool in your design tool belt. If you are looking to find work as a designer you will have to know how to work with photoshop.

Adobe illustrator

Many will tell you that is photoshop for raster graphics, the illustrator is for vectors. First started as illustrator 88 on Mac right away it took first place for vector graphics from FreeHand and it continued on its path of vector dominance. After some time and more integration with photoshop Adobe managed to overthrow Corel Draw as well winning the title for best vector editing software with illustrator. Same as with photoshop, if you are planning to work in a serious industry you will need to know the illustrator.

Adobe InDesign

We are still in Adobe train and it is moving hard, InDesign is graphic design software aimed for paper publications. If you need to create and prepare any kind of professional publication for printing InDesign is the application to go to. With its specific print aimed features it is a must-have for any graphic designer.

Corel Draw Graphic Suite

Once the king of vector and print design but dethroned by Adobe Corel Draw still has some punches to stay relevant in the field. With some cool features like symmetry and long shadows, it stands out from its competitors for its ease of use. Corel was always focused on easy to learn, and difficult to master and it is still following that kind of thinking. Granted not many employers will require you to be a master of Corel Draw but some of them will request that you are familiar with the application. One of perhaps the greatest advantages of Corel over Adobe is not locking you into a subscription making Draw suit a great choice for freelancers and designers that want to own software, not rent it.

Affinity Designer

The first software from Affinity was Photo, made as a cheap version one-time purchase competitor for photoshop. Later it has released Designer, also a one-time purchase competitor for illustrators. If we are going to take a good look into a feature for feature comparison, both Adobe and Corel will win over Affinity but if we take a look at a price that is a one-time purchase Affinity will win over easily. Priced only at $54.99 it is a steal, and taking into account that many designers will not require any very advanced features found in Corel or Adobe applications Affinity is the way to go.

Inkscape & GIMP

Speaking of price, nothing beats free, and both Inkscape and GIMP are completely free. offering very decent and competitive features applications will require you to get used to their own specific UI and workflow, but once you get a grasp of them, you will be able to do most design work in them. One of the downsides of using these free open source apps is their limited export options but if all that is required from you is to deliver a typical SVG, JPG, EPS, PNG, or PDF file you are good to go.

Colorcinch

Free with basic functionality with the option to purchase more advanced features Colorcinch is a great application if you are on quickly developing and creating graphics for social media posts. Add quickly text or filters, quickly do the color adjustment and save for social apps. The application also within its basic boundaries can work directly on the website without you requiring to even install it making it one of a kind. Go try it at the official site and enjoy yourself.

Conclusion

If you have followed the graphic design scene you will notice that nothing has changed and it will not change in near future. This just speaks about how much industry is defined and how little change is there over time. I advise if you can to get and learn adobe suite since it is industry standard and is required from almost every employer today. Rest applications on the list are great alternatives and can bring you income and offer you a way to finish your project.

Read More
Identify resource hogging applications
Resource hogging is a term when one single application or few of them are taking all system resources for themself causing extreme slow down in the computer and nonresponsiveness. It can be a very frustrating and time-consuming experience and it can cost you money if you can not finish work on time due to this effect. I believe that everyone has experienced at least one slowdown in their IT carrier because of resource-hogging applications and most users do not know how to deal with this. We are here to help you with this issue. Just to be aware that this method shown here is not a method to miraculously speed up your PC or anything similar, this is to be able to detect and recover from extreme slowdowns. Hardware components are still very important and if you can upgrade your computer if it is outdated, please do it because new applications will require a more modern system, and not any kind of tips and tricks will save you from outdated hardware.

Identifying resource hogging app

Now when we got that out of the way let's talk about slowdowns, it is no secret that sometimes an application has bugs and memory leaks that can cause this kind of behavior, and sometimes the application simply takes up too much memory for any other application to work normally. The most simple and straightforward way is to bring up a Windows task manager and inspect running applications and services. You can bring task manager by the key combination of CTRL + SHIFT + ESC If the system is in deep memory deficit you will have to wait for the task manager to open and show itself on-screen. Once opened, click on more details if that view is not opened by default. Once the view expands you will see all running applications with how much RAM memory have they taken and how much CPU they are using.

What to do with app?

Now you are presented with a choice on what to do with the problematic application. If you press the end task button on the bottom right, Windows will kill the application and its processes but any unsaved work inside the application will be lost and unrecoverable in most cases. Or you can try to remove smaller applications running to free up more memory and CPU in order for the computer to catch up. Any choice you make is up to you, but be very careful not to kill Windows essential service by mistake, that will cause immediate system instability with high chances of a system crash.
Read More
Shift Key is not working in Windows
A lot of users rely on keyboard shortcuts to carry out tasks on their PCs. One of the most common keyboard shortcuts used is the Ctrl + Shift + Esc which opens the Task Manager. As you can see, the Shift key is not just used to capitalize a text as it can also be used for other functions and plays an essential role in operating a computer. However, if you suddenly find it not working, read on as this post will help you fix the problem. If your Shift key is not working, there are several potential fixes you can check out to fix it. These are the different ways to get rid of the Shift key not working issue on Windows 10:
  1. Physically clean the key and keyboard
  2. Disable Sticky Keys.
  3. Update, Reinstall, or Rollback Keyboard driver.
  4. Test the keyboard on another system.
  5. Check your connections
  6. Run the Hardware troubleshooter
  7. Troubleshoot in Clean Boot State.

Option 1 – Clean the keyboard keys physically

Your keyboard might not be working properly due to some dirt or other corrosion. Thus, you need to clean your keyboard, especially the Shift key. First, you need to shut down your computer and then unplug the keyboard if you are using a desktop computer and then prepare it for cleaning. After that, use a small cotton ear cleaning tool to get between the creases and clean them. You can dip it slightly in alcohol to make it more efficient in cleaning dust and dirt. And if you can, you have the option to pull apart the keyboard completely and then wipe away all the corrosion from the inside. Once you’re done, put the keyboard back together and then plug it back into your PC. Now turn your PC on and check if the Shift key is now working.

Option 2 – Try to disable the Sticky keys

Another thing you can try is to disable the Stick keys. How? Refer to these steps:
  • Tap the Win + I keys to open the Settings app.
  • After that, navigate to the Ease of Access section, and here, select Keyboard.
  • Next, make sure that the option for Press one key at a time under the Sticky Keys is toggled off.

Option 3 – Reinstall, update or rollback your keyboard driver

Once you’ve determined that the problem is in the software part of the keyboard, it is now time to try to reinstall, update or roll back your keyboard drivers. To reinstall the driver for your keyboard, refer to these steps:
  • From the WinX Menu, open the Device Manager.
  • In the Device Manager, you should find your laptop’s keyboard under the “Keyboards” option. Right-click on it and select the “Uninstall” option.
Note: If you’re not quite certain about your laptop’s keyboard, you can uninstall all the keyboards if there’s more than one.
  • After that, restart your PC and see if the keyboard driver is installing automatically. If not, open the Device Manager again and right-click on Keyboards, and select the option “Scan for hardware changes” to install it.
Once the keyboard driver is installed again, check if your keyboard is now working properly or not.

Option 4 – Try connecting the keyboard to a different USB port or another computer

The problem might have something to do with the USB port that’s currently in use by your keyboard. It could be that it’s not working so it makes sense to unplug it and attach it to another USB port. You can also clean the USB port on both ends to ensure that they are not affected by corrosion. In addition, you can also try connecting the keyboard to a different computer and see if the Shift key works there or not.

Option 5 – Try to check your connections

You can also try checking if the connection mode you are using for your keyboard is functioning properly. For instance, if you are using a Surface 2-in-device, you can clean the connection pins and see if it resolves the problem.

Option 6 – Run the Hardware and Devices Troubleshooters

  • The first thing you need to do is click on Start and then on the gear-like icon to pull up the window for Settings.
  • After opening Settings, look for the Update and Security option and select it.
  • From there, go to the Troubleshoot option located on the left-hand side of the list.
  • Next, select Hardware and Devices from the list and open the Troubleshooter and run it. Once it is doing its job, wait for it to complete the process and then restart the system.
  • After the system restarts, check if the problem’s now fixed. If not, refer to the next option given below.

Option 7 – Put your PC in a Clean Boot State

You might also want to put your computer in a Clean Boot State to fix the problem with the Shift key. It could be that there is a third-party program that’s preventing the Shift key from functioning. To isolate this possibility, you need to put your computer in a Clean Boot State.
  • Log onto your PC as an administrator.
  • Type in MSConfig in the Start Search to open the System Configuration utility.
  • From there, go to the General tab and click “Selective startup”.
  • Clear the “Load Startup items” check box and make sure that the “Load System Services” and “Use Original boot configuration” options are checked.
  • Next, click the Services tab and select the “Hide All Microsoft Services” check box.
  • Click Disable all.
  • Click on Apply/OK and restart your PC. (This will put your PC into a Clean Boot State. And configure Windows to use the usual startup, just simply undo the changes.)
  • Now try to connect the external devices and check if the error is now gone.
Read More
Methods To Repair "Error in Loading DLL" on Windows PC's

Error in Loading DLL - What is it?

This is a Dynamic Link Library (DLL) error. It results when a program calls upon a DLL file to perform a certain task and the file fails to load as it is damaged. In a nutshell, DLL is a collection of small programs. DLL is called upon by the executable program (EXE) that is running. The DLL file allows the executable program to run on the system. For example this error may occur when you try to run wizards in Microsoft Office Access such as the Import Wizard, the Report Wizard or the Control Wizard. This error is usually displayed as:
“Error in loading dll” “Object library not registered”

Solution

Restoro box imageError Causes

The error in loading DLL occurs due to numerous reasons. Some of the most common causes include:
  • The DLL or the referenced DLL is not in a directory specified in the path.
  • DLL File is damaged due to hard disk errors and registry corruption
  • Registry key may not exist
  • Malware errors add malicious codes to the application
  • Spyware and adware infections
When you come across error in loading DLL, it is advisable to fix it right away as this error can pose serious threats and lead to your PC malfunctioning. It can corrupt programs and put you at risk of data security and privacy threats.

Further Information and Manual Repair

To resolve this error in loading DLL files, you don’t always have to hire a technician even if you don’t have technical knowledge. This error is quite easy to repair. Here are two ways to resolve error in loading DLL without any professional assistance:

Solution 1: Reinstall the Program

Reinstalling the program can help you resolve this issue. However, when doing this you will first have to uninstall the program and also remove the DLL files from the registry to ensure the update is carried successfully. In addition to this, you will also have to uninstall some programs that share DLL files with the program that you are removing from your system to reinstall it again. Windows will prompt the DLL shared message if it is being shared by other software on your system. Though this is a method used to resolve errors in loading DLL this can be slightly tricky and confusing for many.

Solution 2: Repair the Registry and Remove Malware

This is the best, easiest and most efficient way to repair error in loading DLL files. Did you know 94% of the PC-related errors are triggered by registry corruption and malware infection? To repair the registry and remove malware from your system, you don’t have to download a separate registry cleaner and an anti-virus. Simply download Restoro. Restoro is a cutting-edge and multi-functional repair tool integrated with powerful utilities like a registry cleaner, system optimizer, and an anti-virus. By running Restoro on your computer you can resolve all the underlying causes for error in loading DLL files in seconds. Whether the error results from registry corruption or viral infection, Restoro is the only tool you need to run to repair. It is a safe, efficient and a super functional tool. It has a neat layout, easy navigation, and a user-friendly interface embedded with advanced technology and automated algorithms that scan your entire PC and repair all kinds of PC issues right away.  It can be easily operated by even novice users.

Restoro features

The registry cleaner feature repairs DLL errors and corrupt registry. It removes all the unnecessary and obsolete files that have overloaded and damaged the hard disk. It scans and wipes out such files clearing up the disk space. It fixes mis-configured registry keys and settings thus resolving errors in loading DLL files. If your system is infected by malware it may create Dll.exe malicious files on your system. If these are viruses, they can damage your system. Malicious software like Trojan and spyware are detected and removed with the help of the privacy error detector module integrated into Restoro. Other features that are worth mentioning are its backup feature and outstanding Windows compatibility. With Restoro users can create backup files for data recovery in the event of data loss during repair. Also, it is compatible with all Windows versions. To resolve error in loading DLL files on your system you just have to perform 3 simple steps:
  1. Click here to download Restoro.
  2. Run it on your system to scan for errors in loading DLL files
  3. Click repair to fix the issues.
Read More
Disable or Enable App Launch Tracking
The Windows 10 operating system utilizes a variety of measures in order to track your app launches so that it can boost both your start and search results. It can personalize the start menu based on the apps that you use the most on the Start menu as well as the search results. This way, the App Launch Tracking is definitely useful especially when you want to access your favorite and frequently used apps quickly in the Start menu and search results on your Windows 10 computer. On the other hand, Windows 10 provides users with the ability to control their privacy settings in order to protect the privacy of users. Windows 10 users can either opt to enable the app launch tracking to improve the start menu and search menu or opt to disable the app launch tracking in order to prevent the Windows operating system from tracking that you open if you really value your privacy that much. Whichever setting you prefer, you need to change the privacy control settings as well as make some tweaks in the Windows Registry in order to turn on or turn off the app launch tracking feature.

Option 1 – Turn off or turn on app launch tracking via Settings

  • Go to Settings and click on Privacy.
  • After that, toggle On the “Let Windows track app launches to improve Start and search results” option on the right side of the page under the General Settings to enable the app launch tracking feature.
  • And of course, if you wish to disable the app launch tracking feature, simply toggle Off the “Let Windows track app launches to improve Start and search results” option on the very same page under General Settings.
  • After that, close the Settings window.
Note: Keep in mind that when you disable the app launch tracking feature, the “Show most used app” setting will either be grayed out or labeled as “Disable” on your Windows 10 computer. Thus, if you want to keep viewing the most used apps, just re-enable the app launch tracking feature if you have disabled it.

Option 2 – Turn off or turn on app launch tracking via Windows Registry

Before you proceed, make sure to create a System Restore point
  • Tap the Win + R keys to open the Run dialog box.
  • Then type “Regedit” in the field and hit Enter or click OK to open the Registry Editor.
  • Next, navigate to the following path:
HKEY_CURRENT_USERSOFTWAREMicrosoftWindowsCurrentVersionExplorerAdvanced
  • After that, right-click on the Advanced folder and then click on New to create a new 32-bit DWORD value.
  • Name the newly created DWORD as “Start TrackProgs” and set its value to “1” to enable the app launch tracking feature.
  • If you want to disable the app launch feature, set “0” as the value instead of 1.
  • Now click OK and restart your computer.
Take note that you still have to create a 32-bit DWORD value even if you are using a 64-bit Windows computer.
Read More
Personalize Windows 11 Start menu
Windows 11 is released and its adoption goes slower than Microsoft would like but nevertheless, it is slowly getting adopted, especially among new computers. Windows 11 has brought us a new modern look of OS but if you would like to personalize it a little more you can. Follow the guide on various things that you can change inside Windows 11.

windows 11 desktop iconsPersonalize list of recently added apps, opened items, folders

The recommended section that shows recently added apps and recently open items can be turned off and hidden now to be shown. In order to do this follow these steps:
  1. Open Windows Settings by pressing WINDOWS + I
  2. Click on personalization in the sidebar
  3. Click on START and go through the options
  4. Turn OFF switch beside recently accessed files
  5. Additionally, you can also change which folders appear on the Start menu.

Remove apps or change app order on the Start Menu

To remove application not to be shown in the Start menu at all follow this simple guide:
  1. Right-click on app
  2. Choose unpin
  3. To place the application on Start click on All Apps, right-click on the app and choose Pin to Start
  4. To drag and rearrange apps, simply click on them and drag them to the new place.

Change the Start Menu location

When Windows 11 was first released Start Menu could only be located in the middle of the screen but thanks to plenty of backlash from users now it is possible to move it on a more traditional left side.
  1. Press WINDOWS + I to open the settings app
  2. Click on Personalization
  3. Look for taskbar behaviors
  4. Inside taskbar behaviors look for Taskbar alignment
  5. Change alignment to left

Change the Start Menu color

In order to change the color of the Start Menu follow the next steps:
  1. Open Settings app
  2. Go to personalization settings
  3. Go to Colors
  4. Switch to custom
  5. Under accent color pick a color you like or make your custom one.
Read More
Regular vs Gaming mouse comparison

You have probably heard a lot of good things about gaming mice, how they are better feeling, better in any way possible and it is all true, everything you heard is actually true, they are superior in any way to a regular mouse but with one big disadvantage, and that would be the price. While you can find a regular mouse for pocket change, a gaming mouse is in comparison very expensive even for entry-level ones.

gaming mouse

In this article we will explore all advantages and compare it with the regular one so you can come up with your own conclusion about do you really need one for yourself or if you are fine with regular.

Price

As stated price is one factor that does not favor gaming mice. Regular mouse for a personal computer goes around 10 or 20 USD, while entry-level in gaming one will be 40 USD and can go up to 250 USD, this large gap in price is usually determining factor why people pick up regular one. If you are on a really tight budget go for the regular one, but if you can afford a gaming one get it without second thoughts.

Software

This is where you will see the big difference between mice. Regular ones when connected are recognized and the driver is automatically installed and you can use it, same goes with gaming ones but with one big difference, you have an option to install additional manufacturers' software specially tailored for your mouse. In the application, you will be able to access some features that are specific to the mouse model that you could not set in typical Windows mouse properties. Beside more options software can also have features like setting your profiles and saving them to be recalled when you need them on the fly.

Sensitivity of mouse

The sensitivity of the mouse is measured in dots per one inch or short DPI, this is directly shown on your screen by how fast your mouse can move, higher sensitivity means your mouse will move faster across the screen and lower means it will move slower. All gaming mice come with buttons and settings that will allow you to change DPI on the fly and you can choose precise DPI settings in the software.

The regular mouse comes with DPI around 800 and goes to 1200 typically and does not have usually the option to change this while gaming mice start at 400 and can go as high as 26000 with the option to change it. Some regular mice can have only 1 option of DPI, usually very cheap ones.

Polling rates in mice

Pooling rate is the measurement of how often your mouse reports where it is positioned on the computer. The higher the pooling rate, the more responsive your mouse will be and vice versa. It is measured in hertz (Hz) and regular mice have them around 125Hz that is enough if you are using a computer for office, internet, and mail work.

If you are working in design or gaming you will need more than 125Hz polling rate, luckily gaming mice come with a minimum of 500Hz as an entry point and some hi-end models are going as far as 8000Hz. This very high pooling rate will get some extra load on your CPU but the mouse itself will be maximally responsive and will respond even to the smallest moves.

Ergonomics

Regular mice are well just mice, they are typical shape and size, gaming mice are made with ergonomics in mind. How they are made for extensive daily use of several hours per day they are constructed in a way to offer a pleasant and pain-free experience.

If you work on a computer for long periods of time consider gaming an ergonomic mouse since it will take the strain from hands and place them in a more natural position.

Macro keys

Gaming mice most of the time come with more keys compared with regular ones and good thing is that via its software you can tie certain actions to these extra keys making work or gaming more pleasant and quicker.

Components and material quality

In order to make regular mice more affordable and cheaper materials and quality of components had to suffer. Gaming mice have millions of guaranteed clicks by companies that make them before they break and regular ones usually do not guarantee a single one. This is due of course quality of materials that have been used in constructing these devices.

In the long term, if you use a gaming mouse for typical daily tasks it will outlive your regular one and on the side offer you more pleasant and responsive use along the way.

Read More
How to remove Search Donkey

Search Donkey is a Potentially Unwanted Program for Windows developed by Western Web Applications, LLC. This program may inject ads into your browsing sessions, giving you false search results and advertisements.

As described by Western Web Applications: “Search Donkey is entirely free to use. To keep Search Donkey free, we’ve partnered with high-quality ad providers and you may see additional ads when Search Donkey is installed.

While installed, Search Donkey will keep track of your web search queries, allowing it to let you know what pages you already visited, however, this data is also used to better target personal unwanted ads.

Search Donkey has been flagged as a Potentially Unwanted Program (PUP) by several anti-virus scanners, and their website is blacklisted by Google, giving warning to whoever visits it, and due to the nature of this application, it is not recommended to keep on your computer.

About Adware

Exactly what is Adware? If you have ever owned a computer, then you’ve probably heard the word numerous times, but it is still beneficial to define it. The term “adware” is actually a short form of advertising-supported software and it includes programs that are solely designed to display ads on a computer. A kind of malware, it will come bundled right in with the software package that a user either installs or accesses. Shareware or freeware programs are often times packaged with adware. If adware penetrates your system without you knowing and sends information about you or your PC to 3rd parties, then it is spyware. Quite often, adware changes your web browser settings to open pop-up adverts or modifies browser homepage and default internet search engine to some unwanted website. Adware is a common problem that affects a large number of PCs around the globe. If your computer doesn’t have any anti-malware software then it’s very likely it could get infected with adware as well as other malware.

Adware and its effects on your PC:

Adware could generate and display plenty of ads of all sorts which in turn disrupt the functions of your personal computer while browsing the net. Pop-ups might also show up on your computer’s desktop even when you’re not online. Adware results in a reduction of available memory and processing power, or resources. It also causes a slow net connection because adware consumes bandwidth whenever it retrieves adverts from the internet. Adware was originally created to support companies to generate income when they offer the software away free of charge. However, adware nowadays displays hundreds of adverts which will cause your PC to slow down and even crash.

Adware prevention:

As we discussed, adware could potentially be harmful to your computer, generally not by itself, but by bringing other problems to you. A top-quality antivirus program has the capability of permanently removing adware. We recommend Safebytes Anti-Malware, one of the top-rated anti-malware programs by world-renowned industry experts. It will act either as a preventative tool stopping websites or software installations that contain adware or as a removal tool for an already infected computer. To prevent adware, download software from websites that you trust. Never download from websites that you have never been aware of or tried before; Always study the end-user license agreement (EULA) of any application you want to install; You need to avoid freeware and shareware where possible; Lastly, watch out for ActiveX, since many adware and spyware companies make use of the technology to install their wares onto your computer system

Malware Blocking Internet And All Anti-Malware Software? Do This!

All malware is bad and the consequences of the damage will vary based on the specific type of malware. Some malware variants alter browser settings by adding a proxy server or modify the PC’s DNS settings. In these instances, you will be unable to visit some or all internet sites, and thus not able to download or install the required security software to eliminate the malware. So what to do when malicious software prevents you from downloading or installing Anti-Malware? There are a few options you could try to get around with this problem.

Remove viruses in Safe Mode

In Safe Mode, you can actually change Windows settings, un-install or install some program, and eliminate hard-to-delete viruses and malware. If the malware is blocking access to the internet and affecting the computer, launching it in Safe Mode will let you download antivirus and run a diagnostic scan while limiting possible damage. To enter into Safe Mode or Safe Mode with Networking, press the F8 key while the PC is starting up or run MSConfig and look for the “Safe Boot” options under the “Boot” tab. Once you’re in safe mode, you can attempt to install your anti-malware program without the hindrance of the malicious software. At this point, you could run the anti-malware scan to eliminate viruses and malware without hindrance from another application.

Switch over to an alternate browser

Some malware only targets certain browsers. If this sounds like your case, use another web browser as it could circumvent the malware. If you suspect that your Internet Explorer has been hijacked by malware or otherwise compromised by hackers, the ideal approach is to switch over to a different internet browser like Firefox, Chrome, or Safari to download your chosen computer security software – Safebytes Anti-Malware.

Create a portable USB antivirus for eliminating malware

Another solution is to make a portable antivirus program on your USB flash drive. Adopt these measures to run the anti-malware on the affected computer system. 1) Download the anti-malware program on a virus-free PC. 2) Connect the flash drive to a USB slot on the clean computer. 3) Run the setup program by double-clicking the executable file of the downloaded software, which has a .exe file format. 4) Select the flash drive as the destination for saving the software file. Follow the directions to complete the installation process. 5) Transfer the pen drive from the clean computer to the infected computer. 6) Double-click the Safebytes Anti-malware icon on the thumb drive to run the software. 7) Hit the “Scan Now” button to start the virus scan.

Detect And Remove Viruses With SafeBytes Anti-Malware

Today an anti-malware tool can protect the computer from different types of online threats. But wait, how to decide on the best one amongst countless malware protection application that’s available out there? As you might be aware, there are many anti-malware companies and products for you to consider. A few are well worth your money, but many aren’t. You need to choose one that is reliable, practical, and has a strong reputation for its malware source protection. Amongst few good applications, SafeBytes Anti-Malware is the strongly recommended software for the security-conscious individual. SafeBytes anti-malware is a trustworthy tool that not only secures your PC permanently but is also very easy to use for people of all ability levels. With its outstanding protection system, this tool will easily detect and remove most of the security threats, including adware, viruses, browser hijackers, ransomware, trojans, worms, and PUPs.

SafeBytes has outstanding features when compared to other anti-malware programs. Below are some of the great ones:

Real-time Threat Response: SafeBytes provides 100 % hands-free real-time protection and is set to check, block, and eliminate all threats at its very first encounter. They’re very effective in screening and getting rid of different threats because they’re constantly revised with new updates and safety measures. Robust, Anti-malware Protection: With its enhanced and sophisticated algorithm, this malware removal tool can identify and get rid of the malware threats hiding in the PC effectively. Internet Security: SafeBytes gives an instant safety rating about the pages you’re about to visit, automatically blocking harmful sites and ensure that you’re certain of your safety while browsing the world wide web. “Fast Scan” Abilities: SafeBytes’s virus scan engine is one of the fastest and most efficient within the industry. It's targeted scanning seriously increases the catch rate for viruses which is embedded in various computer files. Low CPU and Memory Usage: This program is not “heavy” on your computer’s resources, so you’ll not see any overall performance issues when SafeBytes is working in the background. 24/7 Customer Support: You can obtain totally free 24/7 technical support from their computer experts on any product queries or computer security concerns. Overall, SafeBytes Anti-Malware is a solid program as it has lots of features and could identify and remove any potential threats. Malware problems will become a thing of the past once you put this software to use. So if you’re searching for the best malware removal application out there, and if you don’t mind paying out some money for it, opt for SafeBytes Anti-Malware.

Technical Details and Manual Removal (Advanced Users)

If you don’t want to use malware removal software and prefer to get rid of Search Donkey manually, you could do so by going to the Windows Add/Remove Programs menu in the control panel and deleting the offending program; in cases of web browser plug-ins, you may remove it by visiting the browsers Add-on/Extension manager. You’ll probably also want to reset your internet browser. To ensure the complete removal, manually examine your hard disk and registry for all of the following and remove or reset the values accordingly. But bear in mind, editing the Windows registry can be a complicated job that only experienced users and professionals should attempt to fix it. Furthermore, some malware keeps replicating which makes it tough to eliminate. It is advised that you do the removal procedure in Windows Safe Mode.
Files: % Program Files% \Search Donkey.exe %UserProfile%\Desktop\ Search Donkey.lnk %UserProfile%\Start Menu \ Search Donkey C:\Users\%CurrentUserName%\AppData\Local\Temp\nst2A8A.tmp\nsDialogs.dll (21 bytes) C:\ProgramData\SearchDonkey\Firefox\chrome\content\overlay.xul (391 bytes) C:\Users\%CurrentUserName%\AppData\Local\Temp\nst2A8A.tmp\System.dll (23 bytes) C:\ProgramData\SearchDonkey\IE\common.dll (11359 bytes) C:\ProgramData\SearchDonkey\Chrome\common.crx (5843 bytes) C:\Users\%CurrentUserName%\AppData\Local\Temp\nst2A8A.tmp\modern-wizard.bmp (4232 bytes) C:\Users\%CurrentUserName%\AppData\Local\Temp\nst2A8A.tmp\util_ex.dll (21609 bytes) C:\ProgramData\SearchDonkey\Firefox\chrome\content\main.js (17 bytes) C:\ProgramData\SearchDonkey\app.dat (172455 bytes) C:\Users\%CurrentUserName%\AppData\Local\Temp\nst2A8A.tmp\Helper.dll (27542 bytes) C:\Users\%CurrentUserName%\AppData\Local\Temp\nst2A8A.tmp\version.dll (14 bytes) C:\Users\%CurrentUserName%\AppData\Local\Temp\nst2A8A.tmp\Processes.dll (1772 bytes) C:\ProgramData\SearchDonkey\Firefox\chrome.manifest (196 bytes) C:\ProgramData\SearchDonkey\Uninstall.exe (12729 bytes) C:\ProgramData\SearchDonkey\Firefox\install.rdf (955 bytes) C:\ProgramData\SearchDonkey\SearchDonkey.ico C:\ProgramData\SearchDonkey\Chrome\common.crx C:\ProgramData\SearchDonkey\Firefox\chrome.manifest C:\ProgramData\SearchDonkey\Firefox\chrome\content\main.js C:\ProgramData\SearchDonkey\Firefox\chrome\content\overlay.xul C:\ProgramData\SearchDonkey\Firefox\install.rdf C:\ProgramData\SearchDonkey\IE\common.dll C:\ProgramData\SearchDonkey\SearchDonkey.ico C:\ProgramData\SearchDonkey\Uninstall.exe C:\ProgramData\SearchDonkey\app.dat Registry: HKEY_CURRENT_USER\Software\Microsoft\Windows\CurrentVersion\Uninstall\SearchDonkey \DisplayIcon %AppData%\%RANDOM CHARACTERS%\%RANDOM CHARACTERS%.exe,0 HKEY_CURRENT_USER\Software\Microsoft\Windows\CurrentVersion\Uninstall\SearchDonkey HKEY_CURRENT_USER\Software\Microsoft\Windows\CurrentVersion\Uninstall\SearchDonkey\UninstallString %AppData%%RANDOMCHARACTERS%\%RANDOM CHARACTERS%.exe
Read More
Enable or Disable Auto-Mounting in Windows
Every time a new drive or any storage device is connected to a Windows 10 computer, the operating system tends to allot a drive letter to it automatically. Not only that, as the OS also maps the location of the drive which helps it point the letter to the exact port location of the drive and serve requests from the user. As a result, it builds up a bit of cache as per the pattern in which the user uses the storage of the computer. This whole process is known as “Auto Mounting” which works for hard disks or optical drive readers that are connected using the SATA ports and even for USB drives that are connected using the USB ports. There are several ways you can enable or disable the Auto-Mount feature in Windows 10. You can do it using the MountVol tool or the Registry Editor or the Diskpart utility. Before you proceed, it is recommended that you create a System Restore point first so that you can always undo the changes you made in case anything goes wrong.

Option 1 – Enable or disable Auto Mounting via MountVol tool

In this option, you will be using the mountvol command in the Command Prompt. Refer to the steps below.
  • Tap the Wins key once and type in “command prompt” in the field.
  • From the search results, right-click on Command Prompt and select the “Run as administrator” option to run it with admin privileges.
  • Next, type the following command and tap Enter to enable the Auto Mount feature:
mountvol /E
  • On the other hand, if you want to disable the Auto Mount feature, type the following command instead:
mountvol /N
  • After that, type the command below to remove all the previously assigned drive letters:
mountvol /R
  • Finally, restart your computer.

Option 2 – Enable or disable Auto Mounting via Registry Editor

  • Tap the Win + R keys to open the Run dialog box.
  • Then type “Regedit” in the field and tap Enter to open the Registry Editor.
  • After that, navigate to this registry key: ComputerHKEY_LOCAL_MACHINESYSTEMCurrentControlSetServicesmountmgr
  • Next, look for a DWORD named “NoAutoMount”. If you can’t find a DWORD with that name then simply create a new DWORD with the same name and make sure that the base is selected to Hexadecimal.
  • Now double click on that DWORD and change its value to 0 if you want to enable it, otherwise, input 1 as its value to disable it.
  • Restart your computer.

Option 3 – Enable or disable Auto Mounting via Diskpart utility

  • Tap the Wins key once and type in “command prompt” in the field.
  • From the search results, right-click on Command Prompt and select the “Run as administrator” option to run it with admin privileges.
  • After opening Command Prompt as admin, type the following command and hit Enter to launch the Diskpart utility:
diskpart
  • After that, a User Account Control prompt will appear. Just click on the Yes button.
  • Next, type the following command and hit Enter:
automount
  • Following the command you entered, you will an output that either says, “Automatic mounting of new volumes enabled” or “Automatic mounting of new volumes disabled” which means you can use it to check the status of Auto Mount.
  • Now if you want to enable the Auto Mount feature, type the following command and tap Enter:
automount enable
  • And if you want to disable the Auto Mount feature, just enter the following command:
automount disable
  • To remove all the assigned letter and history of drives that were connected previously, type the following command:
automount scrub
  • Finally, restart your computer.
Read More
1 2 3 171
Logo
Copyright © 2023, ErrorTools. All Rights Reserved
Trademark: Microsoft Windows logos are registered trademarks of Microsoft. Disclaimer: ErrorTools.com is not affiliated with Microsoft, nor claims direct affiliation.
The information on this page is provided for information purposes only.
DMCA.com Protection Status