Why You Need Antivirus Software & How to Select the Right One
Anxiety from all these digital threats lurking everywhere? An antivirus program can help put your mind at ease.
What can a virus do to your device?
A virus is malicious software that can affect pretty much any device and does so in a variety of ways. Be it your computer, your phone or your smart lightbulb - as long as there’s access to the internet, malware can get to it.
How exactly does this kind of attack manifest itself? Well, there’s a wide variety of effects ranging from mild to severe. Among other things, they depend on which type of malware attacks your device - a virus, spyware, ransomware, adware or something else.
These are some of the things you can expect to happen:
Slow performance
System crashes
Theft of data and sensitive information
Connectivity issues
Constant browser redirects
Strange messages sent to your contacts
Interference with files
It really can be the stuff of nightmares. So, if you want to sleep peacefully knowing that your devices are completely safe, you should definitely consider getting an antivirus.
P.S. don’t let its name fool you - an antivirus does indeed protect your devices against more than just viruses.
What is antivirus software exactly?
Antivirus software is designed to help you battle and ward off malware. Basically, it scans your device to detect any suspicious activity and offers tools to get rid of the culprit.
At first, antiviruses were developed to fight against viruses only, but nowadays they cover a lot more ground. Here are some of the biggest benefits of getting yourself a powerful defender.
Advantages of antivirus software
1. It fights those pesky ads
Look, constant ads that pop up everywhere aren’t the absolute worst thing that can happen on your computer. If anything, they are annoying, like when you’re trying to sleep but that one fly in your room just won’t stop buzzing.
Now, there’s a free, well-established solution for that - installing an ad blocker. And we’re about a hundred and ten percent sure you’ve already done that on each and every browser you use.
However, “if I can’t see it, it doesn’t exist” isn’t the most ideal approach for your online safety. Ad blockers can’t block everything and they won’t protect you from potential adware. An antivirus on the other hand offers that layer of protection against malware snuck into pop-ups and spammy websites.
2. It protects you from hackers
Hackers don’t target government institutions only. They’ll target regular people too if they have something to gain.
Credit Clint Patteron Unsplash
There are different types of hacking, such as phishing e-mails, transmission of malicious programs, credential reuse, denial of service and more. In any case, they take control of your device and hijack your data.
The good thing is that, as threats evolve, antiviruses evolve too and there are tons of quality programs on the market that can keep you secure for an affordable price.
3. It keeps your files and data safe
When malware enters your device, it can target pretty much any file and get access to any and all data.
Installing an antivirus program will make sure that every single file, new or old, is monitored at all times, warning you against threats immediately. That way, you can make sure to react before your other files become infected and data is lost or stolen.
Another great thing for data protection is that the best antivirus software normally comes with a password manager, so no one can use malware to steal your passwords.
4. It blocks all kinds of malware
As we already stated, malicious attacks can be performed in many ways and malware comes in in different shapes an sizes, such as:
Trojan horse
Spyware
Ransomware
Adware
Rootkit
RAT (remote access Trojan)
Keyloggers
Worms
Botnets
Credit Growtika Unsplash
Nowadays, antivirus software is designed to fight against all of these types. That’s why more often than not we hear the term 'antivirus' used interchangeably with 'anti-malware,' like in this article.
5. It keeps your children protected
You can’t keep your eyes on your kid every second of the day and you can’t protect them from everything. But at least you can limit their exposure to the threats they can encounter at every corner of the digital world.
An antivirus program will block harmful or suspicious websites and ads, which is great both for you and your children. To take it a step further, though, many such programs come with special parental controls and offer monitoring as well. It’s a great solution for keeping your kids safe online without sounding like the irritating, overbearing, controlling parent who “just doesn’t get it!”
How to pick one
There are definitely lots of different antivirus programs out there, both free and paid. We recommend you look for a paid option, since free ones are unfortunately a lot more susceptible to being compromised through malicious attacks.
Now, there are a few factors to consider when choosing the right software. If you use your PC for basic things then a basic antivirus will suffice. However, the more complex your use and the more sensitive the data you deal with, the stronger it needs to be.
It’s also crucial that you take into account the features it includes. As we already mentioned, some programs have additional security options. For example, depending on the package you select, Bitdefender provides:
Some are included in plans and some are separate products, so make sure to check out all the offers.
And don’t worry if you have multiple PCs or you’re looking for protection for your smartphone or tablet as well; Bitdefender has suitable solutions for your needs. Of course, you can also just pick their classic antivirus software if you’re not in need of advanced protection.
Another important point is how regularly the software is updated and enhanced. The more frequent the updates the better, as bugs can make the program more vulnerable. Other things we advise you consider are user-friendliness, impact on performance, reputation (user reviews especially) and, of course, price.
The bottom line
Fact is: anyone can be a malware victim. Don’t let it be you.
You can’t put a price on peace and security, so don’t be reluctant to pay for yours - especially since a lot of options out there are extremely affordable. Is $159.00 a year really too much to pay for cross-platform protection for up to 10 devices? We don’t think so.
Explore your options and protect your files and data before it’s too late.
myBrowser is a Potentially Unwanted Program that allows users to access the internet. This browser suggests users install other PUP like myfiles, myemail, and others.
This application claims to be a good reliable portable internet browser, however during our test use of the program several website scripts crashed and were not able to open up all the website assets required, leaving the users with a mediocre browsing experience.
While browsing the internet through this program, you might see additional ads and sponsored links injected into your search results and/or websites.
About Potentially Unwanted Applications
What is a Potentially Unwanted Program (PUP)?
Everyone has experienced it – you download and install a free application, you then notice some unwanted programs on your computer system, come across a strange toolbar on your web browser, or find your default search engine has been changed to something else. You didn’t set them up, so how did they turn up? Potentially Unwanted Programs (PUP), also referred to as Potentially Unwanted Applications (PUA), are programs that you never wanted in the first place and often come bundled with freeware software. Once installed, most of these applications can be difficult to eliminate and become much more of an annoyance rather than a necessity.
PUP doesn’t involve malware in the traditional sense. A basic difference between PUP and malware is distribution. Malware is commonly dropped by silent installation vectors such as drive-by downloads while PUP gets installed with the consent of the user, who knowingly or unintentionally authorizes the PUP installation on their PC. PUP developers may argue that their programs aren’t malicious software but they can still be dangerous software and put the computer at risk much the same way a computer virus does.
What do PUPs do on your PC, precisely?
Unwanted programs can be found in various forms. Usually, they will be found in adware bundlers that are known to utilize aggressive and misleading advertising. The majority of bundlers install many adware applications from several vendors, each of which features its own EULA policy. Safebytes Anti-malware entirely removes this threat and protects your PC against unwanted programs or malware infection. PUPS also appear in the form of undesirable toolbars or web browser add-ons. They may change your internet browser settings, monitor your surfing activities and online searches, take up a large amount of space on your monitor, and degrade your web browsing experience.
Potentially Unwanted Programs at times act quite similarly to computer viruses or spyware. They will often carry keyloggers, dialers, and other programs built inside them that may track you or send your sensitive details to third parties. Even if the PUPs aren’t basically malicious, these programs still do absolutely nothing good on your computer – they will take precious resources, slow down your PC, weaken your device’s security, making your PC more vulnerable to trojans.
Protect yourself from PUPs
• Read very carefully before you install anything. Do not click accept till you have read the fine print. There will probably be a clause about PUPs.• Always select “Custom” or “Advanced” installation and never blindly click the Next button, which will let you uncheck any foistware software programs you do not want.• Use an anti-PUP program. Security software like Safebytes Anti-malware provides the very best real-time protection against PUPs and also other malware.• Be alert if you install freeware, open-source software, or shareware. Don’t install programs that appear suspicious or malicious.• Always download software from reliable sources like official websites instead of untrustworthy sharing space. Stay away from file-hosting sites where/when possible.
Comply with these guidelines and you should more or less never get potentially unwanted programs on your PC
What To Do When You Cannot Install Safebytes Anti-Malware?
Malware could cause all kinds of damage once they invade your PC, from stealing your private details to deleting files on your computer. Some malware is designed to restrict or prevent things that you wish to do on your computer. It may well not let you download anything from the internet or stop you from accessing a few or all of the internet sites, particularly the anti-malware sites. So what you should do if malware prevents you from downloading or installing Safebytes Anti-Malware? Follow the instructions below to eliminate malware by alternate methods.
Make use of Safe Mode to fix the problem
If any virus is set to run automatically when Microsoft Windows starts, stepping into safe mode could very well block this attempt. Since only the minimal programs and services launch in Safe Mode, there are hardly any reasons for issues to occur. Below are the steps you need to follow to start into the Safe Mode of your Windows XP, Vista, or 7 computers (check out the Microsoft website for instructions on Windows 8 and 10 computers).
1) Hit the F8 key repeatedly as soon as your PC boots, but before the big Windows logo comes up. This will bring up the Advanced Boot Options menu.2) Make use of the arrow keys to select Safe Mode with Networking and press ENTER.3) When this mode loads, you should have the internet. Now, make use of your internet browser to download and install an anti-malware application.4) Right after the software is installed, let the scan run to remove viruses and other threats automatically.
Obtain the antivirus software using a different browser
Some malware mainly targets specific web browsers. If this sounds like your case, make use of another internet browser as it might circumvent the virus. If you’re not able to download the security application using Internet Explorer, this means the virus is targeting IE’s vulnerabilities. Here, you should switch to another internet browser such as Chrome or Firefox to download the Safebytes program.
Create a bootable USB antivirus drive
Here’s another solution which is creating a portable USB anti-virus software package that can scan your system for malware without needing installation. Adopt these measures to run the anti-virus on the affected PC.
1) Download Safebytes Anti-Malware or Microsoft Windows Defender Offline onto a clean PC.2) Plug in the pen drive into the uninfected computer.3) Double click on the exe file to open the installation wizard.4) When asked, choose the location of the USB drive as the place in which you want to store the software files. Follow the directions to finish the installation process.5) Now, transfer the flash drive to the infected computer.6) Double-click the EXE file to open the Safebytes tool right from the flash drive.7) Click the “Scan” button to run a full computer scan and remove malware automatically.
SafeBytes Anti-Malware: Lightweight Malware Protection for Windows Computer
If you’re looking to download the anti-malware program for your computer, there are numerous tools on the market to consider however, you should not trust blindly anyone, irrespective of whether it is a paid or free program. Some of them do a good job in removing threats while some will ruin your computer themselves. You have to select one that is reliable, practical and has a good reputation for its malware source protection. On the list of strongly recommended tool by industry experts is SafeBytes Anti-Malware, a well known security software for Microsoft Windows.
SafeBytes is a powerful, real-time anti-malware application that is designed to assist the common computer user in safeguarding their computer from malicious threats. With its outstanding protection system, this tool will quickly detect and eliminate the majority of the security threats, which includes adware, viruses, browser hijackers, ransomware, trojans, worms, and PUPs.
SafeBytes anti-malware takes computer protection to a whole new level with its enhanced features. The following are some of the great features included in the software.
Live Protection: SafeBytes offers real-time active checking and protection against all known viruses and malware. It will continuously monitor your pc for hacker activity and also gives end-users superior firewall protection.
Best AntiMalware Protection: This deep-cleaning anti-malware application goes much deeper than most antivirus tools to clean your computer. Its critically acclaimed virus engine locates and disables hard to remove malware that hides deep within your computer.
Website Filtering: SafeBytes provides instant safety rating to the webpages you’re going to visit, automatically blocking unsafe sites and to make sure that you are certain of your safety while browsing the internet.
Lightweight Utility: SafeBytes is a light-weight application. It consumes a very small amount of processing power as it works in the background so you are free to use your Windows-based computer the way you really want.
Premium Support: You will get 24/7 technical assistance to quickly resolve any concern with your security application.
SafeBytes can keep your PC protected from the latest malware threats automatically, thus keeping your online experience secure and safe. Now you may realize that this tool does more than just scan and delete threats in your computer. If you’re looking for the very best malware removal tool out there, and if you don’t mind spending some dollars for it, opt for SafeBytes Anti-Malware.
Technical Details and Manual Removal (Advanced Users)
If you want to carry out the removal of myBrowser manually instead of using an automated software tool, you can follow these simple steps: Proceed to the Windows Control Panel, click on the “Add/Remove Programs” and there, choose the offending application to remove. In cases of suspicious versions of browser extensions, you can easily remove them through your web browser’s extension manager. You will most probably also want to totally reset your internet browser to its default settings.
Lastly, check your hard disk for all of the following and clean your Windows registry manually to remove leftover application entries after uninstalls. Please remember that only advanced computer users should try to manually edit the registry because incorrect file deletion leads to a major problem or even a PC crash. Moreover, some malicious programs have the capability to defend against its deletion. Carrying out this in Safe Mode is advised.
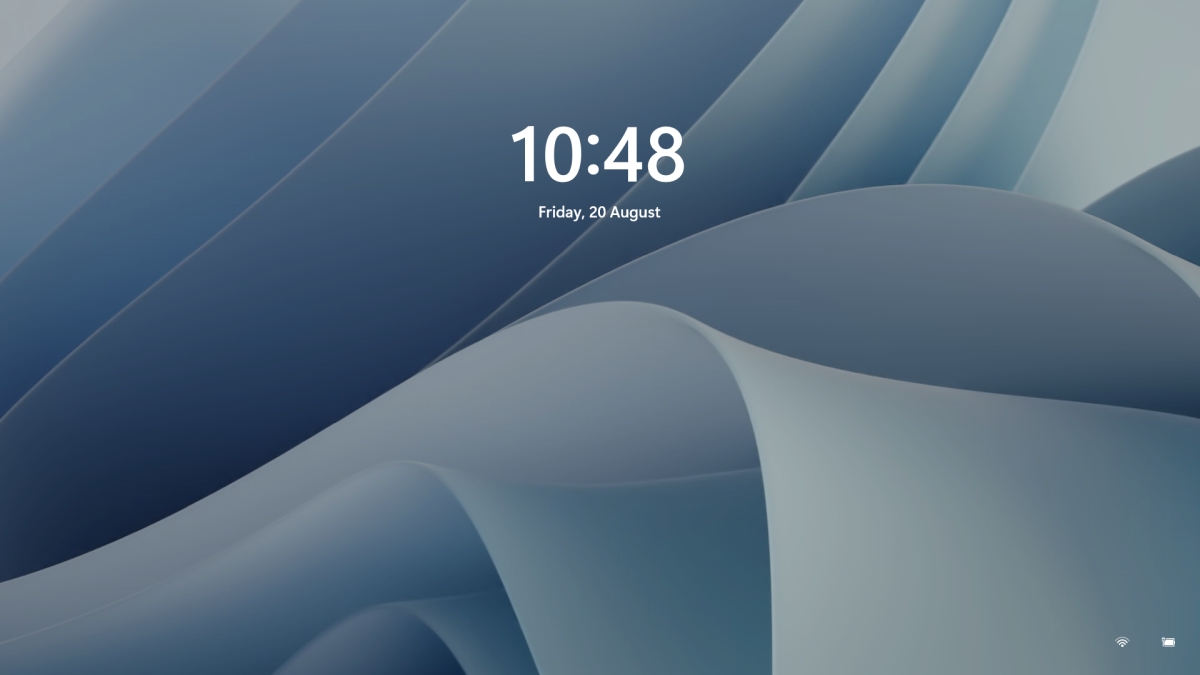
Same as in Windows 10, Windows 11 also features a lock screen. IN this lock screen by default, you will see a clock and date above the standard Windows 11 background. Not all users will be happy with this choice but do not worry, you can choose and customize your lock screen to better suit your idea of it.
To personalize the lock screen do:
Right-click on Desktop and select Personalize
Click on the lock screen
Choose one of three options and customize it
Personalize Your Lock Screen
this option will let you set a custom image or slideshow for your lock screen. Choose either one that best suits you. Under selecting picture or pictures for the slide show you can uncheck the option to see tips, tricks, and facts on your lock screen.
Lock screen status
when clicking on this option you can select the application widget that you wish to be shown on the lock screen like weather, mail, calendar, etc. Choose if you would like one by clicking on it.
Show the lock screen background picture on the sign-in screen
as self-explanatory this switch will enable or disable chosen lock screen wallpaper on your login credentials screen.
Close settings
All settings will be automatically saved and applied and when you wish to lock the screen easiest way is to press ⊞ WINDOWS + L shortcut on your keyboard.
Hello everyone and welcome to our Windows 10 security basics where we will provide you with common practices you should aim to follow in order not to cough some viruses, malware, keylogger, worm, etc.
As you are all aware, we live in a digital age where we are surrounded by luxuries of unlimited information, video chats all over the globe, free calls via the internet, applications that track stuff for us, and many many more things that make our lives easier. Sadly with this kind of technology comes risks of cyber attacks that aim to steal your information, credit card numbers, or any other relevant stuff which could be used illegally in order to make purchases, loans, and other theft in your name so ones doing that could not get caught.
Think of data stealers the same as you think of armed robbers in a dark alley, just this time their pray is data about your life so they can make purchases for themselves more than once.
This article aims to provide you with some common logic, tips, and tricks of what should you do and where should you pay attention in order not to provide wrong people with your crucial information and data. we hope that you will find reading informative and helpful.
Keep Windows updated.
Microsoft is working hard on their Windows defender and firewall to provide protection to its users and fixing any introduced security leaks which are found in Windows itself. By updating and keeping Windows updated you make sure that every security leak that is found is patched and removed from Windows and that you have the latest database of known malware inside the firewall and defender.
This common practice, however, should not be limited to Windows only, you should update every application you are using for the same reasons.
Use antivirus, anti-malware, and firewall
These applications exist for a reason and that reason is to protect your data. Dedicated applications specifically made for purposes of defending your data are better than any kind of I am careful mentality since sometimes is enough to just visit a website or just click on some link and you are compromised. You can use Windows Defender and firewall if you wish, they are already in Windows but if you are serious about your data and like to surf the internet some better protection is worth the investment.
Get a dedicated password manager
Your password is bad, if you use the same password everywhere then it is even worse. Computers have come a long way in the last 50 years and so have cyber attack applications which make your commonsense passwords extremely vulnerable and all of your accounts open to cyber attacks. Dedicated password managers that can hash passwords and automate them are your safest bet that your passwords will not be compromised, get one, and get it today.
Do not click on anything inside emails
Cyber attacks come in vast variety and one of them is sending you emails informing you that for example your Paypal or anything else has been hacked and that you must click this link to reset your password. These you do not click, no matter how convincing they sound or how good they look, if you need to update your information on a specific service or website, you delete email, open browser and go to that service and change stuff. The same goes with different offers, discounts, women seeking you, men seeking you, prince sending you 1 billion in gold. Only click on links in emails from a trusted and verified source.
Do not click on pop-ups
Similar to clicking on links in emails you should not click on pop-ups, the same rules, same stuff apply as with emails.
Be careful what you are downloading
Be careful from where you download your software and be careful what are you downloading and stop using pirated software, any kind of malicious applications, keyloggers, viruses, etc could be hidden in these downloads, and by downloading them you are opening doors to your private information. Only use legal software from trusted sources.
Never leave your phone or computer unattended
You can never tell who can implement malicious software or get some crucial information from unattended devices, lock them all time and take them with you.
There you go, 7 common tips and tricks for the basic security of your computer. Thank you for reading and I hope to see you again on our site.
intelppm.sys blue screen of death is linked to an outdated driver, if you received this error do not sweat we have simple solutions for you. Please keep on reading in order to find out what can you do to fix this error.
Update driver
Go to the device manager and manually update old-dated drivers. Note that this will take some time because you will need to update each device manually through the device manager but in the end, it will fix the issue.
Use automated application
Instead of going through each device one by one manually get a dedicated driver fixing device like DRIVERFIX and update all drivers automatically.
In any Windows operating system, Safe Mode is definitely a special environment used for troubleshooting issues as well as system diagnostics. Safe Mode allows you to remove any malware in your computer and troubleshoot issues that can’t be fixed when you’re in desktop mode. This is why Microsoft made sure that the Safe Mode option is not available directly and can only be accessed by pressing function keys such as F2, F8 (depends on what PC you are using) or via MSConfig. To make it easier for you to access Safe Mode, this post will guide you on how you can add Safe Mode to the Boot Menu options in Windows 10.
As you know, Windows 10 now has Advanced Startup options that allow you to boot directly into Safe Mode without having to restart your PC and then tapping the special key a couple of times. However, if you really have to always use Safe Mode, it’s best to add it in the Boot Menu options. To do that, simply follow the steps below.
Select Command Prompt (Admin) option from the WinX menu to open Command Prompt with administrator privileges.
After opening Command Prompt, type the bcdedit /copy {current} /d "Safe Mode" command and hit Enter.
Once the command is executed, you will see a message saying, “The entry was successfully copied to {74a93982-9486-11e8-99df-00270e0f0e59}”. This message indicates that Safe Mode was successfully added in the Boot menu option which means that you can now directly access it and boot your Windows 10 PC in that mode.
To check if Safe Mode was really added in the Boot menu options, you have to open Msconfig. From there, you will also have to use it to configure the boot settings for the Safe Mode entry. To do so, follow the given steps below.
Tap the Win + R keys to open the Run dialog box.
Then type “MSConfig” in the field and click OK.
Next, go to the Boot tab and find the Safe Mode option which should be located under the default Windows 10 mode.
Afterward, you need to select the Sage boot option and Minimal. You also have to select the Make all boot settings permanent option.
Make sure to increase the timeout to at least 10 seconds which will ensure that the menu does not disappear right away.
Note: In similar steps as above, you can add the Safe Mode with Networking and Safe Mode with Command Prompt entries as well. Just simply select “Network” for Safe Mode with Networking and “Alternate Shell” for Safe Mode with Command Prompt. Once you’re done adding any of them, click on Apply and restart your PC. In addition, if you wish to remove the entry, you just have to open MSConfig again and select the entry you want to remove, and then click Delete.
Originally Microsoft has imagined its widgets menu as Microsoft-only widgets but it seems that they have changed their mind.
Due to the latest leak, it seems that Microsoft will open the widgets menu to 3rd party developers as well but at launch, it will be only official widgets. It was hinted that later widgets menu will be open to developers who want to bring their own stuff into it.
Distribution, date, and technology that will need to be used in order to create your widget have not been discussed nor leaked at a given time but in some way, I am very glad that at least some customization will be in Windows 11.
It is funny and amusing how some things that were in Windows Vista are getting back like glass design, round corners, and widgets. Let’s just hope Windows 11 will be a better Windows than Vista was.
Device drivers serve as a connection between the hardware in your computer and the operating system. So if any of the device drivers fail, the concerned hardware will stop communicating with Windows. And when you encounter some network-related issues, you can run the Network Adapter troubleshooter to fix them. However, this built-in troubleshooter does not work all the time as there are still problems that it can’t fix on its own and you’ll see the following error message:
“Windows could not find a driver for your network adapter.”
If you encounter this kind of error, read on as this post will help you in fixing the problem but before you get started in troubleshooting the problem, try running the Network Adapter Troubleshooter again.
Open the Search bar on your computer and type in “troubleshoot” to open the Troubleshoot settings.
Next, scroll down and select the “Network Adapter” option from the right pane.
Then click on the Run Troubleshooter” button.
After that, your computer will check for any possible errors and will pinpoint the root cause of the problem if possible.
Refer to each one of the solutions given below to get started:
Option 1 – Update the Network Adapter drivers
Of course, the first thing you can try to do is to update the Network Adapter drivers to resolve the error.
Tap the Win + R keys to launch the Run window and then type in the “devmgmt.msc” command and hit Enter to open the Device Manager window.
Under the Device Manager, you will see a list of drivers. From there, look for the Network Adapters and expand it.
Then right-click on each one of the Network drivers and update them all.
Restart your PC and see if it helped in fixing the BSOD error.
Note: If updating the network drivers didn’t help in fixing the “Windows could not find a driver for your network adapter” error, you can also try to uninstall the very same drivers and restart your Windows 10 PC. After that, the system itself will reinstall the drivers you just uninstalled. Alternatively, you can also download and install the drivers from the manufacturer’s website directly.
To reinstall the network adapter driver, refer to these steps:
Open the Devices Manager from the Win X Menu.
Then locate the device drivers and right-click on them to open the Properties.
After that, switch to the Driver tab and click on the Uninstall Device button.
Follow the screen option to completely uninstall it.
Finally, restart your computer. It will just reinstall the device drivers automatically.
Option 2 – Try running the Hardware and Devices Troubleshooter
Apart from the Network Adapter Troubleshooter, you can also run another built-in troubleshooter in Windows, the Hardware and Devices Troubleshooter, as it can also help you in resolving the “Windows could not find a driver for your network adapter” error.
The first thing you need to do is click on Start and then on the gear-like icon to pull up the window for Settings.
After opening Settings, look for the Update and Security option and select it.
From there, go to the Troubleshoot option located on the left-hand side of the list.
Next, select Hardware and Devices from the list and open the Troubleshooter and run it. Once it is doing its job, wait for it to complete the process and then restart the system.
After the system restarts, check if the problem’s now fixed. If not, refer to the next option given below.
Option 3 – Try performing a System Restore
You might also want to perform a System Restore that might help you in fixing the error. You can do this option either by booting into Safe Mode or in System Restore. If you are already in the Advanced Startup Options, just directly select System Restore and proceed with the next steps. And if you have just booted your PC into Safe Mode, refer to the steps below.
Tap the Win + R keys to open the Run dialog box.
After that, type in “sysdm.cpl” in the field and tap Enter.
Next, go to the System Protection tab then click the System Restore button. This will open a new window where you have to select your preferred System Restore point.
After that, follow the on-screen instructions to finish the process and then restart your computer and check if the problem is fixed or not.
rtf64x64.sys Blue Screen error happens in random intervals but it is a regular occurrence, it can happen when playing games, when watching movies, or even when the computer is idle. in this article we will guide you on how to resolve this error from the most simple steps you could take and do not worry, altho the error seems dreadfully and scary, it is nothing to worry about.
If you can boot Windows normally after error great, proceed with instructions, else reboot into safe mode or use installation media to boot.
Use official Microsoft online troubleshooter
Microsoft has an online blue screen troubleshooter that was made specifically for this kind of situation. Go to Troubleshoot screen error and answer questions needed. Most of the time this will be enough to solve any blue screen issue.
Update network and sound drivers
How is this error traced back to Realtek devices, go to the Realtek website and download drivers. Install them and reboot the system.
Use a dedicated software solution
DRIVERFIX is an application made for these and other kinds of driver issues and problems, it is one click automated solution for driver fixing. Visit the Driverfix site and download the application
Perform system Restore
If you have not managed to fix the issue with previous steps roll back to a previous restore point when everything was working.
Replace network or sound card
If everything failed including system restore then it is likely that it is a hardware malfunction. Replace faulty components and you should not receive errors anymore.
Microsoft starting as of today will block its Office 365 users if they are using Internet Explorer or early versions of Edge browsers.
So if you are using older non Chromium Edge versions of Microsoft browsers you can no longer access Office services until you switch. Now normally I would fully support this kind of decision since Internet explorer is a slow and vulnerable browser and the edge is similar in that regard.
The new edge browser is great and it should be used but the issue I have is that Office 365 is not free, it is a premium feature and I am wondering how Microsoft plans to deal with people that have already paid for service but suddenly cannot access it anymore.
Error code 0xC004E003 almost always appears when there are damaged files in the Windows operating system. These files could be corrupt for a number of reasons and are usually a serious danger to the life of the computer system. These file errors may be caused by a number of things. Incomplete installation setup, incorrect deletion of hardware or utilities, or an unfinished file erasure. The trigger might also be in the event that the computer system is contaminated with a virus or adware or spyware, or even by the improper shut down of the computer. Any of these scenarios have the possibility to result in the removal or corruption of data of the Windows system data files.
The data system files that are damaged will give linked data and archives that are missing or wrongly linked. These are needed for the proper functioning of the software. This can also happen when or after installing third-party software that might have changed the system files. If it is suspected that a program installation will need to be stopped, it is best to let it run through the setup and then delete it later. While it installs, it is altering program files, and likely rearranging them. Stopping this in the middle can scramble files associated with the program and files vital to the usage of the computer.
Solution
Error Causes
This error will pop up after installing third-party software that has changed the system files. These system files are necessary to finish the activation process. A restore point will be necessary if it is ultimately determined that a system restore is necessary, to bring the computer back to the state it was in previous to the failed installation.
Error code “0xC004E003” appears and does not allow the system to continue the install.
The computer will not allow any further access or installation of the program.
The computer may crash.
The third-party program will not have installed completely or successfully.
The system will not start up correctly.
Personal files are corrupt or missing.
Further Information and Manual Repair
There are several steps that can be taken when the error code 0xC004E003 appears. It is helpful to know that this can occur from trying to install third party software. Going forward, do not attempt to install third-party software that is not trusted, and does not attempt to abruptly stop the third-party software from installing. This may cause the program to corrupt the files or delete important files. Recovering from this error can be easy if there is a recent restore point already backed up in the recovery portion of the system's files.
Method One
Run an error scan. The problem should be resolved after rebooting the computer once these steps have been completed.
Download and save an error code fix utility.
Setup the program and then click the Scan button.
Click the Repair Errors button when the diagnostic has been completed successfully.
Reboot the computer.
Method Two
Best when utilized by an expert.
Start the system up and sign in as the admin.
Click on Get Started, then select Programs, Accessories, Tools, and then System Restore.
On the next screen, click on Restore my PC to an Earlier Period, and then click Next.
Select the most recent system restore date within the drop-down menu of “select restore point”.
Click Next.
Click Next on the confirmation window.
Reboot the system after the system has finished restoring.
Method Three
Another option for restoring. This method can be used by a novice.
Right-click on the Start button, then select Control Panel.
Look for the Control Panel for Recovery.
Select Recovery, then Open System Restore, then Next.
Choose the restore point right before the problematic installation.
Click Next, click Finish.
NOTE: If there are no restore points available, the system recovery may not be turned on. To check this, go to Control Panel, and select Recovery. Configure System Restore, Configure. Then, select Turn on system protection. Having a current restore point for a computer ensures the ease of recovery if any problems with the computer arise.
If you wish to always have at your disposal a utility tool to fix these Windows 10 and other related issues when they do arise, download and install a powerful automated tool.


 To personalize the lock screen do:
 Originally Microsoft has imagined its widgets menu as Microsoft-only widgets but it seems that they have changed their mind.
Due to the latest leak, it seems that Microsoft will open the widgets menu to 3rd party developers as well but at launch, it will be only official widgets. It was hinted that later widgets menu will be open to developers who want to bring their own stuff into it.
Distribution, date, and technology that will need to be used in order to create your widget have not been discussed nor leaked at a given time but in some way, I am very glad that at least some customization will be in Windows 11.
It is funny and amusing how some things that were in Windows Vista are getting back like glass design, round corners, and widgets. Let’s just hope Windows 11 will be a better Windows than Vista was.
Originally Microsoft has imagined its widgets menu as Microsoft-only widgets but it seems that they have changed their mind.
Due to the latest leak, it seems that Microsoft will open the widgets menu to 3rd party developers as well but at launch, it will be only official widgets. It was hinted that later widgets menu will be open to developers who want to bring their own stuff into it.
Distribution, date, and technology that will need to be used in order to create your widget have not been discussed nor leaked at a given time but in some way, I am very glad that at least some customization will be in Windows 11.
It is funny and amusing how some things that were in Windows Vista are getting back like glass design, round corners, and widgets. Let’s just hope Windows 11 will be a better Windows than Vista was.  Microsoft starting as of today will block its Office 365 users if they are using Internet Explorer or early versions of Edge browsers.
So if you are using older non Chromium Edge versions of Microsoft browsers you can no longer access Office services until you switch. Now normally I would fully support this kind of decision since Internet explorer is a slow and vulnerable browser and the edge is similar in that regard.
The new edge browser is great and it should be used but the issue I have is that Office 365 is not free, it is a premium feature and I am wondering how Microsoft plans to deal with people that have already paid for service but suddenly cannot access it anymore.
Microsoft starting as of today will block its Office 365 users if they are using Internet Explorer or early versions of Edge browsers.
So if you are using older non Chromium Edge versions of Microsoft browsers you can no longer access Office services until you switch. Now normally I would fully support this kind of decision since Internet explorer is a slow and vulnerable browser and the edge is similar in that regard.
The new edge browser is great and it should be used but the issue I have is that Office 365 is not free, it is a premium feature and I am wondering how Microsoft plans to deal with people that have already paid for service but suddenly cannot access it anymore. 