Shortcut virus is an easily spreadable and annoying combination of Worm and Trojan that hides all of your files and folders and then replaces them with shortcuts that look identical to replaced files and folders.
Once disguised it will wait patiently for a user's click and once that happens it will replicate itself and further infect the system. This rapid spread can lead to stolen personal data, some system hick-ups, and other system-related issues.
This malware mainly affects physical file transfer devices like for example and most USB drives, hard drives, and SD memory cards and it can easily transfer itself to the computer.
The advantage of this shortcut virus comparing it to others is that it is mostly undetected by a vast variety of antivirus software. So running just anti-virus software maybe not be enough to remove it from your system. Luckily for all unfortunate users that have caught this annoyance, it can be easily removed fully manually in a short time.
How to Remove Virus from USB and other removable media
Firstly plugin USB, SD, or removable drive. The infection will transfer to your computer when the infected drive is plugged in so before we go to clean the computer itself, clean each removable drive that you have. Also know that infection will spread from computers into removable devices as well if it is not cleaned.
Open the File Explorer and remember under which letter is removable drive registered. Open Command prompt but with administrator privileges and go to infected rive by typing its letter followed with “:” (for example D:) and press ENTER
Once you have successfully gone to infected drive type in command prompt:
Attrib -s -r -h /s /d *.*
This will unlock all original files back into removable storage, next copy all files to your computer, and format the removable drive. Once the format is complete, unplug the removable device. Continue to clean all devices with the same method.
How to Permanently Remove a Shortcut Virus from Your PC
Now once we have cleaned all removable devices it is time to fully clean the PC
Firstly open the task manager ( CTRL + SHIFT + ESC ), in the process tab find wscript.exe or wscript.vbs, right-click on it (or both if present), and select End Task. Now close the task manager and press Start. Inside start typing in registry editor to search for it and once found open it.
Find the following key inside the registry editor:
In the right panel, look for any strange-looking key names, such as odwcamszas, WXCKYz, OUzzckky, etc. For each one, run a Google search to see if it's related to shortcut viruses.
If any returns a positive match, right-click on them and select Delete. !!! Accidentally deleting an important key can cause Windows to become unstable, so double-check everything !!!.
Close the Registry Editor
Now press ⊞ WINDOWS + R to open the run dialog and type in it Msconfig followed by ENTER. Once the System Configuration window opens go to the Startup tab. In the Startup tab, look for any strange-looking .EXE or .VBS programs, select each one and click Disable. Close the Window.
Once again open the run dialog and type inside %TEMP% and press ENTER in order to open the Windows temp folder. Inside this folder delete everything.
A couple of Windows 10 users have reported an error on domain-connected systems when they tried accessing their computer systems remotely. This occurs when the network level authentication or NLA is enabled on the computer. If you are one of these users, you better keep reading as this post will guide you on how you can fix this error. To resolve this issue, there are several workarounds you can try. You can either disable this option directly via properties or you can also modify some registry entries or sub-keys and restart the system.
When you encounter this problem, an error message pops up that states:
“The remote computer that you are trying to connect to requires network level authentication (NLA), but your windows domain controller cannot be contacted to perform NLA. If you are an administrator on the remote computer, you can disable NLA by using the options on the Remote tab of the System Properties dialog box.”
Or you could also see this error message instead:
“The remote computer requires Network Level Authentication, which your computer does not support. For assistance, contact your system administrator or technical support.”
Before you proceed in troubleshooting the problem using the options provided below, you need to create a backup for your data or system restore point as well as make a copy of any registry entries you are going to modify.
Option 1 – Disable Network Level Authentication via Properties
The NLA is a useful tool that provides your computer with extra security and helps network administrators in controlling who can log into the system with just a click of a single box. However, there are times when it can become a disadvantage and could prevent you from accessing your system remotely. Thus, you need to disable it using Properties.
Tap the Win + R keys to open the Run dialog box.
After that, type in “sysdm.cpl” and tap Enter to open System Properties.
Next, go to the remote tab and uncheck the checkbox for the “Allow connections only from computers running Remote Desktop with Network Level Authentication (recommended)” option.
Now click the Apply button to save the changes made and exit System Properties and then try logging into the remote computer again and see if the problem is fixed or not.
Option 2 – Disable NLA via Registry Editor
Note that you can only use this option if the first one didn’t work for you. Take note that this option will require you to restart your PC completely which could mean some downtime if your computer is running a production server. So make sure to save all your work.
Tap the Win + R keys to open the Run dialog box and then type in “Regedit” in the field and tap Enter to open the Registry Editor.
From there, click on File > Connect Network Registry and input the details of the remote computer and then try to connect.
Navigate to the path below after you’re connected:
HKLM >SYSTEM > CurrentControlSet > Control >Terminal Server > WinStations > RDP-Tcp
After that, change the values given below to “0”
SecurityLayer
UserAuthentication
The navigate to PowerShell and execute this command – restart-computer
Option 3 – Disable NLA via PowerShell
PowerShell allows you to tap into the remote computer and once you’ve targeted the machine, you can execute the commands given below to disable NLA.
Tap the Win + S to open Search and then type in “PowerShell” in the field. Right-click on the related result and select the “Run as administrator” option.
After opening PowerShell, execute the command below:
Once in the PowerShell, execute the following command:
$TargetMachine = “Target-Machine-Name”(Get-WmiObject -class “Win32_TSGeneralSetting” -Namespace rootcimv2terminalservices -ComputerName $TargetMachine -Filter “TerminalName=’RDP-tcp'”).SetUserAuthenticationRequired(0)
Note: In the command given, the “Target-Machine-Name” is the name of the machine you are targeting.
Option 4 – Use the Group Policy Editor to disable NLA
Another option you can use to disable NLA is via the Group Policy Editor. This is ideal for you if you are blanket disabling. Just take note that the Group Policy Editor is a powerful tool and that if you make some mistakes by changing values you have no clue about, you can render your computer useless so make sure that you create a backup for all the values before you proceed.
Tap the Win + R keys to open the Run dialog box.
Then type in “gpedit.msc” and tap Enter to open the Group Policy Editor.
From there, go to this path – Computer Configuration > Administrative Templates > Windows Components > Remote Desktop Services > Remote Desktop Session Host > Security
After that, search for “Require user authentication for remote connections by using Network Level Authentication” and set it to disabled.
In this post, you will be guided on how you can fix error 0x80070013 while executing various operations in your Windows 10 computer like System Restore, Windows Backup, or Windows Updates. When you encounter error 0x80070013, you will see the following error messages.
For System Restore, it states:
“System Restore did not complete successfully. Your computer’s system files and settings were not changed.Details: System Restore failed while scanning the file system on the drive <Partition Letter>The drive might be corrupt. You might want to retry System Restore after running chkdsk /R on this disk.An unspecified error occurred during System Restore. (0x80070013)You can try System Restore again and choose a different restore point. If you continue to see this error, you can try an advanced recovery method.”
Whereas in Windows Backup, it states:
“Check your backup, Windows Backup failed while trying to read from this shadow copy on one of the volumes being backed up. Please check in the event logs for any relevant errors.The backup failed, The media is write protected (0x80070013).”
On the other hand, you will see the following error message in Windows Update:
“There were some problems installing updates, but we’ll try again later. If you keep seeing this and want to search the web or contact the support for information, this may help: (0x80070013).”
There are several suggestions you can check out to fix the error depending on where you encountered it. If you encountered it while running Windows Updates, then you can try to reset the Windows Update components or run the Windows Update Troubleshooter. And if you got the error when running System Restore, you can try to run a System File Checker scan or the DISM tool as well as the CHKDSK utility. Lastly, if you got this error when running the Windows Backup service, you can try to check its status in the Services Manager.
Error 0x80070013 in Windows Updates:
Option 1 – Try to reset the Windows Update components
Open Command Prompt with admin privileges.
After that, type each one of the following commands and hit Enter after you key in one after the other.
net stop wuauserv
net stop cryptsvc
net stop bits
net stop msiserver
Note: The commands you entered will stop the Windows Update components such as Windows Update service, Cryptographic services, BITS, and MSI Installer.
After disabling WU components, you need to rename both the SoftwareDistribution and Catroot2 folders. To do that, type each one of the following commands below, and don’t forget to hit Enter after you type one command after the other.
Next, restart the services you’ve stopped by entering another series of commands. Don’t forget to hit Enter after you key in one command after the other.
net start wuauserv
net start cryptsvc
net start bits
net start msiserver
Close Command Prompt and reboot your PC.
Option 2 – Run the Windows Update Troubleshooter
You might also want to run the Windows Update Troubleshooter as it could also help in fixing error 0x80070013. To run it, go to Settings and then select Troubleshoot from the options. From there, click on Windows Update and then click the “Run the troubleshooter” button. After that, follow the next on-screen instructions and you should be good to go.
Error 0x80070013 in System Restore:
Option 3 – Try to run both Systems File Checker scan and DISM tool
Running the System File Checker scan as well as the DISM tool can help you resolve error 0x80070013 while performing System Restore. Refer to these steps to do so.
Open the Command Prompt with admin privileges.
After opening Command Prompt, execute this command to run a System File Checker scan: sfc /scannow
Once the scan is completed, restart your computer and then see if the error is now fixed. If not, you can run the DISM tool.
Open Command Prompt with admin privileges again.
Then type in the following commands and make sure to hit Enter right after you type each one of them in order to properly run the DISM tool:
Dism /Online /Cleanup-Image /CheckHealth
Dism /Online /Cleanup-Image /ScanHealth
Dism /Online /Cleanup-image /Restorehealth
Do not close the window if the process takes a while as it will probably take a few minutes to finish.
Option 4 – Run the CHKDSK utility
In the Windows Search box, type “command prompt” and from the search results, right-click on Command Prompt and select “Run as administrator”.
After opening Command Prompt, type this command and tap Enter: chkdsk <Partition Letter>: /f /r /x /b
The command you entered will start to check for errors and fix them automatically. Else, it will throw an error message saying, “Chkdsk cannot run because the volume is in use by another process. Would you like the schedule this volume to be checked the next time the system restarts? (Y/N)”.
Tap the Y key to schedule Disk Check the next time your computer restarts.
Error 0x80070013 in Windows Backup:
Option 5 – Try checking the status of the Windows Backup Service
First, you need to tap the Win + R keys on your keyboard to open the Run dialog box.
Next, type “services.msc” in the field and click OK or tap Enter to open the Windows Services Manager.
After that, you will see a list of services and from there, look for the Windows Backup Service and double click on it to open its Properties.
Then check if its Startup type is set to Disabled. If it is, then change it to “Manual”. Note that this service is essential as it provides backup and restores capabilities.
Now click on the Apply and OK buttons to save the changes made and then restart your computer. Check if the error is now gone.
Still sitting on the fence about upgrading to Windows 11 because you don’t know what to expect? Interestingly, the new edition somehow manages to be both a total revamp and still very similar to its predecessor in many ways. It’s really something to experience for yourself.
We do want to give you a sneak peek, though. So here’s an overview of the biggest changes Windows 11 brings to the table.
What’s different in Windows 11?
1. Visual changes
The first thing anyone will notice after switching to Windows 11 is the striking visual difference. The entire interface is smoother, cleaner and more minimalistic than on Windows 10, even resembling the macOS in some instances. Perhaps the most obvious change in appearance is the Start menu and Taskbar location, which is now at the bottom center. It’s actually very neat, but if you’re someone who loves familiarity, don’t worry, you can move it back to the left.
Centralized Taskbar and Start menu
Moreover, you’ll notice that the Taskbar includes a Microsoft Teams icon by default (which you can, of course, remove) and that Live Tiles are gone. The News and Interests section has also been removed - or, shall we say, replaced. As opposed to Windows 10, news, weather forecasts and other information are now displayed as widgets.
To add to the cleanliness of the UI, Microsoft also enhanced the ‘Snap Layouts’ feature to help you better organize your windows and maximize screen real estate. It’s similar to app grouping on your smartphone. In Windows 10 this feature is slightly restricted, as it requires some manual resizing and dragging. In Windows 11, you can just hover over the minimize/maximize option on a window, select a layout and throw the windows in there.
Snap Layouts
2. New accessibility features
Microsoft has certainly paid attention to accessibility with Windows 10, but Windows 11 takes this to a whole new level.
One of the ways Windows 11 has taken things up a notch is by adding the long-awaited ‘Live Captions’ feature and advanced Narrator options.
Live Captions apply both to media played on your PC as well as your own speech when you’re using the microphone. Keep in mind that, as with almost all kinds of subtitles, you have to be prepared for a potential delay. However, it’s barely noticeable and doesn’t take away from the usefulness of this awesome new feature whatsoever.
As for the Narrator, there are three new voice packs to choose from. Microsoft has tried to put emphasis on a more natural voice than we are used to. So, now you can choose between Aria, Jenny and Guy, who will read pretty much anything off your screen out loud. Aside from this, Microsoft has also expanded the list of braille displays supported by the Narrator feature. For users with anxiety or trouble concentrating, a welcomed addition is the Focus app, which is no longer part of the Clock app. It’s now separate and called ‘Focus Sessions’, automatically triggering the Do Not Disturb mode when activated. It blocks all pop-ups and flashes and lets you work in peace until you’re ready to switch it off.
3. Android apps
Android users may rejoice! Windows 11 supports the use of your favorite applications now.
Microsoft has done this by integrating the Amazon Appstore to the Windows 11 Microsoft Store. From there, you can download your favorite Android apps and use them on your PC in a smartphone-like window.
Unfortunately not too many apps are supported at this time, but Microsoft is working on making the emulation possible for many more. Also, the option is only available in specific regions at this moment - check out if you’re one of the lucky ones.
4. Improved gaming performance
Avid gamers will be happy to hear that Microsoft has put some effort into streamlining Windows 11 for their gaming needs.
To give gamers a supreme visual experience, Windows 11 offers the ‘Auto HDR’ feature. As long as your monitor is HDR-compatible, this feature will automatically adjust the colors, brightness and contrast of games without any input from you.
Another update is DirectStorage, which we were introduced to in Windows 10 already. In Windows 11, it’s been improved to tweak loading times and overall gaming performance efficiency even better. The predisposition for it to work optimally is that your device has an NVMe SSD.
The Xbox Game Bar also helps gamers towards a smoother experience. It allows in-game screenshots, viewing processes that are running (similar to the Task Manager), monitoring the CPU and GPU performance and frame rate, integrating the Xbox App and more. There’s also a number of widgets you can now use with the Game Bar, for example the Spotify widget.
Xbox Game Bar
Another cool addition is the Xbox Game Pass, which unlocks hundreds of games to play on your Xbox App, with new additions coming in every month.
5. Smart App Control
Aside from a sleek new look and better accessibility for all users, Windows 11 also comes with a security power-up. Bear in mind that this feature is only available on clean Windows 11 installs.
Smart App Control (SAC) is an AI-powered new feature designed to protect your PC from potential threats. It blocks untrustworthy apps and adware and helps detect potentially unwanted apps, maintaining your PC’s performance and keeping your system safe.
It comes with an ‘Evaluation’ mode, which you should definitely select when running SAC for the first time. That way, the app monitors your usage and assesses whether you’re a candidate for SAC. Some users need it to be on all the time, for others it might be too distracting. Evaluation mode will turn SAC on or off based on your usage.
Don’t disable SAC again unless you’re absolutely sure you don’t need it, since reenabling it will require a fresh install. We recommend you don’t turn it off, as it is a neat feature protecting your data and files from malware at all times.
Summary
Have we piqued your interest in trying Microsoft’s latest OS? It’s a pretty exciting new iteration, but we’ll let you find out for yourself. We hope you like it!
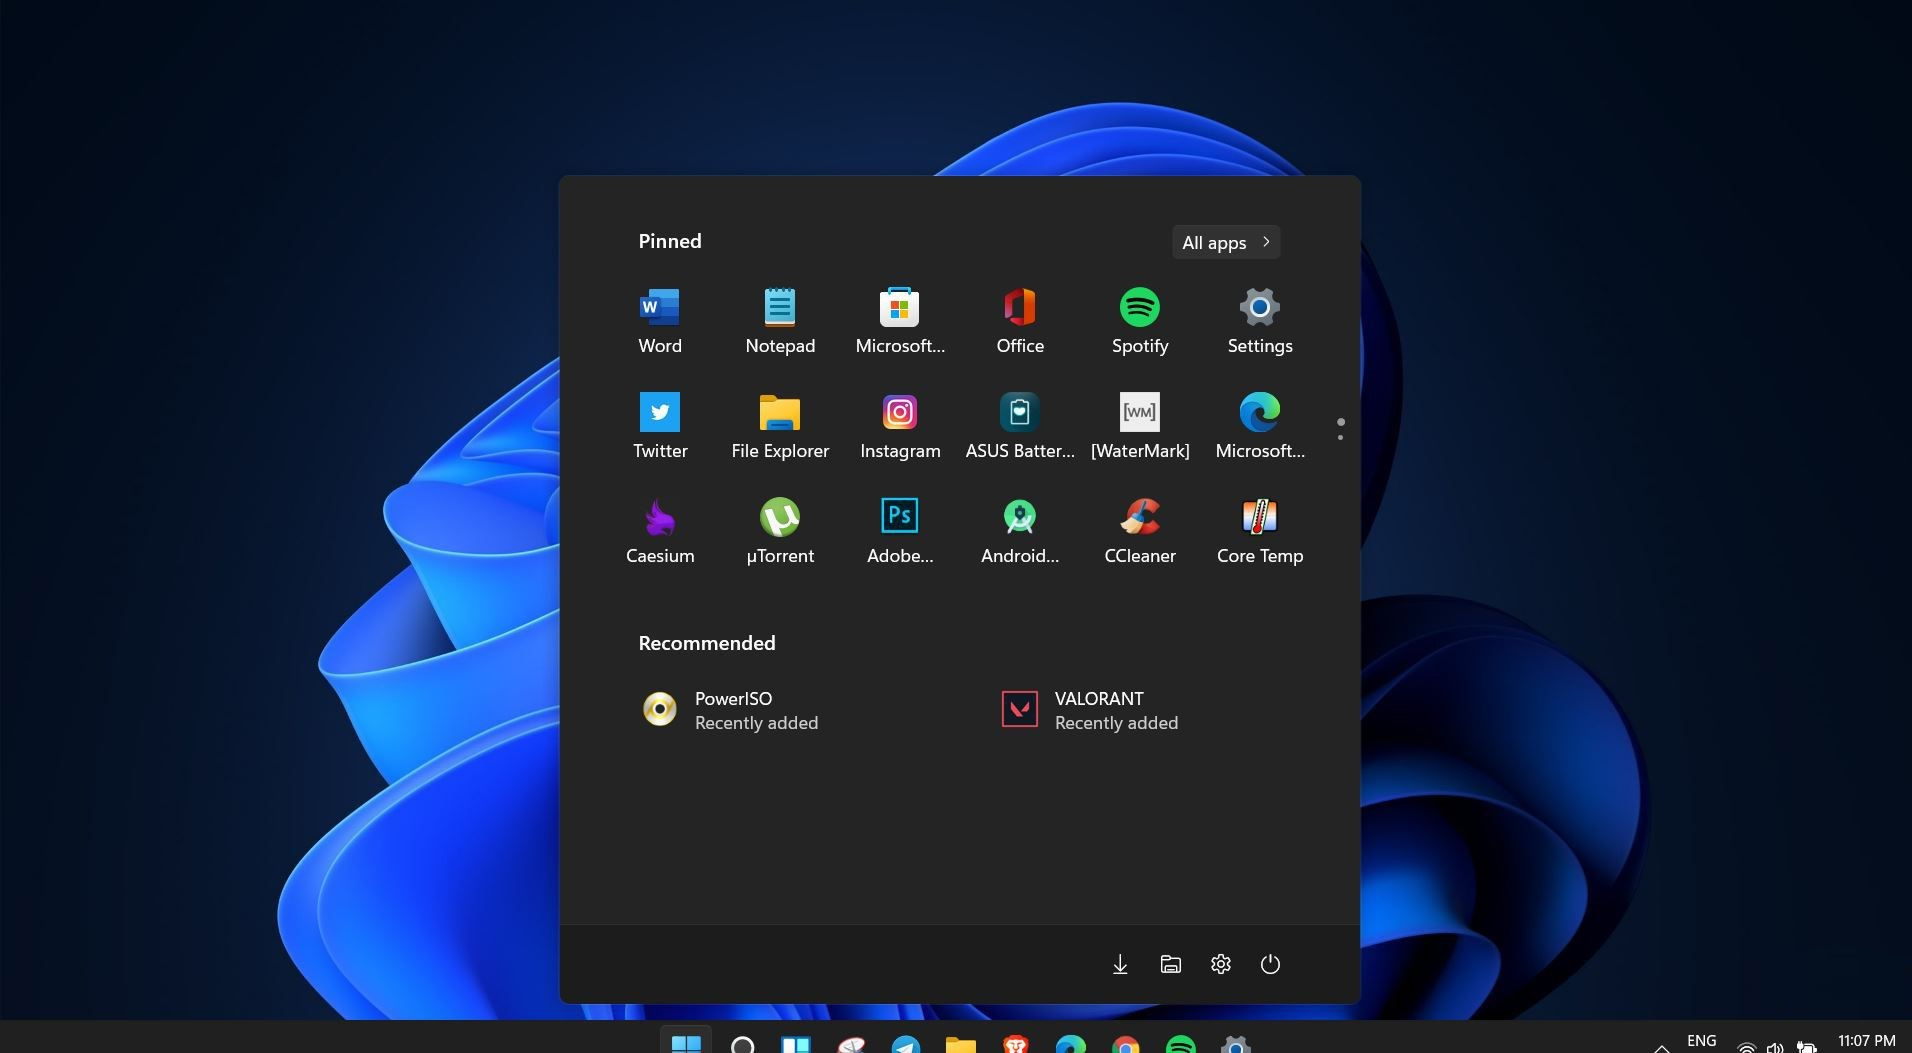
Windows 11 is coming soon, from its typical view and color scheme, Windows 11 will natively support dark mode.
The dark mode is very popular in many applications today, some large companies like Adobe, Autodesk, and many more have already adopted a dark color scheme for their software so it is logical for others to follow and Microsoft is aboard for it.
The dark mode itself has its benefits, for people who work on computer for longer period of time dark mode inside applications will throw less white and blue light on their eyes making workhours easier and pleasant on them.
As a person who does indeed spend a lot of time in front of the screen, I would advise you to switch to dark mode regardless of the time that you spend with a computer, your eyes will be grateful.
Switching to Dark mode in Windows 11
Open Windows 11 Settings by pressing ⊞ WINDOWS + I
Click on Personalization on the left sidebar
On the right side click on Color
In color options click on the drop-down menu right next to Choose your color
Select Dark
Your choice will be applied right away and you can safely close settings.
In case you don’t know, Microsoft Edge, the new default browser of Windows 10, is equipped with the essential tools that are needed to help web developers in testing their websites in the Edge browser. However, it is not without its flaws as there are instances when you could also encounter some errors when using DevTools. One of these errors is the “An error occurred while starting the profiling session” error. You can see this error message in the DevTools Memory Panel, worry not for this post will help you resolve it.
A memory panel is one that primarily measures your memory resource usage and compares heap snapshots in different states of code execution. The Memory panel also provides profiling of three different types, such:
Head Snapshot
Record Allocation timeline
Record Allocation profiles
Using a memory panel, you can find issues that affect the page performance in the most common scenarios like bloats and memory leaks.
There are two steps you need to carry out to fix this error that’s associated with the Memory Panel of Microsoft Edge (Chromium) DevTools. First, you need to access the Microsoft (R) Diagnostics Hub Standard Collector Service. Second, you need to restart this service. For detailed steps, follow the instructions provided below.
Step 1: Access the Microsoft (R) Diagnostic Standard Collector Service
To access the Microsoft (R) Diagnostic Standard Collector Service, follow these steps:
Tap the Win + R keys to open the Run dialog box.
Then type “services.msc” in the field and hit Enter or click OK.
This will open the Services Manager. Here, look for the Microsoft (R) Diagnostic Service from the Services panel that opens on the right-hand side.
Step 2: Now restart the Microsoft (R) Diagnostic Hub Standard Collector Service
After accessing the Microsoft (R) Diagnostic Standard Collector Service, right-click on it and select the Restart option.
Once it’s done, exit the Microsoft Edge Developer Tools as well as the tab.
Next, open a new tab and navigate to your page and tap the F12 key.
It seems that Microsoft is going to offer subscription and sales of individual office applications in the Windows Store. The office package will still be available as a package but for the first time, we will get single applications as standalone ones available for purchase.
This is a very interesting decision by Microsoft and I fully support it, this time users will be able to pay less and to choose only applications that they need instead of paying for the whole package and not using it.
Having an eMail in today's modern world is no longer a privilege or being geeky, it has surely become a necessity. From Facebook to LinkedIn or Steam many services today require you to have an account in order to use them, and in order to create an account, you need working eMail.
That being said many people today have several eMail accounts, one for social media, one for work, maybe even one for very close friends and family. How creating eMail today is completely free we might end up with several eMail accounts.
eMail clients have also evolved much since their first days and became more than just applications for receiving eMails, today they can take various different tasks having additional features built into them like calendar, batch eMail processing, etc.
Taking all of said into account I am presenting to you within my personal opinion some of the best eMail clients starting with free ones.
Best free eMail clients
Google Gmail
https://gmail.comIt would be very difficult to even start a free eMail list without mentioning Google's Gmail. Introduced all the way back in 2004 as an invite-only service it became over time the most popular email platform largely due to the fact Google is offering free eMail accounts.
There are a lot of good things to be said about Gmail itself, most of the area is clutter-free and the largest space is reserved for eMail itself letting users focus on what is important. WEB client itself means that you do not need to have any application installed on your device, altho via Google chrome, you can use Gmail offline offering you flexibility if needed.
The ability to connect and manage other accounts like Outlook, Yahoo, etc is just making Gmail even more attractive, and the snooze feature is a really neat little detail that will pause eMail notifications if you need to focus on other things.
Lack of organizing messages into folders is a little confusing since Gmail offers its own unique label system but sometimes I need to have old reliable save eMail to folder.
All in all, Gmail is a great service and it offers a great eMail on the go experience.
Mail eMail client
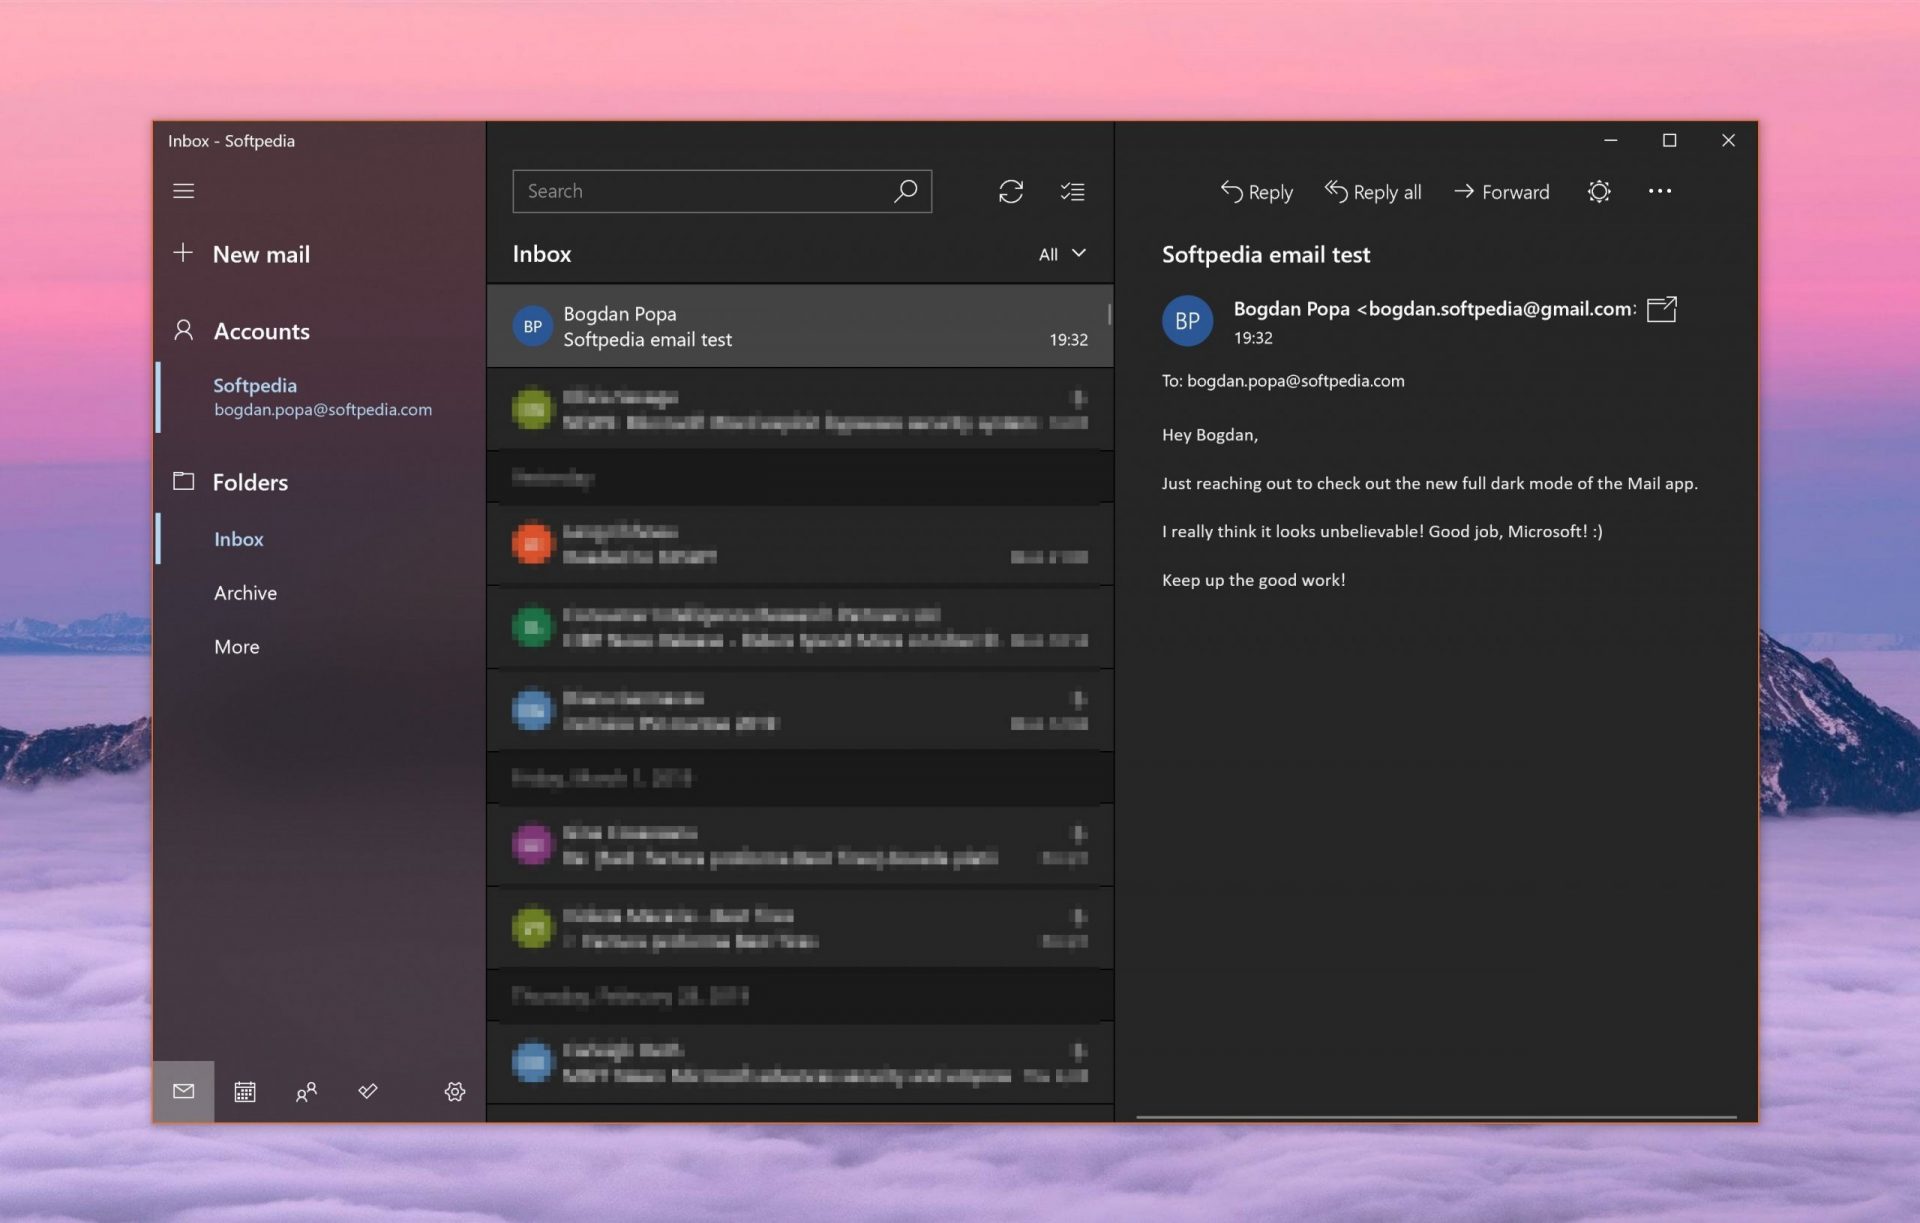
https://www.microsoft.com/en-us/p/mail-and-calendar/Free Windows eMail client simply called Mail is what was once outlook express. Mail itself has the ability to work with other popular accounts like Google Gmail account, Yahoo, iCloud etc. How it comes with Windows OS and it integrates very well with Microsoft Calendar, this eMail client is for many the first choice.
On the negative side, I might say this is a strip-down version of Outlook which is paid solution so some features are missing if we would compare the two.
Overall, a simple and nice eMail client worth your time, especially if you are on the Windows platform.
Mozilla Thunderbird
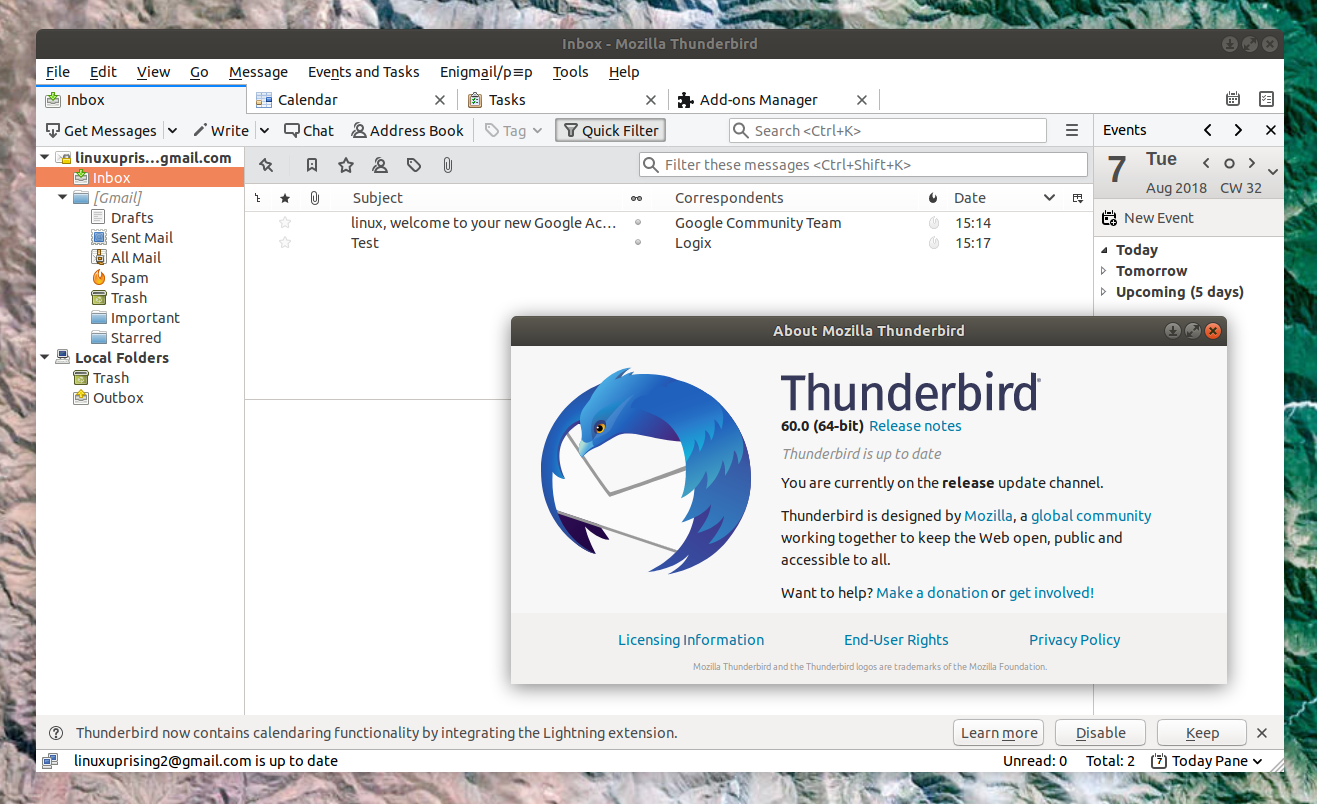
https://www.thunderbird.netGreat eMail client matching in functions against paid and premium solutions of big tech companies. Fueled with plenty of customization options and reskinning ones this eMail client offers a lot for its free price tag.
It is also fueled by Mozilla community focusing on privacy and security. It can work with any mail service and it is lightweight with a clean look, altho the look itself can be heavily customized.
The bad side is that client itself relies on email services to provide cloud-based emails, so if you are receiving your email via a service that does not have a cloud-based service in itself all of your received emails will be locked to the computer where you have received them. Also customizing it can be sometimes a little too technical for the average computer user.
All in all, Thunderbird is one great eMail client and it would be a shame not to use it because of its technical side, if you need a reliable and secure eMail client on a single machine, look no further than Thunderbird.
Paid eMail clients
Microsoft Outlook
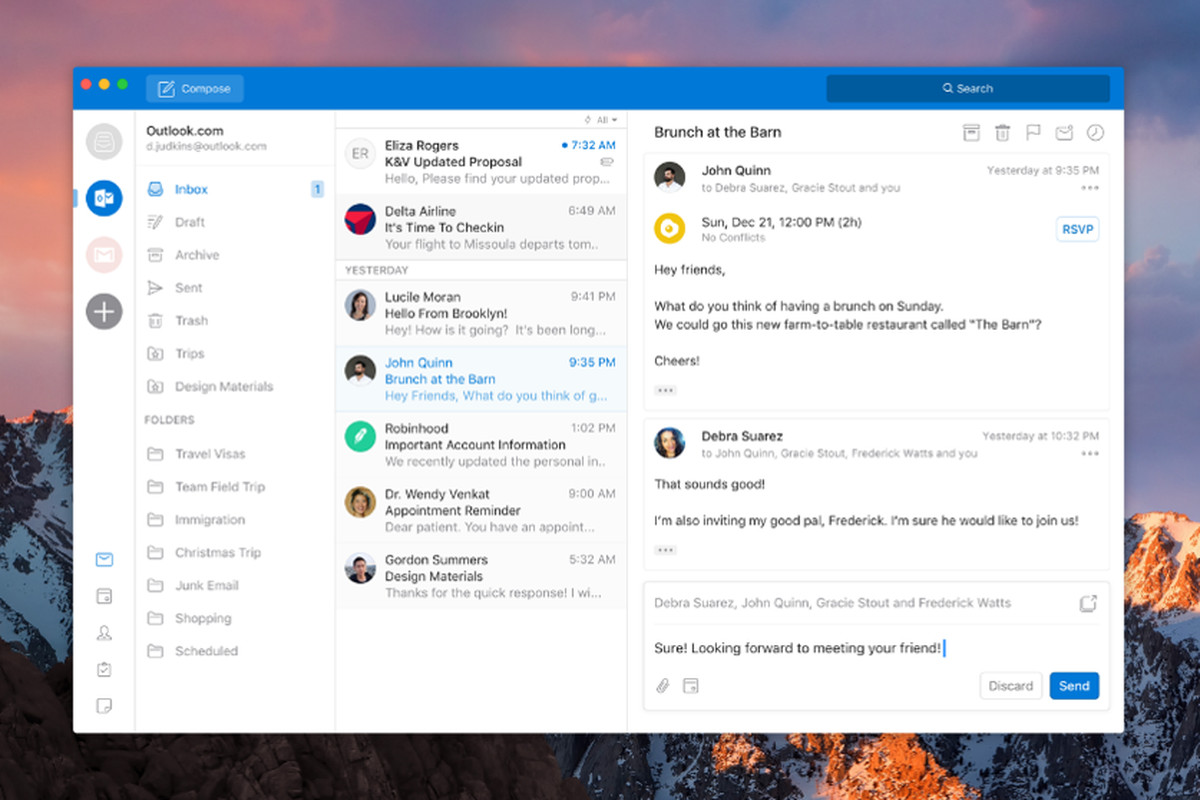
https://www.microsoft.com/en-us/microsoft-365/Outlook comes as a part of the Microsoft Office suite and as one of the oldest eMail clients, it is still widely popular and adopted through many users and businesses. It has tight integration with all Microsoft services and full integration with Calendar making it one of the if not the best eMail client out there.
Outlook also has a free online service completely free for personal use as well.
The downside is that you can not get it as a separate product if you want a business version other than as a part of the Office suite.
The final verdict would be that this is perhaps the best eMail client out but the big downside is that there is no desktop version outside the Office suite.
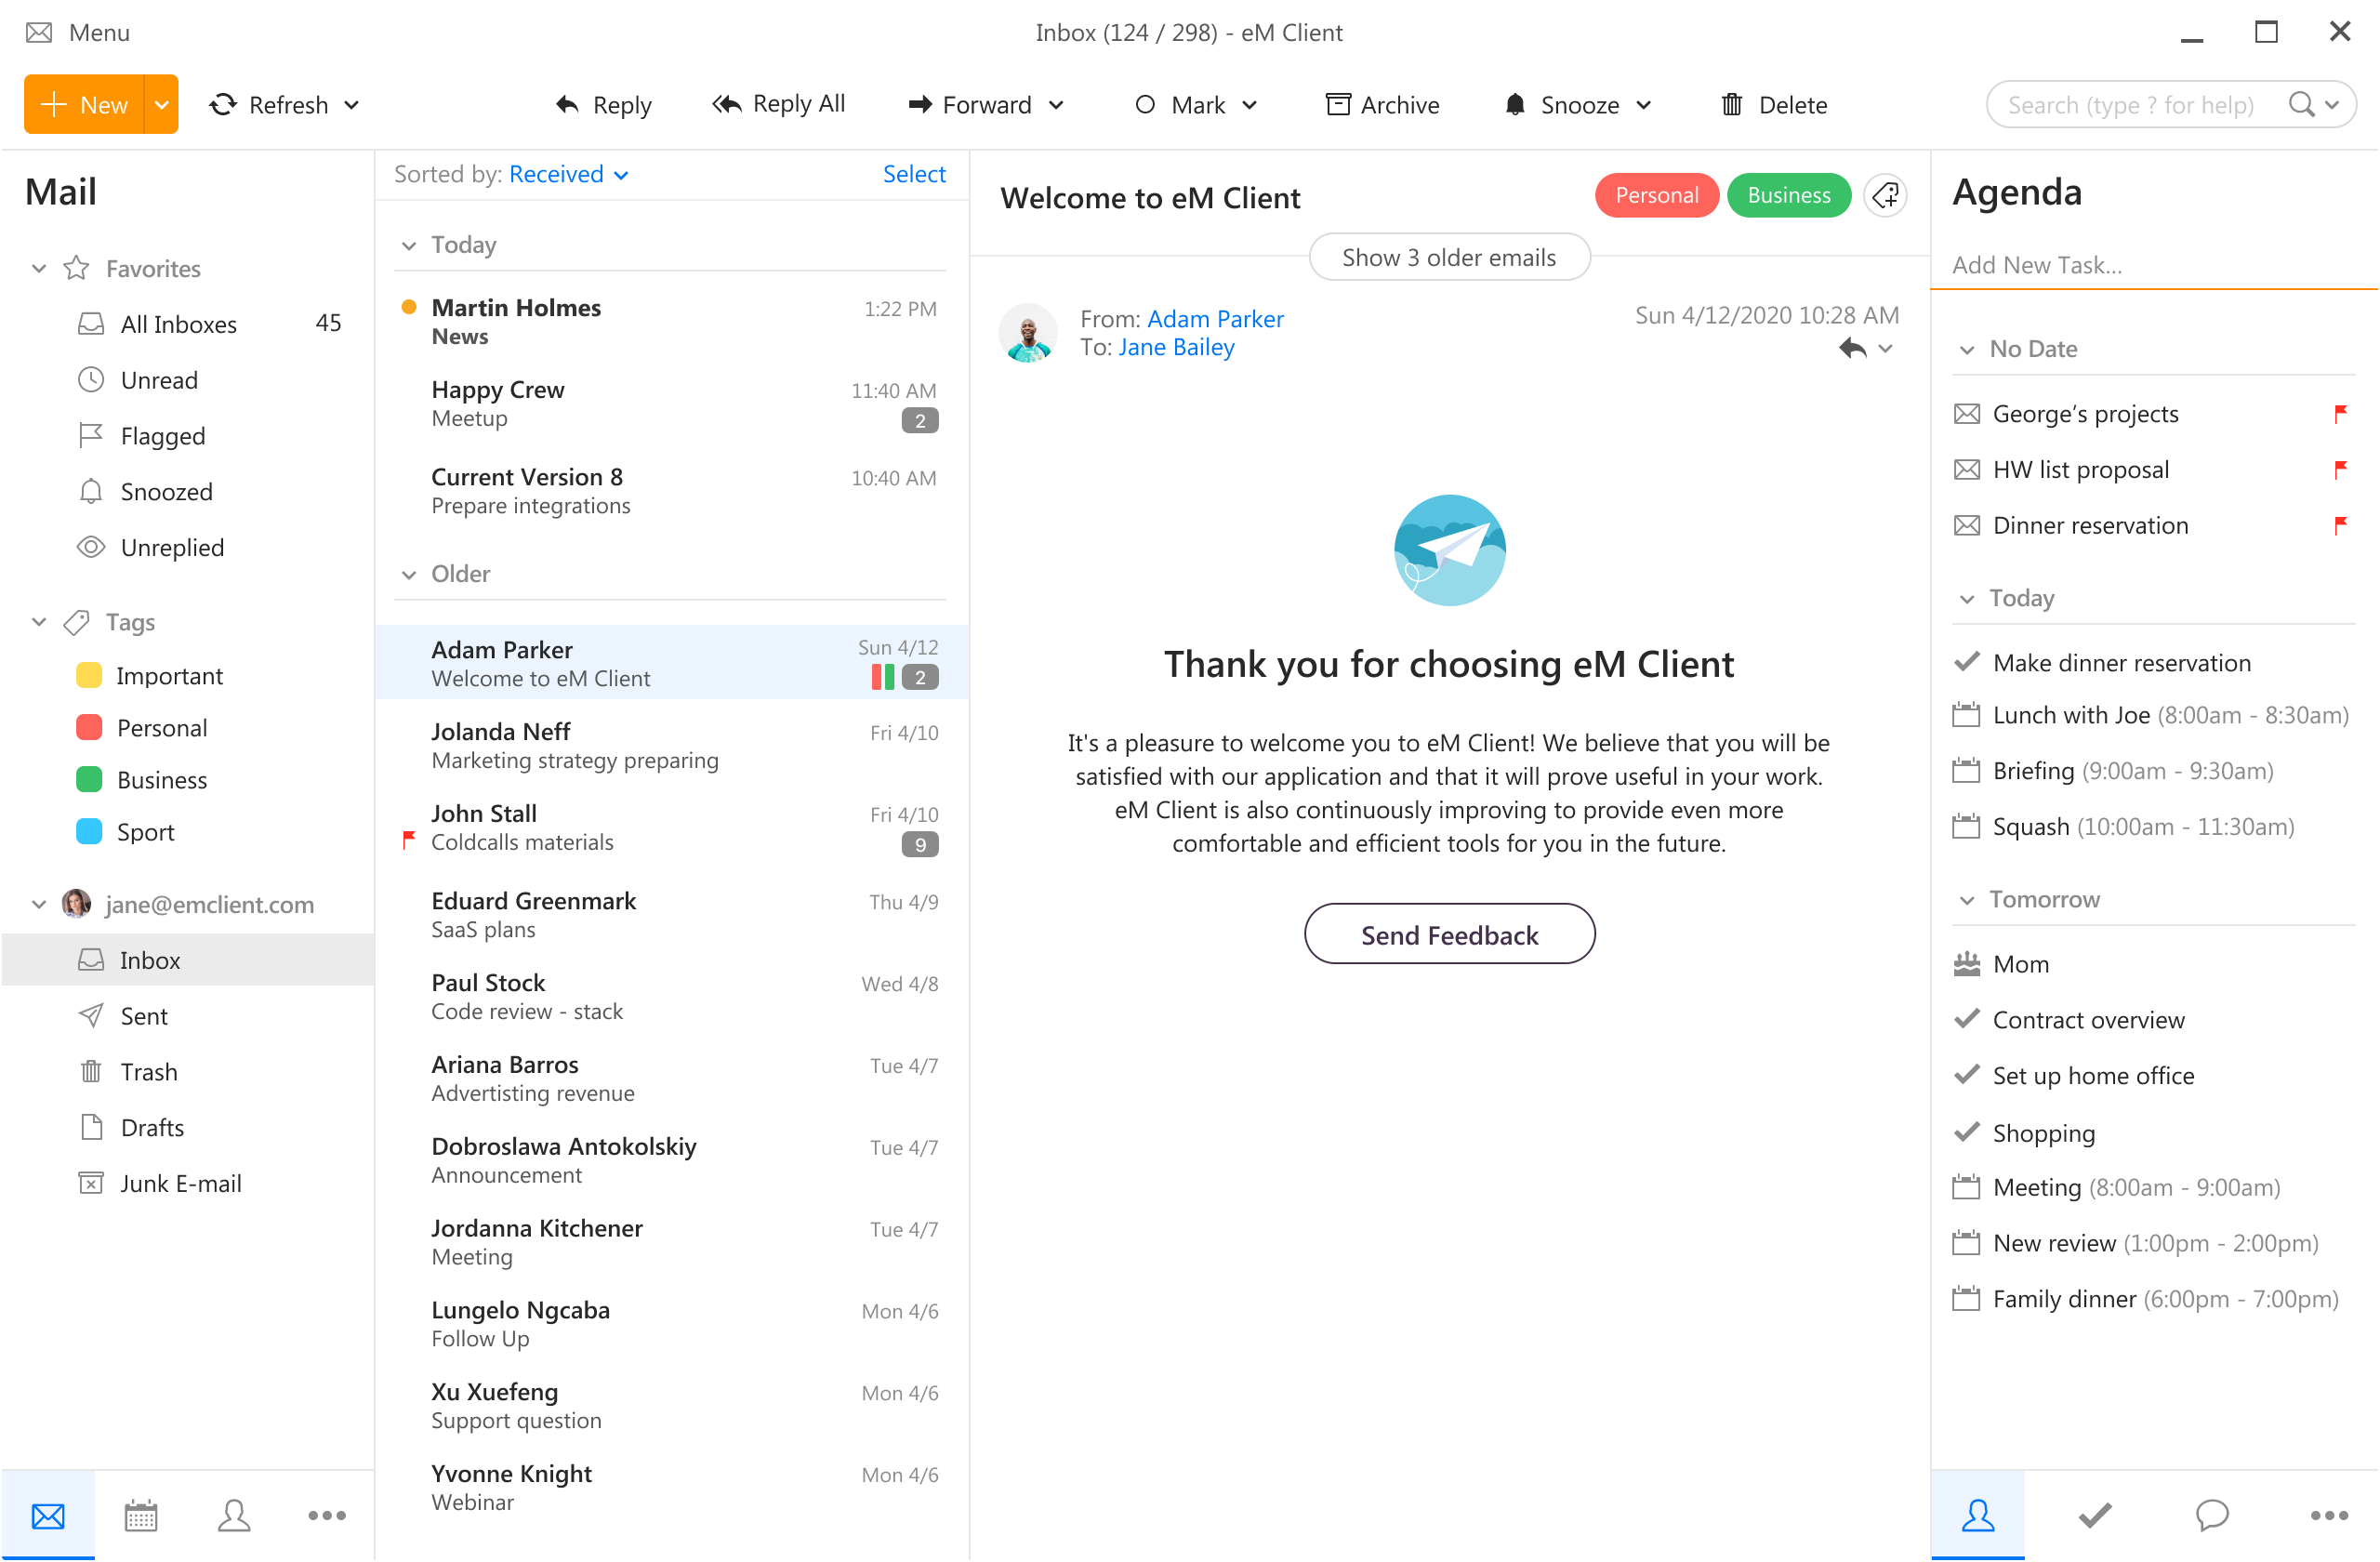
eM Client
https://www.emclient.com/eM Client offers a wide array of features, including a calendar, contacts, and chat. Support is provided for all the major email services including Gmail, Yahoo, iCloud, and Outlook.com. The latest version also offers PGP encryption, live backup, basic image editing capabilities, and auto-replies for Gmail.
Its automatic system makes it very easy to get emails from other services since there is no manual setting, all that is needed is to type in your email and eM Client will do everything else automatically.
A one-time purchase is not pricy and it could offer some features that some free clients are missing. Go check it out with a free trial and see if it is for you.
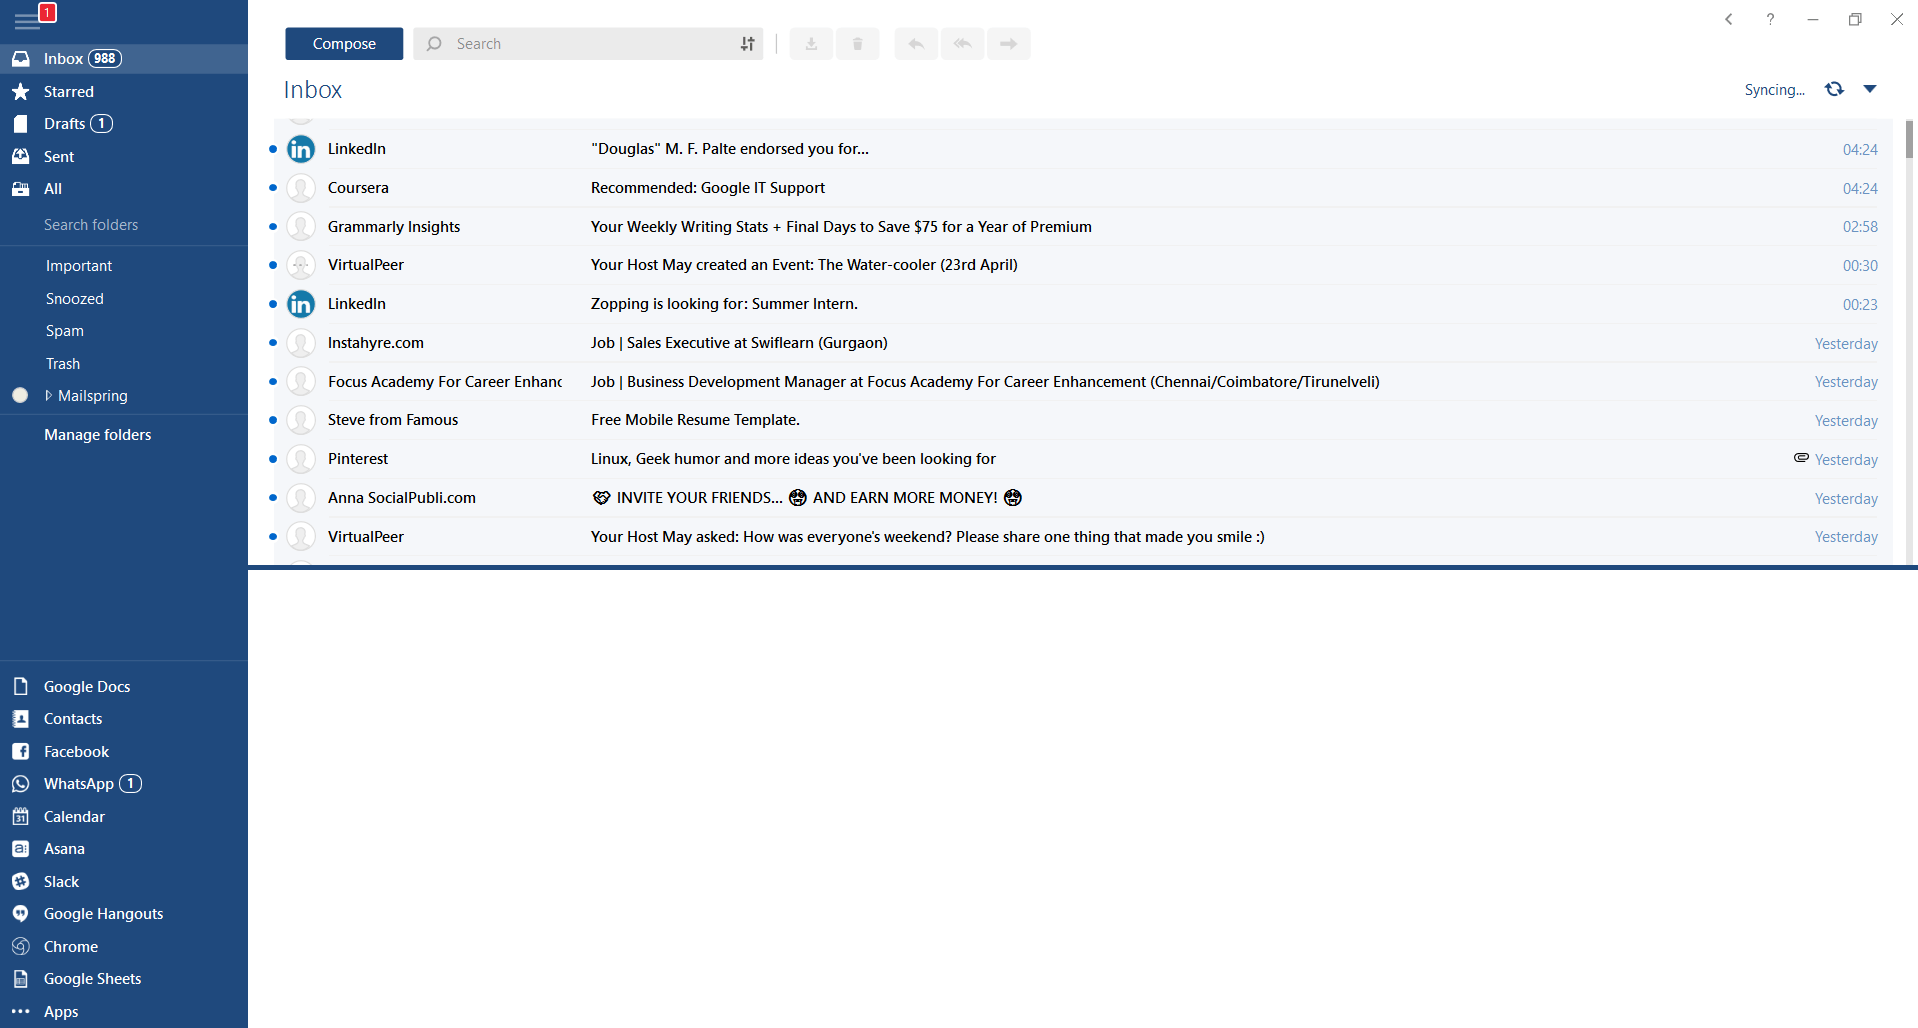
Mailbird
https://www.getmailbird.comThis eMail client's main focus is the simplicity of use with visual appeal while tackling multiple eMail accounts. It has many built-in apps along with a customizable interface. Unlike some more Microsoft-centric email clients, Mailbird Business supports a diverse range of integrated apps, including WhatsApp, Google Docs, Google Calendar, Facebook, Twitter, Dropbox, and Slack, all making for a better-streamlined workflow.
The downside of this client is the yearly subscription plan. I think people, in general, want to get away from software subscription plans so I will include this as a downside but bear in mind it is downside just in terms of a business plan not in the client itself.
Inky
https://www.inky.com/Inky is eMail client if you are looking for security. It uses AI along with machine learning in order to block all types of phishing attacks that can get through to other clients. The proprietary machine learning technology can literally read an email to determine if it has phishing content, and then is able to quarantine the email or deliver it with the malicious links disabled. It also takes things a step further and offers an analytics dashboard, which allows an administrator to see patterns of attacks based on dates, or targeted users.
The downside is that client itself is so much focused on security that sometimes some nonsecurity features get overlooked and provide a poor experience but if you need a good and greatly secured eMail client Inky is one to check out.
If you see the following error message in the File History tab of the File Recovery utility of the Windows Backup module in your Windows 10 computer, read on as this post will guide you in fixing it with the help of two potential fixes.
“An internal error has occurred: The specified resource name cannot be found in the image file. (0x90070716).”
You can also encounter this error when you run the System Image Backup function. As mentioned, you can resolve this error using two potential fixes namely checking the status of the Windows Backup Service and checking the settings in the Windows Registry. For more details, refer to the instructions provided below but before you proceed, it would be better if you create a System Restore point first.
Option 1 – Try checking the status of the Windows Backup Service
First, you need to tap the Win + R keys on your keyboard to open the Run dialog box.
Next, type “services.msc” in the field and click OK or tap Enter to open the Windows Services Manager.
After that, you will see a list of services and from there, look for the Windows Backup Service and double click on it to open its Properties.
Then check if its Startup type is set to Disabled. If it is, then change it to “Manual”. Note that this service is essential as it provides backup and restores capabilities.
Now click on the Apply and OK buttons to save the changes made and then restart your computer. Check if the error is now gone.
Option 2 – Try checking the Registry setting of Windows Backup
Tap the Win + R keys to open the Run dialog box.
Then type “Regedit” in the field and tap Enter to open the Registry Editor.
After opening the Registry Editor, navigate to this registry key: HKEY_LOCAL_MACHINESOFTWAREMicrosoftWindowsCurrentVersionWindowsBackup
From there, look for DWORDs named “ValidConfig” and “ValidSystemImageBackup” located in the right-side panel.
Once you found them, delete them or set both of their values to “0” and make sure that the base is Hexadecimal and click OK.
Now exit the Registry Editor and restart your computer to apply the changes made.
The File Explorer in Windows 10 provides several ways to organize the contents of folders and files in the system. Windows users can utilize some efficient styles to view the contents of the file system as per the user’s requirement. A user may opt to display the file picture in large size thumbnails while the other one could opt to set the icons of folder and files in a small or medium size list. On the other hand, while setting up several styles for the folder and file icons, some Windows 10 users have experienced some unusual issues where there is the Black background showing up behind folder icons. They tried refreshing the File Explorer a couple of times but it didn’t help in fixing the problem and the black squares are still visible on some folder icons.
The black squares behind the folder icons might look disturbing though it’s not really a big problem and is merely a graphical glitch that does not cause any damage or whatsoever to the content of the folder and files. The most likely cause of this glitch might have something to do with the corrupted system files or it could also be caused by outdated thumbnail caches. In addition, graphical glitches like this one could also occur if you are using out outdated graphics drivers. To fix this problem, you need to follow the options laid out below.
Option 1 – Try using the Disk Cleanup to remove Thumbnail files
The Disk Cleanup tool is one of the options you can try to fix the black squares behind the folder icons. Through this tool, you can delete all the Thumbnail files on your disk. To use it, refer to these steps:
Open the Search bar and type “disk cleanup” in the field.
After opening Disk Cleanup from the search results, then from the drop-down menu select the C: drive to clean up and click OK.
Wait for the scanning process to complete. Once it’s done, select the files you want to delete.
Ensure that you select the box labeled “Thumbnails” under the Files to Delete section then click on OK.
After that, a confirmation box will appear, just click on Delete files to delete the files permanently.
Restart your PC.
Option 2 – Try resetting the Thumbnail cache
You have the option to manually delete the Thumbnail Cache to resolve the black square background behind the folder icons issue. Follow the steps given below to reset the Thumbnail cache.
Open the File Explorer.
Next, navigate to the View tab and select the option with Hidden items to display all the hidden folders and files.
Next, go to this path: C:Users<username>AppDataLocal
In the given path, make sure that you put your actual username in the username field. Then look for a file named “IconCache.db”. Right-click on this file and click on Delete.
After that, go to this path: C:Users<username>AppDataLocalMicrosoftWindowsExplorer
From there, select all the files and delete them.
Note: If a prompt appears saying, “The files are in use and cannot be deleted”, simply select the “Do this for all current items” option and then click on Try Again. If you get an error message, click on Cancel to close the window and restart your computer.
Option 3 – Try updating or reinstalling the Graphics driver
Tap the Win + R keys to open the Run dialog box and then type in devmgmt.msc and tap Enter or click OK to open the Device Manager.
Expand the section for the outdated device drivers.
And then select the outdated driver(s) and right-click on it/them.
From the drop-down menu, select the Update Driver option if you wish to update the driver or select the Uninstall device if you want to uninstall the driver and then follow the on-screen instructions to install the latest version of the driver.
Restart your PC after the installation to allow the system to reinstall the driver.
If you spend a large amount of time gaming or working on a computer gaming chair is a very important asset. One other thing that is mostly looked past but could help greatly is a good desk. A great chair accompanied by a great desk can make your long sitting sessions more pleasant and more healthy which is very important in the long run.
Hey, but it is only a desk, what is so special about having an expensive desk? Well truth to be told desk is just a desk and any kind of desk can serve the purpose of hosting a keyboard, mice, and screen. But a good desk will offer some other advantages that may not seem so important but they could mean a lot like adjusting desk height so it fits perfectly on your size and sitting position making long hours more pleasant and lower stress on hands sitting on it.
Advanced desk features
Bytezone might not be a company that will sound familiar to you, mostly because they manufacture gaming chairs and desks, now in the gaming chairs world there are a lot of competitors and Bytezone has managed to make a name for itself despite this fact. But they are more popular in their gaming and office modern-looking desk category.
The advanced desk is made from carbon steel and plastic combination, it is very durable and it weighs 27kg. Now that is not really light but it is not very heavy if we compare it to wood desks. The top layer of the table is made from easy-to-clean material and the desk comes with a large mouse and keyboard pad.
The table itself includes a cup holder, headphones bracket under the table and it has a cable management drawer in the back. The desk is sized 66x120x76 cm. Also for anyone interested desk itself comes also with RGB lights for that true gaming feel.
 Once disguised it will wait patiently for a user's click and once that happens it will replicate itself and further infect the system. This rapid spread can lead to stolen personal data, some system hick-ups, and other system-related issues.


 Windows 11 is coming soon, from its typical view and color scheme, Windows 11 will natively support dark mode.
The dark mode is very popular in many applications today, some large companies like Adobe, Autodesk, and many more have already adopted a dark color scheme for their software so it is logical for others to follow and Microsoft is aboard for it.
The dark mode itself has its benefits, for people who work on computer for longer period of time dark mode inside applications will throw less white and blue light on their eyes making workhours easier and pleasant on them.
As a person who does indeed spend a lot of time in front of the screen, I would advise you to switch to dark mode regardless of the time that you spend with a computer, your eyes will be grateful.
Windows 11 is coming soon, from its typical view and color scheme, Windows 11 will natively support dark mode.
The dark mode is very popular in many applications today, some large companies like Adobe, Autodesk, and many more have already adopted a dark color scheme for their software so it is logical for others to follow and Microsoft is aboard for it.
The dark mode itself has its benefits, for people who work on computer for longer period of time dark mode inside applications will throw less white and blue light on their eyes making workhours easier and pleasant on them.
As a person who does indeed spend a lot of time in front of the screen, I would advise you to switch to dark mode regardless of the time that you spend with a computer, your eyes will be grateful.
 This is a very interesting decision by Microsoft and I fully support it, this time users will be able to pay less and to choose only applications that they need instead of paying for the whole package and not using it.
 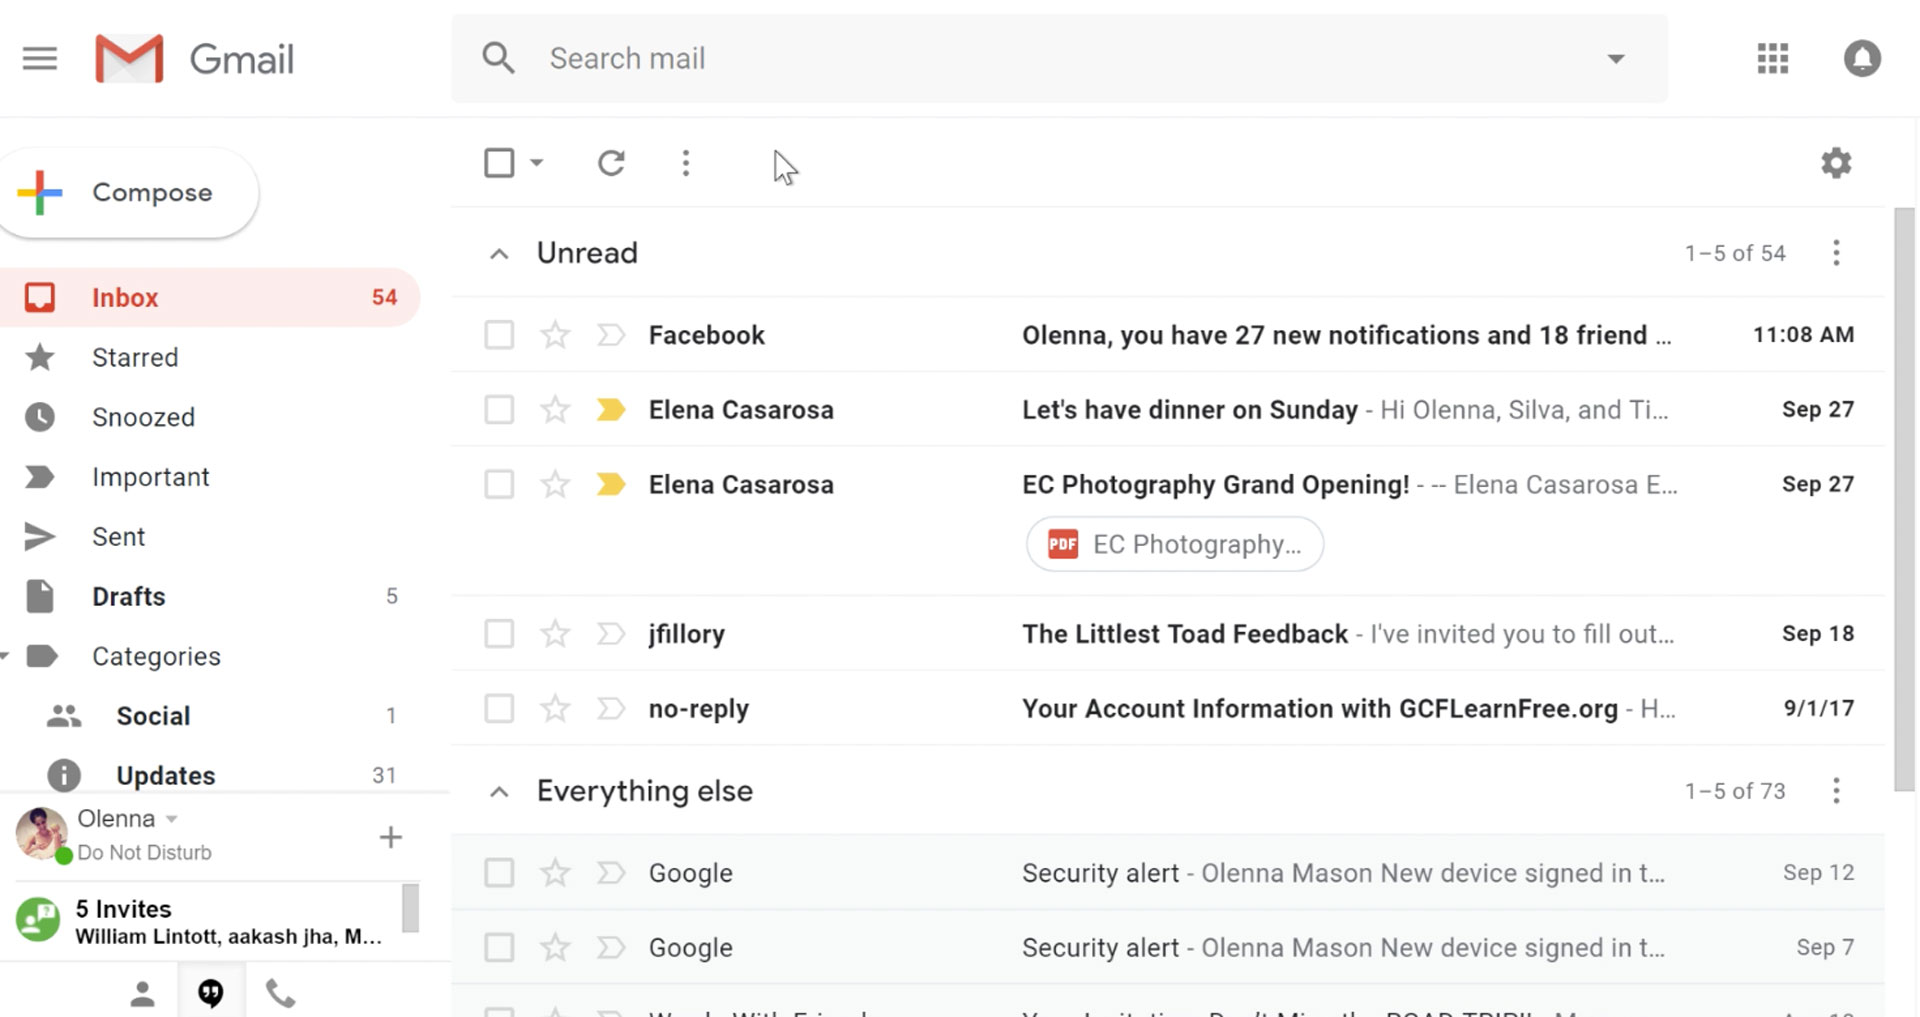 It would be very difficult to even start a free eMail list without mentioning Google's Gmail. Introduced all the way back in 2004 as an invite-only service it became over time the most popular email platform largely due to the fact Google is offering free eMail accounts.
There are a lot of good things to be said about Gmail itself, most of the area is clutter-free and the largest space is reserved for eMail itself letting users focus on what is important. WEB client itself means that you do not need to have any application installed on your device, altho via Google chrome, you can use Gmail offline offering you flexibility if needed.
The ability to connect and manage other accounts like Outlook, Yahoo, etc is just making Gmail even more attractive, and the snooze feature is a really neat little detail that will pause eMail notifications if you need to focus on other things.
Lack of organizing messages into folders is a little confusing since Gmail offers its own unique label system but sometimes I need to have old reliable save eMail to folder.
All in all, Gmail is a great service and it offers a great eMail on the go experience.
It would be very difficult to even start a free eMail list without mentioning Google's Gmail. Introduced all the way back in 2004 as an invite-only service it became over time the most popular email platform largely due to the fact Google is offering free eMail accounts.
There are a lot of good things to be said about Gmail itself, most of the area is clutter-free and the largest space is reserved for eMail itself letting users focus on what is important. WEB client itself means that you do not need to have any application installed on your device, altho via Google chrome, you can use Gmail offline offering you flexibility if needed.
The ability to connect and manage other accounts like Outlook, Yahoo, etc is just making Gmail even more attractive, and the snooze feature is a really neat little detail that will pause eMail notifications if you need to focus on other things.
Lack of organizing messages into folders is a little confusing since Gmail offers its own unique label system but sometimes I need to have old reliable save eMail to folder.
All in all, Gmail is a great service and it offers a great eMail on the go experience.
 Free Windows eMail client simply called Mail is what was once outlook express. Mail itself has the ability to work with other popular accounts like Google Gmail account, Yahoo, iCloud etc. How it comes with Windows OS and it integrates very well with Microsoft Calendar, this eMail client is for many the first choice.
On the negative side, I might say this is a strip-down version of Outlook which is paid solution so some features are missing if we would compare the two.
Overall, a simple and nice eMail client worth your time, especially if you are on the Windows platform.
Free Windows eMail client simply called Mail is what was once outlook express. Mail itself has the ability to work with other popular accounts like Google Gmail account, Yahoo, iCloud etc. How it comes with Windows OS and it integrates very well with Microsoft Calendar, this eMail client is for many the first choice.
On the negative side, I might say this is a strip-down version of Outlook which is paid solution so some features are missing if we would compare the two.
Overall, a simple and nice eMail client worth your time, especially if you are on the Windows platform.
 Great eMail client matching in functions against paid and premium solutions of big tech companies. Fueled with plenty of customization options and reskinning ones this eMail client offers a lot for its free price tag.
It is also fueled by Mozilla community focusing on privacy and security. It can work with any mail service and it is lightweight with a clean look, altho the look itself can be heavily customized.
The bad side is that client itself relies on email services to provide cloud-based emails, so if you are receiving your email via a service that does not have a cloud-based service in itself all of your received emails will be locked to the computer where you have received them. Also customizing it can be sometimes a little too technical for the average computer user.
All in all, Thunderbird is one great eMail client and it would be a shame not to use it because of its technical side, if you need a reliable and secure eMail client on a single machine, look no further than Thunderbird.
Great eMail client matching in functions against paid and premium solutions of big tech companies. Fueled with plenty of customization options and reskinning ones this eMail client offers a lot for its free price tag.
It is also fueled by Mozilla community focusing on privacy and security. It can work with any mail service and it is lightweight with a clean look, altho the look itself can be heavily customized.
The bad side is that client itself relies on email services to provide cloud-based emails, so if you are receiving your email via a service that does not have a cloud-based service in itself all of your received emails will be locked to the computer where you have received them. Also customizing it can be sometimes a little too technical for the average computer user.
All in all, Thunderbird is one great eMail client and it would be a shame not to use it because of its technical side, if you need a reliable and secure eMail client on a single machine, look no further than Thunderbird.
 Outlook comes as a part of the Microsoft Office suite and as one of the oldest eMail clients, it is still widely popular and adopted through many users and businesses. It has tight integration with all Microsoft services and full integration with Calendar making it one of the if not the best eMail client out there.
Outlook also has a free online service completely free for personal use as well.
The downside is that you can not get it as a separate product if you want a business version other than as a part of the Office suite.
The final verdict would be that this is perhaps the best eMail client out but the big downside is that there is no desktop version outside the Office suite.
Outlook comes as a part of the Microsoft Office suite and as one of the oldest eMail clients, it is still widely popular and adopted through many users and businesses. It has tight integration with all Microsoft services and full integration with Calendar making it one of the if not the best eMail client out there.
Outlook also has a free online service completely free for personal use as well.
The downside is that you can not get it as a separate product if you want a business version other than as a part of the Office suite.
The final verdict would be that this is perhaps the best eMail client out but the big downside is that there is no desktop version outside the Office suite.
 eM Client offers a wide array of features, including a calendar, contacts, and chat. Support is provided for all the major email services including Gmail, Yahoo, iCloud, and Outlook.com. The latest version also offers PGP encryption, live backup, basic image editing capabilities, and auto-replies for Gmail.
Its automatic system makes it very easy to get emails from other services since there is no manual setting, all that is needed is to type in your email and eM Client will do everything else automatically.
A one-time purchase is not pricy and it could offer some features that some free clients are missing. Go check it out with a free trial and see if it is for you.
eM Client offers a wide array of features, including a calendar, contacts, and chat. Support is provided for all the major email services including Gmail, Yahoo, iCloud, and Outlook.com. The latest version also offers PGP encryption, live backup, basic image editing capabilities, and auto-replies for Gmail.
Its automatic system makes it very easy to get emails from other services since there is no manual setting, all that is needed is to type in your email and eM Client will do everything else automatically.
A one-time purchase is not pricy and it could offer some features that some free clients are missing. Go check it out with a free trial and see if it is for you.
 This eMail client's main focus is the simplicity of use with visual appeal while tackling multiple eMail accounts. It has many built-in apps along with a customizable interface. Unlike some more Microsoft-centric email clients, Mailbird Business supports a diverse range of integrated apps, including WhatsApp, Google Docs, Google Calendar, Facebook, Twitter, Dropbox, and Slack, all making for a better-streamlined workflow.
The downside of this client is the yearly subscription plan. I think people, in general, want to get away from software subscription plans so I will include this as a downside but bear in mind it is downside just in terms of a business plan not in the client itself.
This eMail client's main focus is the simplicity of use with visual appeal while tackling multiple eMail accounts. It has many built-in apps along with a customizable interface. Unlike some more Microsoft-centric email clients, Mailbird Business supports a diverse range of integrated apps, including WhatsApp, Google Docs, Google Calendar, Facebook, Twitter, Dropbox, and Slack, all making for a better-streamlined workflow.
The downside of this client is the yearly subscription plan. I think people, in general, want to get away from software subscription plans so I will include this as a downside but bear in mind it is downside just in terms of a business plan not in the client itself.
 Inky is eMail client if you are looking for security. It uses AI along with machine learning in order to block all types of phishing attacks that can get through to other clients. The proprietary machine learning technology can literally read an email to determine if it has phishing content, and then is able to quarantine the email or deliver it with the malicious links disabled. It also takes things a step further and offers an analytics dashboard, which allows an administrator to see patterns of attacks based on dates, or targeted users.
The downside is that client itself is so much focused on security that sometimes some nonsecurity features get overlooked and provide a poor experience but if you need a good and greatly secured eMail client Inky is one to check out.
Inky is eMail client if you are looking for security. It uses AI along with machine learning in order to block all types of phishing attacks that can get through to other clients. The proprietary machine learning technology can literally read an email to determine if it has phishing content, and then is able to quarantine the email or deliver it with the malicious links disabled. It also takes things a step further and offers an analytics dashboard, which allows an administrator to see patterns of attacks based on dates, or targeted users.
The downside is that client itself is so much focused on security that sometimes some nonsecurity features get overlooked and provide a poor experience but if you need a good and greatly secured eMail client Inky is one to check out. 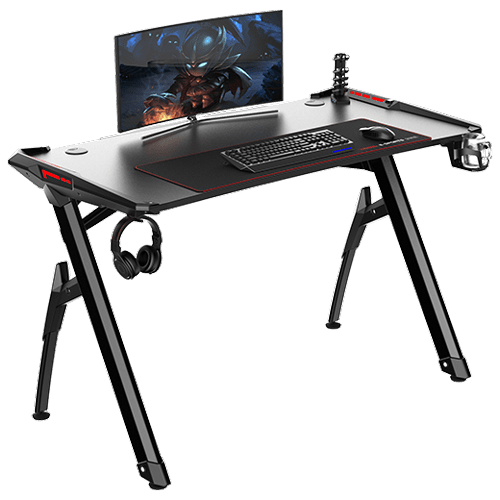 Advanced desk features