0x80040154 is a typical ‘class not registered’ error message. It occurs when PC users try to register and Run a 32-bit DLL (dynamic link library) Windows programs on a 64-bit version of Windows.
Solution
Error Causes
The 0x80040154 error causes include:
Incompatible software
Invalid entry command path
Damaged and corrupt DLL files
COM components not properly registered
Active X control and class issues
To avoid the inconvenience of running programs on your Windows PC, it is advisable to resolve the 0x80040154 error.
Further Information and Manual Repair
Here are some of the best methods that you can try to resolve the 0x80040154 error code on your PC:
# 1. Use Regsvr32.exe to Re-register the Failing COM Component
This is one way to resolve the 0x80040154 error code. Regsvr32.exe is a program that you can use to register DLLs (Dynamic Link Libraries) and ActiveX controls in the registry.
To use this file to re-register the failing COM components, simply open an elevated command prompt. If the 32-bit DLL is in the %systemroot%System32 folder, then move it to the %systemroot%SysWoW64 folder.
After that run the following command: %systemroot%SysWoW64regsvr32 <full path of the DLL>. This will help resolve the issue.
# 2. Install and Run Restoro PC Fixer.
Another alternative is to download Restoro. This is a new, advanced, and innovative PC repair tool deployed with multiple utilities like Active X control and class fixer, system optimizer, an antivirus, and a registry cleaner.
It has a user-friendly interface with simple navigation. This makes it quite easy to use for all levels of users. It is safe, fast, and compatible on all Windows versions.
The Active X control and class utility scans your entire PC, detects and resolves all errors like 0x80040154 triggering ActiveX and class ID issues in seconds.
Besides this, Restoro also offers other benefits. By running this software on your system you can also ensure good PC health and performance as it also removes anti-viruses, repairs registry issues, fixes damaged DLL files, and also boosts the speed of your PC.
DLL files often can get damaged and corrupt due to data overload. This is associated with the registry. If you don’t clean the registry frequently, it overloads with data and damages the DLL files.
However, with the help of the registry cleaner utility embedded inside this software, you can repair these files easily. The registry cleaner wipes out all the unnecessary files from your system occupying your disk space and simultaneously fixes the damaged DLL files and restores the registry.
However, if the DLL files are damaged due to a malware attack, the antivirus module takes care of them. It removes all the malicious software like adware, spyware, viruses, and Trojans and restores your files.
Click here to download Restoro on your PC and resolve the error 0x80040154 on your PC now!
SweetIM Toolbar for Internet Explorer is a browser add-on which adds various shortcuts to your browsers for easy access. This toolbar also changes your homepage to home.sweetim.com. The toolbar is typically bundled with the free Sweet Instant Messenger program and does not necessarily get uninstalled when Instant Messenger is removed from the user’s PC. Additionally, if the home page and search settings were modified by this toolbar, they need to be manually reverted back by the user.
This extension injects various ads into your browser search results and changes your default search engine. While you are browsing the internet, this software records your website surfing data, clicks, and possibly private information. Several Anti-virus programs have classified SweetIM Toolbar as a potentially unwanted application and are not recommended to keep.
About Browser Hijackers
Browser hijacking means that a malicious program code has power over and modified the settings of your web browser, without your approval. They are made to disrupt browser functions for many different reasons. Generally, the idea would be to force users to visit particular sites that are looking to increase their visitor traffic and produce higher ad revenue. Most people assume that such websites are legitimate and harmless but that is incorrect. Nearly every browser hijacker poses an actual threat to your online safety and it is vital to categorize them under privacy dangers. On top of that, hijackers can make the whole infected system vulnerable – other harmful malware and viruses would grab these opportunities to intrude into your system effortlessly.
Major signs that an internet browser has been highjacked
The common signs that indicate having this malicious software on your PC are: the home page of your respective browser is changed unexpectedly; bookmark and the new tab are also modified; the default search engine and the default web browser settings are altered; discover new toolbars that you didn’t add; you find lots of pop-up ads on your computer screen; web pages load very slowly and sometimes incomplete; Inability to navigate to particular sites, particularly antivirus and also other computer security software websites.
Exactly how they get into your computer or laptop
There are several ways your computer can get infected with a browser hijacker. They usually arrive by way of spam e-mail, via file sharing websites, or by a drive-by download. Many browser hijackings originate from add-on software, i.e., toolbars, browser helper objects (BHO), or extensions added to browsers to give them additional features. A browser hijacker may also come bundled up with some freeware that you unwittingly download to your computer system, compromising your internet security. A good example of some notorious browser hijackers includes Anyprotect, Conduit, Babylon, SweetPage, DefaultTab, RocketTab, and Delta Search, but the names are continually changing.
Browser hijackers can record user keystrokes to gather potentially invaluable information that leads to privacy concerns, cause instability on systems, severely disrupt the user experience, and eventually slow down the PC to a stage where it becomes unusable.
Removal
Some browser hijacking could be quite easily corrected by identifying and removing the corresponding malware application through your control panel. But, many browser hijackers are hard to eliminate manually. Regardless of how much you attempt to remove it, it may keep returning over and over. You should consider doing manual repairs only if you are a tech-savvy person, as there are risks associated with tinkering around with the computer registry and HOSTS file.
Browser hijackers could be effectively removed by installing the anti-malware application on the affected computer. One of the finest tools for repairing browser hijacker malware is Safebytes Anti-Malware. It will help you get rid of any pre-existing malware on your computer and gives you real-time monitoring and protection from new internet threats. Along with the antivirus tool, a PC optimizer will help you in getting rid of all related files and modifications in the registry automatically.
Can't Install Safebytes Anti-malware because of Malware? Do This!
Viruses could potentially cause a great deal of damage to your personal computer. Certain malware variants alter browser settings by including a proxy server or change the computer’s DNS settings. In such cases, you will be unable to visit certain or all internet sites, and thus unable to download or install the necessary security software to remove the infection. If you’re reading this, chances are you’re stuck with a virus infection that is preventing you to download or install Safebytes Anti-Malware software on your system. Although this kind of issue will be difficult to get around, there are some actions you can take.
Eliminate malware in Safe Mode
The Windows-based PC has got a special mode referred to as “Safe Mode” in which only the minimum required programs and services are loaded. If the malware is blocking access to the internet and affecting your computer, launching it in Safe Mode enables you to download anti-virus and run a diagnostic scan while limiting potential damage. To boot into Safe Mode, hit the “F8” key on the keyboard just before the Windows logo screen shows up; Or after normal Windows boot up, run MSCONFIG, check the Safe Boot under the Boot tab, and then click Apply. As soon as you restart the PC into Safe Mode with Networking, you can download, install, and update the anti-malware program from there. At this point, you can actually run the anti-virus scan to remove computer viruses and malware without any hindrance from another malicious application.
Switch over to an alternate browser
Malicious code could exploit vulnerabilities on a specific internet browser and block access to all antivirus software sites. If you appear to have malware attached to Internet Explorer, then switch over to an alternate internet browser with built-in safety features, such as Firefox or Chrome, to download your preferred antivirus program – Safebytes.
Make a bootable USB anti-virus drive
Another solution is to create a portable antivirus program onto your USB thumb drive. Follow these steps to run the anti-virus on the affected PC.
1) On a clean computer, install Safebytes Anti-Malware.2) Mount the USB drive onto the same computer.3) Double-click the Setup icon of the anti-malware software to run the Installation Wizard.4) Pick a USB flash drive as the place when the wizard asks you exactly where you want to install the application. Follow activation instructions.5) Disconnect the USB drive. You may now utilize this portable antivirus on the infected computer.6) Double-click the EXE file to open the Safebytes program from the thumb drive.7) Click “Scan Now” to run a complete scan on the infected computer for viruses.
Overview of SafeBytes Anti-Malware
Nowadays, an anti-malware program can protect your laptop or computer from different forms of online threats. But wait, how do choose the best one amongst plenty of malware protection applications that’s available on the market? You may be aware, there are numerous anti-malware companies and tools for you to consider. A few of them are good, some are ok types, and some will affect your computer themselves! You should go with a product that has gained a strong reputation and detects not just viruses but other kinds of malware as well. On the list of highly recommended applications by industry, analysts are SafeBytes Anti-Malware, a well-known security application for Windows computers.
SafeBytes anti-malware is a trusted software that not only protects your system completely but is also very user-friendly for people of all ability levels. Once you’ve got installed this application, SafeBytes advanced protection system will ensure that absolutely no viruses or malicious software can seep through your PC.
There are many great features you’ll get with this security product. Listed below are some of the great ones:
Active Protection: SafeBytes offers complete and real-time security for your laptop or computer. This tool will constantly monitor your PC for suspicious activity and updates itself regularly to keep current with the latest threats.
Antimalware Protection: With its advanced and sophisticated algorithm, this malware elimination tool can identify and remove the malware threats hiding within your computer system effectively.
Web protection: Through its unique safety score, SafeBytes informs you whether a site is safe or not to visit it. This will make sure that you’re always certain of your safety when browsing the net.
Lightweight Tool: This program is not “heavy” on the computer’s resources, so you’ll not see any overall performance difficulties when SafeBytes is operating in the background.
24/7 Live Expert Support: Support service is available 24 x 7 x 365 days via chat and email to answer your concerns.
Technical Details and Manual Removal (Advanced Users)
If you wish to manually remove SweetIM without the use of an automated tool, it may be possible to do so by removing the program from the Windows Add/Remove Programs menu, or in cases of browser extensions, going to the browsers AddOn/Extension manager and removing it. You will likely also want to reset your browser.
To ensure the complete removal, manually check your hard drive and registry for all of the following and remove or reset the values accordingly. Please note that this is for advanced users only and may be difficult, with incorrect file removal causing additional PC errors. In addition, some malware is capable of replicating or preventing deletion. Doing this in Safe Mode is advised.
The following files, folders, and registry entries are created or modified by SweetIM
Files:
File %COMMONAPPDATASweetIMMessengerconfusersmain_user_config.xml.
File %COMMONAPPDATASweetIMMessengerdatacontentdbcache_indx.dat.
File %PROGRAMFILESSweetIMMessengerdefault.xml.
File %PROGRAMFILESSweetIMMessengermgYahooMessengerAdapter.dll.
File %PROGRAMFILESSweetIMMessengermsvcp71.dll.
File %PROGRAMFILESSweetIMMessengermsvcr71.dll.
File %PROGRAMFILESSweetIMMessengerresourcesimagesAudibleButton.png.
File %PROGRAMFILESSweetIMMessengerresourcesimagesDisplayPicturesButton.png.
File %PROGRAMFILESSweetIMMessengerresourcesimagesEmoticonButton.png.
File %PROGRAMFILESSweetIMMessengerresourcesimagesGamesButton.png.
File %PROGRAMFILESSweetIMMessengerresourcesimagesKeyboardButton.png.
File %PROGRAMFILESSweetIMMessengerresourcesimagesNudgeButton.png.
File %PROGRAMFILESSweetIMMessengerresourcesimagesSoundFxButton.png.
File %PROGRAMFILESSweetIMMessengerresourcesimagesWinksButton.png.
File %PROGRAMFILESSweetIMMessengerSweetIM.exe.
File %PROGRAMFILESSweetIMToolbarsInternet Explorerdefault.xml.
File %PROGRAMFILESSweetIMToolbarsInternet Explorerresourcesabout.html.
File %PROGRAMFILESSweetIMToolbarsInternet Explorerresourcesaffid.dat.
File %PROGRAMFILESSweetIMToolbarsInternet Explorerresourcesbasis.xml.
File %PROGRAMFILESSweetIMToolbarsInternet Explorerresourcesbing.png.
File %PROGRAMFILESSweetIMToolbarsInternet Explorerresourcesclear-history.png.
File %PROGRAMFILESSweetIMToolbarsInternet Explorerresourcescontent-notifier.js.
File %PROGRAMFILESSweetIMToolbarsInternet Explorerresourcescontent-notifier-anim.gif.
File %PROGRAMFILESSweetIMToolbarsInternet Explorerresourcescontent-notifier-anim-over.gif.
File %PROGRAMFILESSweetIMToolbarsInternet Explorerresourcesdating.png.
File %PROGRAMFILESSweetIMToolbarsInternet Explorerresourcesdictionary.png.
File %PROGRAMFILESSweetIMToolbarsInternet Explorerresourcese_cards.png.
File %PROGRAMFILESSweetIMToolbarsInternet Explorerresourceseye_icon.png.
File %PROGRAMFILESSweetIMToolbarsInternet Explorerresourceseye_icon_over.png.
File %PROGRAMFILESSweetIMToolbarsInternet Explorerresourcesfind.png.
File %PROGRAMFILESSweetIMToolbarsInternet Explorerresourcesfree_stuff.png.
File %PROGRAMFILESSweetIMToolbarsInternet Explorerresourcesgames.png.
File %PROGRAMFILESSweetIMToolbarsInternet Explorerresourcesglitter.png.
File %PROGRAMFILESSweetIMToolbarsInternet Explorerresourcesgoogle.png.
File %PROGRAMFILESSweetIMToolbarsInternet Explorerresourceshelp.png.
File %PROGRAMFILESSweetIMToolbarsInternet Explorerresourceshighlight.png.
File %PROGRAMFILESSweetIMToolbarsInternet Explorerresourceslocales.xml.
File %PROGRAMFILESSweetIMToolbarsInternet Explorerresourceslogo_16x16.png.
File %PROGRAMFILESSweetIMToolbarsInternet Explorerresourceslogo_21x18.png.
File %PROGRAMFILESSweetIMToolbarsInternet Explorerresourceslogo_32x32.png.
File %PROGRAMFILESSweetIMToolbarsInternet Explorerresourceslogo_about.png.
File %PROGRAMFILESSweetIMToolbarsInternet Explorerresourcesmore-search-providers.png.
File %PROGRAMFILESSweetIMToolbarsInternet Explorerresourcesmusic.png.
File %PROGRAMFILESSweetIMToolbarsInternet Explorerresourcesnews.png.
File %PROGRAMFILESSweetIMToolbarsInternet Explorerresourcesoptions.html.
File %PROGRAMFILESSweetIMToolbarsInternet Explorerresourcesphotos.png.
File %PROGRAMFILESSweetIMToolbarsInternet Explorerresourcessearch-current-site.png.
File %PROGRAMFILESSweetIMToolbarsInternet Explorerresourcesshopping.png.
File %PROGRAMFILESSweetIMToolbarsInternet ExplorerresourcesSmileySmile.png.
File %PROGRAMFILESSweetIMToolbarsInternet ExplorerresourcesSmileyWink.png.
File %PROGRAMFILESSweetIMToolbarsInternet Explorerresourcessweetim_text.png.
File %PROGRAMFILESSweetIMToolbarsInternet Explorerresourcestoolbar.xml.
File %PROGRAMFILESSweetIMToolbarsInternet Explorerresourcesversion.txt.
File %PROGRAMFILESSweetIMToolbarsInternet Explorerresourcesvideo.png.
File %PROGRAMFILESSweetIMToolbarsInternet Explorerresourcesweb-search.png.
File %PROGRAMFILESSweetIMToolbarsInternet Explorerresourcesweb-toolbar.js.
File %PROGRAMFILESSweetIMToolbarsInternet Explorerresourcesyahoo.png.
Registry:
Directory %COMMONAPPDATASweetIMMessengerconfusers.
Directory %COMMONAPPDATASweetIMMessengerconf.
Directory %COMMONAPPDATASweetIMMessengerdatacontentdb.
Directory %COMMONAPPDATASweetIMMessengerdata.
Directory %COMMONAPPDATASweetIMMessengerlogs.
Directory %COMMONAPPDATASweetIMMessengerupdate.
Directory %COMMONAPPDATASweetIMMessenger.
Directory %COMMONAPPDATASweetIMToolbarsInternet Explorercache.
Directory %COMMONAPPDATASweetIMToolbarsInternet Explorer.
Directory %COMMONAPPDATASweetIMToolbars.
Directory %COMMONAPPDATASweetIM.
Directory %PROGRAMFILESSweetIMMessengerresourcesimages.
Directory %PROGRAMFILESSweetIMMessengerresources.
Directory %PROGRAMFILESSweetIMMessenger.
Directory %PROGRAMFILESSweetIMToolbarsInternet Explorerconf.
Directory %PROGRAMFILESSweetIMToolbarsInternet ExplorerMicrosoft.VC90.CRT.
Directory %PROGRAMFILESSweetIMToolbarsInternet Explorerresources.
Directory %PROGRAMFILESSweetIMToolbarsInternet Explorer.
Directory %PROGRAMFILESSweetIMToolbars.
Directory %PROGRAMFILESSweetIM.
Key HKEY_CLASSES_ROOT named SWEETIE.IEToolbar.1, plus associated values.
Key HKEY_CLASSES_ROOT named SWEETIE.IEToolbar, plus associated values.
Key HKEY_CLASSES_ROOT named SweetIM_URLSearchHook.ToolbarURLSearchHook.1, plus associated values.
Key HKEY_CLASSES_ROOT named SweetIM_URLSearchHook.ToolbarURLSearchHook, plus associated values.
Key HKEY_CLASSES_ROOT named Toolbar3.SWEETIE.1, plus associated values.
Key HKEY_CLASSES_ROOT named Toolbar3.SWEETIE, plus associated values.
Key 4D3B167E-5FD8-4276-8FD7-9DF19C1E4D19 at HKEY_CLASSES_ROOTTypeLib.
Key 82AC53B4-164C-4B07-A016-437A8388B81A at HKEY_CLASSES_ROOTCLSID.
Key A4A0CB15-8465-4F58-A7E5-73084EA2A064 at HKEY_CLASSES_ROOTCLSID.
Key EEE6C35B-6118-11DC-9C72-001320C79847 at HKEY_CLASSES_ROOTCLSID.
Key EEE6C35C-6118-11DC-9C72-001320C79847 at HKEY_CLASSES_ROOTCLSID.
Key EEE6C35C-6118-11DC-9C72-001320C79847 at HKEY_LOCAL_MACHINESOFTWAREMicrosoftWindowsCurrentVersionExplorerBrowser Helper Objects.
Key EEE6C35D-6118-11DC-9C72-001320C79847 at HKEY_CLASSES_ROOTCLSID.
Key EEE6C35E-6118-11DC-9C72-001320C79847 at HKEY_CLASSES_ROOTTypeLib.
Key EEE6C35F-6118-11DC-9C72-001320C79847 at HKEY_CLASSES_ROOTTypeLib.
Key EEE6C360-6118-11DC-9C72-001320C79847 at HKEY_CURRENT_USERSoftwareMicrosoftInternet ExplorerSearchScopes.
Key EEE6C360-6118-11DC-9C72-001320C79847 at HKEY_LOCAL_MACHINESOFTWAREMicrosoftInternet ExplorerSearchScopes.
Key 878E59AD181B66344A3316549572708A at HKEY_CLASSES_ROOTInstallerProducts.
Key E54D4DC11584D69448F0C2E257E2FC7B at HKEY_CLASSES_ROOTInstallerProducts.
Key Install at HKEY_CURRENT_USERSoftwareSweetIM.
Key Messenger at HKEY_LOCAL_MACHINESOFTWARESweetIM.
Key SweetIM.exe at HKEY_LOCAL_MACHINESOFTWAREMicrosoftWindowsCurrentVersionApp Paths.
Key SweetIM at HKEY_CURRENT_USERSoftware.
Key SweetIM at HKEY_LOCAL_MACHINESOFTWARE.
Key Toolbars at HKEY_CURRENT_USERSoftwareSweetIM.
Key Toolbars at HKEY_LOCAL_MACHINESOFTWARESweetIM.
Value (Default) at HKEY_LOCAL_MACHINESOFTWAREMicrosoftWindowsCurrentVersionApp PathsSweetIM.exe.
Value EEE6C35B-6118-11DC-9C72-001320C79847 at HKEY_CURRENT_USERSoftwareMicrosoftInternet ExplorerToolbarWebBrowser.
Value EEE6C35B-6118-11DC-9C72-001320C79847 at HKEY_LOCAL_MACHINESOFTWAREMicrosoftInternet ExplorerToolbar.
Value EEE6C35D-6118-11DC-9C72-001320C79847 at HKEY_CURRENT_USERSoftwareMicrosoftInternet ExplorerURLSearchHooks.
Value Path at HKEY_LOCAL_MACHINESOFTWAREMicrosoftWindowsCurrentVersionApp PathsSweetIM.exe.
Value simapp_id at HKEY_CURRENT_USERSoftwareSweetIM.
Value simapp_id at HKEY_LOCAL_MACHINESOFTWARESweetIM.
As you know, Windows allows you to share files between systems that are on the same network even though they are not connected physically. All you have to do is to make sure that the folder administrator allows access to the intended use and that your computer should be connected to the internet. Once you meet these conditions, you can share files between systems. However, recently a number of users reported that despite fulfilling these conditions, they end up getting errors instead when they try to access the shared drive. The error states:
“Error code: 0x80070035. The network path was not found.”
One of the common causes of this error is the antivirus program or the Firewall installed on your computer. It could also be that the drive is not shared in the first place or there are some issues with your network drivers. Whichever the case is, here are some potential fixes you need to check out to fix the Error code: 0x80070035.
Option 1 – Try to temporarily disable anti-virus and Windows Defender Firewall
As mentioned, the error could be due to the antivirus program or the Windows Defender Firewall installed on your computer. Thus, disabling them or any security software installed in your computer is always a good idea you can try when you’re not able to access the shared drive on your computer. There are times when you encounter problems like Error code: 0x80070035 due to interference of antivirus or security programs. Thus, you have to disable both your antivirus program and Windows Defender Firewall for the meantime and check if it fixes the error or not.
Option 2 – Check if the drive is shared
Before you further troubleshoot the problem, make sure that the drive you are trying to access is shared first. To do so, follow these steps:
Right-click on the folder and select Properties.
Go to the Sharing tab and check the status of the Network File and Folder Sharing.
And if the status is “Not Shared”, you need to select Share.
Next, select the intended Network User for sharing the file and choose the permission level for the user.
After that, click on the Apply and OK buttons to save the changes made. You or the intended user should now be able to access the shared folder or file.
Option 3 – Try to ping the IP address of the targeted computer
Even though the shared folder or file is shared correctly, it is possible that the network channel is not connected properly which is why you have to test it by pinging the IP address of the targeted computer from the primary computer.
Tap the Win + R keys to launch the Run dialog box.
Type “cmd” in the field and tap Enter to open Command Prompt.
Next, type the “ipconfig/all” command and tap Enter to execute it. This will populate various details.
From the given details, take note of the IPv4 address.
Afterward, open Command Prompt on the primary computer and then type the “ping <IPv4 address of the target computer>” command and hit Enter.
Now check if you get 4 confirmation replies or not. If not, you can try to access the Network Adapter Troubleshooter.
To run the Network Troubleshooter, refer to these steps:
Open the Search bar on your computer and type in “troubleshoot” to open the Troubleshoot settings.
Next, scroll down and select the “Network Adapter” option from the right pane.
Then click on the Run Troubleshooter” button.
After that, your computer will check for any possible errors and will pinpoint the root cause of the problem if possible.
Restart your computer.
Option 4 – Verify if Network Discovery is enabled
All you have to do is go to Start > Settings > Network & Internet and from there, click on the “Change connection properties” option and shift the radio button for Network profile to Private. After that, check if folder sharing is now working.
Option 5 – Try to modify the Network Security settings
There are times when the Network Security settings interfere with the folder or file sharing process. And if that’s the case, you can modify it to resolve the problem. How? Refer to these steps:
Tap the Win + R keys to open the Run dialog box.
Then type “secpol.msc” in the field and tap Enter to open the Local Security Policy manager window.
After that, go to Local Policies > Security Options located on the left pane.
Next, double click on Network security: LAN Manager authentication level in the right pane to open its Properties.
And then select the “Send LM & NTLM-use NTLMv2 session security if negotiated” option from the drop-down menu.
Now click on Apply and OK buttons to save the changes made.
Reboot your computer.
Option 6 – Try to enable NetBIOS over TCP/IP
Tap the Win + R keys to open the Run dialog box.
Then type “ncpa.cpl” in the field and tap Enter to open the Network Connections window.
After that, right-click on your network and select Properties.
Next, double click on Internet Protocol Version 4 and click on the Advanced button.
From there, go to the WINS tab and shift the radio button to Enable NetBIOS over TCP/IP.
Now click OK to save the changes made and then restart your computer.
Option 7 – Update the Network Adapter drivers
You might also want to update the Network Adapter drivers by following these steps:
Tap the Win + R keys to launch the Run window and then type in the “MSC” command and hit Enter to open the Device Manager window.
Under the Device Manager, you will see a list of drivers. From there, look for the Network Adapters and expand it.
Then right-click on each one of the Network drivers and update them all.
Restart your PC and see if it helped in fixing the BSOD error.
Note: If updating the network drivers didn’t help in fixing Error code: 0x80070035, you can also try to uninstall the very same drivers and restart your Windows 10 PC. After that, the system itself will reinstall the drivers you just uninstalled. Alternatively, you can also download and install the drivers from the manufacturer’s website directly.
To reinstall the network adapter driver, refer to these steps:
Open the Devices Manager from the Win X Menu.
Then locate the device drivers and right-click on them to open the Properties.
After that, switch to the Driver tab and click on the Uninstall Device button.
Follow the screen option to completely uninstall it.
Finally, restart your computer. It will just reinstall the device drivers automatically.
As you know, the functioning of the Windows Sandbox feature is supported by various components in the background of the Windows operating system. And the only way for you to enable the Windows Sandbox feature in your computer is through the Turn Windows features on or off utility. This feature will work directly on the basis of Virtualization which is also supported by Hyper-V. However, there are some reports claiming that some computers have the Windows 10 Sandbox item greyed out in the Turn Windows features on or off utility. Thus, in this post, you will be guided on what you can do to resolve such a problem in your Windows 10 computer.
In this kind of problem, you should know that this has something to do with the Second Level Address Translation which is one of the important pillars of how the Windows 10 Sandbox feature functions. Thus, if the Second Level Address Translation or SLAT feature in Windows Sandbox is not supported by the CPU of your computer, there is no way for you to use Windows Sandbox on your computer. On the other hand, if SLAT is supported, then there is definitely something you can do to resolve the greyed-out Sandbox item in Windows 10.
To get started, follow the steps provided below.
Step 1: First, you have to boot into the BIOS of your PC.
Step 2: After that, make sure that the following options are set to their respective configurations:
Hyper-V – Enabled
VM Monitor Mode – Yes
Virtualization – Enabled
Second Level Address Translation (VT-d or RVI) – Enabled
Data Execution Prevention – Enabled
Step 3: Once you’re done, save the configuration and then restart your Windows 10 computer as usual.
Step 4: Once your computer has restarted, you should see the same option in the Turn Windows features on or off utility and it should no longer be greyed out. Then you can now enable the feature and follow the onscreen instructions need to use the feature as best as you can.
0x80131700 is a Windows 7 error that occurs when there is a problem with the Troubleshooting Wizard. The wizard fails to function and with an error message displaying the following message on the computer screen:
‘An unexpected error has occurred’- The troubleshooting wizard can’t continue
Error code: 0x80131700'
Windows 7 features Troubleshooting Wizard, an automated tool that helps users resolve several PC-related problems such as accessing shared files or internet connectivity to name a few.
Error Causes
The error code 0x80131700 largely occurs because of two reasons:
The .NET framework is not properly installed on your system
Mis-configured System Files and Registry Issues
Further Information and Manual Repair
0x80131700 Windows error is rated easy to fix error code. Thus, repairing this error code is not difficult. It is so easy to fix that you don’t need any technical expertise or professional help for that matter.
To begin with, there are 2 methods to resolve the 0x80131700 error code. Let’s take a look at the solutions:
Cause:The .NET framework not properly installed on your system
Solution: If the underlying cause for the error code 0x80131700 is the improper installation of .NET framework on your PC, then the best and easy way to resolve this error is to reinstall it. By default, the built-in version of the .NET framework in Windows is 3.5.1 to reinstall this again on your system follow the steps given below:
Go to the Start menu and type: features in the search box
Now Choose the option ‘Turn Windows Features on or off’ and then press Enter
After this, look for Microsoft .NET framework 3.5.1 and uncheck the box
Once you uncheck it, restart your computer
Repeat the step 1 and 2
Now check the box before .NET framework 3.5.1
Restart your system
Now try using the Troubleshooting Wizard.
Cause:Mis-configured System Files and Registry Issues
Solution: If the error code 0x80131700 triggered due to misconfigured files and registry issues, then the easiest way to fix this error on your system is to download Restoro
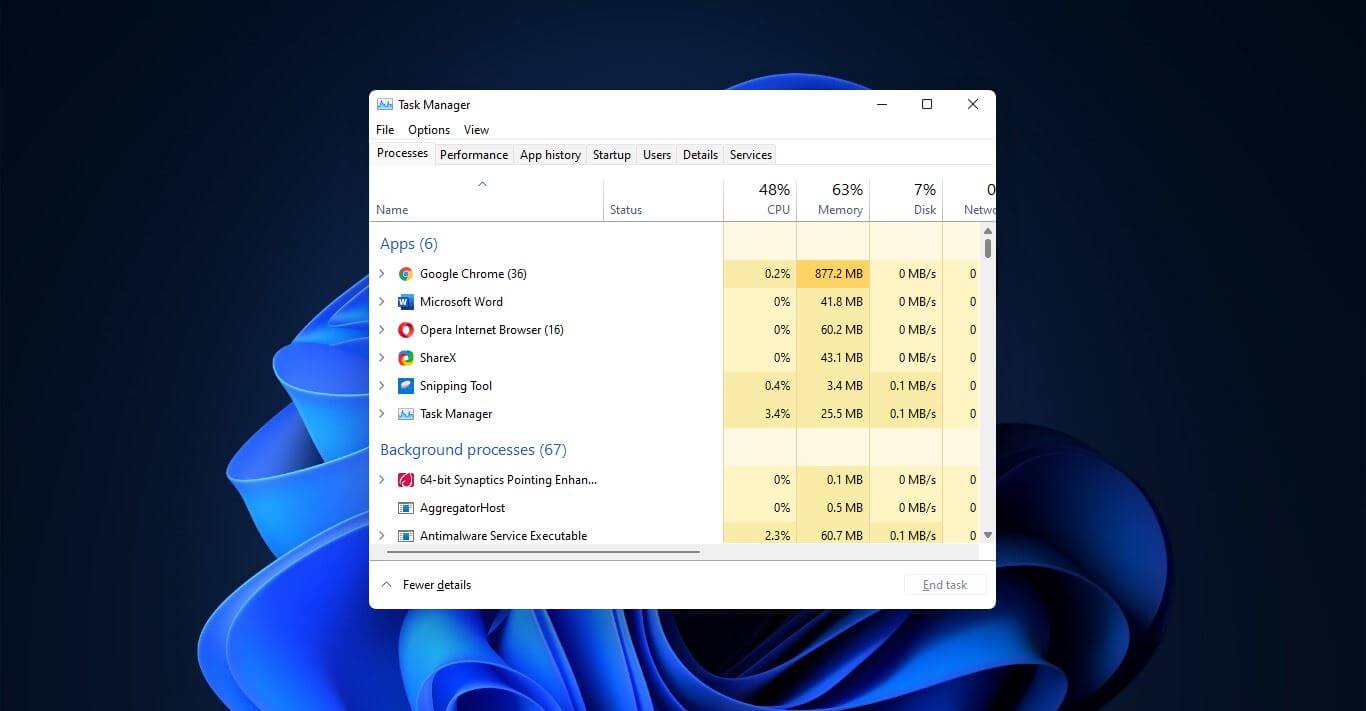
Something we are used to doing in a certain way inside Windows 10 is slightly changed in Windows 11. One of those things is how you open task manager, well kind of.
Option to right-click on the taskbar and launch task manager is gone but do not worry there are other same and simple ways you can launch it.
Press CTRL + SHIFT + ESC or CTRL + ALT + DEL
Right-click on the START button
Type task manager in start search on top in the start menu
Type taskmgr in command prompt
Press ⊞ WINDOWS + R to open run dialog and type in taskmgr
And that’s it, now depending on your situation, you might use different methods to evoke task manager.
As you know, NVIDIA is one of the topmost graphics cards used and it has been that way for several years already. And in those years, the company has managed to release the best cards on the market. However, there are still times when some things fail and don’t work as expected due to some NVIDIA driver issues.
As of late, one of the issues users reported about NVIDIA drivers is that it keeps on crashing on a daily basis. It gets to the point where they aren’t able to play games anymore while some users experience lag and rendering issues. In addition, some users also reported that their computer display tends to freeze sometimes, and then things would seem to go back to normal but only for a short span of time as the crash seems to happen every 10 minutes. This can be extremely annoying as you won’t be able to use your computer properly. If you are one of these users, worry not for there are several ways you can try to resolve the problem in your Windows 10 computer. Make sure to carefully follow the options given below.
Option 1 – Try checking if the NVIDIA graphics card is enabled
Although the problem is quite massive, the fix could be as simple as enabling the NVIDIA graphics card if it turns out to be disabled. There might be some strange reason why your graphics card disables itself. Thus, the best and first option you can try is to check if the NVIDIA graphics card is enabled or not. To do so, follow these steps:
Tap the Win + R keys to open the Run dialog box.
Then type “devmgmt.msc” in the field and hit Enter to open the Device Manager.
After opening the Device Manager, look for the Nvidia graphics card option among the list of device drivers. Once you found it, check if it is enabled or not. If it’s not enabled, you should see a gray arrow pointing downwards. Right-click on the card and select Enabled.
Next, right-click on the graphics card once more and click on the Update Driver Software option and then click on the “Search automatically for updated driver software” option.
Option 2 – Try to choose Maximum Performance and disable Vsync
If the first option didn’t work out for you, then you might want to try turning off Vsync and adjust the performance to the maximum. Refer to these steps to disable Vsync and adjust performance to the maximum.
The first thing you have to do is right-click on your desktop and select the NVIDIA Control Panel among the options.
After opening the NVIDIA Control Panel, select Manage 3D Settings.
After that, set Vsync to off, and then in the Power Management Mode, set it to Maximum Performance. That should fix the problem.
Option 3 – Try updating the drivers from the official site of NVIDIA
If both the first and second given options didn’t work, you can also try updating the drivers from the official NVIDIA website. And in case you don’t know the type of Nvidia graphics card that your computer is on, follow the steps below:
Tap the Win + R keys to open the Run dialog box.
Next type in “dxdiag” in the field and click OK or hit Enter to open the DirectX Diagnostic Tool.
From there, you can see what type of Nvidia graphics card that your system is on.
Take note of your graphics card information and then look for the best drivers for your operating system. Once you’ve downloaded and installed the file, restart your PC.
Runtime Error 5 is one of those errors that Windows users encounter at least once in their life.
Generally, when Runtime Error 5 occurs, the message that appears says ‘Invalid Procedure Call or Argument’. Runtime Error 5 occurs because the Quality Analyst function that resides within the Operating System behaves in an abnormal manner and the user receives a warning.
Solution
Error Causes
As explained above, Runtime Error 5 is caused because of the unexplained behavior of the Quality Analyst function.
The problem occurs when the function is lost and is not mapped to any drive. As a result, Windows is unable to find and load it and displays the error message. Runtime Error 5 is also caused by other reasons listed below as follows.
When files of programs like Visual Basic use bad entries in the registry.
When a user attempts to load Internet Explorer and a global cash of browser occurs, this also causes Runtime Error 5.
Since these types of errors can easily be fixed, it is strongly advised that a user takes the necessary actions to keep them from occurring in the future.
Further Information and Manual Repair
Some instructions for users to fix Runtime Error 5 as soon as it appears are listed below as follows.
Users are recommended to restart their computers. However, prior to doing so, it is advised that any programs that are opened are closed and work is saved to prevent data loss. Once the computer restarts, users should load the program that triggered Runtime Error 5 once again to determine whether or not the error recurs.
If the problem persists, the best approach is to uninstall the program causing the error. This can be accomplished by going to the ‘Control Panel’ and selecting the ‘Add/Remove programs’ option if one is using Windows XP or Windows 95. However, if a user is running Windows 7, the same task can be accomplished in the ‘Program and Features’ option. If there’s an option that allows you to clear personal settings and preferences, the box should be checked.
Now reinstall the program using the latest version of the installer to stop encountering this error. Use any patch for the program if available. Run installer while following the instructions on the screen. Check the default settings as well. It is suggested to instantly install any patches if available.
Another piece of advice is to simultaneously press ‘Ctrl, Shift, and Esc’. Windows task manager will appear. Go to the “processes” tab and select a process that doesn’t look familiar to you. Note the filename and click on the ‘End Process’ button. Load the program again and find out if the error occurs. Once the program causing the error is identified, the user can perform the steps listed above to resolve the problem.
It really sucks when you can’t fully enjoy the newest version of your favorite OS.
Windows 11 is still relatively fresh and consequently has some annoying little bugs that really ruin our experience. The good news is that you’re not alone and most of them are easy to fix.
Here are 5 commonly reported Windows 11 issues and what you can do to get rid of them.
1. Windows 11 audio problems
One of the absolute most irritating things in the world is struggling with the sound on your computer. Windows 11 users have reported facing the issue of low or no sound. If you’re currently experiencing the same frustration, you can be relieved. Chances are fixing it will only take a few minutes.
The first thing to check would be whether you accidentally muted your device by pressing the mute button on your keyboard. Yes, we know it sounds a lot like the old “have you tried turning it off and on again?” But it’s important to leave no stone unturned, and the most obvious things are usually the ones we easily overlook.
Moreover, if you have several audio output sources, check whether the right one is selected. You can do this via the Action Center or through Settings. If you want to use the same source every time, we also recommend you set it as the default one.
It’s also important to have a good, up-to-date audio driver. More often than not, this will be the true cause of your audio struggles. Make sure to update your driver, and if that doesn’t work out, you can always un- and reinstall it or install a different one.
Lastly, if all attempts remain unsuccessful, run the audio troubleshooter to figure out what’s actually going wrong.
2. Unable to find files
Such a powerful new operating system, yet it can’t seem to do the simplest thing imaginable? The File Explorer not responding on Windows 11 is one of the most frustrating and most common problems with Microsoft’s newest iteration of its awesome OS.
However, 9/10 times it can be fixed by simply restarting your PC. You could also try killing the Windows Explorer process in the Task Manager and then rerunning it.
If these don’t help, check whether there are any pending Windows 11 updates. A single missing update can compromise your PC’s functionality, so always make sure to install them all on time.
Should none of that work, then there are other ways to solve the File Explorer problem. However, then the issue is probably a bit deeper and it’s no longer in the ‘easy fix’ territory.
3. Start menu not working
Just like the File Explorer, the Start menu is a fundamental element of your OS. So, it’s only natural that its malfunction grinds your gears. It may be more customizable than on previous Windows versions, but it doesn’t always work smoothly.
If you’re facing the so-called Start menu critical error, there are a few things this could be caused by. Usually it means you turned off your system while an important update was still being installed, there is a corrupt file on your PC, or Windows forcefully stopped a program.
Whatever the reason, the solution should be pretty simple. Try the basic steps: restarting your File Explorer (like we explained above) and signing out and back into your account. If that doesn’t do anything, you may want to try uninstalling third-party start menu apps (if you have any), since they can interfere with your default programs’ functionality.
Now, those are the easy fixes. If you get nowhere with them, you might need to identify the root cause and search for more complex solutions than that.
4. Snipping tool not working
Our beloved screenshot tool was introduced with Windows 10 and Microsoft decided to keep it. However, you were probably just as disappointed as us when you tried to run it and failed.
Normally, this can be fixed by installing the latest Out-of-band (OOB) update, or even pending updates in general. Even if your system appears to be up-to-date, run the checker just in case.
Another cool thing Windows 11 lets you do is ‘Repair’ and ‘Reset’, which is the easiest way to troubleshoot your Snipping tool. If this fails, you can also try the good old un- and reinstall method. Simply uninstall the tool through the Control Panel and reinstall it from the Microsoft Store.
Furthermore, in the case of an upgrade from Windows 10 to 11, it may be that the old Snipping tool version is interfering with the launch of the new one. If you don’t care that much about the additional options available with the enhanced screenshot tool, you can use the old version instead.
Simply go to your C Drive, find the Windows.old folder, search for the tool and open it from there. Make sure to pin it to your taskbar as well, if you know you’re going to use it often.
5. Can’t install the latest update
The latest Windows 11 version, 22H2, has brought tons of enhancements to our dearest operating system. Unfortunately, a lot of users still haven’t had the opportunity to experience it. A mere update of your OS version should be the one thing that goes smoothly, but sometimes that’s not the case.
Failure to install 22H2 can be caused by a few things. Most commonly, the issue is caused by lack of storage space or corrupted files, but there could be other culprits.
There are a couple of things you could try. For example, it’s crucial that your drivers be up-to-date and some important services be enabled. These are: Windows Modules Installer, Background Intelligent Transfer Service, Cryptographic Service, Windows Update services.
To enable them, search ‘Services’, find the service you need and right-click on it. Open ‘Properties’ and select the startup type ‘Automatic’.
It may also be necessary to unplug all peripherals that aren’t crucial and disable third-party antivirus tools until after the update is finished.
Ultimately, you can run the Windows Update troubleshooter to detect and fix other possible issues.
Summary
Tiny bugs like these are nothing out of the ordinary. That said, we still all hate when they happen.
Hopefully some of our solutions have helped you to a smoother Windows 11 experience. But if you’re still struggling, feel free to reach out to us. We’d be happy to help!
Interesting information has come out from Microsoft, Windows 11 dark theme will include a different sound theme from its standard light one.
When in dark mode on Windows 11, the system sounds generally become softer, and they echo a bit, creating a more soothing experience that matches the overall look and feel of the dark mode. Flipping back to light mode brings the system sounds back to their normal level.
However, even though the light model has slightly louder sounds than the dark mode, Microsoft has taken great care to make sure the audio is more soothing, according to a report from CNBC.
The designers of Windows 11 took inspiration from an approach called calm technology. Microsoft’s Christian Koehn and Diego Baca wrote about calm technology in a post on Medium. In it, they said, “Windows 11 facilitates this through foundational experiences that feel familiar, soften formerly intimidating UI, and increase emotional connection.”
According to a Microsoft spokesperson in a statement to CNBC, “The new sounds have a much rounder wavelength, making them softer so that they can still alert/notify you, but without being overwhelming.”
Being in the Microsoft Windows insider program will let you get a hands-on new Windows 11, but some people just want Windows 11 without being in the insider program.
Well, people beware! It was detected that some groups have been releasing fake Windows 11 installers with malware into them.
There’s one malicious file called 86307_windows 11 builds 21996.1 x64 + activator.exe. Based on the filename, one might guess that it includes Windows 11 build 21996.1, and on top of that, there’s something in it that will automatically activate Windows for you. It comes in at 1.75GB, so for some people, that might seem reasonable. It starts out looking like a normal installer, and then there’s a second installer that calls itself a download manager. If you accept the nonsense agreement that’s included, you get a bunch of malware.
This is just one example of malicious installers running amok internet, but there are more of them with different software placed inside. Malware can be anything from adware to a Trojan virus. The adware usually isn’t super dangerous. It’s just malware that’s meant to inject your PC with advertisements. Viruses can be more of an issue, and they can be harder to get rid of if your machine is infected.
Windows Defender does a good job of getting rid of this stuff. The only problem is that if you’re downloading Windows 11 from shady sources, you’re probably already set to click through the dozen or so warnings that pop up telling you not to install it.
The solution will be to get Windows from a trusted source of roll inside the insider program and get it from Microsoft directly.


 Option to right-click on the taskbar and launch task manager is gone but do not worry there are other same and simple ways you can launch it.


 Interesting information has come out from Microsoft, Windows 11 dark theme will include a different sound theme from its standard light one.
When in dark mode on Windows 11, the system sounds generally become softer, and they echo a bit, creating a more soothing experience that matches the overall look and feel of the dark mode. Flipping back to light mode brings the system sounds back to their normal level.
However, even though the light model has slightly louder sounds than the dark mode, Microsoft has taken great care to make sure the audio is more soothing, according to a report from CNBC.
The designers of Windows 11 took inspiration from an approach called calm technology. Microsoft’s Christian Koehn and Diego Baca wrote about calm technology in a post on Medium. In it, they said, “Windows 11 facilitates this through foundational experiences that feel familiar, soften formerly intimidating UI, and increase emotional connection.”
According to a Microsoft spokesperson in a statement to CNBC, “The new sounds have a much rounder wavelength, making them softer so that they can still alert/notify you, but without being overwhelming.”
Interesting information has come out from Microsoft, Windows 11 dark theme will include a different sound theme from its standard light one.
When in dark mode on Windows 11, the system sounds generally become softer, and they echo a bit, creating a more soothing experience that matches the overall look and feel of the dark mode. Flipping back to light mode brings the system sounds back to their normal level.
However, even though the light model has slightly louder sounds than the dark mode, Microsoft has taken great care to make sure the audio is more soothing, according to a report from CNBC.
The designers of Windows 11 took inspiration from an approach called calm technology. Microsoft’s Christian Koehn and Diego Baca wrote about calm technology in a post on Medium. In it, they said, “Windows 11 facilitates this through foundational experiences that feel familiar, soften formerly intimidating UI, and increase emotional connection.”
According to a Microsoft spokesperson in a statement to CNBC, “The new sounds have a much rounder wavelength, making them softer so that they can still alert/notify you, but without being overwhelming.”