Fixing the We can’t find a USB flash drive

One of the preferred ways to upgrade Windows 10 is by creating a bootable USB drive. However, you might change your mind when you encounter an error during the Windows 10 Setup that says, “We can’t find a USB flash drive”. Worry not for this error can be fixed using some suggestions that will be provided in this post.

The funning thing about this error in Windows setup is that the computer says it’s not there when it’s clearly there. To fix this problem, you need to check if the USB device is accessible on your computer or you can also try a different USB device. In addition, you could check if there are any issues with both the USB 3.0 and USB 2.0 ports as it could be the reason why you’re getting the error or fix the bad sectors in the USB drive as well as see if the USB drive is set as the primary drive.

Option 1 – Try to check if the USB is accessible on your PC

The first thing you can do to resolve the problem is to check if you can access your USB device from your computer. All you have to do is open File Explorer and check if the USB device is listed there or not.

Option 2 – Try to connect a different USB device

The next thing you can do to fix the error is to try connecting a different USB device, specifically the one that has more significant storage space. You also have to make sure that it’s working on a different PC.

Option 3 – Fix any issues with the USB 3.0 and 2.0 ports

Although the USB 3.0 ports are compatible with the USB 2.0 ports, it does not necessarily mean that there wouldn’t be any problem when you use them which is why it’s best to fix any issues in them or better yet, use a compatible drive.

Option 4 – Try to fix the bad sectors in the USB drive via CHKDSK

When it comes to some issues concerning the hard drive or removable devices, there is a utility in Windows that might help which is called “chkdsk”. To use it, follow the steps below.

  • Tap the Win + S keys to open the Search box.
  • Then type “command prompt” in the field and from the search results that appear, right-click on Command Prompt and select “Run as administrator”.
  • After opening an elevated command prompt, copy and paste the following command and hit Enter:

CHKDSK [volume [[path] filename]] [/F] [/V] [/R] [/X] [/C] [: size]]

Note: In the command given above, “[/F]” will try to fix the system errors while “[/R]” will be the one to fix the bad sectors.

  • Now if you are prompted to run CHKDSK after your reboot your PC, just tap Y and reboot your PC.
  • If CHKDSK is not able to find any errors, tap the Win + E keys and navigate the access window. From there, right-click on the concerned drive and click on Properties.
  • After opening Properties, click on the tab Tools and then click on the “Check” button under the Error-checking section.
  • Wait until the process is completed and then restart your computer.

Option 5 – Try checking if the USB is set as the primary drive

You might also want to check if the USB drive is set as the primary drive because if it is, then it won’t appear on the list. It could also be that the USB drive has a primary disk in it. To undo it, you need to use the DISKPART utility.

  • In the Start Search, type “command prompt” and right-click on Command Prompt from the search results, and then select the “Run as administrator” option.
  • Next, execute the “diskpart” command to initiate the DISKPART utility.
  • After that, type the “list disk” command and tap Enter to display the list of disks on the computer. You have to take note of the drive number or letter of the concerned USB drive.
  • Once done, type the “select disk <X>” command where X is the drive letter or number and tap Enter.
  • Then execute the “list partition” command to see the list of all the partitions in your computer. It should be listed as 0, 1, or 2. 0 is the primary partition.
  • Now type the “select partition 0” command and tap Enter and then type “delete partition” to delete the selected partition.
  • You can do the same to the other partitions as well and when you’re done, execute the format command to turn the USB drive into a standard one.

Do You Need Help with Your Device?

Our Team of Experts May Help
Troubleshoot.Tech Experts are There for You!
Replace damaged files
Restore performance
Free disk space
Remove Malware
Protects WEB browser
Remove Viruses
Stop PC freezing
GET HELP
Troubleshoot.Tech experts work with all versions of Microsoft Windows including Windows 11, with Android, Mac, and more.

Share this article:

You might also like

Windows 11 android apps update

One of the selling points of Windows 11 was the ability to run Android apps natively in it without the need for any third-party software. It is not a big surprise that even after its release Microsoft is evolving and expanding Windows 11 and its features.

Windows 11 Android apps

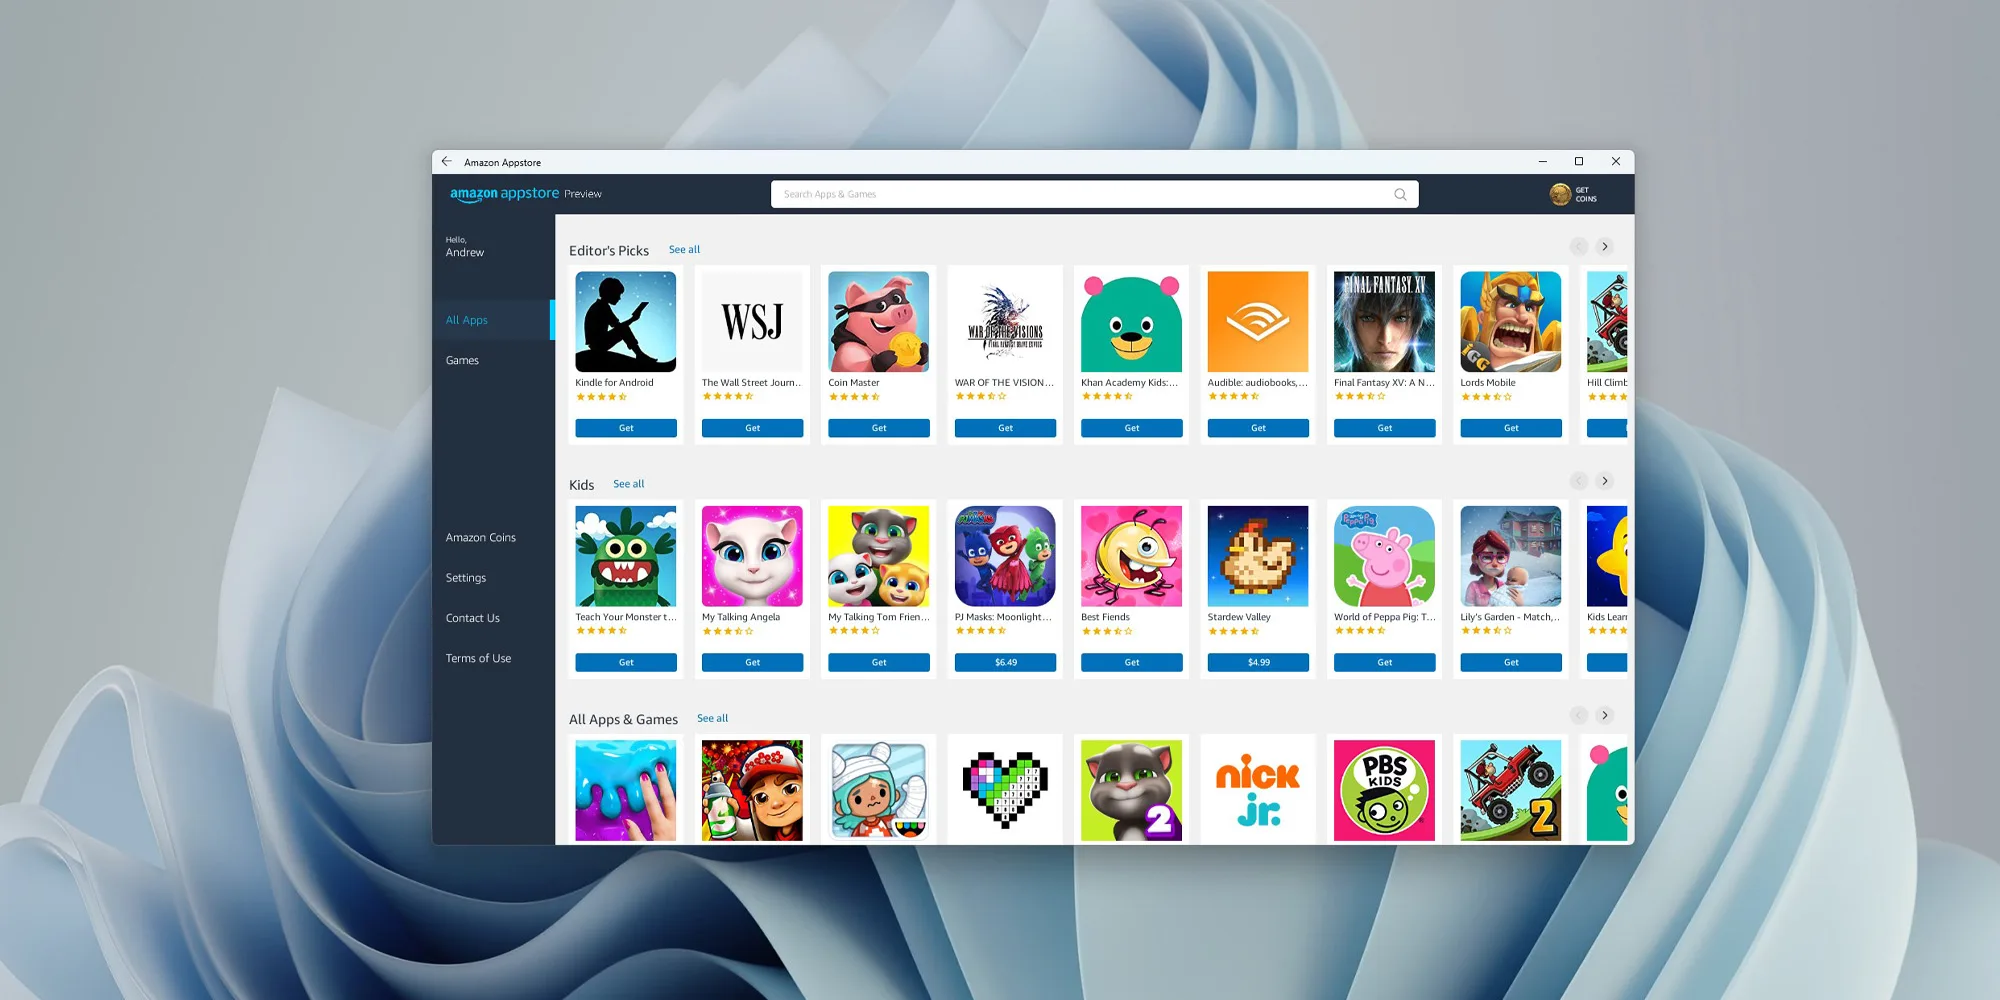
Microsoft is now rolling out an update for the Windows Subsystem for Android on the Dev Channel of the Windows Insiders program. The new version upgrades the core operating system from Android 11 to Android 12.1 (also known as Android 12L), which means the new system and app features in Android 12 and 12.1 are now available on Windows for the first time. However, not the new features in those updates apply to the modified version that runs on top of Windows. For example, one of the main improvements in 12.1 was a dual-pane notification panel for larger screens, but Android app notifications on Windows just show up in the Windows notification panel.

The upgrade also improves how Android apps integrate into Windows. The Windows taskbar will now show which Android apps are currently using the microphone, location, and other system services — similar to many native Windows applications. Toasts messages (the small popups that some apps use for temporary messages) are now displayed as Windows notifications, and the titlebar on Android apps will use the current activity name for the title.

Full changelog

  • Windows Subsystem for Android updated to Android 12.1
  • Advanced networking on by default for newer x64 Windows builds
  • Updated Windows Subsystem for Android Settings app: redesigned UX and diagnostics data viewer added
  • Simpleperf CPU profiler recording now works with Windows Subsystem for Android
  • Windows taskbar now shows which Android apps are using microphone and location
  • Improvements to Android app notifications appearing as Windows notifications
  • Reduced flicker when apps are restored from minimized state
  • Apps are not restarted when devices come out of connected standby on recent Windows builds
  • New video hardware decoding (VP8 and VP9)
  • Fixes for on-screen keyboard in apps
  • Fixes for full-screen Android apps and auto-hidden Windows taskbar
  • Windows Subsystem for Android updated with Chromium WebView 100
  • Added support for Android NetworkLocationProvider in addition to GpsLocationProvider
  • Improved general stability, performance, and reliability

The new update is limited to Windows Insiders for now, but once Microsoft fixes all the bugs, it should start rolling out to everyone on Windows 11 that has the Android Subsystem enabled.

Read More
Fix 0X800F080C Error in Windows 10
Error 0X800F080C is tied to corrupted system files and .NET framework issues. In this article, we will focus on how to fix it starting first with .NET fixes and then moving to system-related ones. Follow the guide step by step so you can fix this error fast and easily.

.NET issues

As previously stated 0X800F080C error can occur due to issues with .NET framework, 3.5 framework to be more precise and there are two ways we can fix this error. Follow the guide below as presented:
  1. Install .NET 3.5 framework from Windows features

    First thing is to try and install the framework from Window features itself. Sometimes installation and activation of .NET 3.5 in other ways can result in this error. To install it do the following: Press ⊞ WINDOWS + R to open the run dialog Inside run type in appwiz.cpl and press ENTER to open up the Programs and Features menu Inside the Programs and Features menu click on Turn Windows features on or off. Check the box associated with .NET Framework 3.5 (this package includes .NET 2.0 and 3.0) Press OK Click on YES and wait for the package to be installed then reboot your PC
  2. Run the .NET Repair Tool

    If the previous step was not successful or you already had .NET 3.5 installed then run the troubleshooter in order to fix issues. Go to the official Microsoft .NET framework repair tool website here and download it. Once downloaded install the tool and follow onscreen instructions.

Corrupted system files

If the previous solution has not provided you with results then you have system file corruption that needs to be fixed. Move from one solution to another as presented below:
  1. Run SFC scan

    SFC scan is a built-in Windows tool for solving corrupted system files issues, it is fully automated and does not require from the user any kind of knowledge or information. To run it and scan the system do the following: Press ⊞ WINDOWS + X to open the secret menu Left-click on the command prompt (admin) In command prompt type SFC /SCANNOW and press ENTER Wait for the process to finish, do not interrupt it and once it is done, restart your computer
  2. Run DISM scan

    DISM scan is similar to SFC scan but it tackles different types of system file corruption and it is recommended to run it also after SFC has been completed. Please note that for DISM scan to be successful you will need a stable internet connection since DISM will replace corrupted files with new ones downloaded from Microsoft. To run it do the following: Press ⊞ WINDOWS + X to open the secret menu Left-click on the command prompt (admin) inside command prompt type: exe /online /cleanup-image /scanhealth followed by ENTER, then type: Dism.exe /online /cleanup-image /restorehealth also followed with ENTER. Leave scan to finish and reboot your PC
Read More
How to Fix Windows 10 Error Code 0xc004fc03

Error Code 0xc004fc03 – What is it?

Error code 0xc004fc03 occurs when Windows users fail to activate their Windows operating system due to a networking problem. The error code’s common symptoms include the following:

  • Inability to activate Windows 10 operating system
  • Message box with error code 0xc004fc03

Solution

Restoro box imageError Causes

Error code 0xc004fc03 in Windows 10 usually occurs due to issues related to a Windows user’s network. Your computer may be having problems connecting to the Internet or your firewall may be blocking or interrupting your device’s ability to activate Windows 10. In some cases, users may simply need to wait a day or two to reattempt to activate their system using a valid product key, as there may be an issue with the Windows activation servers.  Failure to promptly fix this error code might result in other Windows 10 error messages, such as error code 0xc004f034.

Further Information and Manual Repair

To rectify the error code, Windows 10 users will need to perform manual repair procedures that fix the underlying problems causing error code 0xc004fc03. These procedures may include reconnecting to one’s network, checking your firewall settings, or activating your Windows operating system via phone. The manual repair methods are simple and do not require technical knowledge of the Windows operating system. If your attempts at manually repairing this error code fail, however, you may need to try a few other procedures.

Method One: Verify Internet Connection

To check your Internet connection, you’ll need to access the Network & Internet tab in Windows 10. Follow the instructions below to access this tab and fix Internet connectivity issues if they are preventing you from activating Windows on your machine.

  • Step one: Click the Start button and select Settings
  • Step two: Select Network & Internet
  • Step three: Click the Status section of the Network & Internet tab

If your status shows that you are not connected to a network, you will need to fix your connection. Simply use the Network Troubleshooter to troubleshoot your connection. You will be able to activate your copy of Windows once your connectivity issues are resolved.

If, however, the problem persists and error code 0xc004fc03 occurs during the activation process, this simply means that the existence of the error code is not due to connectivity or networking problems. In such a case, move to the next manual repair method listed below and follow the exact instructions given.

Method Two: Check Firewall Settings

Windows Firewall protects your PC from hackers, worms, and other malicious programs. However, in some cases, it may result in error codes like error code 0xc004fc03. If your firewall is interfering with the Windows 10 activation, you’ll be able to rectify the problem by simply adjusting your settings. Follow the steps below to check – and adjust if necessary – your Windows Firewall settings.

  • Step one: Click search bar and type firewall
  • Step two: Select Windows Firewall
  • Step three: Select Turn Windows Firewall on or off

In some cases, Windows users may not be able to adjust settings within the Windows Firewall tab, as your firewall settings may be controlled by a third party antivirus software. If this is the case, open the antivirus software and turn off the firewall if the software does not prevent you from making such changes to its settings.

Note, however, that you will need to readjust the settings as soon as you activate your version of Windows 10. This is due to the fact that turning off your firewall settings permanently may lead to exposure to worms and other malicious programs.

Method Three: Activate Windows by Phone

Activation of Windows via phone is another option for individuals experiencing error code 0xc004fc03. The activate by phone option in the Update & Security tab will be available once you fail to activate Windows 10. To complete this manual repair method, follow the steps below.

  • Step one: Select Settings
  • Step two: Click Update & security
  • Step three: Select Activate by phone
  • Step four: Follow the instructions provided thereafter.

This is one of the most effective ways to fix error code 0xc004fc03. If the issue persists, however, you can proceed to the last resort.

Method Four: Download an Automated Tool

If you wish to always have at your disposal a utility tool to fix these Windows 8 and other related issues when they do arise, download and install a powerful automated tool.

Read More
Windows 10 Update and Shutdown/Restart is not working
Update and Shutdown/Restart is not working. As you have probably noticed, every time a new update is released and is downloaded on your Windows 10 computer, the operating system replaces the Restart and Shut down button with “Update and Restart” as well as “Update and Shut down”. This is most likely done so that you won’t miss the update. However, some users noticed that there are times when these buttons still continue to display the same message even if they’ve already performed the required operations such as shutting down or restarting their PCs. Cases like this happen when an update wasn’t installed properly or has failed which is why your computer keeps on prompting you to Update and Shutdown every time. To fix this dilemma, follow the options laid out below.

Option 1 – Try restarting the File Explorer

Restarting the File Explorer can definitely help you fix lots of issues especially when there is some issue with the user interface including this one.
  • On the right side of the Taskbar, right-click on any open spot.
  • Then click on Task Manager.
  • Next, scroll down until you see Windows Explorer.
  • After that, right-click on it and select Restart.
  • If you are able to kill its process, you have to tap the Win + R keys to open the Run dialog box and type “explorer.exe” in the field, and hit Enter to launch the Windows Explorer.

Option 2 – Try running the Windows Update Troubleshooter

As you know, Windows 10 has various auto-repair built-in tools to help users fix small issues which used to get fixed manually. And in this case, you will need the Windows Update Troubleshooter to fix the issue.
  • Go to Settings and click on Update and Security.
  • From there, click Troubleshoot and click on Windows Update and then click the “Run the troubleshooter” option.
  • After that, it will try to detect and automatically fix common issues in the Windows Updates which can be resolved by Windows itself. Note that the process may take several minutes before it completes so you need to wait until it’s done. Once it’s done, in case you have some pending update that wasn’t realized by the system early on, it will apply the fix right away and restart the Windows Update service.

Option 3 – Try setting the Power button to Shut down

In case the first two options didn’t work out, you can try changing what the power button does. To do that, refer to these steps:
  • Go to Control Panel > Power Options.
  • From there, select the “Choose what the power buttons do” option from the left side.
  • Then set the Power button setting the “When I press the power button” option to “Shut down”. After that, it will shut your computer down without installing the updates but obviously, this is only a temporary fix.

Option 4 – Turn off your PC instantly without updating it

  • Tap the Win + R keys to open the Run dialog box.
  • Type in “shutdown -s -f -t 0” in the field and hit Enter if you really want to turn off your computer without any delay.
  • You could also tap the Ctrl + Alt + Del keys and select Shut down from the bottom right menu.
Just like the third option, this is also only a temporary fix.

Option 5 – Try running the Windows Module Installer

The Windows Module Installer is a built-in service in Windows 10 that allows you to fix the stuck Windows Updates in your computer. To use it, follow these steps:
  • In the Cortana search box, type in “cmd” and from the search results that appear, right-click on Command Prompt and select the “Run as administrator” option from the context menu.
  • Once you’ve opened Command Prompt as admin, type the SC config trustedinstaller start=auto command and tap Enter.
  • After the command is executed, you will see the “[SC] ChangeServiceConfig SUCCESS” message displayed on the Command Prompt console.
  • Now exit Command Prompt and then check if the buttons are now back to normal.

Option 6 – Put your PC in a Clean Boot State

  • Log onto your PC as an administrator.
  • Type in MSConfig in the Start Search to open the System Configuration utility.
  • From there, go to the General tab and click “Selective startup”.
  • Clear the “Load Startup items” checkbox and make sure that the “Load System Services” and “Use Original boot configuration” options are checked.
  • Next, click the Services tab and select the “Hide All Microsoft Services” check box.
  • Click Disable all.
  • Click on Apply/OK and restart your PC. (This will put your PC into a Clean Boot State. And configure Windows to use the usual startup, just simply undo the changes.)
After putting your PC in a Clean Boot State, try creating a system restore point and see if the problem still occurs. Clean Boot troubleshooting is designed to help you isolate the problem. For you to execute a clean boot troubleshooting, you must do a couple of actions (the steps are given above) and then restart your PC after every action. You might have to disable one third-party app after the other to really isolate the issue. And once you’ve narrowed down the problem, you can either disable the third-party app that’s causing the problem or remove it. Note that you must switch your PC back into the Normal Startup mode after you’re done troubleshooting the problem. Here’s how you can do it:
  • From the “Start” menu, go to System Configuration.
  • After that, switch to the General tab and click the option for “Normal Startup”.
  • Next, go to the Services tab and clear the checkbox for “Hide all Microsoft services”.
  • Then find and click “Enable all” and if prompted, you have to confirm.
  • Afterward, go to the Task Manager and enable all the Startup programs and confirm the action.
  • Restart your PC when prompted.
Read More
Intel's open-source Clear Linux* Project
clear linux projectThe Clear Linux Project creates an operating system and software stack that offers highly optimized performance, security, versatility, and manageability. Clearly optimized for Intel CPUs and based on GNOME it will offer you incredible speeds if you are on Intel CPU. The big news, though, is that Clear Linux sports the shiny new Gnome 40. This is a fresher Gnome than you'll find even on Ubuntu's more experimental 21.04 release. The only big names that let you test drive Gnome 40 are Fedora and Arch Linux.

Packages only when you need them

Installation of packages is used by Swupd, a Clear Linux* package management tool. It is easy to use and pretty straightforward.
  • "bundle-list" for showing what's installed
  • "bundle-info" for details on installed bundles (such as owned files via the "‑‑files" flag)
  • "search" for repository searching
  • "bundle-add" for installation
  • "bundle-remove" for uninstallation
The only problem here is the packages themselves. Clean Linux* has been imagined as a developer distro focusing mostly on well-development tolls. In intel’s words: “A Linux OS built for Linux developers”, so some things will be left out. Strangely enough some things as FFmpeg which if you want to have and blast some youtube videos while you work will have to complete manually by yourself.

Clear Linux* modular philosophy

Everything in Clear Linux* is based on a modular philosophy approach. There is no /etc/fstab file, the /boot directory is totally empty. Every partition to be mounted is enabled as a systemd "mount unit." Intel reaping the benefits of systemd's modular philosophy, where everything is a unit. If you know your way around systemd, intermediate-level configuration tasks should be straightforward. Any advanced configuration likely demands deep systemd knowledge.

Clear Linux* performance

As stated earlier this is Intel’s distro, optimized for Intel hardware meaning that Intel as the developer has every possible tool at its disposal to make use of hardware to its maximum potential and it shows. Distro almost leaves other ones two times in speed performance. So if you are looking for a distribution that will deliver you speed and it is aimed for developer Clear Linux* is for you.

Conclusion

Clear Linux* is a really interesting distro and seeing how Intel is adding new software packages on its official website it might have a bright future. But as always, be the judge for yourself and see if it can fit your needs. Go get it at: https://clearlinux.org/
Read More
Watch Marvel Universe in chronological order
marvelSo far I believe each person on this planet has at least heard of Marvel superhero movies, perhaps even watched a few of them, and no wonder. Movies are spawning now over 20 titles and they are not really released as events described in them. Throw into mix TV series and you can get confused pretty fast. Now it was officially stated that all TV series that were released before Wanda vision is no canon in Marvel cinematic universe which simplify thing a little but there are still series that are.

So without further blabbering around here is a list of Marvels films and TV series in chronological order:

  • Captain America: The First Avenger
  • Captain Marvel
  • Iron Man
  • Iron Man 2
  • The Incredible Hulk
  • Thor
  • The Avengers
  • Iron Man 3
  • Thor: The Dark World
  • Captain America: The Winter Soldier
  • Guardians of the Galaxy
  • Guardians of the Galaxy Vol. 2
  • Avengers: Age of Ultron
  • Ant-Man
  • Captain America: Civil War
  • Spider-Man: Homecoming
  • Doctor Strange
  • Black Panther
  • Thor: Ragnarok
  • Ant-Man and The Wasp
  • Black Widow
  • Avengers: Infinity War
  • Avengers: Endgame
  • WandaVision
  • The Falcon and The Winter Soldier
  • Spiderman: Far From Home
  • Loki
And there you go, if you have someone who has not yet seen movies or you would like to view that as the story is revealed and not by the date they were released now you can easily with this list.
Read More
How to Fix the Error 103

Error 103 - What is it?

The error 103 may occur either due to issues in your Google Chrome browser or system issues. If error 103 occurs when using Chrome, this means there is a conflict between Google Chrome and the antivirus program running on your PC. It is displayed in either of the following formats: ‘Chrome error 103 connection aborted’, ‘Chrome error 103 err_connection_aborted’ or ‘Error 103 (net: ERR_CONNECTION_ABORTED): Unknown error. However, if this is a system error code, it may be displayed in the following format ‘The semaphore cannot be set again’ or as ‘ERROR_TOO_MANY_SEM_REQUESTS’ or as the value 0x67.

Solution

Restoro box imageError Causes

The error 103 is triggered due to multiple reasons such as: The conflict between Google Chrome and anti-viruses arises because when the web browser attempts to update, the anti-virus programs on your PC may view the update as a threat. Due to this, the connection to the internet is terminated and the error 103 message is displayed on your computer screen. And besides, this keeps you from upgrading your Google Chrome browser too. Other causes include:
  • Viral infection
  • Missing Windows component called ‘expand.exe’
  • Registry overlaps
  • Incompatible drivers

Further Information and Manual Repair

Here are some of the easy and efficient ways to resolve error 103. Choose a method according to the error 103 messages displayed on your screen.

Method 1: Check for the ‘Expand.exe’ Windows component

This method is workable if the error 103 is triggered due to browser issues. To get started, follow these steps. First, go to the start menu, and in the search bar type ‘expand.exe’. If you are able to find it, move it to the following directory C:\Windows\system32. However, if you are unable to locate it, then copy the file from Windows installation CD. Once you copy the file to the directory, reinstall the updated version of Google Chrome.

Method 2: Change the Location of the Temporary File

If the error still persists, try method 2. Go to the start menu and open the Run window. Now type C: and press OK. Then go to File, then New, and then Folder. Now create a temporary folder and name it ‘test’. After that go back to the start menu and open the Run window again. Now enter the following text in the text field:cmd.exe then press OK. In the command prompt type set TMP=C:\test. After that try reinstalling Google Chrome by typing the following in the command prompt: start ChromeSetup.exe.

Method 3: Update Drivers

If the error message 103 is generated due to system issues, then try updating drivers. Sometimes the error may occur due to incompatible drivers.

Method 4: Perform an Entire PC Scan for Viruses

To resolve error 103, perform an entire PC Scan for viruses. Sometimes the error may occur due to viral infection. Removing viruses may fix the error.

Method 5: Clean and Restore the Registry

If the error is triggered due to registry issues, then it is advisable to download Restoro. This is a multi-functional PC repair tool integrated with powerful utilities including an anti-virus, a registry cleaner, Active X controls, and class scanner, and a system optimizer. The registry cleaner feature wipes out all the unnecessary files including cookies, junk files, and bad registry keys that corrupt the registry. It cleans and restores the registry instantly. The anti-feature removes all viruses and spyware while the system optimizer utility ensures your system works at its optimum speed. It can be downloaded on all Windows versions. It is safe and efficient. This software is a one-stop solution for all PC-related errors. Click here to download Restoro.
Read More
Fix Error 0164, Memory size decreased
Computer upgrades are the most common and most efficient ones. RAM upgrade is one of the easiest ones you can do and the most common ones but even as simple an upgrade as this one can cause certain issues. If you are experiencing error 0164, memory size decreased after RAM upgrade we are offering you solutions on how to fix this particular error and get your computer back in working order.
  1. Change BIOS settings

    Enter your motherboard BIOS (usually by pressing the del key on startup) Load BIOS defaults Save changes and exit If the Error 0164: Memory size decreased issue persists even after loading setup defaults, then it must be configured manually inside the BIOS.
  2. Clear CMOS

    Follow the instructions precisely:
    • Turn off all peripheral devices connected to the computer.
    • Disconnect the power cord from the AC power source.
    • Remove the computer cover.
    • Find the battery on the board. The battery may be in a horizontal or vertical battery holder or connected to an onboard header with a wire.
    If the battery is in a holder, note the orientation of the + and – on the battery. With a medium flat-blade screwdriver, gently pry the battery-free from its connector. If the battery is connected to an onboard header with a wire, disconnect the wire from the onboard header.
    • Wait one hour, then reconnect the battery.
    • Put the computer cover back on.
    • Plug the computer and all devices back in.
    • Power on the computer.
Read More
Choose what application will load on startup
Hello everyone and welcome to another great tutorial from errortools.com I hope everyone is feeling great and that you are prepared to boost the performance of your computer. This time we will speed up Windows startup time and overall performance by eliminating startup programs that we don't need and do not use. Microsoft itself and some application developers tend to have some applications or some services always active and set to be loaded on Windows startup. If you want to change which of these applications are starting up with your Windows and change them, follow this easy guide and you will be speeding up your Windows in no time. First thing is to open a task manager, fastest and most direct way of doing this is with a keyboard combination of CTRL + SHIFT + ESC keyboard with ctrl shift and esc markedWhen Task Manager opens, click on the startup tab on top. task manager startup tabOnce you click on startup you will get a list of applications that are set to be started when Windows is booted. startup applicationsYou can now click on the application and then click on disable on the bottom button, the application status will update in task manager to disabled and it will not be booted anymore when Windows starts. In this same manner, you can enable back some applications if you changed your mind about them. Please note that some applications are using some services and must have them running or they will not work properly. The best practice is to disable applications you are positive you will not use or use rarely so you do not want them to slow down Windows.
Read More
An Easy Guide to Resolving Internal Error 2324

Internal Error 2324 - What is it?

Internal Error 2324 occurs when you try to upgrade Firefox on your Windows 7 PC. The program fails to install and run successfully. The following error message is displayed:
‘The installer encountered an unexpected error installing this package. This may indicate a problem with this package. The error code is 2324.’

Solution

Restoro box imageError Causes

This error may occur due to different reasons. These include:
  • Viral infection
  • Bad registry entries (cookies or traces of old version of Firefox program)
  • Other programs running on your PC during Firefox program installation
  • Installation was not performed from the Administrator account
To use the Firefox web browser successfully on your PC, you first need to resolve error 2324 on your system.

Further Information and Manual Repair

To repair error 2324, try the following methods:

Method 1 - Perform a Clean Reinstall.

This means to remove the Firefox program completely from your PC and then reinstall it. To do this, remove the Firefox installation folder saved in one of the locations by default: C:\Program Files\Mozilla Firefox C:\Program Files (x86)\Mozilla Firefox Now download the latest Firefox version on your PC and save the setup file on your computer. After that double click, the downloaded installation file and follow the steps illustrated in the wizard to install Firefox on your PC.

Method 2

Sometimes Firefox installation may fail because of the interference from other programs running on your PC. Therefore, it is advisable to close all programs running in the background when upgrading the Firefox program. You can also disable programs like Logitech QuickCam and Spybot Tea Timer.  These are some of the many programs that are notorious for interfering with Firefox updates.

Method 3 - Scan for viruses to resolve.

Viruses are malicious programs that often enter computers through files downloads from unreliable websites and phishing emails. These programs then hide in your PC and infect it. You may often experience problems during program installation if your PC is infected by viruses. To fix the issue and ensure smooth Firefox program installation on your system, simply run an antivirus. Antivirus scans and detects all viruses in a few minutes. Upon detection, remove them right away to ensure your PC is free from such malicious programs. Now try updating Firefox on your system again. If it is updated smoothly, then the error is resolved.

Method 4

The registry of your system stores all the activities performed on your PC. You may have uninstalled the old Firefox version from the Control Panel but the traces of the uninstalled program may still remain in the registry as bad entries. These bad entries may be causing error 2324 to pop up on your PC. To resolve, you need to remove these entries from the registry. For quick removal, download Restoro. It is a user-friendly PC Fixer with a registry cleaner that scans and removes all obsolete files stored in the registry such as incorrect registry keys, bad entries, cookies, and junk files. Click here to download Restoro.
Read More
1 2 3 171
Logo
Copyright © 2023, ErrorTools. All Rights Reserved
Trademark: Microsoft Windows logos are registered trademarks of Microsoft. Disclaimer: ErrorTools.com is not affiliated with Microsoft, nor claims direct affiliation.
The information on this page is provided for information purposes only.
DMCA.com Protection Status