Logo

An Easy Guide to Resolving Error 0x80040600

0x80040600 - What is it?

This is a typical MS Outlook error code. This error message may prevent you from sending and receiving emails via your Outlook account. The error message is displayed in the following format:

"An unknown error has occurred. 0x80040600"

If this is the primary source of your communication in the office, then this error can cause you a great deal of inconvenience as it may prevent you from running important business errands via your Outlook account efficiently.

Therefore, when you experience the 0x80040600 error on your PC, it is advisable to fix it immediately.

Solution

Restoro box imageError Causes

This error code is triggered due to multiple reasons. These include but are not limited to:

  • PST (Personal Storage Table) file reaches its file size limit
  • PST file corruption
  • Viral infection
  • Incorrect Windows registry settings
  • Improper shutdown of Outlook

This error code can lower your office productivity as you may be unable to send and receive emails on your Outlook account. Also, you may get locked out of your account and be unable to view your calendar entries and open email attachments saved previously in your account.

Further Information and Manual Repair

To resolve the error on your PC, you don’t have to wait for the network personnel to fix it or be a computer expert. Here is a list of easy and effective DIY methods to help you fix this error code right away.

Method 1: Download a PST File Repair

If the error occurs because your PST file has reached it maximum limit which is normally 2 GB or because of PST file corruption, then it is advisable to download a PST file repair tool. After downloading it, simply run it on your PC. This tool will immediately fix the damaged PST file and file the issue.

Method 2: Download an Antivirus

Deadly viruses like Trojans and spyware can penetrate into your PC if through downloads and opening phishing emails. Therefore, to remove such viruses it is important to install an antivirus and scan your entire PC.

Method 3: Install Restoro.

If the problem is associated with incorrect Windows registry settings or viral infection, it is advisable to download Restoro.

This software is multi-functional deployed with 6 different and powerful utilities including an antivirus, a registry cleaner, and a system optimizer to name a few.

The registry cleaner repairs the registry corrects the settings and fixes the damaged files.

The antivirus on the other hand simultaneously removes all types of viruses including Trojans, spyware, malware, and adware on the system. While the system optimizer feature ensures the PC performance and speed are not compromised during the scanning and cleanup process.

This software is safe, efficient, and compatible with all Windows versions. It has a user-friendly interface and simple navigations which makes it quite easy for all levels of users including novice and intermediate to operate.

Click here to download Restoro and resolve the 0x80040600 error code on your PC today!

Do You Need Help with Your Device?

Our Team of Experts May Help
Troubleshoot.Tech Experts are There for You!
Replace damaged files
Restore performance
Free disk space
Remove Malware
Protects WEB browser
Remove Viruses
Stop PC freezing
GET HELP
Troubleshoot.Tech experts work with all versions of Microsoft Windows including Windows 11, with Android, Mac, and more.

Share this article:

You might also like

Change Font Size in Sticky Notes in Windows
Sticky Notes is one of the useful programs and in the early days, the option is available for users to change the font size of the text a lot easier. However, for some unknown reason, Microsoft decided to get rid of this feature in the latest Windows Update. One would expect that the feature will be replaced by an even more useful feature but it’s not which makes the Sticky Notes app worse than before. Worry not though for it doesn’t have to stay that way as there is another thing you can try to change the font size in your Sticky Notes app and that’s what we’re going to cover in this post. As mentioned, Microsoft removing this font feature is quite strange and in the past, users asked for this feature and since it’s no longer available, you can try following the steps given below to bring it back. And for that, you need to go to the Ease of Access section in the Settings app. Refer to the steps given below for more instructions. Step 1: First, tap the Win + I keys to open Settings and then go to the Ease of Access section. Step 2: After going to the Ease of Access menu and select Display from the list of options. Step 3: From there, you should see an option that says “Make text bigger”. And then use your mouse to navigate to the slider to change the size of the font. Note: Take note that after doing all the steps above, it will change not just the Sticky Notes app but also everything in Windows 10. This method is actually the best since it only changes the size of the apps rather than a wholesale change in your Windows 10 computer. Step 4: Next, scroll under Display until you see the “Change the size of apps and text on the main display” option where you’ll see that the option is 100% but you’ll want to change that to 125%. Step 5: After that, click on the drop-down menu and select 125% and then restart your Windows 10 computer. Step 6: Now open the Sticky Notes app and check if you can now change the font size in the Sticky Notes app.
Read More
Guide to Patching Error Code 34

Code 34 - What is it?

Code 34 is one of the several Device Manager error codes. This error code indicates that a hardware device on your PC is not properly configured.

This usually occurs when the device installed on your system is a non-plug and play. Non-plug and play devices don’t configure automatically and require manual configuration from the users end.

Error code 34 is usually displayed in the following format:

“Windows cannot determine the settings for this device. Code 34”

Solution

driverfix boxError Causes

Error code 34 may be triggered due to several reasons like:

  • Improper device configuration
  • Missing or outdated drivers

Device Manager error codes like code 34 are easy to fix. These error codes don’t indicate any serious PC problem, nor are they fatal like blue screen of death error codes.

Nonetheless fixing it immediately is advisable to ensure the proper functioning of the plugged-in hardware device. If you don’t resolve it, you may not be able to use the device.

Further Information and Manual Repair

When PC users experience error codes like code 34, they instantly think of hiring a professional for repair especially if they lack technical understanding.

If you are not a technical whiz and you are also thinking of hiring a professional for the repair job, then don’t! Here’s why, to begin with, Device Manager error codes can be resolved easily, better yet you can fix it by yourself without spending a dime even if you are not technically sound.

To help you, below is a list of easy and effective repair solutions for error code 34. Try them to resolve the issue.

Method 1 - Configure the Device by Using Device Manager

This is one of the best ways to resolve error code 34 on your system. The procedure will take 5 to 7 minutes. Simply follow the steps illustrated below to configure the problematic device on your PC.

  1. First off, go to the start menu
  2. Now type Device Manager in the search bar and press enter to continue
  3. Now in the Device Manager locate the problematic device and click on it
  4. Click on the resources tab to change the resource settings
  5. Now click on the Use Automatic Settings check box
  6. After that click on the Settings based on the tab and then click on the hardware configuration of the device you want to change
  7. Press resource type in the resource settings box to make further changes
  8. Once that is done, click change settings and type a new value for the resource type

Method 2 - Consult the Hardware Manufacturer for Resource Settings

You may not be able to configure resource settings for some devices in such an event it is advisable to consult your hardware manufacturer. Your hardware manufacturer can provide you with specific resource settings. Follow the manufacturer’s instructions to repair error code 34.

If the error continues to persist even after device configuration, then the problem may be linked to driver corruption. In that case, try method 3.

Method 3 - Download DriverFIX to Update Drivers Automatically

Whether code 34 is caused by outdated or corrupted drivers, simply download DriverFIX to resolve. DriverFIX is an advanced and user-friendly software program deployed with an intelligent programming system.

The software scans your PC to detect all problematic drivers. It finds and matches the latest and compatible versions and then updates the drivers accordingly that too automatically and on a regular basis.

Click here to download DriverFIX to repair Device Manager error code 34 on your PC automatically.

Read More
Seven Windows 10 security basics
Hello everyone and welcome to our Windows 10 security basics where we will provide you with common practices you should aim to follow in order not to cough some viruses, malware, keylogger, worm, etc. As you are all aware, we live in a digital age where we are surrounded by luxuries of unlimited information, video chats all over the globe, free calls via the internet, applications that track stuff for us, and many many more things that make our lives easier. Sadly with this kind of technology comes risks of cyber attacks that aim to steal your information, credit card numbers, or any other relevant stuff which could be used illegally in order to make purchases, loans, and other theft in your name so ones doing that could not get caught. Think of data stealers the same as you think of armed robbers in a dark alley, just this time their pray is data about your life so they can make purchases for themselves more than once. This article aims to provide you with some common logic, tips, and tricks of what should you do and where should you pay attention in order not to provide wrong people with your crucial information and data. we hope that you will find reading informative and helpful.
  1. Keep Windows updated.

    Microsoft is working hard on their Windows defender and firewall to provide protection to its users and fixing any introduced security leaks which are found in Windows itself. By updating and keeping Windows updated you make sure that every security leak that is found is patched and removed from Windows and that you have the latest database of known malware inside the firewall and defender. This common practice, however, should not be limited to Windows only, you should update every application you are using for the same reasons.
  2. Use antivirus, anti-malware, and firewall

    These applications exist for a reason and that reason is to protect your data. Dedicated applications specifically made for purposes of defending your data are better than any kind of I am careful mentality since sometimes is enough to just visit a website or just click on some link and you are compromised. You can use Windows Defender and firewall if you wish, they are already in Windows but if you are serious about your data and like to surf the internet some better protection is worth the investment.
  3. Get a dedicated password manager

    Your password is bad, if you use the same password everywhere then it is even worse. Computers have come a long way in the last 50 years and so have cyber attack applications which make your commonsense passwords extremely vulnerable and all of your accounts open to cyber attacks. Dedicated password managers that can hash passwords and automate them are your safest bet that your passwords will not be compromised, get one, and get it today.
  4. Do not click on anything inside emails

    Cyber attacks come in vast variety and one of them is sending you emails informing you that for example your Paypal or anything else has been hacked and that you must click this link to reset your password. These you do not click, no matter how convincing they sound or how good they look, if you need to update your information on a specific service or website, you delete email, open browser and go to that service and change stuff. The same goes with different offers, discounts, women seeking you, men seeking you, prince sending you 1 billion in gold. Only click on links in emails from a trusted and verified source.
  5. Do not click on pop-ups

    Similar to clicking on links in emails you should not click on pop-ups, the same rules, same stuff apply as with emails.
  6. Be careful what you are downloading

    Be careful from where you download your software and be careful what are you downloading and stop using pirated software, any kind of malicious applications, keyloggers, viruses, etc could be hidden in these downloads, and by downloading them you are opening doors to your private information. Only use legal software from trusted sources.
  7. Never leave your phone or computer unattended

    You can never tell who can implement malicious software or get some crucial information from unattended devices, lock them all time and take them with you.
There you go, 7 common tips and tricks for the basic security of your computer. Thank you for reading and I hope to see you again on our site.
Read More
Corsair Voyager laptop review

Corsair is well known for RAM memory modules for PC but then it has expanded to PC peripherals and even selling some pre-build computers as well in past few years. New Corsair expansion now includes a laptop line, starting with their new gaming laptop Voyager.

Corsair Voyager laptop

Voyager laptop is packed with a mechanical keyboard and MacBook-like touch bar for your typing and pointing needs. It is built with a 16-inch QHD+ screen packing 240Hz that is run by Radeon 6800M GPU. Also inside lurks AMD 16 thread Ryzen 9 6900HS CPU, Wi-Fi 6E support, Dolby Atmos audio, and full HD 1080p WEB camera.

The keyboard has low-profile mechanical Cherry MX switches with per-key RGB lightning and above is what Corsair calls a macro bar, with 10 shortcut buttons and a small LCD in the center.

Corsair is also including a few features that tie in with its other products. Many of the company’s keyboards, mice, and other accessories use the ‘Slipstream’ USB wireless adapter, which is built into the Voyager laptop. The macro bar is also configured using the same software used for the Elgato Stream Deck, a popular product sold by Corsair.

Read More
Fix DRIVER_VERIFIER_DETECTED_VIOLATION
Driver Verifier is a built-in tool in Windows 10 that monitors device drivers on your computer, if it detects issues with drivers, it will attempt to fix the issue. If you are encountering Blue Screen for a Driver and after running Driver Verifier you get another with message DRIVER_VERIFIER_DETECTED_VIOLATION ten follow this article step by step in order to solve it. There is a chance that you will maybe even have to do this in safe mode, if that is your case, login into safe mode and proceed, otherwise proceed normally.
  1. Update Device Drivers

    the most common issue with the blue screen is old Drivers, in most cases, graphical drivers, update all Drivers with the latest versions and see if this will resolve the issue.
  2. Stop or uninstall Virtualization software

    Virtua machine software is a great way to have a safe environment and to experiment while preserving your Windows installation intact, however sometimes due to the nature of these applications they can be a case for blue screen errors. Stop virtualization software to see if it will remove the issue. If that is the case, try another virtualization application
  3. Disable Driver Verifier

    Press ⊞ WINDOWS + X to open the secret menu Click on Command Prompt (admin) Inside command prompt type: verifier and press ENTER Select the Delete existing settings radio button Click Finish Reboot your computer
  4. Reset Driver Verifier

    Press ⊞ WINDOWS + X to open the secret menu Click on Command Prompt (admin) Inside command prompt type: verifier /reset and press ENTER Reboot your computer
  5. Use system restore

    Rollback Windows to the previous state where everything was working fine.
Read More
Network License NotAvailable15.570.0 Autodesk
If when trying to start Autodesk applications you receive a Network license not available error then please keep on reading, this guide is for you:

Causes of the error:

  • The license on the License Server is invalid.
  • The port for Autodesk Network License Manager is blocked.
  • The client computer is configured with incorrect license server information.
  • The license request is timing out on the client's computer before the license is obtained.

Solutions for the error:


Verify that the Autodesk License Server is setup with the correct license file.

To set up a license server for Windows, perform the following:

  1. Download and install the Network License Manager for Windows:
  2. Open LMTools and access the System Settings tab. Make a note of the "hostname" and "ethernet address" of the license server.
  3. Generate a Network License File in Autodesk Account.
  4. On the Service/License tab, select Configuration Using Services and LMTOOLS ignores license file path environment variables.
  5. On the Config Services tab, enter a name for the new service in the Service Name field.
  6. Fill the following fields, using the Browse buttons:
    • Path to the lmgrd.exe - Navigate to this file: C:\Autodesk\Network License Manager.
    • Path to the License file - Navigate to the new Autodesk.lic file, typically placed in: C:\Autodesk\Network License Manager\Licenses.
    • Path to the Debug Log file: C:\Autodesk\Network License Manager.
    • If no file is present, create a TXT file in Notepad and rename it “Debug.log.”
  7. Make sure the "Start Server at Power Up" and the "Use Services" boxes are checked. Then click Save Services.
  8. On the Start/Stop/Reread tab, click Start Server.
  9. On the Server Status tab, click Perform Status Enquiry.
  10. Licenses should display as active.

How to set up the Autodesk Network License Manager on a Mac.

Note: The Autodesk License Server Manager (version 11.16.2.0) is supported only on the following Mac operating systems:
  • Apple macOS High Sierra 10.13
  • Apple macOS Sierra 10.12
  • Apple Mac OS X El Capitan 10.11
  1. Download Autodesk Network License Manager version 11.16.2.0 for Mac
    • ​​Download the nlm11.16.2.0_ipv4_ipv6_mac_universal.tar.gz file to the Desktop.
  2. To install the Autodesk Network License Manager:
    • Double click on nlm11.16.2.0_ipv4_ipv6_mac_universal.tar.gz to unpack the installer package.
    • After unpacking nlm11.16.2.0_ipv4_ipv6_mac_universal.pkg, will be /Downloads/adlm/FLEXnet folder.
    • Double click on nlm11.16.2.0_ipv4_ipv6_mac_universal.pkg to start installation and follow the installation wizard.
    • The license server will be installed in /usr/local/flexnetserver/ directory.
  3. Change permissions for /usr/local/flexnetserver/ directory to 777
  • Open Terminal (located in /Applications/Utilities/Terminal) and enter the following command:
sudo chmod -R 777 /usr/local/flexnetserver
  • Note: Administrator password may be asked. While typing no characters are shown, just type out the password and hit return key.
  • Note: To start the license server only with elevated permissions (using sudo command), change permissions to 755 instead of 777.
  1. Create /usr/local/flexnetserver/licenses directory for network license file location
sudo mkdir /usr/local/flexnetserver/licenses
  1. Find the license server Host Name and Host ID.
  2. Generate the Network License File in the Autodesk Account
    • Once the license file is generated, make sure it has a .lic extension (e.g. adsk_license.lic) and is in a plain text format and place it in /usr/local/flexnetserver/licenses directory
Note: In this article we will refer to  adsk_license.lic as network license file name. Feel free to change the actual name of the license file, but make sure to reflect the new name when using the commands below.
  1. Create a debug.log file in the /usr/local/flexnetserver/ directory using the following command:
touch debug.log
  1. To start the Network License Server use the following command:
/usr/local/flexnetserver/lmgrd -c /usr/local/flexnetserver/licenses/adsk_license.lic -l /usr/local/flexnetserver/debug.log
Note: If folder permissions for  /usr/local/flexnetserver/ are set to  775, then use sudo command to start the server. For example:
sudo /usr/local/flexnetserver/lmgrd -c /usr/local/flexnetserver/licenses/adsk_license.lic -l /usr/local/flexnetserver/debug.log
  1. To obtain license server status enquiry:
/usr/local/flexnetserver/lmutil lmstat -a -c /usr/local/flexnetserver/licenses/adsk_license.lic
  1. To stop the license server:
/usr/local/flexnetserver/lmutil lmdown -q -force
  • A​​lternatively, run ps command to obtain process ids for lmgrd and adskflex and then kill those processes:
ps -ax | grep lmgrd
ps -ax | grep adskflex
kill -9
  • (provide process ids obtained by previous commands individually)

How to set up the Autodesk Network License Manager on Linux.

Note: The Autodesk License Manager (11.16.2.0) is supported only on the following Linux distros:
  • Red Hat® Enterprise Linux® 7
  • Red Hat Enterprise Linux 6
  • SUSE Linux Enterprise 12
  • SUSE Linux Enterprise 11
To configure the license manager use the following steps:
  1. Download Autodesk Network License Manager v. 11.16.2 for Linux from this link
    • ​​Download the nlm11.16.2.0_ipv4_ipv6_linux64.tar.gz file to your desktop.
  2. To install the Autodesk Network License Manager run following command as root.
    • tar –zxvf nlm11.16.2.0_ipv4_ipv6_linux64.tar.gz
    • rpm -vhi nlm11.16.2.0_ipv4_ipv6_linux64.rpm
    • The license server will be installed in /opt/flexnetserver/ directory.
  3. Find the license server Host Name and Host ID
  • To obtain the license server system hostid run the following command
/opt/flexnetserver/lmutil lmhostid From the command output note the hostid in quotes, if the system has two active NIC cards, select the first MAC address. lmutil - Copyright (c) 1989-2018 Flexera. All Rights Reserved. The FlexNet host ID of this machine is "000c297949e0"
  • To obtain the license server system hostname run the following command
/opt/flexnetserver/lmutil lmhostid hostname From the command output note the hostname of the license server. mutil - Copyright (c) 1989-2018 Flexera. All Rights Reserved. The FlexNet host ID of this machine is "HOSTNAME=Centos7.localdomain"
  1. Generate your Network License File in Autodesk Account
    • Once the license file is generated, make sure it has .lic extension (e.g. adsk_license.lic) and place it in /opt/flexnetserver/licenses directory.  If the directory doesn't exits, create it with this command: sudo mkdir /opt/flexnetserver/licenses
Note: in this article we will refer by adsk_license.lic your network license file name.
  1. To start the Network License Server
    • /opt/flexnetserver/lmgrd -c /opt/flexnetserver/licenses/adsk_license.lic -l /opt/flexnetserver/server_log.log
  2. To obtain license server status enquiry
    • /opt/flexnetserver/lmutil lmstat -a -c /opt/flexnetserver/licenses/adsk_license.lic
  3. To stop your license server service
    • /opt/flexnetserver/lmutil lmdown -q -force
    • alternatively you can also run ps command to obtain process ids for lmgrd and adskflex and then kill those processes
      • ps -aw | grep lmgrd
      • ps -aw | grep adskflex
      • kill -9 (provide process ids obtained by previous commands individually)
  4. To start the license server automatically after the system reboot
    • Open /etc/rc.d/rc.local script as root and enter license server start up command in it.
touch /var/lock/subsys/local /opt/flexnetserver/lmgrd -c /opt/flexnetserver/licenses/adsk_license.lic -l /opt/flexnetserver/server_log.logNote: To ensure that the script will be executed during boot, run following command as root. chmod +x /etc/rc.d/rc.local
  1. Make sure that all necessary ports are open:
  • lmgrd.exe needs ports 27000 to 27009.
  • adskflex.exe needs port 2080.
Note: Errors may occur if the network license file is corrupt or in the case of a combined network license it has incorrectly combined licenses. To learn more about combining licenses, see Combining License Files for Multiple Autodesk Products. Use the License File Parser to verify that the license contains the appropriate products and FLEXnet feature codes and does not display an error

Verify that TCP ports (2080, 27000-27009) used by Autodesk Network License Manager are not blocked by Firewall.

The FLEXlm® based version uses the following incoming ports:
  • TCP ports 2080 (for the adskflex vendor daemon)
  • TCP ports 27000 to 27009 (for the lmgrd master daemon, which uses the first open port in the range)
Note: If these port addresses are restricted by a router or firewall software, users on the remote side of the router will not have access to licenses controlled by the Network License Manager.

Verify that the client computer is configured with the correct license server name or IP.

Windows:

Clear license server information from the system registry.

  1. Type regedit in the Windows Search box and hit Enter key.
  2. Select the following registry key
  • [HKEY_CURRENT_USER\SOFTWARE\FLEXlm License Manager]
  1. As the key is selected, in right panel ADSKFLEX_LICENSE_FILE will be visible.
  2. Right click on the key and delete it.

Specify the license server in ADSKFLEX_LICENSE_FILE system variable 

  1. Go to Start > Control Panel > System and Security > System.
  2. Select Advanced system settings.
  3. On the System Properties dialog, click Environment Variables.
  4. Under System Variables, click New.
  5. Enter ADSKFLEX_LICENSE_FILE for the variable name and 2080@SERVER_NAME _OR _IP for the variable value.
Note: the license server information most often is recorded in LICPATH.lic file and can be verified there too.  ADSKFLEX_LICENSE_FILE system variable supersedes LICPATH.lic.  Thus, setting the system variable is preferable when this error is seen.

If the license server is on a VPN or a remote network set the FLEXLM_TIMEOUT environment variable:

  1. Go to Start > Control Panel > System and Security > System.
  2. Select Advanced system settings.
  3. On the System Properties dialog, click Environment Variables.
  4. Under System Variables, click New.
  5. Enter FLEXLM_TIMEOUT for the variable name and 5000000 for the variable value.
  6. Click OK to save the setting.
Note: if needed the variable value can be increased to 10000000.

Mac/Linux:

Specify the Autodesk Network License server information in $HOME/.flexlmrc file.

Use a text editor to create a flexlmrc.txt file and save it in Plain text format (In TextEdit on Mac: Format - Make Plain Text) on desktop. The file content should look like this, except with the name or IP address of the license server.
  • ADSKFLEX_LICENSE_FILE=@SERVER_NAME _OR _IP
If the license server is on the same machine as the Autodesk software, use localhost as the license server name.  Thus, the content of flexlmrc file could look like this:
  • ADSKFLEX_LICENSE_FILE=@localhost
Note: On firewall restricted network or when accessing the license server via VPN, need to include TCP port/s (usually 27000 or 2080) into Autodesk License Server service as follows: ADSKFLEX_LICENSE_FILE=2080@SERVER_NAME _OR _IP

Once flexlmrc file is created move it to user's $HOME folder as follows:

  1. Open a Terminal window
  2. Type open ~ (Mac) or nautilus ~ (Linux) to open $HOME folder
  3. Drag and drop flexlmrc.txt file from Desktop to the home folder.
  4. To make the file a configuration file, rename it to .flexlmrc (please note . [DOT] in front of the file name) by running the following command:
  • mv flexlmrc.txt .flexlmrc (Mac)
  • mv flexlmrc .flexlmrc (Linux)

Verify that the license server information registered with the product is correct (versions 2020 and later only)

In versions 2020 and later, the license server information is registered with the AdskLicensing service running locally on the workstation. When changing to a new license server, the old server information may still be registered with AdskLicensing and result in the error above, if this is not appropriately updated. See the below steps to solve this:
  1. Click the Start menu and type cmd.
  2. Right-click on the Command prompt and choose "Run As Administrator."
  3. In the Command prompt, run the following command, followed by ENTER:

"C:\Program Files (x86)\Common Files\Autodesk Shared\AdskLicensing\Current\helper\AdskLicensingInstHelper.exe" change -pk PRODKEY -pv VER.0.0.F -lm "" -ls "" -lt""

Note:

  • Replace PRODKEY with the product key correspondent to your product(s). See Look Up Product Keys for the full list.
  • Replace VER with the version you are using. E.g. 2020 for AutoCAD 2020.
  • Repeat this step for each software you need to reset.
  1. Open Registry Editor (Start > type regedit > ENTER).
  2. Navigate to HKEY_CURRENT_USER\Software\FLEXlm License Manager.
  3. On the right-side, verify of the ADSKFLEX_LICENSE_FILE key exists. If yes, remove it (right-click > Delete).
  4. Run the software again.
  5. Select Multi-user in the Let's Get Started screen.
  6. Follow the steps to connect to your license server.
Read More
Prevent screen from shutting down in Windows
You left your computer to go to the bathroom or to fetch something to eat, maybe you have to answer the phone or open door to a friend and after some time you get back to your computer see the black screen, you move the mouse and it starts to come from sleep slowly. I am the kind of person who gets annoyed by this kind of behavior, I like my PC to be ON all time when I want it to be ON and my power plan on best performance so naturally, I have turned this sleep feature OFF. If you are interested to see how you to can turn off your screen sleeping follow this easy guide.
  1. Press ⊞ WINDOWS to open the start menu and click on the settings Windows 10 Start menu with marked settings icon
  2. On settings, screen click on system Windows settings with System section selected
  3. When the system dialog opens go to Power & Sleep and on the right side change all values to never. windows settings power and sleep
Please note that after each update Windows tend to reset these settings so you will sadly have to return to this after each major update.
Read More
Arrows keys are not working in Microsoft Excel
As you know, Excel sheet is frequently acclaimed as one of the most useful software that allows users to create spreadsheets, crunch numbers as well as prepare a business report. Usually, tapping the arrow keys to move from one cell to another. However, there are times when you might experience trouble in tapping them – for instance, they won’t work when you tap them. This kind of problem can be quite frustrating since no matter what you do, especially when you tap the arrow keys, instead of a single cell, it moves the entire spreadsheet. If you are one of the users who experience this problem, worry no more for this post will guide you on what you can do to fix it. When arrow keys won’t function as intended in Excel spreadsheets, it could be due to unintended behavior of the Scroll key or it could be related to some issues with the keyboard driver. Whatever the cause is, here are some suggestions you can check out to fix it.

Option 1 – Try to disable the Scroll Lock

The first thing you can do to fix this problem with arrow keys is to disable the Scroll Lock. Although doing this is easy, newer laptops don’t actually come with it so if your keyboard does not come with a scroll key, all you have to do is tap the Fn key and disable Scroll Lock. Aside from that, you could also use the on-screen keyboard to turn off the Scroll Lock. You will see its status on the Excel sheet which will help you to double-check. Moreover, you could also tap the Shift + F14 keys to toggle off the Scroll Lock. To use the on-screen keyboard to turn off Scroll Lock, follow the steps below.
  • Tap the Windows key and type “on-screen keyboard” and then tap Enter.
  • Once the on-screen keyboard is opened, you should see that the Scroll Lock is on the “On” position since the ScrLk keys are in blue.
  • Like pointed out earlier, you can utilize the Scroll Lock indicator located in the status bar as well as disable or enable the scroll key by using this feature on Microsoft Excel.

Option 2 – Try turning on the Sticky key

If disabling the Scroll Lock did not fix the problem, you can try turning on the Sticky Key instead. A lot of users reported that this option fixed the problem for them. So you should try to turn on the Sticky key and to do that, follow the steps below.
  • First, type “control panel” in the Start Search and click on Control Panel from the search results.
  • Next, select the “Turn On Sticky Keys” option and click on OK.
  • After that, go back and uncheck the “Turn On Sticky Keys” option. This should fix the malfunctioning arrow keys on Excel.

Option 3 – Try running the Hardware and Devices Troubleshooter

The first thing you can do to fix the problem is by running the Hardware Troubleshooter. Although it won’t make much of a difference, there’s still a possibility that it could automatically fix the problem with these function keys. To use it, refer to these steps:
  • The first thing you need to do is click on Start and then on the gear-like icon to pull up the window for Settings.
  • After opening Settings, look for the Update and Security option and select it.
  • From there, go to the Troubleshoot option located on the left-hand side of the list.
  • Next, select Hardware and Devices from the list and open the Troubleshooter and run it. Once it is doing its job, wait for it to complete the process and then restart the system.
  • After the system restarts, check if the problem’s now fixed. If not, refer to the next option given below.

Option 4 – Update the keyboard driver

You can also update the keyboard driver to fix the problem. There are cases when an outdated or corrupted driver can fix the problem. To do so, follow the steps below.
  • Tap the Win + R keys to open the Run dialog box.
  • Then type “devmgmt.msc” in the field and hit Enter to open the Device Manager.
  • From there, look for the keyboard driver and click on it.
  • Next, right-click on the keyboard driver and select the Update driver option.
  • After that, click the “Search automatically for updated driver software” option to proceed.

Option 5 – Reinstall the keyboard driver

If updating the keyboard driver didn’t help, then you might want to reinstall it. How? Follow the steps below.
  • Tap the Win + R keys to launch Run.
  • Type in MSC into the box and tap Enter or click OK to open the Device Manager.
  • After that, a list of device drivers will be displayed. Look for the keyboard driver, right-click on it and then select “Uninstall device”.
  • After that, unplug the device and restart your PC.
  • Then plug your device back in. Assuming your device is connected to your PC, open the Device Manager again.
  • Next, click on the Action button and click the Scan for hardware changes button. That should fix the problem
Note: You could also completely uninstall the driver and go directly to the manufacturer’s website and download the latest driver for your hardware and then install it.
Read More
How to Turn Bluetooth ON in Windows 11
Windows 11 Bluetooth
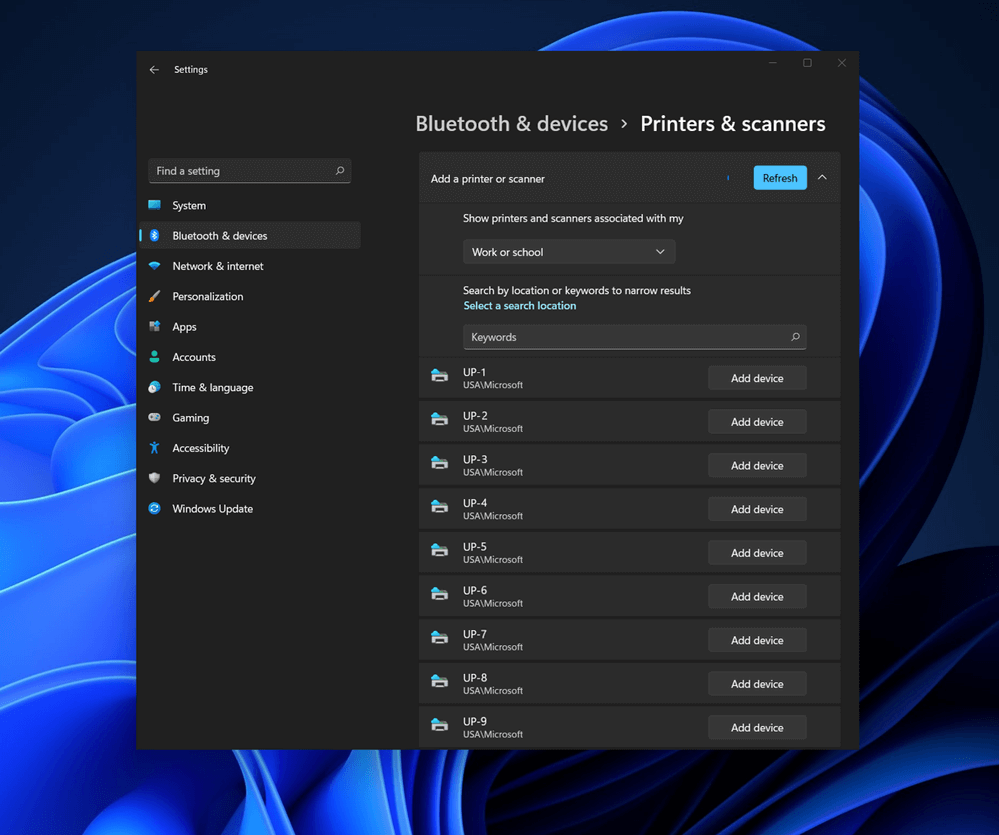
Bluetooth perhaps is slowly becoming an outdated feature but sometimes you can really used it and need it. By default, in Windows 11 Bluetooth is turned OFF so if you need it, you will need to turn it ON first. Luckily turning it ON is easy and we will guide you through the process

Turning Bluetooth using the Quick Settings menu

The easiest and fastest way to turn the Bluetooth ON is using the quick setting menu:
  1. Click on indicator icons located left of date and time in Taskbar
  2. Click on the Bluetooth icon (if the icon is not displayed, click on the pencil icon, then click on Add and add Bluetooth icon from the list)
  3. Right-click on the Bluetooth icon and select go to Settings
  4. Go to Adding a Bluetooth Device to Windows 11 section

Switch it ON via Windows Settings

  1. Open Windows settings by using ⊞ WINDOWS + I combination
  2. Click on Bluetooth & Devices
  3. Inside settings turn Switch to ON beside Bluetooth
  4. Click + Add Device large button on top
  5. Click Bluetooth
  6. Select device in the list of found devices (make sure device is turned ON, it has Bluetooth sharing ON, and that it is in pairing mode)
  7. If the device needs the password, type it in
  8. When the message Your device is ready to go is showed on the screen click on the Done

Advice on Bluetooth devices

Note that the Bluetooth devices you connect to Windows 11 stay linked to your PC unless you pair them with a different PC, smartphone, or tablet later. After a time, most Bluetooth devices power down automatically to save battery life. To continue where you left off, either power the Bluetooth device up (if it has a power button) or press a button on a keyboard or mouse, and it should automatically turn on and reconnect with your PC. If you’re having trouble connecting your Bluetooth device, make sure that Windows 11 is fully updated and that you’ve installed any drivers that came with your device. Make sure that the device is fully charged or that it has a fresh set of batteries. while Windows is searching. You’ll need to remove the device from Windows 11 first and then attempt to pair it with your PC again.

Removing devices

If you need to remove (un-pair) a Bluetooth device, just open Windows Settings and navigate to Bluetooth & Devices. Locate the name of the device that you want to remove, click the three dots button in the corner of its square and select Remove Device.
Read More
How to place control panel in File explorer
Recent Windows updates have been slowly but surely moved a lot of control panel features into settings. This indicates that in the long term goal is probably to get rid of the control panel altogether. No matter how the setting app is easy to use and good there are still things in the control panel that we need and we will still need until they are all moved in the setting application. There are several ways to open and get to the control panel from run dialog to shortcut keys but one perhaps more convenient and easiest way is to just simply have in file explorer right beside hard drives double click away. In order to place the control panel icon inside file explorer, we will need the help of our old friend: the registry editor. As always playing with the registry editor can cause some instability and it is always a smart thing to back up it first before attempting any kind of edits.

Registry editor adding a key

To open registry editor press ⊞ WINDOWS + R to open the run dialog and inside type in REGEDIT followed by ENTER Once the registry editor is opened locate the following key: HKEY_LOCAL_MACHINE\SOFTWARE\Microsoft\Windows\CurrentVersion\Explorer\MyComputer Right-click on the NameSpace folder on the left navigation pane and then select New > Key Rename the key with {21EC2020-3AEA-1069-A2DD-08002B30309D} (This CLSID code will add access to the Category view of the Windows 10 Control Panel) or with {26EE0668-A00A-44D7-9371-BEB064C98683} (This CLSID code will add access to the large icons view of the Windows 10 Control Panel) Save and exit the registry editor Now when opened, file explorer will show a control panel icon for easy access.
Read More
1 2 3 171
Logo
Copyright © 2023, ErrorTools. All Rights Reserved
Trademark: Microsoft Windows logos are registered trademarks of Microsoft. Disclaimer: ErrorTools.com is not affiliated with Microsoft, nor claims direct affiliation.
The information on this page is provided for information purposes only.
DMCA.com Protection Status