The network driver error is a not serious Windows issue. It happens from time to time and luckily it can be solved with a little effort and in a short time period. Today in this article we will explore the most common solutions for driver malfunction for Network adapter inside Windows 10. If you have this particular problem, go from step 1 to the last step since all steps are meant to go from simplest to the most complex.
All of that being said let us fix your Network driver issue.
Check to see if the cable is plugged in and not malfunctioned
The first common issue of the network now working can be cable malfunction or bad contact in your network adapter or in HUB/SWITCH. There are various tools to check the quality and working order of cable but you could also make sure that it is not a cable issue by trying connection with the correct working cable. If the network is restored with another cable then change the malfunctioning cable and your issue is resolved if the problem persists move to the next step.
Check if Windows troubleshooter will resolve the issue
Righ-click on the network icon in the taskbar and choose to troubleshoot problems. Windows built-in tools could resolve issues and fix them for you. If by any chance Windows is not able to find or resolve issues move to the next step.
Check if the Device Manager is reporting an error and update the driver
If the hardware is functioning properly then the issue might be in Windows not detecting device or driver malfunction. In any case, the Device Manager will be the one who will report this problem. In order to check to see if the driver is properly working press ⊞ WINDOWS + X to open the hidden start menu.
Once it opens, click on Device Manager to open it,
If you have a driver device error inside Windows, you should see it immediately when entering the Device Manager, it will have a yellow exclamation mark beside it. Right-click on it and choose update driver.
Reinstall driver
If driver update failed or you already have the latest drivers, reinstalling them could fix the issue since drivers might have corrupted during installation of some update or application. Follow steps from point 3 to get to the driver in Device Manager, then right-click on it but instead of update choose to uninstall. Reboot Windows once the driver is uninstalled and Windows will install a new one automatically. If you do not want to update drivers automatically, do not restart your system, instead install the latest driver for your device, then reboot. Since this is a network error, you will have to get drivers on another computer and transfer them via USB to malfunctioning one.
Check Windows update
Check to see if the latest Windows update is installed, update your Windows if needed
Fix driver issue with DRIVERFIX
If everything else fails, get DRIVERFIX, a premium solution for your PC issues, and fix driver errors.
As you know, each one of the applications that you use in your Windows 10 computer has its own set of permissions by default. These applications either allows or denies the interactions between a few other applications, depending on their own needs. This is why you might suddenly encounter a message that says,
“This app wants to access your pictures”or“This app wants to access your account info”
both of which are followed by two buttons that will ask you to Allow or Deny the action. You can always click on any of the given options. This will determine the permission of the application.
Users in Windows 10 are given the option to either allow or deny applications in accessing their account information like name, picture and other account information. Thus, in this post, you will be guided on how you can change the Privacy settings of these apps to allow or deny them permission to access not just your account info but for all users, as well as specific apps in Windows 10.
The user account information is part of the Privacy data in Windows 10 that you can control easily using the Settings app. In fact, you can revoke or grant access permission for your account information, all the users and specific applications to do that, follow each one of the instructions provided below carefully.
Allow or deny apps permission to account info for yourself:
Step_1: The first thing you have to do is open Settings. From there, select Privacy.
Step_2: After that, scroll and look for Account info and select it.
Step_3: Now turn off the toggle button for the “Allow apps to access your account info” option if you want to deny apps permission to your account info. But if you want to allow them access, simply turn the toggle button on. Keep in mind that when you allow access or permission, you can select which apps can access your picture, name, and other account info by simply using the settings on the page you’re currently in.
Now if you want to allow or deny apps to access your account info for all the users, here’s what you have to do:
Step_1: First, open Settings and click on the icon for Privacy.
Step_2: Next, scroll down until you see the Account info located on the left side and then click on it.
Step_3: After that, click on the Change button under the “Allow access to account info on this device” section. If you want to deny account info access for all other users, then turn the toggle button off. Doing so will automatically disable not just the account info access for all users but also for all the apps as well.
On the other hand, if you want to allow or deny account info access to specific apps, you can do so by following these steps:
Step_1: As you did earlier, go to Settings and click on the Privacy icon.
Step_2: After that, scroll down and select Account info located on the left side.
Step_3: Now turn on or off the toggle button under the “Choose which apps can access your account info” section if you want to deny or allow specific apps permission to access Account Info. If you’ve turned on the toggle button under the “Allow apps to access your account info”, all the apps get access permissions by default.
Error code 0x8007007e often occurs when users attempt to use Windows Update but are unable to access updates or webpages. To resolve this issue, you will need to use tools that detect and correct corrupted files as this is usually the main reason for the error.
Solution
Error Causes
Once this error code is encountered, it's a clear indication that your Operating System has malfunctioned. This could be a consequence of an incorrect or failed installation of software. The software might leave invalid entries in the Windows registry. Improper shut down of your system and a malware attack are also causes of error code 0x8007007e. Additionally, someone with little or no technical knowledge might have deleted a system file by accident. Missing system files can also equate to other error codes such as registry error code 19.
You may not always be able to prevent issues from affecting your computer, but proper measures can be taken to limit your risk of experiencing problems like error code 0x8007007e. See the following suggestions below:
Ensure proper system maintenance by regularly using your automated tool. This will ensure your system is in good shape and error-free. It will also clean your system regularly leading to a boost in PC performance
Keep antivirus software up-to-date. Antivirus software if crucial for the proper functioning of your computer. Keeping your antivirus updated is one of the best ways you can avoid problems with your PC.
Further Information and Manual Repair
Method One: System File Checker
System File Checker is a Windows tool that allows users to check their system for corrupt or bad system files. The utility scans for corrupt files and repairs them as well as files that may have gone missing.
Depending on the type of Windows operating system on your computer, you may need to follow varying instructions. However, note that Windows operating systems including Windows 10 and Windows 8 or 8.1 and Windows Vista all provide access to System File Checker via Command Prompt.
Once you run System File Checker, the tool should be able to repair and replace corrupted files. However, in cases where the repair process does not take place, you can attempt a manual repair by replacing the corrupt file the tool identifies with a good file. The process may require technical knowledge of Command Prompt so consider help from a Windows repair technician or consider contacting Windows for instructions based on your computer’s operating system.
Method Two: Run System Restore Tool
The System Recovery Options menu in Windows contains many tools which can enable users to resolve serious errors. In the case of Error Code 0x8007007e, one of the best tools in this menu is System Restore.
When an error occurs which inhibits users from accessing key functions on their system, System Restore enables the user to restores the computer to an earlier period without causing harm to files, photos, or documents.
However, once you run this tool, you will only be able to access files available within the period to which your computer is restored. For this reason, carefully consider which period is best suited to your purposes. Also, ensure you restore the system to a time when error code 0x8007007e was not present on your machine.
If System Restore does not resolve the error, you may undo the restoration changes. Ensure you have sufficient free space on your machine hard disk before you proceed (300 MB at least for hard drives above 500MB or at least 50 MB for smaller sized disks).
Method Three: Download Automated Software
When it comes to resolving error codes, it can often be a frustrating and tricky venture, especially when you are attempting to fix the problem manually. The Internet is awash with bits and pieces of instruction, some misleading at best with uncertain success rates.
But what if there was a one-stop-shop or better yet a tool that offered solutions for error codes including 0x8007007e? Download a powerful automated tool that offers easy and effective, user-friendly solutions for users with varying error code problems.
Download the nlm11.16.2.0_ipv4_ipv6_mac_universal.tar.gz file to the Desktop.
To install the Autodesk Network License Manager:
Double click on nlm11.16.2.0_ipv4_ipv6_mac_universal.tar.gz to unpack the installer package.
After unpacking nlm11.16.2.0_ipv4_ipv6_mac_universal.pkg, will be /Downloads/adlm/FLEXnet folder.
Double click on nlm11.16.2.0_ipv4_ipv6_mac_universal.pkg to start installation and follow the installation wizard.
The license server will be installed in /usr/local/flexnetserver/ directory.
Change permissions for /usr/local/flexnetserver/ directory to 777
Open Terminal (located in /Applications/Utilities/Terminal) and enter the following command:
sudo chmod -R 777 /usr/local/flexnetserver
Note: Administrator password may be asked. While typing no characters are shown, just type out the password and hit return key.
Note: To start the license server only with elevated permissions (using sudo command), change permissions to 755 instead of 777.
Create /usr/local/flexnetserver/licenses directory for network license file location
sudo mkdir /usr/local/flexnetserver/licenses
Find the license server Host Name and Host ID.
Generate the Network License File in the Autodesk Account
Once the license file is generated, make sure it has a .lic extension (e.g. adsk_license.lic) and is in a plain text format and place it in /usr/local/flexnetserver/licenses directory
Note: In this article we will refer to adsk_license.lic as network license file name. Feel free to change the actual name of the license file, but make sure to reflect the new name when using the commands below.
Create a debug.log file in the /usr/local/flexnetserver/ directory using the following command:
touch debug.log
To start the Network License Server use the following command:
To configure the license manager use the following steps:
Download Autodesk Network License Manager v. 11.16.2 for Linux from this link
Download the nlm11.16.2.0_ipv4_ipv6_linux64.tar.gz file to your desktop.
To install the Autodesk Network License Manager run following command as root.
tar –zxvf nlm11.16.2.0_ipv4_ipv6_linux64.tar.gz
rpm -vhi nlm11.16.2.0_ipv4_ipv6_linux64.rpm
The license server will be installed in /opt/flexnetserver/ directory.
Find the license server Host Name and Host ID
To obtain the license server system hostid run the following command
/opt/flexnetserver/lmutil lmhostid
From the command output note the hostid in quotes, if the system has two active NIC cards, select the first MAC address.
lmutil - Copyright (c) 1989-2018 Flexera. All Rights Reserved.
The FlexNet host ID of this machine is "000c297949e0"
To obtain the license server system hostname run the following command
/opt/flexnetserver/lmutil lmhostid hostname
From the command output note the hostname of the license server.
mutil - Copyright (c) 1989-2018 Flexera. All Rights Reserved.
The FlexNet host ID of this machine is "HOSTNAME=Centos7.localdomain"
Generate your Network License File in Autodesk Account
Once the license file is generated, make sure it has .lic extension (e.g. adsk_license.lic) and place it in /opt/flexnetserver/licenses directory. If the directory doesn't exits, create it with this command: sudo mkdir /opt/flexnetserver/licenses
Note: in this article we will refer by adsk_license.lic your network license file name.
/opt/flexnetserver/lmutil lmstat -a -c /opt/flexnetserver/licenses/adsk_license.lic
To stop your license server service
/opt/flexnetserver/lmutil lmdown -q -force
alternatively you can also run ps command to obtain process ids for lmgrd and adskflex and then kill those processes
ps -aw | grep lmgrd
ps -aw | grep adskflex
kill -9 (provide process ids obtained by previous commands individually)
To start the license server automatically after the system reboot
Open /etc/rc.d/rc.local script as root and enter license server start up command in it.
touch /var/lock/subsys/local
/opt/flexnetserver/lmgrd -c /opt/flexnetserver/licenses/adsk_license.lic -l /opt/flexnetserver/server_log.logNote: To ensure that the script will be executed during boot, run following command as root.
chmod +x /etc/rc.d/rc.local
Make sure that all necessary ports are open:
lmgrd.exe needs ports 27000 to 27009.
adskflex.exe needs port 2080.
Note: Errors may occur if the network license file is corrupt or in the case of a combined network license it has incorrectly combined licenses. To learn more about combining licenses, see Combining License Files for Multiple Autodesk Products. Use the License File Parser to verify that the license contains the appropriate products and FLEXnet feature codes and does not display an error
Verify that TCP ports (2080, 27000-27009) used by Autodesk Network License Manager are not blocked by Firewall.
The FLEXlm® based version uses the following incoming ports:
TCP ports 2080 (for the adskflex vendor daemon)
TCP ports 27000 to 27009 (for the lmgrd master daemon, which uses the first open port in the range)
Note: If these port addresses are restricted by a router or firewall software, users on the remote side of the router will not have access to licenses controlled by the Network License Manager.
Verify that the client computer is configured with the correct license server name or IP.
Windows:
Clear license server information from the system registry.
Type regedit in the Windows Search box and hit Enter key.
As the key is selected, in right panel ADSKFLEX_LICENSE_FILE will be visible.
Right click on the key and delete it.
Specify the license server in ADSKFLEX_LICENSE_FILE system variable
Go to Start > Control Panel > System and Security > System.
Select Advanced system settings.
On the System Properties dialog, click Environment Variables.
Under System Variables, click New.
Enter ADSKFLEX_LICENSE_FILE for the variable name and 2080@SERVER_NAME _OR _IP for the variable value.
Note: the license server information most often is recorded in LICPATH.lic file and can be verified there too. ADSKFLEX_LICENSE_FILE system variable supersedes LICPATH.lic. Thus, setting the system variable is preferable when this error is seen.
If the license server is on a VPN or a remote network set the FLEXLM_TIMEOUT environment variable:
Go to Start > Control Panel > System and Security > System.
Select Advanced system settings.
On the System Properties dialog, click Environment Variables.
Under System Variables, click New.
Enter FLEXLM_TIMEOUT for the variable name and 5000000 for the variable value.
Click OK to save the setting.
Note: if needed the variable value can be increased to 10000000.
Mac/Linux:
Specify the Autodesk Network License server information in $HOME/.flexlmrc file.
Use a text editor to create a flexlmrc.txt file and save it in Plain text format (In TextEdit on Mac: Format - Make Plain Text) on desktop.
The file content should look like this, except with the name or IP address of the license server.
ADSKFLEX_LICENSE_FILE=@SERVER_NAME _OR _IP
If the license server is on the same machine as the Autodesk software, use localhost as the license server name. Thus, the content of flexlmrc file could look like this:
ADSKFLEX_LICENSE_FILE=@localhost
Note: On firewall restricted network or when accessing the license server via VPN, need to include TCP port/s (usually 27000 or 2080) into Autodesk License Server service as follows: ADSKFLEX_LICENSE_FILE=2080@SERVER_NAME _OR _IP
Once flexlmrc file is created move it to user's $HOME folder as follows:
Open a Terminal window
Type open ~ (Mac) or nautilus ~ (Linux) to open $HOME folder
Drag and drop flexlmrc.txt file from Desktop to the home folder.
To make the file a configuration file, rename it to .flexlmrc (please note . [DOT] in front of the file name) by running the following command:
mv flexlmrc.txt .flexlmrc (Mac)
mv flexlmrc .flexlmrc (Linux)
Verify that the license server information registered with the product is correct (versions 2020 and later only)
In versions 2020 and later, the license server information is registered with the AdskLicensing service running locally on the workstation. When changing to a new license server, the old server information may still be registered with AdskLicensing and result in the error above, if this is not appropriately updated.
See the below steps to solve this:
Click the Start menu and type cmd.
Right-click on the Command prompt and choose "Run As Administrator."
In the Command prompt, run the following command, followed by ENTER:
Shortcut virus is an easily spreadable and annoying combination of Worm and Trojan that hides all of your files and folders and then replaces them with shortcuts that look identical to replaced files and folders.
Once disguised it will wait patiently for a user's click and once that happens it will replicate itself and further infect the system. This rapid spread can lead to stolen personal data, some system hick-ups, and other system-related issues.
This malware mainly affects physical file transfer devices like for example and most USB drives, hard drives, and SD memory cards and it can easily transfer itself to the computer.
The advantage of this shortcut virus comparing it to others is that it is mostly undetected by a vast variety of antivirus software. So running just anti-virus software maybe not be enough to remove it from your system. Luckily for all unfortunate users that have caught this annoyance, it can be easily removed fully manually in a short time.
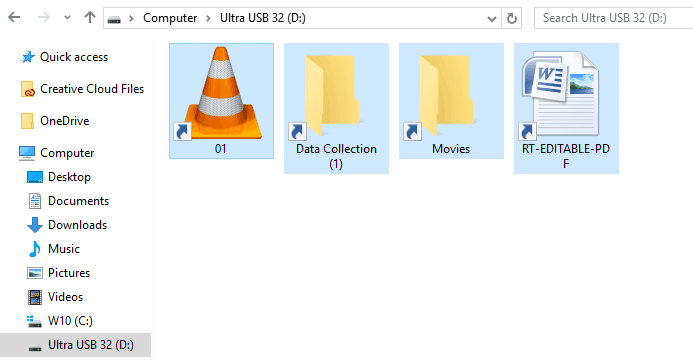
How to Remove Virus from USB and other removable media
Firstly plugin USB, SD, or removable drive. The infection will transfer to your computer when the infected drive is plugged in so before we go to clean the computer itself, clean each removable drive that you have. Also know that infection will spread from computers into removable devices as well if it is not cleaned.
Open the File Explorer and remember under which letter is removable drive registered. Open Command prompt but with administrator privileges and go to infected rive by typing its letter followed with “:” (for example D:) and press ENTER
Once you have successfully gone to infected drive type in command prompt:
Attrib -s -r -h /s /d *.*
This will unlock all original files back into removable storage, next copy all files to your computer, and format the removable drive. Once the format is complete, unplug the removable device. Continue to clean all devices with the same method.
How to Permanently Remove a Shortcut Virus from Your PC
Now once we have cleaned all removable devices it is time to fully clean the PC
Firstly open the task manager ( CTRL + SHIFT + ESC ), in the process tab find wscript.exe or wscript.vbs, right-click on it (or both if present), and select End Task. Now close the task manager and press Start. Inside start typing in registry editor to search for it and once found open it.
Find the following key inside the registry editor:
HKEY_CURRENT_USER/Software/Microsoft/Windows/CurrentVersion/Run
In the right panel, look for any strange-looking key names, such as odwcamszas, WXCKYz, OUzzckky, etc. For each one, run a Google search to see if it's related to shortcut viruses.
If any returns a positive match, right-click on them and select Delete. !!! Accidentally deleting an important key can cause Windows to become unstable, so double-check everything !!!.
Close the Registry Editor
Now press ⊞ WINDOWS + R to open the run dialog and type in it Msconfig followed by ENTER. Once the System Configuration window opens go to the Startup tab. In the Startup tab, look for any strange-looking .EXE or .VBS programs, select each one and click Disable. Close the Window.
Once again open the run dialog and type inside %TEMP% and press ENTER in order to open the Windows temp folder. Inside this folder delete everything.
Next in the File explorer go to
C:\Users\[username]\AppData\Roaming\Microsoft\Windows\Start Menu\Programs\Startup
Look for any strange-looking .EXE or .VBS files and delete them.
The Intel Driver and Support Assistant automatically identifies, finds, and installs drivers in a computer and is pre-installed in newer Intel-supported systems. If you are using one of those newer Intel supported systems but encountered an error that says, “Communication with service process failed, Tray cannot start” when you launch a program, read on as this post will guide you in fixing this problem.
This kind of issue in Intel supported system could be due to some third party application that’s meant to update drivers could be interfering. It is also possible that the Intel Driver and Support Assistant application is corrupted. Whatever the cause may be, here are some suggestions you have to check out to resolve the problem.
Option 1 – Try to uninstall all the third party driver update applications
One of the reasons why some users install third-party driver update software is that it is kind of tiresome to update each one of the drivers manually. However, as tiresome as it might be, it is still better than using a third-party driver update application as these kinds of applications could mess up the drivers, and the Intel Driver and Support Assistant is still much better. To fix the error, you have to uninstall the previously installed third-party driver update application on your computer.
Tap the Win + R keys to open the Run dialog box
Then type “appwiz.cpl” in the field and hit Enter to open the Programs and Features in Control Panel.
From there, look for the third-party driver update application you are using, select it and then click on Uninstall to remove it.
After that, restart your computer and try to install the latest version of the program again. It should work now. If not, proceed to the next available option below.
Option 2 – Try to disable the DSATray in Startup
Another thing about the “Communication with service process failed, Tray cannot start” error is that it keeps on popping up each time you boot your computer. And so to resolve this bug, you can just disable the DSATray from Startup. How? Refer to these steps:
Tap the Ctrl + Alt + Del to pull up the Security options window.
From there, select the option to open the Task Manager.
Once you’re in the Task Manager, go to the Startup tab and look for “DSATray” and right-click on it and then select the Disable option.
Now restart your computer and you should be good to go.
Option 3 – Try to reinstall the Intel Driver and Support Assistant
If the Intel Driver and Support Assistant is corrupted, you need to uninstall it from your computer. All you have to do is go to Programs and Features like what you did in the first option to uninstall the program. Once you’ve uninstalled it, download the newer or latest version of the Intel Driver and Support Assistant from the official site of Intel and then install it.
Many Minecraft players are experiencing Realms internal server error 500, luckily for all of that players, we are offering you solutions.
Preliminary Fixes
Before heading towards the fixes here it is suggested to try some quick tweaks that might work in your case to fix Minecraft Internal Server Error 500.
Restart your PC – Very first it is suggested to shut down your computer and after that restart the system. This worked for many players to get rid of the server outages issue.
Update your Windowsversion – Check if you are running an outdated Windows version then make sure to install the latest Windows update and then run the game.
Update Your Game Version – Also make sure you are running an updated version of Minecraft Realms. Installing the latest updates not only makes the game more stable but also helps you to solve common glitches and issues with the game. So, check if any recent updates are available to make sure to download and install them
Modify the Game Settings – Check if you have tweaked some of the game settings then this might be the reason for the problem. So try to reconfigure the settings to default. This may work for you.
Now after following the preliminary solutions check if the Minecraft Realms Internal Server Error 500 is resolved or else head to the next solution.
Check your Internet Connection
As said above if the internet connection is not working properly or it is preventing you from accessing the servers, then this can also cause the Internal Server Error 500 in the Minecraft server.
So, very first make sure your internet connection is stable and working properly. Also if you are using Wi-Fi then use a wired connection to get a stable network.
Moreover, if your internet connection is working fine then there is a possibility that your internet connection is causing interruption and preventing you from accessing the Minecraft Realms server.
So, if this is the case then here it is suggested to use a VPN connection to get exceptionally fast & reliable speeds without getting detected.
Check for the Minecraft Server Outage
Well, there is a possibility the Minecraft servers are down and if this is the case then you don’t have any other option than just waiting for the servers to get restarted and the service becomes available again.
Also, the service outages can affect the ability of the game and as a result, you are unable to play the game. Additionally, you can also inquire about Minecraft’s server status by visiting the Downdetector website.
But if you find the services are running fine then the issue is from your side.
Disable Background Applications
If you are still getting the Minecraft Realms Internal Server Error 500, then there are chances that other applications running in the background are causing a limit to your internet bandwidth.
It is suggested to disable the internet-connected apps and after that try connecting to Microsoft Realms again.
Hit CTRL + SHIFT + ESC keys > to open the Task Manager.
Then under the Process tab,> right-click on unwanted background process, > click on the End Task
After disabling the applications running in the background, relaunch Minecraft and check if the internal server error 500 still appears or not.
Delete UUID Files in Minecraft
If you are still getting the Minecraft Realms Internal Server Error 500 then here it is suggested to delete the UUID files in Minecraft.
First, visit the website by clicking the https://mcuuid.net/ and enter all the credentials to get the player’s UUID
Then login to the server > proceed to server files > head to the world
Here locate the PlayerData folder > click to open it.
And from here choose the file containing the same name like the player’s Username or UUID > after that hit the Delete
Lastly, restart your server to save the changes
Remove Resource Packs & Mods
If you are getting the Minecraft realms internal server error 500 after the installation of a particular mod or the resource pack then this is what causing the issue while playing the realm.
So, here it is suggested to delete it immediately, also uninstall the mod as well as the resource pack you installed recently.
It is estimated this works for you but if you have a doubt related to any specific mod or the resource pack causing an error you should uninstall then also and check if the Minecraft internal error 500 is fixed.
Disable the Plugins
If you are still encountering the error then check for the plugins installed on your PC. Many times the installed plugin starts causing issues with the game as they are not compatible with the game version.
So here it is recommended to try disabling the plugins on the PC and check if this works for you.
On your system > open the plugin window > rename the plugins files from “[plugin name].jar to [plugin name].jar.disabled”.
Next restart the server and check if the Minecraft Realms Internal Server Error 500 problem is resolved or not.
Uninstall & Reinstall Minecraft
If none of the above-given solutions works for you then here it is suggested to uninstall and reinstall Minecraft.
Well, it is suggested to uninstall the game using the third-party uninstaller. Manually uninstalling the program won’t remove it completely, some of its registry entries, junk files are left behind and causes interruption when the next time you install it.
If you are looking to uninstall it manually then follow the steps given:
Hit Window + R key > to open the Run box
And in the run box type appwiz.cpl command > hit Enter
Now the application manager window pops up on your screen > locate the Minecraft application > right-click to Uninstall
And as the uninstalling process is completed > head to the Minecraft official website and tries downloading and installing the game.
Check if the Minecraft Realms Internal Server Error 500 is resolved or not.
Contact Support Center
If after trying all the solutions given you are still unable to fix the error then the only option left is to contact the Customer Support Center and fill the form in the link and describe the problem in a detailed way.
And within few days you will get feedback from them to fix Minecraft Realms internal error 500.
Afraid of the growing threats online? As you should be. But we’re here to show you what kinds of malware are out there and what you can do to keep them at bay.
Malware definition
Malware comes from the term malicious software. It’s software designed to attack and exploit devices and networks to the advantage of the hacker who made it.
Malware can be transmitted in different ways. Most commonly this happens via infected USB drives, downloadable files or malicious websites. Depending on the type and ultimate goal, the consequences of a malware attack can range from negligible to catastrophic.
Credit: Ed Hardie on Unsplash
What kinds of malware are there?
1. Virus
A virus is typically spread via infected files, websites or links. It’s one of the oldest malware types and one of the most difficult to get rid of. That’s because, once activated, it replicates itself - hence the name.
It can perform different kinds of attacks, depending on what the creator wants to achieve. The main characteristic of a virus is that it really doesn’t show itself until you activate the host. So that’s a scary thought for sure.
2. Adware
Sometimes an ad blocker isn’t enough to fight off unwanted ads. And some of them can, unfortunately, be malicious. They may redirect you to infected sites or prompt downloads of risky files. Even just opening a malicious site can lead to data theft.
So, definitely be careful when clicking around. Even if an ad seems completely legitimate, you can never be too sure.
3. Ransomware
Through ransomware, cybercriminals gain access to a user’s data and use it to extort them for money. Basically, the user is threatened with data deletion or even exposure if a ransom isn’t paid by a specific deadline.
This is a particularly nerve-wracking type of malware. If it targets an individual, it preys upon their sense of anxiety, fear, guilt and even shame. If it targets a business (which is a lot more common), it preys upon not only that business’s profit but also every single one of their customers and their data.
4. Trojans
This type of malware disguises itself very well as a legitimate-looking program. Once you download it, hackers can get full access and control of your device, data and network. They can even be hidden in games, apps and attachments. They cannot self-replicate, though, so we guess that’s… good news?
5. Worms
Worms can replicate, just like viruses, but you don’t need to actually activate the infected program for them to get going. They can be used for various purposes, ranging from data deletion to file encryption to support a ransomware attack.
Credit: Growtika on Unsplash
6. Spyware
Spyware refers to malicious software that stays hidden on your computer and monitors your activity. The best-known type is keyloggers. This can be used to steal sensitive data like passwords and banking information.
7. Rootkits
Rootkits are among the most dangerous types of malware. They allow administrative access and full control of a device, which lets hackers continue hijacking all your data and monitoring your activity without your knowledge.
8. Botnets
Botnets are networks made up of bots - computers that cybercriminals have infected with malicious software. Bots and botnets give hackers remote access to users’ devices and allow them to spy on your camera, take screenshots, memorize passwords and launch Distributed Denial of Service attacks. This one truly makes your hair stand on end.
What can you do about it?
You know the old adage - better safe than sorry. And trust us, malware attacks are such a pain in the you-know-what that you really don’t want to be sorry.
Luckily, there are simple solutions that can shield you from most digital threats these days. What you want to be looking at is a solid antivirus program. Well, technically, you need an antimalware program, but since the latter evolved from the former, we still mostly refer to them as antivirus software. The majority of antimalware programs these days don’t just shield you from potential risks online, but include additional features as well. For example, some Bitdefender antivirus packages also include parental control and a VPN. And Bitdefender is not just for PCs either - it offers protection for your beloved iPhone or Android as well. You can throw in a password manager in there too, for an additional layer of security.
Credit: Dan Nelson on Unsplash
If you aren’t too concerned about all these various threats or feel like you don’t need extra security, you can at least take a step to protect your information from being exposed to lurking cybercriminals as you’re browsing. This can be done through a good VPN like Surfshark, which hides your identity in the digital space and prevents your data from being tracked.
Choosing the right protective software is especially important if you have children with access to the Internet, since they’re unfortunately even more vulnerable to malicious attacks. If you aren’t sure what the right kind of antimalware program is right for you, you can reach out to us and we’ll be happy to help keep your entire household or office digitally secure.
The bottom line
The truth is that there’s no way to be 100% protected in the online world. Hackers are constantly coming up with new ways to infiltrate our devices. But malware-battling software evolves along with them and there’s still plenty you can do to keep risks away. Stay safe!
As you know, the Windows File Explorer is quite a responsive program and contains tons of features. It allows you to do various customizations by changing Settings or changing the value of a Registry key or Group Policy modification. Either way, you will be guided on how you can enable or disable the Status Bar in File Explorer on your Windows 10 computer.
The Status Bar is located at the bottom of the File Explorer and shows you how many items are inside the folder and how many items you’ve selected. In addition, it also shows you information about each item and can display items using large thumbnails with just a single click.
In order to enable or disable the Status Bar in File Explorer, you can use the two given options below as reference. You can either use the Folder Options or the Registry Editor.
Option 1 – Enable or Disable Status Bar via Folder Options
Tap the Win + E keys on your keyboard to open File Explorer.
Then tap the Alt + F keys and click on Options.
From there, make sure that you are in the View tab and look for the “Show Status Bar” option in the list that gets populated.
After that, check if the Show Status Bar option is enabled or disabled. It is supposed to be enabled by default so if it is enabled and you want to disable it, just simply uncheck its checkbox otherwise, leave it as it is.
Now click on Apply and then OK to save the changes made
Option 2 – Enable or Disable Status Bar via Registry Editor
Tap the Win + R keys to open the Run dialog box.
Then type “Regedit” in the field and hit Enter to pull up Registry Editor.
Next, navigate to this registry key: HKEY_CURRENT_USERSoftwareMicrosoftWindowsCurrentVersionExplorerAdvanced
Afterward right-click on Advanced and select New > DWORD (32-bit) Value and then input “ShowStatusBar as the name of the newly created DWORD.
Now double click on the new DWORD and change its value to “0” if you want to disable Status Bar and “1” if you want to enable it.
Then exit the Registry Editor and restart your computer to apply the changes made.
As the name implies the AppCrash error is an error code that indicates a crashed program/application on your system.
This term is used by Windows to designate an application crash. It is reported and displayed on the system as “Problem Event Name: AppCrash,” which is followed by additional technical information which unless you are a computer programmer, you may not fully decode.
There are various symptoms that trigger the occurrence of this error code on your system such as:
Application becoming unresponsive and intermittent
Momentary application freezing
Application times out and then successfully recovers itself
Solution
Error Causes
The reason for AppCrash error occurrence cannot be narrowed down to a specific cause. This error code is triggered by multiple causes such as:
The system is stressed out. This happens when your CPU is held at 100% usage for an unacceptable length of time.
Lack of system resources
Windows version incompatibility with the application
Malware and viral infection
Poor PC maintenance
Registry damage and corruption
Data overload
No matter what the cause for the AppCrash error may be, if you experience this error on your system you must repair it right away before the damage sets in. This is a serious error posing severe consequences.
If not repaired on time, it not only hampers your ability to use your desired application but also exposes your PC to fatal crashes, data loss, and system failure.
Further Information and Manual Repair
Though this is a serious Windows error, the good news is that it is an easy-to-fix error code, so resolving it is not a problem.
There are three ways to fix the AppCrash error:
Hiring a technician, this by the way is quite costly. You may have to pay hundreds of dollars to get professional assistance to fix this error code.
Giving your computer adequate rest to cool down. Stressing out your PC heats the hardware which triggers such errors and eventually results in system failure. Try cooling it, and see if it fixes the error.
Downloading Restoro. This is by far the best, simple, quick, and money-saving way to resolve the AppCrash error on your system. Restoro is an innovative, performance-driven and multi-functional user-friendly PC Fixer that helps resolve practically all types of PC-related errors including the AppCrash error. It has an intuitive and powerful in-built registry cleaner which scans and detects all types of registry issues on your PC in seconds. It helps you clear up all the unnecessary files saved on your hard disk like junk files, internet history, invalid entries and files from the programs that you’ve uninstalled.
Such files not only occupy a lot of disk space but they also lead to registry damage and corruption thus shooting error code pop-ups like the AppCrash error.
Restoro features
Restoro performs an in-depth scan and removes all these files cluttering the system and repairs the damaged registry. It resolves the error AppCrash and simultaneously boosts the speed of your PC making it easy for you to access and run applications fast and smoothly without any application errors.
Sometimes malicious software programs like malware and viruses may also damage and corrupt the registry. If the underlying cause of the AppCrash error is a viral infection on your PC corrupting the registry, then don’t worry;
Restoro, with the help of its built-in anti-virus program, resolves it too. It scans for viruses on your system and removes them immediately.
Restoro is easy to use. Whether you are a novice or an experienced user, working around this PC Fixer is simple. It has a user-friendly interface that allows users to navigate through it without any hassle.
In addition to this, it offers enhanced compatibility. It smoothly runs on all Windows versions.
Get Restoro
To get started, all you need to do is Click here to download Restoro. Once it is installed on your system, run it to scan for registry issues like the AppCrash error.
This intuitive tool will detect all the errors on your PC in just a few seconds and display them on your Windows screen in the form of a comprehensive scan report. Now simply hit the repair tab to resolve.
Once repairing is successfully complete, try running your desired application.
You will notice two significant differences:
No AppCrash error code message pop-ups
The application runs fast and smoothly regardless of whether it’s Windows Media Player or any gaming application.
Athwbx.sys or the Qualcomm Atheros driver file is known to trigger several Blue Screen of Death errors. This occurs when the driver gets corrupted or when the operating system is unable to access or find it. In addition, bad sectors in the hard disk or RAM can also cause BSOD errors. The athwbx.sys file is known to cause the following BSOD errors listed below:
Your PC ran into a problem and needs to restart. You can search online later for this error: athwbx.sys
Before you proceed with the troubleshooting tips given below, you might want to try performing System Restore as it could resolve Blue Screen errors caused by the athwbx.sys file. To run System Restore, follow these steps:
Tap the Win + R keys to open the Run dialog box.
After that, type in “sysdm.cpl” in the field and tap Enter.
Next, go to the System Protection tab then click the System Restore button. This will open a new window where you have to select your preferred System Restore point.
After that, follow the on-screen instructions to finish the process and then restart your computer and check if the problem is fixed or not.
If System Restore didn’t help in fixing the Blue Screen error, now’s the time for you to resort to the troubleshooting tips provided below but before you get started, make sure that you create a System Restore point first.
Option 1 – Try recreating the athwbx.sys file
The first thing you can try is to recreate the athwbx.sys file. Every time your Windows 10 PC boots up, it looks for all the system drivers in place and if it is unable to find them, it tries to create them. This is why if you remove your corrupt driver file, chances are, you might get a fixed file recreated just for you. How? Refer to the steps below.
Boot your Windows 10 PC in Safe Mode.
Then open File Explorer and navigate to this location: C:/Windows/System32/drivers
From there, look for the file named sys and rename it to athwbx.old.
Note: As you can see, the file’s extension has changed from .sys to .old.
Now restart your computer and check if the athwbx.sys Blue Screen error is now fixed.
Option 2 – Try to update or rollback your device drivers
If the first option didn’t work for you, then it’s time to either update or roll back the device drivers. It is most likely that after you updated your Windows computer that your driver also needs a refresh. On the other hand, if you have just updated your device drivers then you need to roll back the drivers to their previous versions. Whichever applies to you, refer to the steps below.
Open the Devices Manager from the Win X Menu.
Then locate the device drivers and right-click on them to open the Properties.
After that, switch to the Driver tab and click on the Uninstall Device button.
Follow the screen option to completely uninstall it.
Finally, restart your computer. It will just reinstall the device drivers automatically.
Note: You can install a dedicated driver on your computer in case you have it or you could also look for it directly from the website of the manufacturer.
Option 3 – Run the System File Checker Scan
System File Checker or SFC is a built-in command utility that helps in restoring corrupted files as well as missing files. It replaces bad and corrupted system files with good system files. To run the SFC command, follow the steps given below.
Tap Win + R to launch Run.
Type in cmd in the field and tap Enter.
After opening Command Prompt, type in sfc /scannow
The command will start a system scan which will take a few whiles before it finishes. Once it’s done, you could get the following results:
Windows Resource Protection did not find any integrity violations.
Windows Resource Protection found corrupt files and successfully repaired them.
Windows Resource Protection found corrupt files but was unable to fix some of them.
Restart your computer.
Option 4 – Try to run the CHKDSK utility
Running the CHKDSK utility might also help you resolve the athwbx.sys Blue Screen error. If your hard drive has issues with integrity, the update will really fail as the system will think that it’s not healthy and that’s where the CHKDSK utility comes in. The CHKDSK utility repairs hard drive errors that might be causing the problem.
Open Command Prompt with admin privileges.
After opening Command Prompt, execute the following command and hit Enter:
chkdsk /f /r
Wait for the process to be completed and then restart your computer.
Option 5 – Run the Memory Diagnostic Tool
Running the Windows Memory Diagnostic tool in Windows 10 might also help you in fixing the athwbx.sys Blue Screen error. Refer to the steps below on how to run this tool:
Tap the Win + R keys to open Run and type exe and hit Enter to open the Windows Memory Diagnostic Tool.
After that, it will give two options such as:
Restart now and check for problems (Recommended)
Check for problems the next time I start my computer
Once your computer has restarted, perform a basic scan or you could also go for the “Advanced” options such as “Test mix” or “Pass count”. Simply tap the F10 key to start the test.
Note: After you select the option, your PC will restart and check for memory-based issues. If it finds any issues, it will automatically fix them and if there’s no issue found, then it’s most likely not a memory-based issue so you should try the other options given below.
Option 6 – Run the Blue Screen Troubleshooter
The Blue Screen troubleshooter is a built-in tool in Windows 10 that helps users in fixing BSOD errors like athwbx.sys. It can be found on the Settings Troubleshooters page. To use it, refer to these steps:
Tap the Win + I keys to open the Settings panel.
Then go to Update & Security > Troubleshoot.
From there, look for the option called “Blue Screen” on your right-hand side and then click the “Run the troubleshooter” button to run the Blue Screen Troubleshooter and then follow the next on-screen options. Note that you might have to boot your PC into Safe Mode.


 Once disguised it will wait patiently for a user's click and once that happens it will replicate itself and further infect the system. This rapid spread can lead to stolen personal data, some system hick-ups, and other system-related issues.
This malware mainly affects physical file transfer devices like for example and most USB drives, hard drives, and SD memory cards and it can easily transfer itself to the computer.
The advantage of this shortcut virus comparing it to others is that it is mostly undetected by a vast variety of antivirus software. So running just anti-virus software maybe not be enough to remove it from your system. Luckily for all unfortunate users that have caught this annoyance, it can be easily removed fully manually in a short time.
Once disguised it will wait patiently for a user's click and once that happens it will replicate itself and further infect the system. This rapid spread can lead to stolen personal data, some system hick-ups, and other system-related issues.
This malware mainly affects physical file transfer devices like for example and most USB drives, hard drives, and SD memory cards and it can easily transfer itself to the computer.
The advantage of this shortcut virus comparing it to others is that it is mostly undetected by a vast variety of antivirus software. So running just anti-virus software maybe not be enough to remove it from your system. Luckily for all unfortunate users that have caught this annoyance, it can be easily removed fully manually in a short time.


