What is a QR Code
QR code or if you want to be more technical Quick Response code is a two-dimensional code made of square dots creating a pattern that can be scanned via QR scanner and then interpreted. Usually, they are present on product packaging, on business cards, websites, etc.
When you decode a QR code you can get a link to a website or link to a file or whatever, you can get text, image, email, contact information, etc.
QR Code Desktop Reader & Generator sample code
How to decode a QR Code? You can scan it with your mobile devices like iPhone, iPad, Android or Blackberry equipped with additional software for scanning QR Codes. You might want to check out tools like Barcode Scanner or Red Laser. If you don’t have a mobile device or you need to scan a barcode on your PC, simply use CodeTwo QR Code Desktop Reader & Generator.
How this program works
QR Code reading
CodeTwo QR Code Desktop Reader & Generator is a free tool that will let you quickly scan any QR Code from your screen – be it a part of the website, email, banner, or document. Simply run the program and hit From the screen on the top menu.
Your standard mouse cursor will change into a cross to help you make a selection on your screen. Simply select an area with a QR Code and the program will automatically scan it. You can scan QR codes from websites, documents, movie files – you name it.
You can also select an image file that contains a QR Code and the program will locate it automatically and decode it. To do that, simply click From file on the top menu of the program and select the desired image from your hard drive.
If you have a file copied to your clipboard, or if you make a screenshot of a QR Code, QR Code Desktop Reader & Generator will let you decode those QR codes in one click. Just click From clipboard and the program will automatically locate and decode the QR code for you.
That is not all, you can also use your camera to scan QR codes. If you have more than one camera, the program will let you choose which one to use. To use this option, simply click From webcam, and you will be able to scan QR codes with your recording device.
QR Code generation
- CodeTwo QR Code Desktop Reader & Generator also acts as a QR code generator. Creating QR codes is as easy as reading them. Here is how to generate a QR code:
- In the top menu, click Generate mode on and enter the text you want to translate into QR Code
- Choose if you want to copy it to the clipboard or save it in a file. The QR Code will be scaled automatically, but you can resize it in the Size settings tab.
- The resulting QR code can be used however you like. To name just a few options, you can:
- Upload it to your blog/website which is especially useful for mobile users.
- Print it on a poster, providing easily accessible links with more information on your event.
- Send it in newsletters, or include it in your email signature.
QR Codes in email signatures
Inserting QR codes in email signatures lets mobile users quickly grab your contact details, or provides them with links so that they can get more information on your company or topic you were discussing. You can also provide your recipients with a link to QR Code Desktop Reader & Generator. This will help them easily decode QR codes when they open your email on a PC.
QR code
If you want to include a QR code automatically in email signatures throughout a whole organization, try CodeTwo central email signature management solution. It is a very useful tool, which enables you to unify email signatures on Exchange Server and Office 365 (Microsoft 365).

 It is officially confirmed, Windows 11 release date is October 5th. Windows 11 will be released as a free upgrade to all registered Windows 10 users that have supported hardware for it.
The rest of the users will be able to install it via ISO file as a clean installation if their computer supports Windows 10 hardware requirements. The official price for the license for Windows 11 has not yet been set but I assume after release it will be set.
Priority for W11 will have users who are upgrading from W10 as stated by Microsoft.
Also, it was officially confirmed that Android apps will not be running natively in this first release of Windows 11, that feature will come in a future update, official statement below:
It is officially confirmed, Windows 11 release date is October 5th. Windows 11 will be released as a free upgrade to all registered Windows 10 users that have supported hardware for it.
The rest of the users will be able to install it via ISO file as a clean installation if their computer supports Windows 10 hardware requirements. The official price for the license for Windows 11 has not yet been set but I assume after release it will be set.
Priority for W11 will have users who are upgrading from W10 as stated by Microsoft.
Also, it was officially confirmed that Android apps will not be running natively in this first release of Windows 11, that feature will come in a future update, official statement below:

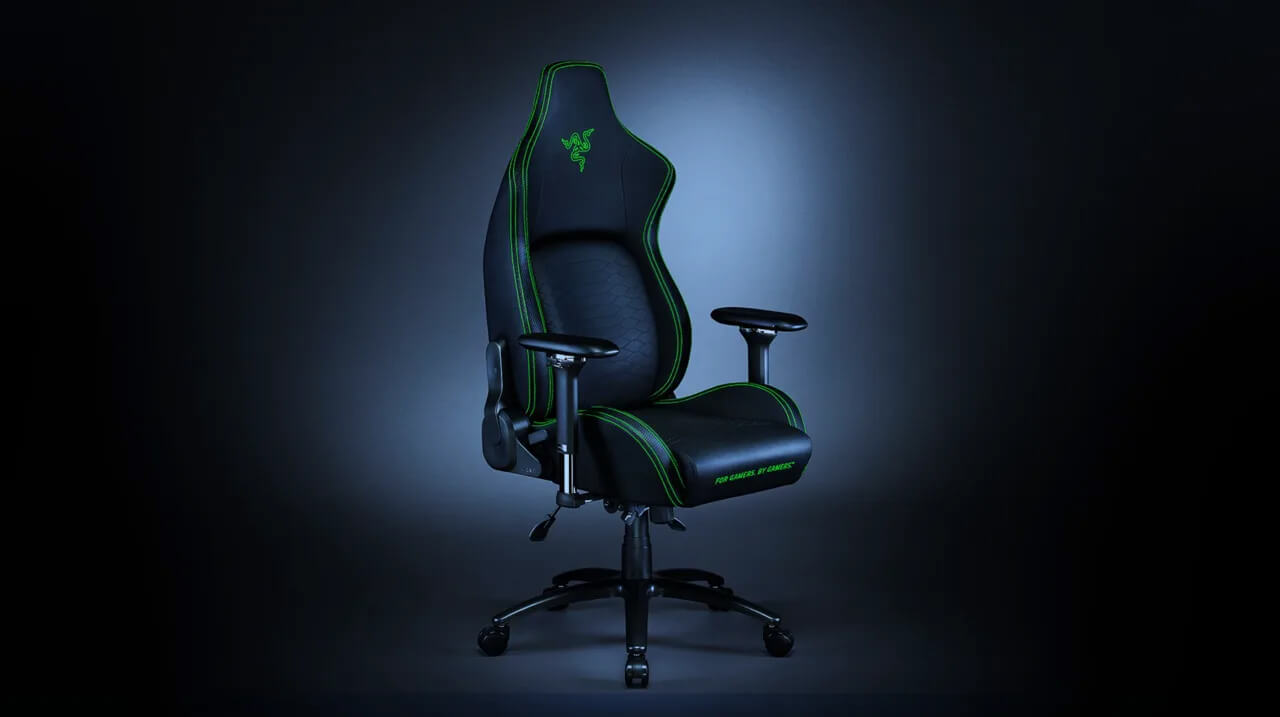 It seems that last few days we were riding some Razer bandwagon but rest assured that we are not sponsored by them in any way, truth is that simply they come up with some interesting accessories which I believe are worth covering.
Gaming Chair itself comes in two colors, fully black and green black combination and it is not really an entry-level chair if we are talking about price. The chair itself is around 600USD depending on the distributor and considering that price range it is placed in more top cream of gaming chairs but it is worth every dime.
It seems that last few days we were riding some Razer bandwagon but rest assured that we are not sponsored by them in any way, truth is that simply they come up with some interesting accessories which I believe are worth covering.
Gaming Chair itself comes in two colors, fully black and green black combination and it is not really an entry-level chair if we are talking about price. The chair itself is around 600USD depending on the distributor and considering that price range it is placed in more top cream of gaming chairs but it is worth every dime.
