Logo

Prevent your laptop from overheating

Long working hours on a laptop can have some issues with laptop heating and thus slowing down. Today we will take a look at how can you prevent it from heating and keep it in a normal temperature range so it lasts longer and works better.

laptop on fire

Close unnecessary programs or browser tabs

Usually, the main reason for high laptop temperature is the heavy and constant workload. Of course, the solution is very simple, turn off unnecessary browser tabs or applications running in the background, and less power will be needed for operation thus directly reducing workload and temperature.

Place it on a hard flat surface

Laptops generally have vents on the side and even under them, these vents, of course, are made so hot air is disposed of through them but if they are covered that will create issues. Placing computers on textiles, pillows, and legs can obstruct their venting holes and increase heat also since they are materials that are not taking heat away.

Your best practice should be placing the laptop onto a hard flat surface so air can flow freely and if you need to keep it in your lap there are lap desks made for this purpose.

Clean the laptop

With some good cleaning, the laptop can stop overheating, and generally, it will be cooler. Vents that has for ventilation can get clogged over large periods of time due to dust which is always present. Compressed air can be a quick easy solution to open the vents and redust it. Other methods include a compressor, vacuum, or brush in order to quickly remove any dust clogs. Taking it into service for complete redusting and paste change is also a great option.

Place it on the dedicated pad

There is some disagreement about using dedicated cooling pads for laptops, some say they are not effective at all, and some swear by them but from my experience good paired laptop and pad can indeed help with cooling it down. Usually, cooling pads will come with fans that will take away heat from the laptop itself reducing its overall heat.

Change your Windows power plan

If your laptop is constantly hot but you are not doing much with him check Windows power settings. There is a good chance it is set to run on a high-performance plan and if this is the case switch it back to a balanced power setting. Power plan like high performance will drain more power and more power will mean more heating. Of course, this will affect performance as well but for regular work that excludes some power gaming, video, and picture manipulations and other demanding tasks this power plan will work just fine.

Take control of the fans inside your laptop

Internal cooling is important and sometimes fans are not running to their full capacity so increasing their speed or changing their plan of work can cool down the computer nicely. Some laptops have fans controlling application already on them, especially gaming laptops but most of them do not. If your laptop does not have it, go to your laptop brand website and see if such an application exists for your model, if it does, download and install it but if there is no such application try general free ones like SpeedFan or Argus Monitor.

Reduce voltage of CPU and GPU

How more power means more heat, reducing the power that CPU and/or GPU take can be reduced inside BIOS by lowering voltage of these 2 components. First, go to BIOS and write down the voltage that is currently assigned to your CPU and/or GPU so you can bring it back if ever needed, also take note that reducing voltage and thus power will not affect negatively your components but increasing it thus overclocking can and will so be careful when bringing voltage back not to overdo it. You can always also reset your BIOS settings to bring them back to factory settings.

Do not use the laptop when charging it

When the laptop is placed on the charger in order to be charged and used at the same time, more power is drawn to it, and since the battery is taking electric charge instead of providing it more heat will be generated now since two different sources will be generating it, the battery itself and computer. When you really can not wait for the laptop to be charged, use it, but turn it off and wait to be fully charged if you can.
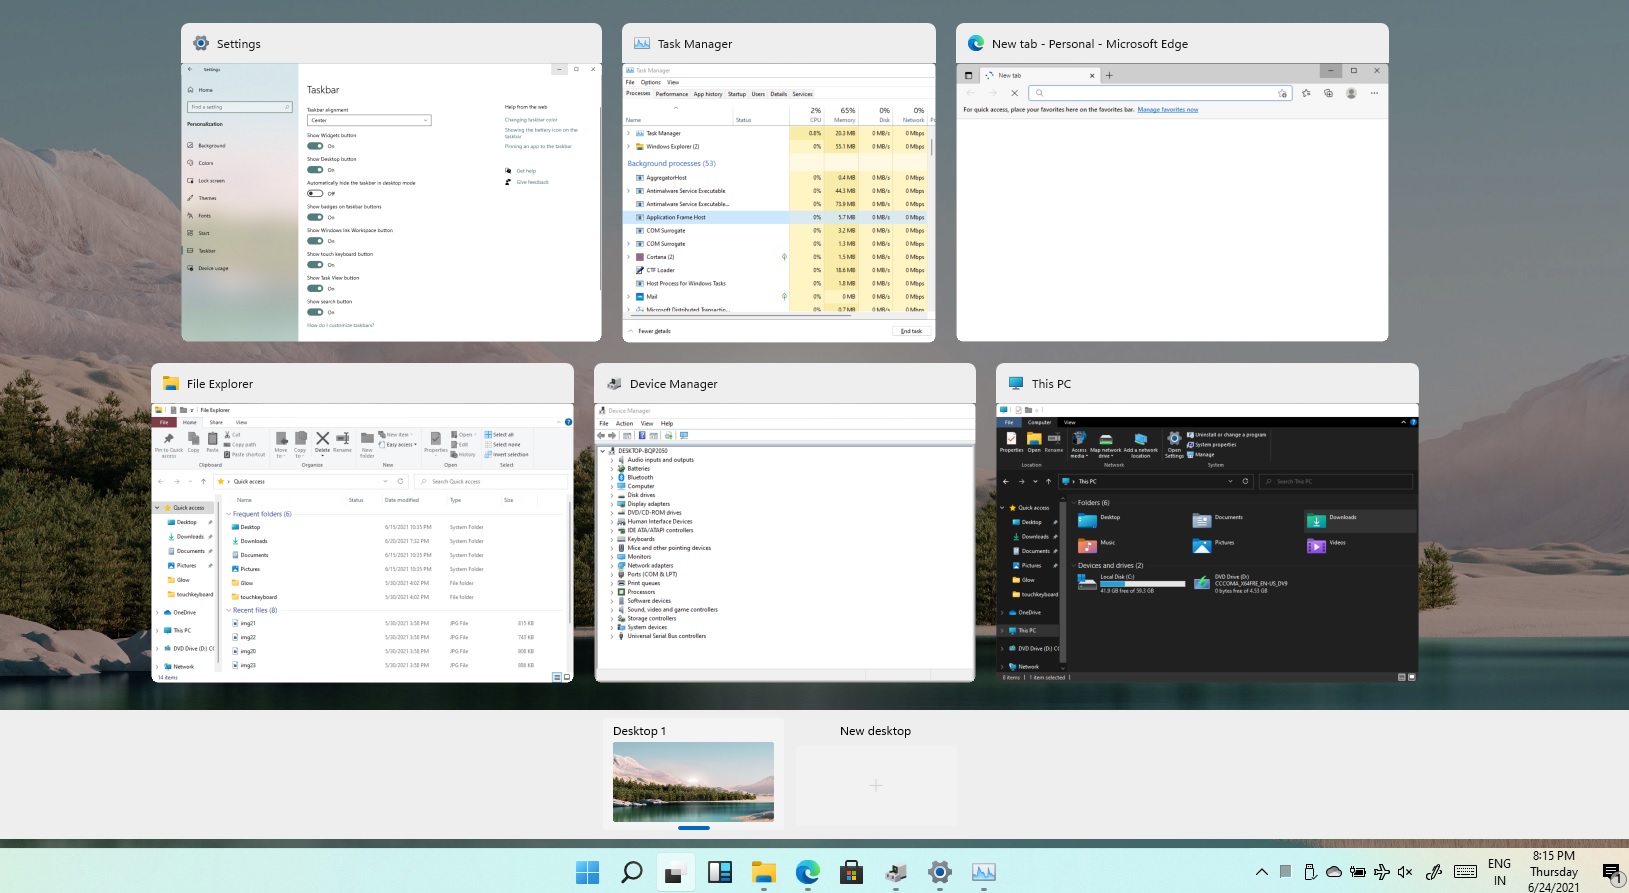
Do You Need Help with Your Device?

Our Team of Experts May Help
Troubleshoot.Tech Experts are There for You!
Replace damaged files
Restore performance
Free disk space
Remove Malware
Protects WEB browser
Remove Viruses
Stop PC freezing
GET HELP
Troubleshoot.Tech experts work with all versions of Microsoft Windows including Windows 11, with Android, Mac, and more.

Share this article:

You might also like

INET_E_RESOURCE_NOT_FOUND
The previous Windows versions all came with Microsoft's browser Internet Explorer. A lot of users love it because not only that it is easy to use. It is also very fast. Users didn’t have to worry about compatibility because it is almost always compatible with its Windows Version. When they introduced Windows 10, they changed the name of the browser from Internet Explorer to Microsoft Edge. It is faster and more user-friendly compared to its predecessors. But after the Creator Update, some experienced receiving the inet_e_resource_not_found error code. In contrary to what everyone expects, you actually don’t have to uninstall and reinstall the Microsoft Edge App. What you can do is reset the browser in your Apps & Features Settings in your Microsoft Settings.

To reset the browser you can follow the steps below:

  1. Click on the Windows icon and go to settings.
  2. Click on Apps and this will bring you to the Apps & Features page. Look for Microsoft Edge from the list of Apps and click on it.
  3. Choose Advance Option
  4. Scroll down then Under Reset, click on repair or reset. When you repair it will fix the existing problem but the data that caused the problem may still be present and can still cause problems. If you click on reset, it will delete all the cache and cookies that are installed in your browser but it will save your Favorites as well as your bookmarks.

Another way to resolve this is by disabling the feature TCP Fast Open on Microsoft Edge. To disable this, go ahead and follow the steps below:

  1. Open the Microsoft Edge browser.
  2. Type in about: flags on the Address (URL) bar.
  3. Under Networking, uncheck the Enable TCP Fast Open.
  4. Close your Microsoft Edge browser and open a new one.
Flushing the DNS also worked for other Users. Sometimes, the error code the inet_e_resource_not_found is caused by a corrupted DNS cache. There are 2 ways to flush your DNS. The first option is to use the command prompt to run the command.
  1. To access the Command prompt or CMD, you can search for it on Cortana or you can click on the Windows icon to access the Programs, scroll down to the Windows System folder and click on it.
  2. A drop-down menu will show up, click on Command Prompt which is the first on the list.
  3. Type in the code ipconfig /flushdns and press enter.
  4. There will be a message that will show that says Windows IP configuration successfully flushed the DNS Resolver Cache
  5. Exit the CMD by typing exit and press enter.
The easiest way to do this is to Press the keys Window + R on your keyboard. Type in ipconfig /flushdns in the search box and hit enter or click on OK. These are only some of the ways to resolve the inet_e_resource_not_found. There are other ways to further troubleshoot this issue such as reinstalling your Wifi Adapter Driver or adjusting the DNS Server Address. But most of the time, users are able to resolve the issue with the steps provided above.
Read More
Best TV streaming services 2021
We live in a world that is in a pandemic, our lives, both social and work are turned upside down. Most of our free time is spent indoors now, maybe with some close relatives or friends, no large gathering, no party. In this world keeping yourself busy and entertained is very important so we do not lose our minds and try to function as well as we can. Keep up the positive spirit, the pandemic will be over soon but in meantime, let's see some premium streaming services for tv and film so we can kill time faster with some quality entertainment.
  1. Netflix

    If you're a connoisseur of movies and/or TV, there's only one must-have player in town and that's Netflix. It is, unequivocally, the biggest and best streaming service, despite not always stocking its digital shelves with must-have new movies and TV; that said, this is the staple streamer you need to own if you ever plan on cutting the cord and surviving without it. These days, most smart TVs have Netflix apps, and finding a streaming box without it is the equivalent of finding a needle in a haystack. The quality of the movies and TV we tried – mostly streamed in Ultra HD – on both TV and on tablets is exquisite.
  2. Amazon Prime Video

    Like Netflix, Amazon Prime Video has its own set of original series The Expanse, Hunters, and The Boys among others – but, generally speaking, they don't receive the same fanfare as their Netflix-bred brethren. Although Netflix is as guilty for dud programming as the rest of them, it's worth mentioning Amazon Prime does get some pretty terrible new additions from time to time. So always check out the guide to the best Amazon Prime TV shows before you dive in head-first. The two big differentiators between the services are the fact that access to Amazon's streaming service comes standard with a subscription to Amazon Prime – meaning access to Amazon Music and premium delivery services.
  3. Hulu

    Video streaming service Hulu offers big-name titles like The Simpsons, Saturday Night Live, and South Park alongside a huge number of titles from NBC, FOX, and Comedy Central. It's also the only streaming service app on the Nintendo Switch. Hulu comes in two flavors: the standard on-demand streaming service you've always known and loved, and the new Hulu with Live TV
  4. Disney Plus

    Disney Plus doesn't feel like it's trying to be the main TV streaming offering in your life. Instead, it's a family-friendly option that feels like it lives alongside a Netflix or Amazon Prime Video subscription. It has a very specific selection of content: Disney animated movies, Star Wars, Pixar, Marvel, and National Geographic. Essentially, if Disney owns it and kids can watch it, it's on here, and often streaming in 4K for no additional price. The real reason to sign up are big originals across those different subject areas – WandaVision, The Mandalorian, and Pixar's Soul, for example, all demonstrate an intention to invest big in blockbuster content for the platform.
  5. YouTube TV

    Ask someone what they think was the biggest internet revolution of the 21st century and they'll probably say it was YouTube. And with good reason – the user-generated video-blogging site has changed the online landscape forever. It lets anyone, however well known they are (or not), whatever the quality of their content and wherever they hail from, upload their weird and wonderful videos for anyone around the world to watch at their convenience. The beauty of YouTube is that in the blink of an eye it's taken the broadcasting power from the bigwigs and placed it right in our hands. OK, so it might not have stopped people wanting to watch a high-quality, professionally made production in their living room TVs, but it's an insight into how TV might be produced in the future. After all, with YouTube you don't need a big budget or indeed any budget at all to produce your own TV series and establish a massive following. While the free portion of YouTube will always remain the most popular (the latest statistic says that a whopping eight years' worth of content is uploaded each and every day to the site), but if you're looking for quality content, YouTube TV is also an excellent option worth considering.
  6. HBO Max

    HBO Max is a new streaming service built on top of an old one. The next evolution of HBO Go and HBO Now, it takes the basis of HBO's content – which includes many phenomenal shows, like The Sopranos, Game of Thrones, Barry, The Leftovers, and Succession – and adds a heap more content to make it into more of a Netflix competitor. That's why a lot of the original fare we're seeing on the service so far is a bit broader in targeting different audiences, with Anna Kendrick's Love Life kicking us off, and Kaley Cuoco's dark comedy The Flight Attendant also feeling a little different to the usual heavy HBO dramas. You'll find original movies on the service, as well as series previously available on the DC Universe app, like Titans and Harley Quinn. There's a big archive of existing shows to enjoy on there, too, like The Fresh Prince of Bel-Air, South Park, and Rick and Morty. The content channels on HBO Max are great, with Studio Ghibli, Adult Swim, and Cartoon Network among those in the mix.
  7. Sling TV

    Sling TV is a kind of cure-all for the cord-cutting generation, something that we knew we needed but no company stepped up to make. That said, it's everything cable's not. It's affordable. It's no-obligation. And there are absolutely zero sales reps trying to stop you from canceling your contract. Best of all, you won't have to give up some of the perks cable provided in the last few years like the ability to pause live TV or watch something that aired up to 72 hours ago.
  8. Crunchyroll

    Crunchyroll is the best streaming service any anime, manga, or East-Asian cinema fan in your life has always wanted and never knew about. Founded by Berkeley graduates back in 2006, Crunchyroll started as a bootleg website of sorts where users uploaded their favorite shows without the permission of the original owners. Not the humblest of beginnings. But now it's an essential offering for anime fans. While you won't find genre staples like Dragon Ball Z, Digimon or Pokémon around, most of the site's 200-plus series are available to watch for free in SD
  9. Apple TV Plus

    Apple's newest streaming service has money bags and talent on its side. Launching back in 2019 with The Morning Show, an expensive drama starring Jennifer Aniston, Reese Witherspoon and Steve Carrell, as well as See with Jason Momoa, Apple is flexing its muscles to get the best talent. Unfortunately, it doesn't have a deep content library, which is what the platform would need to be the best streaming service in 2021
  10. Peacock

    NBC Universal's attempt to enter the streaming market is buoyed by one big benefit: it's free to sign up and use, with an ad-supported tier letting you enjoy a healthy helping of its content for absolutely nothing. That said, a lot of the better stuff is behind a paywall – $4.99 per month if you want to access all of it with ads, and $9.99 if you want to enjoy without ads.
  11. Twitch

    For a certain crowd, Twitch (formerly known as Justin.tv) is about the best invention since sliced bread. Essentially it's a live-streaming platform that focuses primarily on videogames where you can find everything from world tournament coverage to someone muddling their way through that indie darling you had your eye on buying. It's not traditional by any means, but you'll find plenty to see and do on Twitch. Best of all the app is free on almost any platform you can think of: iOS, Android, Xbox One, PS4, Chromecast, Amazon Fire TV … you name it, it probably has a Twitch app.
If you would like to read more helpful articles and tips about various software and hardware visit errortools.com daily.
Read More
Error 1753 Demystified & The Quickest Fix Ever!

Error 1753 - What is it?

Error 1753 is an RPC endpoint mapper error code. This code is typically displayed as "EPT_S_NOT_REGISTERED" or sometimes as the hexadecimal value 0x6D9.  Error 1735 indicates that there are no more endpoints available from the endpoint mapper. To understand this better, basically, RPC is an inter-process communication (IPC) method. This is used by clients and servers for communication purposes. RPC is used by programs to execute programs on a server computer. The perfect example of this is Microsoft Outlook. You communicate with Microsoft Exchange Server using RPC. This enables you to send and receive emails. When you use Microsoft Outlook to send emails, your computer sends a message to the server computer in an obscure coding. The server responds to your computer with another message that contains the results of the executed program. This is all being carried at the backend of the running program. Integral to this is the endpoint. The endpoint includes the name, port, or a group of ports on a computer that is monitored by the server for incoming client requests. This is a network-specific address to be precise. The endpoint mapper is the part of the RPC subsystem that is responsible for dynamically assigning endpoints to the server. When this function fails it leads to error 1753 message display. It shows that RPC service is not available.

Solution

Restoro box imageError Causes

The error code 1753 indicating RPC endpoint mapper service failure is triggered due to multiple reasons. These include:
  • Windows registry damage and corruption
  • Malfunctioning of the hardware
  • Spyware intrusion or viral infections
  • Device driver conflicts

Further Information and Manual Repair

This error code may cause a great deal of inconvenience to execute programs that are dependent on the server. It can lower your productivity and performance. To avoid the hassle, it is advisable to repair the error 1753 immediately. The best way to resolve this error 1753 in seconds is to download Restoro. By using this repair tool, you can fix the error right away for free without paying hundreds of dollars to a professional expert. Restoro is a new and innovative PC fixer integrated with an automated algorithm and intuitive technology that enables users to sit back and relax while Restoro runs on the system and detects all PC-related issues in the shortest time. In just a few clicks you can resolve even the mightiest PC issues like the error code 1753 RPC endpoint mapper problem and resume back to the program in no time.

Why Restoro

It is efficient and user-friendly. Restoro can be used by users of all levels so even if this is your first experience using a repair tool, you don’t have to worry. To operate it, you don’t have to be a computer programmer or have sound technical expertise. It is simple and very easy to use. The layout is simple and neat complimented nicely with easy navigation and a sophisticated user interface. Restoro is a high and multi-functional error tool embedded with powerful, performance-driven, and value-adding utilities, all in one. So, whether the error code 1753 is triggered due to a viral infection on your system or registry corruption, you don’t have to look for different tools to resolve the error, simply run Restoro to fix the issue right away. Restoro includes a dynamic registry cleaner that detects all registry issues and wipes out the clutter from the hard disk like junk files, internet history, and invalid entries which is by the way the number cause for registry corruption leading to error 1753. It clears up disk space and RAM and repairs the misconfigured system files and corrupt registry in seconds thus resolving error 1753. Restoro also functions as a system optimizer thus boosting the speed and performance of your PC massively and reducing boot time. In addition to this, it also has a backup feature.  This tool is embedded for safety purposes. This feature enables you to create backup files on your PC before you start system repair. This helps you recover data in the event of data loss during system repair. To get started:
  • Click here to download and install Restoro on your system
  • After installation, run it to scan for errors like 1753
  • Now press the repair tab to resolve
Read More
How to Resolve “We couldn’t update system reserved partition” Error in Windows 10 Installation

We couldn’t update system reserved partition” - What is it?

Customers will most likely encounter the “We couldn’t update system reserved partition” error when upgrading to Windows 10 from Windows 7 or Windows 8.1. This error may also come with error code 0xc1900104 or error code 0x800f0922.

Solution

Restoro box imageError Cause

“We couldn’t update system reserved partition” Windows 10 upgrade error is normally caused by too little space on the System Reserved Partition (SRP). The System Reserve Partition is an additional small partition created by Windows, which stores boot files. The SRP can be filled up with security apps and third-party anti-virus. Once this partition has insufficient space, the system will not be able to upgrade to Windows 10.

Further Information and Manual Repair

Caution: The following steps are complex and need to be done by experienced users especially using the command line. Once an error is made in entering commands, there’s a chance that your device can be put in a no-boot situation, or data stored on the device can possibly get lost.

To upgrade to Windows 10, your device needs to have at least 15MB free space on the System Reserved Partition. Follow the procedure below and then try upgrading again.

First, know if the System Reserved Partition is whether in GPT or MBR partition style:

  1. Open the Run window by pressing the Windows key + R. Type msc in the window then press Enter.
  2. Right-click on the Disk where SRP is located then select
  3. Click over the Volumes
  4. On the Partition Style line, you’ll see which partition style your device is using, either Master Boot Record (MBR) or GUID Partition Table (GPT)

Second, determine which method you will need:

Depending on what partition style your device has and whether you’re currently on Windows 7 or Windows 8/8.1, there are various methods you need to do.

Method 1: Windows 7 or 8/8.1 with GPT partition

  1. Click on the Start button and search for cmd. In the results, right-click on Command Prompt then choose Run as administrator. The command prompt window will appear.
  2. Type mountvol y: /s at the command prompt then press Enter. This command will add the Y: drive letter where you can access the System Partition.
  3. Type taskkill /im explorer.exe /f then hit Enter. Afterward, restart explorer in Admin mode by typing exe and hitting Enter.

NOTE: While in Admin mode, some apps like OneNote will not run.

  1. Open File Explorer then type Y:EFIMicrosoftBoot in the address bar. Hit Enter.
  2. Choose the language folders you want to permanently delete. Language folders are named with four letters split with a hyphen. For instance, you want to delete the German language: choose de-DE.
  3. Optional: You can also delete unused font files for more space. Type Y:EFIMicrosoftBootFonts in the address bar then press enter.
  4. Once you permanently deleted the unnecessary files, reboot the device to return to explorer.exe to normal mode and remove the Y: drive letter.

Method 2: Windows 7 with MBR partition

Doing this method will make a permanent, but small increase in the free space of the device’s SRP.

  1. Delete language folders

a. Open the Run window by pressing the Windows key + R. Type diskmgmt.msc then hit Enter. b. Select System Reserve partition then right-click on it.

c. Choose Change Drive Letter and Paths then select Add.

d. Type Y for the drive letter then click OK.

e. Click on the Start button and search for cmd. In the results, right-click on Command Prompt then choose Run as administrator. The command prompt window will appear.

f. Type Y: at the command prompt then press Enter.

g. Once you’ve switched to drive Y, type takeown /d y /r /f . then hit Enter.

NOTE: Ensure that the space and period after “f” is included in order for the command to work properly      

h. Type icacls Y:* /save %systemdrive%NTFSp.txt /c /t then hit Enter to back up the permission to the drive.

NOTE: Ensure that all files are marked as successful and that no files are marked as failed.

i. Type whoami then hit Enter. Record the username that appears. Afterwards, type icacls . /grant <username you got from whoami>:F /t then press Enter.

NOTE: Ensure that there’s no space between the username and “:F” or the command will not work.

j. In the File Explorer, open the SRP drive and select the Boot folder. Choose the             language folders you want to permanently delete. Language folders are named      with four letters split with a hyphen. For example: de-DE is the German language          while en-US is the U.S. English language.

2. Truncate the NTFS Log:

a. Open the Command Prompt then type chkdsk /L Y: to check the size of the NTFS Log. If the NTFS Log size is less than 5000KB, you need not truncate the file.

b. Type chkdsk /L:5000 /X /F then hit Enter to truncate the NTFS Log.

c. Return to Disk Management window. Select Action menu then select Check if the device’s SRP now has a larger amount of free space. Once there’s enough space, right click the System Reserve Partition then select Change Drive Letter and Paths. Choose Y: then select Remove.

3. If there’s still not enough available space after truncating the NTFS Log, resize the USN journal:

a. Open the command prompt then type fsutil usn queryjournal Y: to display the size in hex value. Convert the hex value to decimal then divide it by 1048576. The result you will get will be in MB. If the journal size is 30MB or more, proceed with truncating the file.

NOTE: To convert the Hex value to Decimal, open the Calculator app in Windows then choose View menu. Select Programmer then choose Hex. Type the Hex value then choose Dec.

b. Type fsutil usn deletejournal /D /N Y: then hit Enter to delete the journal. Type fsutil usn createjournal m=1500 a=1 Y: to recreate the journal having the new log size value.

  1. Restore permissions

a. Type icacls Y: /restore %systemdrive%NTFSp.txt /c /t in the Command Prompt. Check if the files were successfully processed before proceeding. If you see a message saying some files failed while processing, this is normal since some of the files have already been deleted before performing a backup. However, if there are no successful files indicated, the command was not properly executed.

b. Type icacls . /grant system:f /t then hit Enter to adjust the ACL back to System. Now, you can set the owner of the drive by typing icacls Y: /setowner “SYSTEM” /t /c then press Enter.

c. Check if the device’s SRP now has enough free space by going back to Disk Management and refreshing the data. If the SRP already has sufficient space, you can now remove the drive letter. Right-click on the System Reserved Partition then choose Change Drive Letter and Paths. Select the Y: drive then choose Confirm deleting the drive letter by clicking OK.

Method 3: Windows 8/8.1 with MBR partition

This method makes a larger, but temporary, increase in the SRP free space.

1. Be sure you have an external drive having at least 250 MB free space and formatted as NFTS.

2. Open Run by pressing the Windows key + R. Type mscthen to choose the Recovery Partition. Right-click on it then choose Change Drive Letter and Paths.

3. Select Add then type Y for the drive letter, click

4. Click on the Start screen then type cmd in the search bar. In the results, right-click on Command Prompt then choose Run as administrator. The command prompt window will appear.

5. Switch to another drive by typing Y: in the command prompt. Once you’re in the drive Y, type takeown /d y /r /f .

NOTE: Ensure that space and period after “f” are included in order for the command to work properly.

  1. Type whoami then hit Enter. Record the username that appears. Afterward, type icacls . /grant <username you got from whoami>:F /t then press Enter.
NOTE: Ensure that there’s no space between the username and “:F” or else the command will not work.
  1. Once the command is completed, type attrib -s -r –h Y:RecoveryWindowsREwinre.wim then hit Enter.
  2. Open File Explorer and check the drive letter of the external drive you’re using (In this case, let’s assume F: is the drive letter of the external drive so when you see F: for the rest of the steps, this means the drive letter of the external drive you’re using).
  3. Type mkdir F:RecoveryWindowsRE in the Command Prompt then hit Enter. Afterward, type xcopy Y:RecoveryWindowsREwinre.wim F:RecoveryWindowsREwinre.wim /h
  4. Type C:WindowsSystem32Reagentc /SetREImage /Path F:RecoveryWindowsRE /Target C:Windows to map the new path
  5. Verify if the copy was successfully done then type del Y:RecoveryWindowsREwinre.wim /F
  6. Return to Disk Management window. Click on the Action menu then hit Check if the device’s SRP now has a larger amount of available space. Once there’s enough space, you can proceed with the upgrade.
  7. Upon completion of the upgrade, move back the wim file to the Recovery Partition. At this point, you can re-map now the location by:
    1. Open the Command Prompt then type xcopy F:RecoveryWindowsREwinre.wim Y:RecoveryWindowsREwinre.wim /h and press Enter.
    2. Type C:WindowsSystem32Reagentc /SetREImage /Path Y:RecoveryWindowsRE /Target C:Windows to re-map to the original path.
  8. Return to the Disk Management window. Right-click on the Recovery Partition then choose Change Drive Letter and Paths. Select the Y: drive then choose Remove.

Method: Download a Powerful Automated Tool

Not inclined to go through a long and technical process (as highlighted above)? Download and install a powerful automated tool and get the job done in a jiffy.
Read More
Fix Media Player – Server Execution Failed
You might be trying to play music files using the Windows Media Player, but were unable to do so since you encountered an error saying, “Windows Media Player Error – Server Execution Failed” error. If you encountered this error, worry not for this post will guide you on how to fix it using some potential fixes. In the error message, the “Server execution failed” indicates that the “wmplayer.exe” is still running or shutting down at that point and it is possible that it is stuck which is not able to close properly. To fix this error, there are several potential fixes you can try. The first one is to run the Video Playback troubleshooter. While you could also try to disable the WMP Network Sharing Service or register both the jscript.dll and vbscript.dll files. For more information, refer to the options provided below.

Option 1 – Try to run the Video Playback troubleshooter

The first thing you can do to fix the problem, you can try to run the Video Playback troubleshooter instead. To run it, simply go to Settings > Update & security > Troubleshoot. From there, scroll down until you see the Video Playback option and then click on the “Run the troubleshooter” button to get started. This troubleshooter will detect and automatically fix any problems related to video playback so it should help fix the error.

Option 2 – Try to disable the WMP Network Sharing Service

If the Video Playback troubleshooter didn’t work in fixing the problem, the next thing you need to do is disable the Windows Media Player Network Sharing Service. The WMP Network Sharing Service is used to share the libraries of the Windows Media Player to other users on the network as well as media devices using the Universal Plug and Play. And since you are not using any network here, then you can disable this service to fix the problem. How? Refer to the given steps below.
  • Tap the Win + R keys to open the Run dialog box and type “services.msc” in the field and tap Enter to open the Services Manager.
  • Next, look for the Windows Media Player Network Sharing Service from the list of Services and right-click on it.
  • After that, click on the Stop option and see if it fixes the Windows Media Player error.

Option 3 – Try to register the jscript.dll and vbscript.dll files

  • Tap the Win + X keys and from the menu select the Windows PowerShell (Admin) option to open an elevated Command Prompt.
  • Next, type this command to register the jscript.dll file and click on the confirmation box: regsvr32 jscript.dll
  • After that, execute the regsvr32 vbscript.dll command to register the vbscript.dll file.
  • Once you’re done, these DLL files will be re-registered and should fix the Windows Media Player error.
Read More
A Guide to Fixing Error 0x8007007e on Windows 10

Error Code 0x8007007e – What is it?

Error code 0x8007007e often occurs when users attempt to use Windows Update but are unable to access updates or webpages. To resolve this issue, you will need to use tools that detect and correct corrupted files as this is usually the main reason for the error.

Solution

Restoro box imageError Causes

Once this error code is encountered, it's a clear indication that your Operating System has malfunctioned. This could be a consequence of an incorrect or failed installation of software. The software might leave invalid entries in the Windows registry. Improper shut down of your system and a malware attack are also causes of error code 0x8007007e. Additionally, someone with little or no technical knowledge might have deleted a system file by accident. Missing system files can also equate to other error codes such as registry error code 19.

You may not always be able to prevent issues from affecting your computer, but proper measures can be taken to limit your risk of experiencing problems like error code 0x8007007e. See the following suggestions below:

  • Ensure proper system maintenance by regularly using your automated tool. This will ensure your system is in good shape and error-free. It will also clean your system regularly leading to a boost in PC performance
  • Keep antivirus software up-to-date. Antivirus software if crucial for the proper functioning of your computer. Keeping your antivirus updated is one of the best ways you can avoid problems with your PC.

Further Information and Manual Repair

Method One: System File Checker

System File Checker is a Windows tool that allows users to check their system for corrupt or bad system files. The utility scans for corrupt files and repairs them as well as files that may have gone missing.

Depending on the type of Windows operating system on your computer, you may need to follow varying instructions. However, note that Windows operating systems including Windows 10 and Windows 8 or 8.1 and Windows Vista all provide access to System File Checker via Command Prompt.

Once you run System File Checker, the tool should be able to repair and replace corrupted files. However, in cases where the repair process does not take place, you can attempt a manual repair by replacing the corrupt file the tool identifies with a good file. The process may require technical knowledge of Command Prompt so consider help from a Windows repair technician or consider contacting Windows for instructions based on your computer’s operating system.

Method Two: Run System Restore Tool

The System Recovery Options menu in Windows contains many tools which can enable users to resolve serious errors. In the case of Error Code 0x8007007e, one of the best tools in this menu is System Restore.

When an error occurs which inhibits users from accessing key functions on their system, System Restore enables the user to restores the computer to an earlier period without causing harm to files, photos, or documents.

However, once you run this tool, you will only be able to access files available within the period to which your computer is restored. For this reason, carefully consider which period is best suited to your purposes. Also, ensure you restore the system to a time when error code 0x8007007e was not present on your machine.

If System Restore does not resolve the error, you may undo the restoration changes. Ensure you have sufficient free space on your machine hard disk before you proceed (300 MB at least for hard drives above 500MB or at least 50 MB for smaller sized disks).

Method Three: Download Automated Software

When it comes to resolving error codes, it can often be a frustrating and tricky venture, especially when you are attempting to fix the problem manually. The Internet is awash with bits and pieces of instruction, some misleading at best with uncertain success rates.

But what if there was a one-stop-shop or better yet a tool that offered solutions for error codes including 0x8007007e?  Download a powerful automated tool that offers easy and effective, user-friendly solutions for users with varying error code problems.

Read More
How to Repair Windows 10 Error 0x800ccc13

Error Code 0x800ccc13– What is it?

0x800ccc13 is an error message related to sending email using Outlook. Many people are receiving this error after making an upgrade from Windows 7 or Windows 8.1 to Windows 10. The error message appears when you try to send an email message with the use of a POP3 account or an IMAP account in an Outlook profile that has an Exchange Server 2010 mailbox configured. A common complaint would be: Since upgrading to Windows 10 I cannot send email from Outlook 2013. Mail stays in the Outbox, and I get: Error 0x800CCC13. Cannot connect to the network.

Symptoms

This problem may arise under the following situations:
  • You are using Microsoft Office Outlook in online mode to connect to a Microsoft Exchange Server 2010 mailbox
  • When you add an additional POP3 or IMAP account in the same Microsoft Outlook profile
  • You are sending an attachment through email.
  • You try sending an email by selecting POP3 or IMAP account as the sender
During these circumstances, the email message stays in the Outbox and you receive the following error message: Task '<the POP3 account or the IMAP account> - Sending' reported error (0x800CCC13): 'Unable to connect to the network. Check your network connection or modem.'

Solution

Restoro box imageError Causes

Error Code 0x800ccc13 occurs because the system files in Windows 10 during the upgrade became corrupted and most likely caused authentication issues. It can happen with any version of Outlook. Damaged data files will also cause error code 0x800ccc13 to manifest. Overall, the corruption of the Microsoft Windows System could be a result of an installation partially done (or an incomplete one), deletion of any application or hardware erroneously, and or malware or adware infestation.

Further Information and Manual Repair

Method 1:

Use the Windows System File Checker to repair corrupted files Verify that your SMTP, username, and password settings are correct. Now, in order to correct missing or corrupt Windows System files, try the following solution by running a command. This is known as the System File Checker. Follow the steps below to invoke the program using a command prompt command:
  1. At first, you need to open the command prompt. To do so, right-click the Windows button in the bottom left of the screen, and select Command Prompt (Admin).
  2. Now, enter the following command
sfc/scannow
When it is done, a message will confirm that Windows found some corrupt or missing files and it has successfully repaired those. Check the Outlook and see if your emails are sending. If the problem persists, don’t worry there is another way to solve this. Users have found another command helpful is using the NetShell utility from the command prompt, which is similar to the above solution.
  1. Open the Command prompt by Right-clicking the Windows button in the bottom left of the screen and select Command Prompt (Admin).
  2. Enter the following command
netshwinsosk reset
This helpful command will reset the network adapter to its default settings. Hope this will solve your problem. If not, you may want to try the Method 2 listed below.

Method 2:

For this method, you need to consider the following things:
  • Are you using POP3, IMAP, or Exchange server for your email account?
  • How many email accounts have you configured in your Outlook?
  • Is there an undelivered email stuck in your Outbox?
  • If you are trying to send an attachment, what is the size of the attachment?
Try the following:
  1. Move or delete any undelivered email that is stuck in the Outbox folder, and then try sending an email and verify the result
  2. Start Outlook in Safe Mode by following the instructions below
Hold down Windows key + R. Copy this command Outlook /safe Note, there is a space between Outlook and / Paste it in the open box and press Enter If Outlook in Safe Mode works, disable the add-ins by following the steps below and determine if the problem is caused by add-ins.
  • Click File menu, click Options, Add-ins, Go button beside Manage Com-in Add.
  • If there are add-ins listed, clear the checkbox.
  • Close Microsoft Office and restart it.
  • Disable the add-ins one at a time. Now, restart Outlook and repeat the procedure once more. If the problem appears again, it will help you find which add-in is causing the problem.
  1. Start the computer using the clean boot. Now, try to send an email and see the result.
  2. If the problem still lingers, create a new profile and configure the email account.
If you do not possess the technical expertise required to accomplish this yourself or do not feel comfortable doing so, download and install a powerful automated tool to get the job done.
Read More
What driver to use inside Windows
When clean Windows is installed or when you place new hardware in your computer usually Windows itself detects the device and installs its driver. The question that comes now is, do you keep that driver or do you install the manufacturer's one. In order to answer this question let's analyze what is difference between the two drivers and other factors which could influence your decision.

Difference between drivers

First of all, know that drivers Windows installs are also drivers from the device manufacturer which have gone through Microsoft quality control in order to be included in Windows itself. Now naturally question which occurs, what is the difference, well answer to that would be this: in Windows, you have stripped down driver, just a driver in order for Windows to know what device is plugged and how to use it, meaning that for example if you install printer device, you will be able to print documents and Windows will know it is a printer but ... You will not get the control panel for that printer where you can adjust the printer itself and all of its features like let's say paperweight, etc. So if you need these kinds of features in that case it would be better to install a complete driver suite from the manufacturer and get the whole package. Windows will recognize the RAZER mouse for example but you will not be able to change its colors of program custom buttons on it until you install RAZER drivers. One more important thing to note is that drivers which are in Windows are less updated than drivers from the manufacturer's site. That being said, if you prefer and want to have the latest drivers you will prefer to get them again from the manufacturer.

Conclusion

So it seems that manufacturer's drivers are always in some form of advantage and that you will always want them and most of the time this is true, as a matter of fact, the only time I could think that you could use bare down Windows drivers is when new drivers update breaks something in Windows and device start behaving improperly. in this particular case, it is better to roll back to the previous Windows driver which has passed Microsoft quality control and is working for sure. In any other case, you are better off with the latest manufacturers drivers If you would like to read more helpful articles and tips about various software and hardware visit errortools.com daily.
Read More
Shutdown your PC properly

So, you have finished with work, game, movie, music, email, or whatever on your PC, you look at the clock, it is late, you decide to go to sleep or outside, you click on the power button and choose shutdown. Now when a PC is shut down you feel good and go with your business but the next time you power it up you get the same error like the computer never really shut down in the first place. You wonder why and reboot it, just in case and all of the sudden error is gone.

If something similar has happened to you or you had the feeling that after shutting down your computer has not really felt like shutting it down, do not seek professional help, everything is OK with you because when you click on shut down, your computer does not really shut down!

Truth is that Microsoft has changed how to shut down works and how rebooting works in Windows with an update but has not publicly said anything about it so some users may experience this feeling of not shutdown phenomenon and might even think there is something wrong with their PC.

Why this change?

A few years ago shutdown button and option in Windows were really shutting down OS, but things changed when Microsoft wanted to increase boot-up speed. Now when that decision was made shutdown option was changed. So, what was changed? Well in order to increase Windows booting time, the shutdown will now turn off power to PC components and it will look like everything is indeed shutdown but the Windows kernel will actually be saved to a hard drive with all settings and just awaken once the PC is turned back ON. This will result in all errors and other stuff being just still present same as they were once the system was instructed to be turned off.

Rebooting your PC will now clear kernel and file from the hard drive and you will get a clean system startup without any issues tied with the kernel itself.

Workaround

Now that we know why and what change has been made to Windows logical question is can we shut down our PC at all properly? Luckily for us, the answer is yes and we will not need any external application to do it, we can still do it inside Windows itself and it is quite quick and easy.

Bringing back the old shutdown

In order to bring the old shutdown functionality of your PC please follow the instructions but be aware that by doing this your PC will boot a little bit slower since it will have to load the kernel from scratch each time computer is turned ON.

First thing is to go to settings and go to System

system settings

Then once you are inside the system, navigate to the power and sleep and click on it to select it. Once you have it selected to all the way to the right and click on additional power settings.

power and sleep options

When you click on advanced power settings you should be led to the control panel's power options. Inside this panel click on top left link where it says Choose what the power button does.

power options in control panel

Inside options, you will need to untick the box next to Turn on fast startup (recommended), this option has been ticked ON by the Windows update and probably without notifying you. Option means exactly what was described, it will save kernel state on the hard drive for faster boot time but sadly it can cause some issues since it will never be reloaded from 0.

If you are unable to uncheck the box click on the text beside the shield icon that says: Change settings that are currently unavailable (you will have to be logged in as administrator).

shutdown options for power buttons

Conclusion

Altho turning off fast startup and shutting down the PC completely will for sure extend your bootup time I still believe that it is the right choice since sometimes a lot of clutter and bad things accumulate over time inside the OS and can cause a vast variety of problems in a long run. So stay safe and shut down that PC as it used to be in the past.

Read More
How to Fix Error Code 0xC004C003 When Installing Windows 10

What is Error Code 0xC004C003?

Error code 0xC004C003 has to do with activating Windows 10 after a clean install. This problem has been a frequent nuisance to users trying to update from Windows 7 or 8.1 following the invite path they got from Microsoft.

Solution

Restoro box imageError Causes

There are several problems that may have caused error code 0xC004C003. The most common of them are:
  • The product key entered was invalid, and cannot be used to activate the new OS.
  • The user followed the proper installation procedure, but the Windows update servers were too busy to handle the activation at that moment.
  • The free upgrade invitation was followed but after the reinstallation, the copy of Windows 10 was still not activated.
  • The user tried to perform a full clean install of Windows 10 instead of upgrading from Windows to Windows 10

Further Information and Manual Repair

A lot of solving error code 0xC004C003 has to do with the method in which the user has tried to update the system. If one decided to try and update the program before being invited to do so by the update manager, he must wait. Unfortunately, if one chooses to do it on his own and download a clean install, he was never given a product code to authenticate the process. There are two options to address error code 0xC004C003 — either restore to the previous Windows Operating System or call Microsoft (or visit their Website) and purchase a product key. The Windows update servers are very busy. There are lots of Microsoft users around the world, and the servers are doing their best to get to each and every one of the users as fast as possible, but they can only move at a certain speed. Your best bet is to sit back and wait a while. But what if you were invited, and properly downloaded Windows 10, then decided to do a clean install? It is advised that one do not try to enter Windows 7 or 8.1 serial code as this will not work. However, unlike the problem above, these users will NOT need to purchase a product key. According to Microsoft Support Staff, the installation servers are also very jammed because of the high numbers of installations going on right now. No matter what posts you may read, the key IS genuine, and it is NOT blocked, broken, or invalid. To check if Windows has been properly activated, open the Command Window. Make sure you are logged into an administrator profile; otherwise this check will not work. Type in “slmgr.vbs/ato” and click Enter and then wait. While waiting, the command will check on the status of the activation. Windows Script Host will open and show whether or not it is activated. A lot of users have reported that the activation did not work for the first few times. However they later reported after some more attempts, no issue was found in the way the operating system updated and that the activation process went smoothly. This is most likely due to the overload on the Windows Update servers, so bear with Microsoft. Users have reported that when trying to correct error code 0xC004C003, they have followed the upgrade path and then been told by Microsoft that the key was invalid and they had to purchase a new one. If the upgrade path provided by Windows 7 and Windows 8.1 is correctly followed then there is nothing to worry about Just wait a while and try it again. If there are prolonged issues, speak with a technician by visiting the Microsoft website and contacting the help center by calling the number provided. Give them all relevant information and they will be sure to help accordingly. The best solution to fix error code 0xC004C003 is to wait. In essence, the user will be waiting to reenter the same product key. According to Microsoft, and many user posts found online, it is recommended to wait a while and then try to activate again. This seemed to be an answer to most users' problems, and seem to work just fine. If the problem persists, take it to a windows repair technician to have it sorted out. If that does not work, use a powerful automated tool to fix the problem.
Read More
1 2 3 171
Logo
Copyright © 2023, ErrorTools. All Rights Reserved
Trademark: Microsoft Windows logos are registered trademarks of Microsoft. Disclaimer: ErrorTools.com is not affiliated with Microsoft, nor claims direct affiliation.
The information on this page is provided for information purposes only.
DMCA.com Protection Status