Every new movie & show on Netflix in September

netflixNetflix was one that made streaming service standard and even after some stumbles even today it is still a respected service.

So in that spirit, we are bringing you the list of all new and old movies and TV series releasing to NETFLIX this September.

September 1

Turning Point: 9/11 and the War on Terror — NETFLIX DOCUMENTARY

How to Be a Cowboy — NETFLIX ORIGINAL

Agatha Christie’s Crooked House (2017)

Anjaam (1994)

Barbie: Big City Big Dreams (2021)

Brave Animated Series (Season 1)

Crocodile Dundee in Los Angeles (2001)

Green Lantern (2011)

House Party (1990)

El Patron, radiografia de un crimen / The Boss: Anatomy of a Crime (2014)

HQ Barbers (Season 1)

Letters to Juliet (2010)

Level 16 (2018)

Los Carcamales / Oldsters (Season 1)

Kid-E-Cats (Season 2)

Kuroko’s Basketball (Season 3)

Marshall (2017)

Welcome Home: Roscoe Jenkins (2008)

September 2

Afterlife of the Party — NETFLIX FILM

Q-Force — NETFLIX ORIGINAL

The Guardian

September 3

Dive Club (Season 1) — NETFLIX ORIGINAL

Money Heist (Season 5) — NETFLIX ORIGINAL

Sharkdog (Season 1) — NETFLIX FAMILY

Worth (2021) — NETFLIX ORIGINAL

September 5

Bunk’d (Season 5)

September 6

Countdown: Inspiration 4 Mission to Space (Season 1 – Episodes 1 & 2) — NETFLIX DOCUMENTARY

Shadow Parties (2021)

September 7

Kid Cosmic (Season 2) — NETFLIX ORIGINAL

Octonauts: Above & Beyond (Season 1) — NETFLIX ORIGINAL

On The Verge (Season 1) — NETFLIX ORIGINAL

UNTOLD: Breaking Point — NETFLIX DOCUMENTARY

If I Leave Here Tomorrow: A Film About Lynyrd Skynyrd (2018)

September 8

Into the Night (Season 2) — NETFLIX ORIGINAL

JJ + E — NETFLIX FILM

The Circle (Season 3) — NETFLIX ORIGINAL

Show Dogs (2018)

September 9

Blood Brothers: Malcolm X & Muhammad Ali — NETFLIX DOCUMENTARY

The Women and the Murderer (2021) — NETFLIX DOCUMENTARY

September 10

Firedrake the Silver Dragon (2021) — NETFLIX ORIGINAL

Metal Shop Masters — NETFLIX ORIGINAL

Kate — NETFLIX FILM

Pokemon Master Journey: The Series (Part 1) — NETFLIX ANIME

Prey — NETFLIX FILM

Lucifer (Season 6) — NETFLIX ORIGINAL

Lucifer season 6 poster cast

September 13

Crime Stories: India Detectives (Season 1) — NETFLIX DOCUMENTARY

September 14

You vs. Wild: Out Cold — NETFLIX FILM

The World’s Most Amazing Vacation Rentals — NETFLIX ORIGINAL

September 15

Countdown: Inspiration4 Mission to Space (Season 1 – Episodes 3 & 4) — NETFLIX DOCUMENTARY

Too Hot to Handle Latino — NETFLIX ORIGINAL

Nailed It! — NETFLIX ORIGINAL

Schumacher — NETFLIX DOCUMENTARY

September 16

Safe House (2012)

Birth of the Dragon (2017)

He-Man and the Masters of the Universe (Season 1) — NETFLIX ORIGINAL

My Heroes Were Cowboys (2021) — NETFLIX DOCUMENTARY

September 17

Chicago Party Aunt — NETFLIX ORIGINAL

Sex Education (Season 3) — NETFLIX ORIGINAL

Tayo and Little Wizards (Season 1) — NETFLIX FAMILY

The Stronghold (2020) — NETFLIX FILM

September 22

Dear White People (Season 4) — NETFLIX ORIGINAL

Confessions of an Invisible Girl — NETFLIX FILM

September 23

A StoryBots Space Adventure (2021) — NETFLIX ORIGINAL

September 24

Ganglands (Season 1) — NETFLIX ORIGINAL

Midnight Mass — NETFLIX ORIGINAL

My Little Pony: New Generation — NETFLIX FAMILY

September 28

Aba Twist, Scientist — NETFLIX FAMILY

September 29

Sounds Like Love — NETFLIX FILM
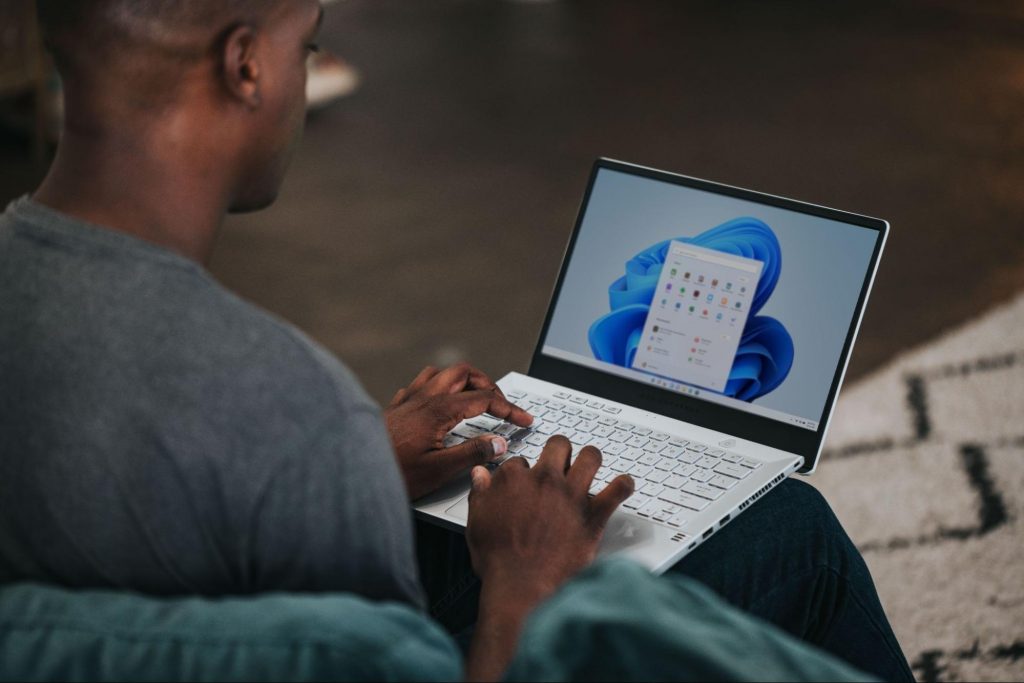
Do You Need Help with Your Device?

Our Team of Experts May Help
Troubleshoot.Tech Experts are There for You!
Replace damaged files
Restore performance
Free disk space
Remove Malware
Protects WEB browser
Remove Viruses
Stop PC freezing
GET HELP
Troubleshoot.Tech experts work with all versions of Microsoft Windows including Windows 11, with Android, Mac, and more.

Share this article:

You might also like

How To Easily Fix Unresponsive Script
This Unresponsive Script problem information is most frequent on Firefox, which is among the top browsers worldwide. Firefox might show you these errors with the information, "Warning: Unresponsive Script". It is going to subsequently inform you that software to the web page you're trying to open is unresponsive, or has quit reacting. This means that the script has ceased functioning and may freeze or hang Firefox if not immediately resolved. You can easily solve this problem.

Solution

Restoro box imageError Causes

Before you can fix this error, you need to understand its primary cause. The biggest risk is that if left unchecked, Unresponsive Scripts will hang your browser and to an extension of your computer thus limiting your productivity. You may have to uninstall and re-install Firefox if the problem persists. Listed here are several of the very most typical reasons for unresponsive script:
  • Programming Errors
  • Interference by other Softwares
  • Using an older outdated version of the program.

Further Information and Manual Repair

Most times, you have to do very little to fix this problem. Furthermore, a lot of the remedies supplied here do not require the assistance of a qualified professional technician. You can easily perform them and completely solve the error.
  • If you wish to stop the error, keep your browser and add-ons up to date.

It's easy to update your browser and any add-ons therein. In most cases it's free. By upgrading your browser and add-ons frequently, you are effectively eliminating the risk of Unresponsive Script occurring and interfering with your work.
  • unresponsive script in firefox warning dialogCheck for a poorly functioning background process

The sorts of background procedures that might result in the Unresponsive Software error include Javascript code, media plugin, and browser extension. You can stop the script from running while using Firefox thus eliminating the Unresponsive script error. Shutting the dialog box is just another easy way of eliminating the unresponsive script error information. Firefox offers you two choices in case of this malfunction. Either "Continue" or "Stop Script". Whatever alternative you pick, you can be certain the dialog box shuts, thus allowing you to continue browsing. firefox home screenThe final solution. Contact Firefox about these errors on your browser. Oftentimes, these errors occur when you attempt to visit particular websites. Mark the offending websites' URLs and include them in your communications with Firefox. Sometimes you can also contact the website owner yourself and request them to check their website's code. Following are additional measures you can take to resolve the Unresponsive Script error.
  • Waiting longer for the error to resolve itself automatically
  • Blocking the offending script
  • Yanking the guilty add-ons
  • Disabling the hardware acceleration tool.
With one of these few steps, you won't have to worry about the Unresponsive Script error, can continue enjoying your browsing activities on Firefox.
Read More
Automatically restart apps when you sign back
If you wish to continue where you have left off when you signed out of Windows follow this guide and learn how to continue your work after signing in, restart apps in your Windows. You can set Windows 10 to Automatically save your restartable apps when you sign out and restart them after you sign in. Here’s how:
  1. Right-click on the Windows logo to open the secret menu
  2. Select Settings
  3. Click open Accounts
  4. From the left side, select Sign-in options
  5. Scroll down till you see Restart apps setting
  6. Toggle the Automatically save your restartable apps when you sign out and restart them after you sign in setting to On position
Read More
Change Network from Public to Private error
You have the option to choose to configure the Network to Private or Public when you set it on Windows 10 PC. On the other hand, if the option to change the Network from Public to Private goes missing in Windows Settings then this post will surely help. You can find this setting under Settings > Network and Internet > Ethernet and appears when you click on it. If you are not able to see the option to change the network profile, then you either can’t open the settings, or the option to change it has been disabled. To resolve this issue, you can either use the Registry Editor or Windows PowerShell. Refer to the options given below for more details.

Option 1 – Change the Network Profile via Registry Editor

Changing the Network Profile can be done using the Registry Editor. But before you proceed, make sure that you create a System Restore Point first just in case. Refer to the steps below to do so.
  • Tap the Win + R keys to open the Run dialog box.
  • Then type “Regedit” in the field and hit Enter to open the Registry Editor.
  • After that, navigate to this key: HKEY_LOCAL_MACHINESOFTWAREMicrosoftWindows NTCurrentVersionNetworkListProfiles
  • Now expand the Profiles key folder located in the left pane to see one or more folders.
  • Next, expand each one of these folders and look for the “Description” sub-key which should match the name of your network.
  • After you find the Description sub-key, look for another sub-key named “Category” and double click on it to open it.
  • Now change its value from “0” to “1” to change the Network Profile from Public to Private.

Option 2 – Change the Network Profile via Windows PowerShell

Aside from the Windows Registry, you can also use Windows PowerShell in changing the Network Profile from Public to Private and so on. Take note that you have to use PowerShell with admin privileges. Just refer to the steps below to do so.
  • Tap the Win + X keys and then select the “PowerShell (Admin)” option.
  • Next, click on Yes if the User Account Control prompt appears.
  • After that, execute the commands listed below. Hit Enter right after you key in each one of them.
    • Get-NetConnectionProfile
    • Set-NetConnectionProfile -InterfaceIndex <index number> -NetworkCategory Private
Note: Since every Network Profile has an index number, you can check the label “Name” to identify the network that you want to change.
Read More
How to Fix the D3dx9_32.dll Error Code

D3dx9_32.dll Error - What is it?

D3dx9_32.dll is basically a type of dynamic link library used to load and run different programs on the PC. The D3dx9_32.dll error message pops on the screen when this file is unable to load successfully. The error message is displayed in either of the following formats on the computer screen:
"The file d3dx9_32.dll is missing" "D3DX9_32.DLL is missing. Replace D3DX9_32.DLL and try again." "File d3dx9_32.dll not found" "D3dx9_32.dll not found. Reinstalling might help fix this." "Missing component d3dx9_32.dll"
This error usually pops while using gaming software. The D3dx9_32.dll error is displayed after a game is loaded or before the game-play begins. However, it may also appear in software that uses advanced graphic features.

Solution

Restoro box imageError Causes

D3dx9_32.dll error may occur due to multiple causes. These include:
  • The problem is related to Microsoft DirectX software. This software includes the D3dx9_32.dll file in its software collection.
  • Incompatible Video Card Drivers
  • Improper game installation
  • DLL File Corruption
  • Registry issues
  • Viral infection

Further Information and Manual Repair

To avoid inconvenience, it is advisable to fix the error right away. To resolve it you don’t need to be a technical whiz or hire a technician. Luckily, the D3dx9_32.dll file error is quite easy to fix. Here are some of the best and effective DIY methods that you can try to remove the error:

Method 1 - Install the Latest Version of DirectX

Since D3dx9_32.dll error is related to DirectX software, it is advisable to make sure that you have the latest version of this software installed on your PC. To install the updated version, simply go to Microsoft’s official website, download the software from there and install it on your PC. To activate changes, restart your computer.

Method 2 - Uninstall and then Re-install Gaming Application

If the error still persists, then the reason for it could be the gaming application. Sometimes D3dx9_32.dll error may also occur due to poor program installation. Therefore, in this case it is recommended that you first uninstall the program by going to the Add/Remove program option. And once the program is uninstalled, try re-installing it on your PC. Hopefully, it will remove the error.

Method 3 - Restore the Damaged/Corrupt D3dx9_32.dll File

The error may also pop due to the damaged or corrupt D3dx9_32.dll file. This indicated registry issues. When the registry becomes overloaded with unnecessary and obsolete files, there is not enough space for other files to store. Due to the poor registry maintenance, the system and dll files are often damaged. To restore the damaged D3dx9_32.dll file, you need to clean the registry first. You can do this manually, but that will be quite time-consuming and slightly technical. Therefore, download a registry cleaner. A registry cleaner scans all registry-related errors and removes them right away. It cleans the registry and restores the damaged dll files.

Method 4 - Scan for Viruses

If the D3dx9_32.dll error is triggered by viruses, then it is advisable to scan your PC with an antivirus. It will scan and removes all viruses from your system. Whether D3dx9_32.dll error is related to registry issues or viral infection, download Restoro. It is a cutting-edge, advanced, and multi-functional PC Fixer. A one-stop solution for all PC-related issues. It is deployed with a powerful registry cleaner, an antivirus, a system optimizer and several other scanners. The registry cleaner detects and removes all registry errors and repairs damaged Dll files including D3dx9_32.dll file and simultaneously the antivirus utility scans your entire PC for all types of malicious software infecting your system including spyware, Trojans, adware and malware. The system optimizer feature ensures your PC works at its optimal level. Restoro PC Fixer is safe and efficient. It has a user-friendly interface which makes it quite easy for all levels of users to operate. In just a few simple clicks, errors are resolved. In addition to this, you can download it on all Windows PC. It is compatible with all Windows versions. Click here to download Restoro and resolve D3dx9_32.dll error code on your PC today.
Read More
Guide to Fixing Error 0x800CCC0E

Error Code 0x800CCC0E - What is it?

The error code 0x800CCC0E is an Outlook error that appears while using either Microsoft Outlook or Outlook Express. The error message hampers your ability to send and receive emails.

Solution

Restoro box imageError Causes

0x800CCC0E Outlook error code is triggered by multiple reasons including:
  • Improper connection with SMTP (Simple Mail Transfer Protocol) server
  • Damaged files
  • Registry corruption
In most cases, it’s the registry that gets corrupted which leads to the occurrence of 0x800CCC0E error code display. This typically happens when you try to update your Outlook/Outlook Express version. When updating, you need to remove all the software files of the previous Outlook version which includes the registry too. If the files are not removed from the registry, the new version update will often fail. The junk files of the old version are likely to damage and corrupt the registry.

Further Information and Manual Repair

It is advisable to repair the error code 0x800CC0E right away to avoid inconvenience and system failure and fatal crashes which can lead to valuable data loss.

Cause: Improper connection with SMTP (Simple Mail Transfer Protocol) server

Solution: If the cause of the 0x800CCC0E is SMTP server connection failure, then the best way to resolve the error is to reconfigure your email account settings. Make sure that port 25 is being used in the SMTP area. Port 25 is the standard outgoing mail port. If the SMTP setting is on port 25 then another reason for the error 0x800CCC0E can be your anti-virus or firewall software enabled on your PC. Turn it off for a moment and then try sending emails from your Outlook.

Cause: Damaged Files and Registry Corruption

Solution: If the error code is triggered due to registry corruption and file damage, then the best way to resolve it is to download Restoro. Restoro is a safe, efficient, and highly functional inbox cleaner and a system optimizer embedded with numerous powerful utilities designed to repair multiple PC-related errors including the error code 0x800CCC0E when triggered by registry corruption. This cutting inbox cleaner scans your PC entirely and detects all the unnecessary and malicious files saved in your system’s registry like junk files, internet history, invalid entries, and files of the uninstalled programs. These files take up most of the registry disk space thus causing the registry files to get damaged and corrupt and triggering error codes like 0x800CCC0E. With the help of Restoro,  you can easily wipe out all such files from your system in just one click. After scanning for errors all you need to do is click the repair tab to make your registry disk clutter-free. Once the clutter is removed, update the new version of the Outlook/ Outlook Express again on your system and then try sending emails. You’ll see two noticeable differences after repairing your PC with Restoro. One is that you will be able to install the new version and send emails smoothly from your Outlook account without any 0x800CCC0E error pop-ups. And the second difference you’ll see is the change in your PC performance. This tool optimizing your PC speed and reduces boot time. This tool is very simple and easy to use. It has a neat design layout and a user-friendly interface which makes it easy for all levels of users to use Restoro smoothly with zero complexity. In just a few clicks the error message 0x800CCC0E is resolved. What makes this tool a favorite among users is that it does not require any skills or technical know-how. To get started here’s what you need to do:
  1. Click here to download Restoro software on your PC
  2. Once the download is complete, run it to scan for 0x800CC0E error
  3. After the scanning is successfully complete, click on the Repair button to fix the error right away.
  4. Then install the new version of Outlook/ Outlook Express again on your system
Read More
How to Fix Error Code 0xC004C770

Error Code 0xC004C770 – What is it?

If the Error Code 0xC004C770 popped up on your computer during your activation of the Windows 10 software, don’t worry. This is a fairly common error, especially for people who own more than one computer upon which Windows 10 is installed and activated. The gist of this error code is that the product key that you have entered has already been claimed or used on a different computer. Because there are limitations on the number of computers that can use any given license activation code or product key, this error code can arise when you have exceeded that limit. If you have a single-use license and have already entered the particular product key onto another machine, you may see this error come up during activation.

Both Error Code 0xC004C770 and Error Code 0x803FA071 arise from the same problem and the same steps can be used to resolve both error codes.

Solution

Restoro box imageError Causes

Error Code 0xC004C770 is likely to appear on your screen during activation of Windows 10 if you or anyone else in your organization have already entered in the product key used on another computer. If you have a multiple-use license, the product key that you are entering may already have been used for the maximum number of computers allowed under that license.

Further Information and Manual Repair

There are two basic methods for addressing the issues associated with Error Code 0xC004C770. These methods can easily be implemented by anyone who is comfortable interacting with the Windows Store from their computer, which makes the resolution of this particular error code fairly simple and straightforward.

If you are unable to complete the steps below or Error Code 0xC004C770 has not been resolved after following the guides below, contact a Windows technician who is familiar with the Windows 10 activation process to assist you in the process. You can also get in touch with the Windows technical support team to assist you in the process if needed.

Method One: Purchase A New Product Key from Windows

If you have already used the product key on another computer or have used it on the maximum number of allowed devices, you may need to purchase an additional product key for the computer with Error Code 0xC004C770. Product keys can be purchased physically from a retailer that sells Windows 10 software licenses or purchased directly from the Windows store.

To purchase a new product key directly from the Windows Store, follow the steps below:

  • Step One: Select the Windows start button at the bottom of your toolbar. Click on “Settings,” then select the option for “Update and Security.”
  • Step Two: Click on the “Activation” option.
  • Step Three: In the menu that appears, choose the option to “Go to Store” and follow any on-screen instructions to finalize a purchase of the Windows 10 software and product key.
  • Step Four: Use the new product key to complete the installation and activation of the Windows 10 software on your computer.

If you are unable to see the “Go to Store” option when you reach the “Activation” page, you may not be set as an administrator of your machine. In this case, get in touch with the support personnel from your company to complete the purchase, installation, and activation process on your computer.

Method Two: Attempt to Finish Activation via Phone

For users who have changed out parts of their computer’s hardware, like putting in a new motherboard or activating a new hard drive, you may have more success if you attempt activation through a phone.

In order to activate your copy of Windows 10 from your phone, follow the steps below:

  • Step One: On your mobile device, open up the search box from the taskbar.
  • Step Two: In the search box, enter the phrase “SLUI 04.”
  • Step Three: Select the “SLUI 04” option that appears.
  • Step Four: Follow the directions given on the screen to complete the activation process for your copy of Windows 10.

As with any error code resolution, if the methods above are not successful or if you are not comfortable with your ability to successfully complete the steps above, get in contact with a qualified professional who is trained in the Windows 10 activation process to assist you or download a powerful automated tool to get the job done.

Read More
How to remove WeatherGenie Browser Hijacker

WeatherGenie is a Browser Extension that allows users to check the current weather in any town at any time. This extension adds the “Weather:” search option to your new tab, and changes your default search engine to Yahoo.com. It also ads system Registry Entities that allow it to run each time the computer is restarted, several task schedulers are also added to allow it to run at various times during the day.

While installing this extension monitor browsing data from your computer. You may also see additional injected ads, sponsored links, and pop-up ads through your browser sessions. Weather games have been marked as a Browser Hijacker by several anti-virus scanners and are therefore not recommended to keep on your computer. It is flagged as potentially unwanted for optional removal.

About Browser Hijackers

Browser hijacking is a very common type of online fraud where your web browser settings are altered to allow it to do things you do not intend. Browser hijackers could do a variety of things on your PC. Often, hijackers will force hits to sites of their preference either to increase targeted traffic generating higher ad earnings, or to gain a commission for every user visiting there. Even though it might seem naive, all browser hijackers are harmful and thus always regarded as security risks. As soon as the malware attacks your computer or laptop, it begins to mess things up a whole that slows your system down to a crawl. In the worse case, you might be pushed to tackle serious malware threats too.

How you can know whether the web browser is hijacked?

Symptoms that an internet browser is hi-jacked include: 1. you notice unauthorized modifications to your web browser’s home-page 2. bookmark and the new tab are also changed 3. the essential web browser settings are modified and unwanted or insecure sites are put into the trusted sites list 4. you’re getting new toolbars you have never witnessed before 5. you’ll notice random pop-ups start showing on a regular basis 6. web pages load slowly and at times incomplete 7. you can’t navigate to particular web pages, such as security software-related websites.

How does a PC get infected with a browser hijacker?

There are a number of ways your PC can become infected with a browser hijacker. They usually arrive by way of spam e-mail, via file-sharing networks, or by a drive-by download. They can be included with toolbars, BHO, add-ons, plugins, or browser extensions. Other times you might have mistakenly accepted a browser hijacker as part of a software bundle (generally freeware or shareware). A good example of some popular browser hijackers includes Conduit, Anyprotect, Babylon, SweetPage, DefaultTab, RocketTab, and Delta Search, but the names are regularly changing. The existence of any browser hijacker on your system might substantially diminish the browsing experience, record your internet activities that lead to critical privacy concerns, diminish overall system performance and cause software instability as well.

The best ways to get rid of browser hijackers

Some browser hijacking can be simply reversed by identifying and eliminating the corresponding malware software from your control panel. But, many hijackers are harder to find or eliminate as they could get themselves connected with certain crucial computer files which allow them to operate as a necessary operating-system process. Besides, browser hijackers could modify the Computer registry so it could be very tough to repair manually, especially if you’re not a very tech-savvy individual. You can go for automatic browser hijacker removal by just installing and running a reliable anti-malware application. SafeBytes Anti-Malware discovers all kinds of hijackers – such as WeatherGenie – and eliminates every trace quickly and efficiently. Utilize a pc optimizer together with your antivirus software to repair various registry issues, remove system vulnerabilities, and improve your computer performance.

How To Get Rid Of Malware That Is Blocking Anti-Malware Installation?

Practically all malware is detrimental and the effects of the damage may vary based on the specific type of malware. Some malware goes to great lengths to stop you from downloading or installing anything on your PC, particularly anti-virus software programs. If you’re reading this, chances are you’re stuck with a malware infection that is preventing you to download or install the Safebytes Anti-Malware program on your system. Refer to the instructions below to get rid of malware through alternative ways.

Remove malware in Safe Mode

Safe Mode is actually a special, basic version of Windows where only bare minimum services are loaded to stop viruses and also other problematic programs from loading. In the event the malware is blocking internet access and affecting your computer, starting it in Safe Mode enables you to download anti-malware and run a scan whilst limiting possible damage. In order to enter into Safe Mode or Safe Mode with Networking, press the F8 key while the PC is starting up or run MSConfig and locate the “Safe Boot” options in the “Boot” tab. Once you’re in Safe Mode, you can attempt to install your anti-malware software without the hindrance of the malware. After installation, run the malware scanner to get rid of most standard infections.

Switch to an alternative internet browser

Some malware mainly targets specific internet browsers. If this is your situation, use another internet browser as it can circumvent the computer virus. The best solution to avoid this problem is to opt for a web browser that is well known for its security features. Firefox contains built-in Phishing and Malware Protection to help keep you safe online.

Make a bootable USB anti-virus drive

Here’s yet another solution which is using a portable USB anti-virus software that can scan your system for malware without needing installation. Follow these steps to employ a USB flash drive to clean your corrupted computer system. 1) Download the anti-malware on a virus-free PC. 2) Insert the USB drive on the same computer. 3) Double-click the Setup icon of the anti-malware program to run the Installation Wizard. 4) Choose the flash drive as the location for saving the file. Follow the instructions to complete the installation process. 5) Now, transfer the flash drive to the infected computer. 6) Run the Safebytes Anti-malware directly from the flash drive by double-clicking the icon. 7) Click on “Scan Now” to run a scan on the affected computer for viruses.

Top Features of SafeBytes Anti-Malware

Today an anti-malware tool can protect your computer or laptop from various forms of online threats. But how do choose the best one amongst several malware protection software that is available in the market? Perhaps you might be aware, there are several anti-malware companies and tools for you to consider. A few of them are great but there are many scamware applications that pretend as genuine anti-malware software waiting to wreak havoc on the computer. When searching for an anti-malware tool, pick one which provides dependable, efficient, and complete protection against all known computer viruses and malware. One of the highly recommended software is SafeBytes AntiMalware. SafeBytes carries a superb history of excellent service, and customers are happy with it. Safebytes is one of the well-established PC solutions companies, which offer this comprehensive anti-malware tool. When you have installed this software, SafeByte's sophisticated protection system will ensure that absolutely no viruses or malware can seep through your computer. SafeBytes anti-malware takes PC protection to a whole new level with its advanced features. The following are a few of the great ones: Active Protection: SafeBytes provides complete and real-time security for your PC. It will inspect your personal computer for suspicious activity at all times and shields your personal computer from illegal access. Robust Anti-malware Protection: Safebytes is based on the best virus engine within the industry. These engines can find and eliminate threats even during the early stages of a malware outbreak. Fast Scan: SafeBytes’s high-speed malware scanning engine reduces scanning times and extends battery life. Simultaneously, it’ll effectively identify and remove infected computer files or any online threat. Internet Security: SafeBytes checks and provides a unique safety ranking to every website you visit and block access to web pages considered to be phishing sites, thus safeguarding you from identity theft, or known to contain malicious software. Very Low CPU and Memory Usage: SafeBytes is a lightweight tool. It consumes a very small amount of processing power as it runs in the background so you are free to use your Windows-based PC the way you would like. Premium Support: For any technical issues or product assistance, you could get 24/7 professional assistance via chat and email. To conclude, SafeBytes Anti-Malware is pretty great for securing your laptop or computer against all sorts of malware threats. Malware problems will become a thing of the past when you put this software program to use. So if you’re looking for a comprehensive antivirus program that’s still easy to use, SafeBytes Anti-Malware is exactly what you will need!

Technical Details and Manual Removal (Advanced Users)

To remove WeatherGenie manually, navigate to the Add/Remove programs list in the Control Panel and choose the program you want to remove. For internet browser extensions, go to your browser’s Addon/Extension manager and choose the plug-in you wish to disable or remove. You’ll probably also want to reset your browser to its default configuration settings. In order to ensure the complete removal, manually examine your hard drive and Windows registry for all of the following and eliminate or reset the values as needed. Please keep in mind that only experienced users should attempt to manually edit the registry because deleting any single critical system file results in a serious problem or even a system crash. In addition, certain malware is capable of replicating or preventing deletion. It is advisable that you do the removal process in Safe Mode.
Files: %UserProfile%\Application Data\Microsoft\%random%.exe %System Root%\Samples %windows%\system32\drivers\Search.weather-genie.com.sys %User Profile%\Local Settings\Temp %Documents and Settings%\All Users\Start Menu\Programs\Search.weather-genie.com %Documents and Settings%\All Users\Application Data\ %Program Files%\Search.weather-genie.com C:\ProgramData\%random numbers%\ Search And Delete: doguzeri.dll 3948550101.exe 3948550101.cfg Registry: HKEY_LOCAL_MACHINE\SOFTWARE\Microsoft\Windows NT\CurrentVersion\Image File Execution Options\msseces.exe Debugger = svchost.exe HKEY_LOCAL_MACHINE\SOFTWARE\Microsoft\Windows\CurrentVersion\Uninstall\Search.weather-genie.com HKEY_CURRENT_USER\Software\Microsoft\Windows\CurrentVersion\Internet Settings WarnOnHTTPSToHTTPRedirect = 0 HKEY_LOCAL_MACHINE\SOFTWARE\Microsoft\Windows\CurrentVersion\Internet Settings WarnOnHTTPSToHTTPRedirect = 0 HKEY_LOCAL_MACHINE\SOFTWARE\Microsoft\Windows NT\CurrentVersion\SystemRestore DisableSR = 1 HKEY_LOCAL_MACHINE\SOFTWARE\Microsoft\Windows NT\CurrentVersion\Image File Execution Options\ekrn.exe Debugger = svchost.exe HKEY_LOCAL_MACHINE\SOFTWARE\Microsoft\Windows NT\CurrentVersion\Image File Execution Options\msascui.exe Debugger = svchost.exe HKEY_LOCAL_MACHINE\SOFTWARE\Microsoft\Windows\CurrentVersion\Run 3948550101 HKEY_CURRENT_USER\Software\Microsoft\Windows\CurrentVersion\Run\xas HKEY_CURRENT_USER\Software\Search.weather-genie.com
Read More
How to Install SafeBytes Anti-Malware Software When Malware Blocks or Prevents the Process
All malware is detrimental and the magnitude of the damage will vary greatly depending on the type of infection. Some malware variants modify internet browser settings by adding a proxy server or modify the PC's DNS settings. When this happens, you'll be unable to visit certain or all the sites, and therefore not able to download or install the required security software to clear out the computer malware. If you’re reading this article, chances are, you’re stuck with a virus infection that is preventing you from downloading and/or installing the Safebytes Anti-Malware program on your computer. Refer to the instructions below to remove malware through alternate methods.

Method 1: Install Anti-Malware in Safe Mode with Networking

If the malware is set to load automatically when Microsoft Windows starts, entering safe mode may block the attempt. Since only the minimal applications and services start-up in safe mode, there are rarely any reasons for conflicts to happen. You will need to do the following to remove malware in Safe mode.
  • 1) Tap the F8 key continuously as soon as your computer boots, however, before the large Windows logo or black screen with white texts come up. This would invoke the Advanced Boot Options menu.
  • 2) Choose Safe Mode with Networking using arrow keys and press Enter.
  • 3) When you are into this mode, you will have access to the internet once again. Now, utilize your web browser normally and download Safebytes Anti-Malware.
  • 4) After installation, do a complete scan and allow the software to get rid of the threats it detects.

Method 2: Utilize An Alternate Internet Browser to Download Anti-Malware Software

Malicious program code may exploit vulnerabilities in a specific web browser and block access to all antivirus software sites. If you suspect that your Internet Explorer has been hijacked by computer malware or otherwise compromised by cybercriminals, the most effective plan of action is to switch to an alternate web browser such as Chrome, Firefox, or Safari to download your chosen security program - Safebytes Anti-Malware.

Download SafeBytes Anti-Malware for Malware Removal

Method 3: Install and Run Anti-Malware From a USB Drive

To effectively remove the malware, you might want to approach the problem of installing an antivirus software program on the affected computer from a different angle. Adopt these measures to employ a flash drive to fix your infected computer.
  • 1) Use another malware-free PC to download Safebytes Anti-Malware.
  • 2) Plug the thumb drive into the uninfected computer.
  • 3) Double click on the executable file to open the installation wizard.
  • 4) Choose the drive letter of the USB drive as the place when the wizard asks you exactly where you would like to install the anti-virus. Follow activation instructions.
  • 5) Now, transfer the thumb drive to the infected computer.
  • 6) Double-click the antivirus program EXE file on the USB flash drive.
  • 7) Click on the “Scan Now” button to start the malware scan.
If no other method of downloading and installing the antivirus software works, then you've no other option than to hit the last resort: a full Windows reinstallation, the only approach known to have a 100% rate of success at virus removal.
Read More
Fix Windows Activation error code 0xC004F078
As you know, Windows 10 has a complicated mechanism for Activation which helps in the verification of a genuine copy of Windows 10. However, there are times when you might encounter some errors during the activation process. One of these errors is the error code 0xc000f074. This kind of error could be due to the Key Management Service or KMS which is unreachable by the client computer or if the key used in the SLSetAuthenticationData function call is incorrect. This kind of error mostly affects surfaces on computers that are upgraded from either Windows 7 or Windows 8.1 to Windows 10. In such cases, you may encounter any of the following error messages:
“Windows is unable to reach your company’s activation service. Please connect to your corporate network. If you are connected and continue to see the error, contact your system administrator. You can also click on the error detail to find the exact error. Error code: 0xC004F074.” “Activating Windows(R), (Key hash)… Error: 0xC004F074 The Software Licensing Service reported that the computer could not be activated. No Key Management Service (KMS) could be contacted. Please see the Application Event Log for additional information.” “Error 0xC004F074, SL_E_AUTHN_MISMATCHED_KEY, The Software Licensing Service reported that the key is mismatched.”
To fix the Windows 10 Activation error 0xC004F078, you have to use the correct key for your type of Windows copy or use Command Prompt to reinstall the key or you could also try running the Activation troubleshooter.

Option 1 – Try running the Windows 10 Activation Troubleshooter

The first thing you can do to resolve the Activation error code 0xc000f074 is to run the Windows 10 Activation Troubleshooter. To do so, follow these steps:
  • Go to Settings and then select Activation.
  • After that, click on the Windows Activation and then troubleshoot. This will help you address most of the commonly found activation issues in Windows devices.
The Windows 10 Activation Troubleshooter will determine if your license key is a valid Windows 10 digital license for an edition that is not currently installed. If it turns out that it’s not, then the troubleshooter will show you how to install the correct edition.

Option 2 – Try to use the correct key for the type of Windows version you have

If the Windows Activation troubleshooter wasn’t able to resolve the error, then you can try using the correct key for your type of Windows version. All you have to do so is check the type of your Windows copy if it’s OEM, retail, or volume. And make sure that you have the correct, valid product key for your operating system.

Option 3 – Try to use Command Prompt to reinstall the key

  • In the Start Search, type “command prompt” and right-click on Command Prompt from the search results, and then select “Run as administrator”.
  • After that, execute this command to uninstall the existing key: vbs /upk
  • Next, you need to install the KMS product key by executing this command: vbs /ipk <The KMS Product Key>
  • Once you’re done, you will see a prompt that’ll tell you whether the operation was either successful or not.
  • To active, the KMS product key online, use this command: vbs /ato
  • Use this command to activate the key using the telephone: exe 4
  • After you’ve activated the KMS product key, restart the Software Protection Service. You can also verify the Activation Status to check if your fix was successful or not.

Option 4 – Contact Microsoft Support for assistance

If you’re at your wits’ end in trying to upgrade your computer, you should consider contacting Microsoft Support for help as they can offer you various options that would make fixing Windows Activation error code 0xc000f074 a lot easier and faster.
Read More
The proxy server is refusing connections
If you receive an error message saying, “The proxy server is refusing connections” while trying to open a website on your Google Chrome or Mozilla Firefox browser in Windows 10, then read on as this post will guide you in fixing this error. This kind of error occurs when you have a wrong or dead proxy configuration or when you are using some VPN service. However, this kind of error could also mean that your computer might be infected by malware which caused some changes in the internal settings. Whatever triggered the error, here are some suggestions that could help in fixing it.

Option 1 – Check the proxy settings in your browser

Like other browsers, Firefox allows users to set up proxy in several ways. However, if you’ve made any changes recently which might have caused the error, the first thing you can do is to check the proxy settings in your Firefox browser. Follow the steps below to do so.
    • Open the browser and go to Menu and then click Options.
    • After that, go to the General tab and scroll down and click the Settings button under Network Settings.
  • From there, make sure that the Use system proxy settings option is set. If not, you have to enable No proxy and then save the changes made.
  • Now check if the “The proxy server is refusing connections” error is fixed or not.
Note: If you want to use a proxy in Firefox, you have to select the Manual proxy configuration and set it up properly. And if your network has a proxy setting and you want to grab that, you have to opt for the Auto-detect proxy settings for this network option.

Option 2 – Try disabling the proxy server for your LAN

If your PC was just attacked by some adware or malware as of late, it is possible that it has changed the network settings in the system and might display spam advertisements. Thus, you have to disable the proxy server for your LAN. To do that, refer to these steps:
  • Tap the Win + R keys to open the Run dialog box.
  • Then type “inetcpl.cpl” in the field and hit Enter to pull up the Internet Properties.
  • After that, go to the Connections tab and select the LAN settings.
  • From there. Uncheck the “Use a Proxy Server” option for your LAN and then make sure that the “Automatically detect settings” option is checked.
  • Now click the OK and the Apply buttons.
  • Restart your PC.
Note: If you are using a third-party proxy service, you have to disable it.

Option 3 – Try disabling the manual proxy setup from Settings

In case you miss it, there is actually an option in the Settings panel that you can use to set up a proxy in your Windows 10 computer. So if you encounter the “The proxy server is refusing connections” error, you should disable manual proxy for the meantime and check if it fixed the error or not.
  • Tap the Win + I keys to open the Windows Settings.
  • Then go to Network & Internet > Proxy.
  • And on your right-hand side, ensure that the Automatically detect settings are enabled and that the Use a proxy server option under the Manual proxy setup is disabled.
  • Now try to open any website again and see if the problem’s fixed.

Option 4 – Check your VPN

If you are using a VPN application, there are times when it causes some issues like this error. If that’s the case, you can try to disable your VPN temporarily and see if the error is resolved or not and if turns out that your VPN is the culprit, you have to uninstall it and install a new one or its latest version. To uninstall it, follow the steps below.
  • Tap the Win + R keys to open the Run dialog box
  • Then type “appwiz.cpl” in the field and hit Enter to open the Programs and Features in Control Panel.
  • From there, look for the VPN service you are using, select it and then click on Uninstall to remove it.
  • After that, restart your computer and try to install the latest version of the program again. It should work now. If not, proceed to the next available option below.

Option 5 – Clear your browser’s internet cache

You actually have the option to Hard Refresh in order to clear the cache of your browser either pressing key combination Ctrl +F5.

Option 6 – Try scanning your computer using Windows Defender

As mentioned, the “The proxy server is refusing connections” might be caused by some malware in the system and so to eliminate the malware, you have to scan your computer using security programs like Windows Defender.
  • Tap the Win + I keys to open Update & Security.
  • Then click on the Windows Security option and open Windows Defender Security Center.
  • Next, click on Virus & threat protection > Run a new advanced scan.
  • Now make sure that Full Scan is selected from the menu and then click the Scan Now button to get started.
Read More
1 2 3 171
Logo
Copyright © 2023, ErrorTools. All Rights Reserved
Trademark: Microsoft Windows logos are registered trademarks of Microsoft. Disclaimer: ErrorTools.com is not affiliated with Microsoft, nor claims direct affiliation.
The information on this page is provided for information purposes only.
DMCA.com Protection Status