Steam Autumn sale is still raging and other storefronts like EPIC and GOG have also had their go, and as the year slowly closes we reflect on the best games released this year.
The games presented are not in any particular order and as sales are still raging pick one for you for a good time.
F1 Manager 22
If you are into formula racing this new manager is something we will wholeheartedly recommend. How it has been a very long time since a good F1 manager has been released this one is breath of fresh air. Masterfully done and fun to play, also licensed with real teams and cars get it here: https://store.steampowered.com/app/1708520/F1_Manager_2022/
Stray
I like cats, but this game is on another level from its competitors. Unique approach, great storyline, and of course orange cat as the main character! Set in a cyberpunk environment following the story of some unfortunate androids you can do most cat things like playing in boxes, etc but essentially the game is a puzzle platformer which in my opinion is a great thing. Meow your things and get the game while it is discounted: https://store.steampowered.com/app/1332010/Stray/
Neon White
Mirror's Edge was the very unique game when it was released introducing parkour into the gaming world, and Neon white brings it one level up. With competitive parkour FPS gameplay this game is great for killing some time and competing with your friends but most of all it is fun to play experience. Get it here: https://store.steampowered.com/app/1533420/Neon_White/
This game needs to be experienced in order to fully grasp its magnitude and quirkiness. From the creators of borderlands comes a new IP fusion of fantasy, guns, and crazy ideas all wrapped into an action RPG looter shooter with a recognizable borderlands style of graphics. https://store.steampowered.com/app/1286680/Tiny_Tinas_Wonderlands/
Norco
Winner of multiple awards, Norco is a classic point-and-click adventure game with a great sci-fi story with a lot of environmental focus. Story and atmosphere are the main selling points for the game and if you enjoy good stories with interesting characters give this one a go: https://store.steampowered.com/app/1221250/NORCO/
Final Fantasy 14: Endwalker
Expansion for Massive multiplayer online roleplaying game brings so much to the table that we just could not oversee it and place it aside. Technically not full standing game since it is the expansion it still delivers on many fronts and since it is supposedly the last expansion now is the best time to pick it up and give a final fantasy 14 a go: https://store.steampowered.com/app/1592500/FINAL_FANTASY_XIV_Endwalker/
Elden Ring
Of course, the list would not be complete if we did not include Elden ring, a great example of how a difficult but well-executed game can go over and beyond. With a story on par with great epics and compact as in dark souls, this title will provide you with many hours of gameplay and content. https://store.steampowered.com/app/1245620/ELDEN_RING/
Strangely enough, Windows 11 does not feature any typical icon on its desktop when installed. No My PC, no Recycle Bin, nothing, just plain and clean wallpaper. Personally, I like this clean look and feel but of course, there are a lot of users that are used to have some system-related icons on their desktop for easy access.
Do not sweat, we will turn them back on with ease. The best part is that you can choose which one would you like. So let’s dive right into it and get the icons back for the old Windows feel and look.
Showing selected Icons desktop
Right-click on Desktop and select Personalize
Select Themes from the list of personalization items
Inside themes scroll down and click on Desktop Icon Settings
Desktop Icon Settings will open and inside it, place checkmarks beside icons that you would like to appear on the desktop and click OK
Close settings
As always settings and choices will be automatically applied and icons will appear right away on the desktop.
Msvcr71.dll is a dynamic library link that belongs to the Microsoft Visual C Runtime library. This file is a core Windows component used by numerous Windows applications like Microsoft Office version 2002 and 2003, Windows XP Media Center, and Windows XP Tablet PC Edition.
The Msvcr71.dll error commonly occurs when two applications share the same DLL file. When an application is deleted sometimes the Msvcr71.dll file is also deleted which is associated with two applications on your PC.
So, when you try to run the other application you come across the Msvcr71.dll error on your system.
The error also occurs when you try to install new programs or update the old program versions. This also misconfigures the DLL files and results in the Msvcr71.dll error.
Msvcr71.dll error messages are often displayed as the following:
“This application has failed to start because Msvcr71.dll was not found.”
“Mscvr71.dll is a bad windows image. Please check against your installation diskette.”
“Cannot find [PATH]msvcr71.dll"
"The file msvcr71.dll is missing."
Solution
Error Causes
Deletion of the Msvcr71.dll file is one cause for the Msvcr71.dll file error. However, this error can also be generated due to other causes such as:
Corrupt, missing, or misconfigured msvcr71.dll file
Damaged and missing .dll files
Corrupt runtime code library
Registry issues
Malware attack and viral infection
Msvcr71.dll error codes usually occur on Windows versions XP and Vista.
Further Information and Manual Repair
Here are different ways to resolve the Msvcr71.dll error code on your system:
1. Reinstall the program/application that is causing the Error to Pop up on the Screen
When this error code occurs due to misconfigured or missing the Msvcr71.dll file, try reinstalling the program/application that is causing the error to pop up on your screen.
When doing this, make sure there is no problem with the setup files from the disk you are performing the installation on your PC.
2. Check the Recycle Bin and Restore the Deleted File
If the Msvcr.dll file was deleted accidentally when you uninstalled a program on your PC, then the deleted file is most likely to be in the recycle bin. Check it and if you find it, restore it. Once the file is restored try running the application again.
3. Scan for Malware and Viruses
Install an antivirus and scan for malware and viruses. This software can also corrupt DLL files and runtime code libraries.
However, this is not the best solution especially if you already have too many programs installed on your PC. New program installations cause more complications and besides antivirus are infamous for slowing down PC speed.
4. Repair the Corrupt Registry
If the three methods discussed above don’t help you resolve the Msvcr71.dll error code on your system, then this means the cause of the error is more critical than you think.
The error is triggered by a corrupt and damaged registry. If this issue is not addressed timely, it can result in system failure and a fatal crash.
To resolve the error code Msvcr71.dll, you need to repair the corrupt registry. And the best way to go about it is to download Restoro
Restoro is a user-friendly, highly functional, and multi-functional repair tool integrated with high speed and powerful utilities such as a registry cleaner, system stability scanner, Active X and class error module, and an antivirus.
It also functions as a system optimizer. It is the answer to your entire PC-related errors and issues.
The automated and intuitive algorithm deployed inside this tool enables it to detect all registry errors and issues generating Msvcr71.dll error. DLL files often get damaged due to data overload, disk fragmentation, and malicious files saved in the registry.
The registry cleaner removes all the unnecessary and obsolete files from the registry, clears up disk space, and repairs defragmented, damaged, and misconfigured disks. DLL files including Msvcr71.dll and also fixes the registry.
It’s an in-built antivirus scan and removes viruses and the system optimizer feature ensures that your PC runs at its optimum speed. It is safe, bug-free, efficient, and easy to use. It runs smoothly on all Windows versions.
Click here to download Restoro and resolve the Msvcr71.dll error on your PC.
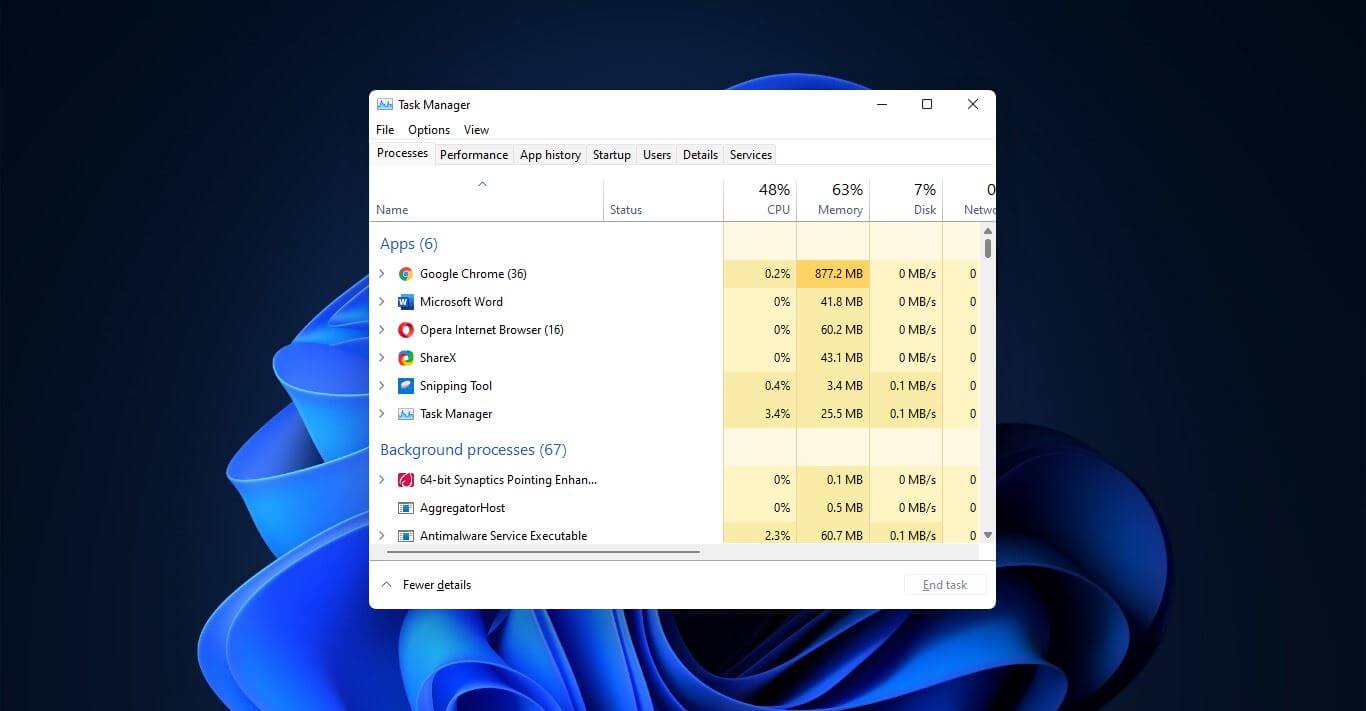
Something we are used to doing in a certain way inside Windows 10 is slightly changed in Windows 11. One of those things is how you open task manager, well kind of.
Option to right-click on the taskbar and launch task manager is gone but do not worry there are other same and simple ways you can launch it.
Press CTRL + SHIFT + ESC or CTRL + ALT + DEL
Right-click on the START button
Type task manager in start search on top in the start menu
Type taskmgr in command prompt
Press ⊞ WINDOWS + R to open run dialog and type in taskmgr
And that’s it, now depending on your situation, you might use different methods to evoke task manager.
This is a type of Google Chrome update error code. It indicates a failure to communicate with Google update. The error code is displayed in the following format:
‘Update server not available (error: 3)’
Solution
Error Causes
Error 3 may be triggered by several reasons. These include:
You are running Vista/ 7 and you have configured Google Chrome to run as an administrator
Google Update is not registered properly
Registry issues
Further Information and Manual Repair
Here are some of the best and effective DIY methods to resolve error 3 on your PC without any professional help. You don’t need to be a technical whiz to try these methods.
Method 1
If the reason for the error cause is related to Google Chrome configured as administrator on your PC, then simply run it as a normal user. This is a common issue with Google Chrome auto-updating mechanism.
Method 2
If the problem still persists, then it is advisable to try re-installing Google Chrome.
To do this, first, uninstall Google Chrome. Go to the start menu, control panel, and then program and features. Choose Add and Remove Programs and uninstall Google Chrome.
To activate changes, reboot your system. Now reinstall Google Chrome by downloading it from Google Chrome’s official website.
Method 3
If error 3 is triggered because Google Chrome is not registered properly, then try this method to fix the issue.
First, verify that GoogleUpdate.exe exists in the location specified in the Windows Registry Editor. For this, go to the Start Menu and then type Regedit in the search bar.
Now click OK. The registry editor will appear. Now in the tree view on the left, navigate to the following directory:
Make sure the default value corresponds to the location of your GoogleUpdate.exe or GoogleUpdateOnDemand.exe file. Also, verify that these files are located in the given path.
For instance, if they are located in different locations, then right-click the default value and select Modify.
Enter the correct file path and use double quotation marks for example "C:\Documents and Settings%USERNAME%Local SettingsApplication DataGoogleUpdateGoogleUpdate.exe(or GoogleUpdateOnDemand.exe)"
Method 4
Error 3 may also pop up because of registry issues.
These issues occur when the registry gets overloaded with obsolete and unnecessary files like cookies, internet history, bad entries, and junk files. In such an event, it is advisable to download Restoro
This is a user-friendly and cutting-edge PC Fixer embedded with a registry cleaner. The registry cleaner removes all the obsolete files instantly and repairs the damaged registry thereby resolving all errors including error 3.
Click here to download Restoro and resolve error 3.
Stable Diffusion is a machine learning model developed by Stability AI to generate digital images from natural language descriptions. The model can be used for different tasks like generating image-to-image translations guided by text prompts and upscaling images.
Unlike competing models like DALL-E, Stable Diffusion is open source and does not artificially limit the images it produces. Stable diffusion was trained on a subset of the LAION-Aesthetics V2 data set. It can run on most consumer hardware equipped with a modest GPU and was hailed by PC World as "the next killer app for your PC".
Since Stable Diffusion is run locally and not in the cloud, as mentioned there is no limit to the number of images that you can produce but in order to use it you will have to get down a little dirty with setting your PC environment for it since it is not really an application, it is a command line text based descriptor that will use python to generate your images, so there is no install nor GUI.
In this guide, we will show you how to both install and run Stable Diffusion on your local PC so you can start producing some cool images all by yourself.
Hardware and software requirements
Make no mistake, Stable Diffusion will not run on a potato PC, in order to harvest the power of AI-generated imagery this is what you will need:
A GPU with at least 4GB of VRAM
10GB of hard disk space
Python and libraries (Miniconda3 installer will install everything you need)
The Stable Diffusion files
Git
Any OS (Windows, Linux, macOS)
Installing components
For this tutorial, we are covering the installation and running of Stable Diffusion on Windows PC. The steps presented here are presented in a way that installation can be performed on any operating system but precise instructions will be for Windows OS.
GIT
The first thing to do is to install GIT. It is a tool that will let you easily maintain and install repos from the internet. to install it go to: https://git-scm.com/ and click on download. Follow the instructions for your version of the operating system. If you are a developer you are familiar with GIT and if you already have it installed you can skip this step.
One thing that is important when installing GIT locally is to select to use it via the command line (the second option that says "Git from the command line and also from 3rd-party software").
Miniconda3
Now when we have GIT installed, next thing is to use Miniconda3 to install python and all required libraries that are needed. Get the installer at: https://docs.conda.io/en/latest/miniconda.html
Miniconda3 is basically an easy installer so you do not have to install tons of stuff manually from different websites and sources, it is nicely packaged in the installer that will take care of everything.
Stable Diffusion
After the previous two steps, we are ready now to actually install Stable Diffusion. Go to https://huggingface.co/CompVis/stable-diffusion#model-access and install the latest library (as of the writing of this article currently it is stable-diffusion-v1-4-original, the last one on the right), the library is almost 5GB in size so be prepared for big download.
Once downloaded click on the Windows start button and type in Miniconda3 and click on open. Create a folder and name it how you want on a drive of your choice. For this example, we will install it all in disk C under folder AI_art, follow the instructions below but use your own names and destination instead. Do not close Minicoda3 after typing commands!!!
cd c:/
mkdir AI_art
cd AI_art
Extract GitHub files that you have downloaded into your new folder and get back to Minicoda3 and type the next commands:
Let the whole process finish, some files are large and it might take a while. After the whole process is finished and completed, copy the checkpoint file that you have downloaded into: C:\AI_art\stable-diffusion-main\models\ldm\stable-diffusion-v1
After the file is copied rename it to model.ckpt and you are finished.
Running Stable Diffusion
The created environment is needed in order to actually use Stable Diffusion to create images. Each time you want to use it you will have to run it, so go into Miniconda3, and inside it type:
conda activate ldm
cd C:\AI_art\stable-diffusion-main
after we are inside the folder call the script with the parameters:
python scripts/txt2img.py --prompt "TXT DESCRIPTION OF IMAGE THAT YOU WANT TO CREATE" --plms --n_iter 5 --n_samples 1
and that's it, your image is created and it is located in C:\AI_art\stable-diffusion-main\outputs\txt2img-samples\samples
Did you previously use Windows 7 or 8 but decided to run with the latest Windows 0S, Windows 10? An early error message encountered was activation error code 0Xc004F074. Error code 0Xc004F074 is manifested when the user fails to activate Windows directly after the installation of Windows 10. This occurs if the previous operating system on your computer was Key Management Service (KMS) activated.
The KMT provides a more seamless operation when users are activating volume license editions of Microsoft Windows and Office. This process tends to be clear to end-users of the system.
Symptoms of error code 0Xc004F074 include:
Windows is unable to reach your company’s activation service.
The Key Management Service is unavailable.
Solution
Error Causes
Various factors might incite error code 0Xc004F074. A primary cause is a discrepancy or difference between the KMS client and the KMS host machine. The host computer could possibly be operating a Windows Server 2003 or Windows Server 2008, while the client runs on OS Windows 7 or Windows Server 2008 R2. To supplement, the computer’s time might be a contributing factor. The time on the host machine and client might show a difference (Usually the host time exceeds 4 hours).
Further Information and Manual Repair
To rectify error code 0Xc004F074, users are advised to try various methods. These methods include:
Method 1: Update Your KMS Host 9 (Windows Server 2003)
Are you running later versions of Windows Server? Use an update that fixes or installs KMS on your computer. The update is available on Microsoft’s website. Keep clearly in mind that the update is only for Windows Server 2013 Service Pack 1 and later versions of Windows Server 2003.
Method 2: Update Your KMS Host 9 (Windows Server 2008)
This step is similar to the aforementioned. However, it applies to Windows Vista and Windows Server 2008. This ensures the service is extended to Windows 7 and Windows Server 2008 R2.
Method 3: Update the Time
It was previously mentioned that the time reflected on the KMS host and client might cause error code 0Xc004F074 to manifest. A simple fix to adhere to is to always ensure that the time between both is updated. To Resync the time on the client, execute the following command.
w32tm /resync
Method 4: Uninstall the Existing KMS
For this method to be successfully deployed, you’ll need to have in your possession an activation key or KMSpico Key. As you cannot apply the new key with the existing one, remove or uninstall the initial key. To perform this step, open the command prompt. This should be done while the computer is in admin mode. Then, run the command
(slmgr.vbs /dlv)
It should be executed without the brackets and before you have removed the existing key.
After executing the command, you’ll encounter the description:
Move along with the process by applying the slmgr.vbs /upk to uninstall the existing KMS key.
After the old key is uninstalled, you’re ready to apply the following:
slmgr.vbs /ipk <NewKMSProductKey>
To check if things are in place and complete the process, follow the steps below: PC Settings >Update and Security > Activation
Method 5: Download an Automated Tool
If you wish to always have at your disposal a utility tool to fix these Windows 8 and other related issues when they do arise, download and install a powerful automated tool.
Waol.exe is an executable file located in a subfolder of "C:\Program Files" - usually C:\Program Files\America Online 9.0a. Waol.exe is not a core file but it is an important part of AOL (American Online) utilities.
It ensures the AOL programs run smoothly on your system. The Waol.exe error occurs when the AOL program fails to execute and run properly.
The error message is displayed in the following format:
“Waol.exe has encountered a problem and needs to close. We are sorry for the inconvenience.’
Solution
Error Causes
Waol.exe error typically occurs when this executable file gets infected by a virus, Trojan, adware, or spyware. When this happens the file location also changes.
Therefore the best way to verify if your PC is under attack by malicious software is to check the Waol.exe file location on your PC. If the file is found in some other location instead of its correct disk location, then you must immediately fix this error before the damage sets it.
Malicious software like viruses and spyware are notorious for slowing down PC performance and besides they give access to hackers to break into your system and manipulate your confidential and private data saved on your PC.
This exposes you to serious privacy errors and data security dangers including identity thefts, cybercrime, and data breaches.
Furthermore, viruses can also corrupt the computer’s registry and lead to system failure and crashes.
Further Information and Manual Repair
To resolve Waol.exe error many PC users seek an antivirus.
Though this also helps resolve the issue but you should know that an antivirus has certain limitations. It is known to slow down the system speed and will only remove viruses from your PC.
This means if the virus has affected the registry of your PC, it will not resolve that, and to repair your registry you may then have to download a registry cleaner separately on your system thereby reducing the PC speed even more.
To ensure all kinds of malware are removed and registry issues resolved along with system speed optimization, it is recommended to download Restoro.
This is an advanced, innovative, and multi-functional PC repair tool deployed with a variety of powerful utilities. These include a registry cleaner and a system optimizer.
It is safe, efficient, user-friendly, and compatible with all Windows versions including Vista, XP, Windows 7, 8, 8.1, and 10. The antivirus feature embedded inside this software detects scans and removes all malicious programs infecting your PC immediately. It resolves all your system’s privacy issues and makes sure that your system is inaccessible to hackers.
Besides this, the registry cleaner removes files cluttering and damaging the registry and also restores it. With the help of the system stability detector, it detects errors causing PC slowdowns and resolves them too thereby boosting the speed of your PC dramatically.
To resolve Waol.exe error right away, click here to download Restoro today.
If you are trying to install or reinstall a program on your Windows 10 computer but encountered an error instead that says, “Fatal error, Installation fails, Installation ended prematurely because of an error”, then you’ve come to the right place as this post will guide you how you can fix it.
This kind of error is most likely caused by some files that may have been left behind by the previous installation of the program. Each time a program is uninstalled, it leaves behind its files and if the uninstallation process wasn’t completed properly, then it would result in errors like the
“Fatal error, Installation fails, Installation ended prematurely because of an error”.
Moreover, this kind of error is a generic one that can also occur with any software reinstallation or installation. And to fix this error, there are several suggestions you must check out. You can try to install or reinstall the program in a Clean Boot State or restart the Windows Installer Service. You could also try to re-register the Windows Installer Service or re-register the VBScript.dll file.
Option 1 – Install or reinstall the program in a Clean Boot State
It is possible that there are some third-party applications in your computer that are preventing the program from getting installed and to isolate this possibility, you need to boot your computer in a Clean Boot State and then try installing the program again. Putting your computer in this state can help you identify which program is the culprit and thus isolates the problem. In a Clean Boot state, your computer will start using only the pre-selected minimal set of drivers and startup programs. Note that you have to disable and enable one process at a time.
Log onto your PC as an administrator.
Type in MSConfig in the Start Search to open the System Configuration utility.
From there, go to the General tab and click “Selective startup”.
Clear the “Load Startup items” checkbox and make sure that the “Load System Services” and “Use Original boot configuration” options are checked.
Next, click the Services tab and select the “Hide All Microsoft Services” checkbox.
Click Disable all.
Click on Apply/OK and restart your PC. (This will put your PC into a Clean Boot State. And configure Windows to use the usual startup, just simply undo the changes.)
After you’ve set your computer into a Clean Boot State, make sure that you’re signed in as administrator and then try to install the program again.
Option 2 – Try to restart the Windows Installer Service
The next thing you can do to fix the problem is to restart the Windows Installer Service. To do this, follow these steps:
Tap the Win + R keys to launch the Run utility and type “services.msc” in the field and then hit Enter to open the Windows Services Manager.
Next, look for the Windows Installer service among the list of services shown.
Once you found it, right-click on it and open its Properties.
From there, click on the Stop button and then click on the Start button.
But if it isn’t running, then just click on the Start button.
Option 3 – Try to unregister and re-register the Windows Installer Module
Tap the Win + R keys to open the Run dialog box.
Then type the “msiexec /unregister” command and hit Enter to unregister the Windows Installer Module.
Next, type the “msiexec /regserver” command and hit Enter to re-register the Windows Installer Module.
Now restart your computer and see if unregistering and re-registering the Windows Installer Module fixed the problem or not.
Option 4 – Try to re-register the vbscript.dll file
You may have to re-register the vbscript.dll file using the regsvr32.exe before you can successfully install the program and fix the error. The Regsvr32 tool is a command-line utility that can be used to register and un-register the OLE controls like DLL and ActiveX (OCX) control in the Windows operating system. Follow the steps below to use it.
Open Command Prompt as admin from the WinX menu.
Next, type regsvr32.exe vbscript.dll in the elevated Command Prompt and hit Enter to execute the command. This will re-register the affected DLL file using the Windows operating system tool, regsvr32.exe.
You should see a message saying, “DllRegisterServer in vbscript.dll succeeded” if the Regsvr32 tool was able to run successfully. After that, try to install the program again and see if it now works.
Google's Pixel smartphone is one if not the best Android smartphone on the market. It regularly gets updates and Google is really trying to keep it as a top choice for Android smartphone users. One of the new things that Google has released for its smartphone series is a new emergency dialer.
With an emergency dialer, you will be able to quickly access local contact information for police, fire, and medical services. This dialer is able to contact before mentioned services even when the phone is locked and when you are traveling.
The idea is to quickly access the default emergency number no matter in which country you are currently in, service will find the appropriate number and set it as default so if you need it there is no delay in searching for the appropriate number and dialing it.
Once the service is enabled on the device you can swipe up and tap Emergency call without unlocking your phone or you can press and hold the power button for five seconds and tap Emergency.
If you have a Pixel smartphone go to the Google support page and follow instructions on how to enable this service. It costs nothing and it could potentially even save your life.
Error 2046 is an error code related to Adobe Flash Player. It usually occurs while watching movies or videos on the web browser. This error code may interrupt video display and hamper you from watching your favorite movies and videos.
Solution
Error Causes
Narrowing down the reason for the occurrence of this error code is quite difficult virtually because it may trigger due to several reasons such as:
There might be issues with Adobe Flash Player settings
Ad-blocking products
Windows not updated
Registry issues
Malware infection
Flash Player Add on not properly installed
Further Information and Manual Repair
The good news is that the error 2046 is not fatal. It is easy to fix. In fact, it is so easy to repair that you can do it all by yourself even if you are not a computer whiz. You don’t have to hire a professional and spend hundreds of dollars on repairs.
Here are some of the many manual solutions that you can try to fix this issue on your computer screen:
Reinstall Adobe Flash Player
Since this error code is largely related to Adobe Flash Player, it is advisable to start by reinstalling the Flash Player. Here is a step-by-step guide to help you work through it.
First, click start and then select the control panel.
Now click on programs and then uninstall Flash Player from the program list.
If it works perfectly, then the issue is resolved. If not, then try other methods given below.
Re-Enable Flash Player Add-on
Adobe Flash Player add-on is basically installed in IE (Internet Explorer) which is loaded each time you load IE. Sometimes the problem with this add-on can also generate error 2046.
Now select Adobe Flash Player Active X and then click disable tab.
Once that’s done, restart the web browser and repeat the same steps but this time click enable button. This will hopefully resolve the issue.
Unblock Ad Blocking Products
Sometimes error 2046 may pop up on your screen if you use ad-blocking products like AdBlock Plus. If so, then try uninstalling ad-blocking products installed on your PC to fix the issue.
Install Window Update
Microsoft releases new updates every now and then. These updates are made with the objective of solving bugs and run-time errors like error 2046.
Therefore if the error code is related to Windows updates then to resolve it is it advisable to launch the Windows update program and update your operating system.
For this, click Start, All Programs, and then click Windows Update. Now click the Check for updates button and download and install the new updates. Once that is complete, restart your PC to bring changes into effect.
Scan for Malware and Look For Registry issues
Whether the issue is related to malware or the registry, it is recommended to download Restoro.
This is a next-generation and a multi-functional PC Fixer embedded with a powerful antivirus and a registry cleaner. Run it on your PC and scan for viruses and registry issues and click repair to resolve. It is user-friendly and compatible with all Windows versions.
Click here to download Restoro to resolve error 2046.


 Option to right-click on the taskbar and launch task manager is gone but do not worry there are other same and simple ways you can launch it.
