Logo

Windows 11 different sounds for dark theme

Windows 11 dark mode2Interesting information has come out from Microsoft, Windows 11 dark theme will include a different sound theme from its standard light one.

When in dark mode on Windows 11, the system sounds generally become softer, and they echo a bit, creating a more soothing experience that matches the overall look and feel of the dark mode. Flipping back to light mode brings the system sounds back to their normal level.

However, even though the light model has slightly louder sounds than the dark mode, Microsoft has taken great care to make sure the audio is more soothing, according to a report from CNBC.

The designers of Windows 11 took inspiration from an approach called calm technology. Microsoft’s Christian Koehn and Diego Baca wrote about calm technology in a post on Medium. In it, they said, “Windows 11 facilitates this through foundational experiences that feel familiar, soften formerly intimidating UI, and increase emotional connection.”

According to a Microsoft spokesperson in a statement to CNBC, “The new sounds have a much rounder wavelength, making them softer so that they can still alert/notify you, but without being overwhelming.”

Do You Need Help with Your Device?

Our Team of Experts May Help
Troubleshoot.Tech Experts are There for You!
Replace damaged files
Restore performance
Free disk space
Remove Malware
Protects WEB browser
Remove Viruses
Stop PC freezing
GET HELP
Troubleshoot.Tech experts work with all versions of Microsoft Windows including Windows 11, with Android, Mac, and more.

Share this article:

You might also like

Reasons to Defrag Hard Drive
Hello and welcome to our Reasons to Defrag Hard Drive. You ought to defrag your hard drive, in case your PC is slow. This could enhance the efficiency and pace of your PC too as its hardware longevity. It places them where there is space, whenever your PC saves files. Often files are separated into bits. For example, whenever you remember a file and focus on it, it frequently doesn't fit back in exactly the same physical place. Where it can your PC divides up the file, occasionally into several parts, and saves it.

Why defrag?

Fragmentation causes difficulties that doing a defrag can correct. Fragmented files because it requires more resources and time to locate and remember these files slow down your pc. Applications may also take longer to load. Defragging can prolong the life span of the components. A defragged hard disk too can raise your likelihood of recovering lost information. Once fragmentation starts, it can propagate fast -- demanding defragging. It's like the pages of a publication are divided and hidden in several locations around a house, if a file is fragmented. It's like the pages of the book being brought back together, should you defrag. Defragging discovers all the bits of the file and places them in contiguous, actual places.

How will you defrag?

To defrag your hard drive, you must utilize software or utility. There are lots of defragging tools available. SpeedyPC Pro, a whole package of cleaning and optimization tools, can defragment your PC. Before you defrag, it's best to assess your hard drive. This evaluation finds if a defrag is needed and how much of the disc is fragmented. You simply allow the application do the work if it's determined that you must defrag your PC to enhance performance. To be able to defrag a drive, free disk space will be required by your PC. Defragging can take a while. How long depends on several variables, such as the system resources accessible, the disc volume, the number of files, and how fragmented the files are. It's a great idea to defrag when you don't have to use your pc or it isn't doing other jobs. For example, the night could become a great time to defrag. Be certain to close out of resource-intensive applications, like your antivirus scanner, before you defrag.
Read More
Fix Gah, Your tab just crashed in Firefox
If you notice that your tabs in your Firefox browser keep on crashing recently, then there might be something wrong with your browser. Every time any of your tabs crashes, you might encounter an error message saying, “Gah, Your tab just crashed”. If you encounter this kind of error message then it is most likely that your Firefox Profile is having some issues with the existing installation of Firefox. The “Gah, Your tab just crashed” error rarely happens but when it does, it can get quite annoying as you won’t get to browse the internet peacefully. So to fix it, here are some suggestions you could check out.

Option 1 – Try disabling multi-process tabs in Firefox

Since Mozilla has one process for Firefox itself, while one process handles all the tabs, you have the option to disable these multi-process tabs in Firefox. To do that, follow these steps:
  • In the address bar of Firefox, type “about: config” and hit Enter.
  • Next, look for the following configurations and set them to false.
    • tabs.remote.autostart = false
    • tabs.remote.autostart.2 = false
  • After that, double-click on the toggle switch between true and false.

Option 2 – Try checking your Add-ons

In this option, you need to start Firefox in Safe Mode and then check if the problem is fixed. If it is, you may have to check your Firefox add-ons as well as extensions as one of them might be the one that's causing the “Gah, Your tab just crashed” error.

Option 3 – Downgrade the Firefox version you’re using

It could be that the current version of Firefox you’re using has some issues so you might have to downgrade it, especially if you are already using the latest version. To downgrade your Firefox browser, go to the directory of the other versions and languages and select an older version that worked for you. After that, you have to disable automatic Firefox updates.
  • First, click the menu button and select Preferences.
  • Next, go to the Firefox Updates section under the General panel.
  • Then select the radio button labeled “Check for updates but let you choose to install them”. This will ensure that you will not have the same issue with the new update.
Note that this is only a temporary fix since updating your programs, including browsers.

Option 4 – Try sending Crash Reports

You might want to send crash reports to Mozilla. This way, Mozilla might come up with some fix to resolve the problem. All you have to do is type “about: crashes” in the address bar. This will list all the crash reports. Now send it to Mozilla using the built-in interface. Although this won’t instantly fix the problem, a lot of user finds it useful. And besides, the issue will get fixed in future releases or with minor updates.
Read More
Fix Error 0xe0434f4d

What is Error 0xe0434f4d?

Error 0xe0434f4d displays when a remote computer runs an instance of the SQL Server 2005 but it fails to initialize. When the plan is started, this error displays in a status window on the SQL Server. Also, when the Update-OffilineAddressBook cmdlet is started in Microsoft Exchange Server, this error can occur.

Solution

Restoro box imageError Causes

Error 0xe0434f4d can occur for possibly two main reasons. The first one is when the System Attendant Service is not properly running, and the second when you don’t have the permission to run the update. Other causes are when the .NET Framework 2.0 security does not allow sqlplanlaunch access to run from a shared network. Another cause is when the Offline Address Book (OAB) is not found in the Configuration Domain Controller server that the server of OAB generation uses.

Further Information and Manual Repair

In case you didn’t know, the Offline Address Book generation server is a mailbox server, and in order to resolve error 0xe0434f4d, you will have to replicate the OAB object to the Configuration Domain Controller server. In order to do so, follow steps:
  • Go to start and click on All Programs, then go and click on Microsoft Exchange Server 2010. Click on Exchange Management Console
  • In Exchange Management Console, go to Server Configuration and click on Mailbox
  • In the details, go to mailbox server that generates Offline Address Book and right-click it, then go to Properties
  • In the Properties, click on System Setting and locate the domain controller name in the box that reads Domain controller servers being used by Exchange
Make sure the OAB object is reproduced in the Configuration Domain Controller Server. Follow these steps to do that:
  • Go to Start and click on Run. Type Adsiedit.msc in Open box and press Enter. Right-click on ADSI Edit and click on Connect to
  • Locate a list reading Select a well-known naming context, and from there select Default naming context. In a Select or type a domain or server window, type FQDN (fully qualified domain name) of the Configuration Domain Controller server which was determined in step 1, and click OK
  • Expand Configuration [dc.domain.com], expand CN=Configuration, DC=domain, DC=com, expand CN=Services, expand CN=First Organization, and expand CN=Address Lists Container
  • Click on CN=Offline Address Lists and make sure the OAB object is listed on the details pane
When the OAB generation server receives this, then it will connect to the Configuration Domain Controller server and will locate the OAB object. If the OAB generation server is unable to find the OAB object, then the error will return on the cmdlet. On SQL Server, you should change the .NET permissions to allow sqlplanlaunch application access to run from shared administration. For that, follow these steps:
  • On ArchiveIQ Server, open System from the Control Panel and note down the computer name
  • On SQL Server, log in as administrator and open the command prompt
  • On the command prompt type, ‘C:windowsmicrosoft.netframeworkv2.0.50727caspol.ece –m –ag l – url file:\[Archive IQServer Computer Name]AlQRemote$*FullTrust and Press Enter. Type yes and press Enter again to confirm the permission changes.
Read More
5 ways to open task manager in Windows 11
Something we are used to doing in a certain way inside Windows 10 is slightly changed in Windows 11. One of those things is how you open task manager, well kind of. task manager
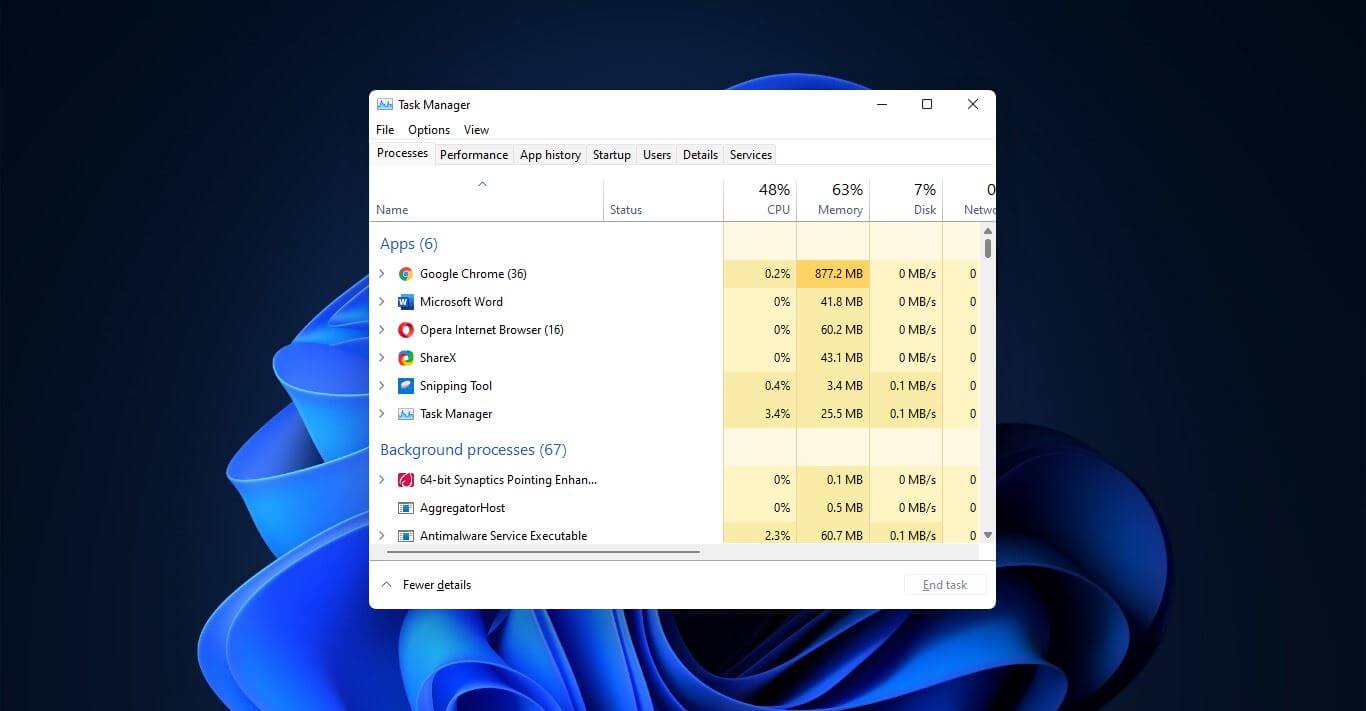
Option to right-click on the taskbar and launch task manager is gone but do not worry there are other same and simple ways you can launch it.
  1. Press CTRL + SHIFT + ESC or CTRL + ALT + DEL
  2. Right-click on the START button
  3. Type task manager in start search on top in the start menu
  4. Type taskmgr in command prompt
  5. Press ⊞ WINDOWS + R to open run dialog and type in taskmgr
And that’s it, now depending on your situation, you might use different methods to evoke task manager.
Read More
Fix Windows Update Error 0x80070652
If you encounter a Windows Update error with an error code 0x80070652 and an error message saying, “ERROR_INSTALL_ALREADY_RUNNING”, then it indicates that there was a previous Windows Update that was not installed successfully. This kind of Windows Update error typically happens when it gets stuck and so to resolve it, here are some suggestions that might help.

Option 1 – Restart your computer and try installing the Updates again

You can restart your computer and then try installing the updates once again. There are instances when a simple restart resolves Windows Update errors. Thus, after you restart your computer, check for updates once again and see if you’re still getting the error or not.

Option 2 – Try running the Windows Update troubleshooter

You might also want to run the Windows Update Troubleshooter as it could also help in fixing Windows Update error code 0x80070652. To run it, go to Settings and then select Troubleshoot from the options. From there, click on Windows Update and then click the “Run the troubleshooter” button. After that, follow the next on-screen instructions and you should be good to go.

Option 3 – Try downloading the Windows Update that failed

If the Windows Update that has failed is not a feature update and only a cumulative update, you can download the Windows Update and install it manually. But first, you need to find out which update has failed, and to do so, refer to the following steps:
  • Go to Settings and from there go to Update and Security > View Update History.
  • Next, check which particular update has failed. Note that Updates that have failed to install will be displayed under the Status column which has a label of “Failed”.
  • After that, go to the Microsoft Download Center and look for that update using its KB number and once you find it, download and then install it manually.
Note: You can also use the Microsoft Update Catalog, a service from Microsoft that provides a list of software updates that can be distributed over a corporate network. With the help of this service, it can be easier for you to find Microsoft software updates, drivers as well as fixes.

Option 4 – Try to restart the Background Intelligent Transfer Service

The Background Intelligent Transfer Service or BITS is a part of the Windows Update service and is the one that manages the background download of Windows Update, as well as scans for new updates and so on. And if Windows Update is experiencing some problems, you can try restarting BITS but make sure that you have admin privileges to do so.
  • Tap the Win + R keys to open the Run dialog box.
  • Next, type “services.msc” in the field and hit Enter to open Windows Services.
  • From the list of Services, look for the Background Intelligent Transfer Service and double-click on it to open Properties.
  • After that, you need to set the Startup type to “Automatic (Delayed Start) and click on Apply.
  • Now click the Stop button to stop BITS and then click the Start button to restart the service.
  • Click OK to save the changes made and then restart your PC.

Option 5 – Try to update Windows after a couple of minutes or an hour

There are times when the issue is from Microsoft’s end. It could be that there’s some issue with Microsoft’s server so it would be better if you give it a couple of minutes or an hour or so before trying to run Windows Update again.
Read More
Run Windows Updates from Command Line
As you know, one of the most highlighted features of Windows 10 is Windows Updates. It was offered to the customers as a service rather than a product with the release of Windows 10 under the scenario of Software as a Service which led to Windows Updates being set by default on Windows 10 and without an option for any users to disable it. Although not all users are happy with what Microsoft did, this is an ultimate step towards the greater good of all its customers since Windows Updates helps users in keeping their computers secured against all kinds of threats as well as provide them with the greatest and latest updates from Microsoft. So if you are one of those users who approved of the Windows Updates service, then read on as this post will guide you in running Windows Updates from Command Line either via Command Prompt or Windows PowerShell. For the complete set of instructions, refer to the options given below.

Option 1 – Run Windows Update via Command Prompt

Command Prompt in the Windows operating system exists for a very long time now compared to the comparatively new Windows PowerShell. That’s why it has similar capabilities to run Windows Updates. However, the highlighting point here is that you don’t have to download any module for Windows Updates. To get started running Windows Updates using Command Prompt, refer to the steps below.
  • First, type “cmd” in the Cortana search box, and from the search results, right-click on Command Prompt and select the Run as Administrator option to open it with Administrator privileges.
  • If a User Account or UAC prompt appears, just click on Yes to proceed.
  • Next, type in the commands listed below, and don’t forget to tap Enter right after you type each one of them.
    • UsoClient StartScan – use this command to start checking for updates.
    • UsoClient StartDownload – use this command to start downloading updates.
    • UsoClient StartInstall – use this command to start installing the downloaded updates.
    • UsoClient RestartDevice – use this command to restart your computer after you install.
    • UsoClient ScanInstallWait – use this command to check, download and install updates.
Note: Keep in mind that the commands in Command Prompt listed above are only meant for Windows 10. On the other hand, if you are using an older Windows version, you can try using the following commands instead:
  • wuauclt /detectnow – use this command to start checking for updates.
  • wuauclt /updatenow – use this command to start installing the updates detected.
  • wuauclt /detectnow /updatenow – use this command to check, download and install updates.

Option 2 – Run Windows Updates via Windows PowerShell

If you run Windows Updates in the Windows PowerShell, it will require you to install the Windows Update module manually. Hence, you have to get the Windows Updates downloaded and install Windows Updates.
  • Search for PowerShell in the Cortana search box and then run it with administrator privileges.
  • Once you’ve opened the Windows PowerShell, type the following command and hit Enter.
    • Install-Module PSWindowsUpdate – use this command to install the Windows Update module for Windows PowerShell.
    • Get-WindowsUpdate – use this command to connect to the servers of Windows Update and download the updates if found.
    • Install-WindowsUpdate – use this command to install the Windows Updates you’ve downloaded to your computer.
Read More
Diagnosing your PC/Preparing Automatic Repair
Windows 10 is has a lot of features that help a user in optimizing a computer. So when the operating system encounters a problem, it is able to provide users with proper resources to get the problem fixed. There are even times when a user is not notified and an issue is either being repaired or dodged in the background. This kind of feature is known as the Diagnosis of the Automatic Repair feature that starts when your computer is booting. In such times, you will either see the “Diagnosing your PC” or “Preparing Automatic Repair” message on your screen. Although this feature is useful and has proven to be effective, some users reported that the process gets stuck. If you experience the same problem, read on as this post will guide you on what to do to fix it but before you start troubleshooting the problem, you might want to perform a Hard Boot first. All you have to do is to power down your computer, remove the battery and the AC adapter and then reconnect them. After that, tap and hold the power button for about 20 seconds and see if your computer boots up properly. If it doesn’t, follow the given fixes below.

Option 1 – Try disabling the automatic Startup Repair

The Automatic Startup Repair window will automatically open during boot when you have some system driver-related problem. So if you think that this is where the problem lies, you can try to disable the automatic Startup Repair.
  • Click on Troubleshoot and go to the Advanced options.
  • After that, select Command Prompt and execute the following command:
bcdedit /set recoveryenabled NO
  • Restart your computer after that and then check.

Option 2 – Run the System File Checker

System File Checker or SFC is a built-in command utility that helps in restoring corrupted files as well as missing files. It replaces bad and corrupted system files to good system files that might be the cause why you’re facing this problem. To run the SFC command, follow the steps given below.
  • Type “cmd” in the Start search and then right-click on the appropriate search result.
  • Next, select “Run as administrator” to open Command Prompt with admin privileges.
  • After opening Command Prompt, type in sfc /scannow
The command will start a system scan which will take a few whiles before it finishes. Once it’s done, you could get the following results:
  1. Windows Resource Protection did not find any integrity violations.
  2. Windows Resource Protection found corrupt files and successfully repaired them.
  3. Windows Resource Protection found corrupt files but was unable to fix some of them.
  • Now restart your computer and see if the problem is fixed or not.

Option 3 – Run CHKDSK to check your disk for errors

When it comes to some issues concerning the hard drive or removable devices, there is a utility in Windows that might help which is called “chkdsk”. This error check utility can help with several issues in the system.
  • Tap the Win + S keys to open the Search box.
  • Then type “command prompt” in the field and from the search results that appear, right-click on Command Prompt and select “Run as administrator”.
  • After opening an elevated command prompt, copy and paste the following command and hit Enter:
chkdsk /r /f
  • Now if you are prompted to run CHKDSK after your reboot your computer, just tap Y and reboot your PC.
  • If CHKDSK is not able to find any errors, tap the Win + E keys and navigate the access window. From there, right-click on the concerned drive and click on Properties.
  • After opening Properties, click on the tab Tools and then click on the “Check” button under the Error-checking section.
  • Wait until the process is completed and then restart your computer.
  • Once your computer has restarted, try accessing the file and check if the error persists.

Option 4 – Run the DISM tool

The next thing you can do is run the DISM tool. This tool is known to repair potentially corrupted files in your system as having them could also system issues like your computer getting stuck in the “Diagnosing your PC” or “Preparing Automatic Repair” screen.
  • Tap the Win + X keys and click on the “Command Prompt (Admin)” option.
  • After that, input each one of the commands listed below sequentially to execute them:
    • Dism /Online /Cleanup-Image /CheckHealth
    • Dism /Online /Cleanup-Image /ScanHealth
    • Dism /Online /Cleanup-Image /RestoreHealth
  • Once you’ve executed the commands given above, restart your computer and check if the problem is now fixed.

Option 5 – Try to use installation media to boot and repair your computer

Another thing you can try to resolve the issue is to use the Windows installation bootable media so you can boot and repair the operating system. To use it, follow these steps:
  • You need to first create an installation media which has the dame version of the operating system installed in your computer.
  • After that, once you reach the Install Windows screen, click on the “Repair your computer” link.
  • Wait until the repair is completed and then shut down your computer
  • Now once your computer has restarted, check if it can now boot properly.
Read More
Choose what application will load on startup
Hello everyone and welcome to another great tutorial from errortools.com I hope everyone is feeling great and that you are prepared to boost the performance of your computer. This time we will speed up Windows startup time and overall performance by eliminating startup programs that we don't need and do not use. Microsoft itself and some application developers tend to have some applications or some services always active and set to be loaded on Windows startup. If you want to change which of these applications are starting up with your Windows and change them, follow this easy guide and you will be speeding up your Windows in no time. First thing is to open a task manager, fastest and most direct way of doing this is with a keyboard combination of CTRL + SHIFT + ESC keyboard with ctrl shift and esc markedWhen Task Manager opens, click on the startup tab on top. task manager startup tabOnce you click on startup you will get a list of applications that are set to be started when Windows is booted. startup applicationsYou can now click on the application and then click on disable on the bottom button, the application status will update in task manager to disabled and it will not be booted anymore when Windows starts. In this same manner, you can enable back some applications if you changed your mind about them. Please note that some applications are using some services and must have them running or they will not work properly. The best practice is to disable applications you are positive you will not use or use rarely so you do not want them to slow down Windows.
Read More
0x800703EE when copying to external storage
If you are trying to copy or move files to and from your external storage device but you suddenly encounter the error 0x800703EE, then you’ve come to the right place as this post will guide you on how you can fix this error in your Windows 10 computer. This kind of error when copying files may be accompanied by an error message that says, “The volume for a file has been externally altered so that the opened file is no longer valid”. This error prevents you from copying or moving the files to and from the external storage device. This kind of issue might be caused by a service that belongs to a backup program that could be blocking the operation or a conflict with your third-party antivirus program. In addition, the error could also be due to corrupted or outdated USB drivers or it could be caused by a disabled Windows Backup and Volume Shadow copy service. It is also possible that some system files are corrupted or that the drivers for the external device are also corrupted. Whatever the cause is, here are some options you need to check out to fix the error. Before you troubleshoot the error, you might want to try moving the files to another location on your local drive and remove the USB drive and insert it back again. After that, try to move or copy the file to the USB drive and see if it still throws an error. If it does, then you need to troubleshoot the problem further by following each one of the suggestions given below.

Option 1 – Update or reinstall the Universal Serial Bus Controller driver

Since it could be a driver issue, you can try to update or reinstall the Universal Serial Bus Controller drivers using the Device Manager. Refer to the following steps:
  • First, click the Start button and type “device manager”.
  • Then click on the “Device Manager” from the search results to open it.
  • From there, look for the “Universal Serial Bus controllers” option and then right-click on each one of the USB drivers and select the Update Driver from the menu.
Note: If it is a regular USB drive, then it will be listed as a USB Mass Storage Device but if you have a USB 3.0 device, then look for a USB 3.0 Extensible Host Controller.
  • Restart your PC and then click the “Search automatically for updated driver software” option.
Note: If updating the USB Controller drivers didn’t work, you can try to reinstall them instead.

Option 2 – Try checking the Volume Shadow Copy and Windows Backup services

The next thing you can do to fix error 0x800703EE is to check the Volume Shadow Copy and Windows Backup service.
  • First, tap the Win + R keys to open the Run dialog box and type “services.msc” in the field, and hit Enter to open the Services Manager.
  • From there, look for the Volume Shadow Copy service and right-click on it, and then select Properties.
  • After that, make sure that its Startup type is set to Manual and that its status is “Started” so if it isn’t, you need to click on the Start button and then on the Apply and OK buttons to save the changes made.
  • Once done, look for the Windows Backup Service and repeat the same process you did with the Volume Shadow Copy service.
  • After you complete the steps, restart your computer and see if the error is now fixed.

Option 3 – Restart your computer in a Clean Boot State

If a third party program like antivirus is the one that’s causing the problem, you can try to put your computer in a Clean Boot State to isolate the issue by following these steps:
  • Log onto your PC as an administrator.
  • Type in MSConfig in the Start Search to open the System Configuration utility.
  • From there, go to the General tab and click “Selective startup”.
  • Clear the “Load Startup items” check box and make sure that the “Load System Services” and “Use Original boot configuration” options are checked.
  • Next, click the Services tab and select the “Hide All Microsoft Services” check box.
  • Click Disable all.
  • Click on Apply/OK and restart your PC. (This will put your PC into a Clean Boot State. And configure Windows to use the usual startup, just simply undo the changes.)
  • Now try to copy the files to your external storage device again and check if the error is now gone.

Option 4 – Try to run System File Checker or SFC scan

  • Tap Win + R to launch Run.
  • Type in cmd in the field and tap Enter.
  • After opening Command Prompt, type in sfc /scannow and hit Enter.
  • Once done, restart your computer.

Option 5 – Try to delete the Filter drivers

Note that this option is only applicable if you see the error 0x800703EE accompanied with the “The volume for a file has been externally altered so that the opened file is no longer valid” error message. Before you start, create a System Restore Point first.
  • Open the Registry Editor and navigate to this registry path: HKEY_LOCAL_MACHINESYSTEMCurrentControlSetControlClass{4D36E965-E325-11CE-BFC1-08002BE10318}
  • After that, select the “{4D36E965-E325-11CE-BFC1-08002BE10318}” key and check if you can find the “Upperfilters” and “Lowerfilters” value in the right pane. If you can find them, right-click on them and select Delete.
  • Once done, exit the Registry Editor and restart your computer.
Read More
Change system font in Windows 10
In previous versions of Windows changing the system, the font was a pretty straightforward process, but it seems Microsoft did not want this feature to keep for whatever reason and there is no option as of the time of the writing of this article to do it in standard options in Windows 10. But do not worry, you are still able to customize your Windows and choose which font would you like to see inside it in all of its dialogs. You can choose whichever font you desire, the only prerequisite is it to be installed on your system. This guide will require you to change values in the registry of Windows itself so please follow step-by-step instructions and always make a backup of the registry before changing it in order to prevent some permanent Windows issues. All of that being said, let's start.

Setting new font

First thing is to open notepad, in the notepad paste the next block of code:
Windows Registry Editor Version 5.00 [HKEY_LOCAL_MACHINE\SOFTWARE\Microsoft\Windows NT\CurrentVersion\Fonts] "Segoe UI (TrueType)"="" "Segoe UI Bold (TrueType)"="" "Segoe UI Bold Italic (TrueType)"="" "Segoe UI Italic (TrueType)"="" "Segoe UI Light (TrueType)"="" "Segoe UI Semibold (TrueType)"="" "Segoe UI Symbol (TrueType)"="" [HKEY_LOCAL_MACHINE\SOFTWARE\Microsoft\Windows NT\CurrentVersion\FontSubstitutes] "Segoe UI"="NEW_FONT"
Where in "Segoe UI"="NEW_FONT" instead of NEW_FONT you need to write the exact name of the font that you wish to use as a system font. Once you have replaced the default system font with your desired one, go to File and save as, from file type drop-down menu, choose all files and save this file as .REG type giving it whatever name you wish. When the file is saved, close notepad, right-click on the saved file and choose the merge option. Confirm with YES and click on OK. Reboot your system and your Windows will now use the font of your choice as its default system font.

Restoring default font

If you wish to return the old default system font as it was, follow the same steps but in your notepad paste this code:
Windows Registry Editor Version 5.00 [HKEY_LOCAL_MACHINE\SOFTWARE\Microsoft\Windows NT\CurrentVersion\Fonts] "Segoe UI (TrueType)"="segoeui.ttf" "Segoe UI Black (TrueType)"="seguibl.ttf" "Segoe UI Black Italic (TrueType)"="seguibli.ttf" "Segoe UI Bold (TrueType)"="segoeuib.ttf" "Segoe UI Bold Italic (TrueType)"="segoeuiz.ttf" "Segoe UI Emoji (TrueType)"="seguiemj.ttf" "Segoe UI Historic (TrueType)"="seguihis.ttf" "Segoe UI Italic (TrueType)"="segoeuii.ttf" "Segoe UI Light (TrueType)"="segoeuil.ttf" "Segoe UI Light Italic (TrueType)"="seguili.ttf" "Segoe UI Semibold (TrueType)"="seguisb.ttf" "Segoe UI Semibold Italic (TrueType)"="seguisbi.ttf" "Segoe UI Semilight (TrueType)"="segoeuisl.ttf" "Segoe UI Semilight Italic (TrueType)"="seguisli.ttf" "Segoe UI Symbol (TrueType)"="seguisym.ttf" "Segoe MDL2 Assets (TrueType)"="segmdl2.ttf" "Segoe Print (TrueType)"="segoepr.ttf" "Segoe Print Bold (TrueType)"="segoeprb.ttf" "Segoe Script (TrueType)"="segoesc.ttf" "Segoe Script Bold (TrueType)"="segoescb.ttf" [HKEY_LOCAL_MACHINE\SOFTWARE\Microsoft\Windows NT\CurrentVersion\FontSubstitutes] "Segoe UI"=-
Reboot your system and your Windows will now revert the font of your choice as its default system font.
Read More
1 2 3 171
Logo
Copyright © 2023, ErrorTools. All Rights Reserved
Trademark: Microsoft Windows logos are registered trademarks of Microsoft. Disclaimer: ErrorTools.com is not affiliated with Microsoft, nor claims direct affiliation.
The information on this page is provided for information purposes only.
DMCA.com Protection Status