External hard drives have become essential these days as they tend to be very useful to many users. They are usually used for storing system images like system backups, Windows installation media, or for personal use. However, if you are not able to utilize your external drivers for some reason then that could be a huge problem. One of the common issues with hard drives is when your USB device or external hard drive just keeps connecting and disconnecting. This kind of issue could be caused by a faulty USB port, some issues with the USB drivers, your computer’s Power Options, corrupted or damaged system files, and many other factors.
The connecting and disconnecting issue with USB devices and external hard drives isn’t really new and has been experienced by many users for years now. Although this issue has somewhat decreased in Windows 10, there are still some users who encounter it every now and then. Worry not though for there are fixes that you can try to resolve the problem.
Refer to the following straightforward solutions to resolve the issue with your USB device or external hard drive.
If your USB device keeps on connecting and disconnecting then the first thing you can do is to try connecting it to a different port. This will help you isolate the problem. In some cases, the port where the USB is connected can be malfunctioning or obsolete so you need to check that possibility by plugging your USB device into a different USB port.
As mentioned earlier, the problem could be due to some issues with the USB drivers. It could be that it has to be updated or you need to reinstall it. To do that, follow these steps:
You also have the option to update the motherboard and the USB driver from the manufacturer’s official website.
There are times when your system turns off some drives in order to conserve your computer’s power, etc. as a result, the driver that’s required to run your external hard drive properly ends up getting disabled. To fix this, you can prevent your system from turning off your external USB drive by following these steps:
Another thing you can try is to turn off USB Selective Suspend especially when the issue has something to do with the Power Options. There are certain systems that are configured to disable USB devices after some time which could be the root cause of the problem. Thus, you need to turn off USB Selective Suspend. Here’s how you can do it:

BubbleDock is a software developed by Nosibay. It installs a customizable dock at the top of your screen.
It adds registry entities to allow it to start automatically each time your system is rebooted, as well as installing an update checker that will automatically update the software when an update is available. The software also adds various scheduled tasks to start the application at different times, this ensures that once the application is closed, it is re-launched at a later time, making it very hard to keep the software closed permanently.
While the software is running, it will generate ad links in your browser, display sponsored ads, and collect personal information and deliver it back to it’s ad network. While using this software you may see additional ads, banners, links, pop-up ads, and various other sponsored content while browsing the internet.
“Windows Media Player cannot burn some of the files. To investigate the problem, click the icon next to the files in the burn list.”As you know, the Windows Media Player helps you burn songs or audio files to CD or disk but it does not always end up successfully as you could encounter some setbacks such as this particular error. Usually, this kind of issue occurs if an audio file does not comply with some restrictions so the Windows Media Player pops up this error instead. You can encounter this error message if:
Social media is here to stay it seems, from Facebook, Instagram, Twitter, etc each site has its users and its rules. Companies, bloggers, public figures, and people, in general, are using them on a daily basis and some are posting cool ads, nice graphics, videos, and many more in order to gain followers or just to share something that they think is worth.
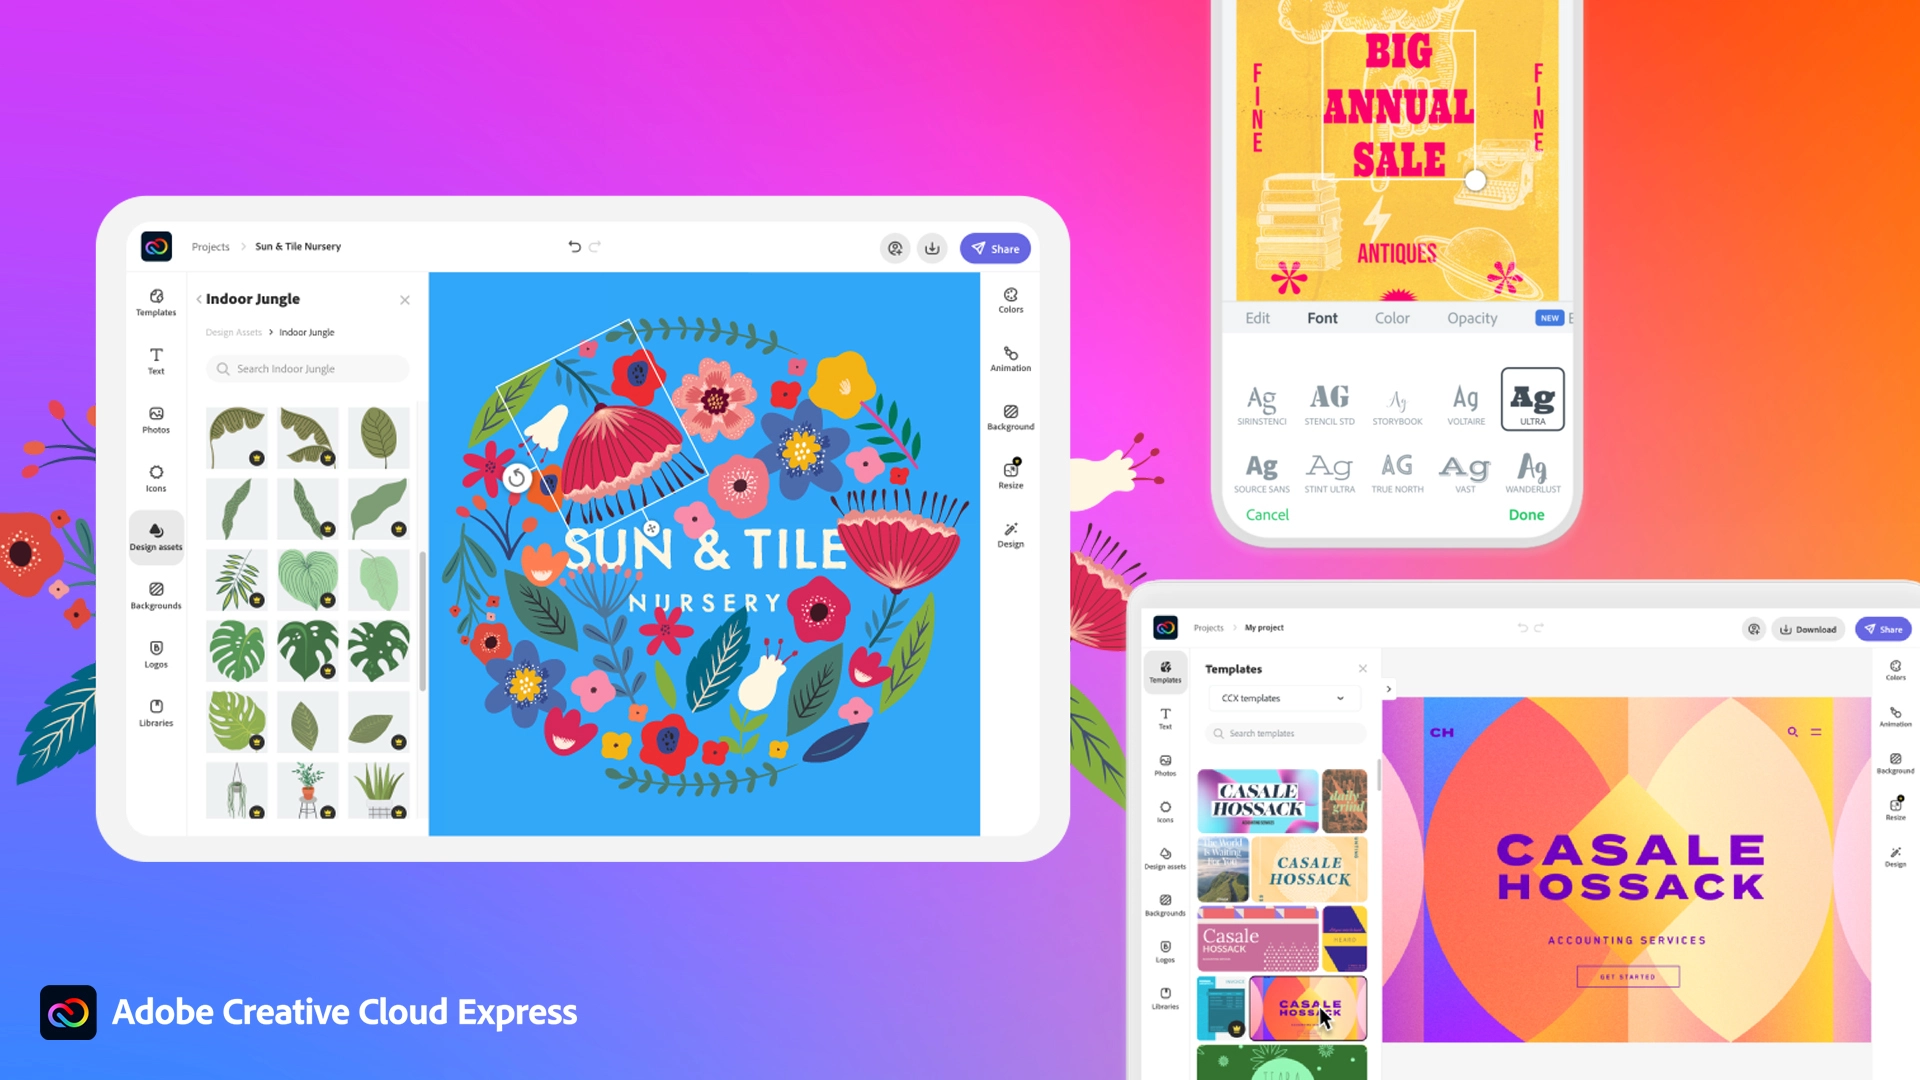
Making your post look good is somewhat essential if you plan on reaching a larger audience and Adobe's Express aims to fill that gap. It is the latest Adobe product that is purposely made for graphic and video creation for social media.
Adobe is well known in the world of professional design in all spheres like print, web, and motion, with this application, they want to take over social media design with Express. The direct competitor to Spark and canva, Express is filled with high-quality adobe templates and some great stuff found in photoshop like automatic background removal which gives it an edge over other applications.
The good thing about Express is that there is a completely free version and premium, like its competitors but with some benefits that clearly show that Adobe is determined to place its application on top of the game. The free plan includes:
For 10 USD per month of 100 USD prepaid annual fee, you get a premium plan that includes:
The application itself is incredibly easy to learn and to work with and literally, anyone can pick it up and start creating immediately. No matter are you just starting with social media or using Canva or Spark, give Express a go, make a free account and try it, I guarantee that you will find some features amazing, and its ease of use relaxing.
DEL /F /S /Q /A “%systemroot%System32driversepfwwfp.sys”
DEL /F /S /Q /A “%systemroot%System32driversmfewfpk.sys”
EmailAccountLogin is a browser extension for Google Chrome, Mozilla, and Internet Explorer. This extension enables you one-click access to your favorite email providers, allowing you to easily check your email without typing the web address.
From the author: One-Click Access to quick links to the most popular email providers.
The Email Account Login new tab extension provides convenient, one-click access to several popular email services including Gmail, Yahoo, Facebook, Outlook, and Live mail along with providing direct access to a web search.
EmailAccountLogin is a browser hijacker, this extension hijacks your home page and replaces it with its own search engine. While active this extension monitors your website visits, links, clicks, and personal information. This information is later sold/forwarded to better server ads across its network. While using EmailAccountLogin you will see additional unwanted ads injected into your search results, sponsored links, and even sometimes pop-up ads. Several anti-virus scanners have categorized EmailAccountLogin as a Browser Hijacker and therefore, for security reasons, it is not recommended to keep it on your computer.FullTab is a Browser Extension for Google Chrome, Firefox, and Internet Explorer. When installed this extension hijacks your home page, and changes your default search engine to http://search.fulltabsearch.com. This extension usually comes bundled with other freeware software, and while installed it monitors your internet browsing activity, visited links, clicked pages, and other private information that it later uses to distribute targeted unwanted ads in your search results.
While this extension is installed, you will see modified search results, injected ads, sponsored links, web page redirects, and sometimes even pop-up ads. Several anti-virus scanners have detected this extension as a Browser Hijacker, and due to the information it is gathering from your computer it is not recommended to keep.