Logo

Using ???? and other emoji in Windows

Did you know you can use emoji in file names inside Windows 10?

It is no secret that emojis are basically everywhere and Microsoft has seen this and integrated them into Windows itself, so you can name files using emojis or combine them with text.

Placing emojis in file names or in the text is extremely easy, all you have to do is press ⊞ WINDOWS + . and the emoji dialog will open from where you can find which emoji you would like to use.

And that's it, you just used emoji for the file naming.

!!!NOTE!!!

In theory, some applications may not like these emojis if they don’t support Unicode characters. However, modern applications are designed to work with a broad set of languages that should properly support emojis.

For example, the classic Windows Command Prompt can’t see emoji characters in file names properly, but both PowerShell and Microsoft’s new Windows Terminal can display them properly.

If you do run into a problem, you can always open File Explorer and rename the affected files and folders to remove the emoji characters. You can then use those files in applications that don’t properly support emoji file names.

Do You Need Help with Your Device?

Our Team of Experts May Help
Troubleshoot.Tech Experts are There for You!
Replace damaged files
Restore performance
Free disk space
Remove Malware
Protects WEB browser
Remove Viruses
Stop PC freezing
GET HELP
Troubleshoot.Tech experts work with all versions of Microsoft Windows including Windows 11, with Android, Mac, and more.

Share this article:

You might also like

Toggle to turn Bluetooth On or Off is missing
Support for Bluetooth hardware has always been included in the Windows 10 operating system for a long time now. And it just keeps getting better especially now with the support for the latest version of Bluetooth 5.0 LE. However, there are still times when Bluetooth experiences a couple of issues one of which is users were not able to turn on or off Bluetooth on their Windows 10 Pc since the option to turn Bluetooth off or on is missing in the Windows 10 settings app and even in the Action Center. So if you are one of the users who experience the same problem, read on as this post will guide you in resolving the issue. To resolve this Bluetooth issue, here are some suggestions that could help:

Option 1 – Try running the Bluetooth Troubleshooter

As you know, Windows 10 has various troubleshooters with user-friendly interfaces where you can utilize them to fix issues in your PC. And since you’re dealing with some Bluetooth problem, you have to run the Bluetooth Troubleshooter.
  • Open the Windows 10 Settings.
  • Then go to Update & Security > Troubleshoot.
  • You should find the option for Bluetooth on your right-hand side – click on it then click on the “Run the troubleshooter” option.
  • Now follow the next screen options.

Option 2 – Try to reinstall or update the Bluetooth driver

The issue might have something to do with the Bluetooth drivers. It could be that it is outdated and needs to be updated or that you recently updated it and since then you have trouble removing the Bluetooth devices and so to fix the issue, you can update, roll back or uninstall the Bluetooth drivers. How? Follow the steps below.
  • Tap the Win + X keys to open the Device Manager.
  • Next, look for the Bluetooth device and right-click on it.
  • Select the option “Update driver”.
  • After that, a new popup window will appear. In there, select the option, “Search automatically for updated driver software”.
Note: Checking the update may take a few minutes so you’ll have to wait until it finishes. If it is able to find an update, you must install it. And if you want to reinstall the Bluetooth driver, just select the “Uninstall driver” option and follow the next on-screen instructions that follow.

Option 3 – Configure the Bluetooth Services

If the first two options didn’t work, the next thing you can do is configure Bluetooth Services. How? Simply follow these steps:
  • Tap the Win + R key combination to open the Run dialog box.
  • After that, type “services.msc” in the field and hit Enter to open the Windows Services Manager.
  • You will then see a list of services and from there, look for the following services and make sure that their default values are set as follows:
    • Bluetooth Handsfree Service – Manual (Triggered)
    • Bluetooth Audio Gateway Service – Manual (Triggered)
    • Bluetooth Support Service – Manual (Triggered)
    • Bluetooth User Support Service – Manual (Triggered)
  • Now click on the Start button to start all the aforementioned services and then check if you can now see the option to turn Bluetooth on or on.
Read More
Something went wrong, We couldn’t start
There are instances when you might encounter an error that says, “Something went wrong, We couldn’t start your program” when you open any Office program. This could be due to an issue with the Office file and any Office app you open throws the same error message. This applies to Office 2019/2016, Office 365 Home, Office for Business as well as Business editions. In this post, you will be guided in what you can do to resolve this error. There are several potential fixes for this error, you might only have to restart your computer or you may have to repair Office from Apps and Features or you could also uninstall and install it back again. For more details, follow each one of the provided options below.

Option 1 – Restart your computer

You might be unable to launch any Office app due to some background process that got stuck or there might be some glitch in the system. Thus, the first thing you can do to resolve the error is simply restarting your computer. Once you’ve restarted your computer, open the Office app again or you could also try to sign in back with your Microsoft account that’s connected to Office. If you’re not quite sure which account you were using, you can follow these steps:
  • Open any Office app.
  • Then click on File and look for your name located in the top-right portion.
  • Now click on it. This will display the email or Microsoft account that’s related to Office.

Option 2 – Try repairing Office from Apps and Features

Since Windows 10 offers some repair features that could replace some of the core files with the original files, you can take advantage of such a feature to fix the “Something went wrong, We couldn’t start your program” error when opening any Office app.
  • Open Windows settings and click the Apps and Features option.
  • Next, scroll down until you see the Microsoft Office installation option. Select it and click on Modify.
  • This will open a window and from there, select Quick Repair or Online Repair and click on the Repair button.
Note: When you choose to repair, you might be given two options which depend on how Microsoft Office was installed. For instance, it was installed via Web Installer or Offline Installer (MSI-based). In Web Installer, select Online Repair > Repair when you’re prompted on how you would like to repair Office. While in MSI-based, you have to select Repair under “Change your installation” and then click on Continue. The repair process makes sure that the app data remains untouched.

Option 3 – Try to uninstall and reinstall Office

If neither of the two given options above worked, then you might want to uninstall Office and reinstall it. All you have to do is download the Microsoft Office Uninstall tool from the official site of Microsoft and run it. This will remove any incomplete Office installation as well as unwanted files. It will also get rid of all the Office apps and settings on your computer.
Read More
Blizzard caught destroying evidence
Blizzard employeesCalifornia's Department of Fair Employment & Housing has widened its anti-discrimination lawsuit against Activision Blizzard and claims the publisher has been shredding vital documents relevant to the ongoing investigation. A recent report from Kotaku described the department as offering poorly paid, highly insecure positions, with a culture of hostility towards LGBTQ+ testers. The DFEH's rewording of "employees" to "workers" now hopes to take these contractors' experiences into account. "As a contract employee, I feel there's a lot of pressure to excel, impress, and move through the ranks as fast as you can before your contract ends and you're forced to go 3 months without income or find another job," Axios reports one worker saying. "I take pride in what I do, but it feels like it's never enough." Activision's contentious hiring of union-busting third-party law firm WilmerHale "directly interferes" with its own investigation, it says. By going to WilmerHale, Activision appears to be claiming that all work related to the investigation is privileged and can't be shared with DFEH. The suit also claims that Activision HR shredded documents related to "investigations and complaints", against its legal obligation to retain them during the investigation. The relevant parts of the updated lawsuit were shared by Axios reporters Stephen Totilo and Megan Farokhmanesh, the former also noting that the DFEH "fixed their misspelling of Bill Cosby's name". "DFEH is also informed and aware that documents and records have not been maintained as required by law or by the DFEH's Document Retention Notice," the complaint reads, "including but not limited to documents related to investigations and complaints were shredded by human resource personnel and emails are deleted thirty days after an employees separation."

Speculation and answer from Activision Blizzard

Blizzard employee Jessica Gonzalez suspects that the costs of fines associated with destroying these documents may have been an easier blow for Blizzard to take than any penalties drawn from their existence in helping the lawsuit go through. In an email to Kotaku, Activision denied the shredding allegations and issued a statement outlining steps it had taken to improve company culture—including the ousting of high-level executives like Blizzard president J. Allen Brack. The full statement reads: "Throughout our engagement with the DFEH, we have complied with every proper request in support of its review even as we had been implementing reforms to ensure our workplaces are welcoming and safe for every employee. Those changes continue today, and include:
  •     Several high-level personnel changes
  •     Revamped hiring and recruiting practices requiring diverse interview panels
  •     Greater transparency on pay equity
  •     Expanded and improved training and investigative capabilities for human resource and compliance staff
  •     Created investigation teams outside of business units to support greater independence
  •     Restructured divisions to support greater accountability
  •     Enhanced review processes to include evaluation of managers by employees
  •     Clear boundaries on workplace behavior with a zero-tolerance approach to harassment and other actions that diminish or marginalize.
"We strive to be a company that recognizes and celebrates the diverse talents and perspectives that lead to the creation of great, globally appealing entertainment. We have provided the DFEH with clear evidence that we do not have gender pay or promotion disparities. Our senior leadership is increasingly diverse, with a growing number of women in key leadership roles across the company. "We share DFEH’s goal of a safe, inclusive workplace that rewards employees equitably and is committed to setting an example that others can follow."

California and RIOT

Beyond Activision Blizzard, California's DFEH has also probed into League of Legends creator Riot Games, accusing the studio of dragging its heels over sexual harassment allegations dating back to 2019. Riot denied the allegations, telling us that it "will never retaliate against anyone for talking to any government agency".
Read More
How to enable God mode inside Windows 11
God mode windows 11Like in Windows 10, Windows 11 will also support God mode to be enabled and used. For those readers that do know what God mode is, let me explain it in simple terms. God mode is the icon on the desktop that once clicked will open and let you adjust every option in the control panel and some hidden features for Windows inside one application. There are a lot of advantages to having this one-click fast access to features, especially if you are a power user. Luckily creating such an awesome icon and enabling God mode is very easy to accomplish, all you have to do is:
  1. Create a new folder where you want to have the God mode icon
  2. Rename folder exactly: {ED7BA470-8E54-465E-825C-99712043E01C}
  3. Enjoy God mode
As you can see creating and accessing all settings at your fingertips is much easier than most people think. Enjoy your ultimate access to Windows 11 features and if you wish you can drag and drop sections from it into the desktop or anywhere for easy access to that specific topic.
Read More
Downloads folder loads slowly in Windows
If you are frequently experiencing slow loading of folders in your Windows 10 computer, Downloads folder for instance, then you’ve come to the right place as this post will help you resolve such issue. Slow loading of folders is a common problem faced by many users even when they are using the latest hardware like SSDs. So if you experience the same thing, be it with the Downloads folder or other folders on your computer, there is a way to resolve that issue and make the folder load faster. Slow-loading means when you attempt to open the folder, it takes a couple of seconds before it displays its contents. In such cases, you’ll see a green loading address bar that says “Working on it” which can get quite annoying especially if you are in a hurry. And if you notice that this only happens in the Downloads folder, there certainly is something wrong. This kind of problem can occur on SSDs and normal hard drives. The main reason behind the occurrence of this problem is that the folder may have been optimized for viewing photos or other media formats which is why it takes quite longer than usual to load all the files and their thumbnails. However, since the Downloads folder usually contains all kinds of files like documents, zip files, audio/video files, etc. there is no need to optimize this folder for media files only because doing so is only going to make the Windows File Explorer slow in loading the folder’s contents and thumbnails which does not exist for many files.

Option 1 – Configure the Downloads folder

  • Right-click on the Downloads folder or the folder you’re having trouble opening.
  • Then click on Properties and go to the Customize tab.
  • After that, click on the “Optimize this folder for” option in the drop-down menu.
  • Next, select General items from the drop-down which might have been set by default to Pictures or Video.
  • You also have the option to apply this template to all the subfolders, that is if your folder has any subfolders.
  • Now apply the settings and restart Windows Explorer.
Note: Once you’ve completed the steps above, it should now make the folder content display a lot faster than before. Now try to open the Downloads folder which would not take much time as you will see the changes right away.

Option 2 – Run CHKDSK to check your disk for errors

When it comes to some issues concerning the hard drive or removable devices, there is a utility in Windows that might help which is called “chkdsk”. This error check utility can help with several issues in the system including File System Error -2147219196.
  • Tap the Win + S keys to open the Search box.
  • Then type “command prompt” in the field and from the search results that appear, right-click on Command Prompt and select “Run as administrator”.
  • After opening an elevated command prompt, copy and paste the following command and hit Enter:
chkdsk /r /f
  • Now if you are prompted to run CHKDSK after your reboot your PC, just tap Y and reboot your PC.
  • If CHKDSK is not able to find any errors, tap the Win + E keys and navigate the access window. From there, right-click on the concerned drive and click on Properties.
  • After opening Properties, click on the tab Tools and then click on the “Check” button under the Error-checking section.
  • Wait until the process is completed and then restart your computer.
  • Once your computer has restarted, try accessing the file and check if the error persists.
Read More
Fix Device not migrated on Windows 10
Hello everyone, in today's tips and tricks we will focus on providing you with various solutions on how to solve the Device not migrated error that appears after the Windows update has been performed. Sometimes sadly updates to our operating systems can introduce us to various issues that look scary but in reality, they are solvable and not so scary at all. After all who would not find this message concerning, especially when it happens in the middle of work. device error messageThe first thing that would pop into my mind is that I have lost tons of work and that something in my hardware has gone very wrong and it is dead. Luckily that is not the case and this error means that due to Windows update drivers were not properly transferred due to some compatibility issues, maybe it was a corrupt update file, etc. Of course, the reason could be hardware malfunction as well, but if everything was working fine before the update, it is a software issue, and I must say it is a common one and fixable. Please keep reading this guide in order to fix the Device not migrated error.
  1. Update the Driver

    You should always try this first, if the device is not recognizable, try updating its driver and see if the problem vanishes. In order to update the driver, we will need first to locate which device has not been migrated properly, we will do this with help of a search engine on the internet like google for example. So open your browser of choice, go to a search engine (google for example) and type in the search box first line from your error message, yes, that scary one. You will be given which device has malfunctioned and was not migrated properly, now we will locate the device and update its drivers. To do this press WINDOWS + X on your keyboard to bring up Windows secret menu and choose device manager. keyboard with windows and x marked Find device inside device manager, right-click on it, and choose properties. Go to the events tab and make sure that the device has migration issues. device not migrates status You have now 3 options for updating the driver, you can do it manually, automatically, or with the driver installer. We will cover all 3 options so you choose which one best suits you. OPTION 1: Manually. Close the Properties tab, go to the device manufacturer website and download the latest driver, if there are no drivers there, the only executable installer for the device skip this step and try the other 2. After you have downloaded the driver package from the website, right-click on the device and choose update driver. device update driver Now navigate to the folder where you have downloaded your driver package and update the driver. Reboot your system. OPTION 2: Automatic update. Close the Properties tab, right-click on the device and choose to uninstall. device manager uninstall device Once the device is uninstalled, restart your system, and Windows will automatically search and install the latest driver for the device. OPTION 3: Via driver installer. If you have downloaded .EXE or executable driver installer from device manufacturers web site try installing it, if the installation fails, try using compatibility mode for the installer. Navigate where the installer is located, right-click on it, and choose properties. Go to compatibility TAB and try installing it with administrator privileges in Windows 8 mode. device run compatibility troubleshooterReboot your system after this step. This should solve the issues, however, if the issue still persists, follow the next steps.
  2. Verify the Corrupted System Files

    Press WINDOWS + X on the keyboard to open the hidden system menu and choose Command prompt (administrator) keyboard with windows and x marked In the command prompt type in: sfc /scannow and press ENTER. command prompt SFC scan The scanning process and repair of files will take around 15 min. Leave it to finish completely, do not restart, work on the computer or shut it down while the process is active, and only after it is finished reboot your system.
  3. Update Windows.

    If your Windows is not updated sometimes this issue can be resolved by updating it on the latest version. Click on start and then on settings. Windows 10 Star menu with marked settings icon Once the settings screen is opened, find and click on Update and Security. Windows settings update and security section marked Go to the Windows update tab and click on DOWNLOAD or click on check for updates for the latest Windows fix. windows settings windows update selected
  4. Reset BIOS to factory settings.

    Sometimes BIOS not being properly configured can cause issues in Windows itself and prevent it from detecting PnP devices thus creating this error. Restoring BIOS back to the factory setting can help. Turn off your computer and turn it back on. Press delete, f12, f11, or any other key which will take you to BIOS (default key is delete but sometimes manufacturers map this to another one. Once your screen turns ON you will see in the bottom message which key needs to be pressed in order to enter BIOS). Sadly since every BIOS could be different we can not cover step by step guide for each but you need to find the option where you load BIOS defaults, click on it save, and exit. Your computer will restart and boot into Windows, check to see if the problem still persists. BIOSD load defaults
  5. Update BIOS

    BIOS can cause issues with certain PnP devices when the newest Windows update is rolled. If reverting BIOS to the factory setting has not been successful try update. Go to your motherboard manufacturer website, find the update and read step by step guide there since updating BIOS differs from version to version and from manufacturer to manufacturer. After the update is done, restart the computer and hopefully, the error is gone.
  6. Perform a System Restore

    If everything else fails, perform a system restore to get Windows back into the state before the update was installed and when everything was working fine. Press WINDOWS + R on the keyboard to open the run dialog. keyboard with windows and r marked In the run dialog, type control panel and press enter to enter control panel, locate recovery and click on it. control panel recovery selected Inside the recovery screen click on Open System Restore. advanced recovery tools Choose a date when everything was working in order, the best bet is the date before Windows update and roll it back. system restore latest backup restore Click on date, and then on next.
Read More
Fix Microsoft Store error 0x80072F30
If you got the Microsoft Store error code 0x80072F30 while trying to open Microsoft Store, then it indicates that the Store fails to connect to the internet or is not able to launch successfully for some reason. It could be that the Windows Update Service has stopped or the Windows Store cache might be corrupted or it could just be due to a poor internet connection. Whichever the cause is, you have to fix this error so that you can use Microsoft Store again and you won’t be getting the following error message every time you open the app:
“Check your connection, Microsoft Store needs to be online, It looks like you are not, error code 0x80072f30.”
The error code 0x80072F30 is related to the Windows Store which prevents it from opening properly. To resolve this problem, you can try fixing the problem with the help of the options given below. Follow each one of them carefully.

Option 1 – Check your internet connection

The first and most obvious thing you can do is to check your internet connection. This may only be a basic tip but it sure works like a charm in most cases. And if you have another internet connection available, you can also try connecting to that and see if you can pull up Microsoft Store or not. 1] Change your internet connection: A basic tip, but sometimes works like a charm. You may want to check if your internet connection has an issue, or you can also try opening a website and see if you can open it and if possible try connecting to a different internet connection and see if the Microsoft Store opens for you. We also suggest you try changing your DNS and see if it helps.

Option 2 – Check the date and time as well as the time zone of your PC

A lot of services and apps rely on the Date, Time, and Time Zone of your PC which is why if they are not configured correctly, a request from the client machine will be rejected from the server and the same thing happens with the Microsoft Store.
  • First, go to Settings > Time and Language.
  • From there, check if it is set to Automatic or not – if it is, switch the toggle button off to set the Time and Time zone manually.
  • Then select the right time zone manually.
  • On the other hand, if the Time and Time zone is set manually, you have to switch the toggle button on to set Time and Time zone automatically.
  • Restart your PC and afterward try opening Microsoft Store again and check if the problem’s fixed or not.

Option 3 – Run the Network Adapter Troubleshooter

Since Windows 10 is packed with various troubleshooters – one of which is the Network Adapter Troubleshooter – you can use it to troubleshoot the problem. To use it, follow these steps:
  • Open the Search bar on your computer and type in “troubleshoot” to open the Troubleshoot settings.
  • Next, scroll down and select the “Network Adapter” option from the right pane.
  • Then click on the Run Troubleshooter” button.
  • After that, your computer will check for any possible errors and will pinpoint the root cause of the problem if possible.

Option 4 – Try to reset the Microsoft Store cache

Just like browsers, Microsoft Store also caches as you view apps and games so it is most likely that the cache is no longer valid and must be removed. To do so, follow the steps below.
  • Right-click on the start button and click on Command Prompt (administrator).
  • Next, type in the command, “exe” and tap Enter. Once you do, the command will clear the cache for the Windows Store app.
  • Now restart your PC and afterward, try opening Microsoft Store again.

Option 5 – Check the Windows Update Service status

You might also want to check the status of the Windows Update Service since the proper functioning of this app depends on the Windows Update Service. It could be that there is some issue with the service which is why you’re getting the error code 0x80072F30 while trying to open Microsoft Store.
  • Tap the Win + R keys to open the Run dialog box.
  • Then type “services.msc” in the field and hit Enter to open Services.
  • Next, look for Windows Update Service from the list of available services in Windows.
  • Once you see it, check if its status is STOP or Pause and then change the status to Automatic.
Read More
How to Fix Windows 10 Error Code 0x800705b4

Error Code 0x800705b4 - What is it?

Error Code 0x800705b4 is an error that will appear when the computer is not stable, and very critical system files will fail to respond or they will start going missing. This will happen when the computer is not being maintained properly. The problem should be solved immediately to avoid any further damage or loss of data. This error code may be regarded as one of the most severe computer problems that can present itself.

Common symptoms include:

  • There will be a failure to install updates and a display of the error message.
  • The Error Code 0x800705b4 will display itself.
  • After a system update, the computer will not be able to install new drivers.

Solution

Restoro box imageError Causes

Windows 10 update error 0x800705b4 can be caused when the user wants to update their windows system when important dll registries or files are missing or are corrupt. This will also happen when the user is trying to install or uninstall programs in a way that is wrong, or it may be infected with a Trojan virus. Additionally, this error code will be displayed when a PC's drivers are either outdated or installed the wrong way. There could be a registry error, a failure to update by the operating system, or even a device failure to update automatically.

Further Information and Manual Repair

There are several ways to resolve the appearance of error code 0x800705b4 on Windows devices. If you are not familiar with fixing error codes on a computer or are having trouble fixing this one, consider contacting a Windows technician to help with fixing the error. The computer must be run on administrator mode no matter which steps you are taking or which methods you are using. Depending on which version of Windows you are using, the steps for each method may differ slightly, but the basic process will remain the same.

Method One: Fixing it with updates

Start the computer in safe mode to begin troubleshooting for error code 0x800705b4. When the computer is starting up, press F8—this will enter the computer into safe mode.

You will now need to manually update your computer's outdated drivers. To do this, click on Start. Then, type in Device Manager into the search box to see if there are any outdated or corrupt issues with the drivers.

Method Two: Run an SFC scan

This will allow users to find files in Windows that are corrupt, damaged, or lost.

  • Start the Command Prompt. To do this, click Start and then type in cmd inside of the search box to see the icon.  Right-click and choose to Run as administrator. If asked, enter the password for the administrator.
  • When viewing the command prompt, type in “sfc/scannnow” and then press enter. This will be scanning all of the protected system files and will fix the corrupt files. Do not close the command prompt before it is done.

Method Three: System Restore

This is the most efficient way to fix any problem or system status. System backup is vital when performing this.

Click on the Start button, and then type in “system restore” inside of the search box. Right click on System Restore, and then choose Run as Administrator. This could also be found in the Control Panel. Now you will choose the time point in which to restore the system. You will be able to choose the recommended or specific restore based on the situation. Now you can review the restore point and then click Finish.

Method Four: For Windows 10

  • You may need to update the Windows Defender in the security center. To locate this, click Start, Settings, Update and Security, Windows Defender.
  • Go to the Windows Updates and click on Advanced Options. Click on the option that will get updates for more Microsoft products.
  • Restart the computer, and then check for updates again. This update process will be able to be done without a problem. When a message comes up that says “Your device is up to date” you will need to click Advanced Options once again and check for update options.
  • Check for updates one more time and now the proper updates should be able to be downloaded and installed properly.

Method Five: Use An Automated Tool

If you wish to always have at your disposal a utility tool to fix these Windows 10 and other related issues when they do arise, download and install a powerful automated tool.
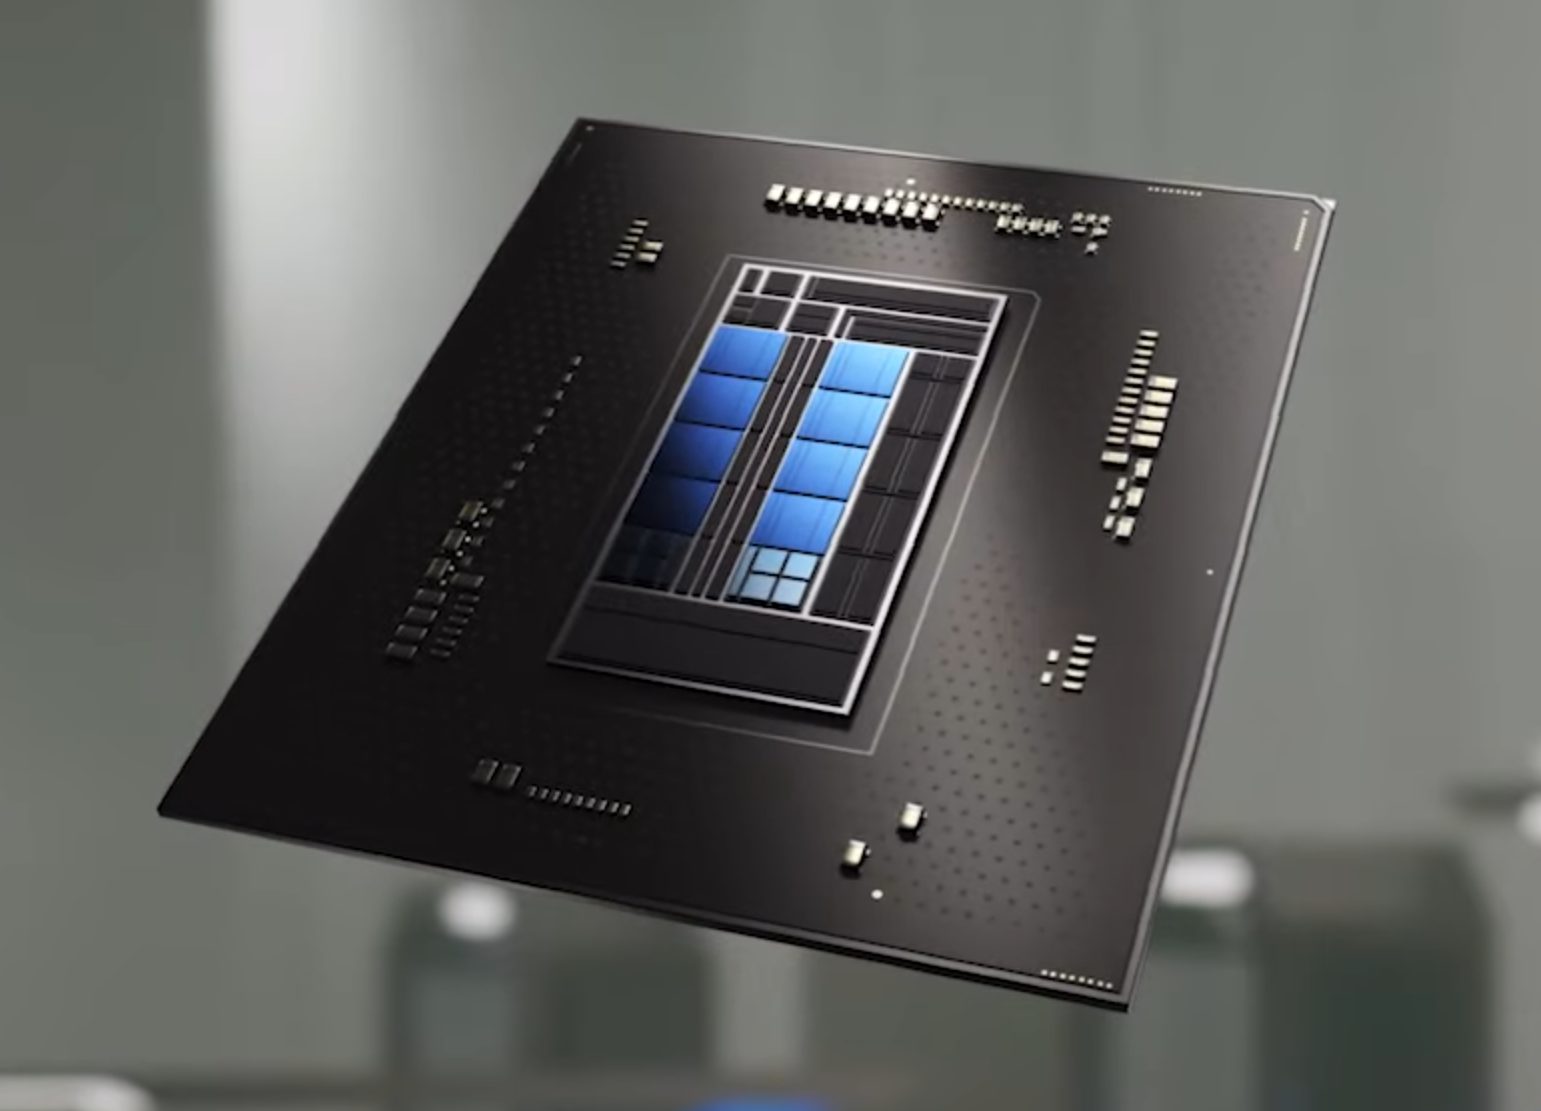
Read More
DuckDuckGo's Browser is not blocking MS scripts

DuckDuckGo has risen in the public eye as a private search engine offering searches without tracking. A less known fact about DuckDuckGo is that they have their own browser, well they have it for the Android platform and it was stated that it is coming for desktops soon.

DuckDuckGo browser

People were excited for this new browser for a few reasons, one of them being privacy and another that it is built from scratch, not using existing chromium runtime that assured users that privacy is the main focus. Still, lately, things got a little out of control. Duckduckgo is under fire from users since a security researcher has discovered that there is an exception for Microsoft trackers inside Browser.

The main feature of their browser is that it blocks tracking scripts and most online advertising with the goal of preventing servers from collecting data about your online behavior. Of course, tracking protection is never 100% effective since it requires a lot of manual labor from people to add sites and links to blocklists but it was discovered that DuckDuckGo has a defined exception in the browser for Microsoft owned ad networks and tracking scripts giving them free pass even when they are related to privacy compromisation.

Zach Edwards first pointed out the exception in a series of tweets, after noticing DuckDuckGo on iPhone and Android wasn’t blocking LinkedIn and Bing advertisements on Facebook’s Workplace site.

You can capture data within the DuckDuckGo so-called private browser on a website like Facebook's https://t.co/u8W44qvsqF and you'll see that DDG does NOT stop data flows to Microsoft's Linkedin domains or their Bing advertising domains.

iOS + Android proof:
👀🫥😮‍💨🤡⛈️⚖️💸💸💸 pic.twitter.com/u3Q30KIs7e

— ℨ𝔞𝔠𝔥 𝔈𝔡𝔴𝔞𝔯𝔡𝔰 (@thezedwards) May 23, 2022

DuckDuckGo’s CEO and founder, Gabriel Weinberg, replied with his own series of tweets.

Most of our other protections also apply to MSFT-owned properties as well. This is just about non-DuckDuckGo and non-Microsoft sites, where our search syndication agreement prevents us from stopping Microsoft-owned scripts from loading, though we can still apply protections post-load (like 3rd party cookie blocking). We are also working to change that.

DuckDuckGo says it uses over 400 sources for search engine results, including the company’s own web crawler, but typical link results are sourced most commonly from Bing. According to Weinberg, DuckDuckGo’s ability to use Bing search results depends on a carved-out exception for Microsoft’s ads in the mobile browser. A representative from DuckDuckGo told that third-party cookies from Microsoft services are still blocked.

Of course, the main aim and campaign of DUckDuckGo's rise was private search and private browsing so this kind of news did not go well among long supporters. The latest statement from them is as follows:

We have always been extremely careful to never promise anonymity when browsing, because that frankly isn’t possible given how quickly trackers change how they work to evade protections and the tools we currently offer. When most other browsers on the market talk about tracking protection, they are usually referring to 3rd-party cookie protection and fingerprinting protection, and our browsers for iOS, Android, and our new Mac beta, impose these restrictions on third-party tracking scripts, including those from Microsoft.

What we’re talking about here is an above-and-beyond protection that most browsers don’t even attempt to do — that is, blocking third-party tracking scripts before they load on 3rd party websites. Because we’re doing this where we can, users are still getting significantly more privacy protection with DuckDuckGo than they would using Safari, Firefox and other browsers. This blog post we published gets into the real benefits users enjoy from this approach, like faster load times (46% average decrease) and less data transferred (34% average decrease). Our goal has always been to provide the most privacy we can in one download, by default without any complicated settings.

Read More
Truth about private and incognito browsing
Privacy is a hot topic lately in all circles so naturally themes like private or incognito browsing pop up immediately as discussion topics. Naturally, when discussing private or incognito browsing it is very important to understand what exactly private or incognito browsing is, what does it do and how it works in order to shed some light on is it really private and safe as we are told. So, when you browse the internet normally websites have tendencies to save your browsing data, save cookies, remember passwords, etc in order to provide you with a better surfing experience next time you visit that same site. Private or incognito browsing treats you as a completely new user which is the first time visiting a given website. It clears all your data, including your browsing history, cookies, etc., on exiting. Every website you visit in private or incognito mode treats you as a new visitor, even if you have visited it before in incognito mode. And basically, that's it. So is it really private? No, it is just a non-remembering mode of internet browsing where after your browsing session history and other data is cleared from the browser, but while you are on the internet you are pretty visible to all like any other normal user. There are a lot of misconceptions and wrong thinking about browsing the internet in this mode so let's take a look at some typical ones.
  1. The government and other companies can not track me

    Many people think that the Government cannot trace their identity when they surf privately. This is only a myth. There are many ways by which the Government can reach you if you do something illegal. When you surf online, you are connected with an ISP of your area, which helps the officials track your location.
  2. Virus and other malware can not infect me while in private or incognito mode

    Many people think that private mode protects them from virus and malware attacks. It is not true because malware and viruses can enter your PC through a software download, phishing email, etc. To protect your PC from virus and malware attacks, you should have good security software.
  3. My IP address is hidden when I am in incognito or private browsing mode

    This is not 100% true. If you search “What is my IP” in incognito and standard mode, you will get the same results. This means that websites can view your IP address in private mode also. Using a VPN would be a good option if you want to hide your IP.
  4. I can not be tracked via ads

    Since cookies are deleted after exiting private browsing, many people think that ads cannot track them. When you surf in incognito mode, the browser saves cookies in a temporary mode, allowing ads to track you during your entire private browsing session.
  5. I am not visible when I am in incognito or private

    You may think if you sign in to your Gmail or other social media accounts in private mode, no one will see you online. This is not true. It does not matter whether you have signed into your account in normal mode or incognito mode; others can always spot you online.
In your regular browsing mode, you may have some addons, extensions, themes, etc installed and you can use them. They may track your activities. The data is deleted when you exit the browser. When you use the private browsing mode, the browser is loaded in its original form, typically without the installed addons, extension, themes, etc. The data gets deleted when you exit the browser. This mode doesn’t save data to disk but keeps it in memory during the current session. If you are really concerned about your privacy we have articles about using DuckDuckGo and deep web where you can be sure that your browsing sessions are encrypted.
Read More
1 2 3 171
Logo
Copyright © 2023, ErrorTools. All Rights Reserved
Trademark: Microsoft Windows logos are registered trademarks of Microsoft. Disclaimer: ErrorTools.com is not affiliated with Microsoft, nor claims direct affiliation.
The information on this page is provided for information purposes only.
DMCA.com Protection Status