Logo

Removing Search.schooldozer.com hijacker

What is Search.schooldozer.com? And how does it function?

Search.schooldozer.com is a browser extension that functions as a search engine. It is developed and maintained by “Schooldozer”. It claims to improve users’ browsing experience by providing them with improved search results. However, it does not really do the things it claims to do. In fact, they’re quite the opposite ones – instead of improving the browsing experience, it makes users’ browsing experience unsafe and full of sponsored content. This is in contrast to what it states in its Privacy Policy:

“Install applications the easy way and without the hassle, using the Schooldozer downloader. The Schooldozer platform stems from years of experience with installing applications, resulting in a highly optimized process, yielding faster downloads, better user experience, and more successful installations.”

In addition, once installed Search.schooldozer.com is installed, it will change the default settings of a browser such as the default search engine, homepage, and new tab page. This is why security experts regard this browser extension as a browser hijacker and a potentially unwanted program. The modification of the browser's settings allows it to control users’ browsing by redirecting them to sponsored sites as well as deliver sponsored content from its affiliated sites in order to gain profit via pay-per-click marketing. And if you think that the ads it displays are harmless, think again for some of these ads can redirect you to suspicious websites that might contain harmful content. What’s more is that this browser hijacker can also keep track and monitor all your browsing activities in order to obtain your browsing data like search queries, what sites you always visit, browsing history, browser type, OS version, and so on. The information collected is then used and may even be shared with its affiliated third parties to deliver more customized and personalized advertisements.

How is Search.schooldozer.com distributed over the web?

Like a typical browser hijacker, Search.schooldozer.com is distributed using the software bundling method where several unknown and unwanted programs are bundled in a software package. Thus when you install any software bundle, make sure to always opt for the Custom or Advanced installation setup rather than the quick setup to avoid installing unwanted programs like Search.schooldozer.com.

To remove Search.schooldozer.com from your computer, follow the removal guide below carefully.

Step 1: Start the removal process by closing all the browsers infected with Search.schooldozer.com. If you’re having a hard time closing them, you can close them using the Task Manager just tap on Ctrl + Shift + Esc.

Step 2: After you open the Task Manager, go to the Processes tab and look for the infected browser’s process and end it.

Step 3: Then close the Task Manager and tap the Win + R keys to open Run and then type in appwiz.cpl to open Programs & Features in Control Panel.

Step 4: From there, look for Search.schooldozer.com or any unfamiliar program that could be related to it under the list of installed programs and once you’ve found it, uninstall it.

Step 5: Edit your Hosts File.

  • Tap the Win + R keys to open then type in %WinDir% and then click OK.
  • Go to System32/drivers/etc.
  • Open the host file using Notepad.
  • Delete all the entries that contain Search.schooldozer.com.
  • After that, save the changes you’ve made and close the file.

Step 6: Reset all your browsers to default to their default state.

Google Chrome

  1. Launch Google Chrome, press Alt + F, move to More tools, and click Extensions.
  2. Look for Search.schooldozer.com or any other unwanted add-ons, click the Recycle Bin button, and choose Remove.
  3. Restart Google Chrome, then tap Alt + F, and select Settings.
  4. Navigate to the On Startup section at the bottom.
  5. Select “Open a specific page or set of pages”.
  6. Click the More actions button next to the hijacker and click Remove.

Mozilla Firefox

  1. Open the browser and tap Ctrl + Shift + A to access the Add-ons Manager.
  2. In the Extensions, menu Remove the unwanted extension.
  3. Restart the browser and tap keys Alt + T.
  4. Select Options and then move to the General menu.
  5. Overwrite the URL in the Home Page section and then restart the browser.

Internet Explorer

  1. Launch Internet Explorer.
  2. Tap Alt + T and select Internet options.
  3. Click the General tab and then overwrite the URL under the homepage section.
  4. Click OK to save the changes.

Step 7: Hold down Windows + E keys simultaneously to open File Explorer.

Step 8: Navigate to the following directories and look for suspicious files associated to the browser hijacker such as the software bundle it came with and delete it/them.

  • %USERPROFILE%Downloads
  • %USERPROFILE%Desktop
  • %TEMP%

Step 9: Close the File Explorer.

Step 10: Empty the contents of Recycle Bin.
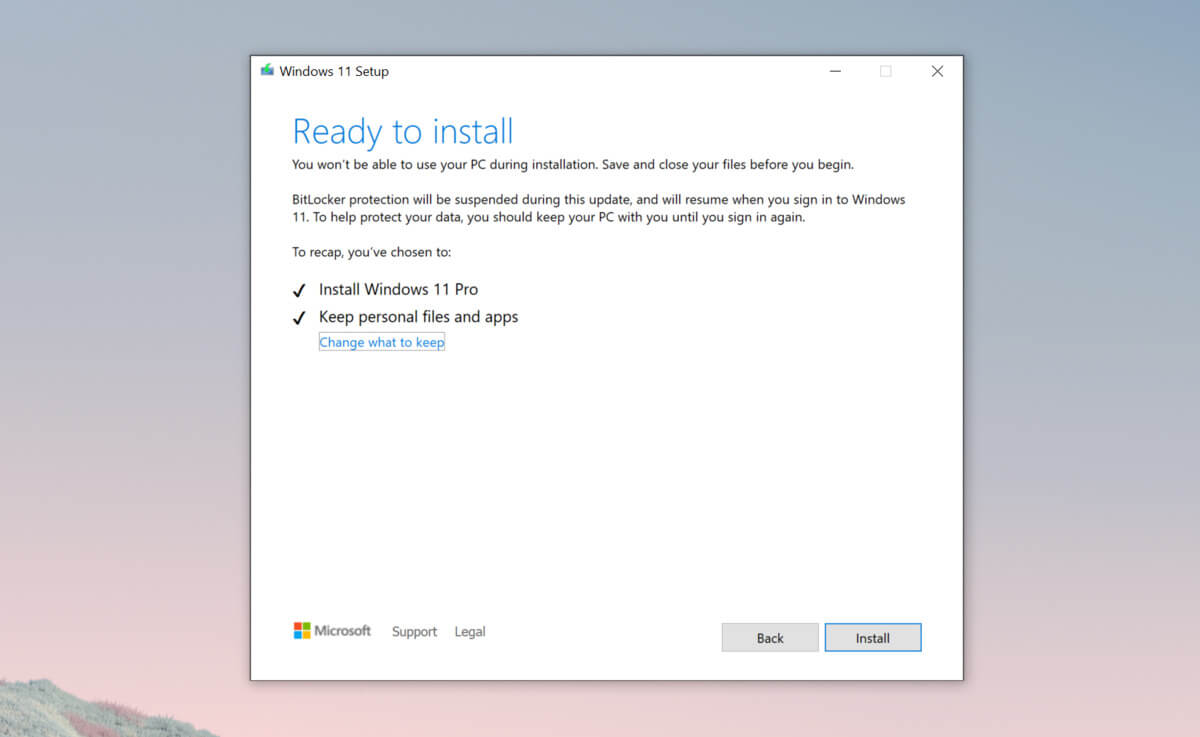
Do You Need Help with Your Device?

Our Team of Experts May Help
Troubleshoot.Tech Experts are There for You!
Replace damaged files
Restore performance
Free disk space
Remove Malware
Protects WEB browser
Remove Viruses
Stop PC freezing
GET HELP
Troubleshoot.Tech experts work with all versions of Microsoft Windows including Windows 11, with Android, Mac, and more.

Share this article:

You might also like

Windows won’t go Sleep, Legacy Kernel Caller
If the display of your Windows 10 computer turns on all of a sudden no matter how put it to sleep over and over again, it always wakes up, read on as this post will guide you in resolving this peculiar issue. In case you don’t know, the Windows 10 computer Sleep state is made in such a way that if it’s really important, it wakes up. You may have configured this kind of behavior or there could be some hardware component that’s interrupting its Sleep state. Thus, this post will give you some troubleshooting tips to fix the Sleep state issue caused by the Legacy Kernel Caller. The Legacy Kernel Caller points to the external hardware that’s causing your Windows 10 to wake up even when it’s in a Sleep state. Step 1: Find out what’s keeping your computer from going to sleep. To figure out what really is keeping your computer from going to sleep, you can execute the “powercfg –requests” command instead of checking the power configuration of your computer. This command will look for requests from applications and drivers that prevent the computer from turning off the display or from going to sleep. To execute the command, simply open Command Prompt and type “powercfg –requests” and hit Enter. After that, you will see part of the result that looks like this:
“SYSTEM [DRIVER] USB AUDIO DEVICE An audio stream is currently in use [DRIVER] Legacy Kernel Caller.”
Step 2: The next thing you have to do is remove all the external hardware connected to your computer. In this step, you have to disconnect external hardware from your computer. Based on reports from users who experienced the same issue, the “TV card” is the culprit so make sure you remove that one. Once you’ve removed it, open Command Prompt and run the “powercfg –requests” command again and you’ll see that the “Legacy Kernel Caller” will no longer be on the list. In addition, your computer will get into its regular sleep mode once the hardware is removed. Once you do that, the driver gets hung and won’t release the power request despite being used. Step 3: Try using the request override option The powercfg command also offers a request override option which allows users to disable the requests from applications and services to wake the computer from sleep mode. To run this command, simply open Command Prompt with admin privileges. After you open Command Prompt, type the following command and hit Enter to disable requests from applications and services that causes the computer to wake from sleep state.
Powercfg -requestsoverride Driver "Legacy Kernel Caller" System
Step 4: Check the streaming and media applications You also have to check if your computer is running an audio or video service in the background. In such cases, your computer won’t be able to go to sleep mode if these services are running in the background. You might have noticed that when you play a video or audio, your computer never goes to sleep. And if you have put it to sleep in between watching the video, then it’s probably why your computer is waking up. Thus, you have to stop these services. Step 5: Check the devices that can wake your computer If you didn’t see the Legacy Kernel Caller in the result after you execute the ”powercfg –requests” command, then you can try to execute the following command instead.
powercfg –devicequery wake_armed
After you enter this command, it will give you a list of all the devices that can wake your computer. So if there is anything other than the mouse, keyboard, touchpad, you have to check the power configuration of that device. To do that, go to the Device Manager and disable the device’s “Allow this device to wake the computer” option in its Properties Step 6: Check the Sleep Advanced Settings
  • Click on the Windows key and type “control panel” in the field and select the related search result.
  • Next, select the Security and Maintenance option and click on the Power Options.
  • After that, you have to select the Change Plan Settings but keep in mind that this option is barely readable so you need to read each option carefully.
  • Now click on the Change advanced power settings button and a new window will appear.
  • Then look for the “Sleep” option and expand it. Make sure that the “Allow hybrid sleep” option is on.
  • Reboot your computer and check if your computer now functions properly. If it still didn’t work, you may have to reverse the changes you’ve made.
On the other hand, you could also run the Power Troubleshooter to resolve the Sleep state issue. This built-in troubleshooter will automatically fix any power-related issues in your computer.
Read More
Easy PrivateSearchPlus Removal Guide

PrivateSearchPlus is a browser extension that redirects all your searches through yonto. This way the extension claims you are browsing privately.

From the author: Search the web without tracking your search history or any personally identifiable information Access quickly to popular websites with icons sliding from this homepage is easy speedy and accessed ..Google Search, Yahoo, Aol, Facebook, Amazon, eBay, and more from all world without login However, PrivateSearchPlus monitors your browsing activity, the websites you visit, the links you click, and stores personal information that is later sent to server ads. This extension changes your default search engine to Yonto, it displays additional unwanted ads, may display pop-up ads, and hijacks your home page. Several anti-virus scanners have classified this extension as a Browser Hijacker and are therefore not recommended to keep on your computer.

About Browser Hijackers

Browser hijacking is actually a type of unwanted program, commonly a web browser add-on or extension, which causes modifications in web browser’s settings. There are several reasons why you might have a browser hijack; but commercial, marketing, and advertising are the main purposes for their creation. In general, hijackers are made for the benefit of internet hackers often through income generation from forced ad clicks and site visits. Nonetheless, it’s not that innocent. Your web safety is compromised and it is also very irritating. Browser hijackers could also allow other vicious programs without your knowledge to further damage your computer.

How to know if your browser has been hijacked

When your web browser is hijacked, the following might happen: your browser’s homepage is suddenly different; you see new unwanted favorites or bookmarks added, usually directed to advertisement-filled or pornography websites; the default browser settings have been changed, and/or your default search engine is altered; you see unsolicited new toolbars added; you notice numerous ads show up on your web browsers or display screen; webpages load slowly and at times incomplete; Inability to navigate to particular sites, especially antivirus and also other security software websites.

So how does a browser hijacker infect a computer?

Browser hijackers might use drive-by downloads or file-sharing websites or an e-mail attachment in order to reach a targeted computer. They could also come from add-on applications, also referred to as browser helper objects (BHO), web browser extensions, or toolbars. Other times you may have unintentionally accepted a browser hijacker as part of a software program bundle (usually freeware or shareware). Some of the most well-known hijackers are EasySearchPlus, Babylon Toolbar, Conduit Search, OneWebSearch, Sweet Page, and CoolWebSearch. The presence of any browser hijacker malware on your system might drastically diminish the web browsing experience, monitor your internet activities that lead to major privacy concerns, produce system stability problems and ultimately cause your PC to slow down or to a nearly unusable state.

Browser Hijacker Malware – Removal

Some browser hijacking could be quite easily stopped by finding and eliminating the corresponding malware program from your control panel. Sadly, many of the software programs used to hijack an internet browser are intentionally created to be hard to detect or remove. Inexperienced PC users shouldn’t ever try for the manual form of removal methods, as it demands thorough computer knowledge to do repairs on the computer registry and HOSTS file.

What to Do if Virus Stops You From Downloading Or Installing Anything?

Malware can cause all sorts of damage once they invade your PC, ranging from stealing your personal details to erasing data files on your computer. Certain malware types alter internet browser settings by adding a proxy server or modify the computer’s DNS configuration settings. In these instances, you will be unable to visit certain or all websites, and therefore unable to download or install the necessary security software to get rid of the computer virus. So what to do if malware keeps you from downloading or installing Safebytes Anti-Malware? There are some options you can try to get around with this particular problem.

Install in Safe Mode with Networking

If the malware is set to load at Windows startup, then booting in Safe Mode should avoid it. Since only the minimal applications and services start-up in “Safe Mode”, there are rarely any reasons for issues to take place. You will need to do the following to eliminate malware in Safe mode. 1) Press the F8 key repeatedly as soon as your PC boots, however, before the big Windows logo appears. This will conjure up the Advanced Boot Options menu. 2) Use the arrow keys to choose Safe Mode with Networking and press ENTER. 3) Once this mode loads, you should have the internet. Now, make use of your web browser to download and install Safebytes. 4) After installation, run a complete scan and let the software program get rid of the threats it detects.

Obtain the antivirus program using an alternate web browser

Web-based viruses could be environment-specific, aiming for a specific browser or attacking particular versions of the browser. The best way to overcome this problem is to pick a browser that is well known for its security measures. Firefox contains built-in Phishing and Malware Protection to help keep you secure online.

Create a portable USB antivirus for eliminating malware

Another method is to download and transfer an antivirus application from a clean computer to run a scan on the affected computer. Follow these steps to employ a flash drive to fix your corrupted computer. 1) Download Safebytes Anti-Malware or Microsoft Windows Defender Offline onto a clean computer. 2) Plug the Thumb drive into the uninfected computer. 3) Double click on the downloaded file to open the installation wizard. 4) Choose a thumb drive as the place when the wizard asks you where you wish to install the software. Do as instructed on the screen to finish off the installation process. 5) Now, plug the pen drive into the infected system. 6) Double-click the anti-malware program EXE file on the thumb drive. 7) Press the “Scan” button to run a full computer scan and remove malware automatically.

A Look at the Best Anti-Malware Program

To help protect your computer from various internet-based threats, it is very important to install an anti-malware program on your computer system. However, with so many anti-malware companies in the market, these days it is tough to decide which one you should obtain for your personal computer. A few are very good ones, some are ok types, while some are just fake anti-malware programs that can ruin your PC themselves! You have to pick a product that has got a good reputation and detects not only computer viruses but other sorts of malware as well. While considering the reliable applications, Safebytes Anti-Malware is certainly the strongly recommended one. SafeBytes is a highly effective, real-time anti-spyware application that is created to assist regular computer users in safeguarding their computers from malicious internet threats. With its cutting-edge technology, this software will allow you to get rid of several types of malware like computer viruses, PUPs, trojans, worms, adware, ransomware, and browser hijackers. SafeBytes anti-malware takes computer protection to a totally new level with its advanced features. Some of them are given as below: Real-Time Protection: SafeBytes provides an entirely hands-free live protection that is set to check, prevent and get rid of all computer threats at its very first encounter. It will continuously monitor your computer for hacker activity and also gives users advanced firewall protection. Anti-Malware Protection: Safebytes is based on the best virus engine within the industry. These engines can detect and eliminate threats even during the initial phases of a malware outbreak. Web Security: SafeBytes checks the links present on a webpage for possible threats and notifies you whether the website is safe to view or not, through its unique safety rating system. “Fast Scan” Abilities: Safebytes Anti-Malware, using its enhanced scanning engine, offers extremely fast scanning which can promptly target any active online threat. Light-weight: SafeBytes is a lightweight and easy-to-use anti-virus and antimalware solution. As it uses very low computer resources, this tool leaves the computer power exactly where it belongs to: with you actually. 24/7 Live Expert Support: For any technical questions or product support, you may get 24/7 professional assistance via chat and e-mail.

Technical Details and Manual Removal (Advanced Users)

If you wish to manually remove PrivateSearchPlus without the use of an automated tool, it may be possible to do so by removing the program from the Windows Add/Remove Programs menu, or in cases of browser extensions, going to the browsers AddOn/Extension manager and removing it. You will likely also want to reset your browser. To ensure the complete removal, manually check your hard drive and registry for all of the following and remove or reset the values accordingly. Please note that this is for advanced users only and may be difficult, with incorrect file removal causing additional PC errors. In addition, some malware is capable of replicating or preventing deletion. Doing this in Safe Mode is advised.

The following files, folders, and registry entries are created or modified by PrivateSearchPlus

Registry: HKEY_LOCAL_MACHINESOFTWAREsupWPM HKEY_LOCAL_MACHINESYSTEMCurrentControlSetServicesWpm HKEY_CURRENT_USERSoftwareMicrosoftInternet ExplorerMain Default_Page_URL HKEY_LOCAL_MachineSoftwareClasses[PUP.Private Search Plus] HKEY_CURRENT_USERSoftwareMicrosoftWindowsCurrentVersionUninstall[PUP.Private Search Plus]
Read More
Cortana is Not Connecting to the Internet
Recently, a number of Windows 10 users reported that they were not able to use Cortana properly because it wasn’t able to connect to the internet. According to these users, Cortana won’t connect to the internet even when their internet connection is stable. According to security experts, this issue is confirmed to occur only with Microsoft accounts. This problem might have something to do with a proxy server that interferes with Cortana. There were reports that this issue was caused by a proxy that was filtering the network connection which also happens to interfere with Cortana’s ability to adapt search results and queries based on the user’s location. It could also be caused by some glitch in the home network or your Microsoft account information is inconsistent or your Microsoft account has to be verified. Here are some suggestions that could help fix the connection issue in Cortana, just start with the first one and work your way down until you encounter an option that fixes the problem.

Option 1 – Restart or reset your modem or router

The first thing you can try is restarting or resetting your modem or router. All you have to do is unplug the power cable of the modem and then plug it back in after a few seconds. You could also use the reset button of the modem at the back if it is one. But before you press the reset button, keep in mind that it will erase all the connection credentials and it will be set back to its default settings. After rebooting the network, you can restart your computer to force your modem or router to reassign an IP address to your computer.

Option 2 – Restart Cortana

Restarting Cortana can help you resolve the issue.
  • To restart Cortana, open the Task Manager, right-click on Cortana and select the “End process” option.
  • Then go to the File tab and select “Run new task”.
  • After that, type in “cortana.exe” and press Enter to restart the process.

Option 3 – Try to remove Proxy

Removing the Proxy might also help you in fixing the connection issue in Cortana. Here’s how you can do it:
  • Tap the Win + R keys to open the Run dialog box.
  • Then type “inetcpl.cpl” in the field and hit Enter to pull up the Internet Properties.
  • After that, go to the Connections tab and select the LAN settings.
  • From there. Uncheck the “Use a Proxy Server” option for your LAN and then make sure that the “Automatically detect settings” option is checked.
  • Now click the OK and the Apply buttons.
  • Restart your PC.
Note: If you are using a third-party proxy service, you have to disable it.

Option 4 – Open another app that uses a Microsoft account

This might seem like an odd fix, however, a couple of users tried doing this and it worked for them as it allowed Cortana to connect to the internet again. In this option, you just have to launch another app that uses your Microsoft account information in the same way as Cortana, for instance, the Store app. Once you open the app, a prompt should appear along with a dialog box that allows you to update your Microsoft account with the information required. After that, restart your computer and check if Cortana is now able to connect to the internet or not.

Option 5 – Verify your Microsoft account

In some cases, Cortana might not be able to connect to the internet because your Microsoft account is no longer verified. This usually happens when you use a two-step authentication system with your Microsoft account. To verify it, just open Settings and click on Accounts. After that, check if you have a Verify hyperlink under your Microsoft account or not then click on Verify. Afterward, follow the next on-screen prompts to verify your Microsoft account. Once your account is verified, restart your computer.

Option 6 – Reset Cortana settings

  • Open Cortana and go to the Settings section where you’ll see the “Turning off Cortana clears what Cortana knows on this device, but won’t delete anything from the Notebook. After Cortana is off, you can decide what you’d like to do with anything still stored in the cloud” option. Turn this option off.
  • Restart your PC.
  • After your computer boots, launch Cortana again and check.
Read More
How to save google DOC as a PDF

Google Docs has cemented itself as a great free alternative to Microsoft Office Word. Most of the time people just share links to google Docs among themselves but sometimes you need to save and download files.

PDF

Luckily Google docs let you download easily files in various formats including PDF as well. In this short tutorial we will explain how can you download your Google document as a PDF file.

Saving Google Docs as a PDF

Open the Google document inside the browser and click on the File drop-down menu. In the file drop-down menu go to Download and choose PDF document. Next, choose the location where you would like your file to be saved and click on SAVE.

And that's all that needs to be done. Also, you can edit PDF files as well in google docs if you need to.

Read More
How to Fix Windows 10 Error Code 0x80070032

Error Code 0x80070032 - What is it?

Error Code 0x80070032 is a command that most often relates to codes or commands that have not been entered correctly or do not apply to the given program. It can also appear when mail folders in Windows Mail are not able to sync in the way that they should between the local device and the servers owned by Microsoft.

Common symptoms include:

  • Inability to access your emails
  • Emails not syncing between devices correctly
  • Inability to use certain commands in certain programs

The primary methods used to address Error Code 0x80070032 are fairly basic and easy to complete. Most users should be able to complete these methods on their own and they do not require a lot of time to do. However, if you don’t feel like you have the experience, skills, or knowledge necessary to complete the steps listed below, consider getting in touch with a qualified Windows repair technician to assist you.

Solution

Restoro box imageError Causes

The two main causes for Error Code 0x80070032 are commands entered into programs that cannot be completed or are incompatible with the program at hand and folders in Windows Mail that cannot sync properly.

Further Information and Manual Repair

There are three basic methods that users can try in order to resolve Error Code 0x80070032 on their machine. These are fairly simple and easy to complete. However, if the methods below aren’t successful in resolving the error code or if you do not feel confident in your ability to use them, get in touch with a certified Windows repair professional to assist you.

If you believe that you are seeing the error due to entering a command that didn’t work, use Method One first. If you believe it is due to a mail syncing error, use Methods Two or Three.

Here are the top methods for addressing Error Code 0x80070032:

Method One:  Reinstall the Program in Question

If you believe that you are experiencing Error Code 0x80070032 because of a command that you have entered, the best solution is to reinstall the program in which you were entering the command. You may also want to try updating your program, if able, before reinstalling it. Remember to restart the computer before reattempting to enter in the command that caused the error.

Method Two:  Download and Install Windows System Updates

For many users, Error Code 0x80070032 appears because of a bug in one of the versions of Windows 10. If you believe that this is the case, open up your Windows Updates and check to see if there are any updates that you can install.

For users who are only seeing Error Code 0x80070032 because of the bug mentioned above, Windows released an update that should address the error code on its own. If your computer is fully updated, the error may be resolved on its own. Always remember to restart your computer after installing updates so that the necessary changes can take effect.

Method Three:  Change Your Windows Mail to Local Access

If the above methods did not resolve the problem successfully, you can switch to local access to your Windows Mail, rather than relying on Microsoft access. To do so, complete the following steps:

  • Go into your Windows settings and click on the option for “Accounts.”
  • Select the account that you wish to access and choose the option to sign in using a local account.
  • Enter your password to verify local access.
  • Add in your user name, password, and password hint.
  • Sign out of the local account to finish.

Once this is done, you can switch back to your Microsoft account, which should reset your syncing ability. Follow these steps to switch back:

  • Go back into your settings, selecting “Accounts” and choosing the proper account.
  • Change the option to sign in with a Microsoft account.
  • Enter your password, then your username and password again.
  • Select “Switch” to change back to the Microsoft account.

Method Four: Use An Automated Tool

If you wish to always have at your disposal a utility tool to fix these Windows 10 and other related issues when they do arise, download and install a powerful automated tool.
Read More
Fix Minecraft Won’t Launch in Windows 10
Minecraft has taken the world by the storm, it was an indie project game and it went mainstream. Dream of every game developer I guess. The dream of every gamer on the other hand is to double click on the game and to play it and not to deal with various issues, especially if they are launch issues. Luckily for all of you gamers, here at errortools we game as well and we are happy to bring you a solution on how to fix Minecraft won't launch issue. So sit back, relax and keep on reading, and hopefully enough you will be gaming again in no time. Follow the guide presented step by step, point by point how it is presented for the quickest way to get back in Minecraft. This guide also presumes that your hardware configurations meet at least the minimum system requirements for running Minecraft.
  1. Disable antivirus and firewall

    90% of the time this is the issue why Minecraft is not working, your antivirus or firewall has detected it as a false positive, and access to system internet, etc has been cut. Try disabling it and if everything is working fine add it to the antivirus or the firewall exception list.
  2. Run Minecraft as admin

    Minecraft will sometimes refuse to run if it does not has administrator privileges. To make sure this is the case locate the Minecraft executable, right-click on it and choose properties. Go to the compatibility tab and check Run as Administrator box.
  3. End Minecraft process

    It came to knowledge that even if Minecraft is not running it can have its processes active in the background. Press CTRL + SHIFT + ESC to open task manager Locate if Minecraft has a process running If you find the Minecraft process right-click on it and choose End Task
  4. Run Minecraft in compatibility mode

    If Minecraft still refuses to start try running it in compatibility mode in the previous Windows version Locate Minecraft executable file in its install location Right-click on it and choose properties In the properties, windows go to the compatibility tab Check run this program in compatibility mode for: Select previous version of the operating system, try Windows 8 or Windows 7
  5. Update graphic card driver

    The best bet is to go to your GPU manufacturer's website and download the latest version of the driver of your GPU.
  6. Remove mods, plugins, texture packs

    Mods, plugins, texture packs are all great but sometimes they can cause GPU overloads and other issues to see if this is the case try running Minecraft in Vannila mode without anything installed, just pure and clean Minecraft as it was just downloaded and installed.
  7. Reinstall Minecraft

    If everything else failed, reinstall Minecraft. There might be a chance that some DLL file was deleted or corrupted by mistake or that some crucial files are missing. Clean reinstallation will fix all of these issues.
Read More
How to clear cache inside Windows 11
Cache files are temporary files that have been created by various applications and services when used.  As temporary files, they are safe to be removed and deleted from the system since the application or service will create new ones when needed but sadly will not remove old ones, this task is left to OS itself. windows 11 cacheAutomatic Windows cleanups can mostly take care of these things but for top-notch performance clearing cache manually is a far better option. We will here explore various cache temporary files, where they are, and how to clean them. Sit back and let’s do some cleaning!

Clear cache using Disk Cleanup

  1. Open Start menu and search Disk Cleanup
  2. Click on it in search results
  3. Click on the drives drop-down menu and select the drive where is Windows 11 installed
  4. In the Files to Delete section enable all boxes and click on OK
  5. Click on delete Files to confirm

Clear Microsoft store cache

  1. Press ⊞ WINDOWS + R to open the run dialog
  2. Type in WSReset.exe and press ENTER
  3. Black blank windows will appear, wait for the window to close itself and you are done

Clearing location cache

  1. Press ⊞ WINDOWS + I to open location history
  2. Select Privacy & Security
  3. In the App Permissions section click on Location
  4. On-Location page click on Clear

Clear and flush DNS

  1. Press Start and search for Windows Terminal
  2. Click on Terminal in search results
  3. Type in: ipconfig /flushdns and press ENTER
And that is that!
Read More
Quick Fix For 0x80004005 Outlook Error

What Is 0x80004005 Outlook Error?

0x80004005 Outlook is an error that users commonly encounter while attempting to send or receive emails on Outlook.

The message that appears usually states “This message could not be sent. Try sending the message again or contact your network administrator."

The client operation failed. Error is [OX80004005- 0X0004B9-OXOO501].

Error Causes

This error is usually caused by a problem in the Local Area Network or LAN. What actually happens is that signals with the wireless LAN are lost or a connection problem occurs within the network cable.

As a result, the 0x80004005 Outlook error is triggered while sending or receiving an email. Sometimes the problem goes away on its own. However, if it recurs after a few hours, it shows that some problem exists within the network.

Also, it is important to understand that different factors can affect the quality of wireless connections in a network.

For instance, garage door openers, microwave ovens, and Bluetooth devices can easily become obstacles, disrupting the connection and causing the quality to degrade. Other causes are listed below as follows.

  • Missing, corrupt, or damaged registry keys
  • Existence of viruses
  • Outdated drivers

It is a must to fix this error otherwise potential risks associate with this error such as permanent damage and blue screens.

Further Information and Manual Repair

There are two ways to fix this error and both are listed below as follows.

  • One solution is to disable script blocking in Norton Antivirus. Most users encountering this problem have Norton Antivirus installed on their PCs. To correct this problem, simply turn off the ‘Enable Script Blocking’ feature. However, there is a downside associated with this solution. Enabling script blocking will make your network or computer vulnerable to viruses and malware. That’s why it is not advised to implement this solution.
  • The alternative solution is to simply disable the new-mail notification feature offered in Outlook. To disable notifications of any new emails, the steps go as follows. Open Outlook and go to the Tools menu. Here you will come across ‘Options’.Click on it and then select the ‘Preferences’ tab. Here you will find the ‘Email Options’. Click on it and then uncheck the checkbox against the option, ‘Display a notification message when new mail arrives’. Click Ok two times.

Both these workarounds will work. Therefore, it is advised that you employ any one of them as per your needs.

Read More
A Quick Guide to Fixing Error 2738

Error 2738 - What is it?

Error 2738 is associated with the VBScript engine. VBScript is the abbreviation for Visual Basic Scripting. It is an Active Scripting programming language developed by Microsoft and modeled on Visual Basic. It is used with a fast interpreter in a large variety of Microsoft environments. Error 2738 indicates that the VBScript engine is not registered properly on your PC. It occurs when you try to install or uninstall VBScript-supported applications on your system. The error message is displayed in the following format:
"Error 2738. Could not access VBScript run time for custom action."

Solution

Restoro box imageError Causes

There are several reasons for the error 2738 message pop up. These include: Incorrect or corrupt registry entries on your system. These entries interfere with VBScript support in Windows thereby generating such error codes.
  • Removal of McAfee Antivirus
  • Windows registry values are not updated accurately during the uninstallation of McAfee Software
  • The Visual Basic Script is registered in the registry under the local user instead of the local machine
No matter what the cause of the error may be, it is recommended that you resolve the issue immediately without any delay.

Further Information and Manual Repair

Here are some of the easy and proven DIY methods to repair error 2738 on your PC:

Method 1

If the error 2738 occurs because the VBScript is not registered correctly, then follow these steps to resolve.
  1. Go to the start menu, open Run, and type RegEdit in the box and then press OK. This will open the Windows Registry Editor.
  2. Now type KEY_LOCAL_MACHINESOFTWAREClassesCLSID{B54F3741-5B07-11cf-A4B0-00AA004A55E8}InprocServer32, if the key does not have a data value of C:\Windows\System32\vbscript.dll then simply add it.
  3. Now go to the All programs option and then Accessories.
  4. Here right-click on Command Prompt and then ‘Run as Administrator’.
  5. Now type egsvr32 vbscript.dll then press enter. After that type regsvr32 jscript.dll and then press enter.
  6. Restart your PC to activate changes.

Method 2

Sometimes error 2738 may occur when you uninstall preinstalled MacAfee antivirus software on your system. Un-installation usually leaves some trace components in the registry. These components must be removed completely otherwise error codes like 2738 may keep occurring on your computer screen. In such an event, the best way to resolve it is to download the McAfee Consumer Product Removal utility from McAfee's official website. Save this file on your desktop. Double click the file and follow the steps to remove this software completely and successfully from your PC. Proper removal of the McAfee program will resolve error 2738 right away. But if the error still persists then try other methods illustrated below.

Method 3

Download Restoro to remove incorrect and corrupt registry entries on your system that may be interfering with VBScript support. Restoro is a new and easy-to-use PC Repair Tool deployed with an intuitive interface and a powerful registry cleaner. The registry cleaner removes all entries corrupting the registry, cleans it, and resumes it to its normal state. Click here to download Restoro.
Read More
Completely Remove MapsGalaxy Malware Removal Tutorial

MapsGalaxy is a Browser Extension developed by MindSpark Inc. witch usually comes bundled with other software. This extension claims it allows users to search the web, open maps, and check out fasters routes to a destination.

While active, it monitors your browser activity. The links you visit, the searches you make, the websites you use, and even personal information is sent back to MindSpark Inc. to later be sold/used to deliver ads to your browser.

While this extension is active you may see additional unwanted ads, sponsored links, and pop-up ads displayed in your search results and browser. It also changes your default search engine to MyWay, ensuring its ads are displayed. Several anti-virus scanners have marked this extension as a Browser Hijacker and are therefore not recommended to keep on your PC.

About Browser Hijackers

Browser hijacking is actually a form of unwanted software program, usually a web browser add-on or extension, which causes modifications in browser settings. Practically all browser hijackers are made for marketing or advertising purposes. Typically, it will drive users to predetermined websites that are looking to increase their advertising campaign revenue. Many people believe that such websites are legitimate and harmless but that is not true. Almost every browser hijacker poses an actual threat to your online safety and it is vital to classify them under privacy risks. They do not just screw up your internet browsers, but browser hijackers can also modify the computer registry to make your computer or laptop vulnerable to various other malware attacks.

How to know if your internet browser has been hijacked

Below are some symptoms that indicate you have been hijacked: 1. your web browser’s homepage is suddenly different 2. you observe new unwanted bookmarks or favorites added, usually directed to ad-filled or pornography websites 3. The default search page of your web browser is modified 4. discover new toolbars that you didn’t add 5. you’ll notice random pop-ups start occurring frequently 6. websites load very slowly and sometimes incomplete 7. Inability to navigate to certain websites, especially anti-malware and other security software sites.

Exactly how they infect computer systems

There are many ways your PC can get infected by a browser hijacker. They typically arrive by way of spam email, via file-sharing networks, or by a drive-by download. They could also be deployed via the installation of a web browser toolbar, extension, or add-on. A browser hijacker could also be installed as a part of freeware, shareware, demoware, and pirated programs. Well-known examples of browser hijackers include Conduit, CoolWebSearch, RocketTab, OneWebSearch, Coupon Server, Searchult.com, Snap.do, and Delta Search. Browser hijackers might record user keystrokes to collect potentially invaluable information leading to privacy concerns, cause instability on computers, significantly disrupt the user experience, and eventually slow down the PC to a point where it will become unusable.

How to fix a browser hijack

The one thing you can try to get rid of a browser hijacker is to locate the malicious software in the “Add or Remove Programs” list in the Windows Control Panel. It may or may not be there. When it is, try to uninstall it. Having said that, most hijackers are quite tenacious and need specialized tools to remove them. Inexperienced PC users should not attempt the manual form of removal methods, since it requires in-depth computer knowledge to do fixes on the system registry and HOSTS file.

Find Out How To Install Safebytes Anti-Malware On An Infected Computer system

Practically all malware is inherently unsafe, but certain kinds of malicious software do more damage to your PC than others. Some malware variants alter web browser settings by adding a proxy server or change the PC’s DNS configurations. In these cases, you’ll be unable to visit certain or all internet sites, and therefore unable to download or install the required security software to eliminate the infection. If you’re reading this article now, you have perhaps recognized that virus infection is the cause of your blocked web connectivity. So how to proceed when you want to download and install an antivirus application such as Safebytes? There are some options you could try to get around with this problem.

Get rid of viruses in Safe Mode

Safe Mode is a special, basic version of Microsoft Windows in which just a bare minimum of services are loaded to prevent viruses as well as other problematic applications from loading. In the event, the malicious software is set to load immediately when the computer boots, switching into this particular mode could prevent it from doing so. In order to get into Safe Mode or Safe Mode with Networking, press F8 while the computer is booting up or run MSCONFIG and look for the “Safe Boot” options under the “Boot” tab. Once you’re in Safe Mode, you can attempt to download and install your anti-malware program without the hindrance of the malware. At this point, you are able to run the anti-virus scan to remove computer viruses and malware without hindrance from another malicious application.

Utilize an alternate web browser to download the anti-malware application

Malicious code could exploit vulnerabilities in a specific browser and block access to all anti-virus software sites. If you seem to have a trojan attached to Internet Explorer, then switch to a different browser with built-in safety features, such as Chrome or Firefox, to download your favorite antivirus program – Safebytes.

Install and run anti-virus from your flash drive

Here’s another solution which is utilizing a portable USB anti-malware software package that can scan your computer for malicious software without the need for installation. Adopt these measures to run the anti-virus on the infected computer. 1) Download Safebytes Anti-Malware or Microsoft Windows Defender Offline onto a clean computer. 2) Plug the pen drive into the uninfected computer. 3) Double-click on the downloaded file to open the installation wizard. 4) Select the drive letter of the pen drive as the place when the wizard asks you exactly where you would like to install the antivirus. Do as instructed on the screen to finish up the installation process. 5) Unplug the USB drive. You may now utilize this portable anti-malware on the infected computer. 6) Double-click the Safebytes Anti-malware icon on the flash drive to run the software. 7) Run Full System Scan to detect and clean-up up all types of malware.

Features and Benefits of SafeBytes Anti-Malware

If you are looking to download an anti-malware application for your computer, there are plenty of tools in the market to consider nonetheless, you should not trust blindly anyone, regardless of whether it is a paid or free program. Some are worth your money, but many aren’t. You need to pick one that is trustworthy, practical, and has a strong reputation for its malware source protection. On the list of the recommended tools by industry leaders is SafeBytes Anti-Malware, the most dependable program for Windows computers. SafeBytes anti-malware is really a powerful, very effective protection tool created to assist users of all levels of computer literacy in detecting and removing harmful threats from their personal computers. This software program can easily identify, eliminate, and protect your PC from the most advanced malware threats such as spyware, adware, trojan horses, ransomware, worms, PUPs, along with other possibly damaging software programs. SafeBytes carries a plethora of amazing features which can help you protect your laptop or computer from malware attack and damage. Let’s look into some of them below: Live Protection: SafeBytes provides real-time active checking and protection from all known computer viruses and malware. It will regularly monitor your pc for hacker activity and also provides end-users with sophisticated firewall protection. Optimum AntiMalware Protection: With its advanced and sophisticated algorithm, this malware elimination tool can detect and remove the malware threats hiding in your computer system effectively. Safe Web Browsing: SafeBytes inspects the hyperlinks present on a web page for possible threats and notifies you if the website is safe to check out or not, through its unique safety rating system. Fast Multi-threaded Scanning: SafeBytes’s virus scan engine is among the quickest and most efficient within the industry. It's targeted scanning drastically increases the catch rate for viruses that are embedded in various PC files. Lightweight: The program is lightweight and can run silently in the background, and will not impact your PC efficiency. 24/7 On-line Tech Support: Support service is available for 24 x 7 x 365 days via email and chats to answer your queries.

Technical Details and Manual Removal (Advanced Users)

If you want to manually get rid of MapsGalaxy without the use of an automated tool, it might be actually possible to do so by removing the program from the Windows Add/Remove Programs menu, or in cases of browser extensions, going to the browsers AddOn/Extension manager and removing it. You’ll likely also want to reset your internet browser. If you choose to manually delete the system files and registry entries, make use of the following list to make sure you know exactly what files to remove before undertaking any actions. But bear in mind, this can be a difficult task and only computer experts could accomplish it safely. Additionally, certain malicious programs have the capability to defend against its deletion. It is highly recommended that you carry out the removal process in Safe Mode.
Files: %PROGRAMFILES(x86)%Maps4PC_0cbar.bin%PROGRAMFILES(x86)%Maps4PC_0cbar.bin%#MANIFEST#%cbrmon.exe 26,576 682c1b3de757f8d44c49aa01fff940ab %PROGRAMFILES%Maps4PC_0cbar.bin%#MANIFEST#%cbarsvc.exe 34,864 2114e46c4564da66ac9026e9c848504d %PROGRAMFILES%MapsGalaxy_39bar.binbarsvc.exe 87,264 6b0c56f3192873cddf2bda0c6615118d %LOCALAPPDATA%GoogleChromeUser DataDefaultExtensionsmjkonbafhhjkakmgejhidcnkkidokinm %LOCALAPPDATA%GoogleChromeUser DataDefaultExtensionseejjfjgkdnjfeflpeeopjobjjldcmlfi %LOCALAPPDATA%GoogleChromeUser DataDefaultExtensionsggjmakejeechofmkhjljemfepbhppbbh %LOCALAPPDATA%GoogleChromeUser DataDefaultExtensionslkfkgnbjmeminilhckfckamlbkdgeaik %LOCALAPPDATA%GoogleChromeUser DataDefaultExtensionsijjnmdphpnlnelhbhefnfmimenjgbfcn %PROGRAMFILES%MapsGalaxy_39EIMapsGalaxy_39EIInstallr.binEIPlug.dll 55,784 59a25ac6974b6c98bfd4d11d4b2653f8 %PROGRAMFILES%MapsGalaxy_39EIMapsGalaxy_39EIInstallr.binEzSetp.DLL 739,816 8e7674f70d21bbc0703000ce5c72398a %PROGRAMFILES%MapsGalaxy_39EIMapsGalaxy_39EIInstallr.binNP39EISb.DLL 31,216 fa7fbc48b84026c2a0dcb611e0e04bf9 %LOCALAPPDATA%GoogleChromeUser DataDefaultExtensionsdcahllpkcnofkhpacpajmibjfjccajlj %LOCALAPPDATA%GoogleChromeUser DataDefaultExtensionshfnlkbpoacofighnabkdomkfdbpjeomm %LOCALAPPDATA%MapsGalaxy Installer(00ef2c80).exe Registry: HKEY_CURRENT_USERSoftwareAppDataLowHKEY_CURRENT_USERSoftwareMapsGalaxy_39 HKEY_CURRENT_USERSoftwareMapsGalaxy_39 HKEY_CURRENT_USERSoftwareWow6432NodeMicrosoftInternet ExplorerLow RightsElevationPolicy6818868a-1b3d-4e35-a561-fa964a96cd3b HKEY_CURRENT_USERSoftwareWow6432NodeMicrosoftInternet ExplorerLow RightsElevationPolicy79e57afa-bc05-4636-9457-fbc0abb3576b HKEY_CURRENT_USERSoftwareWow6432NodeMicrosoftInternet ExplorerLow RightsElevationPolicy9193e23b-4182-493f-a38e-682307a7c463 HKEY_CURRENT_USERSoftwareWow6432NodeMicrosoftInternet ExplorerLow RightsElevationPolicyae0f4663-eae3-437f-be60-9ec9b745dbfa HKEY_CURRENT_USERSoftwareWow6432NodeMicrosoftInternet ExplorerLow RightsElevationPolicye1f80eb5-8af4-410d-87c1-4f3e2776822a HKEY_CURRENT_USERSoftwareWow6432NodeMicrosoftInternet ExplorerToolbar, value: 364ea597-e728-4ce4-bb4a-ed846ef47970 HKEY_CURRENT_USERSoftwareWow6432NodeMicrosoftWindowsCurrentVersionexplorerBrowser Helper Objects1e91a655-bb4b-4693-a05e-2edebc4c9d89 HKEY_CURRENT_USERSoftwareWow6432NodeMicrosoftWindowsCurrentVersionexplorerBrowser Helper Objects71c1d63a-c944-428a-a5bd-ba513190e5d2 HKEY_CURRENT_USERSoftwareWow6432NodeMicrosoftWindowsCurrentVersionExtPreApproved3ED5E5EC-0965-4DD3-B7D8-DBC48A1172B9 HKEY_CURRENT_USERSoftwareWow6432NodeMicrosoftWindowsCurrentVersionExtPreApproved4b7d0b0c-cff3-49c5-9bc3-ffabc031c822 HKEY_CURRENT_USERSoftwareWow6432NodeMicrosoftWindowsCurrentVersionExtPreApproved8f0b76e1-4e46-427b-b55b-b90593468ac6 HKEY_CURRENT_USERSoftwareWow6432NodeMicrosoftWindowsCurrentVersionExtPreApproveda35ff019-6dbe-4044-b080-6f3fa78a947f HKEY_CURRENT_USERSoftwareWow6432NodeMicrosoftWindowsCurrentVersionExtPreApprovede045df14-bf1d-405c-a37b-a75c1551ad17 HKEY_CURRENT_USERSoftwareWow6432NodeMicrosoftWindowsCurrentVersionRun, value: MapsGalaxy Search Scope Monitor HKEY_CURRENT_USERSoftwareWow6432NodeMicrosoftWindowsCurrentVersionUninstallMapsGalaxy_39bar Uninstall Firefox HKEY_CURRENT_USERSoftwareWow6432NodeMicrosoftWindowsCurrentVersionUninstallMapsGalaxy_39bar Uninstall Internet Explorer HKEY_CURRENT_USERSoftwareMicrosoftInternet ExplorerLow RightsElevationPolicy1241cebd-9777-4bc6-aae5-2a77e25db246 HKEY_CURRENT_USERSoftwareMicrosoftInternet ExplorerLow RightsElevationPolicy6818868a-1b3d-4e35-a561-fa964a96cd3b HKEY_CURRENT_USERSoftwareMicrosoftInternet ExplorerLow RightsElevationPolicy79e57afa-bc05-4636-9457-fbc0abb3576b HKEY_CURRENT_USERSoftwareMicrosoftInternet ExplorerLow RightsElevationPolicy9193e23b-4182-493f-a38e-682307a7c463 HKEY_CURRENT_USERSoftwareMicrosoftInternet ExplorerLow RightsElevationPolicyae0f4663-eae3-437f-be60-9ec9b745dbfa HKEY_CURRENT_USERSoftwareMicrosoftInternet ExplorerLow RightsElevationPolicye1f80eb5-8af4-410d-87c1-4f3e2776822a HKEY_CURRENT_USERSoftwareMicrosoftInternet ExplorerToolbar, value: 364ea597-e728-4ce4-bb4a-ed846ef47970 HKEY_CURRENT_USERSoftwareMicrosoftWindowsCurrentVersionExtPreApproved1796ec91-d094-4a5f-b681-e16015d1ceac HKEY_CURRENT_USERSoftwareMicrosoftWindowsCurrentVersionExtPreApproved3ED5E5EC-0965-4DD3-B7D8-DBC48A1172B9 HKEY_CURRENT_USERSoftwareMicrosoftWindowsCurrentVersionExtPreApproved4b7d0b0c-cff3-49c5-9bc3-ffabc031c822 HKEY_CURRENT_USERSoftwareMicrosoftWindowsCurrentVersionExtPreApproved8f0b76e1-4e46-427b-b55b-b90593468ac6 HKEY_CURRENT_USERSoftwareMicrosoftWindowsCurrentVersionExtPreApproveda35ff019-6dbe-4044-b080-6f3fa78a947f HKEY_CURRENT_USERSoftwareMicrosoftWindowsCurrentVersionExtPreApprovede045df14-bf1d-405c-a37b-a75c1551ad17 HKEY_CURRENT_USERSoftwareMicrosoftWindowsCurrentVersionRun, value: MapsGalaxy Search Scope Monitor HKEY_CURRENT_USERSoftwareMicrosoftWindowsCurrentVersionRunOnce, value: MapsGalaxy_39bar Uninstall HKEY_CURRENT_USERSoftwareWow6432NodeMicrosoftInternet ExplorerLow RightsElevationPolicybf75b5a2-8403-4f70-88a6-488e3bea0d7b HKEY_CURRENT_USERSoftwareWow6432NodeMapsGalaxy_39 HKEY_CURRENT_USERSoftwareMicrosoftInternet ExplorerLow RightsElevationPolicybf75b5a2-8403-4f70-88a6-488e3bea0d7b HKEY_CURRENT_USERSoftwareMicrosoftInternet ExplorerApproved Extensions, value: 71C1D63A-C944-428A-A5BD-BA513190E5D2 HKEY_CURRENT_USERSoftwareMicrosoftWindowsCurrentVersionExtSettings364EA597-E728-4CE4-BB4A-ED846EF47970 HKEY_CURRENT_USERSoftwareMicrosoftWindowsCurrentVersionExtStats1E91A655-BB4B-4693-A05E-2EDEBC4C9D89 HKEY_CURRENT_USERSoftwareMicrosoftWindowsCurrentVersionExtStats364EA597-E728-4CE4-BB4A-ED846EF47970 HKEY_CURRENT_USERSoftwareMicrosoftWindowsCurrentVersionExtStats71C1D63A-C944-428A-A5BD-BA513190E5D2 HKEY_CURRENT_USERSoftwareMicrosoftInternet ExplorerDOMStoragesearch.myway.com HKEY_CURRENT_USERSoftwareMicrosoftInternet ExplorerSearchScopesb0441a0e-a49a-4e16-afc1-74ecced1921f HKEY_CURRENT_USERSoftwareMicrosoftInternet ExplorerDOMStoragemapsgalaxy.dl.myway.com HKEY_CURRENT_USERSoftwareWow6432NodeMicrosoftInternet ExplorerSearchScopesb0441a0e-a49a-4e16-afc1-74ecced1921f HKEY_CURRENT_USERSoftwareMapsGalaxy HKEY_CURRENT_USERSoftwareWow6432NodeMapsGalaxy HKEY_CURRENT_USERSoftwareMicrosoftInternet ExplorerLowRegistryDOMStoragewww.mapsgalaxy.com HKEY_CURRENT_USERSoftwareMicrosoftInternet ExplorerLowRegistryDOMStoragemapsgalaxy.dl.myway.com HKEY_CURRENT_USERSoftwareMicrosoftInternet ExplorerLowRegistryDOMStoragemapsgalaxy.com HKEY_CURRENT_USERSoftwareMicrosoftWindowsCurrentVersionExplorerStartupApprovedRun32, value: MapsGalaxy EPM Support HKEY_CURRENT_USERSoftwareMicrosoftWindowsCurrentVersionRun, value: MapsGalaxy EPM Support HKEY_CURRENT_USERSoftwareWow6432NodeMicrosoftTracingMapsGalaxy_RASMANCS HKEY_CURRENT_USERSoftwareMicrosoftTracingMapsGalaxy_RASMANCS HKEY_CURRENT_USERSoftwareMicrosoftTracingMapsGalaxy_RASAPI32 HKEY_CURRENT_USERSoftwareWow6432NodeMicrosoftTracingMapsGalaxy_RASAPI32 HKEY_CURRENT_USERSoftwareMicrosoftInternet ExplorerLowRegistryDOMStoragemapsgalaxy.dl.tb.ask.com HKEY_LOCAL_MACHINEHKEY_CURRENT_USERSoftware[APPLICATION]MicrosoftWindowsCurrentVersionUninstall..Uninstallercbrmon.exe 26,576 682c1b3de757f8d44c49aa01fff940ab %PROGRAMFILES%Maps4PC_0cbar.bin%PROGRAMFILES(x86)%Maps4PC_0cbar.bin%#MANIFEST#%cbrmon.exe 26,576 682c1b3de757f8d44c49aa01fff940ab %PROGRAMFILES%Maps4PC_0cbar.bin%#MANIFEST#%cbarsvc.exe 34,864 2114e46c4564da66ac9026e9c848504d %PROGRAMFILES%MapsGalaxy_39bar.binbarsvc.exe 87,264 6b0c56f3192873cddf2bda0c6615118d %LOCALAPPDATA%GoogleChromeUser DataDefaultExtensionsmjkonbafhhjkakmgejhidcnkkidokinm %LOCALAPPDATA%GoogleChromeUser DataDefaultExtensionseejjfjgkdnjfeflpeeopjobjjldcmlfi %LOCALAPPDATA%GoogleChromeUser DataDefaultExtensionsggjmakejeechofmkhjljemfepbhppbbh %LOCALAPPDATA%GoogleChromeUser DataDefaultExtensionslkfkgnbjmeminilhckfckamlbkdgeaik %LOCALAPPDATA%GoogleChromeUser DataDefaultExtensionsijjnmdphpnlnelhbhefnfmimenjgbfcn %PROGRAMFILES%MapsGalaxy_39EIMapsGalaxy_39EIInstallr.binEIPlug.dll 55,784 59a25ac6974b6c98bfd4d11d4b2653f8 %PROGRAMFILES%MapsGalaxy_39EIMapsGalaxy_39EIInstallr.binEzSetp.DLL 739,816 8e7674f70d21bbc0703000ce5c72398a %PROGRAMFILES%MapsGalaxy_39EIMapsGalaxy_39EIInstallr.binNP39EISb.DLL 31,216 fa7fbc48b84026c2a0dcb611e0e04bf9 %LOCALAPPDATA%GoogleChromeUser DataDefaultExtensionsdcahllpkcnofkhpacpajmibjfjccajlj %LOCALAPPDATA%GoogleChromeUser DataDefaultExtensionshfnlkbpoacofighnabkdomkfdbpjeomm %LOCALAPPDATA%MapsGalaxy Installer(00ef2c80).exe HKEY_CURRENT_USERSoftwareAppDataLowHKEY_CURRENT_USERSoftwareMapsGalaxy_39 HKEY_CURRENT_USERSoftwareMapsGalaxy_39 HKEY_CURRENT_USERSoftwareWow6432NodeMicrosoftInternet ExplorerLow RightsElevationPolicy6818868a-1b3d-4e35-a561-fa964a96cd3b HKEY_CURRENT_USERSoftwareWow6432NodeMicrosoftInternet ExplorerLow RightsElevationPolicy79e57afa-bc05-4636-9457-fbc0abb3576b HKEY_CURRENT_USERSoftwareWow6432NodeMicrosoftInternet ExplorerLow RightsElevationPolicy9193e23b-4182-493f-a38e-682307a7c463 HKEY_CURRENT_USERSoftwareWow6432NodeMicrosoftInternet ExplorerLow RightsElevationPolicyae0f4663-eae3-437f-be60-9ec9b745dbfa HKEY_CURRENT_USERSoftwareWow6432NodeMicrosoftInternet ExplorerLow RightsElevationPolicye1f80eb5-8af4-410d-87c1-4f3e2776822a HKEY_CURRENT_USERSoftwareWow6432NodeMicrosoftInternet ExplorerToolbar, value: 364ea597-e728-4ce4-bb4a-ed846ef47970 HKEY_CURRENT_USERSoftwareWow6432NodeMicrosoftWindowsCurrentVersionexplorerBrowser Helper Objects1e91a655-bb4b-4693-a05e-2edebc4c9d89 HKEY_CURRENT_USERSoftwareWow6432NodeMicrosoftWindowsCurrentVersionexplorerBrowser Helper Objects71c1d63a-c944-428a-a5bd-ba513190e5d2 HKEY_CURRENT_USERSoftwareWow6432NodeMicrosoftWindowsCurrentVersionExtPreApproved3ED5E5EC-0965-4DD3-B7D8-DBC48A1172B9 HKEY_CURRENT_USERSoftwareWow6432NodeMicrosoftWindowsCurrentVersionExtPreApproved4b7d0b0c-cff3-49c5-9bc3-ffabc031c822 HKEY_CURRENT_USERSoftwareWow6432NodeMicrosoftWindowsCurrentVersionExtPreApproved8f0b76e1-4e46-427b-b55b-b90593468ac6 HKEY_CURRENT_USERSoftwareWow6432NodeMicrosoftWindowsCurrentVersionExtPreApproveda35ff019-6dbe-4044-b080-6f3fa78a947f HKEY_CURRENT_USERSoftwareWow6432NodeMicrosoftWindowsCurrentVersionExtPreApprovede045df14-bf1d-405c-a37b-a75c1551ad17 HKEY_CURRENT_USERSoftwareWow6432NodeMicrosoftWindowsCurrentVersionRun, value: MapsGalaxy Search Scope Monitor HKEY_CURRENT_USERSoftwareWow6432NodeMicrosoftWindowsCurrentVersionUninstallMapsGalaxy_39bar Uninstall Firefox HKEY_CURRENT_USERSoftwareWow6432NodeMicrosoftWindowsCurrentVersionUninstallMapsGalaxy_39bar Uninstall Internet Explorer HKEY_CURRENT_USERSoftwareMicrosoftInternet ExplorerLow RightsElevationPolicy1241cebd-9777-4bc6-aae5-2a77e25db246 HKEY_CURRENT_USERSoftwareMicrosoftInternet ExplorerLow RightsElevationPolicy6818868a-1b3d-4e35-a561-fa964a96cd3b HKEY_CURRENT_USERSoftwareMicrosoftInternet ExplorerLow RightsElevationPolicy79e57afa-bc05-4636-9457-fbc0abb3576b HKEY_CURRENT_USERSoftwareMicrosoftInternet ExplorerLow RightsElevationPolicy9193e23b-4182-493f-a38e-682307a7c463 HKEY_CURRENT_USERSoftwareMicrosoftInternet ExplorerLow RightsElevationPolicyae0f4663-eae3-437f-be60-9ec9b745dbfa HKEY_CURRENT_USERSoftwareMicrosoftInternet ExplorerLow RightsElevationPolicye1f80eb5-8af4-410d-87c1-4f3e2776822a HKEY_CURRENT_USERSoftwareMicrosoftInternet ExplorerToolbar, value: 364ea597-e728-4ce4-bb4a-ed846ef47970 HKEY_CURRENT_USERSoftwareMicrosoftWindowsCurrentVersionExtPreApproved1796ec91-d094-4a5f-b681-e16015d1ceac HKEY_CURRENT_USERSoftwareMicrosoftWindowsCurrentVersionExtPreApproved3ED5E5EC-0965-4DD3-B7D8-DBC48A1172B9 HKEY_CURRENT_USERSoftwareMicrosoftWindowsCurrentVersionExtPreApproved4b7d0b0c-cff3-49c5-9bc3-ffabc031c822 HKEY_CURRENT_USERSoftwareMicrosoftWindowsCurrentVersionExtPreApproved8f0b76e1-4e46-427b-b55b-b90593468ac6 HKEY_CURRENT_USERSoftwareMicrosoftWindowsCurrentVersionExtPreApproveda35ff019-6dbe-4044-b080-6f3fa78a947f HKEY_CURRENT_USERSoftwareMicrosoftWindowsCurrentVersionExtPreApprovede045df14-bf1d-405c-a37b-a75c1551ad17 HKEY_CURRENT_USERSoftwareMicrosoftWindowsCurrentVersionRun, value: MapsGalaxy Search Scope Monitor HKEY_CURRENT_USERSoftwareMicrosoftWindowsCurrentVersionRunOnce, value: MapsGalaxy_39bar Uninstall HKEY_CURRENT_USERSoftwareWow6432NodeMicrosoftInternet ExplorerLow RightsElevationPolicybf75b5a2-8403-4f70-88a6-488e3bea0d7b HKEY_CURRENT_USERSoftwareWow6432NodeMapsGalaxy_39 HKEY_CURRENT_USERSoftwareMicrosoftInternet ExplorerLow RightsElevationPolicybf75b5a2-8403-4f70-88a6-488e3bea0d7b HKEY_CURRENT_USERSoftwareMicrosoftInternet ExplorerApproved Extensions, value: 71C1D63A-C944-428A-A5BD-BA513190E5D2 HKEY_CURRENT_USERSoftwareMicrosoftWindowsCurrentVersionExtSettings364EA597-E728-4CE4-BB4A-ED846EF47970 HKEY_CURRENT_USERSoftwareMicrosoftWindowsCurrentVersionExtStats1E91A655-BB4B-4693-A05E-2EDEBC4C9D89 HKEY_CURRENT_USERSoftwareMicrosoftWindowsCurrentVersionExtStats364EA597-E728-4CE4-BB4A-ED846EF47970 HKEY_CURRENT_USERSoftwareMicrosoftWindowsCurrentVersionExtStats71C1D63A-C944-428A-A5BD-BA513190E5D2 HKEY_CURRENT_USERSoftwareMicrosoftInternet ExplorerDOMStoragesearch.myway.com HKEY_CURRENT_USERSoftwareMicrosoftInternet ExplorerSearchScopesb0441a0e-a49a-4e16-afc1-74ecced1921f HKEY_CURRENT_USERSoftwareMicrosoftInternet ExplorerDOMStoragemapsgalaxy.dl.myway.com HKEY_CURRENT_USERSoftwareWow6432NodeMicrosoftInternet ExplorerSearchScopesb0441a0e-a49a-4e16-afc1-74ecced1921f HKEY_CURRENT_USERSoftwareMapsGalaxy HKEY_CURRENT_USERSoftwareWow6432NodeMapsGalaxy HKEY_CURRENT_USERSoftwareMicrosoftInternet ExplorerLowRegistryDOMStoragewww.mapsgalaxy.com HKEY_CURRENT_USERSoftwareMicrosoftInternet ExplorerLowRegistryDOMStoragemapsgalaxy.dl.myway.com HKEY_CURRENT_USERSoftwareMicrosoftInternet ExplorerLowRegistryDOMStoragemapsgalaxy.com HKEY_CURRENT_USERSoftwareMicrosoftWindowsCurrentVersionExplorerStartupApprovedRun32, value: MapsGalaxy EPM Support HKEY_CURRENT_USERSoftwareMicrosoftWindowsCurrentVersionRun, value: MapsGalaxy EPM Support HKEY_CURRENT_USERSoftwareWow6432NodeMicrosoftTracingMapsGalaxy_RASMANCS HKEY_CURRENT_USERSoftwareMicrosoftTracingMapsGalaxy_RASMANCS HKEY_CURRENT_USERSoftwareMicrosoftTracingMapsGalaxy_RASAPI32 HKEY_CURRENT_USERSoftwareWow6432NodeMicrosoftTracingMapsGalaxy_RASAPI32 HKEY_CURRENT_USERSoftwareMicrosoftInternet ExplorerLowRegistryDOMStoragemapsgalaxy.dl.tb.ask.com HKEY_LOCAL_MACHINEHKEY_CURRENT_USERSoftware[APPLICATION]MicrosoftWindowsCurrentVersionUninstall..Uninstallercbarsvc.exe 34,864 2114e46c4564da66ac9026e9c848504d %PROGRAMFILES%MapsGalaxy_39bar.binbarsvc.exe 87,264 6b0c56f3192873cddf2bda0c6615118d %LOCALAPPDATA%GoogleChromeUser DataDefaultExtensionsmjkonbafhhjkakmgejhidcnkkidokinm %LOCALAPPDATA%GoogleChromeUser DataDefaultExtensionseejjfjgkdnjfeflpeeopjobjjldcmlfi %LOCALAPPDATA%GoogleChromeUser DataDefaultExtensionsggjmakejeechofmkhjljemfepbhppbbh %LOCALAPPDATA%GoogleChromeUser DataDefaultExtensionslkfkgnbjmeminilhckfckamlbkdgeaik %LOCALAPPDATA%GoogleChromeUser DataDefaultExtensionsijjnmdphpnlnelhbhefnfmimenjgbfcn %PROGRAMFILES%MapsGalaxy_39EIMapsGalaxy_39EIInstallr.binEIPlug.dll 55,784 59a25ac6974b6c98bfd4d11d4b2653f8 %PROGRAMFILES%MapsGalaxy_39EIMapsGalaxy_39EIInstallr.binEzSetp.DLL 739,816 8e7674f70d21bbc0703000ce5c72398a %PROGRAMFILES%MapsGalaxy_39EIMapsGalaxy_39EIInstallr.binNP39EISb.DLL 31,216 fa7fbc48b84026c2a0dcb611e0e04bf9 %LOCALAPPDATA%GoogleChromeUser DataDefaultExtensionsdcahllpkcnofkhpacpajmibjfjccajlj %LOCALAPPDATA%GoogleChromeUser DataDefaultExtensionshfnlkbpoacofighnabkdomkfdbpjeomm %LOCALAPPDATA%MapsGalaxy Installer(00ef2c80).exe HKEY_CURRENT_USERSoftwareAppDataLowHKEY_CURRENT_USERSoftwareMapsGalaxy_39 HKEY_CURRENT_USERSoftwareMapsGalaxy_39 HKEY_CURRENT_USERSoftwareWow6432NodeMicrosoftInternet ExplorerLow RightsElevationPolicy6818868a-1b3d-4e35-a561-fa964a96cd3b HKEY_CURRENT_USERSoftwareWow6432NodeMicrosoftInternet ExplorerLow RightsElevationPolicy79e57afa-bc05-4636-9457-fbc0abb3576b HKEY_CURRENT_USERSoftwareWow6432NodeMicrosoftInternet ExplorerLow RightsElevationPolicy9193e23b-4182-493f-a38e-682307a7c463 HKEY_CURRENT_USERSoftwareWow6432NodeMicrosoftInternet ExplorerLow RightsElevationPolicyae0f4663-eae3-437f-be60-9ec9b745dbfa HKEY_CURRENT_USERSoftwareWow6432NodeMicrosoftInternet ExplorerLow RightsElevationPolicye1f80eb5-8af4-410d-87c1-4f3e2776822a HKEY_CURRENT_USERSoftwareWow6432NodeMicrosoftInternet ExplorerToolbar, value: 364ea597-e728-4ce4-bb4a-ed846ef47970 HKEY_CURRENT_USERSoftwareWow6432NodeMicrosoftWindowsCurrentVersionexplorerBrowser Helper Objects1e91a655-bb4b-4693-a05e-2edebc4c9d89 HKEY_CURRENT_USERSoftwareWow6432NodeMicrosoftWindowsCurrentVersionexplorerBrowser Helper Objects71c1d63a-c944-428a-a5bd-ba513190e5d2 HKEY_CURRENT_USERSoftwareWow6432NodeMicrosoftWindowsCurrentVersionExtPreApproved3ED5E5EC-0965-4DD3-B7D8-DBC48A1172B9 HKEY_CURRENT_USERSoftwareWow6432NodeMicrosoftWindowsCurrentVersionExtPreApproved4b7d0b0c-cff3-49c5-9bc3-ffabc031c822 HKEY_CURRENT_USERSoftwareWow6432NodeMicrosoftWindowsCurrentVersionExtPreApproved8f0b76e1-4e46-427b-b55b-b90593468ac6 HKEY_CURRENT_USERSoftwareWow6432NodeMicrosoftWindowsCurrentVersionExtPreApproveda35ff019-6dbe-4044-b080-6f3fa78a947f HKEY_CURRENT_USERSoftwareWow6432NodeMicrosoftWindowsCurrentVersionExtPreApprovede045df14-bf1d-405c-a37b-a75c1551ad17 HKEY_CURRENT_USERSoftwareWow6432NodeMicrosoftWindowsCurrentVersionRun, value: MapsGalaxy Search Scope Monitor HKEY_CURRENT_USERSoftwareWow6432NodeMicrosoftWindowsCurrentVersionUninstallMapsGalaxy_39bar Uninstall Firefox HKEY_CURRENT_USERSoftwareWow6432NodeMicrosoftWindowsCurrentVersionUninstallMapsGalaxy_39bar Uninstall Internet Explorer HKEY_CURRENT_USERSoftwareMicrosoftInternet ExplorerLow RightsElevationPolicy1241cebd-9777-4bc6-aae5-2a77e25db246 HKEY_CURRENT_USERSoftwareMicrosoftInternet ExplorerLow RightsElevationPolicy6818868a-1b3d-4e35-a561-fa964a96cd3b HKEY_CURRENT_USERSoftwareMicrosoftInternet ExplorerLow RightsElevationPolicy79e57afa-bc05-4636-9457-fbc0abb3576b HKEY_CURRENT_USERSoftwareMicrosoftInternet ExplorerLow RightsElevationPolicy9193e23b-4182-493f-a38e-682307a7c463 HKEY_CURRENT_USERSoftwareMicrosoftInternet ExplorerLow RightsElevationPolicyae0f4663-eae3-437f-be60-9ec9b745dbfa HKEY_CURRENT_USERSoftwareMicrosoftInternet ExplorerLow RightsElevationPolicye1f80eb5-8af4-410d-87c1-4f3e2776822a HKEY_CURRENT_USERSoftwareMicrosoftInternet ExplorerToolbar, value: 364ea597-e728-4ce4-bb4a-ed846ef47970 HKEY_CURRENT_USERSoftwareMicrosoftWindowsCurrentVersionExtPreApproved1796ec91-d094-4a5f-b681-e16015d1ceac HKEY_CURRENT_USERSoftwareMicrosoftWindowsCurrentVersionExtPreApproved3ED5E5EC-0965-4DD3-B7D8-DBC48A1172B9 HKEY_CURRENT_USERSoftwareMicrosoftWindowsCurrentVersionExtPreApproved4b7d0b0c-cff3-49c5-9bc3-ffabc031c822 HKEY_CURRENT_USERSoftwareMicrosoftWindowsCurrentVersionExtPreApproved8f0b76e1-4e46-427b-b55b-b90593468ac6 HKEY_CURRENT_USERSoftwareMicrosoftWindowsCurrentVersionExtPreApproveda35ff019-6dbe-4044-b080-6f3fa78a947f HKEY_CURRENT_USERSoftwareMicrosoftWindowsCurrentVersionExtPreApprovede045df14-bf1d-405c-a37b-a75c1551ad17 HKEY_CURRENT_USERSoftwareMicrosoftWindowsCurrentVersionRun, value: MapsGalaxy Search Scope Monitor HKEY_CURRENT_USERSoftwareMicrosoftWindowsCurrentVersionRunOnce, value: MapsGalaxy_39bar Uninstall HKEY_CURRENT_USERSoftwareWow6432NodeMicrosoftInternet ExplorerLow RightsElevationPolicybf75b5a2-8403-4f70-88a6-488e3bea0d7b HKEY_CURRENT_USERSoftwareWow6432NodeMapsGalaxy_39 HKEY_CURRENT_USERSoftwareMicrosoftInternet ExplorerLow RightsElevationPolicybf75b5a2-8403-4f70-88a6-488e3bea0d7b HKEY_CURRENT_USERSoftwareMicrosoftInternet ExplorerApproved Extensions, value: 71C1D63A-C944-428A-A5BD-BA513190E5D2 HKEY_CURRENT_USERSoftwareMicrosoftWindowsCurrentVersionExtSettings364EA597-E728-4CE4-BB4A-ED846EF47970 HKEY_CURRENT_USERSoftwareMicrosoftWindowsCurrentVersionExtStats1E91A655-BB4B-4693-A05E-2EDEBC4C9D89 HKEY_CURRENT_USERSoftwareMicrosoftWindowsCurrentVersionExtStats364EA597-E728-4CE4-BB4A-ED846EF47970 HKEY_CURRENT_USERSoftwareMicrosoftWindowsCurrentVersionExtStats71C1D63A-C944-428A-A5BD-BA513190E5D2 HKEY_CURRENT_USERSoftwareMicrosoftInternet ExplorerDOMStoragesearch.myway.com HKEY_CURRENT_USERSoftwareMicrosoftInternet ExplorerSearchScopesb0441a0e-a49a-4e16-afc1-74ecced1921f HKEY_CURRENT_USERSoftwareMicrosoftInternet ExplorerDOMStoragemapsgalaxy.dl.myway.com HKEY_CURRENT_USERSoftwareWow6432NodeMicrosoftInternet ExplorerSearchScopesb0441a0e-a49a-4e16-afc1-74ecced1921f HKEY_CURRENT_USERSoftwareMapsGalaxy HKEY_CURRENT_USERSoftwareWow6432NodeMapsGalaxy HKEY_CURRENT_USERSoftwareMicrosoftInternet ExplorerLowRegistryDOMStoragewww.mapsgalaxy.com HKEY_CURRENT_USERSoftwareMicrosoftInternet ExplorerLowRegistryDOMStoragemapsgalaxy.dl.myway.com HKEY_CURRENT_USERSoftwareMicrosoftInternet ExplorerLowRegistryDOMStoragemapsgalaxy.com HKEY_CURRENT_USERSoftwareMicrosoftWindowsCurrentVersionExplorerStartupApprovedRun32, value: MapsGalaxy EPM Support HKEY_CURRENT_USERSoftwareMicrosoftWindowsCurrentVersionRun, value: MapsGalaxy EPM Support HKEY_CURRENT_USERSoftwareWow6432NodeMicrosoftTracingMapsGalaxy_RASMANCS HKEY_CURRENT_USERSoftwareMicrosoftTracingMapsGalaxy_RASMANCS HKEY_CURRENT_USERSoftwareMicrosoftTracingMapsGalaxy_RASAPI32 HKEY_CURRENT_USERSoftwareWow6432NodeMicrosoftTracingMapsGalaxy_RASAPI32 HKEY_CURRENT_USERSoftwareMicrosoftInternet ExplorerLowRegistryDOMStoragemapsgalaxy.dl.tb.ask.com HKEY_LOCAL_MACHINEHKEY_CURRENT_USERSoftware[APPLICATION]MicrosoftWindowsCurrentVersionUninstall..Uninstaller
Read More
1 2 3 171
Logo
Copyright © 2023, ErrorTools. All Rights Reserved
Trademark: Microsoft Windows logos are registered trademarks of Microsoft. Disclaimer: ErrorTools.com is not affiliated with Microsoft, nor claims direct affiliation.
The information on this page is provided for information purposes only.
DMCA.com Protection Status